How to Do Shoulder Rolls Correctly: Step-by-Step Guide for Beginners

Learn how to do shoulder rolls with perfect form, avoid common mistakes, and discover the best shoulder roll variations to improve mobility and upper-body function.

Shoulder rolls are one of the most effective dynamic mobility exercises for increasing blood flow, relieving tension, and preparing the shoulders and upper back for training. Whether you are warming up for strength training, sports, or military fitness, mastering shoulder rolls is essential.


What Are Shoulder Rolls?

A shoulder roll is a dynamic mobility exercise where you rotate your shoulders in a circular motion by elevating, retracting, depressing, and protracting the shoulder blades.

Shoulder rolls are considered one of the best warm-up exercises because they improve shoulder mobility and activate the muscles responsible for posture and shoulder stability.

Shoulder rolls are commonly used in:

  • Dynamic warm-up routines
  • Strength and conditioning programs
  • Athletic performance training
  • Mobility and rehabilitation sessions

Unlike static stretches, shoulder rolls actively prepare the upper body for movement while helping reduce stiffness.

Benefits of Shoulder Rolls

Shoulder rolls are one of the most effective exercises for improving shoulder health and mobility.

Benefits include:

  • Improves shoulder mobility
  • Increases blood flow to the upper body
  • Helps relieve tension and stiffness
  • Activates postural muscles
  • Enhances shoulder stability
  • Requires no equipment

Few mobility exercises prepare the shoulders as effectively as shoulder rolls.

Muscles Worked in Shoulder Rolls

Shoulder rolls activate several muscles surrounding the shoulders and upper back.

Primary Muscles
  • Trapezius
  • Deltoids
Secondary Muscles
  • Rhomboids
  • Levator Scapulae
  • Serratus Anterior
  • Rotator Cuff Muscles
  • Upper Back Stabilizers

Because of this muscle activation, shoulder rolls are one of the best exercises for improving shoulder function and posture.


How to Do Shoulder Rolls (Step-by-Step)

Step 1: Stand Tall

Begin with:

  • Feet shoulder-width apart
  • Chest up
  • Core engaged
  • Arms relaxed by your sides

Tip: Maintain good posture throughout the movement.

Step 2: Lift Your Shoulders

Raise your shoulders toward your ears.

Focus on:

  • Moving smoothly
  • Staying relaxed
  • Avoiding excessive tension

This initiates the rolling motion.

Step 3: Roll Your Shoulders Back

Move your shoulders backward while squeezing your shoulder blades together.

Focus on:

  • Using a full range of motion
  • Maintaining an upright posture
  • Keeping the movement controlled

Avoid rushing the exercise.

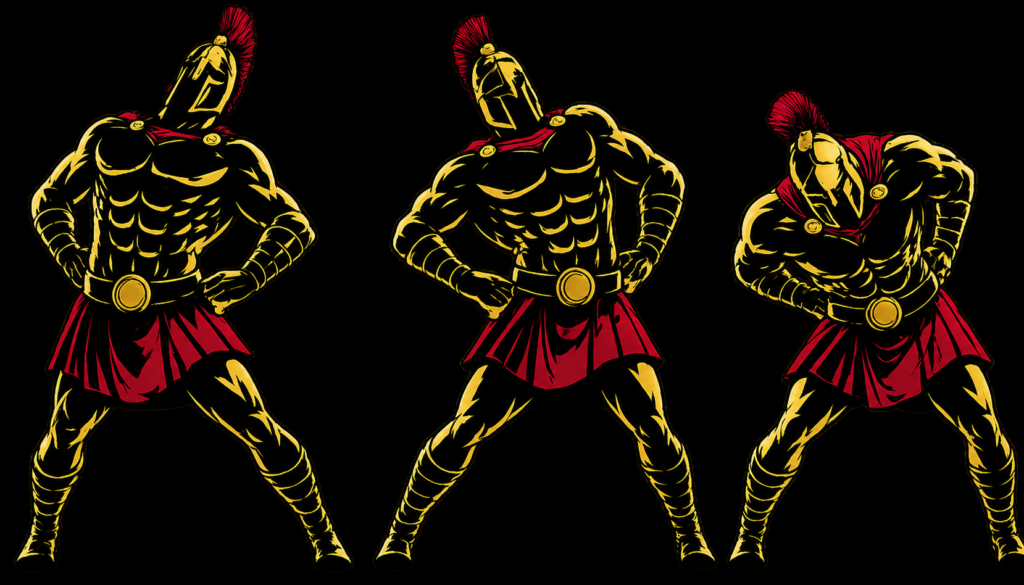
Warrior showcasing How to do Shoulder Rolls with proper form

Step 4: Lower Your Shoulders

Continue the circular motion by lowering your shoulders.

At this stage:

  • Keep your neck relaxed
  • Maintain control
  • Breathe normally

Complete the full circle.

Step 5: Reverse Directions

After several repetitions, switch directions and roll the shoulders forward.

Perform equal repetitions in both directions for balanced mobility.


Shoulder Rolls Form Checklist

Use this quick checklist to ensure perfect shoulder roll form.

  • Maintain good posture
  • Use smooth, controlled movements
  • Keep your neck relaxed
  • Move through a comfortable range of motion
  • Perform rolls in both directions

Perfect form improves mobility and reduces injury risk.


Common Shoulder Rolls Mistakes

Moving Too Quickly

Problem: Reduces mobility benefits and control.

Fix: Perform each repetition slowly and deliberately.

Shrugging Excessively

Problem: Creates unnecessary tension in the neck.

Fix: Use a comfortable range of motion.

Leaning the Torso

Problem: Reduces shoulder involvement.

Fix: Keep your chest up and your core engaged.

Holding Your Breath

Problem: Increases tension throughout the body.

Fix: Breathe naturally during each repetition.

Using Jerky Movements

Problem: Places unnecessary stress on the joints.

Fix: Focus on smooth and controlled circles.

Controlled movement always beats rushed movement.


Shoulder Rolls Variations

Once you master the basic shoulder roll, different variations can help improve mobility and activate additional muscles.

Forward Shoulder Rolls

A beginner-friendly variation.

How to Do Forward Shoulder Rolls

  • Lift your shoulders toward your ears
  • Roll them forward and downward
  • Repeat with controlled movements

This variation helps loosen tight muscles.

Backward Shoulder Rolls

The most common variation.

How to Do Backward Shoulder Rolls

  • Lift your shoulders upward
  • Roll them backward while squeezing the shoulder blades
  • Complete the circle slowly

This variation promotes better posture.

Single-Arm Shoulder Rolls

Improves unilateral mobility.

How to Do Single-Arm Shoulder Rolls

  • Rotate one shoulder at a time
  • Maintain proper posture
  • Alternate sides

This variation helps address imbalances.

Weighted Shoulder Rolls

An advanced variation.

How to Do Weighted Shoulder Rolls

  • Hold light dumbbells
  • Perform slow shoulder rolls
  • Maintain full control

This variation improves muscular endurance and shoulder stability.


Final Thoughts

Shoulder rolls are one of the most effective mobility exercises you can master.

They build:

  • Shoulder mobility
  • Joint health
  • Upper-body coordination
  • Postural awareness
  • Functional movement quality

Progress may feel subtle because shoulder rolls are primarily a mobility exercise. However, with consistent practice and proper form, your shoulder health and movement quality will steadily improve. Learn more about Stretching Here.

Quality movement is always better than rushed movement.

Focus on control, posture, and smooth repetitions.

A warrior maintains his armor before entering the battle.

Essential Gear for Shoulder Rolls

While shoulder rolls require no equipment, the following gear can improve your warm-ups, increase shoulder mobility, and help you progress to more challenging variations.

  • Resistance Bands: Add light resistance to improve shoulder stability.
  • Light Dumbbells: Use for weighted shoulder roll variations.
  • Exercise Mat: Provides a comfortable surface for mobility routines.
  • Foam Roller: Loosens tight upper-back and shoulder muscles before training.
  • Massage Ball: Targets muscle knots around the shoulders to improve mobility.

Shoulder Rolls FAQ

Q1: Are shoulder rolls good before workouts?
Yes. Shoulder rolls are an excellent dynamic warm-up exercise because they increase blood flow and prepare the shoulders for movement.

Q2: How many shoulder rolls should I do?
Most people can perform 10-20 repetitions in each direction or 20-60 seconds as part of a warm-up routine.

Q3: Can shoulder rolls improve posture?
Yes. When performed consistently, shoulder rolls can help improve shoulder mobility, reduce stiffness, and promote better posture.

How to Do Hip Circles Correctly: Step-by-Step Guide for Beginners

Learn how to do hip circles with perfect form, avoid common mistakes, and discover the best hip circle variations to improve mobility and lower-body function.

Hip circles are one of the most effective dynamic mobility exercises for increasing blood flow, improving hip flexibility, and preparing the lower body for training. Whether you are warming up for strength training, running, or athletic performance, mastering hip circles is essential.


What Are Hip Circles?

A hip circle is a dynamic mobility exercise where you rotate your hips in a circular motion while maintaining an upright posture.

Hip circles are considered one of the best warm-up exercises because they improve hip mobility and activate the muscles surrounding the hip joint.

Hip circles are commonly used in:

  • Dynamic warm-up routines
  • Athletic performance training
  • Strength and conditioning programs
  • Mobility and rehabilitation sessions

Unlike static stretches, hip circles actively prepare the body for movement while increasing joint lubrication and range of motion.

Benefits of Hip Circles

Hip circles are one of the most effective exercises for improving lower-body mobility.

Benefits include:

  • Improves hip mobility
  • Increases blood flow to the lower body
  • Enhances range of motion
  • Activates the glutes and hip muscles
  • Helps reduce injury risk during training
  • Requires no equipment

Few mobility exercises prepare the hips as effectively as hip circles.

Muscles Worked in Hip Circles

Hip circles activate several muscles around the hip and core simultaneously.

Primary Muscles
  • Gluteus Medius
  • Gluteus Maximus
  • Hip Flexors
Secondary Muscles
  • Adductors
  • Abductors
  • Obliques
  • Lower Back Stabilizers
  • Core Muscles

Because of this muscle activation, hip circles are one of the best exercises for improving movement quality and hip health.


How to Do Hip Circles (Step-by-Step)

Step 1: Stand Tall

Begin with:

  • Feet shoulder-width apart
  • Chest up
  • Core engaged
  • Hands placed on your hips

Tip: Keep your knees slightly bent throughout the exercise.

Step 2: Shift Your Hips Forward

Start by pushing your hips slightly forward.

Focus on:

  • Maintaining good posture
  • Keeping your movements smooth
  • Staying relaxed

This initiates the circular motion.

Step 3: Rotate Your Hips Around

Move your hips in a large circular motion.

Focus on:

  • Creating a smooth circle
  • Moving through a comfortable range of motion
  • Keeping your upper body stable

Avoid rushing the movement.

Warrior showcasing How to do Hip Circles with proper form

Step 4: Complete the Circle

Continue rotating until you return to the starting position.

At this stage:

  • Maintain control
  • Keep your core engaged
  • Avoid excessive leaning

Pause briefly if necessary.

Step 5: Reverse Directions

After several repetitions, switch directions.

Perform equal repetitions on both sides to improve balanced mobility.


Hip Circles Form Checklist

Use this quick checklist to ensure perfect hip circle form.

  • Maintain good posture
  • Keep your core engaged
  • Use slow, controlled movements
  • Move through a comfortable range of motion
  • Perform circles in both directions

Perfect form improves mobility and reduces the risk of injury.


Common Hip Circles Mistakes

Moving Too Quickly

Problem: Reduces control and mobility benefits.

Fix: Perform each repetition slowly and deliberately.

Leaning Excessively

Problem: Places unnecessary stress on the lower back.

Fix: Keep your torso upright and your core engaged.

Using Small Movements

Problem: Limits range of motion.

Fix: Gradually increase the size of the circles while staying comfortable.

Holding Your Breath

Problem: Creates unnecessary tension.

Fix: Breathe normally throughout the exercise.

Forcing the Range of Motion

Problem: May cause discomfort or strain.

Fix: Move only within a pain-free range.

Controlled movement always beats forced movement.


Hip Circles Variations

Once you master the basic hip circle, different variations can help improve mobility and activate additional muscles.

Seated Hip Circles

A beginner-friendly variation.

How to Do Seated Hip Circles

  • Sit upright on a chair
  • Place your hands on your hips
  • Rotate your hips in controlled circles

This variation reduces balance requirements.

Single-Leg Hip Circles

Improves balance and coordination.

How to Do Single-Leg Hip Circles

  • Stand on one leg
  • Raise the opposite knee
  • Perform circular movements with the lifted leg

This variation enhances hip stability.

Standing Knee Circles

Emphasizes hip joint mobility.

How to Do Standing Knee Circles

  • Lift one knee toward your chest
  • Move it in a circular pattern
  • Alternate sides

This variation increases mobility and coordination.

Resistance Band Hip Circles

An advanced variation.

How to Do Resistance Band Hip Circles

  • Place a resistance band around your thighs
  • Perform controlled hip circles
  • Maintain constant tension

This variation improves glute activation and hip stability.


Final Thoughts

Hip circles are one of the most effective mobility exercises you can master.

They build:

  • Hip mobility
  • Joint health
  • Lower-body coordination
  • Core stability
  • Functional movement quality

Progress may feel subtle because hip circles are primarily a mobility exercise. However, with consistent practice and proper form, your movement quality and flexibility will steadily improve. Learn more about Stretching Here.

Quality movement is always better than rushed movement.

Focus on control, posture, and smooth circles.

A warrior prepares his foundation before unleashing his strength.

Essential Gear for Hip Circles

While hip circles require no equipment, the following gear can improve your warm-ups, increase hip activation, and help you progress to more challenging variations.

  • Resistance Bands: Add resistance to improve glute activation and hip stability.
  • Exercise Mat: Provides a comfortable surface for mobility and warm-up routines.
  • Mini Loop Bands: Increase tension during banded hip circle variations.
  • Foam Roller: Loosens tight hips and surrounding muscles before training.
  • Massage Ball: Targets tight glutes and hip muscles to improve mobility.

Hip Circles FAQ

Q1: Are hip circles good before workouts?
Yes. Hip circles are an excellent dynamic warm-up exercise because they increase blood flow and prepare the hips for movement.

Q2: How many hip circles should I do?
Most people can perform 10-20 repetitions in each direction or 20-60 seconds per side as part of a warm-up routine.

Q3: Can hip circles improve hip mobility?
Yes. When performed consistently, hip circles can help improve hip flexibility, joint health, and overall movement quality.

How to Do Arm Circles Correctly: Step-by-Step Guide for Beginners

Learn how to do arm circles with perfect form, avoid common mistakes, and discover the best arm circle variations to improve shoulder mobility and upper-body function.

Arm circles are one of the most effective dynamic warm-up exercises for increasing blood flow, improving shoulder mobility, and preparing the upper body for training. Whether you are warming up for strength training, sports, or military fitness, mastering arm circles is essential.


What Are Arm Circles?

An arm circle is a dynamic mobility exercise where you extend your arms out to your sides and move them in circular motions.

Arm circles are considered one of the best shoulder warm-up exercises because they improve mobility while activating the muscles surrounding the shoulder joint.

Arm circles are commonly used in:

  • Dynamic warm-up routines
  • Athletic performance training
  • Strength and conditioning programs
  • Rehabilitation and mobility work

Unlike static stretches, arm circles actively prepare the muscles and joints for movement.

Benefits of Arm Circles

Arm circles are one of the most effective exercises for improving shoulder function.

Benefits include:

  • Improves shoulder mobility
  • Increases blood flow to the upper body
  • Activates the shoulder muscles
  • Enhances range of motion
  • Helps reduce injury risk during training
  • Requires no equipment

Few warm-up exercises prepare the shoulders as effectively as arm circles.

Muscles Worked in Arm Circles

Arm circles activate several upper-body muscles simultaneously.

Primary Muscles
  • Deltoids
  • Rotator Cuff Muscles
Secondary Muscles
  • Trapezius
  • Pectoralis Major
  • Serratus Anterior
  • Rhomboids
  • Upper Back Stabilizers

Because of this muscle activation, arm circles are one of the best exercises for preparing the upper body for exercise.


How to Do Arm Circles (Step-by-Step)

Step 1: Stand Tall

Begin with:

  • Feet shoulder-width apart
  • Chest up
  • Core engaged
  • Arms extended out to the sides

Tip: Keep your shoulders relaxed throughout the movement.

Step 2: Start With Small Circles

Move your arms in small circular motions.

Focus on:

  • Keeping the movement smooth
  • Maintaining straight arms
  • Avoiding excessive tension

Start slowly to establish control.

Step 3: Gradually Increase the Circle Size

Increase the diameter of the circles over time.

Focus on:

  • Maintaining good posture
  • Keeping the movement controlled
  • Breathing normally

Avoid shrugging your shoulders.

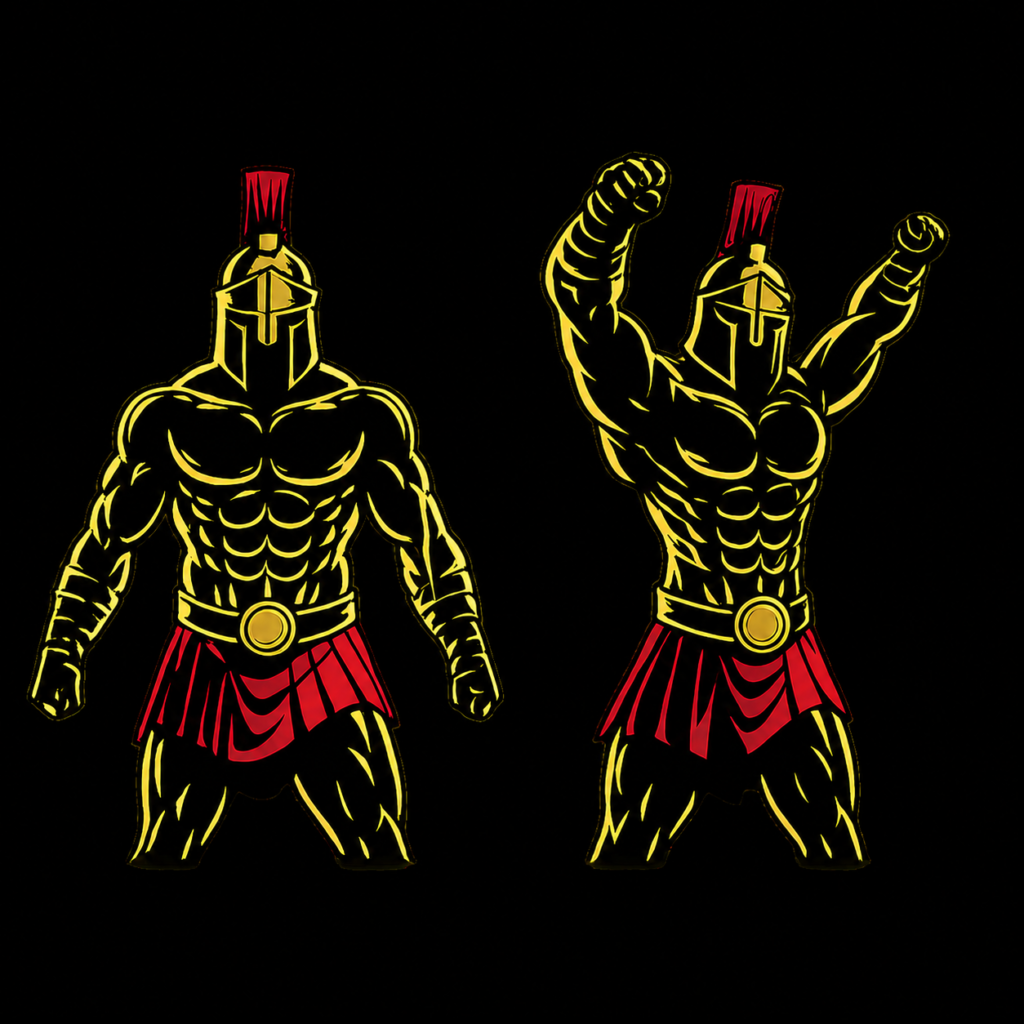
Warrior showcasing How to do Arm Circles with proper form

Step 4: Reverse the Direction

After completing several repetitions, switch directions.

At this stage:

  • Continue using controlled movements
  • Maintain straight arms
  • Keep your core engaged

This helps improve shoulder mobility evenly.

Step 5: Continue for the Desired Duration

Perform arm circles for 20-60 seconds in each direction.

Maintain smooth and controlled movements throughout.


Arm Circles Form Checklist

Use this quick checklist to ensure perfect arm circle form.

  • Keep your arms straight
  • Maintain good posture
  • Use smooth circular motions
  • Keep your shoulders relaxed
  • Reverse directions evenly

Perfect form improves mobility and reduces injury risk.


Common Arm Circles Mistakes

Shrugging the Shoulders

Problem: Creates unnecessary tension.

Fix: Keep your shoulders relaxed throughout the exercise.

Moving Too Quickly

Problem: Reduces control and effectiveness.

Fix: Use smooth and controlled circles.

Bending the Arms Excessively

Problem: Limits shoulder involvement.

Fix: Keep your arms fully extended.

Arching the Lower Back

Problem: Compromises posture.

Fix: Engage your core and maintain a neutral spine.

Using Jerky Movements

Problem: Places unnecessary stress on the shoulder joints.

Fix: Perform the movement with consistent control.

Controlled movement always beats speed.


Arm Circles Variations

Once you master the basic arm circle, different variations can help improve mobility and target different muscles.

Small Arm Circles

A beginner-friendly variation.

How to Do Small Arm Circles

  • Extend your arms out to the sides
  • Perform tight circular motions
  • Maintain good posture

This variation emphasizes control and endurance.

Large Arm Circles

Improves shoulder range of motion.

How to Do Large Arm Circles

  • Gradually increase the circle size
  • Maintain straight arms
  • Reverse directions after several repetitions

This variation enhances mobility.

Forward and Backward Arm Swings

Adds dynamic shoulder activation.

How to Do Forward and Backward Arm Swings

  • Swing your arms forward and backward
  • Maintain a smooth rhythm
  • Avoid forcing the movement

This variation improves blood flow and flexibility.

Weighted Arm Circles

An advanced variation.

How to Do Weighted Arm Circles

  • Hold light dumbbells
  • Perform small controlled circles
  • Maintain proper posture

This variation increases muscular endurance and shoulder stability.


Final Thoughts

Arm circles are one of the most effective exercises you can master for shoulder mobility and upper-body preparation.

They build:

  • Shoulder mobility
  • Joint health
  • Muscular endurance
  • Upper-body coordination
  • Functional movement quality

Progress may feel subtle because arm circles are primarily a mobility exercise. However, with consistent practice and proper form, your shoulder function and movement quality will steadily improve. Learn more about Stretching Here.

Quality movement is always better than rushed movement.

Focus on control, posture, and smooth circles.

A warrior prepares his body before he tests its strength.

Essential Gear for Arm Circles

While arm circles require no equipment to perform, the right gear can help improve comfort, mobility, and shoulder development as you progress.

  • Resistance Bands: Add light resistance to strengthen the shoulders and improve control.
  • Light Dumbbells: Use for weighted arm circles to build shoulder endurance.
  • Exercise Mat: Provides a comfortable surface for mobility and warm-up routines.
  • Foam Roller: Helps loosen tight shoulder and upper-back muscles before training.
  • Massage Ball: Targets muscle knots around the shoulders for better mobility.

Looking to upgrade your training setup? Explore our WarriorBodyAcademy Equipment Guides to find the best gear for your workouts.


Arm Circles FAQ

Q1: Are arm circles good before workouts?
Yes. Arm circles are an excellent dynamic warm-up exercise because they increase blood flow and prepare the shoulders for exercise.

Q2: How long should I perform arm circles?
Most people can perform arm circles for 20-60 seconds in each direction as part of a warm-up routine.

Q3: Can arm circles improve shoulder mobility?
Yes. When performed consistently, arm circles can help improve shoulder mobility, range of motion, and joint health.

Stretching: Benefits, Types & Best Stretches

Stretching is one of the most important yet often overlooked aspects of fitness. Whether you’re lifting weights, practicing calisthenics, running, playing sports, or simply staying active, stretching helps your body move more efficiently while improving flexibility, mobility, and recovery.

Many people focus solely on building strength or endurance, but neglecting flexibility can lead to tight muscles, reduced range of motion, poor movement quality, and an increased risk of injury.

A well-designed stretching routine prepares your body for exercise, enhances athletic performance, supports muscle recovery, and promotes long-term joint health. Whether you’re a beginner or an experienced athlete, stretching should be a regular part of your training program.


Why Stretching Matters

Healthy muscles and joints need more than strength—they also need the ability to move freely through their full range of motion.

Stretching helps maintain muscle length, improves joint mobility, and enhances body control during both exercise and everyday activities.

Regular stretching is especially beneficial for people who:

  • Lift weights
  • Practice calisthenics
  • Run or sprint
  • Play sports
  • Spend long hours sitting
  • Experience muscle tightness
  • Want better posture
  • Want to reduce injury risk

Improving flexibility and mobility allows your body to move with greater efficiency and less discomfort.

Benefits of Stretching

Consistent stretching provides numerous physical and performance benefits.

Improve Flexibility

Stretching gradually increases muscle length and elasticity, allowing joints to move through a greater range of motion.

Enhance Mobility

Flexible muscles combined with healthy joint movement improve squat depth, overhead mobility, running mechanics, and athletic performance.

Reduce Injury Risk

Maintaining adequate flexibility helps reduce excessive stress on muscles, tendons, and joints during physical activity.

Improve Athletic Performance

Moving through a full range of motion allows muscles to produce force more efficiently during sports and strength training.

Reduce Muscle Tightness

Stretching after exercise helps relax muscles, reduce stiffness, and improve recovery following intense workouts.

Support Better Posture

Stretching tight muscles in the chest, shoulders, hips, and lower back helps improve posture and movement quality.

Increase Blood Flow

Stretching encourages circulation, delivering oxygen and nutrients to working muscles while supporting recovery.


Muscles Targeted During Stretching

A complete stretching routine should target every major muscle group.

Upper Body

  • Chest
  • Shoulders
  • Triceps
  • Biceps
  • Lats
  • Neck
  • Forearms

Core

  • Rectus Abdominis
  • Obliques
  • Lower Back
  • Hip Flexors

Lower Body

  • Quadriceps
  • Hamstrings
  • Glutes
  • Hip Adductors
  • Hip Abductors
  • Calves
  • Tibialis Anterior

Stretching these muscle groups helps maintain balanced flexibility and healthy movement patterns.


Equipment Needed

Most stretching routines require little or no equipment.

Essential Equipment

Optional Equipment


Types of Stretching

Different types of stretching serve different purposes.

Dynamic Stretching

Dynamic stretching uses controlled movement to prepare the muscles and joints for exercise.

Examples

Benefits

  • Raises body temperature
  • Improves mobility
  • Activates muscles
  • Prepares the nervous system for exercise

Dynamic stretching is best performed before workouts.

Static Stretching

Static stretching involves holding a stretch without movement for a period of time.

Examples

Benefits

  • Improves flexibility
  • Reduces muscle tightness
  • Promotes relaxation
  • Supports recovery

Static stretching is most effective after workouts.

Active Stretching

Active stretching uses the contraction of one muscle group to stretch another without external assistance.

Examples

  • Standing Leg Raise Hold
  • Active Hamstring Stretch
  • Yoga Balance Poses

Benefits

  • Improves flexibility
  • Builds body control
  • Develops mobility and stability simultaneously

Passive Stretching

Passive stretching relies on external assistance such as gravity, equipment, or a training partner.

Examples

  • Resistance Band Hamstring Stretch
  • Assisted Shoulder Stretch
  • Partner Hip Stretch

Benefits

  • Increases flexibility
  • Allows deeper stretches
  • Improves relaxation

Best Stretching Exercises

Upper-Body Stretches

Lower-Body Stretches

Full-Body Mobility Stretches


Stretching Recommendations

Beginner

Focus on improving general flexibility and learning proper technique.

Recommended routine:

  • Dynamic warm-up before workouts
  • Five to eight static stretches after exercise
  • Hold each stretch for 20–30 seconds

Stretch 3–5 days per week.

Intermediate

Increase flexibility while improving mobility for strength training and sports.

Recommended routine:

  • Dynamic stretching before every workout
  • Full-body static stretching after training
  • Mobility drills on recovery days

Stretch 4–6 days per week.

Advanced

Develop maximum flexibility and mobility to support demanding athletic performance.

Recommended routine:

  • Daily mobility work
  • Dynamic warm-ups
  • Sport-specific stretching
  • Longer post-workout recovery sessions

Stretch according to your training volume and recovery needs.


Common Stretching Mistakes

Stretching Cold Muscles

Always perform a light warm-up before deep stretching to reduce the risk of muscle strain.

Bouncing During Static Stretches

Ballistic bouncing can place unnecessary stress on muscles and connective tissues.

Holding Your Breath

Slow, controlled breathing allows muscles to relax and improves the effectiveness of stretching.

Forcing a Stretch

Stretch to mild tension—not pain. Overstretching can increase injury risk.

Inconsistent Stretching

Flexibility improves gradually through regular practice rather than occasional long sessions.


Pro Stretching Tips

  • Warm up for 5–10 minutes before deep stretching.
  • Use dynamic stretches before workouts and static stretches afterward.
  • Stretch both sides of the body evenly.
  • Breathe slowly and relax into each stretch.
  • Never force painful positions.
  • Stretch consistently throughout the week for lasting improvements.
  • Combine stretching with strength training for optimal mobility and joint health.

Final Thoughts

Stretching is far more than a warm-up or cooldown—it is an essential component of long-term fitness, movement quality, and injury prevention. By improving flexibility, mobility, posture, and recovery, regular stretching helps you perform better both in and out of the gym.

Whether your goal is building strength, mastering calisthenics, improving athletic performance, or simply moving without pain, consistent stretching will help you stay mobile, resilient, and ready for every workout.

Flexible muscles create stronger movement. Make stretching part of every training session, move with confidence, and build the mobility of a true warrior.


Frequently Asked Questions

How long should I stretch each day?

Five to ten minutes of daily stretching is enough to maintain flexibility, while longer sessions may be beneficial for improving mobility.

Should I stretch before or after workouts?

Perform dynamic stretches before exercise to prepare the body and static stretches afterward to improve flexibility and support recovery.

Is stretching important if I lift weights?

Yes. Stretching helps maintain joint mobility, improves movement quality, and may reduce muscle tightness caused by strength training.

Can stretching reduce muscle soreness?

Stretching may help reduce feelings of muscle tightness after exercise, although it is not a guaranteed way to prevent delayed onset muscle soreness (DOMS).

How often should I stretch?

Most people benefit from stretching at least three to five days per week, while daily stretching can further improve flexibility and mobility.

Advanced At-Home PPL Workout Plan (Push-Pull-Legs)

This Advanced At-Home PPL Workout Plan is built for experienced trainees who have already developed a strong foundation and need greater resistance, exercise complexity, volume, and movement variety to continue progressing at home.

This program uses a Push Pull Legs (PPL) structure alongside advanced bodyweight exercises, weighted backpack movements, resistance bands, unilateral training, explosive exercises, and demanding core work. The goal is to continue developing strength, muscle, muscular endurance, stability, and body control without requiring a commercial gym.

You can choose between a 3-day PPL option with greater recovery or a 6-day PPL option featuring separate A and B sessions for greater training frequency and exercise variety.

Click on any exercise to learn how to do it.

Benefits of an Advanced At-Home PPL Plan

  • Builds advanced upper and lower-body strength
  • Supports continued muscle development
  • Develops muscular endurance and work capacity
  • Uses challenging bodyweight and weighted movements
  • Trains muscles through multiple movement patterns
  • Improves unilateral strength and stability
  • Develops explosive power
  • Strengthens the core and improves body control
  • Allows progressive overload without a full gym
  • Offers flexible 3-day and 6-day training options

What Is an Advanced PPL Training Split?

PPL stands for Push, Pull, and Legs, dividing your workouts according to movement patterns and the muscles primarily responsible for them.

  • Push – Chest, shoulders, and triceps
  • Pull – Back, biceps, rear delts, and forearms
  • Legs – Quads, hamstrings, glutes, and calves

Advanced trainees require more than simply performing additional repetitions of basic exercises. Resistance, leverage, range of motion, unilateral movements, tempo, and harder exercise variations can all be manipulated to continue making training progressively more challenging.

The 3-day option provides a full Push, Pull, and Legs rotation with generous recovery.

The 6-day option uses separate A and B sessions, allowing you to train each movement group twice per week while varying exercise selection and emphasis.


Equipment Needed

Although this program is performed at home, advanced training benefits greatly from a few pieces of equipment.

Make sure all equipment and elevated surfaces are stable enough to safely support the exercise being performed.


Weekly Training Structure

Option 1 – 3-Day Advanced PPL

  • Monday – Push
  • Tuesday – Rest
  • Wednesday – Pull
  • Thursday – Rest
  • Friday – Legs
  • Saturday – Rest or Light Activity
  • Sunday – Rest

For greater exercise variety, alternate between the A and B workouts each week:

Week 1: Push A, Pull A, Legs A

Week 2: Push B, Pull B, Legs B

Continue alternating as you progress.

Option 2 – 6-Day Advanced PPL

  • Monday – Push A
  • Tuesday – Pull A
  • Wednesday – Legs A
  • Thursday – Push B
  • Friday – Pull B
  • Saturday – Legs B
  • Sunday – Rest

The 6-day option provides higher training frequency, but it also demands greater attention to recovery. Adjust your workload if fatigue begins consistently reducing your performance.


Pre-Workout Stretch & Mobility Routine

Perform this dynamic warm-up for approximately 5–10 minutes before every session.

Follow the general warm-up with easier repetitions of your first exercise before starting your working sets.


Push A – Strength & Vertical Pressing

Push A emphasizes challenging pressing movements for the chest, shoulders, and triceps.

Main Workout

  • Weighted Push-Ups – 4 sets × 6–10 reps
  • Feet-Elevated Pike Push-Ups – 4 sets × 6–10 reps
  • Weighted Dips – 4 sets × 6–10 reps
  • Resistance Band Shoulder Press – 3 sets × 8–12 reps
  • Archer Push-Ups – 3 sets × 6–10 reps each side
  • Resistance Band Lateral Raises – 3 sets × 12–20 reps

Rest 90–150 seconds after demanding compound movements and 60–90 seconds after accessory exercises.

If you’re not ready to add weight to Dips, perform controlled bodyweight Dips within the prescribed range.

Core Finisher

Pull A – Vertical Pulling & Back Strength

Pull A emphasizes vertical pulling strength while developing the upper back, biceps, forearms, and grip.

Main Workout

  • Weighted Pull-Ups – 4 sets × 5–8 reps
  • Archer Inverted Rows – 3 sets × 6–10 reps each side
  • Single-Arm Resistance Band Rows – 3 sets × 10–15 reps each arm
  • Resistance Band Face Pulls – 3 sets × 12–20 reps
  • Backpack Bicep Curls – 3 sets × 8–12 reps
  • Towel Dead Hangs – 3 sets × 20–40 seconds

Rest 90–150 seconds after heavy pulling movements and 60–90 seconds after accessory work.

If weighted Pull-Ups compromise your technique, perform strict bodyweight Pull-Ups instead.

Core Finisher

Legs A – Strength & Posterior Chain

Legs A combines unilateral strength with loaded squatting and hip-hinge movements.

Main Workout

  • Heavy Backpack Squats – 4 sets × 8–12 reps
  • Weighted Bulgarian Split Squats – 4 sets × 8–10 reps each leg
  • Backpack Romanian Deadlifts – 4 sets × 8–12 reps
  • Reverse Lunges – 3 sets × 10–12 reps each leg
  • Single-Leg Calf Raises – 4 sets × 12–20 reps each leg

Rest 90–150 seconds after demanding exercises and 60–90 seconds after Calf Raises.

Core Finisher

  • Reverse Crunches – 3 sets × 15–20 reps
  • Plank Shoulder Taps – 3 sets × 20 reps

Push B – Bodyweight Control & Hypertrophy

Push B uses different pressing angles and advanced bodyweight variations to challenge the upper body.

Main Workout

  • Resistance Band-Resisted Push-Ups – 4 sets × 8–15 reps
  • Wall-Assisted Handstand Push-Ups or Handstand Push-Up Progressions – 4 sets × 4–8 reps
  • Decline Push-Ups – 3 sets × 10–15 reps
  • Straight-Bar Dips or Parallel-Bar Dips – 3 sets × 8–12 reps
  • Pseudo Planche Push-Ups – 3 sets × 6–10 reps
  • Resistance Band Tricep Extensions – 3 sets × 12–15 reps

Rest 90–150 seconds after demanding compound exercises and 60–90 seconds after accessory exercises.

Only use a Handstand Push-Up progression you can perform with controlled technique and a secure setup.

Core Finisher

Pull B – Back, Biceps & Grip

Pull B changes the grip and pulling angles while incorporating demanding horizontal pulling and additional back work.

Main Workout

  • Weighted Chin-Ups – 4 sets × 5–8 reps
  • Feet-Elevated Inverted Rows – 4 sets × 8–12 reps
  • Backpack Bent-Over Rows – 4 sets × 8–12 reps
  • Resistance Band Straight-Arm Pulldowns – 3 sets × 12–15 reps
  • Resistance Band Reverse Flyes – 3 sets × 12–20 reps
  • Resistance Band Hammer Curls – 3 sets × 10–15 reps

Rest 90–150 seconds after compound exercises and 60–90 seconds after accessory work.

Grip Finisher

For an additional challenge, use a towel grip only when your bar and towel setup are secure.

Core Finisher

Legs B – Unilateral Strength, Power & Stability

Legs B emphasizes single-leg strength, explosive power, hamstring development, and lower-body stability.

Main Workout

  • Pistol Squats or Assisted Pistol Squats – 4 sets × 5–8 reps each leg
  • Weighted Step-Ups – 3 sets × 8–12 reps each leg
  • Single-Leg Romanian Deadlifts – 3 sets × 8–12 reps each leg
  • Nordic Hamstring Curl Progressions – 3 sets × 5–8 reps
  • Jump Squats – 3 sets × 8–10 reps
  • Single-Leg Calf Raises – 4 sets × 15–20 reps each leg

Rest 90–150 seconds after strength exercises.

For Jump Squats, prioritize maximum-quality repetitions and controlled landings rather than fatigue. Stop the set when your jump height or landing quality noticeably declines.

Only perform Nordic Curl variations with a completely secure ankle anchor. If you don’t have one, use sliding Hamstring Curls on a suitable surface instead.

Core Finisher

  • Flutter Kicks – 3 sets × 30 reps
  • Side Plank Hip Dips – 3 sets × 12–15 reps each side

Post-Workout Stretch Routine

After training, allow your breathing and heart rate to gradually settle before performing static stretches.

Hold each stretch for approximately 20–30 seconds.

Prioritize the muscle groups trained during that session rather than forcing yourself through every stretch after every workout.


How to Progress at the Advanced Level

Advanced trainees usually progress more slowly than beginners and intermediates. Small improvements matter.

Add Resistance

Gradually increase the load in your backpack or weight vest when you reach the upper end of the prescribed repetition range.

For example:

Weighted Pull-Ups – 4 sets × 5–8 reps

Once you can perform four controlled sets of eight repetitions, slightly increase the resistance and work upward again.

Use Harder Exercise Variations

Advanced bodyweight training allows leverage to become a form of progressive overload.

Examples include:

Pike Push-Up → Feet-Elevated Pike Push-Up → Handstand Push-Up Progression

Push-Up → Weighted Push-Up → Archer Push-Up → Pseudo Planche Push-Up

Squat → Weighted Squat → Bulgarian Split Squat → Pistol Squat

Increase Range of Motion

Where appropriate, increasing the controlled range of motion can make an exercise significantly more demanding.

Never increase range by forcing your joints into uncomfortable positions.

Manipulate Tempo and Pauses

When additional resistance isn’t available, use controlled tempo work.

For example:

  • Lower for 3–5 seconds
  • Pause briefly at the hardest position
  • Perform the lifting phase under control

Track Performance

Record:

  • Resistance used
  • Sets
  • Repetitions
  • Hold times
  • Exercise variation
  • Range of motion

Advanced progress can be gradual, so accurate tracking makes small improvements easier to identify.


3-Day or 6-Day PPL: Which Should You Choose?

Choose the 3-day option if you:

  • Perform other demanding sports or conditioning
  • Prefer longer recovery periods
  • Train with very high effort per session
  • Have limited weekly training time
  • Perform better with fewer but demanding workouts

Choose the 6-day option if you:

  • Have years of consistent training experience
  • Recover reliably from high-frequency training
  • Want to train each muscle group twice per week
  • Prefer distributing your weekly volume across more sessions
  • Can consistently maintain nutrition, sleep, and recovery

Your schedule should support performance rather than simply maximize the number of days you train.


Signs You’re Ready for Advanced PPL Training

Advanced training should come after you’ve developed considerable strength and movement proficiency.

Useful indicators include being able to perform approximately:

  • 30+ controlled Push-Ups
  • 10–15 strict Pull-Ups
  • 15+ controlled Dips
  • 8–10 Pike Push-Ups with strong technique
  • 12 Bulgarian Split Squats per leg
  • 60+ Second Plank
  • Controlled loaded Squats and Romanian Deadlifts

These are guidelines rather than strict entrance requirements. Your overall technique, training history, recovery capacity, and control are equally important.

Tips for Advanced Trainees

  • Track every workout and aim for measurable long-term progression.
  • Prioritize quality repetitions over unnecessary volume.
  • Don’t take every working set to complete muscular failure.
  • Use additional resistance when basic bodyweight exercises become too easy.
  • Use advanced variations only after mastering their prerequisites.
  • Give heavy compound movements sufficient rest between sets.
  • Keep Push and Pull training balanced.
  • Train both knee-dominant and hip-dominant lower-body movements.
  • Treat explosive exercises as power training rather than endurance work.
  • Reduce volume or intensity when accumulated fatigue consistently reduces performance.
  • Prioritize adequate protein, total nutrition, hydration, and sleep.
  • Keep at least one genuine recovery day each week.

Final Thoughts

An Advanced At-Home PPL Workout Plan can provide demanding, structured training without requiring a commercial gym. With advanced bodyweight movements, resistance bands, weighted exercises, unilateral training, explosive movements, and progressive overload, a home setup can continue challenging even highly experienced trainees.

Whether you choose the 3-day or 6-day PPL option, make every session purposeful. Track your performance, progress resistance and exercise difficulty gradually, maintain strict technique, and give your body enough recovery to adapt.

Advanced training isn’t about making every workout as exhausting as possible. It’s about continuing to create meaningful challenges as you become stronger.

Train with control, recover with purpose, and keep pushing your capabilities forward.


Intermediate At-Home PPL Workout Plan (Push-Pull-Legs)

This Intermediate At-Home PPL Workout Plan divides training into Push, Pull, and Legs while introducing more challenging exercises for strength, muscle development, stability, and muscular endurance.

Once you’ve mastered the basics of home training, simply repeating beginner exercises with more reps eventually stops being enough. An intermediate program needs greater exercise variety, harder movement patterns, progressive overload, and enough training volume to keep your body adapting.

You can follow it as a 3-day PPL routine for greater recovery or a 6-day PPL routine to train each muscle group twice per week. Unlike the old version of this program, the 6-day option also uses different exercises during the second half of the week rather than simply repeating the exact same workouts.

Click on any exercise to learn How to do it.

Benefits of an Intermediate At-Home PPL Workout

  • Builds strength and lean muscle
  • Provides balanced full-body development
  • Increases muscular endurance
  • Introduces more challenging exercise variations
  • Allows progressive overload with limited equipment
  • Trains muscles through different movement patterns
  • Develops core strength and stability
  • Offers flexible 3-day and 6-day schedules
  • Prepares you for advanced home training

What Is a PPL Training Split?

PPL stands for Push, Pull, and Legs. Instead of training the entire body in every workout, exercises are grouped according to the muscles and movement patterns involved.

  • Push – Chest, shoulders, and triceps
  • Pull – Back, biceps, rear shoulders, and forearms
  • Legs – Quads, hamstrings, glutes, and calves

The 3-day version trains each group once per week and leaves plenty of room for recovery, sports, cardio, or other activities.

The 6-day version trains each group twice per week. Instead of repeating identical workouts, you’ll perform Push A/Pull A/Legs A followed by Push B/Pull B/Legs B, giving you greater exercise variety and a more complete intermediate program.


Equipment Needed

You can perform this program with a relatively small home setup:

Load your backpack with suitable household items and make sure it is securely closed before exercising.


Weekly Training Structure

Option 1 – 3-Day Intermediate PPL

  • Monday – Push A
  • Tuesday – Rest
  • Wednesday – Pull A
  • Thursday – Rest
  • Friday – Legs A
  • Saturday – Rest or Light Activity
  • Sunday – Rest

If you follow the 3-day version for several weeks, you can periodically replace the A workouts with the B workouts for additional variety.

Option 2 – 6-Day Intermediate PPL

  • Monday – Push A
  • Tuesday – Pull A
  • Wednesday – Legs A
  • Thursday – Push B
  • Friday – Pull B
  • Saturday – Legs B
  • Sunday – Rest

The 6-day option is the primary progression-focused version of this intermediate program because it allows each muscle group to be trained twice per week with different exercises.

However, six days isn’t automatically better. Choose the schedule that fits your recovery, experience, and lifestyle.


Pre-Workout Warm-Up Routine

Perform this routine for approximately 5–8 minutes before each workout.

After the general warm-up, perform a few easy repetitions of the first exercise before beginning your working sets.


Push A – Chest, Shoulders & Triceps

Push A emphasizes fundamental pressing strength with harder variations than the beginner program.

Main Workout

  • Decline Push-Ups – 4 sets × 8–15 reps
  • Pike Push-Ups – 4 sets × 6–12 reps
  • Dips – 3 sets × 8–12 reps
  • Resistance Band Shoulder Press – 3 sets × 10–15 reps
  • Diamond Push-Ups – 3 sets × 8–12 reps
  • Resistance Band Lateral Raises – 2 sets × 12–20 reps

Rest 60–90 seconds between most sets and up to 2 minutes after demanding compound exercises when needed.

Core Finisher

Pull A – Back, Biceps & Forearms

Pull A focuses on vertical pulling strength while adding horizontal pulling and direct arm work.

Main Workout

  • Pull-Ups – 4 sets × 6–10 reps
  • Inverted Rows – 4 sets × 8–15 reps
  • Single-Arm Resistance Band Rows – 3 sets × 10–15 reps each arm
  • Resistance Band Face Pulls – 3 sets × 12–20 reps
  • Backpack Bicep Curls – 3 sets × 10–15 reps
  • Dead Hangs – 3 sets × 30–45 seconds

Rest 60–120 seconds between sets.

If you cannot complete the prescribed Pull-Up repetitions with clean form, use a resistance band for assistance rather than turning the final repetitions into uncontrolled reps.

Core Finisher

Legs A – Quads, Hamstrings, Glutes & Calves

Legs A provides more balanced lower-body development.

Main Workout

Rest 60–120 seconds between sets.

Core Finisher


Push B – Chest, Shoulders & Triceps

Push B changes the angles and exercise selection rather than simply repeating Push A.

Main Workout

  • Weighted Backpack Push-Ups – 4 sets × 8–12 reps
  • Feet-Elevated Pike Push-Ups – 3 sets × 6–10 reps
  • Wide-Grip Push-Ups – 3 sets × 10–15 reps
  • Resistance Band Chest Press – 3 sets × 10–15 reps
  • Close-Grip Push-Ups – 3 sets × 8–15 reps
  • Resistance Band Tricep Extensions – 3 sets × 12–15 reps

Rest 60–120 seconds between sets.

If weighted push-ups aren’t practical, perform standard push-ups with a slow 3-second lowering phase instead.

Core Finisher

Pull B – Back, Biceps & Grip

Pull B introduces different grips and pulling patterns to complement the first Pull workout.

Main Workout

  • Chin-Ups – 4 sets × 6–10 reps
  • Feet-Elevated Inverted Rows – 3 sets × 8–12 reps
  • Backpack Bent-Over Rows – 4 sets × 10–15 reps
  • Resistance Band Straight-Arm Pulldowns – 3 sets × 12–15 reps
  • Resistance Band Reverse Flyes – 3 sets × 12–20 reps
  • Hammer Curls with Backpack or Resistance Band – 3 sets × 10–15 reps

Rest 60–120 seconds between sets.

Grip Finisher

  • Towel Dead Hang – 3 sets × 20–30 seconds

If your pull-up bar isn’t suitable for safely hanging a towel from it, use ordinary dead hangs instead.

Core Finisher

Legs B – Lower Body Strength & Stability

Legs B shifts more attention toward unilateral strength, posterior-chain development, stability, and controlled power.

Main Workout

  • Backpack Front Squats – 4 sets × 10–15 reps
  • Reverse Lunges – 3 sets × 10–12 reps each leg
  • Single-Leg Romanian Deadlifts – 3 sets × 8–12 reps each leg
  • Single-Leg Glute Bridges – 3 sets × 12–15 reps each leg
  • Jump Squats – 3 sets × 8–12 reps
  • Standing Calf Raises – 3 sets × 15–25 reps

Rest 60–120 seconds between sets.

Keep the Jump Squats explosive and controlled. Stop the set if your landings become heavy or your technique deteriorates.

Core Finisher

  • Flutter Kicks – 3 sets × 20–30 reps
  • Plank Shoulder Taps – 3 sets × 20 reps

Post-Workout Stretch Routine

After your workout, cool down and perform the stretches relevant to the muscles you trained.

Hold each static stretch for approximately 20–30 seconds.

Don’t force yourself into uncomfortable ranges. Stretch gently and allow your breathing to return to normal.


How to Progress at the Intermediate Level

Intermediate training requires more than endlessly adding repetitions. As your strength improves, use several forms of progressive overload.

1. Increase Repetitions

If an exercise is prescribed for 8–12 reps, gradually work toward 12 clean repetitions on every set.

2. Add Resistance

Once you reach the upper end of the range, add a small amount of weight to your backpack or increase resistance-band tension.

For example:

Push-Ups → High-Rep Push-Ups → Weighted Push-Ups

3. Progress the Exercise

Move to a mechanically harder variation when the current movement becomes too easy.

Examples include:

Pike Push-Up → Feet-Elevated Pike Push-Up → Wall-Assisted Handstand Push-Up Progression

Inverted Row → Feet-Elevated Inverted Row → Weighted Inverted Row

Bodyweight Squat → Backpack Squat → Bulgarian Split Squat → Heavier Bulgarian Split Squat

4. Improve Range of Motion

Don’t sacrifice range of motion simply to use more resistance. Better control through a full, comfortable range can itself make an exercise more challenging.

5. Use Tempo Strategically

Slowing the eccentric portion of an exercise can increase difficulty when your available home resistance is limited.

For example, lower yourself for 3 seconds, briefly pause, and then perform the concentric phase under control.

You don’t need to use every progression method simultaneously. Change one variable, adapt to it, and continue from there.


3-Day vs. 6-Day PPL: Which Should You Choose?

Choose the 3-day option if you have other sports or training commitments, need more recovery, have a busy schedule, or are transitioning from beginner to intermediate training.

Choose the 6-day option if you have already built a good training base, enjoy frequent workouts, recover reliably, and want more weekly training volume and exercise variety.

The important factor isn’t simply how many days you train. Your total workload must be something you can consistently recover from and progressively improve.


Signs You’re Ready for Intermediate Training

This program assumes you’ve already spent time learning the basic exercises.

Useful indicators include being able to perform movements such as:

  • 15–20 controlled Push-Ups
  • 5–8 clean Pull-Ups
  • 8–12 controlled Dips
  • 20+ Bodyweight Squats
  • 10 Bulgarian Split Squats per leg
  • 45–60-second Plank

These aren’t mandatory entrance tests. They’re simply useful signs that a beginner program may no longer provide enough challenge.

If basic movements are still difficult, continue with the Beginner At-Home PPL Workout Plan until you’ve built a stronger foundation.

Tips for Intermediate Trainees

  • Keep a training log and record sets, reps, resistance, and exercise variations.
  • Prioritize good technique before increasing resistance.
  • Don’t take every set to muscular failure.
  • Use harder exercise variations instead of adding endless repetitions.
  • Keep Pull Day balanced between vertical and horizontal pulling.
  • Train your hamstrings and glutes rather than making Leg Day entirely quad-dominant.
  • Adjust training volume if your performance consistently declines.
  • Eat enough protein and total calories to support your goal.
  • Stay hydrated and prioritize quality sleep.
  • Use your rest day for recovery rather than another hard workout.

Final Thoughts

An Intermediate At-Home PPL Workout Plan should be more than a beginner routine with extra repetitions. At this stage, your training needs greater resistance, more challenging exercise variations, balanced movement patterns, and deliberate progressive overload.

The upgraded 3-day option gives you a straightforward Push-Pull-Legs structure with plenty of recovery, while the 6-day option introduces separate A and B workouts so you can train each muscle group twice per week without simply repeating the same session.

Your home equipment may be simple, but your progression doesn’t have to be.

Master each movement, make the exercises progressively harder, recover properly, and continue building toward advanced-level training.


The Mind and The Body: Two Halves of the Same Coin

Physical strength alone does not determine athletic success. Behind every elite athlete, soldier, or high performer lies a powerful mental framework that drives discipline, consistency, resilience, and focus. The connection between mindset and physical performance is one of the most studied topics in sports psychology.

Scientific research shows that psychological factors such as motivation, self-discipline, confidence, and emotional control significantly influence athletic performance and training outcomes. Sports psychology explores how mental skills can enhance physical capabilities and help individuals achieve peak performance.

Simply put: the body performs at the level the mind allows.


The Mind–Body Connection in Physical Performance

The human body and mind operate as a unified system. Thoughts, beliefs, and emotions influence physical output, endurance, and recovery.

Research in sports psychology indicates that athletes with strong mental discipline and psychological resilience are more likely to adhere to their training routines and achieve long-term goals.

A strong mindset improves:

  • Motivation during difficult training
  • Focus during competition
  • Emotional control under pressure
  • Long-term commitment to physical development

When the mind is trained alongside the body, performance becomes significantly more consistent.


Discipline: The Foundation of Physical Excellence

Discipline is the cornerstone of both physical and mental strength. It is the ability to follow through with actions regardless of motivation or emotional state.

Motivational speaker and former Navy SEAL David Goggins often emphasizes that discipline is more powerful than motivation. Motivation is temporary, but discipline creates habits that sustain performance over time.

In his philosophy of “embracing discomfort,” Goggins explains that pushing through difficult workouts trains both the body and the mind simultaneously. Each difficult training session strengthens mental resilience, which later translates into improved physical endurance and toughness.

Disciplined athletes:

  • Train even when motivation fades
  • Maintain structured routines
  • Develop mental toughness
  • Build long-term physical capability

Discipline ensures that physical training becomes a consistent lifestyle rather than an occasional effort.


Consistency: The Hidden Secret of Elite Performance

Consistency is what transforms average training into extraordinary results.

Many people start workouts with enthusiasm but fail to maintain them over time. A strong mindset helps individuals stay committed even when results appear slow.

Research on mindset and athletic performance shows that athletes with strong mental toughness demonstrate greater adherence to training programs and better long-term results.

Consistency builds:

  • Muscular strength
  • Cardiovascular endurance
  • Skill mastery
  • Habit formation

As motivational author Jeff Keller explains in the book Attitude Is Everything, success is largely determined by one’s attitude toward challenges and effort. Keller argues that a positive mindset encourages persistence, which eventually leads to tangible results.


Mental Toughness: Performing Under Pressure

Mental toughness is the ability to maintain focus, confidence, and effort under stress or fatigue.

Elite athletes often use psychological techniques such as:

  • Visualization
  • Positive self-talk
  • Goal setting
  • Controlled breathing
  • Mental rehearsal

These strategies help athletes maintain focus and reduce anxiety during competition.

Studies show that psychological skills like self-confidence, emotional regulation, and motivation significantly influence performance outcomes.

Mental toughness enables individuals to:

  • Push through fatigue
  • Recover from failure
  • Maintain focus under pressure
  • Sustain high performance levels

The Role of Goal Setting in Physical Success

Goal setting is another powerful psychological tool that improves physical performance.

According to goal-setting theory, specific and challenging goals lead to greater effort and persistence than vague goals.

For example, instead of saying:

“Get stronger”

An effective goal would be:

“Perform 50 push-ups in one set within three months.”

Clear goals help direct attention, increase motivation, and improve long-term discipline.


Confidence and Self-Belief

Confidence is a crucial mental factor that directly influences physical performance.

Athletes who believe in their abilities are more likely to:

  • Attempt difficult challenges
  • Persist after failure
  • Maintain focus under pressure

Psychological research also shows that mindset influences stress response, motivation, and behavioral outcomes. Alia Crum has studied how mindset shapes both mental and physical health outcomes, demonstrating that beliefs can significantly affect human performance and resilience.

A confident mindset can therefore enhance both training performance and competitive success.


Growth Mindset and Continuous Improvement

A growth mindset is the belief that abilities can improve through effort and practice.

Athletes with this mindset:

  • View challenges as opportunities
  • Learn from failure
  • Remain committed to long-term improvement

Research indicates that athletes with a growth mindset are more likely to stay motivated and committed to their goals even when progress is slow.

This mindset transforms setbacks into valuable lessons, strengthening both mental and physical resilience.


Final Thoughts

Physical performance is not determined by muscles alone. Behind every strong body lies an even stronger mind.

Discipline builds habits, consistency sustains progress, and mental toughness allows individuals to push beyond their limits. A powerful mindset enables athletes, soldiers, and everyday individuals to train harder, recover faster, and perform better under pressure.

As many high performers emphasize, the greatest battles are often fought within the mind. When mindset is strengthened alongside physical training, the results are extraordinary.

Train the mind, and the body will follow. Learn more about the Warrior Body here.

Post-Workout Nutrition: What to Eat After Training

Your workout ends when you finish your last set, but your body’s work is far from over.

Exercise creates a recovery challenge. Muscle tissue needs to repair and adapt, glycogen used during training may need to be restored, fluids lost through sweat need replacing, and your body still needs enough total energy to support those processes.

That is where post-workout nutrition comes in.

However, you do not need to sprint toward a protein shake the second your workout ends.

For most people, good post-workout nutrition is much simpler: eat enough protein throughout the day, consume enough calories for your goal, replace carbohydrates according to your training demands, and rehydrate properly.

This guide explains what to eat after training, how much you may need, when timing actually matters, and how to adjust your recovery nutrition for different goals.

Quick Answer

For most people, a good post-workout meal contains:

  • A quality source of protein
  • Carbohydrates according to training demands
  • Fluids
  • A normal amount of healthy fats
  • Enough total calories to support your goal

A practical protein serving after training is generally around:

0.25–0.40 grams of protein per kilogram of bodyweight

For many people, this works out to roughly 20–40 grams of protein.

Carbohydrates become especially important after long, high-volume, endurance, combat-sports, or repeated training sessions.

You do not need to eat within exactly 30 minutes after training. A protein-containing meal within the next few hours is generally appropriate for most people, particularly if you ate before training.


What Is Post-Workout Nutrition?

Post-workout nutrition refers to the food and fluids you consume after exercise to support recovery and adaptation.

Its main purposes include:

  • Supporting muscle protein synthesis
  • Providing amino acids for muscle repair
  • Replenishing glycogen
  • Restoring fluids
  • Replacing electrolytes when necessary
  • Supporting recovery before the next workout
  • Helping meet your total daily calorie and nutrient requirements

It is important to understand that your post-workout meal does not work in isolation.

Recovery depends on your entire diet.

Someone who consistently eats enough protein, carbohydrates, calories, and micronutrients throughout the day is in a much better position than someone relying on one perfect post-workout shake after otherwise poor nutrition.

Why Post-Workout Nutrition Matters

Exercise changes the demands placed on your body.

What happens afterward depends partly on the nutrients available for recovery.

Muscle Repair and Growth

Resistance training stimulates muscle protein synthesis, but your body still requires amino acids from dietary protein to support muscle remodeling.

Protein after training helps provide those amino acids.

This does not mean the protein literally “repairs torn muscles” in a simple mechanical sense. Muscle adaptation is a complex biological process involving remodeling and synthesis of new proteins.

What matters practically is that resistance training and adequate protein work together.

Glycogen Replenishment

Your muscles store carbohydrate as glycogen.

Training can reduce glycogen stores, particularly during:

  • Long workouts
  • High-volume resistance training
  • Running
  • Cycling
  • Combat sports
  • Sprinting
  • Repeated high-intensity exercise

Eating carbohydrates after training helps restore those stores.

Research also shows that carbohydrate-containing foods can effectively support post-exercise glycogen restoration.

Rehydration

Sweat means losing both water and electrolytes.

The amount varies dramatically between people and workouts.

A short strength workout indoors may result in relatively little fluid loss, while a long outdoor session in hot conditions can result in substantial sweating.

Post-workout nutrition therefore also includes replacing fluids.

Preparing for Your Next Session

Recovery becomes even more important when another workout is coming soon.

If you train once and then have 24–48 hours before repeating hard exercise, nutrient timing is relatively flexible.

If you need to train again later the same day, rapidly restoring carbohydrates, fluids, and protein becomes much more important.


The Most Important Principle: Your Daily Nutrition Matters More Than a 30-Minute Window

For years, bodybuilding advice often claimed that you had roughly 30–60 minutes after training to consume protein or you would “miss the anabolic window.”

That greatly exaggerates the urgency.

Muscle protein synthesis remains elevated for much longer than 30 minutes after resistance training.

The need to eat immediately also depends on what happened before your workout.

If you ate a substantial meal containing protein two hours before training, amino acids from that meal are still being digested and absorbed during and after your workout.

In that situation, there is little reason to panic if your next meal takes some time.

On the other hand, if you trained first thing in the morning after an overnight fast, eating relatively soon afterward makes more sense.

The practical hierarchy is:

  1. Eat enough protein across the entire day.
  2. Eat enough calories for your goal.
  3. Consume enough carbohydrates for your activity level.
  4. Distribute protein across several meals.
  5. Time post-workout nutrition according to convenience and recovery needs.

Get the fundamentals right before worrying about minutes.


Protein After Training

Protein is generally the most important macronutrient to prioritize after resistance training because it provides essential amino acids required for muscle protein synthesis.

A useful general serving is:

0.25–0.40 g/kg of bodyweight

For example:

60 kg Person

  • 60 × 0.25 = 15 g
  • 60 × 0.40 = 24 g

A practical meal might contain roughly 20–25 grams.

80 kg Person

  • 80 × 0.25 = 20 g
  • 80 × 0.40 = 32 g

A practical meal might contain roughly 25–35 grams.

Larger people and those eating fewer meals per day may prefer somewhat larger servings.

The exact amount does not need to be mathematically perfect at every meal.

Your total daily protein intake remains more important.

Good Post-Workout Protein Sources

Useful options include:

  • Chicken
  • Eggs
  • Fish
  • Lean beef
  • Milk
  • Greek yogurt
  • Cottage cheese
  • Whey protein
  • Soy foods
  • Lentils
  • Beans
  • Chickpeas
  • Plant-protein blends

You do not need a special “fast-absorbing” food to recover properly.

Whey protein is convenient and rapidly digested, but normal food works perfectly well when you have time to eat a meal.


Carbohydrates After Training

Carbohydrates help replenish glycogen used during exercise.

However, the importance of eating large amounts of carbohydrate immediately afterward depends on how much glycogen you used and how soon you need it again.

When Carbohydrates Matter Most

Post-workout carbohydrate becomes especially important after:

  • Long endurance sessions
  • High-volume training
  • Combat-sports sessions
  • Sprint training
  • Long runs or rides
  • Multiple workouts in one day
  • Competitions involving repeated events

If your workout was moderate and your next hard session is tomorrow, you have many hours to replenish glycogen through normal meals.

There is usually no need to rush toward sugar immediately after a normal lifting session.

How Much Carbohydrate Do You Need?

For ordinary resistance training, there is rarely a need to calculate a precise post-workout carbohydrate dose.

Simply include an appropriate carbohydrate source in your next meal.

Examples include:

  • Rice
  • Potatoes
  • Oats
  • Bread
  • Pasta
  • Fruit
  • Cereal
  • Quinoa
  • Beans
  • Lentils

For athletes requiring rapid glycogen restoration between demanding sessions, sports-nutrition strategies may use approximately 1.0–1.2 g of carbohydrate per kilogram per hour during the early recovery period.

That is an athletic recovery strategy—not a requirement for everyone who performs push-ups or lifts weights.

Research presented through ACSM also supports high carbohydrate availability during short recovery periods following exhaustive exercise, especially when another demanding bout follows soon afterward.


Do You Need Protein and Carbohydrates Together?

They often make a very practical combination.

For example:

  • Chicken + rice
  • Eggs + toast
  • Yogurt + fruit
  • Whey protein + banana
  • Fish + potatoes

Protein supports muscle protein synthesis while carbohydrates help replenish glycogen.

But carbohydrates do not magically make protein “work.”

If you have already consumed enough carbohydrate and your workout did not heavily deplete glycogen, you do not need to force additional sugar merely because your workout finished.

Likewise, eating carbohydrate without enough daily protein will not maximize muscle recovery.

Think of the two nutrients as serving different but complementary purposes.


What About Fat After Training?

You do not need to avoid fat after training.

The old idea that eating fat after exercise will completely ruin nutrient absorption or recovery is overly simplistic.

Healthy fats can be included normally in your post-workout meal.

Examples include:

  • Olive oil
  • Nuts
  • Seeds
  • Avocado
  • Nut butter
  • Egg yolks
  • Fatty fish

A gigantic high-fat meal may digest more slowly, but slower digestion is not automatically a problem if you have plenty of time before your next workout.

For most people, there is no reason to deliberately make every post-workout meal extremely low in fat.


Hydration After Training

Replacing lost fluid is another important part of recovery.

How much you need depends mainly on how much you sweated.

After training:

  • Drink according to thirst and fluid losses.
  • Continue drinking over the following hours.
  • Consume fluids with meals.
  • Replace sodium if you lost substantial sweat.
  • Pay more attention to hydration after exercise in hot or humid conditions.

Most people performing a short workout can recover perfectly well using water and normal meals.

Special electrolyte drinks become more useful after long sessions, very heavy sweating, exercise in heat, or repeated workouts.


When Should You Eat After a Workout?

There is no single perfect time for everyone.

Instead, consider when you last ate.

If You Ate 1–3 Hours Before Training

There is little urgency.

Your previous meal is still contributing nutrients.

Having your next balanced meal within the next few hours is generally reasonable.

If You Trained Fasted

Eating sooner becomes more useful.

Try to consume a meal containing protein and, depending on the workout, carbohydrates reasonably soon afterward.

Examples:

  • Eggs + toast + fruit
  • Oats + milk + yogurt
  • Chicken + rice
  • Whey protein + banana if a meal is not immediately available

If You Had a Very Long Workout

Prioritize:

  • Fluids
  • Carbohydrates
  • Protein
  • Sodium when sweat losses were high

If You Need to Train Again Soon

Timing becomes more important.

Rapidly consuming carbohydrate, protein, and fluids can help accelerate recovery between sessions.

This is where post-workout nutrition stops being a small optimization and becomes a meaningful performance strategy.


Practical Post-Workout Meal Ideas

You do not need expensive recovery foods.

Option 1: Chicken and Rice

A simple complete recovery meal.

  • Grilled or cooked chicken
  • Rice
  • Vegetables
  • Water

Provides:

  • High-quality protein
  • Carbohydrates
  • Micronutrients
  • Fluid when consumed with a drink

Option 2: Eggs, Toast, and Fruit

Useful after a morning workout.

  • 3–4 eggs
  • Whole-grain or white toast
  • Banana, berries, or another fruit
  • Milk or water

Option 3: Fish and Potatoes

  • Fish
  • Potatoes
  • Vegetables
  • Yogurt if desired

This provides protein, carbohydrates, and several useful micronutrients.

Option 4: Greek Yogurt, Oats, and Fruit

Useful when you want something lighter.

  • Greek yogurt
  • Oats
  • Banana or berries
  • Optional honey

Option 5: Whey Protein and Banana

Useful when you cannot eat a meal immediately.

  • Whey protein
  • Banana
  • Water or milk

A full meal can follow later.

Option 6: Beef and Rice

  • Lean beef
  • Rice
  • Vegetables

Useful after demanding strength training when it fits your overall calorie intake.

Option 7: Lentils, Rice, and Yogurt

A simple plant-focused option.

  • Lentils
  • Rice
  • Yogurt or a plant-based protein addition

Combining several protein-containing foods can make plant-based meals easier to fit into a higher-protein diet.

Option 8: Cereal and Milk

This might not look like stereotypical “fitness food,” but it can provide both carbohydrate and protein.

Research has even shown that cereal with milk can support post-exercise glycogen replenishment and anabolic signaling similarly to a carbohydrate-electrolyte sports drink in a controlled recovery setting.


Post-Workout Nutrition for Muscle Gain

If your primary goal is building muscle, focus on:

  • Adequate daily calories
  • Enough daily protein
  • Progressive resistance training
  • Sufficient carbohydrate for performance
  • Consistent sleep and recovery

After training, choose a protein-rich meal containing enough calories to help you reach your daily target.

Examples:

  • Chicken + rice
  • Beef + potatoes
  • Eggs + toast + milk
  • Greek yogurt + oats + fruit
  • Protein shake alongside a normal meal

Do not assume you need to massively overeat immediately after training.

Muscle gain occurs over weeks and months, not during one enormous post-workout meal.


Post-Workout Nutrition for Fat Loss

Post-workout nutrition still matters while cutting.

The mistake is believing you have “earned” unlimited food because you trained.

You still need to maintain your calorie deficit.

Prioritize:

  • Lean protein
  • Filling carbohydrates
  • Vegetables
  • Fruit
  • Lower-calorie foods
  • Fluids

Examples:

  • Chicken + potatoes + vegetables
  • Greek yogurt + fruit
  • Eggs + toast
  • Fish + rice + vegetables

Protein is especially useful during fat loss because it helps support muscle retention while calories are reduced.

You do not need to eliminate carbohydrates after training.

They can help support performance and recovery while still fitting within a calorie deficit.


Post-Workout Nutrition for Strength and Calisthenics

After normal resistance or calisthenics training, prioritize:

  • Protein
  • Enough total calories
  • A normal carbohydrate-containing meal
  • Hydration

You generally do not need an aggressive recovery protocol unless the workout was exceptionally long or another hard session is coming soon.

A normal meal is usually enough.


Post-Workout Nutrition for Running and Endurance

Endurance exercise can use considerably more glycogen than a short strength workout.

As training duration increases, carbohydrate replacement becomes increasingly important.

After longer endurance sessions, prioritize:

  • Carbohydrates
  • Protein
  • Fluids
  • Electrolytes when needed

Examples include:

  • Rice + chicken
  • Pasta + lean meat
  • Oats + milk + fruit
  • Sandwich + yogurt + fruit

Athletes training again within several hours have a stronger reason to begin refueling promptly.


Post-Workout Nutrition for Boxing, Kickboxing, Wrestling, and MMA

Combat sports can combine:

  • High-intensity intervals
  • Aerobic conditioning
  • Repeated explosive movements
  • Strength demands
  • High sweat losses

After hard sessions, recovery meals should generally include:

  • Protein
  • Carbohydrates
  • Fluids
  • Sodium if sweating was substantial

Examples:

  • Chicken + rice
  • Fish + potatoes
  • Eggs + bread + fruit
  • Greek yogurt + oats + banana

If another practice occurs later the same day, recovery nutrition becomes especially important.


Should You Use Post-Workout Supplements?

Supplements can be convenient, but they are not required.

Whey Protein

Whey is useful because it provides a convenient dose of high-quality protein.

It can be especially helpful when:

  • You have little appetite after training.
  • You cannot prepare food immediately.
  • You struggle to meet your daily protein target.
  • You need something portable.

It is not inherently superior to a balanced protein-rich meal.

Creatine

Creatine supports strength, power, and lean-mass adaptations when taken consistently.

It does not have to be consumed immediately after your workout.

A common maintenance intake is:

3–5 grams per day

Take it at a time that makes consistency easy.

Electrolytes

Electrolytes may be helpful after:

  • Heavy sweating
  • Long sessions
  • Training in heat
  • Multiple daily workouts

For a short routine with modest sweating, water and normal meals will generally replace what you need.

BCAAs

If you already consume enough high-quality protein, additional BCAA supplements are generally unnecessary.

Complete protein foods or protein powders provide the essential amino acids needed for muscle protein synthesis.


Common Post-Workout Nutrition Mistakes and Myths

Believing You Have Only 30 Minutes to Eat

Your recovery does not collapse after 30 minutes.

If you ate before training, the urgency is especially low.

Eat a good meal within a reasonable period and focus on your overall diet.

Thinking a Protein Shake Is Mandatory

It is not.

Chicken, eggs, fish, yogurt, milk, beef, soy, and other protein-rich foods can work perfectly well.

Protein powder is about convenience.

Ignoring Total Daily Protein

One 30-gram protein shake after training cannot compensate for chronically low protein intake throughout the rest of the day.

Daily intake comes first.

Believing Everyone Needs Fast-Digesting Carbs Immediately

Rapid carbohydrate replacement matters most when glycogen depletion is substantial or another demanding session is coming soon.

The average person performing one resistance workout per day usually has plenty of time to replenish glycogen through normal meals.

Avoiding Fat Completely

Healthy fat does not suddenly become harmful because your workout ended.

Include it normally according to your overall diet.

Overeating Because You Trained

Exercise does not give you unlimited calories.

This mistake is particularly harmful during fat loss.

Ignoring Fluids

Recovery nutrition includes hydration too.

A great meal does not compensate for remaining significantly dehydrated after a sweaty workout.

Depending on Supplements

Protein powder, creatine, and electrolyte products can be useful.

None of them replace:

  • Food
  • Calories
  • Protein
  • Carbohydrates
  • Hydration
  • Sleep

Practical Post-Workout Nutrition Tips

Have Food Ready

Planning ahead makes recovery much easier.

Keep simple foods available such as:

  • Eggs
  • Cooked chicken
  • Rice
  • Potatoes
  • Yogurt
  • Fruit
  • Oats
  • Milk
  • Canned fish
  • Whole-grain bread

Prioritize Protein

Build your post-workout meal around a meaningful source of protein.

Then add carbohydrates and other foods according to your goals.

Match Carbohydrates to Training

The harder, longer, and more frequent your workouts are, the more important carbohydrate replacement becomes.

Do Not Fear Normal Food

You do not need special “recovery” foods.

A normal balanced meal can do the job extremely well.

Use Shakes for Convenience

Protein shakes are useful when life gets in the way.

Use them because they are convenient—not because your muscles supposedly stop growing without them.

Think About Your Next Workout

Ask yourself:

When do I need to perform again?

If the answer is tomorrow or later, you have plenty of time.

If the answer is in four hours, recovery nutrition deserves much more attention.

Get Enough Sleep

No food or supplement can fully compensate for consistently poor sleep.

Post-workout recovery continues long after dinner.


Final Thoughts

Post-workout nutrition matters, but it is not a race against a 30-minute clock.

Your biggest priorities are much simpler:

  • Eat enough protein throughout the day.
  • Consume enough calories for your goal.
  • Replace carbohydrates according to your training demands.
  • Rehydrate after sweating.
  • Eat a balanced meal within a reasonable period after training.
  • Prioritize faster refueling when another hard session is coming soon.
  • Use supplements for convenience or proven benefits—not because marketing says they are mandatory.

For most people, a normal meal containing protein, carbohydrates, vegetables or fruit, and fluids provides everything required to begin recovering properly.

Train hard, then give your body the resources it needs to adapt.

Learn more about Nutrition for Workouts here.


FAQ

Q1: Do I need a protein shake after every workout?
No. A protein shake is simply a convenient source of protein. Whole foods such as chicken, eggs, fish, yogurt, milk, beef, soy, or other protein-rich foods can work just as well.

Q2: What is the best post-workout meal?
There is no single best meal. Good options combine quality protein with carbohydrates and fluids, such as chicken and rice, eggs and toast, fish and potatoes, or Greek yogurt with oats and fruit.

Q3: What should I eat after a workout when trying to lose fat?
Choose a protein-rich meal that fits your calorie deficit, such as chicken with potatoes and vegetables, Greek yogurt with fruit, eggs with toast, or fish with rice and vegetables.

Pre-Workout Nutrition: What to Eat Before Training

What you eat before training can influence how energetic, strong, focused, and comfortable you feel during your workout.

A good pre-workout meal can provide carbohydrates for demanding exercise, supply amino acids from protein, support hydration, and prevent hunger from distracting you halfway through your session.

But pre-workout nutrition does not need to involve an expensive supplement or a perfectly timed meal.

For most people, the goal is much simpler: eat enough during the day, arrive at training reasonably fueled and hydrated, and choose foods that you can digest comfortably.

This guide explains what to eat before training, how much you may need, when to eat it, and how to adjust your pre-workout nutrition for different goals and types of exercise.

Quick Answer

For most strength, calisthenics, conditioning, or combat-sports workouts, a good pre-workout meal contains:

  • Carbohydrates for training fuel
  • Protein to provide amino acids
  • Enough fluid to begin training hydrated
  • Relatively little fat and fiber if you are eating close to your workout

A larger balanced meal usually works well around 2–4 hours before training.

If you only have 30–90 minutes, choose something smaller and easier to digest, such as:

  • Banana + yogurt
  • Toast + honey + milk
  • Dates + yogurt
  • Banana + whey protein
  • A small bowl of oats

The closer you get to training, the more important comfort and digestion become.


What Is Pre-Workout Nutrition?

Pre-workout nutrition refers to the food, fluids, and sometimes supplements consumed before exercise to help support training performance.

Its main purposes can include:

  • Providing energy
  • Maintaining carbohydrate availability
  • Preventing excessive hunger
  • Providing amino acids
  • Supporting hydration
  • Improving concentration and alertness
  • Helping you maintain training intensity

However, your pre-workout meal is only one part of your overall diet.

What you have eaten throughout the previous several hours—or even the entire day—can matter just as much.

Someone who ate a large balanced meal two hours ago usually does not need to panic about eating another snack before walking into the gym.

Why Pre-Workout Nutrition Matters

Hard training requires energy.

The harder and longer the session becomes, the more useful proper fueling can become.

Better Energy During Training

Carbohydrates are stored in the muscles and liver as glycogen.

During moderate-to-high-intensity exercise, carbohydrate can provide an important source of rapidly available energy.

Being appropriately fueled can help you maintain training intensity rather than feeling drained halfway through the workout.

Better Training Performance

Adequate nutrition may help you sustain:

  • More repetitions
  • More sets
  • Higher training intensity
  • Longer workouts
  • Faster or more explosive movements

The benefit becomes particularly relevant during high-volume resistance training, conditioning, endurance work, and repeated high-intensity efforts.

Reduced Hunger

Trying to train while extremely hungry can make it harder to concentrate and perform.

A suitable meal or snack beforehand can prevent hunger without leaving you overly full.

Amino Acid Availability

Protein consumed before training contributes amino acids that remain available during and after exercise.

You do not need protein immediately before every workout, especially if you recently ate a protein-rich meal, but including protein in a pre-training meal can be useful.

Better Hydration

Starting a workout already dehydrated makes maintaining fluid balance more difficult.

Pre-workout hydration is therefore part of proper pre-workout nutrition—not something separate from it.


The Most Important Principle: Fuel the Workout Without Ruining the Workout

The best pre-workout meal is not necessarily the meal with the most calories, carbohydrates, supplements, or protein.

It is the meal that gives you enough fuel while still allowing you to train comfortably.

Eat too little, and you may feel weak or hungry.

Eat too much immediately beforehand, and you may experience:

  • Bloating
  • Nausea
  • Heaviness
  • Cramping
  • Reflux
  • Sluggishness

This creates a simple rule:

The closer you eat to training, the smaller and easier to digest your meal should usually become.


Carbohydrates Before Training

Carbohydrates are generally the nutrient most closely associated with supplying fuel for higher-intensity exercise.

They are particularly useful before activities such as:

  • Resistance training
  • Calisthenics
  • Sprinting
  • Running
  • Kickboxing
  • Boxing
  • Wrestling
  • Circuit training
  • High-intensity conditioning
  • Long training sessions

However, carbohydrate requirements vary considerably.

A 30-minute easy workout does not require the same fueling strategy as a two-hour combat-sports session.

Good Pre-Workout Carbohydrate Sources

Useful options include:

  • Rice
  • Whole-wheat Flatbread
  • Oats
  • Potatoes
  • Bread
  • Bananas
  • Dates
  • Other fruit
  • Honey
  • Cereal
  • Pasta

The best option depends partly on how soon you will train.

Several Hours Before Training

You can comfortably use larger and slower-digesting meals such as:

  • Rice
  • Whole-wheat Flatbread
  • Oats
  • Potatoes
  • Pasta
  • Whole grains

Shortly Before Training

Simpler, easier-to-digest carbohydrates may feel better.

Examples include:

  • Banana
  • Dates
  • Honey
  • White bread
  • Lower-fiber cereal
  • Fruit

That does not mean fast-digesting carbohydrates are inherently better.

They are simply sometimes more convenient when there is little time left before training.

How Much Carbohydrate Do You Need?

There is no single mandatory pre-workout carbohydrate target for every workout.

For prolonged or demanding exercise, sports-nutrition recommendations can involve roughly 1–4 grams of carbohydrate per kilogram of bodyweight during the several hours leading up to exercise, with the amount depending heavily on duration, intensity, and opportunity to eat beforehand.

That range is far more relevant to serious endurance competition or prolonged athletic events than to an ordinary 45-minute home workout.

For general strength and calisthenics training, you usually do not need to calculate carbohydrate intake this precisely.

Instead, use your workout demands as a guide:

Short or Easy Workout

You may not need a dedicated carbohydrate meal at all if you have eaten normally during the previous few hours.

Moderate Strength or Calisthenics Workout

A normal meal containing carbohydrates beforehand is usually sufficient.

Long or High-Volume Workout

A larger carbohydrate-containing meal can become more useful.

Multiple Sessions or Intense Sports Training

Carbohydrate intake becomes increasingly important as training volume rises.


Protein Before Training

Protein is important for muscle repair and adaptation, but you do not need to consume a protein shake immediately before every workout.

If you ate a substantial protein-containing meal a couple of hours earlier, amino acids from that meal are still being digested and absorbed.

However, including protein in your pre-workout meal can be a convenient way to help meet your daily protein target.

A practical serving for many exercising people is roughly:

0.25–0.40 grams of protein per kilogram of bodyweight

For a 70 kg person:

  • 70 × 0.25 = 17.5 g
  • 70 × 0.40 = 28 g

So roughly 18–28 grams of protein would fit within that range.

For simplicity, around 20–30 grams works well for many people.

Good Pre-Workout Protein Sources

  • Eggs
  • Chicken
  • Fish
  • Milk
  • Yogurt
  • Greek yogurt
  • Cottage cheese
  • Whey protein
  • Lentils
  • Chickpeas
  • Soy foods

The type of protein matters less than choosing something nutritious that you tolerate well and that contributes toward your overall daily protein intake.


Fat Before Training

Fat is an essential part of a healthy diet, but a very high-fat meal immediately before exercise may not be ideal.

Fat slows gastric emptying and takes longer to digest than carbohydrate.

That can be perfectly fine when you are eating several hours before training.

It becomes more likely to cause discomfort when consumed in a large amount immediately beforehand.

Good Fat Sources

  • Nuts
  • Seeds
  • Peanut butter
  • Egg yolks
  • Olive oil
  • Avocado

You do not need to deliberately remove all fat from your pre-workout meals.

Simply avoid making a huge high-fat meal your last-minute pre-workout snack if doing so makes you feel heavy.


Fiber Before Training

Fiber is extremely important for overall health, but high-fiber meals can sometimes cause digestive problems during intense exercise.

This is especially relevant for:

  • Running
  • Sprinting
  • Combat sports
  • High-intensity conditioning
  • Long endurance sessions

A large serving of beans, raw vegetables, bran cereal, and similar foods immediately before hard training may not sit well for everyone.

If you are eating several hours beforehand, this becomes much less important.

Again, individual tolerance matters.


Hydration Before Training

You should ideally begin your workout already hydrated.

There is no single water intake that perfectly fits everyone because sweat loss varies enormously according to:

  • Body size
  • Temperature
  • Humidity
  • Workout intensity
  • Workout duration
  • Clothing
  • Individual sweat rate

Drink regularly throughout the day and have additional fluid before exercise when needed.

You do not need to force several liters of water immediately before training.

That can simply leave you feeling bloated and needing the bathroom.

For most people performing an ordinary workout in normal conditions, water plus a normal diet is sufficient.

Electrolytes become more useful when training is long, very sweaty, or performed in hot conditions. ACSM notes that most people training for less than roughly 60–90 minutes in normal weather are unlikely to require aggressive electrolyte replacement, whereas prolonged exercise and heavy sweating make fluid and sodium management more important.


When Should You Eat Before a Workout?

The timing of your meal should depend mainly on meal size and digestive comfort.

3–4 Hours Before Training

You have enough time for a substantial meal.

Example:

  • Chicken
  • Rice
  • Vegetables
  • Yogurt

Or:

  • Eggs
  • Whole-wheat Flatbread
  • Yogurt
  • Fruit

This meal can contain:

  • Plenty of carbohydrates
  • A full serving of protein
  • Moderate fat
  • Vegetables and fiber

2–3 Hours Before Training

A normal balanced meal still works well.

Examples:

  • Chicken + rice
  • Eggs + toast + banana
  • Lentils + rice + yogurt
  • Oats + milk + banana

Avoid eating so much that you still feel stuffed when training begins.

60–90 Minutes Before Training

Choose a smaller meal or snack.

Examples:

  • Banana + yogurt
  • Oats + milk
  • Toast + eggs
  • Dates + yogurt
  • Cereal + milk

Keep fat and extremely high-fiber foods moderate if they cause digestive discomfort.

30–60 Minutes Before Training

Prioritize foods that are easy to digest.

Examples:

  • Banana
  • Dates
  • Toast + honey
  • Banana + protein shake
  • Milk + a small amount of cereal
  • Yogurt + fruit

The goal here is not to eat a full dinner.

It is simply to provide some readily available fuel without feeling heavy.

Less Than 30 Minutes Before Training

If you need food, keep it simple.

Possible options include:

  • Banana
  • A few dates
  • Small amount of honey
  • Small sports drink during demanding exercise

But if you are already well fed from an earlier meal, you may not need anything.


Practical Pre-Workout Meal Ideas

Option 1: Chicken and Rice

Best when eaten around 2–4 hours beforehand.

  • Chicken
  • Rice
  • Vegetables
  • Water

This provides carbohydrates and a substantial serving of protein.

Option 2: Eggs and Flatbread

A simple, affordable option.

  • 2–4 eggs
  • 1–2 whole-wheat flatbreads
  • Yogurt or fruit
  • Water

Adjust the portion according to your calorie requirements and how long remains before training.

Option 3: Oats and Milk

Useful for morning or afternoon training.

  • Oats
  • Milk
  • Banana
  • Optional honey

Add extra protein if necessary.

Option 4: Daal and Rice

An inexpensive plant-based combination.

  • Lentils
  • Rice
  • Yogurt if desired

Because legumes contain substantial fiber, give yourself enough time to digest this meal before intense exercise.

Option 5: Banana and Yogurt

Excellent when training is approaching quickly.

  • Banana
  • Yogurt

Simple, inexpensive, and relatively easy to digest for many people.

Option 6: Dates and Milk

Useful when you want something small.

  • 2–4 dates
  • Glass of milk

The dates provide carbohydrate while milk contributes protein and fluid.

Option 7: Banana and Whey Protein

Convenient when you have very little time.

  • Banana
  • Whey protein mixed with water or milk

Whole foods are not magically superior in every situation. A protein shake can simply be a convenient food option.


Pre-Workout Nutrition for Different Goals

Muscle Gain

If you are trying to build muscle, your biggest priorities remain:

  • Sufficient daily calories
  • Adequate protein
  • Progressive resistance training

A good pre-workout meal can then help you train harder.

Choose a substantial meal containing carbohydrates and protein when possible.

Examples:

  • Chicken + rice
  • Eggs + Whole-wheat Flatbread+ fruit
  • Oats + milk + banana

There is usually little reason to deliberately train hungry during a muscle-gain phase.

Fat Loss

You still need training fuel while losing fat.

A calorie deficit determines fat loss—not avoiding pre-workout food.

You can keep the pre-workout meal while reducing calories elsewhere in your day.

Choose foods that provide good satiety and fit your calorie target.

Examples:

  • Yogurt + banana
  • Eggs + toast
  • Chicken + moderate rice portion
  • Fruit + protein shake

Strength and Calisthenics

Carbohydrate and protein before training can be particularly useful during:

  • High-volume push/pull/legs workouts
  • Weighted calisthenics
  • Long skill sessions
  • Difficult compound training

If your workout is short and you recently ate, a dedicated pre-workout snack may not be necessary.

Running and Endurance

Carbohydrate availability becomes increasingly important as exercise duration increases.

Large amounts of:

  • Fat
  • Fiber
  • Heavy protein

immediately before running may cause digestive discomfort for some athletes.

Practice your pre-workout strategy during normal training rather than trying a completely new meal on race day.

Boxing, Kickboxing, Wrestling, and MMA

Combat sports combine repeated high-intensity efforts with substantial movement and conditioning demands.

Carbohydrates can therefore be particularly useful.

However, feeling bloated during punches, kicks, sprawls, takedowns, or grappling is miserable.

Eat larger meals several hours beforehand and keep closer snacks lighter.


Early-Morning Workouts

Morning training creates a common problem: you may not want to wake up two hours earlier just to eat.

You have several options.

Option 1: Train After a Small Snack

Examples:

  • Banana
  • Dates
  • Toast + honey
  • Small glass of milk
  • Protein shake + fruit

Option 2: Eat a Larger Dinner the Night Before

Your previous day’s nutrition contributes to your available fuel too.

A proper dinner containing carbohydrates and protein can help support morning training.

Option 3: Train Fasted

Some people train perfectly well without breakfast.

If your workout is short and performance remains good, there is no rule saying you must eat beforehand.

However, if you consistently experience:

  • Weakness
  • Poor performance
  • Lightheadedness
  • Excessive hunger
  • Difficulty maintaining intensity

then eating something beforehand may help.


Is Fasted Training Bad?

No.

Fasted training is not automatically harmful, nor is it automatically superior.

The important question is whether it suits your goal and allows you to perform effectively.

For fat loss, exercising fasted does not remove the fundamental need for an overall calorie deficit.

For muscle and strength development, consistently training poorly because you refuse to eat beforehand would obviously be counterproductive.

Use performance, comfort, and your overall diet to decide.


Should You Use Pre-Workout Supplements?

You do not need a commercial pre-workout supplement to train effectively.

Many products combine ingredients such as:

  • Caffeine
  • Citrulline
  • Beta-alanine
  • Creatine
  • Flavorings and sweeteners

Some of these ingredients have legitimate uses, while others may be underdosed or included mainly for marketing.

Caffeine

Caffeine is one of the most evidence-supported performance-enhancing substances.

Research indicates that doses around 3–6 mg/kg can improve certain aspects of exercise performance, although some people experience benefits from lower doses and higher doses increase the likelihood of side effects.

For a 70 kg person, 3 mg/kg would equal:

210 mg caffeine

But that does not mean every 70 kg person should take 210–420 mg.

Sensitivity varies dramatically.

Beginners should be especially cautious.

Too much caffeine can cause:

  • Jitters
  • Anxiety
  • Headaches
  • Rapid heartbeat
  • Digestive discomfort
  • Poor sleep

If caffeine interferes with your sleep, the extra workout stimulation may not be worth the recovery cost.

Creatine

Creatine does not need to be taken immediately before training.

Its benefits come from maintaining elevated muscle creatine stores through consistent intake.

Take it whenever it is easiest for you to remember.

Beta-Alanine

Beta-alanine also works through regular supplementation rather than providing an immediate stimulant-like effect from a single pre-workout dose.

The tingling sensation some people experience does not mean the supplement has suddenly increased strength.

Citrulline

Citrulline is commonly included in pre-workout formulas and may support blood flow and certain aspects of high-intensity performance.

However, it should still be viewed as an optional optimization rather than the foundation of your workout nutrition.


Common Pre-Workout Nutrition Mistakes and Myths

Thinking You Must Eat Immediately Before Training

You do not need to eat 30 minutes before every workout.

If you ate a substantial meal two hours earlier, you may already be well fueled.

Eating a Huge Meal Right Before Training

More food does not automatically mean more performance.

A large meal sitting in your stomach can make training miserable.

Avoiding Carbohydrates

Carbohydrates can be highly useful for high-intensity training.

There is little benefit in deliberately making hard training feel harder unless you have a specific reason for doing so.

Thinking Fasted Training Burns More Body Fat Overall

Burning more fat during one particular workout does not necessarily mean losing more body fat over time.

Long-term fat loss still depends largely on your overall energy balance.

Depending on Pre-Workout Powder for Energy

If you cannot train without several hundred milligrams of caffeine, examine:

  • Sleep
  • Calories
  • Hydration
  • Recovery
  • Training volume

before simply increasing your stimulant dose.

Trying New Foods Before Important Training

Your hardest workout, competition, race, or fight is not the time to discover that a particular meal destroys your stomach.

Test your nutrition during normal training.

Ignoring Hydration

Food gets most of the attention, but arriving at training dehydrated can undermine performance too.

Copying Someone Else’s Meal Exactly

One athlete may feel great after oats and peanut butter.

Another may feel terrible.

Your digestive tolerance matters.


Practical Pre-Workout Nutrition Tips

Keep It Simple

You do not need a complicated recipe.

Rice and chicken, eggs and roti, yogurt and banana, or oats and milk can all work.

Use Foods You Already Know

Familiar foods reduce the chance of digestive surprises.

Adjust Portion Size With Timing

More time before training = larger meal.

Less time before training = smaller snack.

Plan Around Your Hardest Sessions

Your longest and hardest workouts deserve more attention to fueling than an easy mobility session.

Don’t Forget the Rest of the Day

Pre-workout nutrition cannot rescue an entire day of poor eating.

A well-fueled athlete generally eats appropriately throughout the day.

Track How You Feel

Pay attention to:

  • Energy
  • Hunger
  • Bloating
  • Training performance
  • Digestion

Then adjust your food quantity and timing.

Your own repeated training experience is valuable.


Final Thoughts

Pre-workout nutrition is not about finding one magical food that suddenly transforms your performance.

It is about arriving at training with enough energy, adequate amino acids, proper hydration, and a stomach that feels comfortable.

For most people:

  • Eat a balanced carbohydrate-and-protein meal a few hours before training when possible.
  • Choose a lighter snack if training is approaching quickly.
  • Stay hydrated.
  • Keep high-fat and very high-fiber meals farther away from intense workouts if they cause discomfort.
  • Use caffeine and other supplements only when they genuinely help.
  • Remember that your total daily nutrition matters more than perfect meal timing.

Experiment with portions and timing until you find a routine that consistently lets you train hard without feeling hungry or heavy.

Learn more about Nutrition for Workouts here.


FAQ

Q1: What is the best food to eat before working out?
There is no single best food. Good choices typically combine easily digestible carbohydrates with protein, such as chicken and rice, eggs and toast, oats and milk, yogurt and banana, or fruit with a protein shake.

Q2: Is it bad to train on an empty stomach?
Not necessarily. Fasted training is acceptable if you feel good and can maintain performance. It is not required for fat loss, however, and eating beforehand may improve performance for harder training.

Q3: Is coffee a good pre-workout?
Coffee can provide caffeine, which may improve alertness and exercise performance. However, caffeine sensitivity varies, and excessive intake can interfere with sleep or cause unwanted side effects.

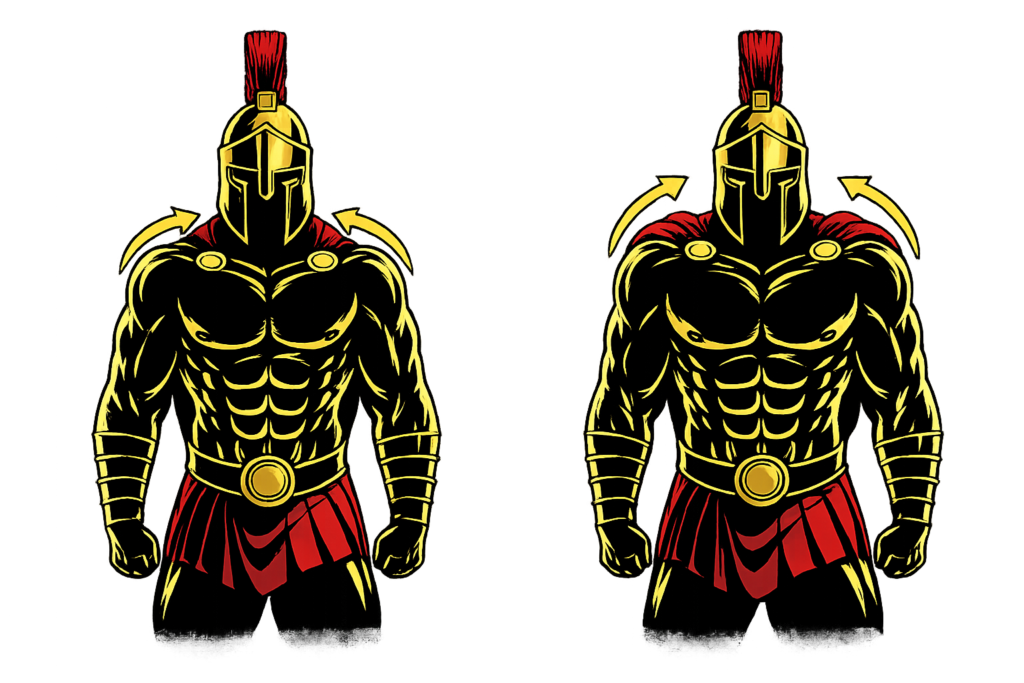
How to Do Rows Correctly: Step-by-Step Guide for Beginners

Rows are a fundamental upper-body pulling exercise used to strengthen the back, biceps, rear shoulders, and other muscles involved in horizontal pulling.

The exercise can be performed with a barbell, dumbbells, resistance bands, cables, or even your own bodyweight. Although each variation is slightly different, the basic movement involves pulling resistance toward your torso while keeping your body controlled.

This guide focuses primarily on the Barbell Bent-Over Row, one of the most common weighted Row variations. Learning proper Row technique can help you build a stronger back and establish a solid foundation for other pulling exercises.


What Are Rows?

Rows are horizontal pulling exercises in which you pull resistance toward your torso by bending your elbows and moving your upper arms backward.

During a Barbell Bent-Over Row, you hold a barbell while maintaining a hip-hinged position. From there, you pull the bar toward your lower ribs or upper abdomen before lowering it under control.

Rows are commonly used in:

  • Back workouts
  • Pull-day workouts
  • Upper-body workouts
  • Strength-training programs
  • Bodybuilding routines
  • Home workouts
  • Gym workouts
  • Calisthenics programs

Rows complement vertical pulling exercises such as Pull-Ups and Chin-Ups by training the back through a different pulling direction.

Benefits of Rows

Rows train several major muscles across the back while also strengthening the arms and grip.

Benefits include:

  • Strengthens the upper and mid-back
  • Trains the latissimus dorsi
  • Strengthens the rhomboids and trapezius
  • Builds biceps and elbow-flexor strength
  • Trains the rear deltoids
  • Develops horizontal pulling strength
  • Challenges grip strength
  • Can support balanced upper-body development
  • Can be adapted to many types of equipment

Bent-Over Rows also require your trunk and hip musculature to maintain a stable position while you move the weight.

Muscles Worked in Rows

Rows are compound pulling exercises that involve several muscles across the back, shoulders, and arms.

Primary Muscles
  • Latissimus Dorsi
  • Rhomboids
  • Middle Trapezius
  • Posterior Deltoids
Secondary Muscles
  • Biceps Brachii
  • Brachialis
  • Brachioradialis
  • Lower Trapezius
  • Forearms
  • Erector Spinae
  • Core Muscles
  • Glutes and Hamstrings during unsupported bent-over variations

The exact muscular emphasis changes according to your Row variation, grip, elbow path, and pulling angle.


How to Do Rows (Step-by-Step)

Step 1: Set Up the Barbell

Place a barbell in front of you and load it with a manageable amount of weight.

Stand with your feet approximately hip- to shoulder-width apart.

Position the bar over your midfoot and prepare to lift it using a controlled hip hinge.

Beginners should start light enough to learn the movement without sacrificing torso position.

Step 2: Grip the Bar

Grip the bar with both hands using an overhand grip.

Position your hands approximately shoulder-width apart or slightly wider.

Wrap your fingers and thumbs securely around the bar.

Keep your:

  • Wrists relatively neutral
  • Grip secure
  • Shoulders controlled
  • Feet firmly planted

Step 3: Establish the Bent-Over Position

Lift the bar into position and hinge backward at your hips.

Allow your knees to bend slightly while pushing your hips backward.

Lean your torso forward while maintaining a neutral spinal position.

Keep your:

  • Core braced
  • Chest controlled
  • Head neutral
  • Feet planted
  • Arms extended beneath your shoulders

Your exact torso angle can vary somewhat according to the Row variation and your proportions, but it should remain consistent throughout your set.

Step 4: Initiate the Pull

Begin pulling the bar toward your torso.

Drive your elbows backward while keeping your torso stable.

As you pull:

  • Keep your core braced
  • Maintain your hip hinge
  • Avoid shrugging excessively
  • Keep your wrists controlled
  • Avoid jerking your torso upward

Think about moving your elbows behind you rather than simply lifting the bar with your hands.

Step 5: Pull the Bar Toward Your Torso

Continue pulling until the bar approaches or lightly touches your lower ribs or upper abdomen, depending on your proportions and technique.

Keep your elbows moving backward rather than excessively flaring them outward.

Do not force the bar to touch your body if doing so requires you to round your back or dramatically change your torso angle.

Step 6: Reach the Contracted Position

At the top of the Row, briefly contract your back muscles while maintaining your bent-over position.

Keep your:

  • Spine neutral
  • Core braced
  • Shoulders controlled
  • Elbows behind your torso
  • Feet stable

Avoid throwing your chest upward simply to move the bar farther.

Step 7: Lower the Bar Under Control

Slowly extend your elbows and lower the bar toward the starting position.

Allow your shoulder blades to move naturally as your arms extend.

Maintain your hip hinge and torso position throughout the lowering phase.

Once your arms return to extension, reset your position and begin the next repetition.

Warrior showcasing How to do Rows with proper form

Rows Form Checklist

Use this checklist to maintain proper Row technique.

  • Choose a manageable weight
  • Stand with a stable base
  • Grip the bar securely
  • Hinge from your hips
  • Keep your knees slightly bent
  • Maintain a neutral spine
  • Brace your core
  • Keep your head neutral
  • Keep your torso angle relatively consistent
  • Pull your elbows backward
  • Bring the bar toward your lower ribs or upper abdomen
  • Avoid excessive elbow flare
  • Keep your wrists controlled
  • Avoid jerking the weight upward
  • Lower the bar under control

If your torso rises significantly with every repetition, consider reducing the weight and rebuilding the movement with stricter control.


Common Rows Mistakes

Rounding the Back

Problem: Allowing your spine to round excessively can compromise your stable bent-over position and make it more difficult to control the load.

Fix: Brace your core, hinge from your hips, and maintain a neutral spinal position throughout the set. Reduce the weight if you cannot maintain your position.

Using Too Much Weight

Problem: Excessive resistance often causes jerking, shortened repetitions, or large changes in torso angle.

Fix: Use a weight that allows you to perform controlled repetitions through a comfortable range.

Standing Up During Each Rep

Problem: Repeatedly raising your torso to generate momentum changes the exercise and reduces the consistency of your Row technique.

Fix: Establish your hip hinge before the first repetition and keep your torso angle relatively stable throughout the set.

Pulling With Excessive Elbow Flare

Problem: Allowing your elbows to flare directly outward changes the pulling mechanics and may shift more emphasis toward the rear shoulders and upper back.

Fix: For a standard Barbell Row, allow your elbows to travel backward at a comfortable angle rather than forcing them directly out to the sides.

Shrugging the Shoulders

Problem: Pulling your shoulders excessively toward your ears can create unnecessary upper-trapezius dominance.

Fix: Keep your shoulders controlled and focus on driving your elbows backward.

Bending the Wrists

Problem: Curling your wrists toward your body as you pull can make your grip less stable and turn part of the movement into unnecessary wrist flexion.

Fix: Keep your wrists relatively neutral and aligned with your forearms.

Dropping the Bar Too Quickly

Problem: Allowing the bar to fall rapidly removes control from the lowering phase and can disturb your torso position.

Fix: Lower the bar deliberately until your arms return to the starting position.


Rows Variations

Rows can be performed with many different types of equipment while maintaining the same basic horizontal pulling pattern.

Dumbbell Rows

The Dumbbell Row allows you to train one side at a time and can provide additional support through your opposite hand.

How to Do Dumbbell Rows

  • Hold a dumbbell in one hand.
  • Support your opposite hand on a stable bench if desired.
  • Hinge at your hips.
  • Keep your spine neutral.
  • Pull the dumbbell toward your hip or lower ribs.
  • Drive your elbow backward.
  • Lower the dumbbell under control.
  • Repeat on both sides.

Resistance Band Rows

Resistance Band Rows provide a portable option for home workouts.

How to Do Resistance Band Rows

  • Secure a resistance band to a stable anchor.
  • Hold one end or handle in each hand.
  • Step backward until the band has light tension.
  • Brace your core.
  • Pull your hands toward your lower ribs or upper abdomen.
  • Drive your elbows backward.
  • Return slowly without allowing the band to snap forward.

Seated Cable Rows

Cable resistance provides continuous external resistance throughout the movement.

How to Do Seated Cable Rows

  • Sit at the cable station.
  • Grip the selected attachment securely.
  • Establish a stable torso position.
  • Pull the handle toward your abdomen.
  • Drive your elbows backward.
  • Contract your back muscles.
  • Extend your arms under control.

Chest-Supported Rows

Supporting your chest reduces the need to maintain an unsupported hip-hinged position.

How to Do Chest-Supported Rows

  • Lie chest-down against an inclined bench or Row machine.
  • Hold the weights with your arms extended.
  • Keep your chest supported.
  • Pull your elbows backward.
  • Bring the weights toward your torso.
  • Pause briefly.
  • Lower under control.

Australian Rows

Also known as an Inverted Row, this variation uses your bodyweight as resistance.

How to Do Australian Rows

  • Grip a secure horizontal bar.
  • Position your body underneath it.
  • Keep your body in a straight, controlled line.
  • Pull your chest toward the bar.
  • Drive your elbows backward.
  • Pause briefly at the top.
  • Lower yourself under control.

Final Thoughts

Rows are one of the fundamental pulling patterns for developing a strong and balanced upper body.

They develop:

  • Back strength
  • Lat strength
  • Upper-back development
  • Rear-delt strength
  • Biceps strength
  • Grip strength
  • Horizontal pulling ability

Proper Rows are built around control rather than simply moving the heaviest possible weight. Establish a strong hip hinge, brace your core, keep your torso relatively stable, drive your elbows backward, and control the weight in both directions.

Once you can consistently complete your target repetitions with good technique, gradually increasing resistance, repetitions, sets, or another training variable can help you continue progressing. Learn more about Pull Workouts here.

Essential Gear for Rows

Using the right equipment can make rows more effective, improve your pulling technique, and help you continue building back strength as you progress.

  • Adjustable Dumbbells: One of the most versatile tools for performing rows, allowing you to increase resistance gradually as your strength improves.
  • Resistance Bands: A beginner-friendly option that provides constant tension, making them ideal for home workouts, warm-ups, and rehabilitation exercises.
  • Pull-Up Bar or Suspension Trainer: Perfect for performing inverted rows, helping you build bodyweight pulling strength and progress toward pull-ups.
  • Weightlifting Gloves or Gym Chalk: Improve grip and reduce hand fatigue during heavy rowing exercises, allowing you to focus on your back muscles instead of your grip.
  • Adjustable Weight Bench: Provides a stable surface for single-arm dumbbell rows and chest-supported row variations, helping reduce lower-back strain while improving exercise control.

Rows FAQ

Q1: How many Rows should beginners do?
A practical starting point is approximately 8-15 controlled repetitions for 2-3 sets. Choose a resistance that challenges you while still allowing you to maintain your hip hinge and torso position.

Q2: Where should I pull the bar during Barbell Rows?
For a standard Bent-Over Barbell Row, pulling toward the lower ribs or upper abdomen is a useful general target. Your exact contact point can vary with your proportions, grip, torso angle, and Row style.

Q3: Should I squeeze my shoulder blades together during Rows?
Your shoulder blades naturally move toward each other as you pull, but you do not need to force an exaggerated squeeze. Focus on controlled shoulder-blade movement and driving your elbows backward through a comfortable range.