Want a stronger chest, powerful triceps, and serious upper-body strength…
Without needing a gym?
You need ONE thing:
A proper pair of dip bars.
Dips are one of the best bodyweight exercises you can add to a home calisthenics setup.
But here’s the problem:
Most people either:
- Buy bars that are too short for proper dips
- Choose unstable equipment
- Overpay for features they don’t need
- Or confuse parallettes and push-up handles with actual dip bars
This guide fixes that.
Quick Answer (Don’t Overthink It)
⇛ Want the BEST value for home training?
Go for the Adjustable Steel Dip Bars
The adjustable height and affordable price make them the better option for most home athletes.
⇛ Want a heavier premium setup?
Go for the Heavy-Duty Steel Dip Station
A straightforward steel setup for anyone willing to spend more on their home calisthenics equipment.
Why Dip Bars Are a Game-Changer
A proper pair of dip bars gives you much more than dips.
You can train:
- Chest
- Triceps
- Shoulders
- Core
- Hip flexors
- Straight-arm strength
- Body control
And once you get stronger?
You can progress toward:
- Dips
- Assisted dips
- L-sits
- Knee raises
- Leg raises
- Support holds
- Bodyweight rows
- Advanced dip variations
⇛ All from one piece of home workout equipment.
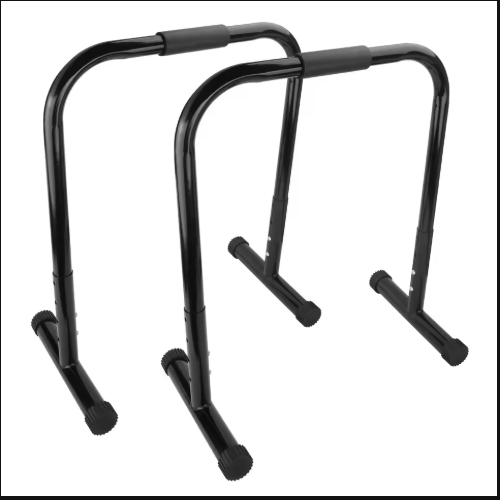
1. Adjustable Steel Dip Bars (Best Overall)
Key Features:
- Steel construction
- Adjustable and fixed-height options
- Adjustable model shown at approximately 80–95 cm
- Fixed-height 85 cm option available
- Approximately 63 cm long
- Approximately 43 cm wide at the base
- Padded grip area
- Wide individual bases
- Multiple configurations available
Why This One Wins:
This is the option I’d choose for most home calisthenics athletes.
Why?
⇛ Height adjustability.
Different exercises and different athletes can benefit from different bar heights.
Instead of locking yourself into one setup, the adjustable version lets you change the height to better suit your training.
And because these are independent bars, you can position them according to the exercise you’re performing.
Use them for:
- Dips
- Assisted dips
- Support holds
- L-sits
- Knee raises
- Leg raises
- Bodyweight rows
The seller also offers non-adjustable versions if you’d rather keep things simple.
Pros:
✓ Adjustable-height option
✓ Fixed-height alternatives available
✓ Suitable for multiple calisthenics exercises
✓ Independent bars allow flexible positioning
✓ Good option for home workouts
✓ Strong value compared with many larger dip stations
Cons:
❌ Takes considerably more floor space than parallettes
❌ Adjustable equipment should always be locked securely before training
❌ Shipping costs can heavily affect the final price
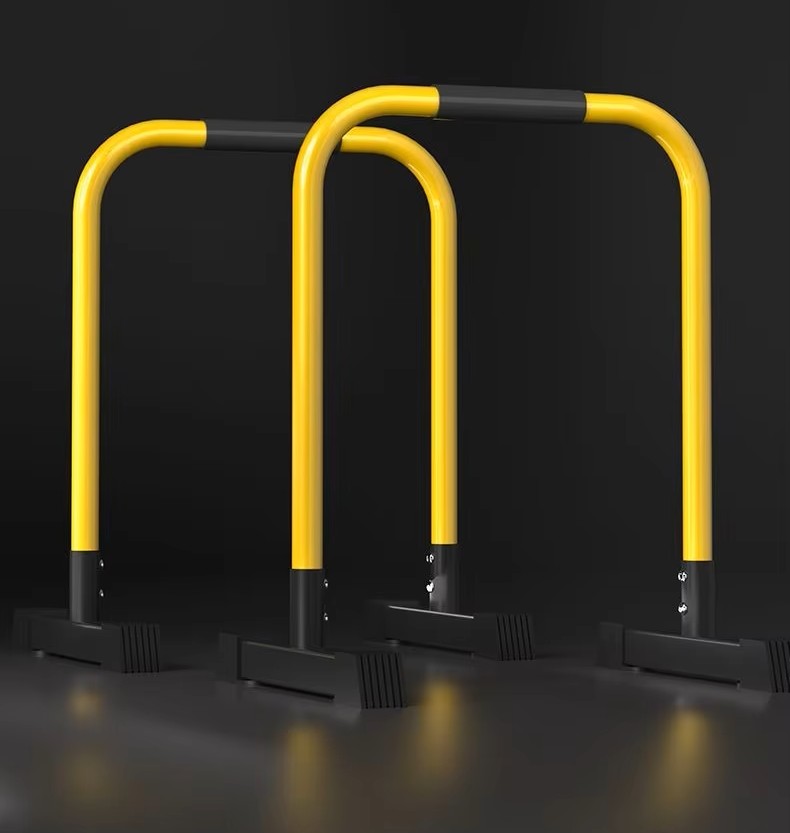
2. Heavy-Duty Steel Dip Station (Premium Pick)
Key Features:
- Steel construction
- Approximately 65 × 38 × 78 cm
- Approximately 9 kg product weight
- Parallel independent-bar design
- Padded grip sections
- Wide feet for floor contact
- Designed for calisthenics and strength training
Why Choose This:
If you don’t need adjustable height and want a straightforward set of full-height dip bars, this is the alternative.
There are fewer decisions to make.
Set them up.
Position them correctly.
Start training.
The approximately 78 cm height gives you the clearance needed for proper dip training while still keeping the equipment manageable for a home setup.
And because the two bars aren’t permanently connected, you can adjust their spacing to suit your body and the exercise.
Pros:
✓ Steel construction
✓ Full-height design
✓ Simple setup
✓ Independent bar positioning
✓ Suitable for dips and other calisthenics exercises
✓ Heavier construction than many basic options
Cons:
❌ More expensive
❌ Fixed height
❌ Less adaptable than Product 1
❌ Takes up dedicated floor space
Comparison – Choose Your Arsenal
| Feature | Adjustable Steel Dip Bars | Heavy-Duty Steel Dip Station |
|---|---|---|
| Height | Approx. 80–95 cm adjustable | Approx. 78 cm fixed |
| Adjustable Option | Yes | No |
| Construction | Steel | Steel |
| Independent Bars | Yes | Yes |
| Versatility | Excellent | Good |
| Best For | Most home athletes | Premium fixed setup |
| Our Pick | Best Overall | Premium Pick |
Beginner Plan
Listen carefully—this is where most people fail.
Even with the BEST dip bars, you won’t build serious strength if you don’t train smart.
Start with:
- Dip bar support holds
- Assisted dips
- Negative dips
- Dips
- Knee raises
- L-sit progressions
⇛ Train 2–3 times/week
Start with control.
Build your chest, triceps, shoulders, and core.
Then gradually progress toward full dips and harder calisthenics movements.
Important Buying Advice
Before you click:
Make sure you’re buying actual dip bars, not low parallettes or push-up handles.
For proper dips, you need enough height for your body to move freely between the bars.
Adjustable vs Fixed Height
If you’re unsure which height will suit you:
⇛ Choose the adjustable option.
Product 1’s adjustable version gives you approximately 80–95 cm of height, allowing you to experiment with your setup.
If you already know what you want and prefer simplicity:
⇛ A fixed-height pair can do the job perfectly well.
Also check:
- Bar height
- Base dimensions
- Available floor space
- Grip comfort
- Bar spacing
- Adjustment locks
- Floor stability
- Shipping cost
- Your preferred configuration before ordering
Most importantly:
⇛ Never sacrifice stability for price.
Before every workout, place the bars on a flat surface and make sure they don’t wobble, slide, or shift.
Final Verdict
⇛ Want the best value and maximum versatility?
Go for the Adjustable Steel Dip Bars.
The combination of adjustable height, multiple available configurations, independent positioning, and a relatively affordable product price makes Product 1 the better choice for most home calisthenics setups.
This would be my Best Overall pick.
⇛ Want a heavier, simple fixed-height setup?
Go for the Heavy-Duty Steel Dip Station.
You lose the height adjustment, but you get a straightforward steel setup built specifically around dip and calisthenics training.
But between the two?
I’d take Product 1.
The adjustable version simply gives you more freedom for the money.
Final Words
You don’t need a commercial gym to build serious pushing strength.
You don’t need machines.
You need:
- A stable pair of dip bars
- Proper technique
- Progressive training
- Consistency
- Discipline
Start with support holds.
Master your first clean dips.
Build your reps.
Then start chasing harder variations.
Your body is the weight.
The bars just give you somewhere to fight gravity.
Affiliate Disclosure: WarriorBodyAcademy may earn a commission when you purchase through affiliate links in this article, at no extra cost to you. We only recommend products that we believe are useful for our readers and training community.