
Resistance Band Rows are a simple and effective pulling exercise for strengthening your back, biceps, and rear shoulders without requiring heavy gym equipment.
By pulling an anchored resistance band toward your torso, you train many of the same major muscle groups involved in other horizontal pulling exercises. Resistance Band Rows are easy to perform at home, while traveling, or as part of a resistance-band workout.
With a secure setup and proper technique, they can be adapted from beginner-friendly resistance levels to more challenging variations as your strength improves.
What Are Resistance Band Rows?
Resistance Band Rows are a horizontal pulling exercise performed by pulling an elastic resistance band toward your torso while keeping your upper body controlled.
They can be performed with the band secured around your feet, attached to a suitable anchor, or positioned using another safe setup depending on the variation.
During a standard repetition, you pull your elbows backward and bring your hands toward your torso before slowly extending your arms again.
Unlike free weights, resistance bands generally provide increasing resistance as they stretch farther. This means the exercise often becomes more challenging as you approach the contracted position.
Resistance Band Rows are commonly used in:
- Back workouts
- Pull-day workouts
- Home workouts
- Resistance band training
- Calisthenics accessory training
- General strength training
- Travel workouts
- Upper-body training
They are particularly useful when you want a horizontal pulling exercise but do not have access to barbells, dumbbells, cable machines, or a suitable setup for bodyweight Rows.
Benefits of Resistance Band Rows
Resistance Band Rows provide several upper-body strength and training benefits while requiring very little equipment.
Benefits include:
- Strengthens the upper and mid-back
- Trains the lats
- Strengthens the biceps
- Develops the rear shoulders
- Trains the shoulder-blade retractors
- Builds horizontal pulling strength
- Provides progressively increasing band tension
- Allows resistance to be adjusted easily
- Requires minimal equipment
- Works well for home workouts
Resistance Band Rows can also complement Pull-Ups and Chin-Ups by adding a horizontal pulling pattern to your training.
Muscles Worked in Resistance Band Rows
Resistance Band Rows train several muscles across the back, arms, and shoulders.
Primary Muscles
- Latissimus Dorsi
- Rhomboids
- Middle Trapezius
- Biceps Brachii
Secondary Muscles
- Rear Deltoids
- Brachialis
- Brachioradialis
- Lower Trapezius
- Forearms
- Rotator Cuff Muscles
Your core and spinal stabilizers may also work isometrically to help maintain your torso position, particularly during standing variations.
How to Do Resistance Band Rows (Step-by-Step)
Step 1: Inspect Your Resistance Band
Before beginning, check the entire band for signs of damage.
Look for:
- Cracks
- Tears
- Fraying
- Damaged handles
- Weak attachment points
- Excessive wear
Do not use a visibly damaged resistance band.
Step 2: Secure the Resistance Band
Attach the middle of the band to a stable anchor approximately at lower-chest to waist height.
Make sure the anchor is designed or suitable to withstand the direction and amount of force you will apply.
If using a door anchor, install it according to the manufacturer’s instructions and confirm that the door and anchor are secure before applying significant tension.
Hold one end or handle in each hand.
Step 3: Establish Your Starting Position
Step backward until the band has light tension with your arms extended.
Stand approximately hip- to shoulder-width apart with your knees slightly bent.
Keep your:
- Head neutral
- Chest naturally upright
- Shoulders controlled
- Core braced
- Spine neutral
- Wrists straight
Avoid standing so close to the anchor that the band becomes completely slack.
Step 4: Initiate the Row
Begin the pulling motion by allowing your shoulder blades to move back as your elbows start traveling behind you.
Keep your shoulders away from your ears.
Avoid dramatically throwing your chest forward or leaning backward to create momentum.
Step 5: Pull the Band Toward Your Torso
Continue bending your elbows and pull the handles toward the sides of your lower ribs or upper abdomen.
During the pull:
- Drive your elbows backward
- Keep your wrists neutral
- Keep your torso stable
- Avoid shrugging your shoulders
- Maintain controlled band tension
Your exact hand position may vary slightly depending on the band, handle design, and grip you use.
Step 6: Reach the Contracted Position
At the end of the row, your elbows should be behind or approximately alongside your torso depending on your proportions and technique.
Briefly contract your back muscles without excessively arching your lower back.
Tip: Think about pulling your elbows behind you rather than simply pulling the handles with your hands.
Step 7: Return Under Control
Slowly extend your elbows and allow your shoulder blades to move naturally as you return toward the starting position.
Do not suddenly relax and allow the band to snap your arms forward.
Reach a controlled arm-extended position while maintaining tension and posture before beginning the next repetition.
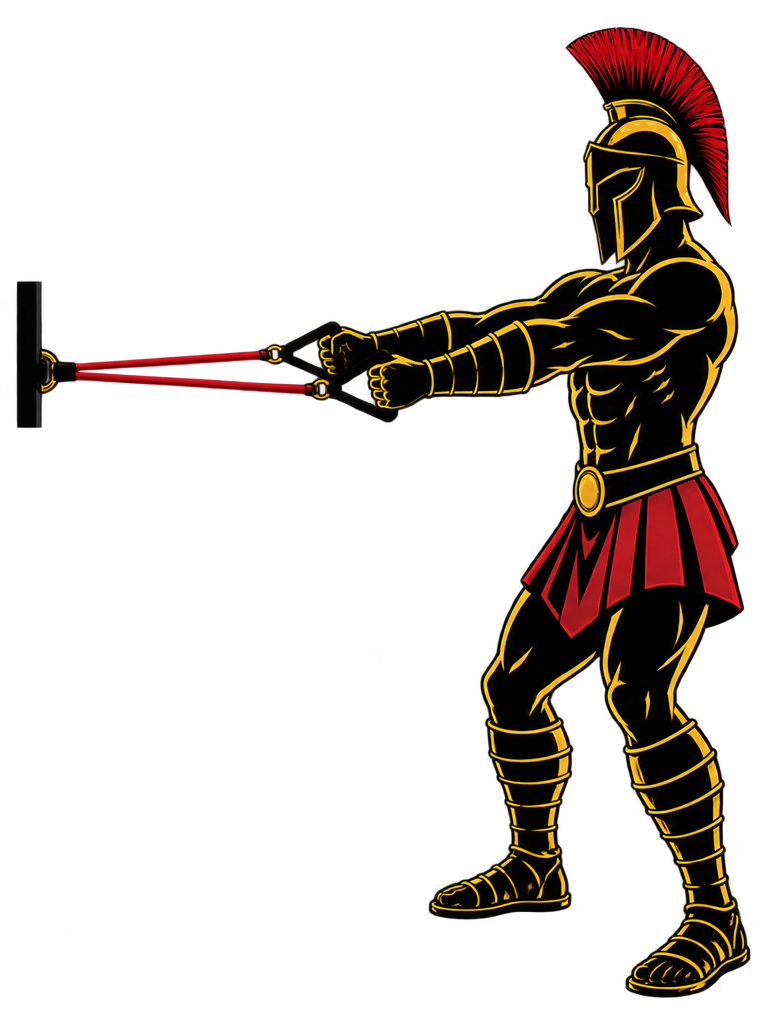
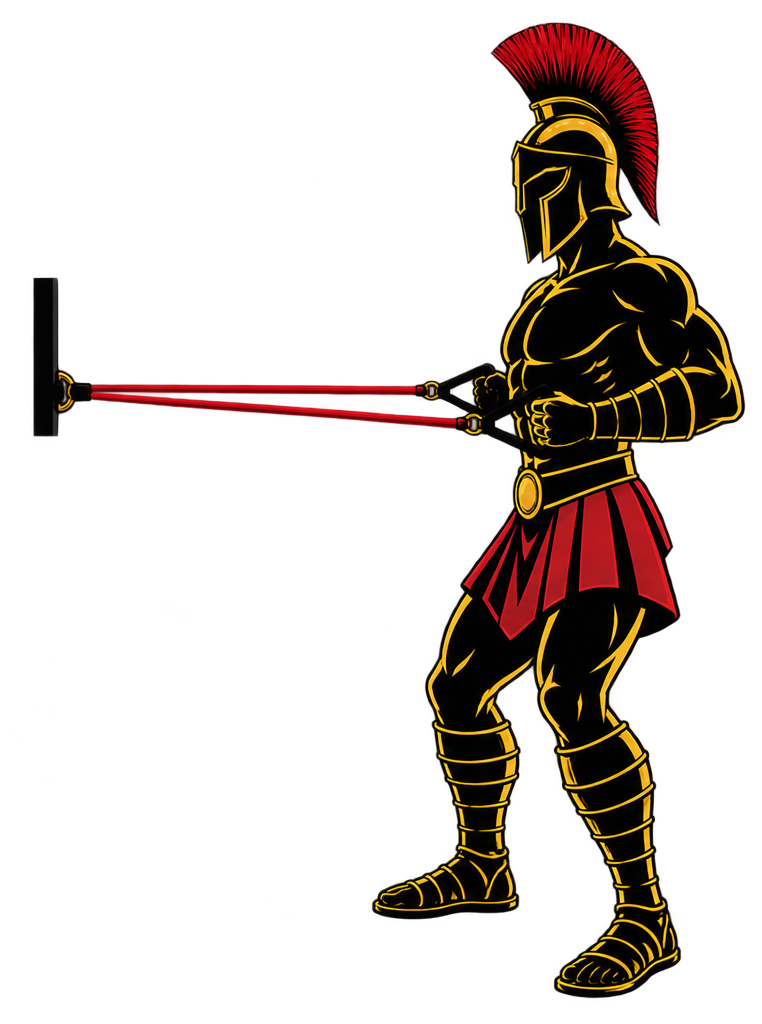
Resistance Band Rows Form Checklist
Use this checklist to keep your Resistance Band Rows controlled and effective.
- Inspect the band before training
- Use a secure anchor
- Begin with light band tension
- Keep your feet stable
- Maintain a neutral spine
- Brace your core
- Keep your chest naturally upright
- Pull your elbows backward
- Keep your shoulders away from your ears
- Maintain neutral wrists
- Keep your torso relatively still
- Contract your back at the end of the pull
- Control the return phase
- Never suddenly release a stretched band
Proper technique should determine your resistance level. If you have to swing or lean excessively to complete each repetition, use less resistance.
Common Resistance Band Rows Mistakes
Using an Unsafe Anchor
Problem: Attaching the band to an unstable object or improperly installed anchor creates a risk of the setup coming loose while the band is stretched.
Fix: Use a secure anchor appropriate for resistance-band training, inspect the setup before every set, and follow the equipment manufacturer’s instructions.
Leaning Back to Pull the Band
Problem: Using your entire body to rock backward turns the exercise into a momentum-assisted movement rather than a controlled Row.
Fix: Brace your core and keep your torso relatively stable while your arms and shoulder blades perform the pulling movement.
Shrugging the Shoulders
Problem: Pulling your shoulders toward your ears creates unnecessary tension and changes the movement.
Fix: Keep your shoulders controlled and away from your ears as your elbows travel backward.
Flaring the Elbows Too Far Out
Problem: Allowing your elbows to travel directly sideways changes the emphasis of the exercise and may make the position less comfortable for some trainees.
Fix: For a standard Resistance Band Row, keep your elbows relatively close to your torso while allowing them to follow a natural path.
Starting With Too Much Slack
Problem: A large amount of slack can leave the beginning of each repetition with very little resistance.
Fix: Step farther from the anchor or adjust the band’s effective length until you have light tension at the starting position.
Using Too Much Resistance
Problem: An excessively strong band can cause shortened repetitions, torso swinging, shrugging, and poor control.
Fix: Use a resistance level that allows you to complete the entire movement with strict technique.
Letting the Band Snap Forward
Problem: Suddenly relaxing after the pull allows the elastic tension to rapidly pull your arms toward the anchor.
Fix: Control the band throughout the return phase until your arms are extended.
Resistance Band Row Variations
Resistance Band Rows can be modified by changing your body position, grip, or training setup.
Seated Resistance Band Row
This variation can be performed with the band looped securely around your feet.
How to Do a Seated Resistance Band Row
- Sit on the floor with your legs extended or slightly bent.
- Loop the middle of the band securely around both feet.
- Hold one end or handle in each hand.
- Sit tall and brace your core.
- Pull your elbows backward.
- Bring your hands toward your torso.
- Return under control.
Make sure the band is positioned securely so it cannot slip off your feet.
Single-Arm Resistance Band Row
Training one side at a time increases the demand on your core to resist torso rotation.
How to Do a Single-Arm Resistance Band Row
- Secure the band to a stable anchor.
- Hold the band in one hand.
- Step backward to create tension.
- Brace your core.
- Pull your elbow backward.
- Keep your torso from rotating excessively.
- Slowly extend your arm again.
- Complete the same work on both sides.
Resistance Band High Row
A higher pulling path places relatively more emphasis on the upper back and rear shoulders.
How to Do a Resistance Band High Row
- Secure the band around upper-chest height.
- Hold both handles.
- Step backward until the band is under light tension.
- Pull your elbows backward and somewhat outward.
- Bring the band toward your upper torso.
- Keep your shoulders controlled.
- Return slowly.
Resistance Band Low Row
Changing the anchor and pulling angle creates another useful rowing variation.
How to Do a Resistance Band Low Row
- Secure the band to a low stable anchor.
- Hold one end in each hand.
- Step backward to create tension.
- Maintain an upright, stable torso.
- Pull the handles toward your lower ribs or waist.
- Contract your back.
- Return under control.
Heavy Resistance Band Row
A stronger band can provide a progression once standard Band Rows become easy.
How to Do a Heavy Resistance Band Row
- Select an appropriately stronger band.
- Secure it to a stable anchor.
- Establish a strong starting position.
- Brace your core.
- Pull without leaning backward for momentum.
- Briefly contract your back.
- Control the return phase.
Only increase resistance if you can maintain the same movement quality.
Final Thoughts
Resistance Band Rows are a practical horizontal pulling exercise for developing the back and arms without requiring traditional gym equipment.
They develop:
- Back strength
- Lat strength
- Biceps strength
- Rear-shoulder strength
- Horizontal pulling strength
- Upper-body muscular control
- Resistance-band proficiency
For effective Resistance Band Rows, focus on a secure setup, controlled shoulder-blade movement, and driving your elbows backward without turning the exercise into a full-body swing.
Choose a band that challenges you without compromising technique. As you become stronger, gradually increase the resistance or starting tension while maintaining complete control over both the pulling and returning phases. Learn more about Pull Workouts here.
Essential Gear for Resistance Band Rows
Resistance Band Rows require minimal equipment, but a few items can make the exercise safer and provide more training options.
- Resistance Bands: The essential equipment for the exercise. A set containing multiple resistance levels makes it easier to progressively increase the difficulty.
- Resistance Band Handles: Compatible handles can provide a comfortable and secure grip during higher-repetition or heavier Band Rows.
- Door Anchor: Allows you to create different pulling angles when a suitable fixed anchor is unavailable. Install it according to the manufacturer’s instructions and make sure the door and anchor are secure.
- Exercise Mat: Useful for seated Resistance Band Rows and other floor-based band exercises.
Resistance Band Row FAQ
Q1: Are Resistance Band Rows good for beginners?
Yes. Beginners can use lighter resistance and gradually progress as their strength and technique improve. The exercise is also relatively easy to perform at home with minimal equipment.
Q2: How many Resistance Band Rows should beginners do?
A practical starting point is approximately 8-15 controlled repetitions for 2-3 sets using resistance that allows proper form. Adjust the resistance and volume according to your ability and training program.
Q3: Where should I pull the band during Resistance Band Rows?
For a standard Row, pulling toward the lower ribs or upper abdomen is a useful general target. Your exact pulling position can vary somewhat according to your proportions, grip, and the variation being performed.