How to Do Child’s Pose Stretch Correctly: Step-by-Step Guide for Beginners

Child’s Pose is a simple floor-based stretch commonly used to relax into a comfortable position while gently stretching areas such as the back, hips, and shoulders.

The stretch begins from a kneeling position. You move your hips toward your heels while reaching your arms forward and lowering your torso toward the floor. The position can easily be adjusted according to your hip, knee, ankle, and shoulder mobility.

Child’s Pose requires no specialized equipment and can fit into post-workout stretching, mobility routines, yoga sessions, or a general flexibility program.


What Is Child’s Pose Stretch?

Child’s Pose, also known as Balasana in yoga, is a kneeling stretch in which you lower your torso toward the floor while your hips move back toward your heels.

The arms can remain extended in front of you or rest alongside your body depending on the variation.

Because the hips, knees, shoulders, and spine are all involved in the position, Child’s Pose can create a gentle stretch across several areas of the body simultaneously.

Child’s Pose is commonly used in:

  • Post-workout stretching
  • Yoga routines
  • Full-body flexibility sessions
  • Back and shoulder stretching
  • Hip mobility routines
  • Cool-down routines
  • Recovery-focused movement sessions

The goal is not to force your hips onto your heels or your forehead onto the floor. Adjust the position to suit your mobility and comfort.

Benefits of Child’s Pose Stretch

Child’s Pose can provide several useful flexibility and mobility benefits when performed comfortably.

Benefits include:

  • Gently stretches the back
  • Stretches the shoulders when the arms are extended
  • Can stretch the lats
  • Encourages comfortable hip flexion
  • Provides a gentle position for spinal flexion
  • Can reduce the feeling of muscular tightness
  • Requires no specialized equipment
  • Can be modified for different mobility levels
  • Fits easily into cool-down and flexibility routines

The relatively relaxed position also makes Child’s Pose useful between more demanding mobility exercises or yoga positions.

Muscles Stretched During Child’s Pose

The exact stretching sensation depends on your arm position, knee width, hip mobility, and individual anatomy.

Primary Muscles
  • Latissimus Dorsi
  • Erector Spinae
  • Gluteal Muscles
Secondary Muscles
  • Posterior Deltoids
  • Teres Major
  • Trapezius
  • Quadriceps
  • Muscles around the hips

With the arms extended forward, the stretch through the lats and shoulders may become more noticeable. Bringing the arms alongside your body generally makes the upper-body position more relaxed.


How to Do Child’s Pose Stretch (Step-by-Step)

Step 1: Begin on Your Hands and Knees

Start on an exercise mat in a quadruped position.

Place your:

  • Hands approximately underneath your shoulders
  • Knees underneath or slightly wider than your hips
  • Lower legs comfortably on the floor
  • Feet relaxed behind you

Keep your head and spine in a comfortable position.

Step 2: Adjust Your Knees

Choose a knee position that feels comfortable.

You can keep your knees relatively close together or move them farther apart.

A wider knee position may provide additional space for your torso as you move backward.

Avoid forcing your hips or knees into a particular width.

Step 3: Move Your Hips Back

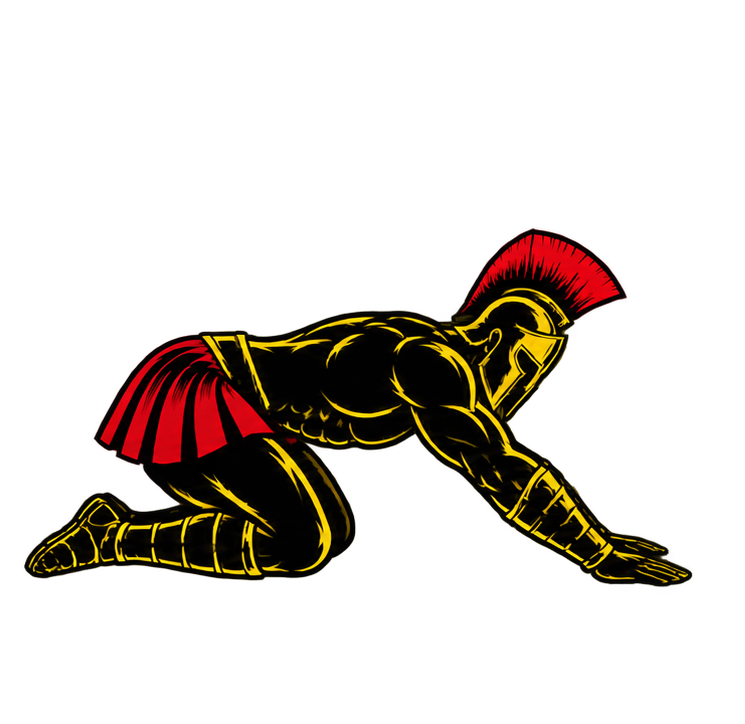
Slowly push your hips backward toward your heels.

Keep the movement controlled.

Your hips do not need to touch your heels. Move only as far as your knees, hips, and ankles comfortably allow.

Step 4: Reach Your Arms Forward

Extend both arms along the floor in front of you.

Keep your palms facing downward and allow your hands to reach forward as your hips continue moving backward.

Maintain:

  • Relaxed neck
  • Comfortable shoulders
  • Controlled breathing
  • Comfortable hip position
  • Gentle stretch intensity

Avoid aggressively forcing your chest toward the floor.

Step 5: Lower Your Torso

Allow your torso to move down between or over your thighs.

Gradually lower your forehead toward the mat.

If your forehead does not comfortably reach the floor, do not force it. A folded towel, yoga block, or cushion can provide support.

Step 6: Settle Into the Stretch

Once you reach a comfortable position, relax into the stretch.

You may feel gentle tension through your:

  • Back
  • Lats
  • Shoulders
  • Glutes
  • Hips

Continue reaching forward if you want more emphasis through the upper body, but keep the stretch comfortable.

Step 7: Hold and Return

Hold Child’s Pose for approximately 20-60 seconds while breathing normally.

When finished, press gently through your hands and gradually bring your torso upright as your hips move forward.

Return to your hands and knees under control rather than suddenly rising from the stretch.
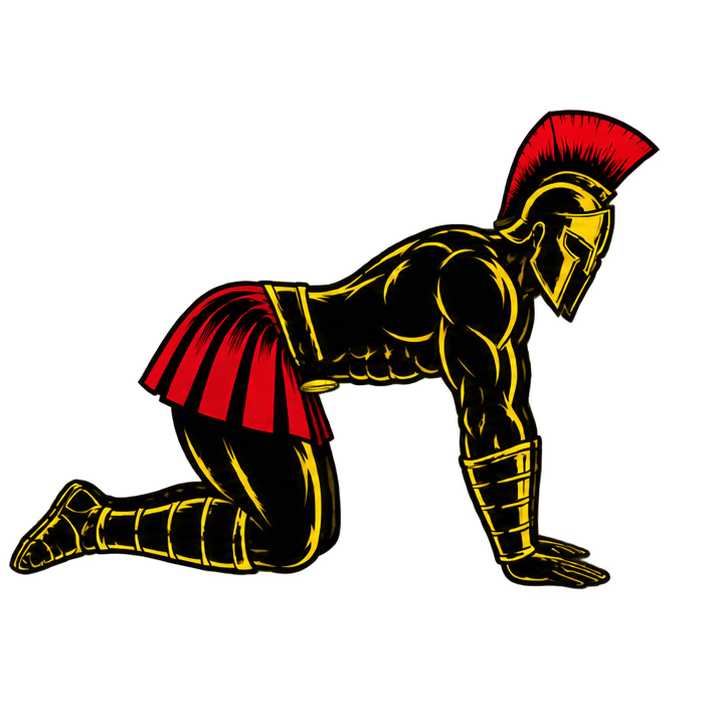
Warrior showcasing How to do Child’s Pose Stretch with proper form

Child’s Pose Stretch Form Checklist

Use this checklist to maintain a comfortable Child’s Pose.

  • Begin from a stable kneeling position
  • Choose a comfortable knee width
  • Move your hips backward gradually
  • Allow your hips to stop before discomfort occurs
  • Extend your arms comfortably
  • Keep your neck relaxed
  • Lower your torso under control
  • Support your forehead if necessary
  • Breathe normally
  • Maintain gentle stretch intensity
  • Avoid bouncing
  • Avoid forcing your hips toward your heels
  • Exit the position gradually
  • Stop if you experience sharp or unusual pain

Child’s Pose should feel like a controlled stretch rather than a test of how deeply you can force yourself into the position.


Common Child’s Pose Stretch Mistakes

Forcing the Hips Onto the Heels

Problem: Trying to make your hips touch your heels despite limited mobility can create unnecessary discomfort around the knees, hips, or ankles.

Fix: Allow your hips to stop wherever the position remains comfortable. Your hips do not need to reach your heels.

Forcing the Forehead to the Floor

Problem: Trying to push your head downward can create unnecessary neck tension and make the position uncomfortable.

Fix: Let your head descend naturally. Use a yoga block, folded towel, or cushion underneath your forehead if needed.

Reaching the Arms Too Aggressively

Problem: Trying to stretch your hands as far forward as possible can create excessive tension through the shoulders.

Fix: Reach only far enough to feel a comfortable stretch. You can also bring your arms alongside your body for a more relaxed variation.

Holding Your Breath

Problem: Holding your breath can create unnecessary tension while you are trying to settle into the stretch.

Fix: Breathe slowly and naturally throughout the hold.

Ignoring Knee Discomfort

Problem: Child’s Pose places the knees into substantial flexion, which may be uncomfortable for some people.

Fix: Reduce how far you sit backward, adjust your knee position, or use appropriate padding. Stop if the position causes sharp or worsening knee pain.

Ignoring Ankle Discomfort

Problem: The kneeling position also places the ankles in plantar flexion, which may feel uncomfortable if your mobility is limited.

Fix: Modify the position or use comfortable padding rather than forcing your ankles into a painful range.

Stretching Through Pain

Problem: Sharp, pinching, radiating, or unusual pain is different from normal stretching tension.

Fix: Reduce the range or leave the position if pain occurs. Persistent or worsening symptoms should not simply be addressed by forcing a deeper stretch.


Child’s Pose Stretch Variations

Child’s Pose can be modified to emphasize different areas or accommodate different mobility levels.

Wide-Knee Child’s Pose

Moving your knees farther apart creates additional space for your torso.

How to Do Wide-Knee Child’s Pose

  • Begin on your hands and knees.
  • Move your knees comfortably apart.
  • Keep your feet positioned comfortably behind you.
  • Push your hips toward your heels.
  • Lower your torso between your thighs.
  • Reach your arms forward.
  • Hold the stretch comfortably.

Arms-Back Child’s Pose

Placing your arms alongside your body reduces the overhead shoulder position.

How to Do Arms-Back Child’s Pose

  • Move into a comfortable Child’s Pose.
  • Bring your arms alongside your body.
  • Turn your palms into a comfortable position.
  • Allow your shoulders to relax.
  • Rest your forehead on the floor or appropriate support.
  • Hold while breathing normally.

Supported Child’s Pose

This variation uses support to make the position more accessible.

How to Do Supported Child’s Pose

  • Begin in a comfortable kneeling position.
  • Place a cushion, bolster, or folded blanket in front of you.
  • Move your hips backward.
  • Lower your torso onto the support.
  • Rest your head comfortably.
  • Allow your arms to relax.
  • Hold without forcing the position.

Side-Reaching Child’s Pose

Moving both hands toward one side can increase the stretch along the opposite side of the torso and lat.

How to Do Side-Reaching Child’s Pose

  • Begin in standard Child’s Pose with your arms extended.
  • Walk both hands gradually toward one side.
  • Keep your hips moving backward comfortably.
  • Feel the stretch along the opposite side of your torso.
  • Hold briefly.
  • Return to the center.
  • Repeat on the opposite side.

Thread-the-Needle Child’s Pose

This variation adds gentle upper-back and shoulder rotation.

How to Do Thread-the-Needle Child’s Pose

  • Begin from your hands and knees.
  • Move one arm underneath the opposite arm.
  • Allow your shoulder and side of your head to move toward the floor.
  • Keep your hips controlled.
  • Stop at a comfortable range.
  • Hold briefly.
  • Return slowly.
  • Repeat on the opposite side.

Final Thoughts

Child’s Pose is a simple floor-based stretch that can be adapted to many different mobility levels.

It can help develop or maintain:

  • Back flexibility
  • Lat flexibility
  • Shoulder mobility
  • Hip mobility
  • Comfortable spinal movement
  • General stretch tolerance

There is no requirement for your hips to touch your heels, your chest to reach the floor, or your forehead to touch the mat. Your anatomy and current mobility determine how the position looks.

Move backward gradually, support yourself when necessary, breathe normally, and focus on a comfortable stretch rather than maximum depth. Learn more about Stretching Here.

Essential Gear for Child’s Pose Stretch

Child’s Pose requires no equipment, but a few simple items can make the stretch more comfortable and accessible.

  • Exercise or Yoga Mat: Provides cushioning for your knees, ankles, hands, and upper body during the stretch.
  • Yoga Block: Can support your forehead when comfortably reaching the floor is difficult.
  • Yoga Bolster or Cushion: Supports your torso during a more relaxed Supported Child’s Pose.
  • Folded Towel or Blanket: Can provide additional padding underneath sensitive knees or ankles.

Child’s Pose Stretch FAQ

Q1: How long should I hold Child’s Pose?
A practical starting point is approximately 20-60 seconds. You can adjust the duration according to your comfort, mobility goals, and the rest of your stretching routine.

Q2: Should my hips touch my heels during Child’s Pose?
No. Your hips should move toward your heels only as far as your knees, hips, and ankles comfortably allow. Touching your heels is not required for the stretch to be useful.

Q3: What should I do if my forehead cannot reach the floor?
Place a yoga block, folded towel, cushion, or other comfortable support underneath your forehead rather than forcing your head toward the floor.

How to Do Inchworms Correctly: Step-by-Step Guide for Beginners

Learn how to do Inchworms with proper form, avoid common mistakes, and discover useful variations for improving mobility, core stability, shoulder strength, and full-body coordination.

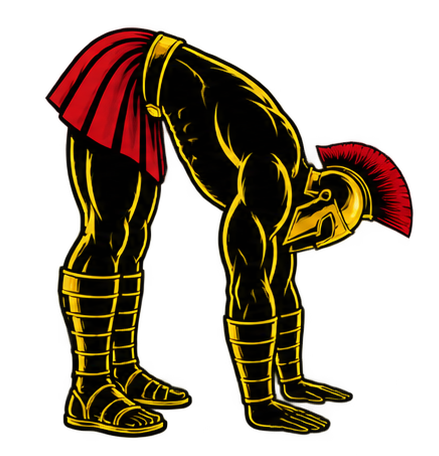
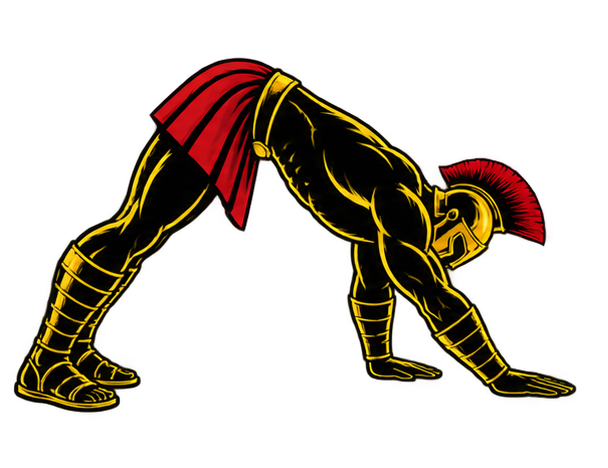
Inchworms are a dynamic bodyweight exercise that combines a standing forward fold, hand walkout, high plank, and return to standing. This combination makes them particularly useful during warm-ups because they move multiple joints while engaging both the upper and lower body.

They require no specialized equipment and can be performed almost anywhere with enough floor space.


What Are Inchworms?

Inchworms are a dynamic full-body exercise performed by bending forward from a standing position, placing your hands on the floor, walking them forward into a high plank, and then reversing the movement or walking your feet toward your hands.

The movement gets its name from the crawling motion of an inchworm.

Unlike a static stretch, Inchworms continuously move your body through several positions. They combine mobility with active muscular control, making them useful before many types of training.

Inchworms are commonly used in:

  • Dynamic warm-ups
  • Calisthenics training
  • Full-body workouts
  • Mobility routines
  • Athletic conditioning
  • Circuit training
  • Home workouts

They can also be modified according to your hamstring mobility, core strength, and training experience.

Benefits of Inchworms

Inchworms provide several mobility, stability, and full-body training benefits.

Benefits include:

  • Dynamically stretches the hamstrings
  • Develops core stability
  • Strengthens the shoulders
  • Trains the arms
  • Improves full-body coordination
  • Moves the hips and shoulders through useful ranges of motion
  • Reinforces the high-plank position
  • Raises general activity before training
  • Requires no specialized equipment

Because Inchworms combine movement and muscular engagement, they are particularly useful when you want a dynamic exercise rather than a prolonged static stretch before training.

Muscles Worked in Inchworms

Inchworms involve several muscle groups as you transition between standing, forward-fold, and plank positions.

Primary Muscles
  • Core Muscles
  • Anterior Deltoids
  • Triceps
  • Hamstrings
Secondary Muscles
  • Pectoralis Major
  • Serratus Anterior
  • Glutes
  • Quadriceps
  • Calves
  • Hip Flexors
  • Forearms

The hamstrings are primarily lengthened during the forward-fold portions, while your shoulders, arms, and core work actively as your hands travel toward and away from the plank position.


How to Do Inchworms (Step-by-Step)

Step 1: Stand Upright

Begin standing with your feet approximately hip-width apart.

Keep your:

  • Head neutral
  • Shoulders relaxed
  • Core lightly engaged
  • Feet firmly planted
  • Knees straight or softly bent

Make sure you have enough open floor space in front of you.

Step 2: Hinge Forward

Push your hips backward and fold your torso toward the floor.

Reach your hands toward the ground in front of your feet.

Maintain control throughout the movement.

If your hamstring mobility prevents you from reaching the floor comfortably, bend your knees slightly rather than forcing the stretch.

Step 3: Place Your Hands on the Floor

Place both palms firmly on the floor in front of your feet.

Keep your:

  • Fingers spread naturally
  • Hands stable
  • Shoulders controlled
  • Knees softly bent if necessary

Shift enough weight toward your hands to begin walking them forward.

Step 4: Walk Your Hands Forward

Take small alternating steps with your hands while keeping your feet in place.

Continue walking your hands away from your feet as your body lengthens toward the floor.

Keep your movement controlled rather than rushing toward the plank.

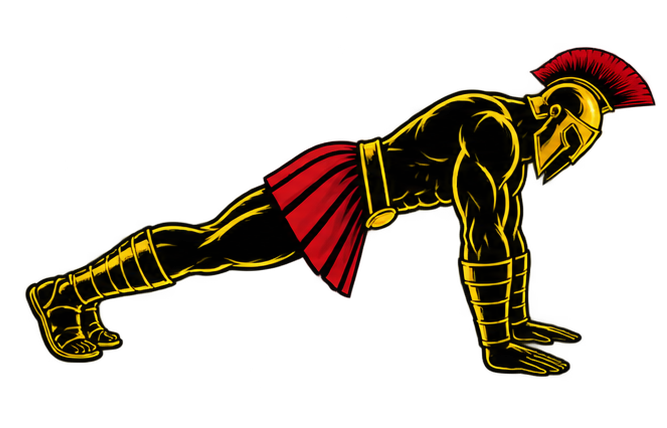
Step 5: Reach a High Plank

Continue until your body reaches a strong high-plank position.

Your hands should be approximately underneath your shoulders.

Keep your:

  • Arms straight
  • Core braced
  • Glutes engaged
  • Hips controlled
  • Legs extended
  • Head neutral

Your body should form approximately a straight line from your head to your heels.

Avoid walking your hands so far forward that your lower back begins to sag.

Step 6: Return Toward Your Feet

From the plank, walk your hands backward toward your feet using small controlled steps.

As your hands approach your feet, allow your hips to rise.

Keep your feet planted while returning to the forward-fold position.

Alternatively, some Inchworm variations keep the hands stationary and walk the feet toward the hands.

Step 7: Return to Standing

Once your hands are close to your feet, gradually lift your torso and return to an upright position.

Reset your posture before beginning the next repetition.

Perform each repetition smoothly rather than trying to complete the movement as quickly as possible.

Warrior showcasing How to do Inchworms with proper form

Inchworms Form Checklist

Use this quick checklist to ensure proper Inchworm form.

  • Start from a stable standing position
  • Hinge forward under control
  • Bend your knees slightly if necessary
  • Place your palms firmly on the floor
  • Walk your hands using small controlled steps
  • Keep your shoulders stable
  • Brace your core
  • Reach a strong high plank
  • Keep your hips from sagging
  • Keep your head neutral
  • Reverse the movement under control
  • Breathe naturally
  • Avoid rushing the exercise

Every repetition should move smoothly between the standing, fold, and plank positions.


Common Inchworms Mistakes

Forcing Straight Knees

Problem: Trying to keep your knees completely straight despite limited hamstring mobility can make it difficult to reach the floor comfortably and may cause you to compensate elsewhere.

Fix: Use a slight knee bend when necessary and gradually work on your mobility rather than forcing the position.

Letting the Hips Sag in the Plank

Problem: Allowing your hips to drop can cause your lower back to excessively extend and reduces your ability to maintain a strong plank.

Fix: Brace your core and squeeze your glutes as you reach the high-plank position.

Walking the Hands Too Far Forward

Problem: Continuing beyond a strong plank position increases the demand on your shoulders and core and may cause your torso to sag.

Fix: For the standard Inchworm, stop when you reach a controlled high plank with your hands approximately beneath your shoulders.

Rushing the Movement

Problem: Moving your hands quickly and carelessly reduces control and can make it difficult to maintain proper positions.

Fix: Use deliberate hand steps and maintain control throughout every phase.

Dropping Into the Forward Fold

Problem: Suddenly collapsing your torso toward the floor removes control from the movement.

Fix: Fold forward gradually and bend your knees slightly when your mobility requires it.

Shrugging the Shoulders

Problem: Allowing your shoulders to collapse toward your ears can create unnecessary upper-body tension during the hand walkout.

Fix: Maintain active, controlled shoulders while supporting your bodyweight.

Holding Your Breath

Problem: Holding your breath unnecessarily can make the movement feel more difficult and tense.

Fix: Breathe naturally throughout the entire repetition.


Inchworm Variations

Inchworms can be modified to change their difficulty or add additional exercises to the movement.

Short-Range Inchworm

A beginner-friendly variation that reduces the distance of the hand walkout.

How to Do a Short-Range Inchworm

  • Stand upright.
  • Fold forward and place your hands on the floor.
  • Walk your hands forward a manageable distance.
  • Stop before your form begins breaking down.
  • Walk your hands back.
  • Return to standing.

Gradually increase your range as your mobility and strength improve.

Inchworm to Push-Up

This variation adds an upper-body strength exercise at the end of each walkout.

How to Do an Inchworm to Push-Up

  • Perform an Inchworm until you reach a high plank.
  • Brace your core.
  • Perform one controlled Push-Up.
  • Return to the high plank.
  • Walk your hands back toward your feet.
  • Return to standing.

Inchworm With Feet Walk-In

Instead of walking your hands back, this variation moves your feet toward your hands.

How to Do an Inchworm With Feet Walk-In

  • Fold forward and place your hands on the floor.
  • Walk your hands forward into a high plank.
  • Keep your hands planted.
  • Take small steps forward with your feet.
  • Raise your hips as your feet approach your hands.
  • Repeat the sequence to travel forward.

Inchworm to Downward Dog

This variation adds an additional mobility position after reaching the plank.

How to Do an Inchworm to Downward Dog

  • Walk your hands forward into a high plank.
  • Push your hips upward and backward.
  • Allow your torso to move toward your thighs.
  • Hold briefly without forcing your heels toward the floor.
  • Return to the high plank.
  • Complete the Inchworm.

Inchworm to Shoulder Tap

This variation increases the core-stability demand.

How to Do an Inchworm to Shoulder Tap

  • Walk your hands forward into a high plank.
  • Brace your core and keep your hips level.
  • Lift one hand and tap the opposite shoulder.
  • Return your hand to the floor.
  • Repeat with the opposite hand.
  • Walk your hands back and return to standing.

Final Thoughts

Inchworms are a simple full-body exercise that combines dynamic mobility with active shoulder, arm, and core engagement.

They develop or improve:

  • Dynamic hamstring mobility
  • Core stability
  • Shoulder strength
  • Upper-body control
  • Plank stability
  • Full-body coordination
  • Movement preparation

Their combination of mobility and muscular engagement makes them particularly useful in dynamic warm-ups before calisthenics, strength training, running, and other athletic activities.

Move through every stage under control, bend your knees when your mobility requires it, and focus on reaching a strong plank rather than walking your hands as far forward as possible. Learn more about Stretching Here.

Essential Gear for Inchworms

Inchworms require no equipment, but a few simple items can make the exercise more comfortable or provide additional progression options.

  • Exercise Mat: Provides a comfortable, non-slip surface for your hands and feet during the walkout.
  • Push-Up Handles: Can provide a more neutral wrist position for Inchworm variations when they are stable enough to be repositioned safely between movements.
  • Weighted Vest: Can increase the difficulty for advanced trainees, although standard bodyweight Inchworms should be mastered first.

Inchworms FAQ

Q1: Are Inchworms a stretch or an exercise?
They can serve as both a dynamic mobility drill and a bodyweight exercise. The forward fold dynamically stretches the posterior legs, while the hand walkout and plank require active upper-body and core strength.

Q2: Should my legs stay completely straight during Inchworms?
Not necessarily. Keep your legs as straight as is comfortable, but use a slight knee bend if needed to reach the floor without forcing your hamstrings or compromising your movement.

Q3: How many Inchworms should beginners do?
Beginners can start with around 5-8 controlled repetitions. When using them as part of a warm-up, focus on movement quality rather than performing a large number of repetitions.


How to Do the Cat-Cow Stretch Correctly: Step-by-Step Guide for Beginners

Learn how to do the Cat-Cow stretch with perfect form, avoid common mistakes, and discover the best variations to improve spinal mobility and flexibility.

The Cat-Cow stretch is one of the most effective mobility exercises for improving spine flexibility, relieving tension, and enhancing movement control. Whether you are training for military fitness tests, calisthenics, or general fitness, mastering the Cat-Cow stretch is essential.


What Is the Cat-Cow Stretch?

The Cat-Cow stretch is a dynamic mobility exercise performed on all fours, where you alternate between arching and rounding your back.

This movement improves spinal flexibility while coordinating breathing with motion.

The Cat-Cow stretch is commonly used in:

  • Warm-up routines
  • Mobility and flexibility training
  • Yoga and recovery sessions
  • Injury prevention programs

Unlike static stretches, Cat-Cow is a dynamic movement that promotes fluid motion in the spine.

Benefits of Cat-Cow Stretch

The Cat-Cow stretch is essential for maintaining spinal health and flexibility.

Benefits include:

  • Improves spinal mobility and flexibility
  • Reduces stiffness in the back and neck
  • Enhances posture and alignment
  • Promotes better breathing coordination
  • Relieves tension in the spine
  • Aids recovery and relaxation

Few exercises are as effective for spinal mobility as the Cat-Cow stretch.

Muscles Worked in Cat-Cow Stretch

The Cat-Cow stretch activates multiple muscles along the spine and core.

Primary Muscles
  • Spinal Erectors
  • Abdominal Muscles
Secondary Muscles
  • Shoulders (Deltoids)
  • Neck Muscles
  • Hip Flexors
  • Glutes

This makes Cat-Cow an excellent movement for improving overall body coordination.


How to Do the Cat-Cow Stretch (Step-by-Step)

Step 1: Get Into All-Fours Position

Start on your hands and knees.

  • Hands under shoulders
  • Knees under hips
  • Spine neutral

Tip: Keep your head in line with your spine.

Step 2: Move Into Cow Position

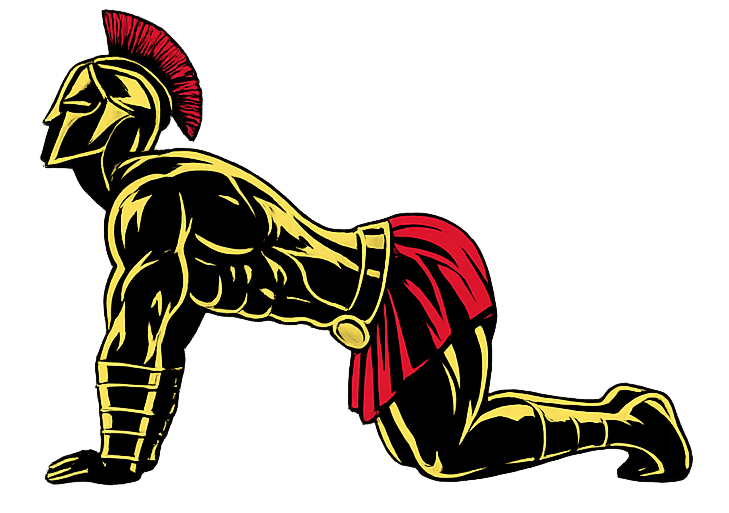
Inhale and drop your belly toward the ground.

  • Lift your chest and tailbone upward
  • Keep shoulders relaxed
  • Gently look forward
Warrior showcasing How to do the Cat-Cow Stretch

Step 3: Move Into Cat Position

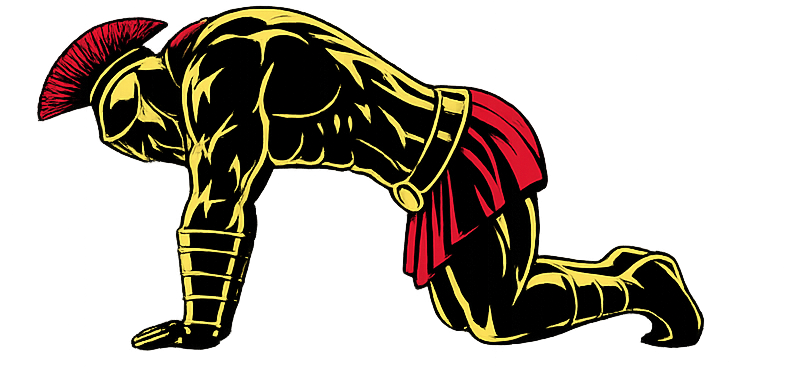
Exhale and round your back upward.

  • Tuck your chin toward your chest
  • Pull your belly button inward
  • Spread your shoulder blades

Step 4: Flow Between Positions

Continue alternating between Cat and Cow positions.

  • Move slowly and smoothly
  • Sync your breathing with movement
Warrior showcasing How to do the Cat-Cow Stretch

Step 5: Maintain Control

Perform each repetition with control.

Avoid rushing — focus on quality movement.


Cat-Cow Stretch Form Checklist

Use this checklist to ensure proper form:

  • Keep movements slow and controlled
  • Coordinate breathing with movement
  • Maintain proper hand and knee placement
  • Avoid forcing the range of motion
  • Keep your core engaged

Proper form improves mobility and prevents strain.


Common Cat-Cow Stretch Mistakes

Moving Too Fast

Problem: Reduces effectiveness.

Fix: Perform slow, controlled movements.

Forcing the Range of Motion

Problem: Can cause discomfort.

Fix: Move within a comfortable range.

Poor Alignment

Problem: Reduces benefits.

Fix: Keep hands under shoulders and knees under hips.

Not Breathing Properly

Problem: Reduces coordination.

Fix: Inhale in Cow, exhale in Cat.

Collapsing Shoulders

Problem: Causes instability.

Fix: Keep shoulders active and stable.


Cat-Cow Stretch Variations

Once you master the basic Cat-Cow stretch, these variations can enhance mobility further.

Seated Cat-Cow Stretch

A beginner-friendly variation.

How to Do Seated Cat-Cow

  • Sit upright in a chair
  • Place hands on knees
  • Alternate arching and rounding your back

Standing Cat-Cow Stretch

Improves accessibility.

How to Do Standing Cat-Cow

  • Stand upright with hands on thighs
  • Alternate spinal flexion and extension
  • Move in a controlled manner

Extended Cat-Cow Stretch

Adds a greater range of motion.

How to Do Extended Cat-Cow

  • Reach one arm forward during the movement
  • Increase stretch intensity
  • Maintain balance

Slow Tempo Cat-Cow

Focuses on control and breathing.

How to Do Slow Tempo Cat-Cow

  • Hold each position for 2–3 seconds
  • Emphasize breathing
  • Move with precision

Final Thoughts

The Cat-Cow stretch is one of the most effective mobility exercises you can master.

It improves:

  • Spinal flexibility
  • Posture
  • Movement coordination
  • Recovery
  • Overall mobility

Progress may feel subtle at first, but consistent practice will greatly improve how your body moves and feels. Learn more about Stretching Here.

Focus on control and breathing.

A warrior moves with fluidity — not stiffness.

Essential Gear for the Cat-Cow Stretch

The right equipment can make the Cat-Cow stretch more comfortable, effective, and easier to perform. Here are the essentials every warrior should consider:

  • Exercise Mat: Cushions your hands and knees during the stretch.
  • Yoga Block: Provides support for modified variations.
  • Foam Roller: Helps loosen the back before mobility work.
  • Resistance Bands: Improve spinal and shoulder mobility in warm-ups.
  • Yoga Knee Pad: Adds extra comfort for kneeling positions.

Explore our equipment guides to find the best gear for your training and take your performance to the next level.


Cat-Cow Stretch FAQ

Q1: How many reps should I do for the Cat-Cow stretch?
Beginners can perform 8–12 slow repetitions per set.

Q2: When should I do the Cat-Cow stretch?
It is ideal for warm-ups, mobility sessions, or recovery routines.

Q3: Can Cat-Cow reduce back pain?
Yes, it can help relieve tension and improve spinal mobility, which may reduce discomfort.

How to Do Hip Openers Correctly: Step-by-Step Guide for Beginners

Learn how to do hip openers with perfect form, avoid common mistakes, and discover the best hip opener variations to improve mobility and athletic performance.

Hip openers are one of the most effective dynamic warm-up exercises for increasing hip mobility, improving movement quality, and preparing the lower body for exercise. Whether you are training for strength, running, sports, or military fitness, mastering hip openers is essential.


What Are Hip Openers?

A hip opener is a dynamic mobility exercise where you lift one knee and rotate it outward through a controlled range of motion before returning to the starting position.

Hip openers are considered one of the best mobility exercises because they improve flexibility, joint health, and movement efficiency while activating key muscles around the hips.

Hip openers are commonly used in:

  • Dynamic warm-up routines
  • Athletic performance training
  • Strength and conditioning programs
  • Mobility and rehabilitation sessions

Unlike static stretches, hip openers actively prepare the hips for movement while improving joint function.

Benefits of Hip Openers

Hip openers are one of the most effective exercises for improving lower-body mobility.

Benefits include:

  • Improves hip mobility
  • Increases dynamic flexibility
  • Enhances athletic performance
  • Activates the glutes and hip stabilizers
  • Improves balance and coordination
  • Helps reduce injury risk during training

Few mobility exercises prepare the hips as effectively as hip openers.

Muscles Worked in Hip Openers

Hip openers activate several muscles throughout the hips and lower body.

Primary Muscles
  • Hip Flexors
  • Gluteus Medius
  • Gluteus Maximus
Secondary Muscles
  • Hip Adductors
  • Hip Abductors
  • Quadriceps
  • Core Muscles
  • Lower Back Stabilizers

Because of this muscle activation, hip openers are one of the best exercises for improving hip function and movement quality.


How to Do Hip Openers (Step-by-Step)

Step 1: Stand Tall

Begin with:

  • Feet hip-width apart
  • Chest up
  • Core engaged
  • Arms relaxed at your sides

Tip: Hold onto a wall or support if balance is a challenge.

Step 2: Lift One Knee

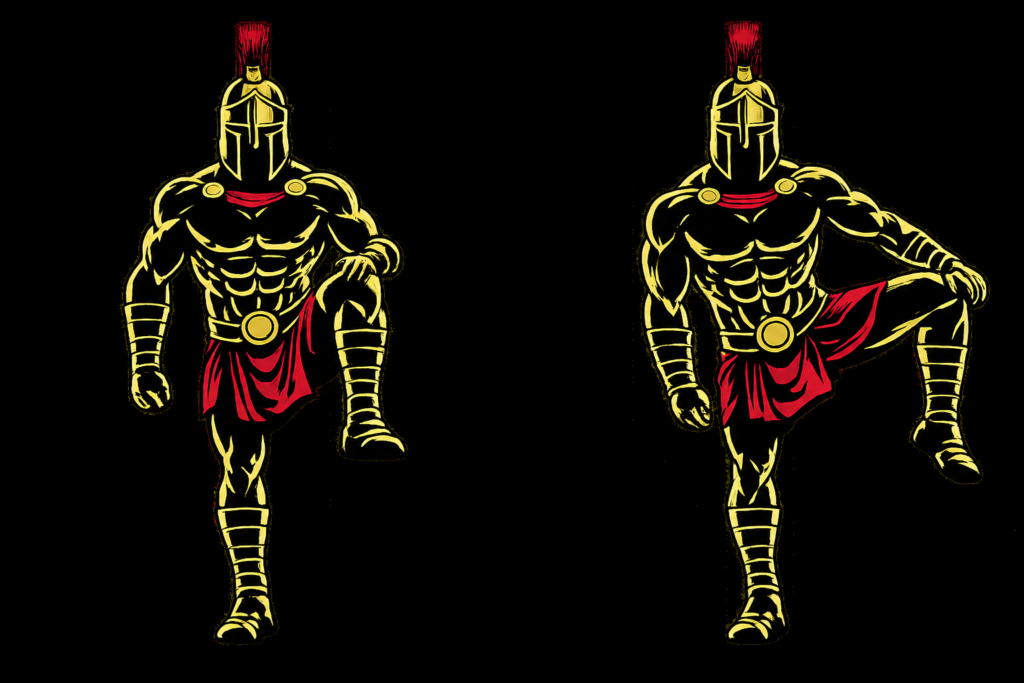
Raise one knee toward your chest until your thigh is approximately parallel to the ground.

Focus on:

  • Maintaining balance
  • Keeping your torso upright
  • Engaging your core

Avoid leaning backward.

Step 3: Rotate the Knee Outward

Open your hip by rotating the raised knee outward.

Focus on:

  • Moving slowly and smoothly
  • Creating a large arc with the knee
  • Maintaining control throughout

Allow the movement to come from the hip joint.

Warrior showcasing How to do Hip Openers with proper form

Step 4: Complete the Movement

Continue rotating until the knee moves outward and slightly behind your body.

At this stage:

  • Keep your chest up
  • Maintain balance
  • Avoid twisting the torso excessively

Pause briefly before returning to the start.

Step 5: Return and Repeat

Bring the leg back to the starting position, then repeat for the desired number of repetitions.

Complete all repetitions on one side before switching legs.


Hip Openers Form Checklist

Use this quick checklist to ensure perfect hip opener form.

  • Keep your chest up
  • Maintain a tight core
  • Move through a comfortable range of motion
  • Control every repetition
  • Avoid excessive torso movement

Perfect form improves mobility and reduces injury risk.


Common Hip Openers Mistakes

Moving Too Quickly

Problem: Reduces mobility benefits and control.

Fix: Perform each repetition slowly and deliberately.

Leaning the Torso

Problem: Compensates for limited hip mobility.

Fix: Keep your torso upright throughout the movement.

Using Momentum

Problem: Decreases muscle activation and mobility gains.

Fix: Focus on controlled movement rather than speed.

Lifting the Knee Too Low

Problem: Limits hip range of motion.

Fix: Raise the knee to at least hip height if mobility allows.

Forcing the Movement

Problem: May cause discomfort or strain.

Fix: Stay within a comfortable and pain-free range of motion.

Controlled movement always beats forced movement.


Hip Openers Variations

Once you master the basic hip opener, different variations can help improve mobility and develop better movement quality.

Standing Hip Openers

The most common variation.

How to Do Standing Hip Openers

  • Lift your knee toward your chest
  • Rotate it outward
  • Return to the starting position

This variation is ideal for warm-ups and athletic preparation.

Walking Hip Openers

Adds coordination and movement.

How to Do Walking Hip Openers

  • Step forward after each repetition
  • Alternate legs while moving
  • Maintain balance and posture

This variation is popular among athletes and runners.

Hip Openers With Support

Ideal for beginners.

How to Do Hip Openers With Support

  • Hold onto a wall or stable object
  • Perform controlled repetitions
  • Focus on maximizing mobility

This variation improves balance and confidence.

Resistance Band Hip Openers

An advanced progression.

How to Do Resistance Band Hip Openers

  • Place a resistance band around your thighs
  • Perform the hip opener movement
  • Maintain tension throughout

This variation improves hip strength and stability.


Final Thoughts

Hip openers are one of the most effective mobility exercises you can master.

They build:

  • Hip mobility
  • Dynamic flexibility
  • Lower-body coordination
  • Athletic readiness
  • Functional movement quality

Progress may feel subtle because hip openers are primarily a mobility exercise. However, with consistent practice and proper form, your hip function and movement quality will steadily improve. Learn more about Stretching Here.

Quality movement is always better than rushed movement.

Focus on control, posture, and smooth repetitions.

A warrior unlocks his mobility before unleashing his power.

Essential Gear for Hip Openers

The right equipment can make hip openers more effective, comfortable, and easier to progress. Here are the essentials every warrior should consider:

  • Resistance Bands: Add resistance to improve hip strength and stability.
  • Exercise Mat: Provides a comfortable surface for floor-based mobility work.
  • Mini Loop Bands: Increase glute activation during hip opener variations.
  • Foam Roller: Loosens tight hip muscles before mobility training.
  • Yoga Block: Provides support for balance and controlled movement.

Explore our equipment guides to find the best gear for your training and take your performance to the next level.


Hip Openers FAQ

Q1: Are hip openers good before workouts?
Yes. Hip openers are one of the best dynamic warm-up exercises because they prepare the hips, glutes, and lower body for movement.

Q2: How many hip openers should I do?
Most people can perform 10-15 repetitions per leg as part of a warm-up routine.

Q3: Do hip openers improve flexibility?
Yes. Regular hip openers can improve hip mobility, dynamic flexibility, and overall movement quality when performed consistently.

How to Do Leg Swings Correctly: Step-by-Step Guide for Beginners

Learn how to do leg swings with perfect form, avoid common mistakes, and discover the best leg swing variations to improve mobility and athletic performance.

Leg swings are one of the most effective dynamic warm-up exercises for increasing hip mobility, activating the lower body, and preparing the muscles for movement. Whether you are training for running, strength training, sports, or military fitness, mastering leg swings is essential.


What Are Leg Swings?

A leg swing is a dynamic mobility exercise where one leg moves through a controlled swinging motion while the other leg provides balance and support.

Leg swings are considered one of the best lower-body warm-up exercises because they improve flexibility, mobility, and movement quality without reducing power output.

Leg swings are commonly used in:

  • Dynamic warm-up routines
  • Running preparation
  • Athletic performance training
  • Strength and conditioning programs

Unlike static stretching, leg swings actively prepare the muscles and joints for movement.

Benefits of Leg Swings

Leg swings are one of the most effective exercises for improving lower-body mobility.

Benefits include:

  • Improves hip mobility
  • Increases dynamic flexibility
  • Activates the glutes and hip flexors
  • Enhances athletic performance
  • Improves balance and coordination
  • Requires no equipment

Few warm-up exercises prepare the lower body as effectively as leg swings.

Muscles Worked in Leg Swings

Leg swings activate several lower-body muscles simultaneously.

Primary Muscles
  • Hip Flexors
  • Gluteus Maximus
  • Hamstrings
Secondary Muscles
  • Quadriceps
  • Hip Adductors
  • Hip Abductors
  • Core Muscles
  • Calves

Because of this muscle activation, leg swings are one of the best exercises for preparing the lower body for activity.


How to Do Leg Swings (Step-by-Step)

Step 1: Find a Stable Support

Stand next to a wall, rack, or sturdy object.

Begin with:

  • Feet hip-width apart
  • Chest up
  • Core engaged
  • One hand holding the support

Tip: Use the support only for balance, not to lean heavily.

Step 2: Lift One Leg

Raise one foot slightly off the ground.

Focus on:

  • Maintaining balance
  • Keeping your torso upright
  • Engaging your core

This creates a stable starting position.

Step 3: Swing the Leg Forward

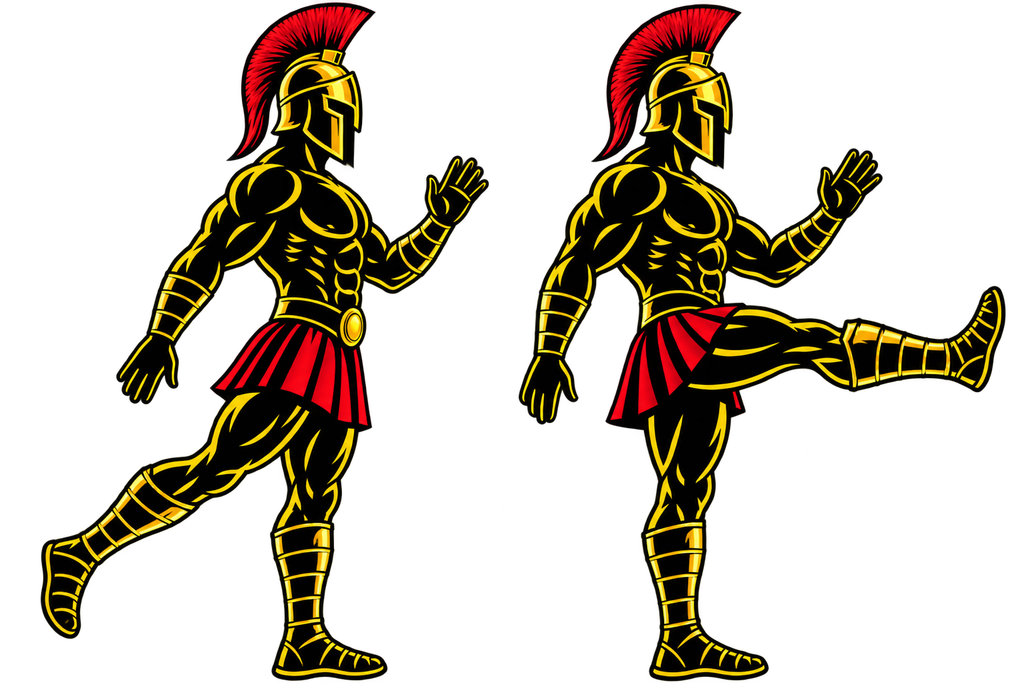
Move your leg forward in a controlled motion.

Focus on:

  • Keeping the movement smooth
  • Maintaining good posture
  • Avoiding excessive force

Allow the hip joint to move naturally.

Warrior showcasing How to do Leg Swings with proper form

Step 4: Swing the Leg Backward

Immediately swing the leg backward.

At this stage:

  • Keep the movement controlled
  • Avoid arching the lower back
  • Maintain balance

The movement should feel fluid rather than forced.

Step 5: Repeat and Switch Sides

Continue swinging for the desired repetitions before switching legs.

Perform equal repetitions on both sides to maintain balanced mobility.


Leg Swings Form Checklist

Use this quick checklist to ensure perfect leg swing form.

  • Keep your chest up
  • Maintain a tight core
  • Use smooth and controlled swings
  • Move through a comfortable range of motion
  • Avoid excessive momentum

Perfect form improves mobility and reduces injury risk.


Common Leg Swings Mistakes

Swinging Too Aggressively

Problem: Increases the risk of muscle strain.

Fix: Gradually increase your range of motion as your muscles warm up.

Leaning Back Excessively

Problem: Places unnecessary stress on the lower back.

Fix: Keep your torso upright and core engaged.

Using Momentum Instead of Control

Problem: Reduces mobility benefits.

Fix: Focus on smooth and deliberate movements.

Holding Your Breath

Problem: Creates unnecessary tension.

Fix: Breathe naturally throughout the exercise.

Forcing the Range of Motion

Problem: May cause discomfort or injury.

Fix: Move only within a comfortable and pain-free range.

Controlled movement always beats excessive range.


Leg Swings Variations

Once you master the basic leg swing, different variations can help improve mobility and target different movement patterns.

Front-to-Back Leg Swings

The most common variation.

How to Do Front-to-Back Leg Swings

  • Swing the leg forward and backward
  • Maintain an upright torso
  • Control the movement throughout

This variation improves hip flexor and hamstring mobility.

Side-to-Side Leg Swings

Improves lateral mobility.

How to Do Side-to-Side Leg Swings

  • Face your support
  • Swing the leg across the body and outward
  • Maintain balance and control

This variation targets the adductors and abductors.

Walking Leg Swings

Adds movement and coordination.

How to Do Walking Leg Swings

  • Take a step forward
  • Perform a controlled leg swing
  • Alternate legs while moving

This variation improves dynamic movement quality.

Resistance Band Leg Swings

An advanced variation.

How to Do Resistance Band Leg Swings

  • Attach a resistance band around your ankle
  • Perform controlled swings
  • Maintain proper posture

This variation increases muscular activation and hip stability.


Final Thoughts

Leg swings are one of the most effective dynamic mobility exercises you can master.

They build:

  • Hip mobility
  • Dynamic flexibility
  • Lower-body coordination
  • Athletic readiness
  • Functional movement quality

Progress may feel subtle because leg swings are primarily a mobility exercise. However, with consistent practice and proper form, your movement quality and lower-body performance will steadily improve. Learn more about Stretching Here.

Quality movement is always better than excessive movement.

Focus on control, posture, and smooth repetitions.

A warrior prepares his movement before he tests his strength.

Essential Gear for Leg Swings

While leg swings require no equipment, the following gear can improve your warm-ups, increase hip mobility, and help you progress to more challenging variations.

  • Resistance Bands: Add resistance to improve hip strength and stability.
  • Exercise Mat: Provides a comfortable surface for warm-up and mobility routines.
  • Mini Loop Bands: Increase glute activation during leg swing variations.
  • Foam Roller: Loosens tight hips, glutes, and hamstrings before training.
  • Massage Ball: Targets tight hip and glute muscles to improve mobility.

Leg Swings FAQ

Q1: Are leg swings good before workouts?
Yes. Leg swings are one of the best dynamic warm-up exercises because they prepare the hips, hamstrings, and glutes for movement.

Q2: How many leg swings should I do?
Most people can perform 10-20 swings per leg in each direction as part of a warm-up routine.

Q3: Do leg swings improve flexibility?
Yes. Regular leg swings can improve dynamic flexibility, hip mobility, and overall movement quality when performed consistently.

How to Do Jumping Jacks Correctly: Step-by-Step Guide for Beginners

Learn how to do jumping jacks with perfect form, avoid common mistakes, and discover the best jumping jack variations to improve conditioning and athletic performance.

Jumping jacks are one of the most effective bodyweight exercises for increasing heart rate, improving coordination, and developing cardiovascular endurance. Whether you are training for military fitness tests, sports performance, or general fitness, mastering jumping jacks is essential.


What Are Jumping Jacks?

A jumping jack is a full-body exercise where you jump your feet apart while raising your arms overhead, then return to the starting position.

The jumping jack is considered one of the best conditioning exercises because it combines cardiovascular training with full-body movement.

Jumping jacks are commonly used in:

  • Military fitness training
  • Athletic warm-ups
  • High-intensity interval training (HIIT)
  • General fitness workouts

Unlike many cardio exercises that require equipment, jumping jacks can be performed virtually anywhere.

Benefits of Jumping Jacks

Jumping jacks are one of the most effective exercises for improving overall fitness.

Benefits include:

  • Improves cardiovascular endurance
  • Increases heart rate quickly
  • Enhances coordination and rhythm
  • Burns calories efficiently
  • Activates the entire body
  • Requires no equipment

Few exercises raise the heart rate as effectively as jumping jacks.

Muscles Worked in Jumping Jacks

Jumping jacks activate multiple muscle groups throughout the body.

Primary Muscles
  • Deltoids
  • Quadriceps
  • Calves
Secondary Muscles
  • Glutes
  • Hip Abductors
  • Hamstrings
  • Core Muscles
  • Trapezius

Because of this muscle activation, jumping jacks are one of the best exercises for full-body conditioning.


How to Do Jumping Jacks (Step-by-Step)

Step 1: Stand Tall

Begin with:

  • Feet together
  • Arms resting at your sides
  • Chest up
  • Core engaged

Tip: Maintain a slight bend in your knees to absorb impact.

Step 2: Jump Your Feet Apart

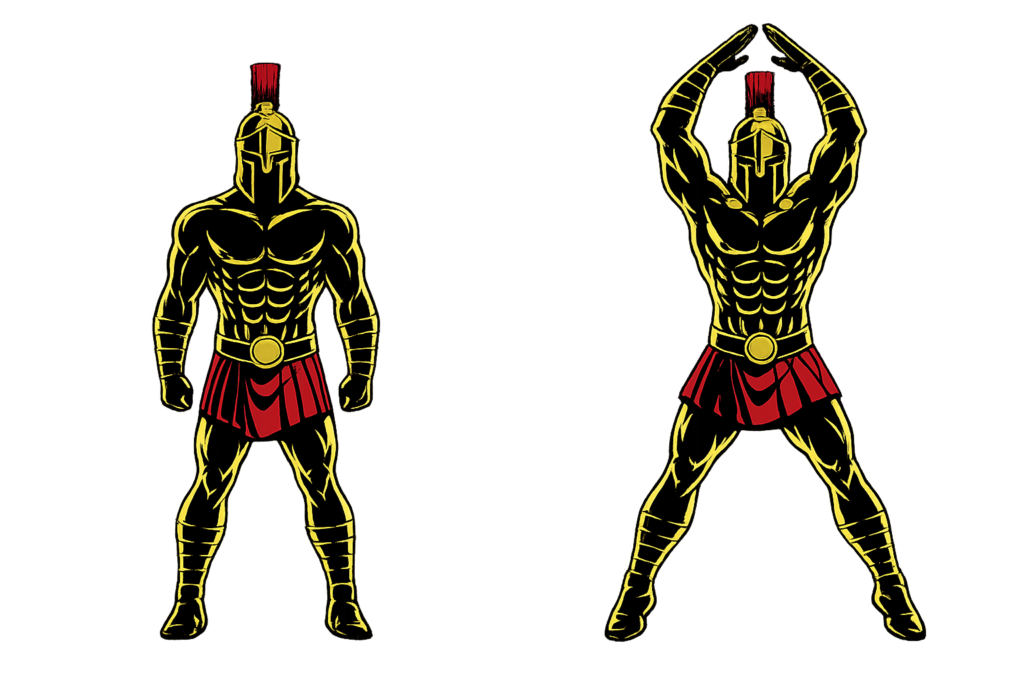
Jump your feet outward to slightly wider than shoulder-width.

Focus on:

  • Landing softly
  • Maintaining balance
  • Keeping your core engaged

Avoid locking your knees.

Step 3: Raise Your Arms Overhead

As your feet move apart, simultaneously raise your arms out to the sides and overhead.

Focus on:

  • Coordinating arm and leg movement
  • Keeping the motion smooth
  • Maintaining good posture

Your hands may touch overhead if comfortable.

Warrior showcasing How to do Jumping Jacks with proper form

Step 4: Return to the Starting Position

Jump your feet back together while lowering your arms to your sides.

At this stage:

  • Land softly
  • Maintain control
  • Keep breathing steadily

This completes one repetition.

Step 5: Continue Rhythmically

Repeat the movement continuously for the desired time or repetitions.

Maintain a steady pace throughout the exercise.


Jumping Jack Form Checklist

Use this quick checklist to ensure perfect jumping jack form.

  • Keep your chest up
  • Land softly on every repetition
  • Coordinate arm and leg movements
  • Maintain a steady rhythm
  • Keep your core engaged

Perfect form improves performance and reduces injury risk.


Common Jumping Jack Mistakes

Landing Heavily

Problem: Places unnecessary stress on the joints.

Fix: Land softly with slightly bent knees.

Losing Coordination

Problem: Reduces efficiency and rhythm.

Fix: Start slowly and gradually increase speed.

Rounding the Shoulders

Problem: Reduces upper-body mobility.

Fix: Keep your chest up and posture tall.

Holding Your Breath

Problem: Reduces endurance.

Fix: Maintain steady breathing throughout the exercise.

Moving Too Fast

Problem: Causes poor form and unnecessary fatigue.

Fix: Focus on smooth and controlled repetitions.

Quality movement always beats sloppy speed.


Jumping Jack Variations

Once you master the basic jumping jack, different variations can help increase difficulty and improve conditioning.

Half Jacks

A beginner-friendly variation.

How to Do Half Jacks

  • Move only your legs while keeping your arms stationary
  • Maintain a controlled rhythm
  • Land softly

This variation reduces coordination demands.

Low-Impact Jumping Jacks

Ideal for beginners and joint-sensitive individuals.

How to Do Low-Impact Jumping Jacks

  • Step one foot out at a time instead of jumping
  • Raise your arms overhead
  • Alternate sides

This variation reduces impact on the joints.

Cross Jacks

Improves coordination and athleticism.

How to Do Cross Jacks

  • Cross your arms and legs in front of your body
  • Alternate sides each repetition
  • Maintain a steady rhythm

This variation challenges coordination and balance.

Star Jumps

An advanced progression.

How to Do Star Jumps

  • Explosively jump upward
  • Spread your arms and legs wide in mid-air
  • Land softly and reset

This variation develops power and explosiveness.


Final Thoughts

Jumping jacks are one of the most effective conditioning exercises you can master.

They build:

  • Cardiovascular endurance
  • Full-body coordination
  • Muscular endurance
  • Athletic conditioning
  • Functional movement capacity

Progress may feel gradual at first, especially if your cardiovascular fitness is limited. However, with consistent training and proper form, your endurance and conditioning will steadily improve. Learn more about Stretching Here.

One minute of quality movement is always better than one minute of sloppy movement.

Focus on rhythm, control, and consistent effort.

A warrior’s endurance is built one repetition at a time.

Essential Gear for Jumping Jacks

While jumping jacks require no equipment, the following gear can improve your workouts, increase training variety, and help you progress to more challenging variations.

  • Exercise Mat: Cushions your feet during high-rep workouts.
  • Resistance Bands: Add resistance to advanced jumping jack variations.
  • Plyometric Box: Pairs well with explosive jump training.
  • Weighted Vest: Increases intensity and conditioning.
  • Jump Rope: Complements jumping jacks for cardio and endurance training.

Jumping Jack FAQ

Q1: Are jumping jacks good for weight loss?
Yes. Jumping jacks burn calories, elevate heart rate, and can contribute to weight loss when combined with proper nutrition and regular exercise.

Q2: How many jumping jacks should a beginner do?
Most beginners can start with 20-50 repetitions or 30-60 seconds per set while maintaining proper form.

Q3: Can jumping jacks be used as a warm-up?
Yes. Jumping jacks are an excellent warm-up exercise because they increase blood flow, elevate heart rate, and prepare the body for more intense activity.