
Learn how to do Handstand Push-Ups with proper form, avoid common mistakes, and discover the best Handstand Push-Up progressions to build powerful shoulders, stronger triceps, better balance, and advanced bodyweight control.
The Handstand Push-Up is one of the most challenging upper-body exercises in calisthenics. It combines the strength demands of a vertical press with the balance and body control required to hold a handstand.
Whether you’re training for calisthenics, gymnastics, athletic performance, or advanced bodyweight strength, mastering Handstand Push-Ups can take your shoulder and pressing strength to another level.
What Is a Handstand Push-Up?
A Handstand Push-Up is an advanced bodyweight pressing exercise performed while upside down in a handstand position. You lower your head toward the floor by bending your elbows, then press your body back up until your arms are straight.
Unlike a regular push-up, the Handstand Push-Up places most of your bodyweight through your hands and shoulders, making it a highly demanding vertical pressing movement.
Handstand Push-Ups are commonly used in:
- Calisthenics training
- Gymnastics
- Bodyweight strength programs
- Cross-training
- Advanced shoulder workouts
- Handstand skill development
Beginners should first develop a solid handstand, strong shoulders, and sufficient pressing strength before attempting unsupported repetitions.
Benefits of Handstand Push-Ups
Handstand Push-Ups provide several strength, balance, and skill-development benefits.
Benefits include:
- Builds powerful shoulders
- Strengthens the triceps
- Develops upper-body pressing strength
- Improves handstand balance
- Strengthens the core
- Improves body control
- Builds muscular endurance
- Requires minimal equipment
The combination of strength and balance makes Handstand Push-Ups particularly valuable for advanced calisthenics athletes.
Muscles Worked in Handstand Push-Ups
Handstand Push-Ups heavily involve the muscles responsible for vertical pressing and stabilization.
Primary Muscles
- Deltoids
- Triceps
- Upper Chest
Secondary Muscles
- Trapezius
- Serratus Anterior
- Core Muscles
- Forearms
- Glutes
Your shoulders perform most of the pressing work, while your triceps extend the elbows and your core helps maintain a stable inverted position.
How to Do Handstand Push-Ups (Step-by-Step)
Step 1: Set Up Against a Wall
Start with a sturdy wall behind you.
Place your hands on the floor approximately shoulder-width apart.
Keep your fingers spread and actively grip the floor.
Tip: Use a wall when learning Handstand Push-Ups. It provides stability while you develop the strength and technique required for the movement.
Step 2: Kick Up Into a Handstand
Kick your feet up against the wall and establish a stable handstand position.
Your body should be as straight as possible.
Focus on:
- Hands firmly planted
- Arms straight
- Core engaged
- Glutes tight
- Legs together
- Eyes focused between your hands
Avoid excessive arching through your lower back.
Step 3: Brace Your Body
Before beginning the repetition, create full-body tension.
Keep your:
- Abs engaged
- Glutes squeezed
- Legs controlled
- Shoulders active
Think about keeping your body stacked rather than allowing your hips to drift away from the wall.
Step 4: Lower Yourself
Slowly bend your elbows and lower your head toward the floor.
Keep your elbows controlled rather than allowing them to flare excessively outward.
Descend under control until your head approaches the floor or your chosen range of motion.
Step 5: Press Back Up
Drive your hands firmly into the floor and extend your elbows.
Push your body upward until your arms return to full extension.
Keep your core tight and maintain your handstand position throughout the repetition.
Step 6: Reset and Repeat
At the top, stabilize your body before beginning another repetition.
Perform each repetition individually if necessary rather than rushing through multiple repetitions.
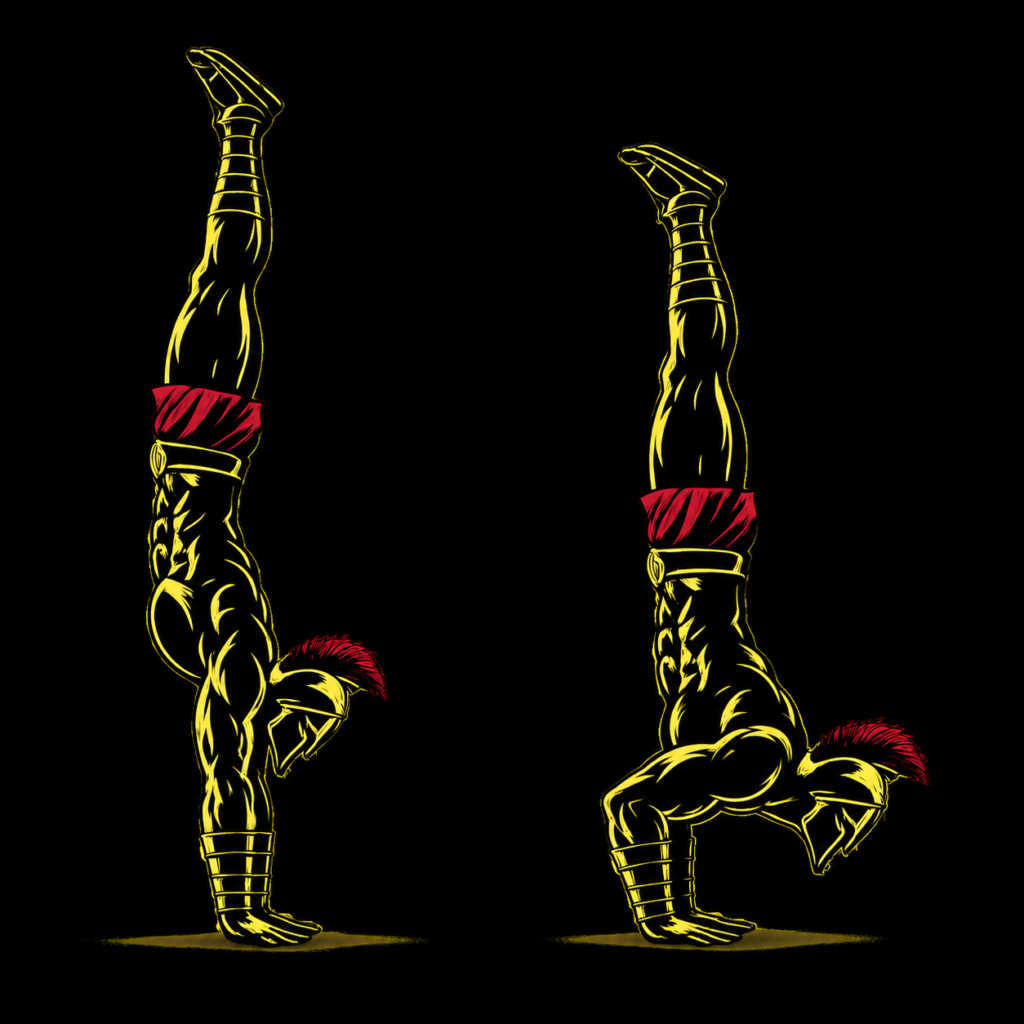
Handstand Push-Up Form Checklist
Use this quick checklist to ensure proper Handstand Push-Up form.
- Place your hands approximately shoulder-width apart
- Spread your fingers for stability
- Keep your core tight
- Squeeze your glutes
- Keep your body controlled
- Lower yourself slowly
- Keep your elbows controlled
- Press strongly through your hands
- Avoid excessive lower-back arching
Proper alignment and control are more important than performing a large number of repetitions.
Common Handstand Push-Up Mistakes
Excessive Lower-Back Arch
Problem: Allowing your ribs and hips to flare creates an excessive banana-shaped handstand and reduces efficient body positioning.
Fix: Brace your abs, squeeze your glutes, and actively keep your ribs controlled.
Flaring the Elbows
Problem: Excessively flared elbows can reduce pressing efficiency and make the movement harder to control.
Fix: Keep your elbows at a controlled angle and allow them to track naturally during the press.
Dropping Too Quickly
Problem: A fast descent reduces control and can place unnecessary stress on the shoulders.
Fix: Lower yourself slowly and deliberately.
Using a Partial Range Without Progressing
Problem: Partial repetitions can be useful for building strength, but relying on them indefinitely may limit your development.
Fix: Gradually increase your range of motion as your strength and control improve.
Losing Hand Pressure
Problem: Relaxing your hands and fingers can make the handstand less stable.
Fix: Spread your fingers and actively grip the floor throughout the movement.
Attempting Freestanding Repetitions Too Early
Problem: Trying unsupported Handstand Push-Ups before developing sufficient handstand control can cause you to lose balance.
Fix: Master wall-supported repetitions and progressively develop your freestanding handstand first.
Handstand Push-Up Progressions and Variations
Once you develop the necessary foundation, these progressions can help you work toward full Handstand Push-Ups.
Pike Push-Ups
A useful beginner progression for developing vertical pressing strength.
How to Do Pike Push-Up
- Start in a pike position.
- Raise your hips high.
- Bend your elbows and lower your head toward the floor.
- Press back up.
- Keep your core engaged throughout the movement.
Elevated Pike Push-Ups
A more challenging progression that places greater emphasis on the shoulders.
How to Do Elevated Pike Push-Up
- Place your feet on a stable elevated surface.
- Keep your hands on the floor.
- Raise your hips into a pike position.
- Lower your head toward the floor.
- Press back to the starting position.
Wall Handstand Hold
Develops the balance, shoulder endurance, and body control needed for Handstand Push-Ups.
How to Do a Wall Handstand Hold
- Place your hands on the floor near a wall.
- Kick your feet up.
- Establish a stable handstand.
- Brace your core and squeeze your glutes.
- Hold the position for a controlled amount of time.
Partial Handstand Push-Up
Builds pressing strength through a limited range of motion.
How to Do Partial Handstand Push-Up
- Kick into a wall-supported handstand.
- Lower yourself partway toward the floor.
- Press back up.
- Gradually increase your depth as your strength improves.
Full Wall Handstand Push-Up
The standard beginner-accessible version of the full movement.
How to Do Full Wall Handstand Push-Up
- Kick into a stable wall handstand.
- Brace your entire body.
- Lower your head toward the floor.
- Press strongly through your hands.
- Return to a straight-arm handstand.
Freestanding Handstand Push-Up
The advanced variation.
How to Do Freestanding Handstand Push-Up
- Establish a stable freestanding handstand.
- Maintain balance using your hands and fingers.
- Bend your elbows and lower under control.
- Press back upward without touching a wall.
- Stabilize at the top before repeating.
Freestanding Handstand Push-Ups require exceptional balance, pressing strength, and body control.
Final Thoughts
The Handstand Push-Up is one of the ultimate bodyweight exercises for developing shoulder strength, pressing power, balance, and full-body control.
It develops:
- Shoulder strength
- Triceps strength
- Upper-body pressing power
- Handstand balance
- Core stability
- Body control
Don’t rush toward freestanding repetitions. Build your foundation with Pike Push-Ups, Elevated Pike Push-Ups, Handstand Holds, and Wall Handstand Push-Ups before progressing to unsupported repetitions. Learn more about Calisthenics Skills here.
Focus on clean technique, controlled movement, and gradual progression.
Master the handstand first. Then earn the press.
Essential Gear for Handstand Push-Ups
Handstand Push-Ups require very little equipment, but the right gear can make training safer and more comfortable.
- Exercise Mat: Provides cushioning beneath your head and hands during training.
- Wall: Essential for practicing supported Handstand Push-Ups and handstand holds.
- Parallettes: Can provide a comfortable neutral grip and increase the available range of motion.
- Handstand Blocks: Useful for improving hand positioning and developing advanced pressing strength.
- Resistance Bands: Can be used for assistance by tying them to a Pull-Up Bar/Sturdy Elevated Object to learn the movement’s progression.
Handstand Push-Up FAQ
Q1: Are Handstand Push-Ups harder than regular push-ups?
Yes. Handstand Push-Ups are significantly more demanding because they require you to support and press a large portion of your bodyweight vertically using your shoulders and arms.
Q2: Can beginners do Handstand Push-Ups?
Beginners should first build the required strength and balance through Pike Push-Ups, Elevated Pike Push-Ups, Wall Handstand Holds, and partial Handstand Push-Ups before attempting full repetitions.
Q3: How many Handstand Push-Ups should I do?
Beginners working toward the movement can start with 3-5 controlled repetitions for 2-3 sets using an appropriate progression. Advanced trainees can increase repetitions gradually while maintaining strict form.