Best Weighted Vests for Calisthenics & Home Workouts (2026)

Once bodyweight exercises become easier, doing more and more reps is not always the answer.

You can make the exercise harder instead.

⇛ That’s where a weighted vest becomes one of the most useful pieces of equipment for calisthenics.

Wear it during exercises you already perform and your body now has additional resistance to move.

Weighted:

  • Push-ups
  • Pull-ups
  • Dips
  • Squats
  • Lunges
  • Step-ups

But there’s a problem:

Not every weighted vest gives you the same progression.

Some offer relatively light loading.

Others can be progressively loaded to seriously heavy resistance.

And some don’t include weights at all—you fill them yourself.

This guide keeps things simple.


Quick Answer (Don’t Overthink It)

⇛ Want the best overall weighted vest?
Go for the 15–50KG Adjustable Weighted Vest.

Its biggest advantage is progression. Multiple maximum-load configurations are available, and the listing also offers compatible steel weights, giving you a more complete weighted-training setup.

⇛ Want a cheaper and simpler option?
Go for the 1–110LBS Adjustable Weighted Vest.

It comes in several load configurations and gives you plenty of room to progress without going straight for the heavier premium option.

⇛ Want something completely different?
Check out the Custom-Fill Weighted Vest in the Worthy Mention section.

Instead of relying on proprietary plates, its compartments can be filled with materials such as sand or steel ball bearings.


Why a Weighted Vest Is a Game-Changer

Calisthenics begins with your own bodyweight.

But eventually, your body adapts.

You might go from struggling with five push-ups to comfortably performing twenty.

Or from your first pull-up to sets of ten.

At that point, you have two choices:

Do more reps…

Or make each rep harder.

⇛ A weighted vest gives you the second option.

Because the load sits around your torso, you can add resistance while keeping your hands free.

That makes weighted vests useful for:

  • Weighted pull-ups
  • Weighted chin-ups
  • Weighted dips
  • Weighted push-ups
  • Squats
  • Lunges
  • Step-ups
  • Walking
  • General conditioning

Instead of abandoning the exercises that built your strength, you can continue progressing them.


1. 15–50KG Adjustable Weighted Vest (Best Overall)

Key Features:

  • Adjustable weighted-vest design
  • Multiple maximum-load options
  • 15KG, 20KG, 35KG, and 50KG configurations shown
  • Multiple weight pockets around the torso
  • Oxford-cloth construction
  • Compatible steel weights available from the same listing
  • Designed for progressive resistance training

Why This One Wins:

This is the strongest overall choice of the three for one major reason:

⇛ Long-term progression.

You’re not buying a vest that becomes useless as soon as you outgrow a light resistance level.

The listing offers versions designed around maximum loads of:

  • 15KG
  • 20KG
  • 35KG
  • 50KG

That gives beginners, intermediates, and advanced athletes different options depending on how far they want to take weighted training.

Even better, Product 1 also sells the steel weights designed for the vest.

That matters.

You don’t necessarily have to source your own filler or improvise weights. You can buy the vest and compatible steel loading pieces from the same product listing.

For someone who plans on progressively adding resistance to calisthenics exercises over the long term, Product 1 makes the most sense.

Best For:

  • Weighted calisthenics
  • Pull-ups
  • Chin-ups
  • Dips
  • Push-ups
  • Squats and lunges
  • Progressive overload
  • Intermediate and advanced trainees
  • Long-term home training

Pros:

✓ Very high maximum loading options
✓ Several configurations available
✓ Steel weights available separately
✓ Excellent progression potential
✓ Weight distributed through multiple pockets
✓ Suitable for much more than one exercise

Cons:

❌ Heavier configurations may be unnecessary for beginners
❌ Total cost increases as you add more weight
❌ Heavy loading requires a strong strength foundation and controlled progression
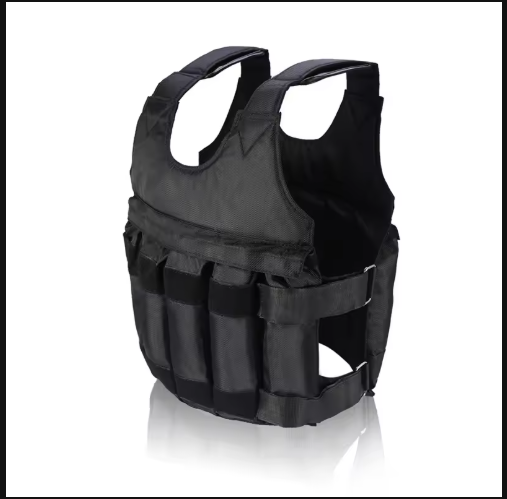
Best Weighted Vest for Calisthenics(First)

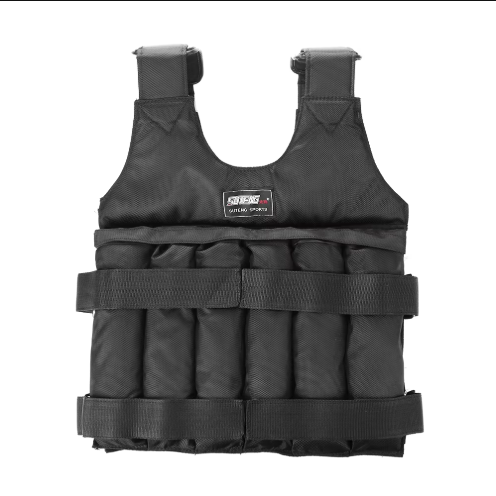
2. 1–110LBS Adjustable Weighted Vest (Best Value)

Key Features:

  • Adjustable loading system
  • Multiple weight configurations
  • 1–3KG option shown
  • 1–15KG option shown
  • 1–20KG option shown
  • 1–35KG option shown
  • Polyester construction
  • Adjustable fit around the torso
  • Compact weighted-vest design

Why Choose This:

Not everyone needs a vest capable of going all the way to 50KG.

For many home trainees, Product 2 offers the more practical entry point.

The listing provides multiple configurations, meaning you can choose something appropriate for your current training instead of immediately buying the heaviest possible setup.

That makes it particularly useful if you’re moving from:

Bodyweight training → weighted calisthenics.

Start conservatively.

Build strength.

Then gradually increase the resistance.

Its design also keeps the weight close to the torso, which is exactly what you want from a basic weighted vest.

Best For:

  • Beginners to weighted calisthenics
  • Push-ups
  • Pull-ups
  • Dips
  • Squats
  • Lunges
  • Walking
  • General home fitness

Pros:

✓ Multiple loading configurations
✓ Beginner-friendly options available
✓ Adjustable design
✓ Compact construction
✓ Good progression range
✓ Lower barrier to weighted training

Cons:

❌ Lower maximum practical progression than Product 1 depending on the selected version
❌ You need to carefully check which weight configuration you’re ordering
Best Weighted Vest for Calisthenics(Second)

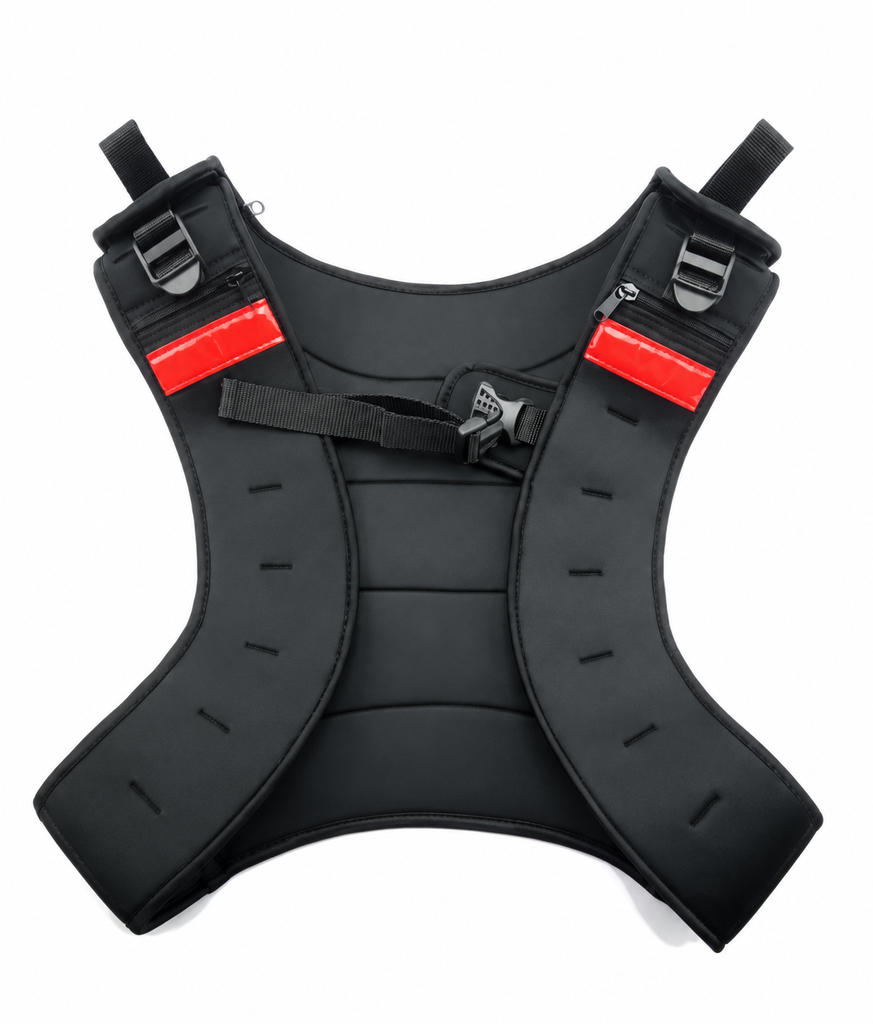
Worthy Mention – Custom-Fill Weighted Vest

This one doesn’t take the #1 or #2 position.

But it was too different to leave out.

What Makes It Different?

Unlike the two conventional adjustable weighted vests above, this design lets you add your own filling material to create the resistance.

The vest can be filled using materials such as:

  • Sand
  • Steel ball bearings

This gives it a completely different appeal.

Instead of buying a conventional plate-loading system, you can determine the load through the material placed inside its compartments.

Key Features:

  • Custom-fill design
  • Fillable weight compartments
  • Can use sand or steel ball bearings
  • Adjustable fit
  • Compact torso design
  • Suitable for running and general training
  • Distinctive open-sided shape

Why It Earns a Worthy Mention:

⇛ Flexibility.

If you already have access to suitable filling material, this design gives you an unusual amount of freedom.

Want inexpensive resistance?

Sand can make sense.

Want more weight without requiring as much volume?

Steel ball bearings are considerably denser.

The open-sided design is also noticeably different from Products 1 and 2, making this an interesting alternative for someone who doesn’t want the traditional pocket-covered weighted vest.

But there is an important trade-off:

⇛ You are responsible for the loading system.

The filler needs to be securely contained and distributed evenly. Loose or poorly secured material can shift during movement and make training uncomfortable or unpredictable.

For that reason, I wouldn’t rank it above Products 1 and 2 for most people.

But as an alternative?

It absolutely deserves a place here.

Pros:

✓ Custom-fillable
✓ Can use sand or steel ball bearings
✓ Unusual and versatile design
✓ Adjustable fit
✓ Doesn’t lock you into one proprietary weight system

Cons:

❌ Filler must be sourced separately
❌ Loading is less convenient than dedicated removable weights
❌ Poorly distributed filler may shift during exercise
Best Weighted Vest for Calisthenics(Third)

Comparison – Choose Your Arsenal

Feature15–50KG Vest1–110LBS VestCustom-Fill Vest
WBA PickBest OverallBest ValueWorthy Mention
Loading StyleRemovable weightsAdjustable loadingUser-filled
Listed Range/OptionsUp to 50KGMultiple options up to 35KG shownDepends on filler
Steel Weights AvailableYesVaries by optionUse your own
Beginner FriendlyYes, with lighter loadingExcellentModerate
Advanced PotentialExcellentHighDepends on loading
ConvenienceHighHighModerate
Best ForLong-term progressionMost home traineesDIY/custom loading

How to Start Training With a Weighted Vest

The biggest mistake you can make is buying a heavy vest and immediately trying to prove how much weight you can handle.

Don’t.

If you can already perform an exercise confidently with your bodyweight, begin with a relatively small additional load.

For example, use your vest with:

⇛ Keep your normal technique.

⇛ Add weight gradually.

⇛ Increase resistance only when you can control your current load.

The goal isn’t simply to wear the heaviest vest possible.

The goal is to make your exercises progressively harder without destroying your form.


Before You Buy

Pay particular attention to the variation you select.

Weighted-vest listings often contain several versions under one product page, and the headline maximum weight doesn’t necessarily mean every option includes that amount of resistance.

Before ordering, check:

  • Which vest configuration you’ve selected
  • Whether weights are included or sold separately
  • Maximum supported load
  • Number and position of weight pockets
  • How the vest adjusts around your torso
  • Whether replacement/additional weights are available
  • Current product price and shipping cost

For Product 1 specifically, the availability of separate steel weights is a major advantage—but make sure you’re selecting the vest, weights, or combination you actually intend to buy before checkout.


Weighted Vest Safety

Weighted training rewards patience.

A weighted vest changes the resistance your muscles and joints have to control, so don’t jump straight from bodyweight exercises to extremely heavy loading.

Use a load that allows you to maintain:

  • Controlled repetitions
  • Stable posture
  • Full-body tension
  • Proper exercise technique
  • A comfortable, secure vest fit

If the vest is bouncing, shifting excessively, changing your technique, or forcing you into sloppy repetitions, reduce the load.

And don’t assume that because a vest can theoretically hold 35KG or 50KG, you should actually train with that much.

⇛ Capacity is not a recommendation.

Earn the heavier loads gradually.


Final Verdict

⇛ Want the best weighted vest for serious long-term progression?
Go for Product 1 – 15–50KG Adjustable Weighted Vest.

The multiple maximum-load configurations and availability of matching steel weights make it the strongest overall choice.

⇛ Want the best value and a more accessible starting point?
Go for Product 2 – 1–110LBS Adjustable Weighted Vest.

Its multiple configurations make it especially attractive for someone beginning weighted calisthenics.

⇛ Want to build your own loading setup?
Consider the Custom-Fill Weighted Vest – Worthy Mention.

Its sand/steel-ball filling system makes it genuinely different from the other two.


Final Words

Eventually, bodyweight gets easier.

That’s a victory.

But it also means it’s time to progress.

You don’t need to abandon calisthenics.

You can make calisthenics harder.

Add resistance.

Keep your form.

Progress gradually.

And turn the same fundamental exercises into a new challenge.

Affiliate Disclosure: WarriorBodyAcademy may earn a commission when you purchase through affiliate links in this article, at no extra cost to you. We only recommend products that we believe are useful for our readers and training community.
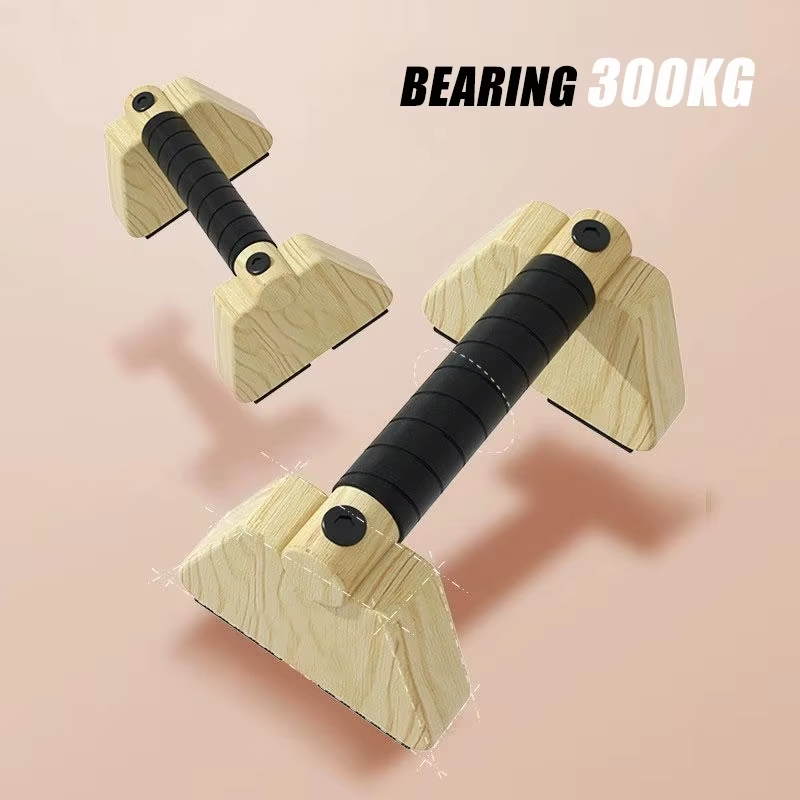
Best Push-Up Handles for Home Workouts (2026) – Build Strength with Better Form

Want stronger push-ups, more comfortable wrist positioning, and a simple way to upgrade your home workouts…

Without buying expensive gym equipment?

⇛ Then push-up handles are worth considering.

They raise your hands off the floor and give you a dedicated handle to grip while performing push-ups.

But here’s the problem:

Most beginners either:

  • Buy flimsy handles
  • Choose uncomfortable grips
  • Pay too much for a basic pair
  • Or buy equipment they don’t actually need

This guide keeps it simple.

Here are 2 push-up handle options for home workouts and calisthenics.


Quick Answer

⇛ Want the best overall option?
Go for the H-Shaped Non-Slip Push-Up Handles.

You get a stable-looking H-shaped design, padded grip areas, four color options, and a reasonable price.

⇛ Want something simple and compact?
Go for the S-Type Carbon Steel Push-Up Handles.

They’re straightforward, compact, and designed specifically for push-up training.


Why Push-Up Handles Are Useful

Regular push-ups are already one of the best bodyweight exercises you can perform.

But push-up handles can make them even more practical.

They can give you:

  • A neutral-style grip instead of placing your palms flat on the floor
  • Extra clearance between your body and the ground
  • A comfortable gripping surface
  • More room for a deeper push-up range of motion when appropriate
  • A portable tool for home workouts
  • An easy way to add variety to your push-up training

⇛ And unlike large gym equipment, they take up very little space.


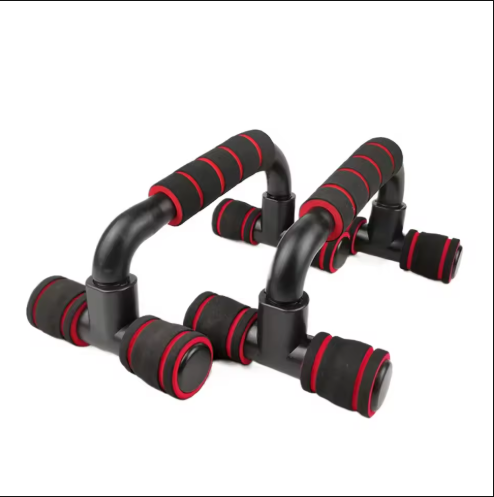
1. H-Shaped Non-Slip Push-Up Handles (Best Overall)

Key Features:

  • H-shaped support design
  • Multiple foam-covered grip and contact points
  • Non-slip design
  • Compact home-training setup
  • Four color options
  • Orange, blue, red, and green options

Why This One Wins:

For most people, this is the pair I’d choose.

The H-shaped structure gives you a broad base on the floor, while the padded areas provide dedicated surfaces for your hands and contact points underneath.

But there’s another simple advantage:

⇛ You actually get some choice.

Instead of being stuck with one design, Product 1 comes in:

  • Orange
  • Blue
  • Red
  • Green

For a simple piece of home workout equipment, that makes Product 1 a strong overall package.

Best For:

  • Standard push-ups
  • Deep push-ups
  • Home workouts
  • Calisthenics beginners
  • People who prefer padded handles
  • Anyone wanting multiple color choices

Pros:

✓ Four color options
✓ H-shaped base
✓ Multiple padded contact areas
✓ Compact and portable
✓ Reasonably priced

Cons:

❌ Foam grips can wear over time
❌ Still limited mainly to floor-based exercises

Best Push-Up Handles for Home Workouts(First)

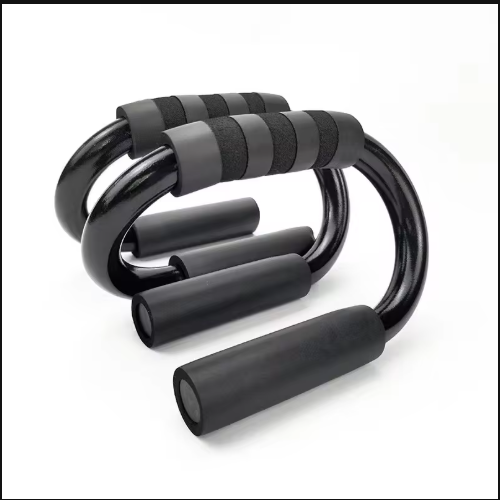
2. S-Type Carbon Steel Push-Up Handles (Simple & Strong)

Key Features:

  • S-type frame
  • Carbon steel construction
  • Foam-covered handles
  • Compact design
  • Designed for push-up training
  • Black finish

Why Choose This:

Maybe you don’t care about multiple colors or a more elaborate H-shaped design.

You just want:

⇛ A simple pair of handles for your push-ups.

That’s where Product 2 makes sense.

The S-shaped carbon steel frame keeps the design straightforward, while the padded upper handles give your hands a dedicated gripping surface.

They’re also compact, making them easy to keep around a home workout area without taking up much room.

Best For:

  • Standard push-ups
  • Home strength training
  • Chest workouts
  • Triceps training
  • Beginners
  • Simple workout setups

Pros:

✓ Carbon steel construction
✓ Simple S-shaped design
✓ Padded handles
✓ Compact and easy to store
✓ Straightforward push-up tool

Cons:

❌ Only one color option shown
❌ Less versatile than Product 1

Best Push-Up Handles for Home Workouts(Second)

Comparison – Choose Your Arsenal

FeatureH-Shaped HandlesS-Type Handles
DesignH-shapedS-shaped
MaterialFitness support frame with foam gripsCarbon steel
GripPaddedPadded
Color OptionsOrange, Blue, Red, GreenBlack
PortabilityHighHigh
Best ForOverall home trainingSimple push-up training
WBA PickBest OverallSimple & Strong

Beginner Plan

Listen carefully—this is where most people fail.

Even with the BEST push-up handles, you won’t get stronger if you don’t train consistently.

Start with:

⇛ Train 3–4 times/week

Start simple.

Build your chest, triceps, shoulders, and core strength.

Then gradually progress toward harder push-up variations.


Important Buying Advice

Before you click:

Make sure you choose handles that suit your training.

Check:

  • The handles sit firmly on your floor
  • The bases don’t wobble
  • The grip feels comfortable
  • The handles don’t slide during push-ups
  • Both handles are positioned evenly before every set
  • The product option you want is available before purchasing

And remember:

⇛ Push-up handles don’t automatically fix your form.

Keep your body controlled, brace your core, and don’t turn the extra height into an excuse to excessively flare your elbows or lose your body position.

If the increased range of motion feels uncomfortable, don’t force yourself as deep as possible.

Use a range you can control.


Final Verdict

⇛ Want the best overall package?
Go for the H-Shaped Non-Slip Push-Up Handles.

The H-shaped design, padded contact areas, four color choices, and reasonable pricing make Product 1 my pick for most home trainees.

⇛ Want simple and strong?
Go for the S-Type Carbon Steel Push-Up Handles.

The carbon steel construction, compact S-shaped frame, and padded handles make them a straightforward option if all you want is a dedicated pair of push-up handles.


Final Words

You don’t need expensive equipment to build a strong upper body.

You need:

  • Push-up handles
  • Proper form
  • Progressive training
  • Consistency
  • Discipline

Start with basic push-ups.

Build your strength.

Progress to harder variations.

And keep earning every rep.

Affiliate Disclosure: WarriorBodyAcademy may earn a commission when you purchase through affiliate links in this article, at no extra cost to you. We only recommend products that we believe are useful for our readers and training community.
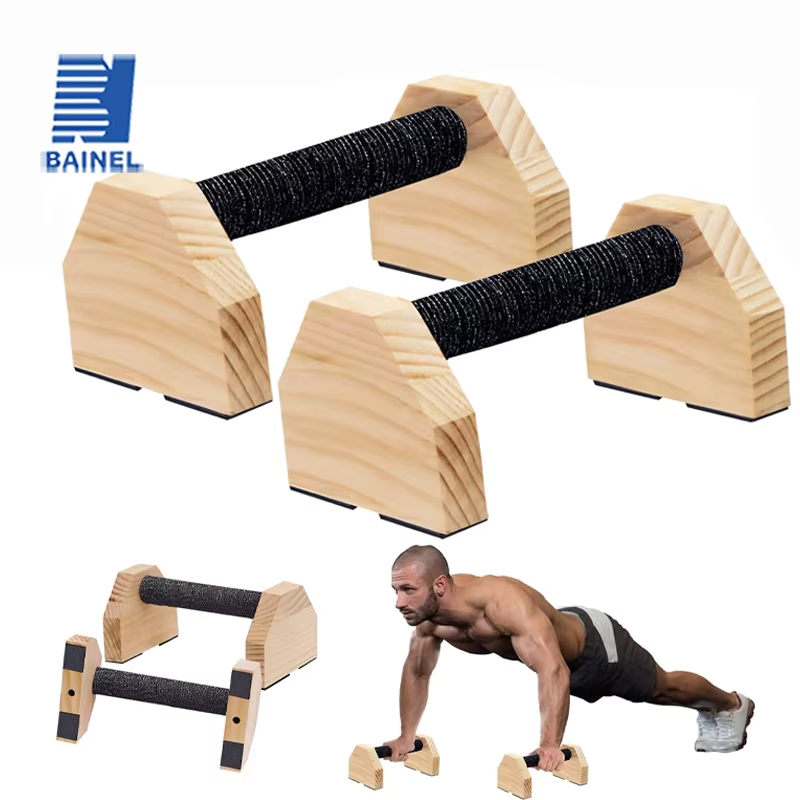
Best Parallettes for Calisthenics (2026) – Start Your Calisthenics Journey

If you’re serious about starting calisthenics, building upper-body strength, and mastering bodyweight skills…

You need ONE thing:

A good pair of parallettes.

No gym. No complicated machines.

Just your bodyweight, a stable surface, and the right equipment.

But here’s the problem:

Most beginners either:

  • Buy unstable parallettes
  • Choose the wrong height
  • Or spend too much on equipment they barely use

This guide fixes that.


Quick Answer (Don’t Overthink It)

⇛ Want the BEST overall setup?
Go for the Beech Wood Parallettes with Non-Slip Handles

They have more size options, a much stronger review history, and a listed load capacity of up to 300 kg.

⇛ Want something simpler and cheaper?
Go for the Classic Wooden Parallettes

They offer the essential features you need without the higher price.


Why Parallettes are Non-Negotiable

Parallettes aren’t just for fancy calisthenics skills.

They make basic exercises more comfortable while opening the door to more advanced movements.

You can use them for:

And the best part?

⇛ You can train almost anywhere at home.

A good pair of parallettes can become one of the most versatile pieces of equipment in your calisthenics setup.


1. Beech Wood Parallettes with Non-Slip Handles (Best Overall)

Key Features:

  • Durable beech wood construction
  • Available in 20 cm, 30 cm, 40 cm, and 50 cm lengths
  • Listed support capacity of up to 300 kg
  • Non-slip cotton grip
  • Includes non-slip stickers
  • Stable wooden bases
  • Designed for home strength training and calisthenics

Why This One Wins:

This is the pair I’d choose for someone who wants to take calisthenics seriously.

The biggest advantage is the range of length options.

You can choose between 20 cm, 30 cm, 40 cm, and 50 cm, allowing you to select the size that best fits your preferred hand position and training space.

And don’t confuse the length with the height.

For example, the 50 cm version shown in the listing measures approximately 500 mm long, 105 mm wide, and 95 mm high.

So these are still relatively low-profile parallettes despite offering a longer handle.

The beech wood construction also gives them a sturdy, natural feel, while the non-slip grip helps keep your hands secure during training.

The bases are designed to provide a stable platform, which is exactly what you want when you’re supporting your entire bodyweight.

And because you have four length options, you aren’t locked into a single configuration.

Pros:

✓ Durable beech wood construction
✓ Four length options
✓ Listed 300 kg support capacity
✓ Non-slip grip
✓ Non-slip stickers included
✓ Stable base design
✓ Suitable for beginner-to-advanced calisthenics

Cons:

❌ More expensive than the basic option
❌ Longer versions take up more floor space

best parallettes for calisthenics(First)

2. Classic Wooden Parallettes (Simple & Affordable)

Key Features:

  • Solid wooden construction
  • Available in 20 cm, 30 cm, and 40 cm lengths
  • Non-slip surface
  • Designed for strength training and calisthenics
  • Compact design
  • Lightweight setup
  • Includes two parallettes

Why Choose This:

If you want:

⇛ “Just give me a simple pair of parallettes that gets the job done.”

This is it.

There are no unnecessary extras.

You get a straightforward wooden design that can be used for push-ups, L-sits, holds, handstand practice, and other bodyweight exercises.

The three available lengths — 20 cm, 30 cm, and 40 cm — give you enough choice for most home calisthenics setups.

The shorter options are particularly convenient if you’re working with limited space, while the longer versions give you more room for your hands.

The wooden construction also provides a firm base, while the non-slip design helps keep the parallettes planted during your workouts.

If you’re just getting started and don’t need the additional size option offered by Product 1, this is a straightforward choice.

Pros:

✓ Simple and practical
✓ Three length options
✓ Wooden construction
✓ Non-slip design
✓ Compact setup
✓ Good for beginners
✓ Lower-cost option

Cons:

❌ Only three length options
❌ Fewer features than the first option
❌ Less versatile for users who want the 50 cm option

best parallettes for calisthenics(Second)

Comparison – Choose Your Arsenal

FeatureBeech Wood ParallettesClassic Wooden Parallettes
Length Options20, 30, 40, 50 cm20, 30, 40 cm
ConstructionBeech woodSolid wood
Non-Slip GripYesYes
Non-Slip FeaturesGrip + stickersYes
Listed Support CapacityUp to 300 kgNot specified
Number of Parallettes22
Best ForSerious calisthenicsBeginners & budget buyers
Main AdvantageMore size options & featuresSimple & affordable

Beginner Plan

Listen carefully—this is where most people fail.

Even with the BEST parallettes, you won’t progress if you don’t train smart.

Start with:

⇛ Train 3–4 times/week

Start simple.

Build your wrist, shoulder, core, and pressing strength.

Then gradually move toward harder calisthenics skills.


Important Buying Advice

Before you click:

Make sure you choose the right length for your training.

20 cm:

A compact option for basic exercises and smaller training spaces.

30 cm:

A balanced middle-ground option for general calisthenics training.

40 cm:

More room for your hands and a little more versatility.

50 cm:

The longest option offered by Product 1, giving you additional handle length while still keeping the parallettes relatively low to the ground.

Also check:

  • The bases are stable
  • The grip feels comfortable
  • The parallettes don’t slide during training
  • The length fits your preferred hand position
  • You have enough floor space
  • Your preferred size is available before purchasing

And remember:

⇛ Longer doesn’t automatically mean better.

Choose the length that fits your training style and available space.


Final Verdict

⇛ Want maximum versatility?
Go for the Beech Wood Parallettes with Non-Slip Handles.

The combination of beech wood construction, four length options, non-slip grip, stable bases, and a listed 300 kg support capacity makes it the better overall package.

⇛ Want simple and affordable?
Go for the Classic Wooden Parallettes.

They’re straightforward, compact, and give you everything you need to start practicing the fundamentals of calisthenics.

But if the price difference isn’t a deal-breaker?

I’d take the first pair.


Final Words

You don’t need a gym to start calisthenics.

You don’t need expensive machines.

You need:

  • A pair of parallettes
  • A basic training plan
  • Consistency
  • Discipline

Start with the basics.

Build your strength.

Master your body.

Then take your calisthenics training to the next level.

Affiliate Disclosure: WarriorBodyAcademy may earn a commission when you purchase through affiliate links in this article, at no extra cost to you. We only recommend products that we believe are useful for our readers and training community.
Best Yoga Blocks for Exercises (2026) – Improve Mobility Fast

If you’re serious about improving your mobility, flexibility, balance, and exercise form…

You need one simple piece of equipment:

Yoga blocks.

No expensive equipment.

No complicated setup.

But here’s the problem:

Most people either:

  • Buy a flimsy block that doesn’t provide enough support
  • Buy an overpriced set they don’t actually need
  • Or have no idea which type is best for exercise

This guide fixes that.


Quick Answer (Don’t Overthink It)

⇛ Want the BEST overall yoga block?
Go for the EVA Foam Yoga Block Props Brick
(Simple, versatile, affordable)

⇛ Want more equipment in one package?
Go for the 2pcs Yoga Kneeling Mat + 2pcs EVA Gym Blocks Set
(Two blocks + two kneeling pads)


Why Yoga Blocks are Non-Negotiable

Yoga blocks aren’t just for yoga.

They can make a huge difference when you’re working on:

  • Flexibility
  • Mobility
  • Balance
  • Stretching
  • Exercise modifications
  • Floor-based exercises
  • Difficult positions

A block essentially brings the floor closer to you.

That means you don’t have to force your body into a position it isn’t ready for.

⇛ Better support = better positioning.

And better positioning means you can focus on performing the movement correctly instead of fighting against your lack of mobility.


Best Yoga Blocks for Exercises

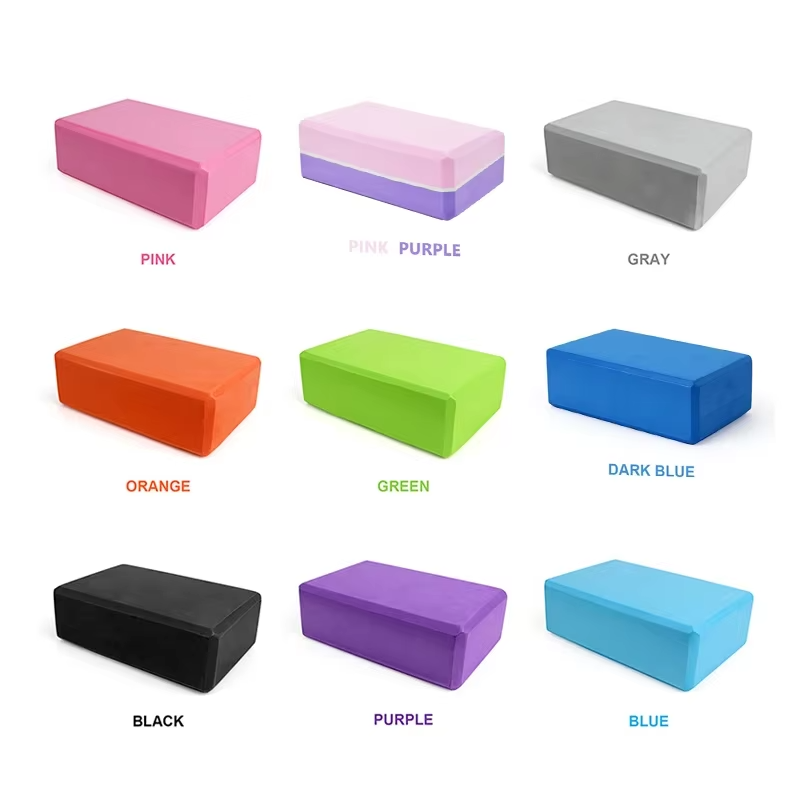
1. EVA Foam Yoga Block Props Brick (Best Overall)

Key Features:

  • EVA foam construction
  • Lightweight and easy to carry
  • Rectangular design
  • Multiple height positions
  • Suitable for stretching and mobility
  • Available in multiple colors
  • Extremely affordable

Why This One Wins:

This is the yoga block we would pick for most people.

Why?

Because it keeps things simple.

You get one solid EVA foam block that can be used for:

  • Hamstring stretches
  • Hip mobility
  • Balance exercises
  • Yoga positions
  • Flexibility training
  • Exercise modifications

You can also rotate the block to change its effective height.

⇛ That’s a BIG advantage when you’re gradually improving your mobility.

You don’t need some giant, complicated accessory.

You need a stable block that does its job.

Pros:

✓ Excellent price
✓ Simple and versatile
✓ Lightweight
✓ Multiple positioning options
✓ Great for beginners
✓ Takes up almost no storage space

Cons:

❌ Only one block included
❌ No kneeling pads
❌ You’ll need a second block for exercises requiring symmetrical support

First of the Best Yoga Blocks for Exercises

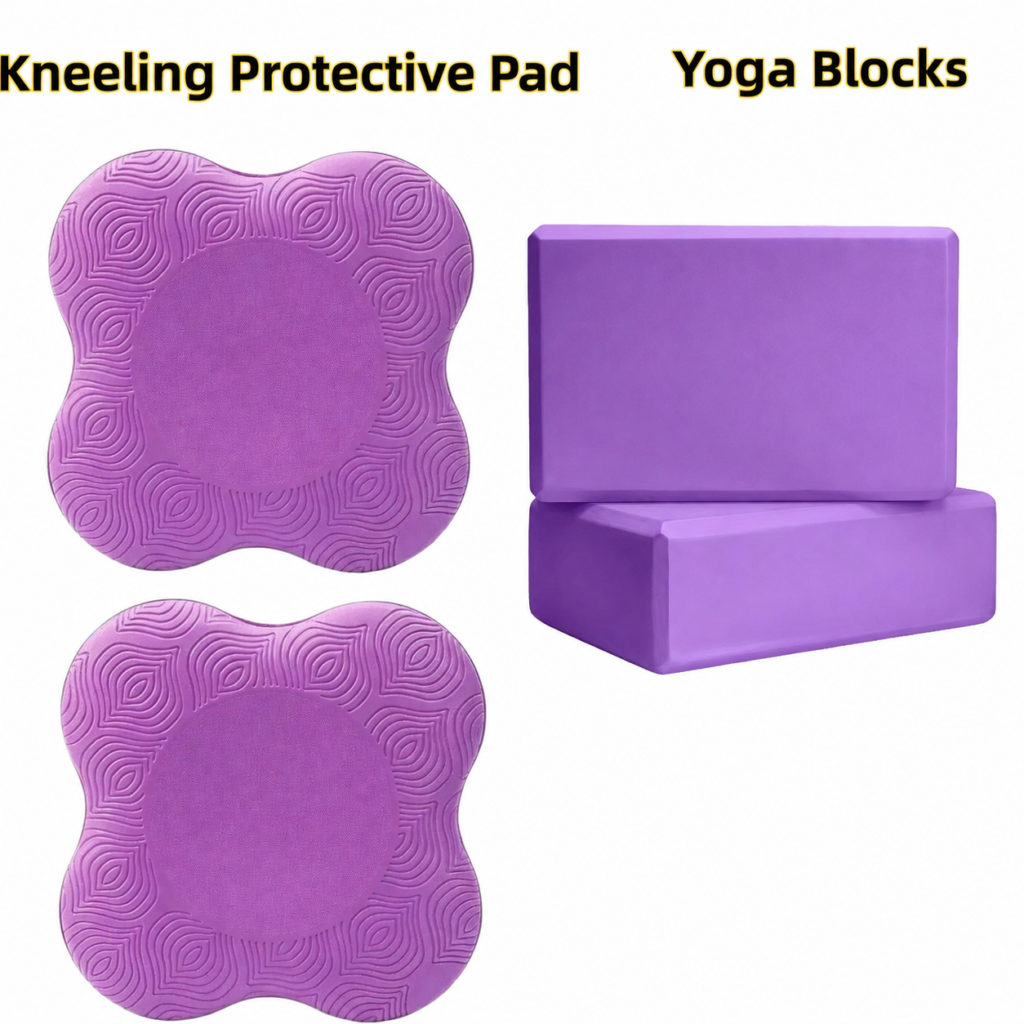
2. 2pcs Yoga Kneeling Mat + 2pcs EVA Gym Blocks (Best Value Set)

Key Features:

  • 2 EVA foam yoga blocks
  • 2 kneeling pads
  • Designed for home exercise
  • Useful for stretching and mobility
  • More versatile than a single block
  • Multiple color options

Why Choose This:

If the first option is about simplicity, this one is about versatility.

You’re getting:

⇛ 2 yoga blocks + 2 kneeling pads

That’s a lot more useful if you’re building your home workout setup from scratch.

Two blocks are especially handy for movements that require equal support on both sides.

And the kneeling pads?

They’re useful when your workout involves spending a significant amount time on your knees.

So instead of buying several accessories separately, you get everything in one package.

Pros:

✓ Two blocks included
✓ Two kneeling pads included
✓ More versatile setup
✓ Great for floor-based training
✓ Excellent for mobility and stretching

Cons:

❌ More expensive than a single block
❌ Takes up more storage space
❌ Kneeling pads may be unnecessary if you already own a good exercise mat

Second of the Best Yoga Blocks for Exercises

Comparison – Choose Your Arsenal

FeatureEVA Foam Block2 Blocks + Kneeling Pads
Blocks12
Kneeling PadsNoYes
VersatilityHighVery High
Mobility WorkExcellentExcellent
StretchingExcellentExcellent
Beginner FriendlyYesYes
StorageMinimalModerate
Best ForSimple setupComplete home setup

Beginner Plan

Listen carefully—this is where most people misuse yoga blocks.

Don’t use a block to force yourself deeper into a stretch.

Use it to make the movement more manageable.

Start with:

  • Use a block to bring the floor closer during forward stretches
  • Use it as support during balance exercises
  • Place your hands on the blocks during mobility drills when reaching the floor is difficult
  • Use two blocks when you need symmetrical support
  • Gradually reduce your reliance on the blocks as your mobility improves

⇛ Start with 10–15 minutes of mobility work, 3–5 times per week.

That’s it.

Consistency beats forcing a deeper stretch.


Important Buying Advice

Before you click:

Make sure:

  • The block is made from reasonably firm EVA foam
  • You choose the correct quantity for your training
  • You have enough floor space to use it safely
  • You don’t buy extra accessories you already own
  • You pair it with a stable exercise surface

And remember:

⇛ One good block is better than a huge pile of equipment you never use.

If you’re only interested in stretching and mobility, the single EVA block is enough for most people.

If you’re building a more complete home setup, the two-block set makes more sense.


Final Verdict

⇛ Want simple, affordable, and effective?
Go for the EVA Foam Yoga Block Props Brick

⇛ Want maximum versatility?
Go for the 2pcs Yoga Kneeling Mat + 2pcs EVA Gym Blocks Set

For most WarriorBodyAcademy readers, the EVA Foam Yoga Block is our Best Overall pick.

It’s inexpensive, compact, versatile, and does exactly what a yoga block needs to do.

But if you’re starting your home gym from scratch and want two blocks plus knee support, the four-piece set is the better value.


Final Words

You don’t need a fancy yoga studio.

You don’t need expensive mobility equipment.

You need:

  • A good yoga block
  • Consistent mobility work
  • Patience
  • Discipline

Use the block to make difficult positions more accessible.

Then, as your mobility improves, reduce the assistance.

And because yoga blocks are primarily used during floor-based training, pairing them with a quality Exercise Mat makes your setup even better. Exercise Mats

Build your equipment wisely.

Train consistently.

And keep getting stronger.

Affiliate Disclosure: WarriorBodyAcademy may earn a commission when you purchase through affiliate links in this article, at no extra cost to you. We only recommend products that we believe are useful for our readers and training community.
Grip Slipping During Workouts? Here’s How to Fix It

Grip slipping during workouts is one of the most frustrating problems you can face in the gym.

Whether you’re doing pull-ups, chin-ups, deadlifts, rows, or climbing, losing your grip can end your set before your muscles are actually tired.

The good news?

You don’t always need stronger hands.

Sometimes, you simply need better grip.


Why Your Grip Keeps Slipping

If your hands keep slipping during workouts, it’s usually because of:

  • Sweaty palms
  • Humid weather
  • Smooth or painted bars
  • Long training sessions
  • Moisture reducing friction between your hands and the equipment

A weak grip isn’t always the problem.

Often, it’s your hands losing traction.

This can lead to:

  • ❌ Missed reps
  • ❌ Poor workout performance
  • ❌ Less muscle activation
  • ❌ Higher risk of losing control of the bar

The Simple Fix

Instead of squeezing the bar harder…

Use Gym Chalk (Magnesium Chalk).

Gym chalk absorbs moisture from your hands, creating more friction between your skin and the bar so you can hold on longer and train with confidence.

It’s one of the simplest and most effective upgrades for:

  • Pull-ups
  • Chin-ups
  • Deadlifts
  • Barbell Rows
  • Climbing
  • Gymnastics
  • Calisthenics
  • Powerlifting

Best Gym Chalk to Improve Your Grip

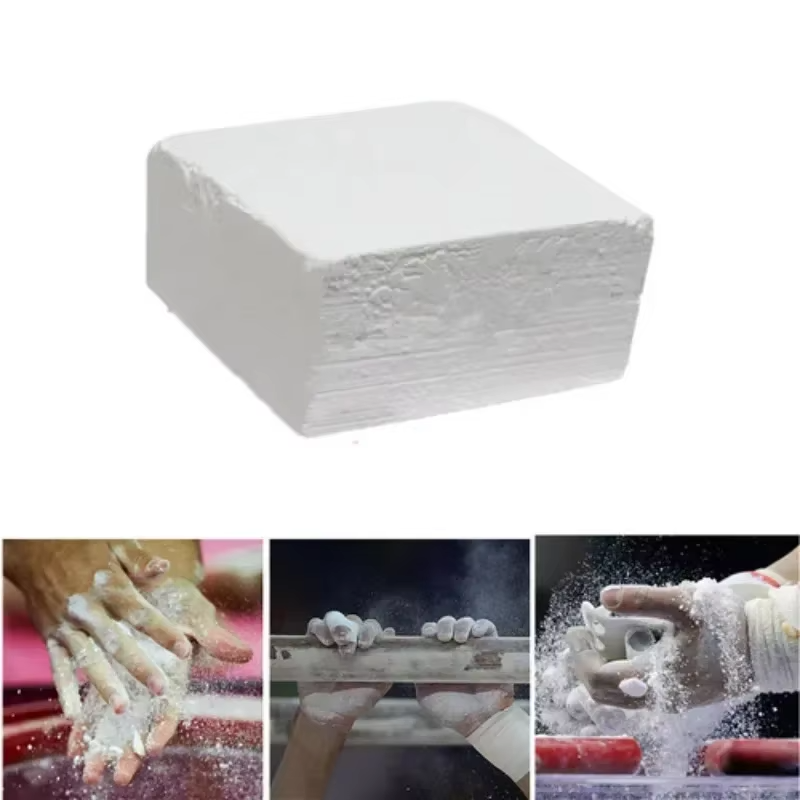
1. Weight Lifting Magnesium Chalk Block (Best Budget Choice)

Why This Works

This traditional magnesium chalk block delivers reliable grip at an affordable price.

Rub a small amount onto your palms before training, and it quickly absorbs sweat to help you maintain a secure hold throughout your workout.

Key Benefits

  • Excellent grip on bars and weights
  • Budget-friendly
  • Long-lasting block
  • Trusted by lifters, climbers, and calisthenics athletes

Best For:

  • Beginners
  • Home gym users
  • Outdoor calisthenics
  • Budget-conscious athletes

Reality:

If you’re looking for the most affordable way to stop your hands from slipping, this chalk block gets the job done.

First of the Gym Chalk(Grip Slipping during Workouts)

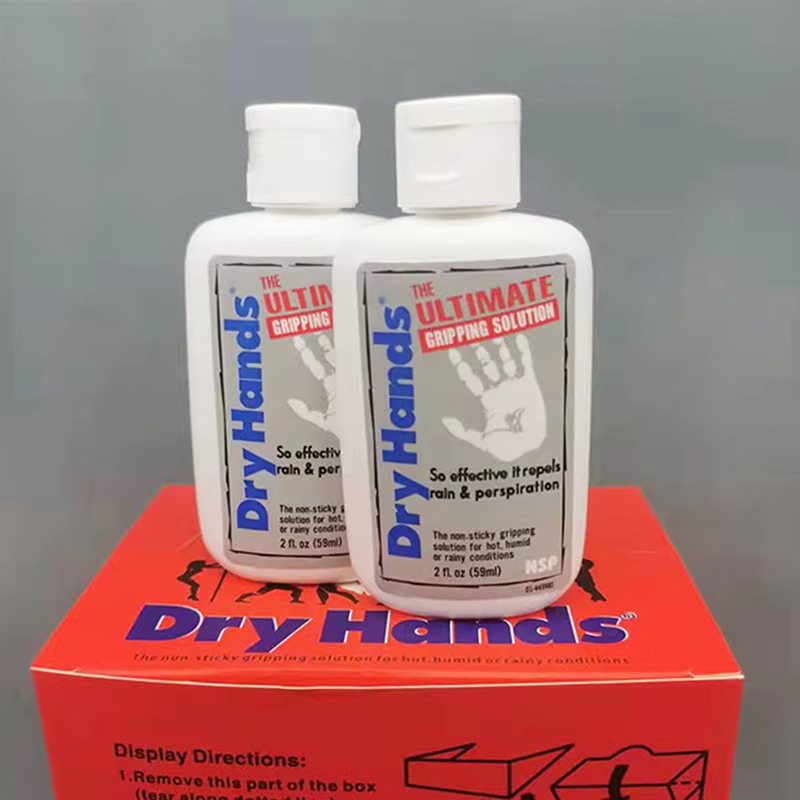
2. Dry Hands Liquid Chalk (Best Overall)

Why This is Better

If you train regularly or have naturally sweaty hands, liquid chalk offers a cleaner and longer-lasting solution.

It dries within seconds and creates a strong grip without covering your equipment or clothes in chalk dust.

Key Benefits

  • Excellent sweat resistance
  • Long-lasting grip
  • Less mess than traditional chalk
  • Easy to carry in your gym bag
  • Quick-drying formula

Best For:

  • Regular gym-goers
  • Calisthenics athletes
  • Climbers
  • Powerlifters
  • Anyone with sweaty hands

Reality:

If you want maximum performance with minimal mess, liquid chalk is the better investment.

Second of the Gym Chalk(Grip Slipping during Workouts)

Which One Should You Choose?

Just starting? → Choose the Chalk Block.

It’s affordable, effective, and perfect for most beginners.

Train regularly or have sweaty hands? → Choose Dry Hands Liquid Chalk.

It lasts longer on your hands and keeps your workouts cleaner.


How to Prevent Your Grip from Slipping

Follow these simple steps:

Before Training

  • Wash and dry your hands.
  • Apply a small amount of chalk.
  • Allow liquid chalk to dry completely before grabbing the bar.

During Training

  • Reapply only when needed.
  • Wipe excessive sweat from your hands between sets.

After Training

  • Wash off the chalk thoroughly.
  • Apply moisturizer if your skin feels dry.

Mistakes That Make Your Grip Worse

Avoid these common mistakes:

  • ❌ Using far too much chalk
  • ❌ Training with sweaty hands
  • ❌ Relying on lifting straps for every exercise
  • ❌ Ignoring grip-strength training

Remember, gym chalk improves your grip—but building stronger forearms and hands should still be part of your training.


Final Verdict

If your grip is slipping during workouts, the solution may be simpler than you think.

The Weight Lifting Magnesium Chalk Block is an excellent budget-friendly option that provides dependable grip for most athletes.

If you prefer a cleaner experience and train frequently, Dry Hands Liquid Chalk offers longer-lasting performance with less mess.

Both options help you hold onto the bar longer, perform more reps, and train with greater confidence.


Final Words

Your grip shouldn’t be the reason your workout ends early.

Whether you’re lifting weights, training calisthenics, or working toward your first pull-up, the right gym chalk can help you stay locked onto the bar and focused on your performance.

Choose the option that fits your training style, stay consistent, and keep getting stronger.

If you’re struggling to improve your pulling strength, check out our How to Do More Pull-Ups guide for practical tips to increase your reps.

Affiliate Disclosure: WarriorBodyAcademy may earn a commission when you purchase through affiliate links in this article, at no extra cost to you. We only recommend products that we believe are useful for our readers and training community.
Wrist Pain During Workouts? Quick Fixes That Actually Work

Wrist pain during workouts can turn even simple exercises into a frustrating experience.

Whether you’re doing push-ups, pull-ups, dips, bench press, overhead press, or lifting weights, sore wrists can limit your performance and make you hesitant to train.

The good news?

Most workout-related wrist pain can be reduced with better preparation, proper technique, and the right support.


Why Your Wrists Hurt During Workouts

Your wrists absorb a lot of force during upper-body exercises.

Pain usually happens because of:

  • Weak wrist stability
  • Poor exercise technique
  • Tight forearm muscles
  • Limited wrist mobility
  • Sudden increases in training intensity
  • Lack of wrist support during heavy lifts

Ignoring these problems can lead to:

❌ Wrist pain

❌ Reduced lifting performance

❌ Less confidence during training

❌ Increased injury risk


Quick Fixes Before Buying Anything

Try these first.

Warm Up Your Wrists

Spend 3–5 minutes doing:

  • Wrist circles
  • Palm stretches
  • Finger extensions
  • Light wrist flexion and extension

A proper warm-up prepares your joints for heavier loads.

Improve Your Technique

Many people bend their wrists too far backward during exercises.

Keeping your wrists in a stronger, more neutral position often reduces unnecessary strain.

Build Wrist Strength

Add exercises like:

  • Wrist curls
  • Reverse wrist curls
  • Farmer’s carries
  • Dead hangs

Stronger wrists handle heavier loads more comfortably.


When Wrist Wraps Can Help

If your wrists still hurt after improving your warm-up and technique, extra support can make a noticeable difference.

Unlike gloves, wrist wraps stabilize the wrist joint without reducing your grip on the bar.

They help by:

  • Supporting your wrist under load
  • Reducing unnecessary movement
  • Increasing confidence during pressing and pulling exercises
  • Providing extra stability during heavy sets

Best Wrist Wraps for Workout Support

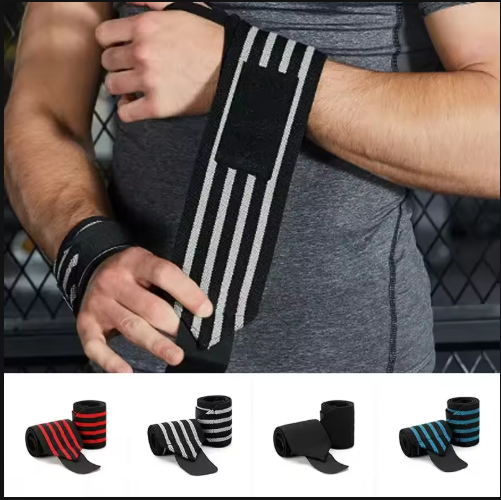
1. Elastic Wrist Support Strap (Best for Beginners)

Why This Works

This lightweight wrist wrap provides comfortable support while still allowing natural wrist movement.

It’s ideal if you’re starting strength training or experiencing occasional wrist discomfort.

Key Benefits

  • Comfortable and breathable
  • Adjustable compression
  • Easy to wear
  • Lightweight design
  • Great everyday support

Best For:

  • Beginners
  • General gym workouts
  • Push-ups
  • Pull-ups
  • Light to moderate training

Reality:

If you need everyday wrist support without feeling restricted, this wrap is an excellent starting point.

First Wrist Wraps(Wrist Pain during Workouts)

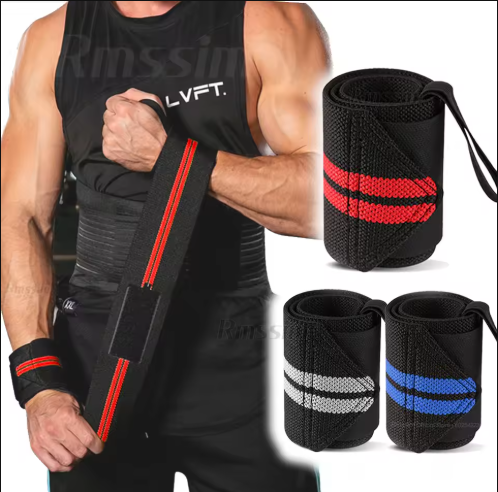
2. Heavy-Duty Wrist Wrap (Best for Heavy Lifting)

Why This Is Better

As the weight on the bar increases, your wrists need greater stability.

This heavy-duty wrap offers firmer compression and stronger support, making it better suited for demanding workouts.

Key Benefits

  • Superior wrist stabilization
  • Durable elastic construction
  • Better support for heavy lifts
  • Adjustable tightness

Best For:

  • Bench press
  • Overhead press
  • Heavy push workouts
  • Dips
  • Powerlifting
  • Advanced strength training

Reality:

If you regularly lift heavy or perform high-volume upper-body workouts, the extra support is worth it.

Second Wrist Wraps(Wrist Pain during Workouts)

Which One Should You Choose?

New to strength training? → Choose the Elastic Wrist Support Strap.

It provides enough support for most people without restricting movement.

Training heavy every week? → Choose the Heavy-Duty Wrist Wrap.

The additional stability is better suited for heavier loads.


How to Prevent Wrist Pain During Workouts

Before Training

  • Warm up your wrists.
  • Stretch your forearms.
  • Start with lighter sets.

During Training

  • Keep your wrists in a neutral position.
  • Avoid increasing weight too quickly.
  • Wear wrist wraps during heavy sets if needed.

After Training

  • Stretch your forearms.
  • Allow sore wrists to recover.
  • Reduce training volume if pain persists.

Common Mistakes That Cause Wrist Pain

Avoid these common errors:

❌ Skipping your warm-up

❌ Poor lifting technique

❌ Increasing weight too quickly

❌ Training through sharp pain

❌ Ignoring recovery

Remember, wrist wraps support your wrists—they don’t replace good technique or proper recovery.


Final Verdict

If you’re experiencing wrist pain during workouts, don’t ignore it.

Start by improving your warm-up, mobility, and lifting technique.

If you still need extra support, a quality pair of wrist wraps can help reduce strain and make your workouts more comfortable.

For most beginners, the Elastic Wrist Support Strap is the best choice.

If you’re lifting heavier weights or training more intensely, the Heavy-Duty Wrist Wrap provides the extra stability you’ll appreciate.


Final Words

Don’t let wrist pain stop your progress.

Take care of your wrists, train with proper form, and use supportive equipment when needed.

A small change today can help you train stronger, longer, and with greater confidence tomorrow.

If your hands keep slipping during workouts, check out our guide on the best Gym Chalk for Better Grip.

Affiliate Disclosure: WarriorBodyAcademy may earn a commission when you purchase through affiliate links in this article, at no extra cost to you. We only recommend products that we believe are useful for our readers and training community.
Best Exercise Mats for Home Workouts (2026) – Train Without Pain

Training on hard ground?

Yeah… that’s how you destroy your elbows, knees, and consistency.

If you’re doing:

  • Push-ups
  • Abs
  • Stretching

⇛ You NEED a proper exercise mat.

This guide shows you the best options—no fluff.


Quick Answer (For Fast Decision Makers)

⇛ Want the cheapest option that works?
Go for the EVA Anti-Slip Yoga Mat

⇛ Want long-term comfort + durability?
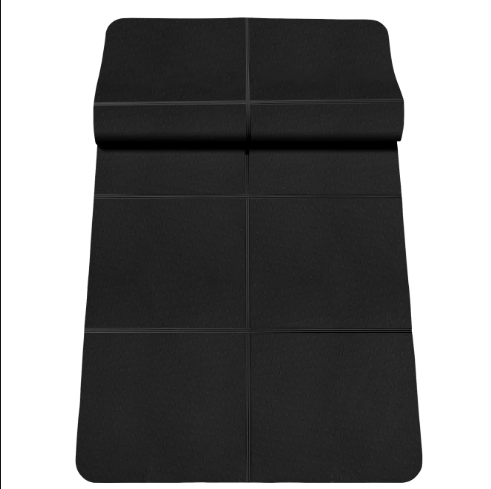
Go for the Foldable TPE Exercise Mat


Why an Exercise Mat is Non-Negotiable

Let’s be real:

Training on bare ground =
❌ Pain
❌ Slipping
❌ Shorter workouts

A proper mat gives you:

✓ Joint protection
✓ Better grip
✓ More comfort = longer sessions

⇛ Which means better results


1. EVA Anti-Slip Yoga Mat (Best Budget Pick)

Key Features:

  • EVA foam cushioning
  • Anti-slip surface
  • Lightweight & portable
  • Beginner-friendly
First of the Best Exercise Mat for Home Workouts

Why This is a Smart Start:

If you’re just starting your journey…

This mat does everything you need without wasting money.

Perfect for:

  • Push-ups
  • Sit-ups
  • Stretching

Pros:

✓ Very affordable
✓ Soft enough for basic training
✓ Easy to carry

Cons:

❌ Not super durable long-term
❌ Thinner than premium mats


2. Foldable TPE Exercise Mat (Best Overall)

Key Features:

  • High-quality TPE material
  • Double-sided anti-slip grip
  • Foldable design (easy storage)
  • Durable build
Second of the Best Exercise Mats for Home Workouts

Why This One Wins:

This is for people who are serious.

⇛ Better grip = better performance
⇛ Better durability = long-term value

You can train HARD on this:

  • Push-ups
  • Core workouts
  • Mobility work

Pros:

✓ Strong grip (no slipping)
✓ More comfortable
✓ Long-lasting

Cons:

❌ Slightly higher price


Comparison – Choose Smart

FeatureEVA MatTPE Mat
PriceLowerHigher
ComfortGoodBetter
DurabilityMediumHigh
GripBasicStrong
Best ForBeginnersSerious users

Beginner Setup

Don’t overcomplicate it. You can click the links below for their guides.

Start with:

⇛ Train 3–5 times/week

Consistency > everything.


Before You Buy

Make sure:

  • The mat is thick enough for your joints
  • It doesn’t slip on your floor
  • You actually USE it

⇛ Cheap + unused = waste
⇛ Simple + consistent = results


Final Verdict

⇛ Want cheap & simple?
Go for EVA Mat

⇛ Want long-term quality?
Go for TPE Mat


Final Words

A mat might seem small…

But it decides whether you:

  • Train consistently
  • Or quit because of discomfort

Choose one.

Start training today.

Affiliate Disclosure: WarriorBodyAcademy may earn a commission when you purchase through affiliate links in this article, at no extra cost to you. We only recommend products that we believe are useful for our readers and training community.
Best Dip Bars for Home Workouts (2026) – Build Pushing Power

Want a stronger chest, powerful triceps, and serious upper-body strength…

Without needing a gym?

You need ONE thing:

A proper pair of dip bars.

Dips are one of the best bodyweight exercises you can add to a home calisthenics setup.

But here’s the problem:

Most people either:

  • Buy bars that are too short for proper dips
  • Choose unstable equipment
  • Overpay for features they don’t need
  • Or confuse parallettes and push-up handles with actual dip bars

This guide fixes that.


Quick Answer (Don’t Overthink It)

⇛ Want the BEST value for home training?
Go for the Adjustable Steel Dip Bars

The adjustable height and affordable price make them the better option for most home athletes.

⇛ Want a heavier premium setup?
Go for the Heavy-Duty Steel Dip Station

A straightforward steel setup for anyone willing to spend more on their home calisthenics equipment.


Why Dip Bars Are a Game-Changer

A proper pair of dip bars gives you much more than dips.

You can train:

  • Chest
  • Triceps
  • Shoulders
  • Core
  • Hip flexors
  • Straight-arm strength
  • Body control

And once you get stronger?

You can progress toward:

  • Dips
  • Assisted dips
  • L-sits
  • Knee raises
  • Leg raises
  • Support holds
  • Bodyweight rows
  • Advanced dip variations

⇛ All from one piece of home workout equipment.


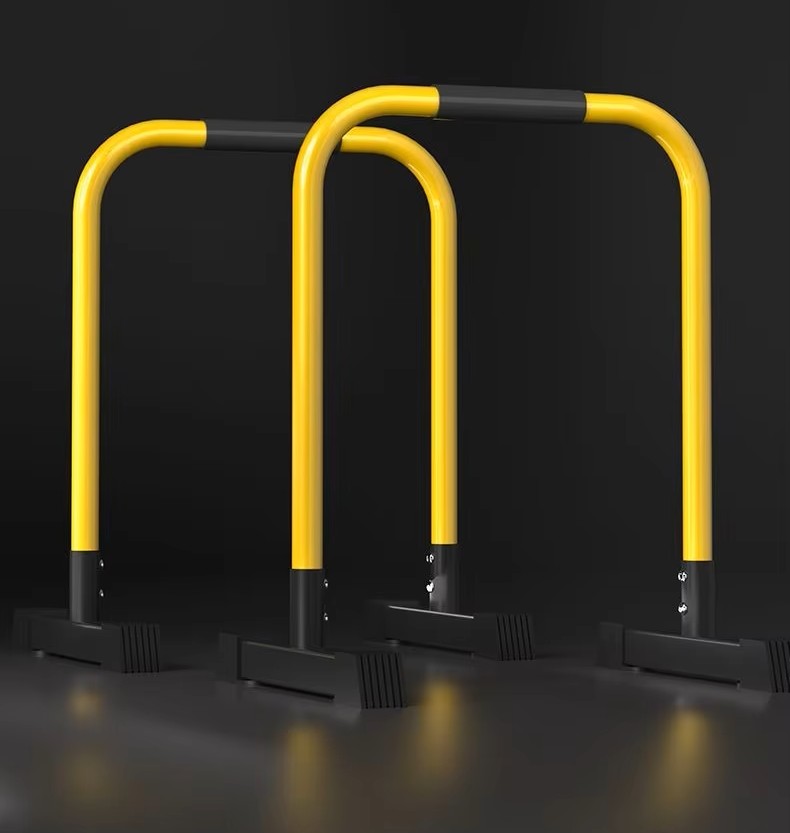
1. Adjustable Steel Dip Bars (Best Overall)

Key Features:

  • Steel construction
  • Adjustable and fixed-height options
  • Adjustable model shown at approximately 80–95 cm
  • Fixed-height 85 cm option available
  • Approximately 63 cm long
  • Approximately 43 cm wide at the base
  • Padded grip area
  • Wide individual bases
  • Multiple configurations available

Why This One Wins:

This is the option I’d choose for most home calisthenics athletes.

Why?

⇛ Height adjustability.

Different exercises and different athletes can benefit from different bar heights.

Instead of locking yourself into one setup, the adjustable version lets you change the height to better suit your training.

And because these are independent bars, you can position them according to the exercise you’re performing.

Use them for:

  • Dips
  • Assisted dips
  • Support holds
  • L-sits
  • Knee raises
  • Leg raises
  • Bodyweight rows

The seller also offers non-adjustable versions if you’d rather keep things simple.

Pros:

✓ Adjustable-height option
✓ Fixed-height alternatives available
✓ Suitable for multiple calisthenics exercises
✓ Independent bars allow flexible positioning
✓ Good option for home workouts
✓ Strong value compared with many larger dip stations

Cons:

❌ Takes considerably more floor space than parallettes
❌ Adjustable equipment should always be locked securely before training
❌ Shipping costs can heavily affect the final price

Best Dip Bars for Home Workouts(First)

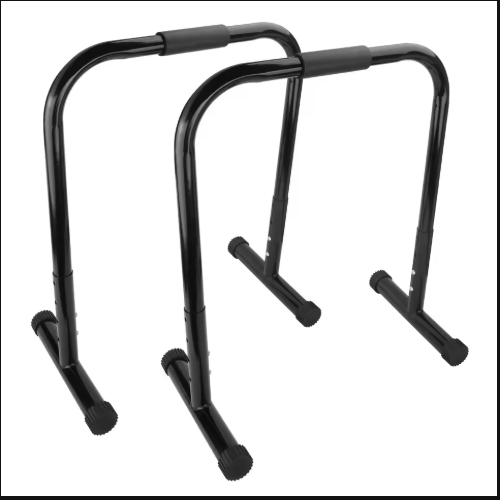
2. Heavy-Duty Steel Dip Station (Premium Pick)

Key Features:

  • Steel construction
  • Approximately 65 × 38 × 78 cm
  • Approximately 9 kg product weight
  • Parallel independent-bar design
  • Padded grip sections
  • Wide feet for floor contact
  • Designed for calisthenics and strength training

Why Choose This:

If you don’t need adjustable height and want a straightforward set of full-height dip bars, this is the alternative.

There are fewer decisions to make.

Set them up.

Position them correctly.

Start training.

The approximately 78 cm height gives you the clearance needed for proper dip training while still keeping the equipment manageable for a home setup.

And because the two bars aren’t permanently connected, you can adjust their spacing to suit your body and the exercise.

Pros:

✓ Steel construction
✓ Full-height design
✓ Simple setup
✓ Independent bar positioning
✓ Suitable for dips and other calisthenics exercises
✓ Heavier construction than many basic options

Cons:

❌ More expensive
❌ Fixed height
❌ Less adaptable than Product 1
❌ Takes up dedicated floor space

Best Dip Bars for Home Workouts(Second)

Comparison – Choose Your Arsenal

FeatureAdjustable Steel Dip BarsHeavy-Duty Steel Dip Station
HeightApprox. 80–95 cm adjustableApprox. 78 cm fixed
Adjustable OptionYesNo
ConstructionSteelSteel
Independent BarsYesYes
VersatilityExcellentGood
Best ForMost home athletesPremium fixed setup
Our PickBest OverallPremium Pick

Beginner Plan

Listen carefully—this is where most people fail.

Even with the BEST dip bars, you won’t build serious strength if you don’t train smart.

Start with:

⇛ Train 2–3 times/week

Start with control.

Build your chest, triceps, shoulders, and core.

Then gradually progress toward full dips and harder calisthenics movements.


Important Buying Advice

Before you click:

Make sure you’re buying actual dip bars, not low parallettes or push-up handles.

For proper dips, you need enough height for your body to move freely between the bars.

Adjustable vs Fixed Height

If you’re unsure which height will suit you:

⇛ Choose the adjustable option.

Product 1’s adjustable version gives you approximately 80–95 cm of height, allowing you to experiment with your setup.

If you already know what you want and prefer simplicity:

⇛ A fixed-height pair can do the job perfectly well.

Also check:

  • Bar height
  • Base dimensions
  • Available floor space
  • Grip comfort
  • Bar spacing
  • Adjustment locks
  • Floor stability
  • Shipping cost
  • Your preferred configuration before ordering

Most importantly:

⇛ Never sacrifice stability for price.

Before every workout, place the bars on a flat surface and make sure they don’t wobble, slide, or shift.


Final Verdict

⇛ Want the best value and maximum versatility?
Go for the Adjustable Steel Dip Bars.

The combination of adjustable height, multiple available configurations, independent positioning, and a relatively affordable product price makes Product 1 the better choice for most home calisthenics setups.

This would be my Best Overall pick.

⇛ Want a heavier, simple fixed-height setup?
Go for the Heavy-Duty Steel Dip Station.

You lose the height adjustment, but you get a straightforward steel setup built specifically around dip and calisthenics training.

But between the two?

I’d take Product 1.

The adjustable version simply gives you more freedom for the money.


Final Words

You don’t need a commercial gym to build serious pushing strength.

You don’t need machines.

You need:

  • A stable pair of dip bars
  • Proper technique
  • Progressive training
  • Consistency
  • Discipline

Start with support holds.

Master your first clean dips.

Build your reps.

Then start chasing harder variations.

Your body is the weight.

The bars just give you somewhere to fight gravity.

Affiliate Disclosure: WarriorBodyAcademy may earn a commission when you purchase through affiliate links in this article, at no extra cost to you. We only recommend products that we believe are useful for our readers and training community.
Best Resistance Bands for Calisthenics (2026) – Master Proper Form

Resistance bands are one of the most useful pieces of equipment you can add to a calisthenics setup.

They can help you learn difficult exercises, improve your warm-up, add resistance to basic movements, strengthen weak points, and make bodyweight training more progressive.

But with so many resistance bands available, choosing the right one can be confusing.

That’s why we’ve selected two versatile options that can fit different training needs and budgets.

Whether you’re working toward your first pull-up, building stronger push-ups, improving your mobility, or simply making your home workouts more challenging, these are the best resistance bands for calisthenics, offering plenty of room to progress.


Quick Answer

If you want a versatile resistance band for calisthenics, both options featured in this guide are worth considering.

  • Product 1: Best for versatility, beginners, and people who want individual bands or multi-band bundles.
  • Product 2: Best for heavier resistance and users who want a long, wide single band for strength and assistance work.

The best choice ultimately depends on how much resistance you need and whether you want a single band or multiple resistance options.


Why Resistance Bands Are Essential for Calisthenics

Calisthenics is built around bodyweight movements, but that doesn’t mean you have to rely exclusively on your bodyweight.

Resistance bands give you another way to manipulate difficulty.

You can use them to:

  • Assist difficult exercises
  • Add resistance to easier exercises
  • Practice proper movement patterns
  • Improve warm-ups
  • Train mobility and flexibility
  • Strengthen muscles through different resistance levels
  • Progress toward advanced calisthenics skills
  • Train effectively at home
  • Add variety to your workouts

This makes resistance bands useful for both beginners and experienced athletes.

For example, a beginner might use a band to perform assisted pull-ups, while an advanced athlete could use one for resisted push-ups, mobility work, or skill training.

The key is choosing a band that matches your current strength and training goals.


Best Resistance Bands for Calisthenics

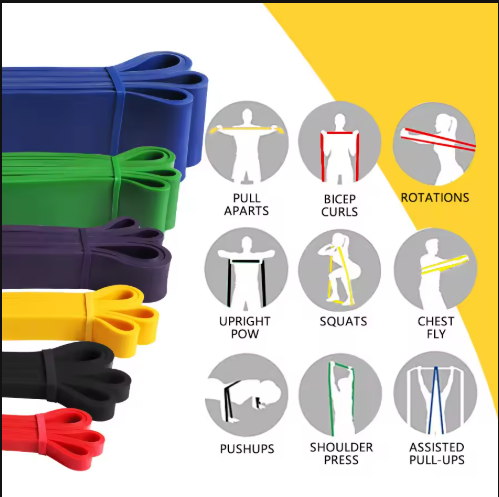
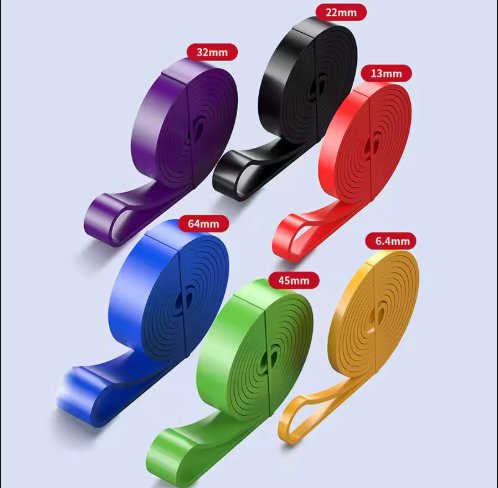
1. Heavy Duty Latex Resistance Band – Best Overall for Versatility

If you want one resistance band option that can cover a wide range of exercises, this heavy-duty latex resistance band is an excellent place to start.

It is designed as a long loop resistance band, making it useful for everything from assisted bodyweight exercises to warm-ups and strength training.

One of its biggest advantages is the variety of options available.

You can purchase an individual band or choose bundles containing multiple bands, allowing you to build a collection with different resistance levels.

Why This Works

The long-loop design makes this band particularly useful for calisthenics.

You can anchor it to a pull-up bar, use it around your legs, hold it with your hands, or incorporate it into mobility exercises.

That versatility means you aren’t limited to one exercise.

Key Features

  • Heavy-duty latex construction
  • Long loop design
  • Multiple resistance options
  • Individual bands available
  • 3-band and 4-band bundle options available
  • Suitable for strength training and calisthenics
  • Useful for assisted exercises
  • Portable and easy to store
  • Can be used for warm-ups and mobility work

Best For

  • Beginners
  • Calisthenics athletes
  • Assisted pull-ups
  • Resistance training
  • Warm-ups
  • Mobility exercises
  • Home workouts
  • Users who want multiple resistance levels

What We Like

The biggest advantage here is choice.

Instead of being locked into one resistance level, you can select the option that fits your current training level. The availability of multi-band bundles is particularly useful if you want several resistance levels without purchasing each band separately.

That also makes this a strong option for long-term progression.

As you become stronger, you can gradually move toward bands that provide less assistance or more resistance depending on the exercise.

Best Resistance Bands for Calisthenics(First)

2. Heavy Duty Resistance Band – Best for Heavy Resistance

If you want a substantial single resistance band for strength training and assisted calisthenics, this option deserves a look.

The band shown in the product listing measures 208 cm in length, variable mm in width, and 4 mm in thickness.

That long, wide design gives you plenty of material to work with during different exercises.

The listing also provides multiple resistance options, making it possible to select a band according to your training requirements.

Why This Works

This band is especially useful when you want a single heavy-duty band rather than purchasing a bundle.

It can be used for assisted pull-ups, resistance exercises, warm-ups, mobility drills, and other forms of strength training.

The wide construction also gives it a substantial feel during training.

Key Features

  • 208 cm length
  • Variable mm width
  • 4 mm thickness
  • Heavy-duty resistance design
  • Multiple resistance options
  • Long-loop construction
  • Suitable for calisthenics and strength training
  • Useful for pull-up assistance
  • Can be used for warm-ups and mobility
  • Available as an individual band

Best For

  • Intermediate athletes
  • Advanced beginners
  • Strength training
  • Assisted pull-ups
  • Full-body workouts
  • Home and gym training
  • Users who prefer a single heavy-duty band

What We Like

The biggest advantage of this band is its combination of length, width, and resistance options.

At 208 cm long, it provides plenty of working length for different movements and setups.

The individual-band format also makes it straightforward if you already know which resistance level you need and don’t want to purchase a bundle.

Best Resistance Bands for Calisthenics(Second)

Product Comparison

FeatureProduct 1Product 2
DesignLong-loop bandLong-loop band
MaterialLatexResistance latex
LengthLong-loop design208 cm
WidthVaries by optionVaries by option
Thickness6.4 mm shown for the pictured option4 mm
Resistance OptionsMultipleMultiple
Individual BandYesYes
Multi-Band Bundles3- and 4-band options availableNo
Assisted Pull-UpsYesYes
Strength TrainingYesYes
Warm-UpsYesYes
MobilityYesYes
Best ForVersatility and progressionHeavy-duty individual-band training

Which Resistance Band Should You Choose?

Choosing between these two is actually pretty simple.

Choose Product 1 If:

  • You want maximum versatility
  • You’re a beginner to calisthenics
  • You want several resistance levels
  • You want the option of buying a bundle
  • You plan to use bands for multiple types of training
  • You want to progressively change resistance as you get stronger

Choose Product 2 If:

  • You prefer purchasing one band
  • You want a long, wide resistance band
  • You already know the resistance level you need
  • You want a heavy-duty option for strength training
  • You primarily need a band for assistance and resistance exercises

Our overall pick for most calisthenics beginners: Product 1.

Its individual and multi-band options make it easier to build a resistance setup that grows with your training.


How to Choose the Right Resistance Level

One of the biggest mistakes beginners make is choosing a band simply because it has a high resistance rating.

Choose a resistance level that allows you to train with proper form while still making you work.

Your band should match the exercise.

For assisted exercises:

More resistance = more assistance.

For resisted exercises:

More resistance = greater training difficulty.

A beginner working toward their first pull-up may need considerably more assistance than someone who can already perform several clean repetitions.

As your strength improves, gradually change the resistance instead of immediately jumping to the hardest option.

⇛ The band is a tool—not a shortcut.


Final Verdict

⇛ Want maximum versatility?

Go for the Heavy Duty Latex Resistance Band.

The combination of multiple resistance options, individual and bundle configurations, and a wide range of possible exercises makes Product 1 our Best Overall choice.

It’s particularly useful if you’re building a calisthenics setup and want different resistance levels for progression.

⇛ Want a single heavy-duty band?

Go for the 208 cm Heavy Duty Resistance Band.

It’s a long, wide resistance band with multiple resistance options, making it a solid choice for pull-up assistance and strength training.


Final Words

You don’t need a gym to build serious calisthenics strength.

You don’t need a room full of equipment.

You need:

  • A resistance band that matches your strength
  • A basic training plan
  • Progressive overload
  • Proper form
  • Consistency

Use resistance bands to make difficult exercises easier.

Use them to make easy exercises harder.

Use them to build the strength you need for advanced calisthenics.

Start where you are.

Train consistently.

Then keep reducing assistance and increasing resistance as your body gets stronger.

Affiliate Disclosure: WarriorBodyAcademy may earn a commission when you purchase through affiliate links in this article, at no extra cost to you. We only recommend products that we believe are useful for our readers and training community.
Best Pull-Up Bars for Home Workouts (2026) – Build Real Strength Fast

If you’re serious about building a strong back, powerful arms, and real grip strength…

You need ONE thing:

A pull-up bar.

No gym.

No machines.

No excuses.

But here’s the problem:

Most beginners either:

  • Buy the wrong type of bar
  • Choose something that doesn’t fit their training space
  • Buy a weak doorway bar when they really want a permanent setup
  • Or overpay for features they don’t need

This guide fixes that.


Quick Answer (Don’t Overthink It)

⇛ Want the BEST overall setup?
Go for the Foldable Multi-Grip Wall-Mounted Pull-Up Bar

More grip positions and exercise options make it the more versatile choice for a serious home calisthenics setup.

⇛ Want something simple and strong?
Go for the Reinforced Wall-Mounted Pull-Up Bar

It’s a straightforward wall-mounted setup built around the exercises that matter most.


Why a Pull-Up Bar is Non-Negotiable

A pull-up bar can help you build:

  • Back strength
  • Biceps and forearms
  • Grip strength
  • Core strength
  • Shoulder stability
  • Body control

And it unlocks some of the most important exercises in calisthenics:

  • Pull-ups
  • Chin-ups
  • Dead hangs
  • Hanging knee raises
  • Hanging leg raises
  • Scapular pull-ups
  • Assisted pull-ups
  • Advanced pulling progressions

And the best part?

⇛ You can build serious pulling strength at home.


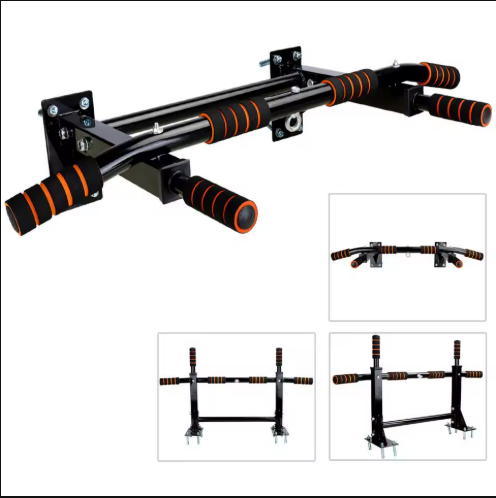
1. Foldable Multi-Grip Wall-Mounted Pull-Up Bar (Best Overall)

Key Features:

  • Wall-mounted steel construction
  • Multiple grip positions
  • Wide-grip handles
  • Neutral-grip handles
  • Padded gripping areas
  • Foldable/adjustable design
  • Multiple exercise possibilities
  • Designed for permanent home installation

Why This One Wins:

This isn’t just a straight bar attached to a wall.

⇛ It’s a more complete upper-body training station.

The biggest advantage is the variety of grip positions.

Instead of performing every pull-up with exactly the same hand position, you can incorporate different grips into your training.

That gives you options for:

  • Standard pull-ups
  • Wide-grip pull-ups
  • Neutral-grip pull-ups
  • Chin-up variations
  • Dead hangs
  • Hanging knee raises
  • Hanging leg raises
  • Scapular work
  • Core training

The additional handles also make this much more versatile than a basic straight pull-up bar.

And because the design is foldable, it can make more sense for a home training area where you don’t want the equipment permanently sticking far out from the wall.

Pros:

✓ Multiple grip positions
✓ More exercise variety
✓ Foldable design
✓ Wall-mounted setup
✓ Useful for both pulling and core exercises
✓ Better long-term versatility

Cons:

❌ Requires proper wall installation
❌ More complicated than a basic pull-up bar
❌ Requires enough wall and training space

Best Pull-Up Bars for Home Workouts(First)

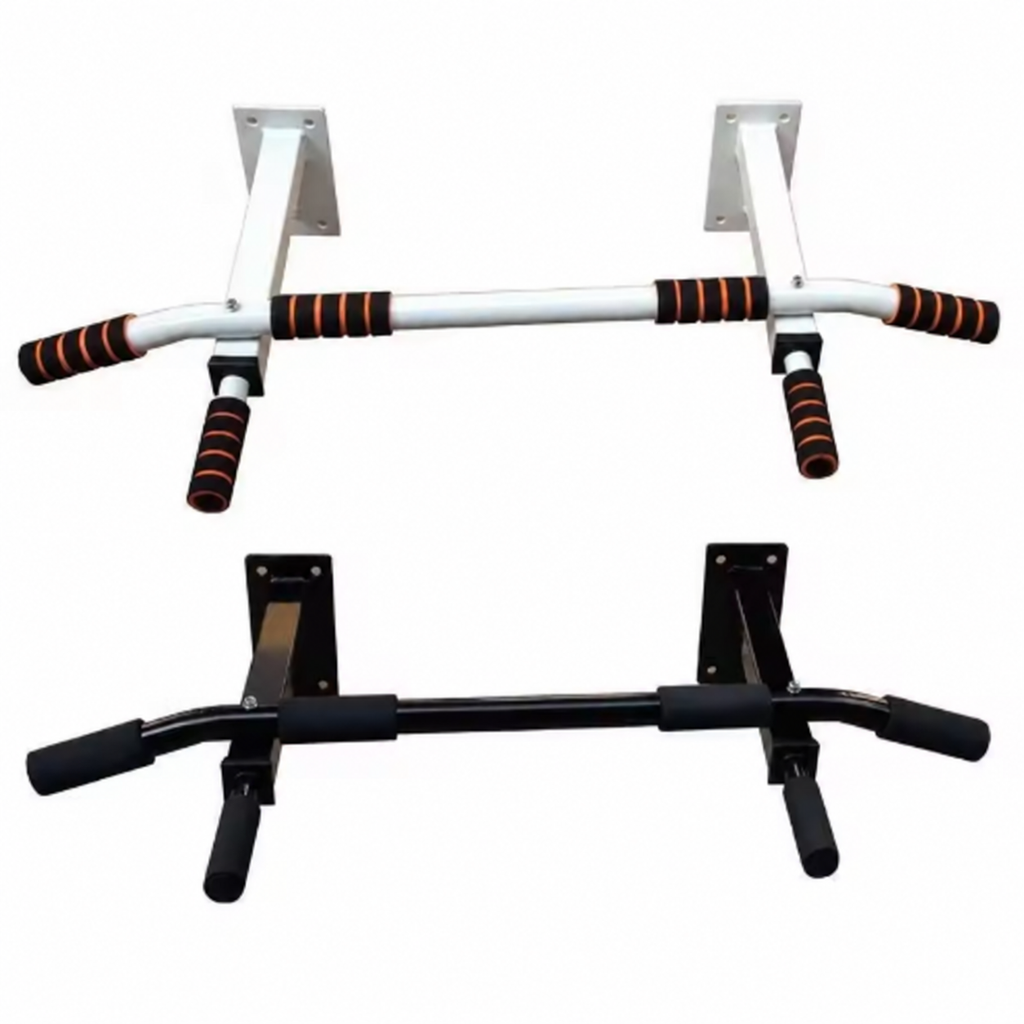
2. Reinforced Wall-Mounted Pull-Up Bar (Simple & Strong)

Key Features:

  • Reinforced steel construction
  • Wall-mounted design
  • Multiple grip positions
  • Padded handles
  • Approximately 94 cm wide on the larger configuration shown
  • Approximately 50 cm projection from the wall
  • 32 mm tubing shown on the larger configuration
  • Multiple versions available

Why Choose This:

If you want:

⇛ “Just give me a proper wall-mounted bar and let me train.”

This is it.

No need for a complicated training station.

Mount it securely, and you’ve got a permanent place for:

  • Pull-ups
  • Chin-ups
  • Dead hangs
  • Hanging knee raises
  • Hanging leg raises
  • Scapular pull-ups
  • Assisted pull-ups

The larger configuration shown also extends roughly 50 cm from the wall, giving your body more clearance than a bar mounted extremely close to the surface.

That matters during hanging exercises.

Pros:

✓ Simple wall-mounted design
✓ Multiple hand positions
✓ Reinforced construction
✓ Good wall clearance on the larger version
✓ Suitable for the essential pulling exercises
✓ Less complicated than Product 1

Cons:

❌ Requires permanent installation
❌ Less versatile than Product 1
❌ Different configurations have different dimensions and features

Best Pull-Up Bars for Home Workouts(Second)

Comparison – Choose Your Arsenal

FeatureFoldable Multi-Grip BarReinforced Wall-Mounted Bar
Wall-MountedYesYes
Multiple GripsYesYes
Foldable DesignYesNo
Exercise VarietyExcellentGood
SimplicityGoodExcellent
Best ForComplete home setupEssential pull-up training
Our PickBest OverallSimple & Strong

Beginner Plan

Listen carefully—this is where most people fail.

Even with the BEST pull-up bar, you won’t progress if you don’t train smart.

Start with:

⇛ Train 3–4 times/week

Start simple.

Build your grip, back, and arm strength.

Then gradually reduce assistance until you can perform clean pull-ups with your own bodyweight.


Important Buying Advice

Before you click:

Make sure your wall can actually support a wall-mounted pull-up bar.

A pull-up bar experiences more than just your static bodyweight.

You’re repeatedly hanging, pulling, lowering, and potentially swinging from it.

That’s why installation matters just as much as the bar itself.

Check Your Wall

A solid structural surface such as concrete or solid masonry is generally a much more appropriate mounting surface than weak or hollow material.

Do not assume every wall is suitable.

If Direct Mounting Isn’t Practical

If the pull-up bar’s mounting holes don’t line up with suitable fixing points on your wall, another option may be to install a strong wooden mounting frame or backer first, then attach the pull-up bar to that.

The wooden frame can provide a larger mounting surface and give you more flexibility when positioning the bar.

However, the frame itself must be securely anchored into a suitable structural wall or framing—not simply attached to weak plaster, hollow material, or another surface that cannot safely support your bodyweight and the forces created during training.

⇛ The wooden frame is only as strong as the structure holding it.

Check Your Space

You need enough room:

  • Below the bar for a full hang
  • In front of the wall for your body
  • Above the bar if you plan to progress toward muscle-ups or similar skills
  • Around the handles for different grip positions

Product 2’s larger configuration shown extends approximately 50 cm from the wall, so measure your available space before ordering.

Check the Exact Version

This is especially important with these listings.

Different configurations can have:

  • Different dimensions
  • Different handles
  • Different designs
  • Different prices

⇛ Don’t buy based only on the main product photo.

Check that the exact option selected in the listing is the one you actually want.

And remember:

⇛ The strongest-looking bar is useless if it isn’t installed correctly.


Final Verdict

⇛ Want maximum versatility?
Go for the Foldable Multi-Grip Wall-Mounted Pull-Up Bar.

The multiple grip positions, additional handles, foldable design, and greater exercise variety make Product 1 the stronger all-around option for a dedicated home calisthenics setup.

This is my Best Overall pick.

⇛ Want something simpler?
Go for the Reinforced Wall-Mounted Pull-Up Bar.

It gives you the essentials without turning your wall into an entire workout station.

Pull-ups.

Chin-ups.

Hangs.

Core work.

That’s enough to build serious strength.

But if both fit your budget and your wall?

I’d take Product 1.

The additional versatility gives you more room to progress.


Final Words

You don’t need a gym.

You don’t need fancy machines.

You need:

  • A pull-up bar
  • Proper technique
  • Progressive training
  • Consistency
  • Discipline

Start with hangs.

Build your first pull-up.

Build your reps.

Then keep progressing.

Install it properly.

Start training.

Affiliate Disclosure: WarriorBodyAcademy may earn a commission when you purchase through affiliate links in this article, at no extra cost to you. We only recommend products that we believe are useful for our readers and training community.