
Learn how to do a Handstand with proper form, avoid common mistakes, and discover the best Handstand progressions to build balance, shoulder strength, core stability, and advanced bodyweight control.
The Handstand is one of the most recognizable skills in calisthenics and gymnastics. It requires you to support your body upside down using your hands while maintaining balance through precise control of your fingers, wrists, shoulders, hips, and core.
Whether you’re training for calisthenics, gymnastics, martial arts, or want to master an impressive bodyweight skill, learning the Handstand provides an excellent foundation for more advanced movements such as Handstand Push-Ups.
What Is a Handstand?
A Handstand is an inverted bodyweight position in which you balance vertically on your hands with your arms extended and your feet above your head.
A technically strong Handstand generally involves:
- Hands planted firmly on the floor
- Straight arms
- Active shoulders
- Tight core
- Engaged glutes
- Legs together and controlled
- Body stacked vertically
Handstands are commonly used in:
- Calisthenics training
- Gymnastics
- Bodyweight skill training
- Mobility and balance practice
- Handstand Push-Up preparation
- Advanced movement training
Although the position looks simple, maintaining balance requires continuous adjustments through the hands and fingers.
Benefits of Handstands
Handstands provide several benefits for strength, balance, and coordination.
Benefits include:
- Improves balance
- Strengthens the shoulders
- Builds wrist and forearm strength
- Develops core stability
- Improves body awareness
- Strengthens the upper body
- Develops coordination
- Builds a foundation for advanced calisthenics skills
Regular Handstand practice can also improve your ability to control your body in inverted positions.
Muscles Worked in Handstands
A Handstand is primarily an isometric exercise, meaning your muscles work continuously to hold your body in position rather than repeatedly moving through a range of motion.
Primary Muscles
- Deltoids
- Triceps
- Forearms
- Core Muscles
Secondary Muscles
- Trapezius
- Serratus Anterior
- Glutes
- Quadriceps
- Calves
Your fingers, wrists, and forearms constantly make small adjustments to help keep your center of mass balanced over your hands.
How to Do a Handstand (Step-by-Step)
Step 1: Warm Up Your Wrists and Shoulders
Before attempting a Handstand, prepare the joints and muscles involved.
Perform movements such as:
- Wrist circles
- Wrist flexion and extension
- Shoulder circles
- Arm swings
- Scapular movements
A proper warm-up can help you feel more comfortable when supporting your bodyweight through your hands.
Step 2: Set Your Hand Position
Place your hands on the floor approximately shoulder-width apart.
Spread your fingers wide and press your fingertips into the floor.
Your hands should be:
- Flat
- Stable
- Shoulder-width apart
- Fingers spread
Think of your hands as the foundation of the entire Handstand.
Step 3: Set Your Starting Position
Begin in a comfortable lunge or crouched position with one foot slightly forward.
Place your hands firmly on the floor.
Keep your arms straight and shoulders active.
Step 4: Kick Up Into the Handstand
Drive through your back leg while gently kicking your other leg upward.
Allow your second leg to follow until both legs reach above your head.
Start with controlled kicks rather than trying to launch yourself aggressively into the position.
Tip: Practice against a wall initially if you’re still learning how to control the kick-up.
Step 5: Stack Your Body
Once your legs are overhead, work toward a straight vertical line.
Aim to align your:
- Hands
- Shoulders
- Hips
- Knees
- Ankles
Keep your legs together and point your toes.
Avoid excessive arching through your lower back.
Step 6: Engage Your Core and Glutes
Brace your abdominal muscles and squeeze your glutes.
Think about slightly tucking your pelvis rather than allowing your stomach and ribs to flare forward.
Your goal is to create a strong, controlled body line.
Step 7: Balance With Your Hands
Your fingers are extremely important for Handstand balance.
If you begin falling forward, press your fingertips harder into the floor.
If you begin falling backward, adjust the pressure through your hands and fingers while controlling your shoulders and body position.
Small corrections are better than large movements.
Step 8: Hold the Position
Once balanced, maintain the Handstand for as long as you can while keeping good form.
Focus on:
- Straight arms
- Active shoulders
- Tight core
- Engaged glutes
- Controlled legs
- Consistent breathing
Come down safely before losing control.
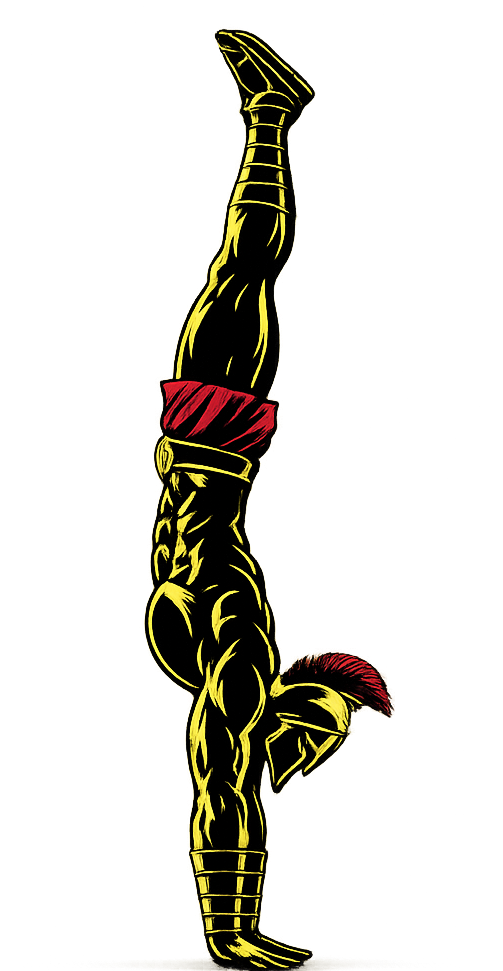
Handstand Form Checklist
Use this quick checklist to ensure proper Handstand form.
- Keep your hands approximately shoulder-width apart
- Spread your fingers
- Keep your arms straight
- Push actively through your shoulders
- Keep your core tight
- Squeeze your glutes
- Keep your legs together
- Point your toes
- Maintain a controlled body line
- Use your fingers to make small balance corrections
The goal is not simply to get upside down. The goal is to become comfortable controlling your body while inverted.
Common Handstand Mistakes
Excessive Lower-Back Arch
Problem: Allowing the ribs and stomach to flare forward creates a curved “banana” position.
Fix: Brace your core, squeeze your glutes, and work toward stacking your hips over your shoulders.
Bending the Elbows
Problem: Bent arms make the Handstand less stable and require more muscular effort.
Fix: Push actively through the floor and maintain straight elbows.
Looking Too Far Forward
Problem: Lifting your head excessively can disrupt your body alignment.
Fix: Keep your head in a neutral position and look toward the floor between your hands.
Kicking Too Hard
Problem: An aggressive kick can cause you to overshoot the balance point.
Fix: Use controlled kick-ups and gradually learn how much force you need.
Relaxing the Shoulders
Problem: Passive shoulders reduce stability and make it harder to maintain the inverted position.
Fix: Actively push the floor away and keep your shoulders elevated.
Separating the Legs
Problem: Uncontrolled legs make balancing more difficult.
Fix: Keep your legs together and squeeze your glutes once you reach the Handstand.
Holding Your Breath
Problem: Holding your breath creates unnecessary tension and makes longer holds more difficult.
Fix: Practice calm, controlled breathing while maintaining full-body tension.
Handstand Progressions and Variations
If you cannot yet hold a freestanding Handstand, these progressions can help you build the necessary strength and balance.
Wall Walks
A useful progression for developing shoulder strength and getting comfortable upside down.
How to Do Wall Walks
- Start in a plank position with your feet against a wall.
- Walk your hands toward the wall.
- Walk your feet upward as your hands move closer.
- Continue until your body reaches a controlled inverted position.
- Walk your hands away from the wall to return.
Wall Handstand Holds
An excellent beginner progression.
How to Do Wall Handstand Holds
- Place your hands on the floor near a wall.
- Kick your feet up against the wall.
- Straighten your arms.
- Engage your core and glutes.
- Hold the position while maintaining control.
Gradually move your feet away from the wall as your balance improves.
Chest-to-Wall Handstand
This variation encourages a straighter body line.
How to Do a Chest-to-Wall Handstand
- Start facing away from the wall.
- Place your hands on the floor.
- Walk your feet up the wall.
- Walk your hands toward the wall.
- Bring your body into a vertical position.
- Keep your chest facing the wall and maintain full-body tension.
Freestanding Handstand
The standard advanced version.
How to Do a Freestanding Handstand
- Place your hands on the floor.
- Perform a controlled kick-up.
- Bring both legs together above your head.
- Stack your hips over your shoulders and hands.
- Use your fingers to make small balance corrections.
- Maintain the position for as long as you can control it.
Handstand Shoulder Taps
An advanced variation that challenges balance and shoulder stability.
How to Do Handstand Shoulder Taps
- Establish a stable Handstand against a wall or freestanding.
- Shift your weight slightly onto one hand.
- Briefly lift the opposite hand and touch your shoulder.
- Return the hand to the floor.
- Repeat on the opposite side.
Only attempt this variation after developing strong Handstand control.
Final Thoughts
The Handstand is one of the most valuable foundational skills in calisthenics because it develops balance, strength, coordination, and body awareness simultaneously.
It develops:
- Shoulder strength
- Wrist and forearm strength
- Core stability
- Balance
- Coordination
- Full-body control
Don’t expect to master the Handstand immediately. Spend time building wrist strength, shoulder stability, and wall-supported control before repeatedly attempting freestanding holds. Learn more about Calisthenics Skills here.
Practice consistently, make small adjustments, and focus on quality rather than simply chasing longer hold times.
Master the balance, and the upside-down world becomes your playground.
Essential Gear for Handstands
Handstands require very little equipment, but the right gear can make practice more comfortable and controlled.
- Exercise Mat: Provides cushioning for your hands and body during practice.
- Wall: Useful for learning kick-ups and building confidence with supported Handstands.
- Parallettes: Provide an alternative hand position and can reduce wrist extension for some trainees.
- Handstand Blocks: Help develop hand and wrist control while providing a stable gripping surface.
- Resistance Bands: Can be used for assistance by tying them to a Pull-Up Bar/Sturdy Elevated Object to learn the movement’s progression.
Handstand FAQ
Q1: How long does it take to learn a Handstand?
The time varies from person to person. Beginners may need several weeks or months of consistent practice to develop a reliable Handstand, depending on their existing strength, mobility, balance, and coordination.
Q2: How long should I hold a Handstand?
Beginners can start with short holds of 5-15 seconds using a wall. Gradually increase the duration as your balance and technique improve rather than sacrificing form for a longer hold.
Q3: Should I practice Handstands every day?
Handstand practice can be performed frequently because it is primarily skill-based, but your wrists and shoulders still need adequate recovery. Short, high-quality sessions are generally more useful than repeatedly practicing when fatigued.