
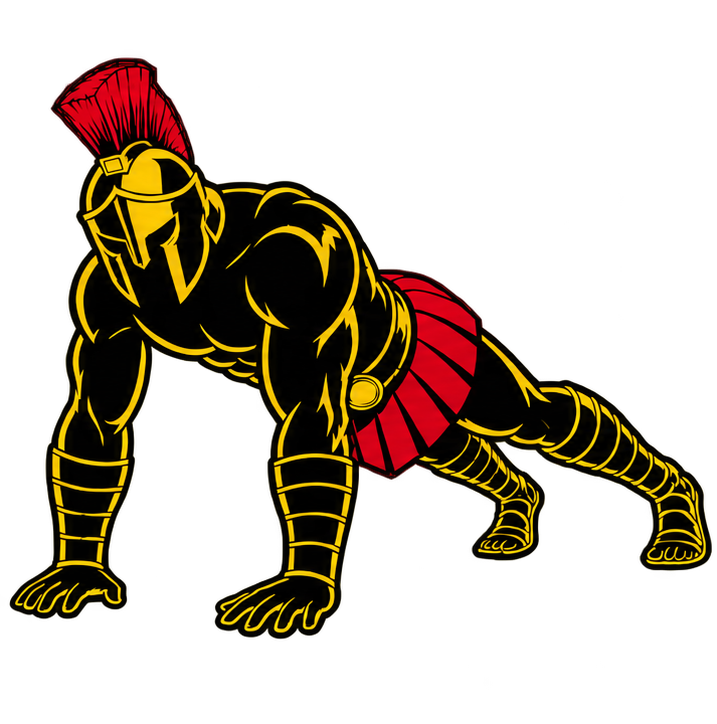
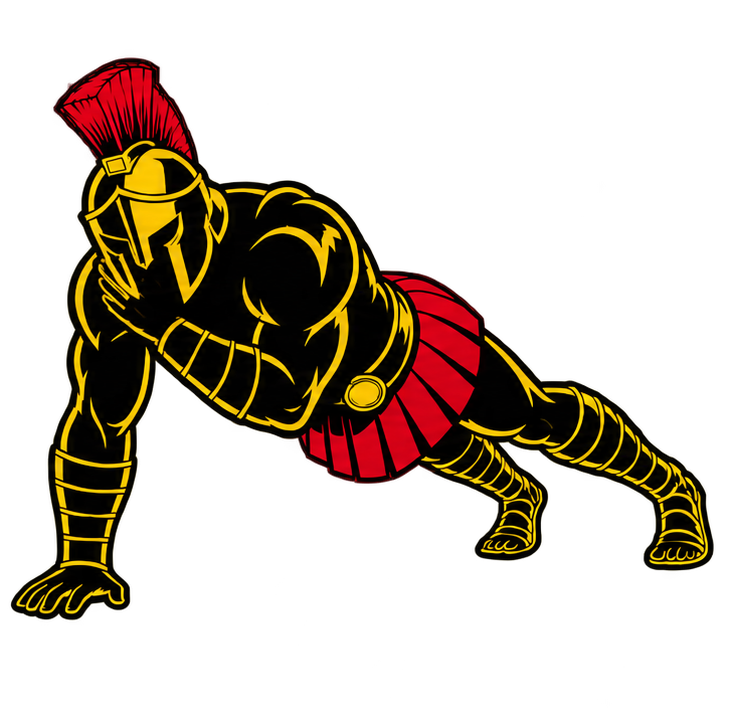
Plank Shoulder Taps are a dynamic core exercise performed from a high plank position. While supporting your body with one hand, you lift the opposite hand and tap the opposite shoulder before returning it to the floor and repeating on the other side.
Although the movement looks simple, removing one hand from the floor creates an asymmetrical load that encourages your hips and torso to rotate. Your core must resist this movement while your supporting shoulder stabilizes your upper body.
Plank Shoulder Taps are useful for developing core stability, shoulder control, and coordination with little to no equipment. They can also serve as a progression beyond a standard High Plank.
What Are Plank Shoulder Taps?
Plank Shoulder Taps are a bodyweight exercise that combines a High Plank with alternating shoulder taps.
You begin in a Push-Up position with both hands on the floor. Keeping your torso as stable as possible, lift one hand and touch the opposite shoulder. Return the hand to the floor before repeating with the other side.
For example:
- Right hand taps left shoulder
- Right hand returns to the floor
- Left hand taps right shoulder
- Left hand returns to the floor
The goal is not to perform the taps as quickly as possible. Instead, focus on preventing excessive hip rotation while maintaining a strong plank position.
Plank Shoulder Taps are commonly used in:
- Core workouts
- Bodyweight training
- Calisthenics workouts
- At-home workouts
- Upper-body workouts
- Full-body circuits
- Warm-up routines
- Stability and coordination training
Benefits of Plank Shoulder Taps
Plank Shoulder Taps add movement and an anti-rotation challenge to the traditional High Plank.
Benefits include:
- Strengthens the core
- Develops anti-rotation control
- Strengthens and stabilizes the shoulders
- Trains the chest and triceps isometrically
- Improves coordination between the upper body and core
- Develops unilateral support control
- Reinforces High Plank stability
- Requires little to no equipment
- Can be easily modified for different strength levels
The exercise becomes significantly more effective when each tap is performed slowly enough to prevent your hips from rocking excessively from side to side.
Muscles Worked in Plank Shoulder Taps
Plank Shoulder Taps involve several muscle groups working together to maintain body position while you alternate between two-hand and one-hand support.
Primary Muscles
- Rectus Abdominis
- Obliques
- Transverse Abdominis
- Anterior Deltoids
- Serratus Anterior
Secondary Muscles
- Pectoralis Major
- Triceps Brachii
- Rotator Cuff Muscles
- Gluteus Maximus
- Quadriceps
- Erector Spinae
- Forearms
The obliques and other core muscles are particularly important for resisting unwanted rotation when one hand leaves the floor.
How to Do Plank Shoulder Taps (Step-by-Step)
Step 1: Start on Your Hands and Knees
Begin on the floor with your hands underneath or approximately underneath your shoulders.
Spread your fingers comfortably and press your palms firmly into the floor.
Keep your elbows extended without aggressively forcing them backward.
Step 2: Enter a High Plank
Step your feet backward until both legs are extended.
Your body should form a relatively straight line from your head through your shoulders, hips, and heels.
Keep your:
- Core braced
- Glutes engaged
- Legs controlled
- Shoulders stable
- Head relatively neutral
Step 3: Adjust Your Foot Position
Place your feet approximately hip-width apart or slightly wider if necessary.
A wider stance generally provides more stability and makes it easier to resist rotation.
As your control improves, you can gradually use a narrower stance.
Step 4: Shift Your Weight Slightly
Before lifting one hand, transfer only enough weight into the supporting hand to remain stable.
Avoid dramatically shifting your entire torso sideways.
Keep your shoulders and hips as controlled as possible.
Step 5: Tap the Opposite Shoulder
Lift one hand from the floor and bring it across your body.
Lightly tap the opposite shoulder.
For example, lift your right hand and tap your left shoulder.
Keep your hips from rotating excessively toward either side.
Step 6: Return Your Hand to the Floor
Place your hand back in approximately its original position underneath the shoulder.
Re-establish stable two-hand support before beginning the next tap.
Avoid rushing directly from one side to the other.
Step 7: Alternate Sides
Lift your opposite hand and tap the other shoulder.
Continue alternating sides while maintaining a controlled High Plank.
One tap with each hand can be counted as two individual taps or one complete right-and-left cycle—just use the same counting method consistently.

Plank Shoulder Taps Form Checklist
Use this checklist to maintain proper Plank Shoulder Tap technique.
- Place your hands shoulder-width apart
- Keep your hands underneath or close to underneath your shoulders
- Maintain a relatively straight body line
- Brace your core throughout the set
- Engage your glutes
- Keep your head relatively neutral
- Keep your shoulders stable
- Use a stable foot position
- Shift only as much weight as necessary
- Tap the opposite shoulder
- Minimize hip rotation
- Avoid letting your hips sag
- Return your hand securely before switching sides
- Perform each tap under control
- Stop when you can no longer maintain good plank position
The goal is not to keep your body perfectly motionless, but to minimize unnecessary rotation and weight shifting.
Common Plank Shoulder Taps Mistakes
Rotating the Hips Excessively
Problem: Allowing your hips to twist dramatically every time you lift a hand removes much of the intended anti-rotation challenge.
Fix: Brace your core and glutes, slow down the movement, and widen your feet if necessary.
Letting the Hips Sag
Problem: Allowing your hips to drop can cause you to lose your strong plank position.
Fix: Brace your core and squeeze your glutes while maintaining a relatively straight line through your torso and legs.
Raising the Hips Too High
Problem: Lifting your hips into a pike position reduces the demand on your core and changes the exercise.
Fix: Keep your hips aligned with the rest of your body rather than deliberately pushing them upward.
Performing the Taps Too Quickly
Problem: Rapidly switching hands can create momentum and allow your body to rock from side to side.
Fix: Pause briefly after returning each hand to the floor and establish stability before performing the next tap.
Shifting Too Far Onto the Supporting Arm
Problem: Moving your entire torso sideways before every tap makes the exercise easier by avoiding some of the anti-rotation demand.
Fix: Shift only enough weight to safely lift the opposite hand while keeping your torso relatively centered.
Reaching for the Same-Side Shoulder
Problem: Tapping the shoulder on the same side does not create the same cross-body movement.
Fix: Use your right hand to tap your left shoulder and your left hand to tap your right shoulder.
Continuing After Form Breaks Down
Problem: As fatigue increases, the hips may begin sagging, rotating, or shifting excessively.
Fix: End the set when you can no longer maintain controlled technique. Use an easier variation if necessary.
Plank Shoulder Tap Progressions and Variations
Plank Shoulder Taps can be adjusted to make the exercise easier or more challenging depending on your current core and upper-body stability.
Knee Plank Shoulder Tap
Keeping your knees on the floor reduces the amount of bodyweight supported by your hands and feet.
How to Do Knee Plank Shoulder Taps
- Begin on your hands and knees.
- Move your knees backward to create a straight line from your head toward your knees.
- Brace your core and glutes.
- Lift one hand from the floor.
- Tap the opposite shoulder.
- Return your hand to the starting position.
- Alternate sides while minimizing torso rotation.
Incline Plank Shoulder Tap
Placing your hands on an elevated surface reduces the difficulty while maintaining the alternating shoulder-tap pattern.
How to Do Incline Plank Shoulder Taps
- Place your hands on a sturdy elevated surface.
- Step your feet backward into an Incline Plank.
- Brace your core and maintain a straight body line.
- Shift your weight slightly into one hand.
- Use the opposite hand to tap your shoulder.
- Return the hand to the elevated surface.
- Alternate sides under control.
Wide-Stance Plank Shoulder Tap
A wider foot position creates a larger base of support and makes resisting rotation easier.
How to Do Wide-Stance Plank Shoulder Taps
- Enter a High Plank position.
- Place your feet wider than hip-width apart.
- Brace your core and glutes.
- Lift one hand without excessively shifting your hips.
- Tap the opposite shoulder.
- Return your hand to the floor.
- Alternate sides while maintaining control.
Narrow-Stance Plank Shoulder Tap
Bringing your feet closer together reduces your base of support and increases the stability challenge.
How to Do Narrow-Stance Plank Shoulder Taps
- Begin in a strong High Plank.
- Position your feet closer together than usual.
- Brace your core firmly.
- Lift one hand slowly from the floor.
- Tap the opposite shoulder without excessive rotation.
- Return your hand to its starting position.
- Alternate sides while maintaining your body line.
Slow-Tempo Plank Shoulder Tap
Slowing the movement increases the amount of time you must stabilize yourself on one arm.
How to Do Slow-Tempo Plank Shoulder Taps
- Establish a stable High Plank.
- Brace your core and glutes.
- Slowly lift one hand from the floor.
- Tap the opposite shoulder and briefly pause.
- Slowly return your hand to the floor.
- Re-establish a stable plank position.
- Repeat on the opposite side.
Final Thoughts
Plank Shoulder Taps are a simple but challenging progression from the standard High Plank. By repeatedly removing one hand from the floor, you force your core and supporting shoulder to stabilize your body against an asymmetrical load.
They develop:
- Core strength
- Anti-rotation control
- Shoulder stability
- Upper-body support strength
- Coordination
- Body awareness
- High Plank control
- Full-body stability
Focus on quality rather than speed. Keep your core and glutes engaged, tap the opposite shoulder deliberately, and minimize unnecessary movement through your hips.
If you cannot yet control the standard version, widen your feet or use Knee or Incline Plank Shoulder Taps. As your stability improves, gradually narrow your stance or slow each repetition to make the exercise more demanding. Learn more about Core Workouts here.
Essential Gear for Plank Shoulder Taps
Plank Shoulder Taps require no mandatory equipment, but a few items can make training more comfortable or provide additional progression options.
- Exercise Mat: Provides a clean, comfortable, and more forgiving surface for your hands and feet.
- Workout Bench: A sturdy bench can be used for Incline Plank Shoulder Taps when the floor variation is too difficult.
- Push-Up Handles: Can provide an alternative wrist position, although you must be able to lift and replace each hand securely on the handles without them shifting.
- Weighted Vest: An advanced option for increasing resistance after standard Plank Shoulder Taps can be performed with excellent control.
Plank Shoulder Taps FAQ
Q1: Why do my hips rotate during Plank Shoulder Taps?
When one hand leaves the floor, your base of support becomes smaller and asymmetrical. Some movement is natural, but excessive rotation can indicate that the variation is currently too difficult or that you are moving too quickly. Widening your feet and slowing the taps can make the exercise easier to control.
Q2: How many Plank Shoulder Taps should beginners do?
A practical starting point is around 6–10 controlled taps per side for 2–3 sets. Technique matters more than accumulating repetitions, so stop the set if your hips begin rotating or sagging excessively.
Q3: Should my feet be together during Plank Shoulder Taps?
Not necessarily. A hip-width or slightly wider stance is often easier to control. Bringing your feet closer together increases the anti-rotation challenge and can be used as a progression.
Q4: Are Plank Shoulder Taps harder than a regular Plank?
They are generally more challenging for stability because you repeatedly remove one point of support and briefly hold your body with one hand. This creates additional anti-rotation and shoulder-stability demands.
Q5: How can I make Plank Shoulder Taps harder?
You can bring your feet closer together, slow each repetition, pause during each shoulder tap, increase your controlled repetitions, or eventually use a weighted vest. Increase difficulty only while maintaining a stable plank and controlled hip position.