How to Do Navy SEAL Burpees Correctly: Step-by-Step Guide for Beginners

Learn how to do Navy SEAL burpees with perfect form, avoid common mistakes, and discover the best Navy SEAL burpee variations to build explosive strength, muscular endurance, and elite conditioning.

Navy SEAL burpees are one of the most demanding bodyweight conditioning exercises for developing strength, cardiovascular endurance, and mental toughness. Whether you are training for military fitness, tactical selection, obstacle course racing, or high-level athletic performance, mastering Navy SEAL burpees is an excellent way to push your limits.


What Are Navy SEAL Burpees?

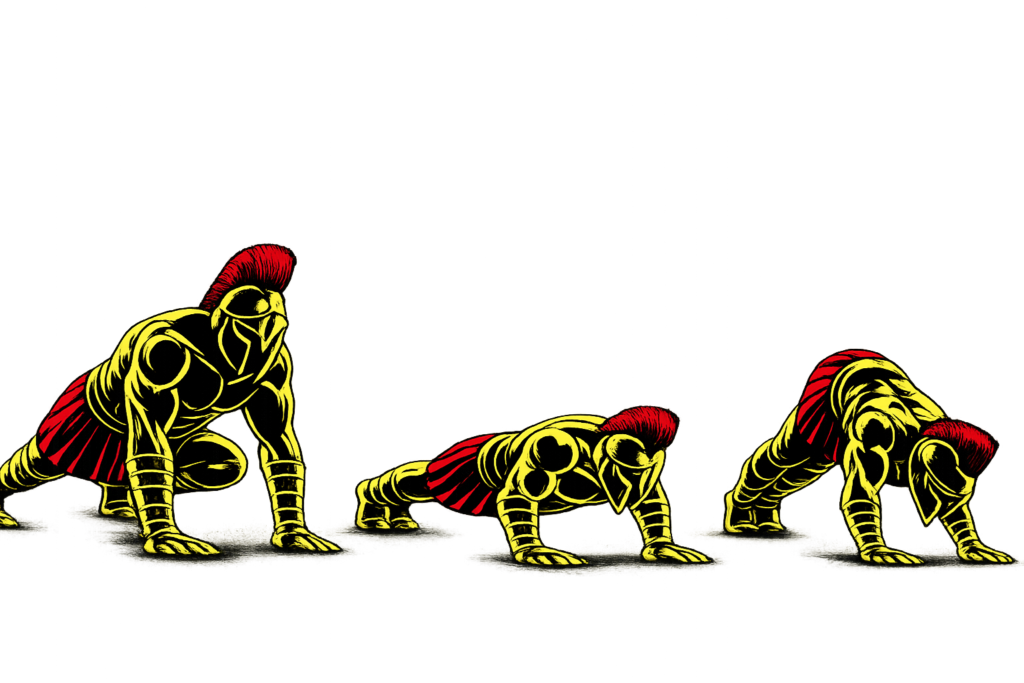
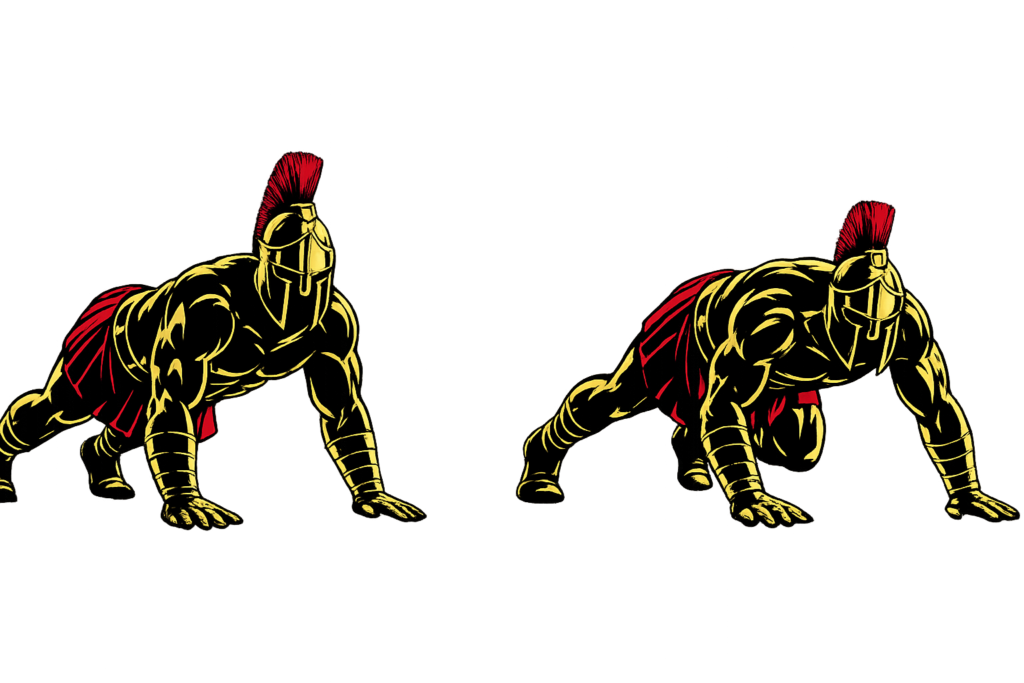
A Navy SEAL burpee is an advanced burpee variation that combines a burpee with three push-ups before returning to the standing position. After kicking your feet back into a high plank, you perform one push-up, bring your feet slightly forward for a second push-up, return them back for a third push-up, then jump your feet forward and explode upward.

Navy SEAL burpees are considered one of the best full-body conditioning exercises because they combine strength, endurance, coordination, and cardiovascular training into one continuous movement.

Navy SEAL burpees are commonly used in:

  • Military fitness preparation
  • Tactical conditioning programs
  • Cross-training workouts
  • High-intensity interval training (HIIT)

Unlike standard burpees, Navy SEAL burpees place much greater emphasis on upper-body endurance and muscular stamina.

Benefits of Navy SEAL Burpees

Navy SEAL burpees are one of the most effective exercises for total-body conditioning.

Benefits include:

  • Builds full-body strength
  • Improves muscular endurance
  • Boosts cardiovascular fitness
  • Develops explosive power
  • Burns a high number of calories
  • Builds mental toughness

Few bodyweight exercises challenge the entire body as effectively as Navy SEAL burpees.

Muscles Worked in Navy SEAL Burpees

Navy SEAL burpees activate nearly every major muscle group.

Primary Muscles
  • Pectoralis Major
  • Triceps Brachii
  • Quadriceps
  • Gluteus Maximus
Secondary Muscles
  • Anterior Deltoids
  • Rectus Abdominis
  • Hip Flexors
  • Hamstrings
  • Calves
  • Serratus Anterior
  • Forearms

Because of this muscle activation, Navy SEAL burpees are one of the best exercises for developing functional athletic fitness.


How to Do Navy SEAL Burpees (Step-by-Step)

Step 1: Stand in the Starting Position

Begin with:

  • Feet shoulder-width apart
  • Chest up
  • Core engaged
  • Arms relaxed by your sides

Tip: Brace your core before beginning each repetition.

Step 2: Squat and Place Your Hands on the Floor

Bend your knees and hips while lowering into a squat.

Focus on:

  • Keeping your chest lifted
  • Placing both hands directly beneath your shoulders
  • Maintaining balance

Prepare to kick your feet backward.

Step 3: Kick Back and Perform the Three Push-Ups

Jump your feet back into a high plank.

Perform the sequence as follows:

  • Complete one full push-up.
  • Jump your feet slightly forward toward your hands and perform a second push-up.
  • Jump your feet back into the original plank position and perform a third push-up.

Maintain proper push-up form during every repetition.

Step 4: Return to Standing

After the third push-up:

  • Jump your feet back underneath your hips
  • Stand up powerfully
  • Finish by jumping vertically while reaching your arms overhead

Land softly with your knees slightly bent.

Step 5: Repeat With Control

Immediately begin the next repetition while maintaining proper technique.

Focus on smooth transitions instead of rushing through the movement.
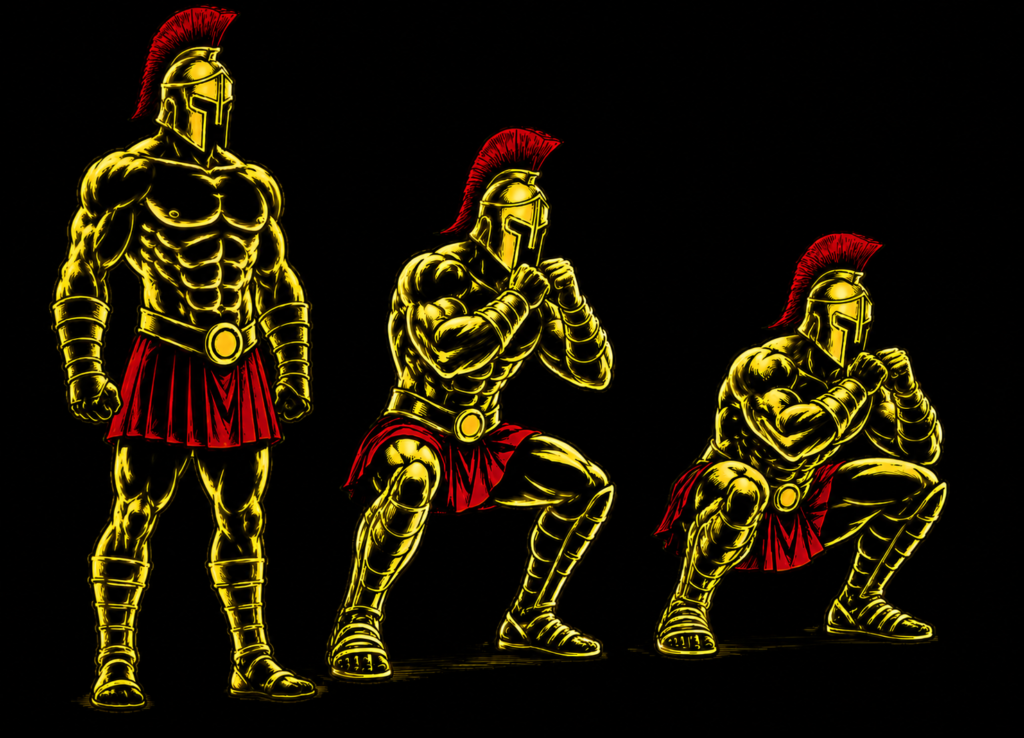
Warrior showcasing How to do Navy SEAL Burpees with proper form

Navy SEAL Burpee Form Checklist

Use this quick checklist to ensure perfect Navy SEAL burpee form.

  • Keep your core engaged throughout
  • Maintain proper push-up technique
  • Land softly after each jump
  • Keep your movements smooth and controlled
  • Maintain a steady breathing rhythm

Perfect form improves conditioning while reducing injury risk.


Common Navy SEAL Burpee Mistakes

Performing Poor Push-Ups

Problem: Reduces upper-body strength development.

Fix: Lower your chest fully and maintain a straight body during every push-up.

Letting the Hips Sag

Problem: Places excessive stress on the lower back.

Fix: Brace your core and squeeze your glutes during the plank position.

Landing Stiff-Legged

Problem: Increases impact on the knees and ankles.

Fix: Land softly with slightly bent knees.

Rushing the Exercise

Problem: Causes poor technique and early fatigue.

Fix: Prioritize clean repetitions over speed.

Holding Your Breath

Problem: Reduces endurance and performance.

Fix: Breathe naturally throughout the movement, exhaling during each push-up and jump.

Quality repetitions always outperform sloppy speed.


Navy SEAL Burpee Variations

Once you master the basic Navy SEAL burpee, different variations can help increase difficulty or match your current fitness level.

Half Navy SEAL Burpees

A beginner-friendly variation.

How to Do Half Navy SEAL Burpees

  • Perform only one push-up instead of three
  • Complete the rest of the movement normally
  • Focus on mastering proper technique

This variation develops the strength needed for the full exercise.

Navy SEAL Burpees Without the Jump

Reduces impact on the joints.

How to Do Navy SEAL Burpees Without the Jump

  • Complete the three push-ups
  • Stand up without performing the vertical jump
  • Repeat under control

This variation is ideal for beginners or recovery sessions.

Weighted Vest Navy SEAL Burpees

Increases the training demand.

How to Do Weighted Vest Navy SEAL Burpees

  • Wear a properly fitted weighted vest
  • Perform the movement with strict form
  • Maintain steady pacing

This variation develops strength and endurance simultaneously.

Timed Navy SEAL Burpees

An advanced conditioning progression.

How to Do Timed Navy SEAL Burpees

  • Perform as many quality repetitions as possible within a set time, such as 5 or 10 minutes
  • Maintain proper technique throughout
  • Pace yourself to avoid excessive fatigue

This variation builds exceptional work capacity and mental resilience.


Final Thoughts

Navy SEAL burpees are one of the most demanding bodyweight exercises you can master.

They build:

  • Full-body strength
  • Muscular endurance
  • Cardiovascular fitness
  • Explosive power
  • Mental toughness

Progress may feel difficult because Navy SEAL burpees combine several challenging movements into one continuous exercise. However, with consistent training and proper form, your conditioning, strength, and resilience will improve dramatically. Learn more about Conditioning Here.

Master technique before increasing speed.

Focus on smooth transitions, quality push-ups, and controlled breathing.

A warrior doesn’t fear hard work—he embraces every repetition.

Essential Gear for Navy SEAL Burpees

The right equipment can make Navy SEAL burpees more comfortable, improve your performance, and help you progress safely. Here are a few pieces of gear worth considering:

  • • Exercise Mat: Cushions your hands during the push-up portion and provides better grip on hard floors.
  • • Wrist Wraps: Adds wrist support during the repeated push-ups and plank positions.
  • • Resistance Bands: Great for building the upper-body and core strength needed for easier Navy SEAL burpees.
  • • Plyometric Box: Useful for pairing with burpees to increase explosive power and conditioning.
  • • Weighted Vest: Adds extra resistance to make Navy SEAL burpees even more challenging as you progress.

As your strength and endurance improve, these tools can help you train more effectively and prepare for increasingly demanding conditioning workouts.


Navy SEAL Burpee FAQ

Q1: Are Navy SEAL burpees harder than regular burpees?
Yes. Navy SEAL burpees are significantly more challenging because they include three push-ups during every repetition, greatly increasing the demand on your chest, shoulders, triceps, and cardiovascular system.

Q2: How many Navy SEAL burpees should beginners do?
Most beginners should start with 3-8 repetitions for 2-3 sets while focusing on proper technique. If necessary, begin with the half Navy SEAL burpee variation.

Q3: Are Navy SEAL burpees good for military fitness?
Yes. Navy SEAL burpees develop full-body strength, muscular endurance, cardiovascular fitness, and mental toughness, making them an excellent exercise for military preparation and tactical athletes.
How to Do Bear Crawls Correctly: Step-by-Step Guide for Beginners

Learn how to do bear crawls with perfect form, avoid common mistakes, and discover the best variations to improve strength, coordination, and conditioning.

Bear crawls are one of the most effective full-body bodyweight exercises for developing functional strength, endurance, and athletic movement. Whether you are training for military fitness tests, sports performance, or general fitness, mastering bear crawls is essential.


What Are Bear Crawls?

Bear crawls are a crawling movement where you move on your hands and feet while keeping your knees elevated slightly above the ground.

This exercise challenges strength, coordination, stability, and cardiovascular endurance simultaneously.

Bear crawls are commonly used in:

  • Military fitness training
  • Athletic conditioning programs
  • Functional fitness workouts
  • Core and stability training

Unlike isolated exercises, bear crawls train the body to move as a connected unit.

Benefits of Bear Crawls

Bear crawls are one of the best exercises for developing athletic conditioning and total-body control.

Benefits include:

  • Builds full-body strength and endurance
  • Improves coordination and balance
  • Enhances core stability
  • Strengthens shoulders and grip
  • Develops functional movement ability
  • Essential for military and tactical fitness

Few exercises challenge the entire body as effectively as bear crawls.

Muscles Worked in Bear Crawls

Bear crawls activate multiple muscle groups throughout the body.

Primary Muscles
  • Shoulders (Deltoids)
  • Core Muscles
  • Quadriceps
Secondary Muscles
  • Chest (Pectorals)
  • Triceps
  • Glutes
  • Hamstrings
  • Calves

This makes bear crawls one of the best full-body conditioning exercises.


How to Do Bear Crawls (Step-by-Step)

Step 1: Start on All Fours

Get into a tabletop position on your hands and knees.

  • Hands under shoulders
  • Knees under hips
  • Spine neutral

Tip: Keep your movements controlled from the start.

Step 2: Lift Your Knees Slightly

Raise your knees a few inches off the ground.

  • Core engaged
  • Back flat
  • Neck neutral

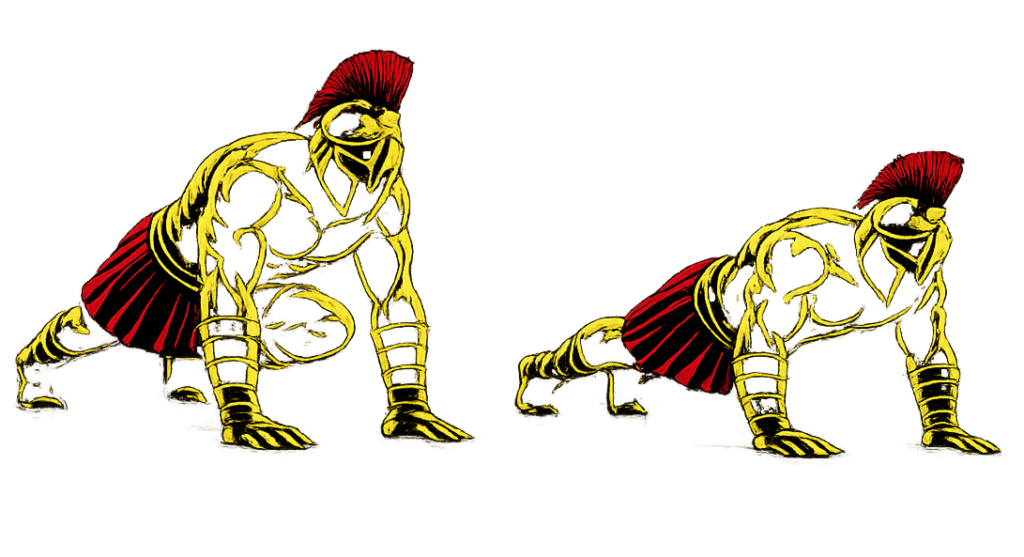
Step 3: Move Opposite Hand and Foot

Move one hand and the opposite foot forward simultaneously.

  • Take small controlled steps
  • Maintain balance and posture
Warrior showcasing How to do Bear Crawls with proper form

Step 4: Continue Crawling Forward

Alternate sides while moving forward.

  • Keep hips stable
  • Avoid excessive body rotation

Step 5: Maintain Control

Keep your movements smooth and controlled throughout the crawl.

Avoid rushing or letting your knees touch the ground.


Bear Crawls Form Checklist

Use this checklist to ensure proper form:

  • Keep knees slightly elevated
  • Maintain a flat back
  • Move your opposite hand and foot together
  • Keep movements controlled
  • Engage your core throughout

Perfect form builds strength and prevents injury.


Common Bear Crawls Mistakes

Hips Too High

Problem: Reduces core activation.

Fix: Keep hips level and controlled.

Knees Touching the Ground

Problem: Reduces exercise difficulty and effectiveness.

Fix: Keep knees hovering slightly above the floor.

Moving Too Fast

Problem: Causes poor coordination.

Fix: Focus on slow, controlled movement first.

Excessive Body Rotation

Problem: Reduces stability.

Fix: Keep your torso stable and core engaged.

Looking Up Excessively

Problem: Creates neck strain.

Fix: Keep your neck neutral and eyes slightly forward.


Bear Crawls Variations

Once you master basic bear crawls, these variations can increase difficulty and effectiveness.

Backward Bear Crawls

Improves coordination and control.

How to Do Backward Bear Crawls

  • Crawl backward slowly
  • Maintain the same posture and control
  • Keep knees elevated

Lateral Bear Crawls

Builds side-to-side coordination.

How to Do Lateral Bear Crawls

  • Move sideways while maintaining crawl position
  • Keep hips stable
  • Move with control

Fast Bear Crawls

Increases conditioning demand.

How to Do Fast Bear Crawls

  • Maintain proper form
  • Increase crawling speed gradually
  • Stay controlled throughout

Weighted Bear Crawls

Adds resistance for advanced training.

How to Do Weighted Bear Crawls

  • Wear a weighted vest or backpack
  • Perform controlled crawls
  • Maintain proper posture

Final Thoughts

Bear crawls are one of the most effective full-body exercises you can master.

They build:

  • Functional strength
  • Core stability
  • Conditioning and endurance
  • Coordination and balance
  • Mental toughness

Progress may feel challenging at first because bear crawls demand total-body control. However, with consistent training and proper form, your strength and athleticism will improve rapidly. Learn more about Conditioning Exercises here.

Focus on smooth and controlled movement.

A warrior moves with strength — not chaos.

Essential Gear for Bear Crawls

While bear crawls require no equipment to perform, the right gear can make your workouts more comfortable, effective, and challenging as your fitness improves.

  • Exercise Mat: Cushions your hands and improves comfort on hard surfaces.
  • Wrist Wraps: Add wrist support during longer training sessions.
  • Resistance Bands: Increase resistance for advanced bear crawl variations.
  • Weighted Vest: Adds intensity to build strength and endurance.
  • Agility Cones: Help set up crawling drills and improve movement control.

Looking to upgrade your training setup? Explore our Equipment Guides to find the best gear for your workouts.


Bear Crawls FAQ

Q1: How far should beginners crawl?
Beginners can start with 10–20 meters or 20–30 seconds per set.

Q2: Are bear crawls good for core strength?
Yes, bear crawls heavily activate the core while also training the entire body.

Q3: How often should I do bear crawls?
You can train bear crawls 2–4 times per week, depending on workout intensity and recovery.

How to Do Burpees Correctly: Step-by-Step Guide for Beginners

Learn how to do burpees with perfect form, avoid common mistakes, and discover the best variations to improve conditioning and full-body athletic performance.

Burpees are one of the most effective bodyweight exercises for developing endurance, explosive power, and full-body conditioning. Whether you are training for military fitness tests, fat loss, or athletic performance, mastering burpees is essential.


What Are Burpees?

Burpees are a full-body bodyweight exercise that combines a squat, plank, and explosive jump into one continuous movement.

This exercise challenges strength, endurance, coordination, and cardiovascular fitness simultaneously.

Burpees are commonly used in:

  • Military fitness training
  • HIIT workouts
  • Athletic conditioning programs
  • Fat-loss training

Unlike isolated exercises, burpees train the entire body while improving conditioning.

Benefits of Burpees

Burpees are one of the most powerful conditioning exercises you can perform.

Benefits include:

  • Improves cardiovascular endurance
  • Burns calories effectively
  • Builds full-body strength and coordination
  • Enhances explosive power
  • Improves athletic conditioning
  • Essential for military and tactical fitness

Few exercises challenge both strength and endurance as effectively as burpees.

Muscles Worked in Burpees

Burpees activate multiple muscle groups throughout the body.

Primary Muscles
  • Quadriceps
  • Chest (Pectorals)
  • Core Muscles
Secondary Muscles
  • Glutes
  • Hamstrings
  • Shoulders (Deltoids)
  • Triceps
  • Calves

This makes burpees one of the best full-body exercises for athletic conditioning.


How to Do Burpees (Step-by-Step)

Step 1: Stand Tall

Stand upright with your feet shoulder-width apart.

  • Core engaged
  • Chest upright
  • Arms relaxed at your sides

Tip: Stay balanced and controlled before starting the movement.

Step 2: Lower Into a Squat

Bend your knees and hips to lower into a squat position.

  • Keep chest up
  • Place your hands on the ground in front of you

Step 3: Kick Your Feet Back

Jump or step your feet backward into a plank position.

  • Body in a straight line
  • Core tight
  • Hands under shoulders

Step 4: Return to the Squat Position

Jump or step your feet back toward your hands.

  • Maintain balance
  • Keep movement controlled
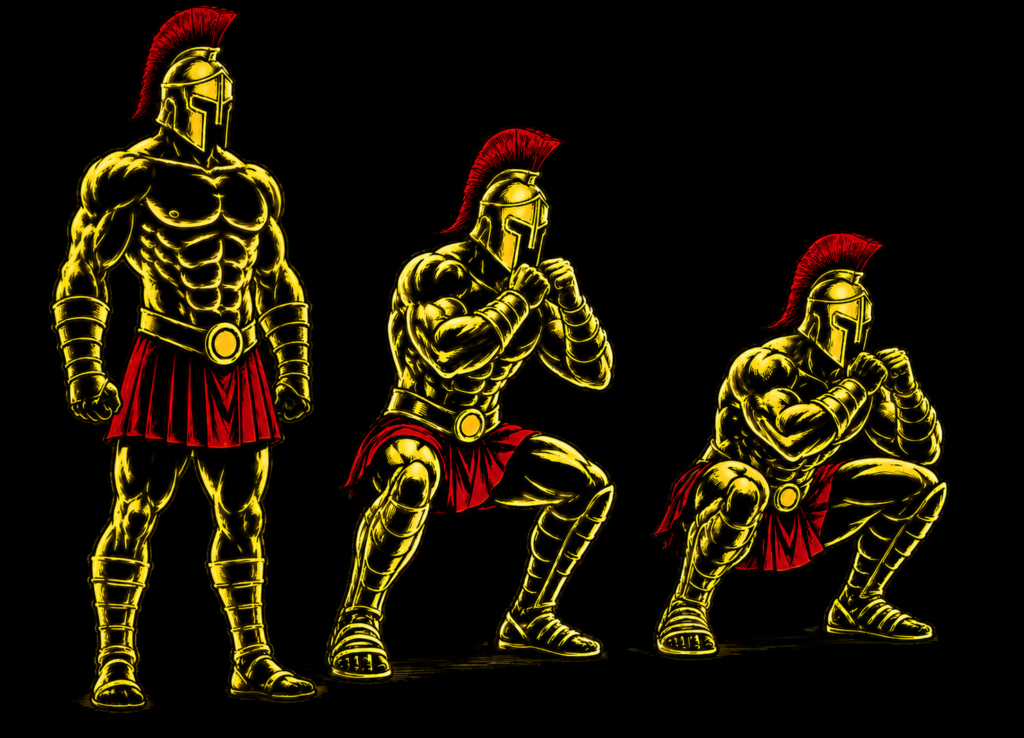
Warrior showcasing How to do Burpees with proper form

Step 5: Explode Upward

Jump upward explosively while reaching your arms overhead.

  • Land softly
  • Immediately prepare for the next rep

Burpees Form Checklist

Use this checklist to ensure proper form:

  • Keep your core engaged
  • Maintain a straight plank position
  • Land softly after each jump
  • Control each phase of the movement
  • Use full range of motion

Perfect form improves performance and reduces injury risk.


Common Burpees Mistakes

Poor Plank Position

Problem: Causes lower back strain.

Fix: Keep your body in a straight line during the plank phase.

Rushing the Movement

Problem: Reduces control and effectiveness.

Fix: Focus on proper form before increasing speed.

Hard Landings

Problem: Increases joint stress.

Fix: Land softly with bent knees.

Incomplete Range of Motion

Problem: Limits effectiveness.

Fix: Fully extend during the jump and maintain proper squat depth.

Letting Hips Sag

Problem: Reduces core stability.

Fix: Keep your abs tight throughout the movement.


Burpees Variations

Once you master basic burpees, these variations can increase intensity and effectiveness.

Half Burpees (Beginner Variation)

An easier version for beginners.

How to Do Half Burpees

  • Remove the jump at the top
  • Step feet back instead of jumping
  • Focus on movement control

Push-Up Burpees

Adds upper-body strength training.

How to Do Push-Up Burpees

  • Perform a push-up in the plank position
  • Return to standing and jump upward
  • Maintain proper form throughout

Explosive Burpees

Improves power and conditioning.

How to Do Explosive Burpees

  • Jump higher during the top phase
  • Move explosively while maintaining control
  • Land softly

Broad Jump Burpees

Builds athletic explosiveness.

How to Do Broad Jump Burpees

  • Perform a standard burpee
  • Instead of jumping vertically, jump forward
  • Reset and repeat

Final Thoughts

Burpees are one of the most effective full-body conditioning exercises you can master.

They build:

  • Cardiovascular endurance
  • Full-body strength
  • Explosive power
  • Coordination and agility
  • Mental toughness

Progress may feel difficult at first, especially during high-rep sets. However, with consistent training and proper form, your conditioning and endurance will improve rapidly. Learn more about Conditioning Exercises Here.

Focus on control before speed.

A warrior pushes through fatigue — without sacrificing form.

Essential Gear for Burpees

While burpees require no equipment, the right gear can improve comfort, protect your joints, and help you perform explosive repetitions more safely and effectively.

  • Exercise Mat: Cushions your hands during the plank phase and provides a more comfortable training surface.
  • Wrist Wraps: Provide extra wrist support during high-volume burpee workouts.
  • Resistance Bands: Great for adding resistance to explosive burpees or assisting beginners with movement progressions.
  • Plyometric Box: Perfect for progressing to box jump burpees, increasing explosive leg power, coordination, and cardiovascular conditioning while adding variety to your workouts.
  • Weighted Vest: Increases workout intensity while building greater strength and endurance.

Using the right equipment can make your workouts safer, more effective, and easier to progress over time. If you’re looking to take your conditioning to the next level, check out our recommended gear guides to find the best equipment for your fitness goals.


Burpees FAQ

Q1: How many burpees should beginners do?
Beginners can start with 5–10 reps per set and gradually increase volume as conditioning improves.

Q2: Are burpees good for fat loss?
Yes, burpees burn a high number of calories and are highly effective for improving conditioning and fat loss.

Q3: How often should I do burpees?
You can train burpees 2–5 times per week, depending on workout intensity and recovery.

How to Do High Knees Correctly: Step-by-Step Guide for Beginners

Learn how to do high knees with perfect form, avoid common mistakes, and discover the best variations to improve conditioning and athletic performance.

High knees are one of the most effective bodyweight cardio exercises for developing endurance, improving coordination, and building explosive lower-body power. Whether you are training for military fitness tests, sports performance, or fat loss, mastering high knees is essential.


What Are High Knees?

High knees are a dynamic cardio exercise where you run in place while driving your knees upward toward your chest as quickly as possible.

This movement combines speed, coordination, and cardiovascular endurance into one powerful exercise.

High knees are commonly used in:

  • Military fitness training
  • HIIT workouts
  • Athletic conditioning programs
  • Warm-up routines

Unlike traditional running, high knees place greater emphasis on explosive movement and core engagement.

Benefits of High Knees

High knees are one of the best exercises for conditioning and endurance.

Benefits include:

  • Improves cardiovascular endurance
  • Burns calories and supports fat loss
  • Enhances coordination and agility
  • Builds lower-body explosiveness
  • Strengthens core and hip flexors
  • Essential for military and tactical fitness

Few exercises improve conditioning as effectively as high knees.

Muscles Worked in High Knees

High knees activate multiple lower-body and core muscles.

Primary Muscles
  • Quadriceps
  • Hip Flexors
  • Calves
Secondary Muscles
  • Hamstrings
  • Glutes
  • Core Muscles
  • Shoulders

This makes high knees an excellent full-body conditioning exercise.


How to Do High Knees (Step-by-Step)

Step 1: Stand Tall

Stand upright with your feet hip-width apart.

  • Core engaged
  • Chest upright
  • Arms relaxed at your sides

Tip: Stay light on your feet throughout the movement.

Step 2: Begin Running in Place

Start jogging lightly in place.

  • Maintain balance
  • Keep movements controlled

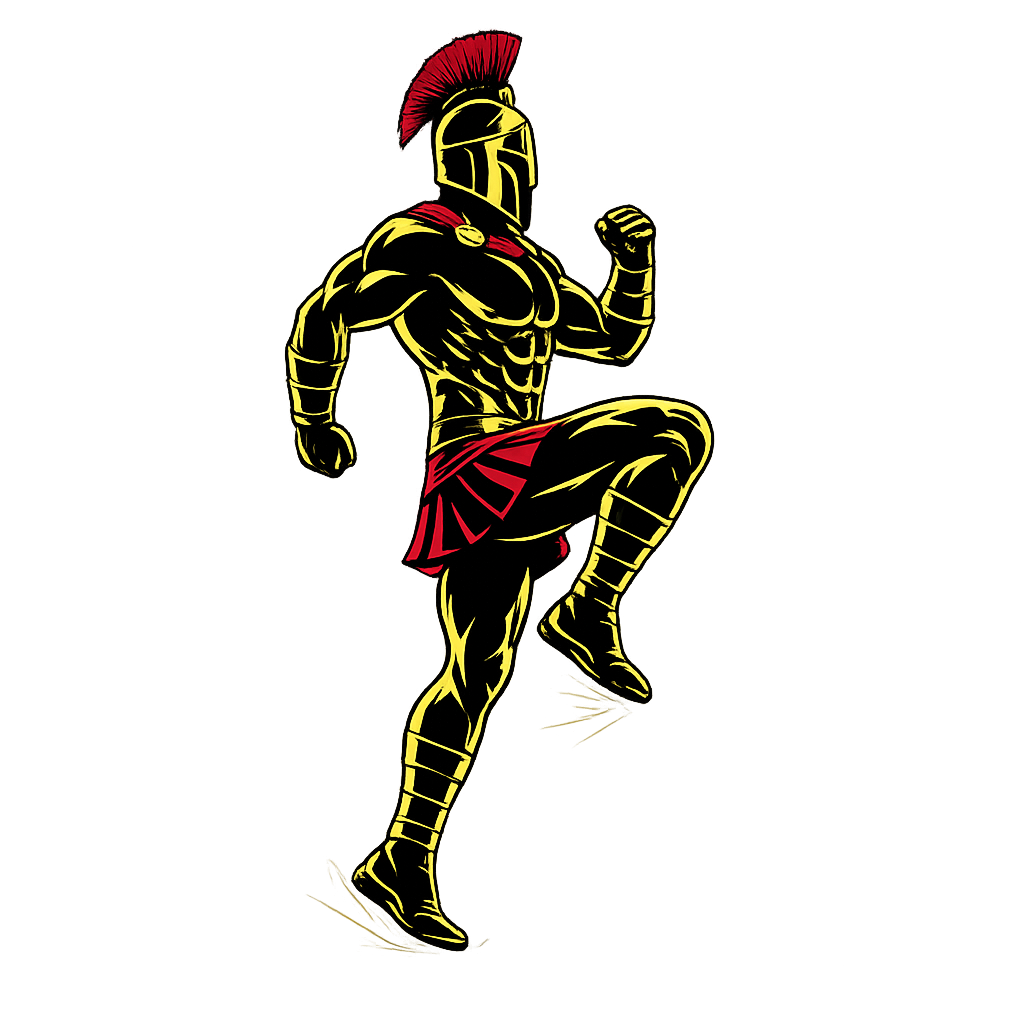
Step 3: Drive Your Knees Up

Lift one knee toward your chest while pumping the opposite arm.

  • Raise knees to waist height if possible
  • Land softly on the balls of your feet
Warrior showcasing How to do High Knees with proper form

Step 4: Alternate Legs Quickly

Continue switching legs rapidly in a running motion.

  • Keep your rhythm steady
  • Maintain posture and control

Step 5: Control Your Tempo

Perform the exercise at a manageable pace.

Avoid sacrificing form for speed.


High Knees Form Checklist

Use this checklist to ensure proper form:

  • Keep your chest upright
  • Drive knees upward with control
  • Pump your arms naturally
  • Stay on the balls of your feet
  • Maintain a steady rhythm

Perfect form improves performance and reduces injury risk.


Common High Knees Mistakes

Leaning Backward

Problem: Reduces efficiency and balance.

Fix: Keep your torso upright.

Low Knee Drive

Problem: Limits effectiveness.

Fix: Raise knees to at least waist level.

Heavy Foot Landing

Problem: Increases joint stress.

Fix: Land softly and stay light on your feet.

Moving Too Fast Too Soon

Problem: Causes poor form.

Fix: Master control before increasing speed.

Weak Arm Movement

Problem: Reduces coordination and power.

Fix: Pump your arms actively during movement.


High Knees Variations

Once you master basic high knees, these variations can increase intensity and effectiveness.

Slow High Knees

A beginner-friendly variation.

How to Do Slow High Knees

  • Perform the movement slowly
  • Focus on knee height and balance
  • Maintain control throughout

Sprint High Knees

Increases speed and conditioning demand.

How to Do Sprint High Knees

  • Perform high knees as fast as possible
  • Maintain quick foot contact
  • Keep posture upright

Resistance Band High Knees

Adds extra resistance for strength and endurance.

How to Do Resistance Band High Knees

  • Place a resistance band around your feet or waist
  • Perform controlled high knees
  • Maintain strong posture

High Knees With Pause

Improves balance and core control.

How to Do High Knees With Pause

  • Pause briefly at the top of each knee drive
  • Maintain balance
  • Alternate sides slowly

Final Thoughts

High knees are one of the most effective conditioning exercises you can master.

They build:

  • Cardiovascular endurance
  • Lower-body explosiveness
  • Coordination and agility
  • Core stability
  • Athletic performance

Progress may feel challenging at first, especially during longer sets. However, with consistent training and proper form, your endurance and conditioning will rapidly improve. Learn more about Conditioning Exercises here.

Focus on rhythm and control.

A warrior moves fast — but never loses form.

Essential Gear for High Knees

While high knees require no equipment to perform, the right gear can make your workouts more comfortable, effective, and challenging as your fitness improves.

  • Exercise Mat: Cushions your feet when training on hard surfaces and provides better traction.
  • Resistance Bands: Add resistance to increase lower-body strength and conditioning.
  • Weighted Vest: Increases intensity to build endurance and explosive power.
  • Jump Rope: Complements high knees by improving footwork, coordination, and cardio fitness.
  • Training Shoes: Provide grip, stability, and impact protection during fast-paced movements.

Looking to upgrade your training setup? Explore our Equipment Guides to find the best gear for your workouts.


High Knees FAQ

Q1: How long should beginners do high knees?
Beginners can start with 20–30 seconds per set and gradually increase duration over time.

Q2: Are high knees good for fat loss?
Yes, high knees burn calories effectively and are excellent for improving conditioning.

Q3: How often should I do high knees?
You can train high knees 3–5 times per week as part of your conditioning workouts.

How to Do Mountain Climbers Correctly: Step-by-Step Guide for Beginners

Learn how to do mountain climbers with perfect form, avoid common mistakes, and discover the best variations to build a strong core and elite conditioning.

Mountain climbers are one of the most effective bodyweight exercises for developing core strength, improving cardiovascular endurance, and burning fat. Whether you are training for military fitness tests, calisthenics, or athletic performance, mastering mountain climbers is essential.


What Are Mountain Climbers?

Mountain climbers are a dynamic bodyweight exercise performed in a high plank position where you rapidly drive your knees toward your chest in an alternating motion.

This exercise combines core training with cardio, making it highly effective for full-body conditioning.

Mountain climbers are commonly used in:

  • Military fitness training
  • HIIT (High-Intensity Interval Training) workouts
  • Fat-loss programs
  • Athletic conditioning

Unlike static exercises, mountain climbers train both strength and endurance simultaneously.

Benefits of Mountain Climbers

Mountain climbers are one of the most powerful exercises for building endurance and core strength.

Benefits include:

  • Strengthens the core and abs
  • Improves cardiovascular endurance
  • Burns calories and supports fat loss
  • Enhances coordination and agility
  • Builds full-body endurance
  • Essential for military and tactical fitness

Few exercises combine cardio and strength as effectively as mountain climbers.

Muscles Worked in Mountain Climbers

Mountain climbers activate multiple muscle groups across the body.

Primary Muscles
  • Rectus Abdominis
  • Lower Abdominals
  • Hip Flexors
Secondary Muscles
  • Shoulders (Deltoids)
  • Chest (Pectorals)
  • Quadriceps
  • Hamstrings
  • Glutes

This makes mountain climbers a highly effective full-body exercise.


How to Do Mountain Climbers (Step-by-Step)

Step 1: Get Into a High Plank Position

Start in a push-up position with:

  • Hands directly under shoulders
  • Arms fully extended
  • Body in a straight line

Tip: Engage your core to maintain stability.

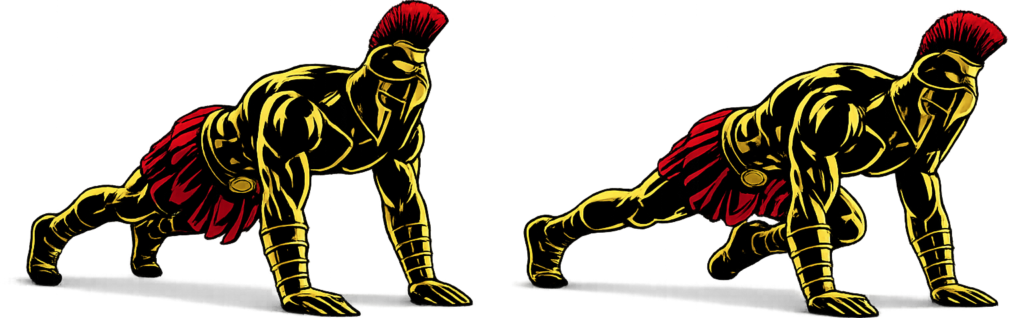
Step 2: Drive One Knee Toward Your Chest

Bring one knee forward toward your chest.

  • Keep your core tight
  • Avoid lifting your hips too high

Step 3: Switch Legs Quickly

Return the leg to the starting position and immediately switch legs.

  • Alternate knees in a running motion
  • Keep movement controlled
Warrior showcasing How to do Mountain Climbers with proper form

Step 4: Maintain Proper Form

Throughout the movement:

  • Keep hips low
  • Maintain a straight body line
  • Engage your core continuously

Step 5: Control Your Speed

Perform the exercise at a steady pace.

Avoid going too fast — proper form is more important than speed.


Mountain Climbers Form Checklist

Use this checklist to ensure perfect form:

  • Keep your body in a straight line
  • Engage your core throughout
  • Keep hips low and stable
  • Drive your knees toward your chest
  • Control your movement

Perfect form maximizes results and prevents injury.


Common Mountain Climbers Mistakes

Hips Too High

Problem: Reduces core engagement.

Fix: Keep your body in a straight plank position.

Moving Too Fast

Problem: Leads to poor form and less effectiveness.

Fix: Focus on controlled movement before increasing speed.

Not Engaging the Core

Problem: Turns it into a leg exercise.

Fix: Keep your abs tight throughout.

Short Range of Motion

Problem: Limits effectiveness.

Fix: Bring knees fully toward your chest.

Bouncing or Sloppy Form

Problem: Reduces muscle activation.

Fix: Stay controlled and stable.


Mountain Climbers Variations

Once you master basic mountain climbers, these variations can increase intensity and effectiveness.

Slow Mountain Climbers

Focuses on control and core strength.

How to Do Slow Mountain Climbers

  • Perform the movement slowly
  • Hold each knee drive briefly
  • Maintain strict plank form

Cross-Body Mountain Climbers

Targets the obliques more effectively.

How to Do Cross-Body Mountain Climbers

  • Drive your knee toward the opposite elbow
  • Keep your core tight
  • Move in a controlled manner

Elevated Mountain Climbers

Increases upper-body involvement.

How to Do Elevated Mountain Climbers

  • Place hands on an elevated surface
  • Perform standard movement
  • Maintain stability

Sliding Mountain Climbers (Advanced)

Adds instability and difficulty.

How to Do Sliding Mountain Climbers

  • Place feet on sliders or a smooth surface
  • Slide knees toward your chest
  • Control the movement throughout

Final Thoughts

Mountain climbers are one of the most effective full-body exercises you can master.

They build:

  • Core strength
  • Cardiovascular endurance
  • Full-body coordination
  • Fat-burning capacity
  • Functional athletic performance

Progress may feel challenging at first, especially when maintaining form under fatigue. However, with consistent training and proper technique, your endurance and strength will rapidly improve. Learn more about Conditioning Exercises here.

Focus on control before speed.

A warrior moves with precision — even at high intensity.

Essential Gear for Mountain Climbers

While mountain climbers require no equipment to perform, the right gear can make your workouts more comfortable, effective, and challenging as your fitness improves.

  • Exercise Mat: Cushions your hands and provides better grip on hard surfaces.
  • Wrist Wraps: Add wrist support during high-repetition training.
  • Resistance Bands: Increase resistance for tougher mountain climber variations.
  • Sliding Discs: Perfect for performing sliding mountain climbers with smooth, controlled movement.
  • Weighted Vest: Increases intensity to build greater strength and conditioning.

Looking to upgrade your training setup? Explore our Equipment Guides to find the best gear for your workouts.


Mountain Climbers FAQ

Q1: How long should beginners do mountain climbers?
Beginners can start with 20–30 seconds per set and gradually increase to 45–60 seconds.

Q2: Are mountain climbers good for fat loss?
Yes, mountain climbers are excellent for burning calories and improving overall conditioning.

Q3: How often should I do mountain climbers?
You can train mountain climbers 3–5 times per week as part of your workouts, depending on recovery.