How to Do Resistance Band Shoulder Press Correctly: Step-by-Step Guide for Beginners

Resistance Band Shoulder Press is an upper-body strengthening exercise that targets your shoulders and triceps. You perform it by pressing a resistance band overhead while keeping your body stable and controlling the tension throughout each repetition.

Unlike Dumbbell or Barbell Shoulder Presses, this exercise uses elastic resistance, which generally becomes stronger as the band stretches. That makes it a practical option when you’re training at home, working out in the gym, or traveling without access to traditional weights.

To perform Resistance Band Shoulder Press correctly, you’ll need to secure the band properly, maintain an upright torso, and press overhead without excessively arching your lower back. Choosing the right resistance is just as important as learning the movement itself.


What Is Resistance Band Shoulder Press?

Resistance Band Shoulder Press is a compound upper-body exercise that involves pressing against the tension of an elastic resistance band.

You start by standing securely on the band and holding its ends or handles near shoulder height. From there, you press your hands overhead until your arms extend comfortably, then slowly lower them back toward your shoulders.

The movement combines shoulder flexion and abduction, elbow extension, and coordinated shoulder blade movement.

Resistance Band Shoulder Press is commonly used in:

  • Shoulder workouts
  • Upper-body strength training
  • At-home workouts
  • Resistance band training
  • Push-day routines
  • Calisthenics accessory workouts
  • Muscular endurance training
  • Minimal-equipment fitness programs

You can adjust the exercise to match your strength by changing the band’s resistance, your stance, or the amount of tension present at the beginning of each repetition.

Benefits of Resistance Band Shoulder Press

Resistance Band Shoulder Press allows you to train your shoulders and triceps without needing heavy gym equipment. It’s particularly convenient when you want an overhead pressing exercise that requires minimal space.

Benefits include:

  • Strengthens the anterior deltoids
  • Develops the lateral deltoids
  • Strengthens the triceps
  • Improves overhead pressing strength
  • Develops shoulder stability and control
  • Trains upper-body muscular endurance
  • Encourages core stabilization during standing presses
  • Provides adjustable resistance for different strength levels
  • Requires minimal equipment
  • Can be performed at home or while traveling

With a sufficiently challenging band, appropriate training volume, and gradual progression, Resistance Band Shoulder Press can contribute to muscle growth and strength development.

Muscles Worked in Resistance Band Shoulder Press

Resistance Band Shoulder Press primarily works the muscles responsible for raising your arms overhead and extending your elbows.

Other muscles help stabilize your shoulders, shoulder blades, and torso so you can press without losing your balance or posture.

Primary Muscles
  • Anterior Deltoids
  • Lateral Deltoids
  • Triceps Brachii
Secondary Muscles
  • Serratus Anterior
  • Upper Trapezius
  • Lower Trapezius
  • Rotator Cuff Muscles
  • Upper Pectoralis Major
  • Rectus Abdominis
  • Obliques
  • Erector Spinae
  • Gluteus Maximus

Your anterior and lateral deltoids contribute to raising your arms overhead, while your triceps straighten your elbows.

Meanwhile, the serratus anterior and trapezius help your shoulder blades rotate upward. Your core and glutes provide stability, allowing you to maintain an upright position throughout the press.


How to Do Resistance Band Shoulder Press (Step-by-Step)

Step 1: Choose a Suitable Resistance Band

Start by selecting a band that allows you to press overhead without straining or compromising your technique.

If you’re new to the exercise, choose a lighter band until you’re comfortable with the movement.

Before starting, inspect the band for:

  • Cracks
  • Tears
  • Fraying
  • Weak attachment points
  • Damaged handles

Never train with a damaged resistance band, as it could break or slip under tension.

Step 2: Secure the Band Under Your Feet

Stand on the middle portion of the resistance band using one or both feet, depending on its design and the resistance you need.

Position your feet approximately hip-width apart.

Make sure the band sits securely beneath your feet and cannot easily slide out during the exercise.

Choose a stable, non-slip surface before you begin pressing.

Step 3: Bring Your Hands to Shoulder Height

Grip the ends or handles of the band and bring your hands up near shoulder level.

Let your elbows sit slightly in front of or beside your torso, whichever feels more comfortable.

Keep your wrists relatively straight and aligned with your forearms.

You should feel manageable tension in the band before starting the press.

Step 4: Establish Your Starting Position

Stand tall with your chest comfortably lifted and your shoulders controlled.

Keep your:

  • Core braced
  • Glutes lightly engaged
  • Feet firmly planted
  • Wrists aligned
  • Head relatively neutral
  • Lower back in a comfortable position

Don’t lean backward to make the resistance easier. Your torso should remain stable as your arms do the pressing.

Step 5: Press the Band Overhead

Begin pushing your hands upward against the band’s resistance.

Extend your elbows gradually as your arms travel overhead.

Depending on the band and your shoulder comfort, your hands may move slightly inward or remain approximately shoulder-width apart.

Allow your shoulder blades to move naturally as your arms rise instead of trying to hold them rigidly in place.

Step 6: Reach the Top Position

Continue pressing until your arms reach a comfortable overhead position.

Your elbows should be extended without forcing an uncomfortable lockout.

Keep your ribs controlled and avoid leaning backward or excessively arching your lower back.

At the top, your hands should be positioned comfortably overhead, with the band remaining securely anchored beneath your feet.

Step 7: Lower and Repeat

Slowly bend your elbows and bring your hands back toward shoulder height.

Resist the band’s pull instead of allowing it to snap your arms downward.

Once you’ve returned to the starting position, stabilize your torso and begin the next repetition.

Continue until you’ve completed your planned set without sacrificing control.
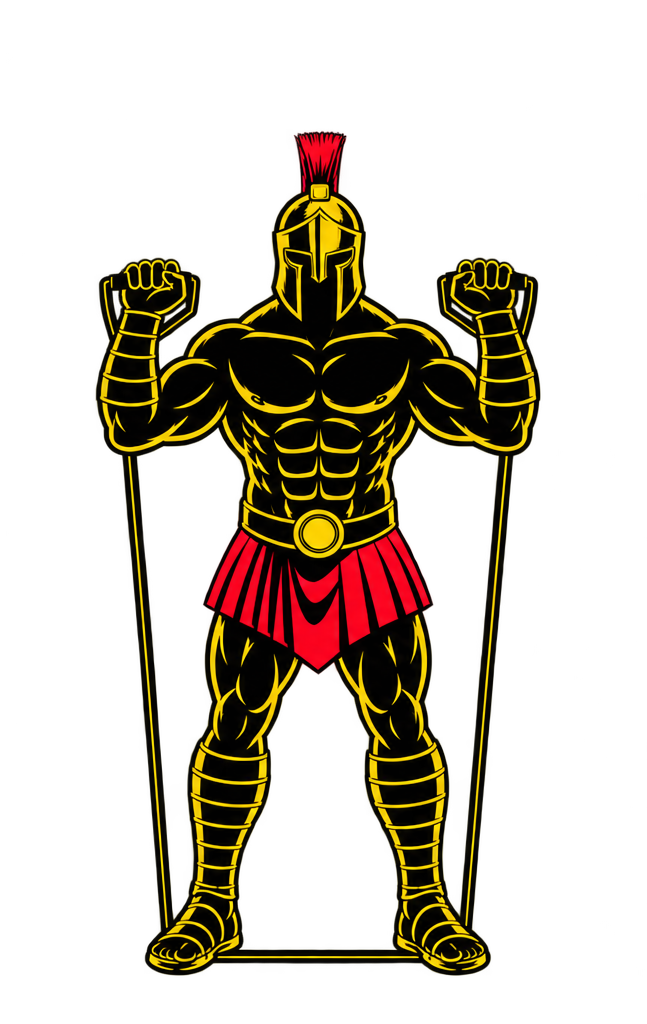
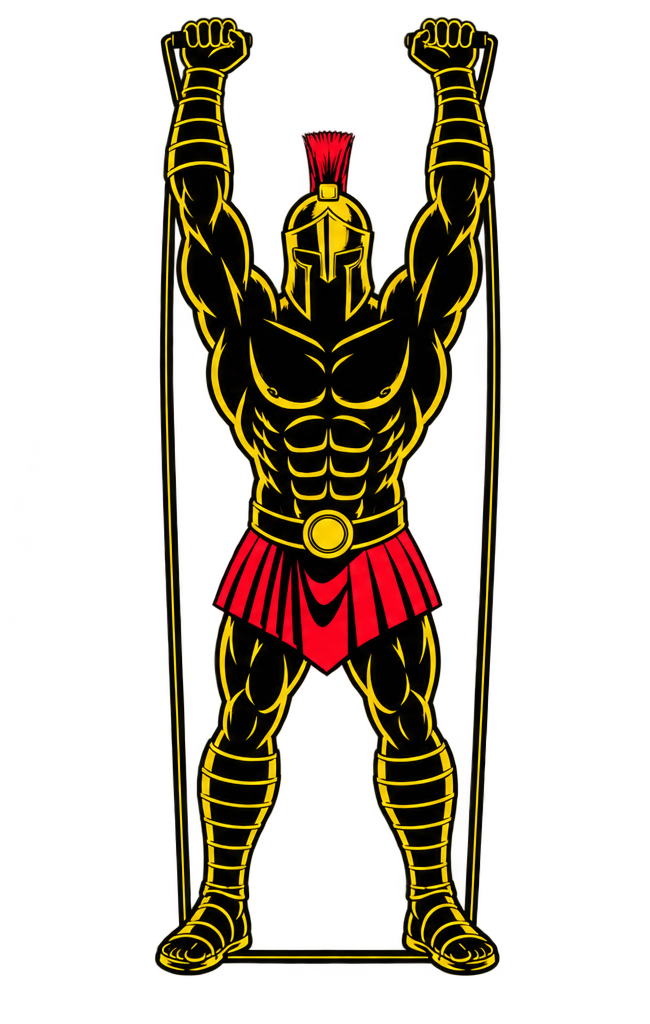
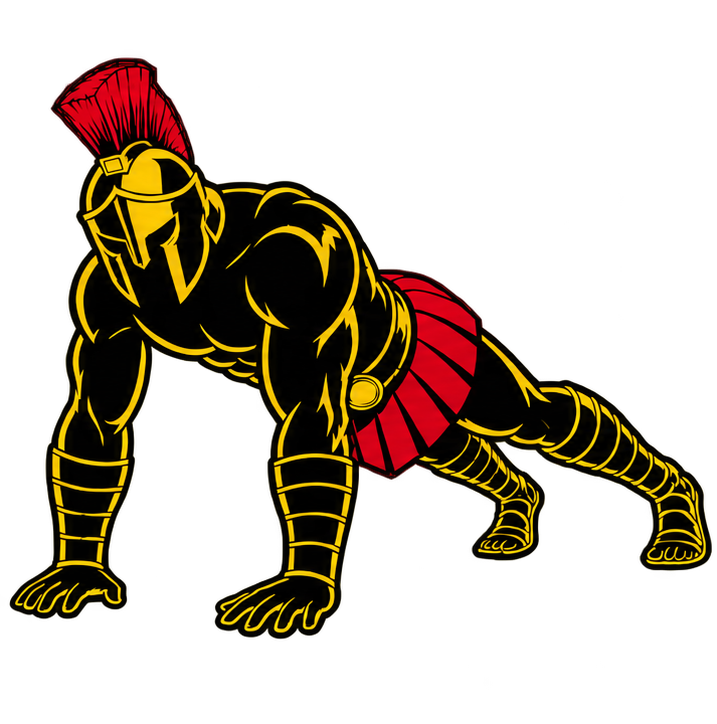
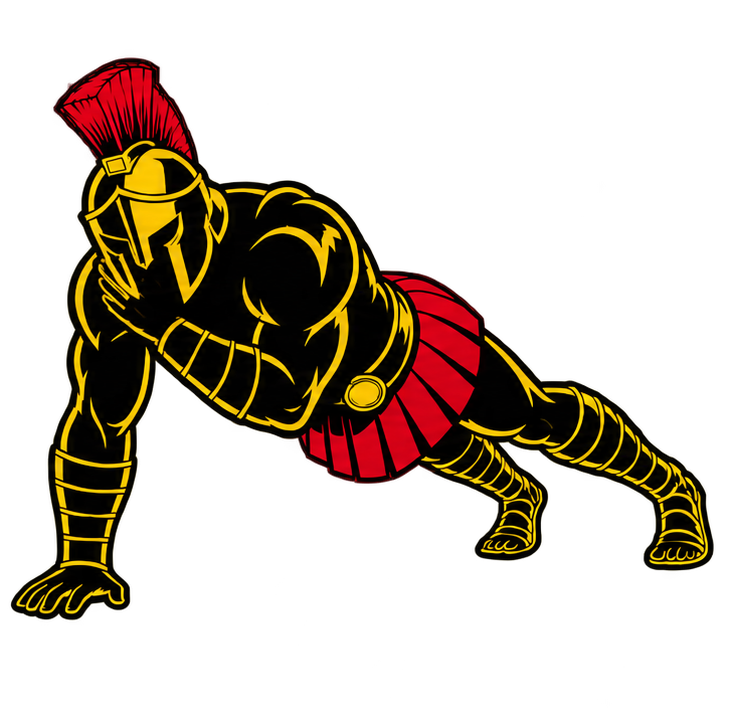
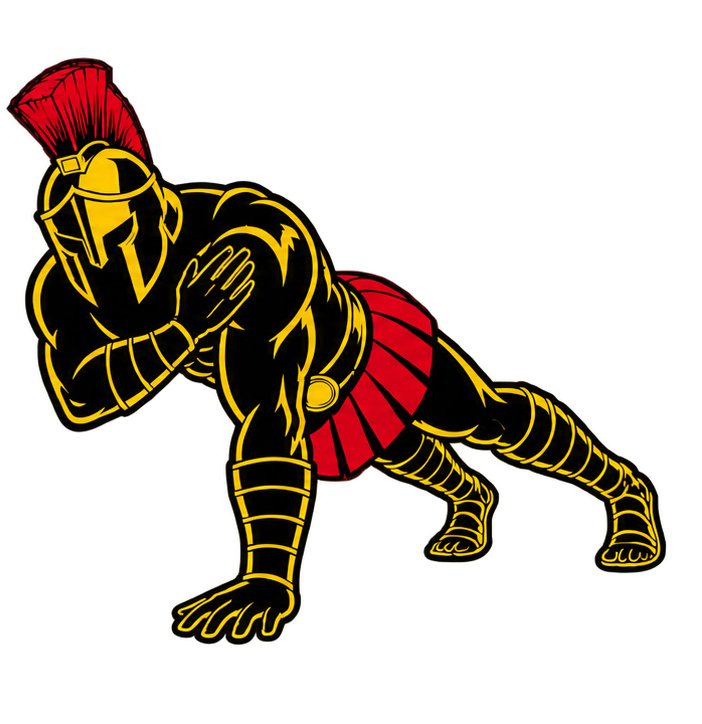
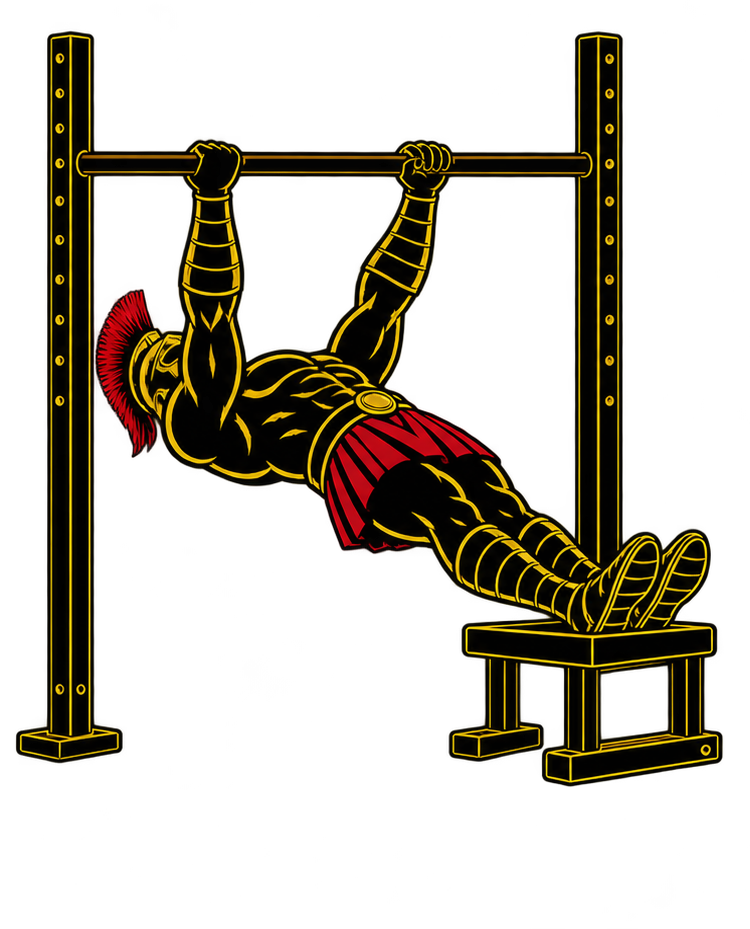
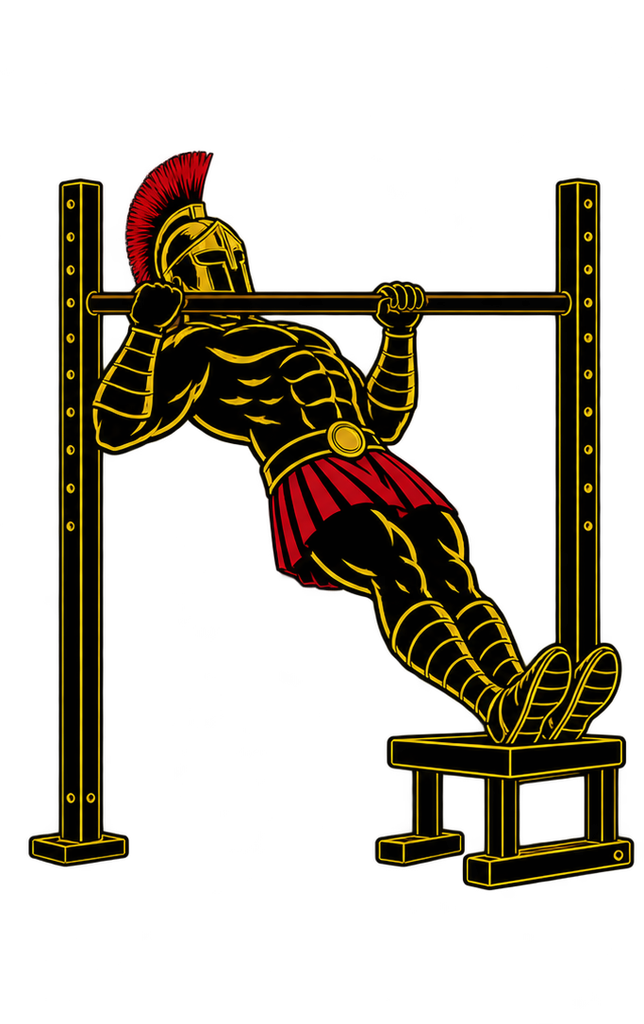
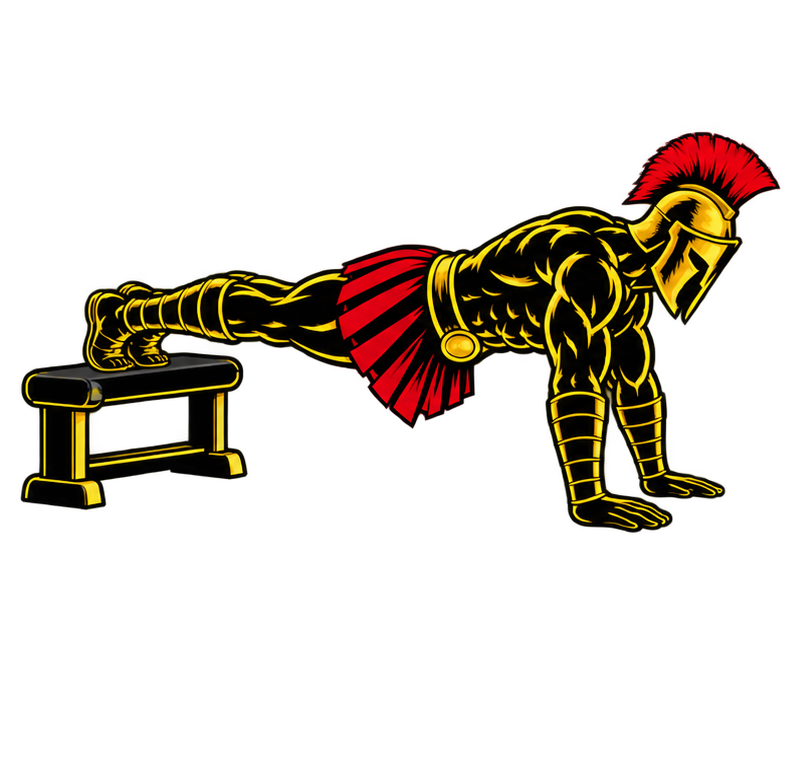
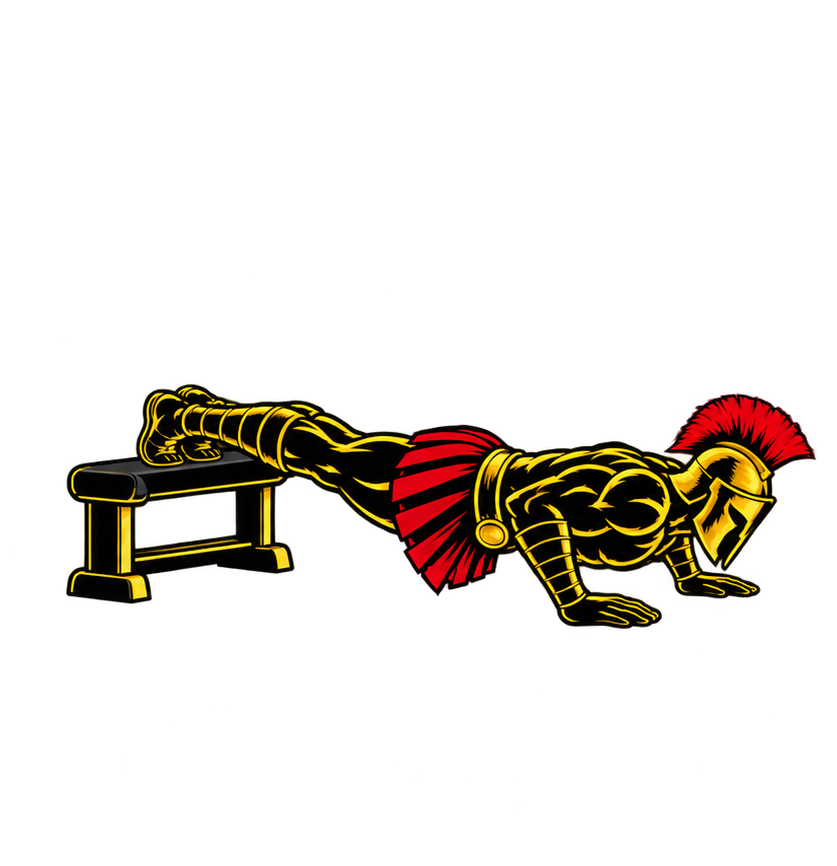
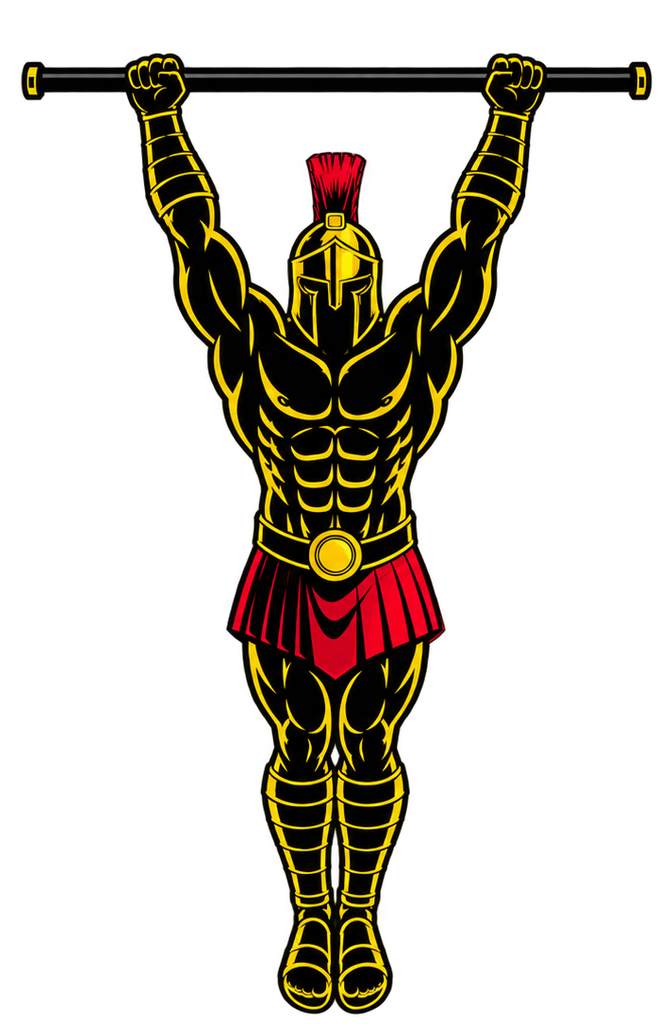
Warrior showcasing How to do Resistance Band Shoulder Press with proper form.

Resistance Band Shoulder Press Form Checklist

Use this checklist to make sure you’re performing each repetition correctly.

  • Choose an appropriate resistance band
  • Inspect the band before exercising
  • Secure the band firmly beneath your feet
  • Maintain stable footing
  • Keep your hands near shoulder height at the start
  • Keep your wrists relatively straight
  • Brace your core
  • Avoid excessive lower-back arching
  • Keep your head relatively neutral
  • Press upward through a comfortable path
  • Allow natural shoulder blade movement
  • Extend your elbows under control
  • Avoid excessive shrugging or neck tension
  • Lower the band slowly
  • Maintain control throughout every repetition

Remember that the goal isn’t simply to get your hands overhead. You want your shoulders and triceps to perform the pressing work while your torso remains stable and the resistance stays under control.


Common Resistance Band Shoulder Press Mistakes

Using a Band That Is Too Heavy

Problem: When the resistance is too strong, you may start leaning backward, shortening your repetitions, or using unnecessary body movement to complete the press.

Fix: Switch to a lighter band that lets you press overhead through a comfortable range without compromising your posture.

Arching the Lower Back Excessively

Problem: Leaning backward and excessively arching your lower back can turn a controlled overhead press into an awkward movement that relies on torso compensation.

Fix: Brace your core, lightly engage your glutes, and keep your ribs controlled. If you still need to lean backward, reduce the resistance.

Allowing the Band to Slip

Problem: If the resistance band isn’t securely positioned beneath your feet, it may slide or snap upward unexpectedly during the exercise.

Fix: Check that the band is firmly secured before every set. Wear suitable footwear and avoid performing the exercise on slippery or unstable surfaces.

Pressing Too Far Forward

Problem: Letting your hands drift excessively forward can make the movement harder to control and create an uncomfortable pressing position.

Fix: Guide your hands upward through a natural overhead path. Keep your wrists and elbows comfortably aligned rather than forcing your arms into an awkward position.

Flaring the Elbows Excessively

Problem: Forcing your elbows directly outward may create an uncomfortable shoulder position, particularly if your shoulder mobility is limited.

Fix: Keep your elbows slightly forward of your torso or at another comfortable angle. Let your arms follow a natural pressing path.

Lowering the Band Too Quickly

Problem: Allowing the band to pull your hands down rapidly reduces muscular control and may place unnecessary stress on your shoulders.

Fix: Control the lowering phase deliberately. Your shoulders and triceps should continue working as your hands return toward shoulder height.

Shrugging and Tensing the Neck Excessively

Problem: Unnecessary neck tension and exaggerated shoulder shrugging can make the press uncomfortable and interfere with smooth shoulder movement.

Fix: Keep your neck relaxed while allowing your shoulder blades to rotate and elevate naturally as your arms move overhead.


Resistance Band Shoulder Press Progressions and Variations

Once you’re comfortable with the standard movement, you can adjust your stance, grip, or pressing tempo to change the exercise’s difficulty and training emphasis.

Seated Resistance Band Shoulder Press

This variation lets you perform the same overhead pressing movement while seated, reducing the balance demands of standing.

How to Do Seated Resistance Band Shoulder Press

  • Sit upright on a sturdy chair or workout bench.
  • Secure the resistance band beneath your feet according to its intended setup.
  • Hold the ends or handles near shoulder height.
  • Brace your core and maintain an upright torso.
  • Press your hands overhead until your arms extend comfortably.
  • Slowly lower your hands toward shoulder height.
  • Repeat while keeping your posture controlled.

Single-Arm Resistance Band Shoulder Press

Pressing with one arm at a time allows you to train each side individually while challenging your torso to resist unwanted leaning.

How to Do Single-Arm Resistance Band Shoulder Press

  • Stand securely on a suitable resistance band.
  • Hold one end or handle in your working hand.
  • Bring your working hand near shoulder height.
  • Brace your core and keep your torso upright.
  • Press the working arm overhead without leaning sideways.
  • Slowly lower your hand to the starting position.
  • Complete your repetitions before switching arms.

Neutral-Grip Resistance Band Shoulder Press

The Neutral-Grip variation uses a palms-facing-inward hand position, which may feel more comfortable for some people.

How to Do Neutral-Grip Resistance Band Shoulder Press

  • Stand securely on the resistance band.
  • Hold the ends or handles with your palms facing inward.
  • Position your hands near shoulder height.
  • Keep your elbows slightly in front of your torso.
  • Press your hands overhead through a comfortable path.
  • Slowly lower your hands while maintaining wrist alignment.
  • Repeat without excessively arching your lower back.

Slow-Tempo Resistance Band Shoulder Press

By slowing down the pressing and lowering phases, you increase the time your muscles spend working against the band’s resistance.

How to Do Slow-Tempo Resistance Band Shoulder Press

  • Secure the resistance band beneath your feet.
  • Bring your hands to shoulder height.
  • Brace your core and establish a stable stance.
  • Press overhead slowly over several seconds.
  • Pause briefly in the top position.
  • Lower your hands gradually toward shoulder height.
  • Repeat while maintaining the same controlled tempo.

Alternating Resistance Band Shoulder Press

This variation involves pressing one arm at a time while keeping the opposite hand near shoulder height.

How to Do Alternating Resistance Band Shoulder Press

  • Stand securely on the resistance band.
  • Hold both ends or handles near shoulder height.
  • Brace your core and maintain an upright torso.
  • Press one arm overhead while keeping the opposite arm controlled.
  • Lower the working arm back toward shoulder height.
  • Press the opposite arm overhead and lower it under control.
  • Continue alternating sides for your planned repetitions.

Final Thoughts

Resistance Band Shoulder Press is a practical exercise for building shoulder and triceps strength without needing a full gym setup. With a suitable resistance band, you can train your overhead pressing muscles at home or include the movement as an accessory exercise in your regular workouts.

It develops:

  • Shoulder strength
  • Triceps strength
  • Overhead pressing strength
  • Shoulder stability
  • Upper-body muscular endurance
  • Core stabilization
  • Movement coordination
  • Resistance training control

To get the most from the exercise, keep your torso stable, secure the band correctly, and move through a comfortable overhead range without excessive lower-back arching.

Start with lighter resistance while learning the movement. As your strength and technique improve, you can progress to stronger bands, slower repetitions, or more challenging variations.


Essential Gear for Resistance Band Shoulder Press

You only need a suitable resistance band to perform the standard exercise, although a few additional items can make certain variations more comfortable or convenient.

  • Resistance Bands: Provide the elastic resistance needed for the exercise. Having bands with different resistance levels allows you to adjust the difficulty as your strength improves.
  • Resistance Band Handles: Compatible handles can make gripping tube-style resistance bands more comfortable during overhead presses.
  • Workout Bench: Provides a stable seated position when performing Seated Resistance Band Shoulder Press.
  • Training Shoes: Help maintain secure footing and keep the resistance band positioned beneath your feet during standing presses.
  • Exercise Mat: Provides a comfortable, non-slip surface for seated or kneeling pressing variations.

Resistance Band Shoulder Press FAQ

Q1: Is Resistance Band Shoulder Press good for beginners?
Yes. It’s a beginner-friendly exercise when you choose a suitable resistance band. Start with light resistance and concentrate on learning the correct pressing movement before increasing the difficulty.

Q2: How many Resistance Band Shoulder Press repetitions should beginners do?
A practical starting point is 8–15 controlled repetitions for 2–3 sets. Choose a band that makes the final repetitions challenging while still allowing you to maintain proper technique.

Q3: Is Resistance Band Shoulder Press as effective as Dumbbell Shoulder Press?
Both exercises can strengthen your shoulders and triceps. Dumbbells provide relatively constant gravitational resistance, while bands generally become more challenging as they stretch. Either can support strength and muscle development when programmed appropriately, although the resistance changes differently throughout each movement.

Q4: Should I lock my elbows at the top of Resistance Band Shoulder Press?
Extend your elbows comfortably at the top without forcing an aggressive lockout. Keep the band under control and avoid pushing your joints into an uncomfortable position.

Q5: How can I make Resistance Band Shoulder Press harder?
You can switch to a stronger band, increase the band’s starting tension within the manufacturer’s guidance, slow down your repetitions, add controlled pauses, or try Single-Arm Resistance Band Shoulder Press. Whichever progression you choose, maintain stable posture and controlled overhead movement.
How to Do Wrist Circles Correctly: Step-by-Step Guide for Beginners

Wrist Circles are a simple mobility exercise performed by moving your hands through controlled circular motions at the wrists. They help you explore your available wrist range of motion while gently activating the muscles responsible for wrist movement.

Although Wrist Circles require no equipment, they can be a useful addition to warm-up routines before exercises such as Push-Ups, Planks, Handstands, Pull-Ups, and weightlifting movements.

The key is to perform smooth, comfortable circles without forcing your wrists into painful positions. Rather than moving as quickly as possible, focus on controlled movement in both directions.


What Are Wrist Circles?

Wrist Circles are a dynamic mobility exercise involving circular movements of the hands around the wrist joints.

You begin with your arms comfortably positioned in front of your body or beside your torso. Keeping your forearms relatively stable, move your hands through a circular path by combining wrist flexion, extension, and side-to-side movement.

Wrist Circles are commonly used in:

  • Warm-up routines
  • Wrist mobility training
  • Calisthenics workouts
  • Upper-body workouts
  • Handstand preparation
  • Push-Up and Plank preparation
  • Weightlifting warm-ups
  • General flexibility and mobility routines

Unlike static wrist stretches, Wrist Circles involve continuous movement rather than holding one position.

They can be performed standing, seated, or kneeling, making them convenient for almost any training environment.

Benefits of Wrist Circles

Wrist Circles provide a gentle way to move the wrists through their available range of motion before training.

Benefits include:

  • Improves active wrist mobility
  • Helps maintain comfortable wrist movement
  • Warms up the wrist and forearm muscles
  • Encourages controlled movement through multiple wrist positions
  • Develops wrist movement awareness
  • Provides a simple preparation exercise for upper-body training
  • Can reduce the feeling of temporary stiffness
  • Requires no equipment
  • Can be performed almost anywhere

Wrist Circles are useful as part of a warm-up, but they do not replace progressive wrist strengthening or guarantee protection against wrist injuries.

Muscles Worked in Wrist Circles

Wrist Circles primarily involve the muscles of the forearms that control wrist movement.

Because the exercise uses little external resistance, these muscles work mainly to produce and control movement rather than develop substantial strength.

Primary Muscles
  • Flexor Carpi Radialis
  • Flexor Carpi Ulnaris
  • Extensor Carpi Radialis Longus
  • Extensor Carpi Radialis Brevis
  • Extensor Carpi Ulnaris
Secondary Muscles
  • Palmaris Longus
  • Flexor Digitorum Superficialis
  • Flexor Digitorum Profundus
  • Extensor Digitorum
  • Pronator Teres
  • Supinator
  • Other Forearm Stabilizers

The wrist flexors, extensors, and muscles responsible for radial and ulnar deviation work together to guide the circular motion.


How to Do Wrist Circles (Step-by-Step)

Step 1: Choose a Comfortable Starting Position

Stand or sit upright with your shoulders relaxed.

Position your arms comfortably in front of your torso.

You can keep your elbows slightly bent to reduce unnecessary tension through your shoulders.

Step 2: Position Your Hands

Extend your hands forward with your fingers relaxed or form loose fists.

Avoid squeezing your fists tightly.

Keep your forearms relatively still so the movement comes primarily from your wrists.

Step 3: Begin the Circular Motion

Slowly move your hands through a circular path at the wrists.

Guide your hands through comfortable combinations of:

  • Wrist flexion
  • Wrist extension
  • Movement toward the thumb side
  • Movement toward the little-finger side

Do not force your wrists beyond their natural range of motion.

Step 4: Complete the First Direction

Continue making smooth circles in one direction.

Keep your:

  • Shoulders relaxed
  • Elbows relatively stable
  • Forearms controlled
  • Fingers relaxed
  • Movements comfortable

Avoid moving your entire arms to create the circles.

Step 5: Reverse the Direction

After several repetitions, reverse the circular motion.

Move at approximately the same speed and through a similarly comfortable range.

Changing direction allows you to practice controlling the movement both ways.

Step 6: Maintain a Controlled Tempo

Perform each circle slowly enough to maintain smooth movement.

Avoid jerking, bouncing, or rapidly snapping your wrists between positions.

Use smaller circles if a larger range causes discomfort.

Step 7: Finish and Relax

After completing your repetitions in both directions, relax your hands and arms.

Gently shake out your hands if comfortable.

You can then continue with other wrist mobility drills or your planned workout warm-up.

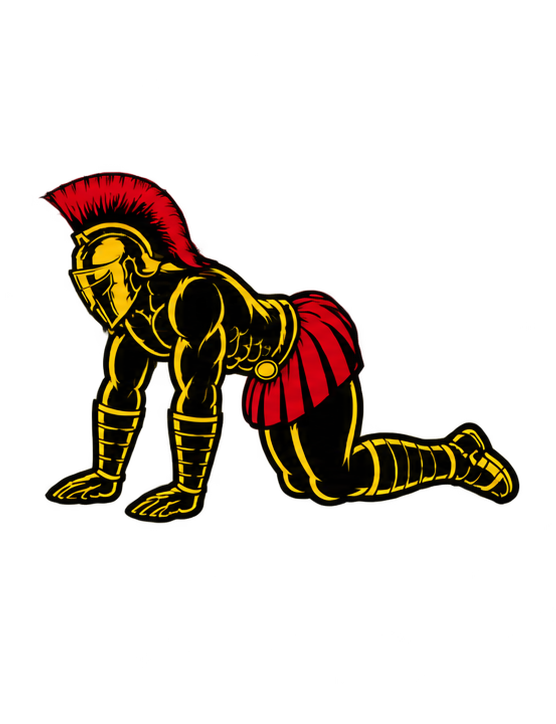
Warrior showcasing How to do Wrist Circles with proper form.

Wrist Circle Form Checklist

Use this checklist to maintain proper Wrist Circle technique.

  • Stand or sit in a comfortable position
  • Keep your shoulders relaxed
  • Maintain a comfortable elbow position
  • Keep your forearms relatively stable
  • Move primarily through your wrists
  • Keep your hands and fingers relaxed
  • Use smooth circular movements
  • Explore a comfortable range of motion
  • Avoid forcing wrist extension
  • Avoid forcing wrist flexion
  • Move at a controlled speed
  • Perform circles in both directions
  • Avoid excessive arm rotation
  • Stop if you experience sharp or unusual pain
  • Keep the movement consistent throughout the set

The goal is to move your wrists comfortably through their available range rather than create the largest possible circles.


Common Wrist Circle Mistakes

Moving Too Quickly

Problem: Rapid wrist movements can reduce control and make it difficult to notice uncomfortable positions.

Fix: Slow down and perform deliberate circles while maintaining a smooth movement pattern.

Moving the Entire Arm

Problem:

Rotating your shoulders, elbows, or entire forearms can make it appear that your wrists are performing larger circles than they actually are.

Fix: Keep your forearms relatively stable and focus on movement at the wrist joints.

Forcing the Range of Motion

Problem: Trying to create excessively large circles can push your wrists beyond their comfortable range.

Fix: Use a natural range of motion and gradually explore greater movement only when comfortable.

Performing Circles in Only One Direction

Problem:

Practicing only one direction limits your exposure to the complete circular movement pattern.

Fix: Perform a similar number of controlled circles in both directions.

Clenching the Fists Too Tightly

Problem: Excessively squeezing your fists can create unnecessary forearm tension and make the movement feel less comfortable.

Fix: Keep your fingers relaxed or use loose fists.

Jerking Through Certain Positions

Problem:

Quickly snapping through wrist flexion, extension, or side-to-side movement reduces control.

Fix: Move smoothly through each portion of the circle without bouncing or forcing the joint.

Continuing Through Wrist Pain

Problem: Forcing the movement through sharp, worsening, or unusual pain may aggravate an existing wrist problem.

Fix: Reduce the range or stop the exercise. Persistent pain, swelling, numbness, or tingling should be assessed by an appropriate healthcare professional.


Wrist Circle Progressions and Variations

Wrist Circles can be performed in several ways depending on your mobility, comfort, and training goals.

Open-Hand Wrist Circles

This variation keeps your fingers extended and relaxed while moving the wrists through circular motions.

How to Do Open-Hand Wrist Circles

  • Stand or sit comfortably.
  • Extend your arms in front of your body.
  • Keep your fingers comfortably spread.
  • Begin making slow circles with your hands.
  • Keep your forearms relatively stable.
  • Reverse the direction after several repetitions.
  • Continue through a comfortable range of motion.

Fist Wrist Circles

Making loose fists provides a slightly different hand position while performing the same basic wrist movement.

How to Do Fist Wrist Circles

  • Stand or sit with your shoulders relaxed.
  • Extend your arms comfortably in front of you.
  • Form loose fists without squeezing excessively.
  • Slowly rotate your hands in a circular path.
  • Keep your elbows and forearms relatively stable.
  • Complete several circles in one direction.
  • Reverse the direction and repeat.

Single-Arm Wrist Circles

Performing the movement with one hand at a time allows you to focus on each wrist individually.

How to Do Single-Arm Wrist Circles

  • Stand or sit in a comfortable position.
  • Extend one forearm in front of your torso.
  • Keep the opposite arm relaxed.
  • Slowly move the working hand in a circular path.
  • Maintain a comfortable range of motion.
  • Reverse the direction after several repetitions.
  • Switch arms and repeat.

Small-Range Wrist Circles

This variation uses smaller circles and can be useful when full-range Wrist Circles feel uncomfortable or difficult to control.

How to Do Small-Range Wrist Circles

  • Begin in a comfortable standing or seated position.
  • Position your hands in front of your torso.
  • Keep your fingers relaxed.
  • Start with small circular wrist movements.
  • Avoid pushing into uncomfortable positions.
  • Complete several circles in both directions.
  • Gradually increase the range only if comfortable.

Supported Wrist Circles

Supporting your forearm can help reduce unnecessary movement from your elbow and shoulder.

How to Do Supported Wrist Circles

  • Sit beside a stable table or desk.
  • Rest one forearm comfortably on the surface.
  • Allow your hand to extend beyond the edge with enough clearance.
  • Keep your forearm supported.
  • Slowly move your hand through a circular path.
  • Reverse the direction after several repetitions.
  • Switch arms and repeat.

Final Thoughts

Wrist Circles are a simple mobility exercise that can help prepare your wrists for training and maintain controlled movement through different wrist positions.

They develop:

  • Active wrist mobility
  • Wrist movement control
  • Forearm muscle activation
  • Movement awareness
  • Coordination
  • Comfortable joint movement
  • Warm-up readiness

Perform Wrist Circles slowly and use a comfortable range of motion. Focus on keeping your forearms relatively stable while moving your hands smoothly in both directions.

They can be included before Push-Ups, Planks, Handstands, weightlifting, and other activities involving the wrists.

However, Wrist Circles alone are not a complete wrist-strengthening program. For greater wrist strength and tolerance to loaded positions, combine mobility work with appropriately progressed strengthening exercises. Learn more about Stretching here.

Essential Gear for Wrist Circles

Wrist Circles require no mandatory equipment, but a few items can provide comfort or support during different variations.

  • Stable Table or Desk: Provides forearm support during Supported Wrist Circles, helping you focus on movement at the wrists.
  • Exercise Mat: Offers a comfortable surface when performing seated or kneeling wrist mobility routines.
  • Yoga Block: Can support the forearm or hand during certain wrist mobility drills when positioned securely.

Wrist Circle FAQ

Q1: How many Wrist Circles should I do?
A practical starting point is around 5–10 slow circles in each direction. One or two rounds can be sufficient as part of a general warm-up, depending on your comfort and training needs.

Q2: Should I perform Wrist Circles before or after workouts?
Wrist Circles are particularly useful during warm-ups before exercises involving gripping or weight-bearing through the hands. They can also be performed after training or during separate mobility sessions.

Q3: Can Wrist Circles improve wrist flexibility?
Wrist Circles can help you practice and maintain active movement through your available wrist range. However, improving a specific range of motion may also require targeted mobility exercises and gradual strengthening.

Q4: Should Wrist Circles hurt?
No. Wrist Circles should generally feel comfortable. Mild muscular effort or a gentle stretching sensation may occur, but sharp, worsening, or unusual pain is a reason to stop or modify the movement.

Q5: Are Wrist Circles enough to strengthen my wrists?
Not usually. Because standard Wrist Circles involve very little external resistance, they are primarily a mobility and movement-control exercise. Progressive wrist flexion, extension, deviation, and appropriately loaded exercises are generally more useful for building wrist strength.


How to Do a Bird Dog Correctly: Step-by-Step Guide for Beginners

The Bird Dog is a bodyweight core exercise performed from a hands-and-knees position while extending one arm and the opposite leg. Although the movement appears simple, maintaining a stable torso while moving opposite limbs creates an effective challenge for your core, back, hips, and shoulders.

Rather than trying to lift your arm and leg as high as possible, the goal is to maintain control through your spine and pelvis. Your core works to resist unwanted rotation and excessive arching while your glutes, back, and shoulder muscles help extend and stabilize your limbs.

Bird Dogs require no specialized equipment and can be useful in beginner workouts, core training, warm-ups, and general bodyweight programs.


What Is a Bird Dog?

A Bird Dog is a bodyweight stability exercise performed from a quadruped, or hands-and-knees, position.

You begin with your hands underneath your shoulders and knees underneath your hips. From this position, you simultaneously extend one arm forward and the opposite leg backward while keeping your torso and pelvis relatively stable.

For example:

  • Right arm extends forward
  • Left leg extends backward
  • Both return to the starting position
  • Left arm extends forward
  • Right leg extends backward

The opposite arm and leg pattern creates a cross-body stability challenge while requiring coordination between your upper and lower body.

Bird Dogs are commonly used in:

  • Core workouts
  • At-home workouts
  • Bodyweight training
  • Warm-up routines
  • Stability training
  • Coordination exercises
  • Beginner fitness programs
  • General strength and conditioning

Benefits of Bird Dogs

Bird Dogs train your core to maintain a stable trunk while your arms and legs move.

Benefits include:

  • Strengthens the core
  • Develops anti-rotation control
  • Trains the lower-back muscles
  • Strengthens the glutes
  • Develops shoulder stability
  • Improves cross-body coordination
  • Reinforces controlled spinal and pelvic positioning
  • Develops balance and body awareness
  • Requires little to no equipment

The exercise is most effective when performed slowly and deliberately rather than by trying to reach as far or as high as possible.

Muscles Worked in Bird Dogs

Bird Dogs involve muscles throughout the torso, hips, shoulders, and limbs.

Primary Muscles
  • Erector Spinae
  • Rectus Abdominis
  • Obliques
  • Transverse Abdominis
  • Gluteus Maximus
Secondary Muscles
  • Gluteus Medius
  • Multifidus
  • Deltoids
  • Trapezius
  • Serratus Anterior
  • Hamstrings
  • Rotator Cuff Muscles
  • Hip Stabilizers

Different muscles contribute to either moving the arm and leg or preventing your torso and pelvis from rotating or excessively extending.


How to Do a Bird Dog (Step-by-Step)

Step 1: Start on Your Hands and Knees

Begin on all fours on the floor or an Exercise Mat.

Position your:

  • Hands approximately underneath your shoulders
  • Knees approximately underneath your hips
  • Fingers comfortably spread
  • Head relatively neutral
  • Back in a comfortable neutral position

Distribute your weight evenly before beginning.

Step 2: Brace Your Core

Gently brace your abdominal muscles before moving your limbs.

Keep your pelvis relatively level and avoid deliberately arching or rounding your lower back.

Imagine keeping your torso quiet while your limbs perform the movement.

Step 3: Extend One Leg Backward

Slowly extend one leg behind you.

Straighten the leg until it is approximately in line with your torso, according to your comfortable range of motion.

Keep your toes generally pointing toward the floor rather than rotating your hip outward.

Step 4: Extend the Opposite Arm Forward

At the same time, reach the opposite arm forward.

For example, extend your right arm while extending your left leg.

Reach long in opposite directions rather than trying to lift both limbs as high as possible.

Step 5: Hold the Extended Position

Briefly control the fully extended position.

Keep your:

  • Core braced
  • Hips relatively level
  • Lower back controlled
  • Head neutral
  • Supporting shoulder stable
  • Extended arm and leg controlled

Your arm and leg do not need to rise above your torso.

Step 6: Return to the Starting Position

Slowly bring your hand and knee back toward the floor.

Return to your stable hands-and-knees position without suddenly dropping your limbs.

Re-establish your balance before beginning the next repetition.

Step 7: Repeat on the Opposite Side

Extend the other arm and opposite leg.

Continue alternating sides while maintaining the same controlled technique.

Move slowly enough that your torso remains stable throughout each repetition.

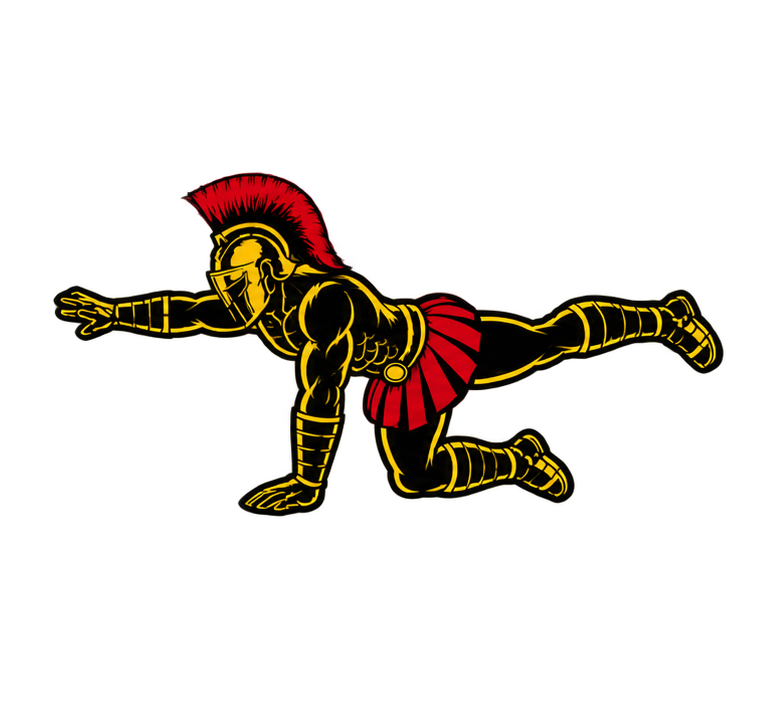
Warrior showcasing How to do a Bird Dog with proper form.

Bird Dog Form Checklist

Use this checklist to maintain proper Bird Dog technique.

  • Keep your hands approximately underneath your shoulders
  • Keep your knees approximately underneath your hips
  • Maintain a comfortable neutral spine
  • Brace your core before extending your limbs
  • Extend opposite arm and leg together
  • Reach forward with the arm
  • Reach backward with the leg
  • Keep your hips relatively level
  • Minimize torso rotation
  • Avoid excessive lower-back arching
  • Keep your head relatively neutral
  • Keep the supporting shoulder stable
  • Move slowly and deliberately
  • Return to the starting position under control
  • Train both sides evenly

Quality matters more than how high you can raise your arm or leg.


Common Bird Dog Mistakes

Arching the Lower Back

Problem: Lifting the leg too high can cause your pelvis to tilt and your lower back to extend excessively.

Fix: Brace your core and think about reaching your heel backward rather than lifting your foot toward the ceiling.

Rotating the Hips

Problem: Opening the hip of the extended leg toward the side reduces the anti-rotation challenge and changes your position.

Fix: Keep your pelvis relatively level and point the extended leg generally toward the floor.

Lifting the Arm and Leg Too High

Problem: Trying to maximize height can encourage excessive movement through the lower back and shoulders.

Fix: Reach your arm forward and leg backward. Approximately torso height is sufficient when you can maintain proper alignment.

Moving Too Quickly

Problem: Rushing from side to side allows momentum to replace stability and control.

Fix: Perform each extension slowly and briefly stabilize yourself before returning to the starting position.

Looking Forward

Problem: Lifting your head excessively can move your neck away from a comfortable neutral position.

Fix: Keep your gaze generally toward the floor and your neck aligned naturally with your spine.

Shifting Excessively Onto the Supporting Side

Problem: Moving your torso dramatically sideways before lifting your limbs reduces the stability challenge.

Fix: Keep your weight shift small and maintain your torso as centered as possible.

Holding Your Breath

Problem: Breath-holding can create unnecessary tension and make longer sets uncomfortable.

Fix: Continue breathing normally while maintaining abdominal tension throughout the exercise.


Bird Dog Progressions and Variations

Bird Dogs can be simplified for beginners or progressed to create a greater stability challenge.

Single-Arm Bird Dog

Moving only one arm allows you to practice upper-body movement while keeping both knees on the floor.

How to Do Single-Arm Bird Dogs

  • Begin on your hands and knees.
  • Brace your core.
  • Keep both knees firmly on the floor.
  • Extend one arm forward.
  • Keep your torso and hips stable.
  • Return the hand to the floor slowly.
  • Repeat with the opposite arm.

Single-Leg Bird Dog

This variation teaches lower-body extension while both hands remain on the floor.

How to Do Single-Leg Bird Dogs

  • Begin in a stable quadruped position.
  • Brace your core.
  • Keep both hands firmly planted.
  • Extend one leg backward.
  • Keep your pelvis relatively level.
  • Return your knee to the floor under control.
  • Repeat with the opposite leg.

Bird Dog With Pause

Adding a longer pause increases the amount of time you must maintain the extended position.

How to Do Bird Dogs With a Pause

  • Begin on your hands and knees.
  • Brace your core.
  • Extend one arm and the opposite leg.
  • Reach in opposite directions.
  • Hold the extended position for several seconds.
  • Return your hand and knee slowly.
  • Alternate sides while maintaining control.

Bird Dog Crunch

This variation adds a controlled flexion movement between extensions.

How to Do Bird Dog Crunches

  • Begin in the standard Bird Dog position.
  • Extend one arm and the opposite leg.
  • Maintain control through your torso.
  • Bring the extended elbow and opposite knee toward each other underneath your body.
  • Avoid collapsing or rushing the movement.
  • Extend the arm and leg again.
  • Complete your repetitions before switching sides.

Resistance Band Bird Dog

Adding a Resistance Band can increase the muscular demand once the standard Bird Dog is easy.

How to Do Resistance Band Bird Dogs

  • Set up the Resistance Band securely for the variation you are using.
  • Begin on your hands and knees.
  • Brace your core before creating tension.
  • Extend one arm and the opposite leg against the resistance.
  • Keep your hips and torso controlled.
  • Return slowly against the band’s tension.
  • Train both sides evenly.

Make sure the band is secure and positioned so it cannot unexpectedly slip or snap toward you.


Final Thoughts

The Bird Dog is a simple but effective exercise for training your core to stabilize your torso while your arms and legs move independently.

It develops:

  • Core strength
  • Anti-rotation control
  • Lower-back endurance
  • Glute strength
  • Shoulder stability
  • Cross-body coordination
  • Balance
  • Body awareness
  • Full-body control

The goal is not to raise your limbs as high as possible. Instead, reach your arm forward and your opposite leg backward while keeping your spine and pelvis controlled.

Start with shorter ranges of motion if necessary. As your stability improves, progress to full Bird Dogs, longer pauses, Bird Dog Crunches, or appropriately resisted variations. Learn more about Core Workouts here.

Essential Gear for Bird Dogs

Bird Dogs require no mandatory equipment, but a few items can improve comfort or provide additional progression options.

  • Exercise Mat: Provides cushioning for your knees and hands while performing the exercise on the floor.
  • Resistance Band: Can add resistance after you have developed good control with standard Bird Dogs.
  • Knee Pad: Provides additional cushioning if kneeling on the floor is uncomfortable.
  • Yoga Block: Can be used as a positioning or feedback tool during certain Bird Dog drills.

Bird Dog FAQ

Q1: How high should I lift my arm and leg during a Bird Dog?
Lift them only as high as you can while maintaining good spinal and pelvic control. Reaching approximately in line with your torso is sufficient; raising the limbs higher is not necessary.

Q2: Should my hips rotate during Bird Dogs?
Your goal should be to keep your pelvis relatively level and minimize unnecessary rotation. A small amount of movement may occur, but large hip rotation usually indicates that you should slow down or reduce the range of motion.

Q3: How many Bird Dogs should beginners do?
A practical starting point is around 6–10 controlled repetitions per side for 2–3 sets. You can also use brief holds at full extension instead of rushing through additional repetitions.

Q4: Why do I feel Bird Dogs in my lower back?
The muscles along your spine help stabilize your torso, so some muscular effort there can be normal. However, excessive arching can increase lower-back stress. Brace your core, keep your pelvis controlled, and avoid lifting the leg higher than your available range. Stop if you experience sharp, worsening, or unusual pain.

Q5: How can I make Bird Dogs harder?
You can slow each repetition, hold the extended position longer, perform Bird Dog Crunches, increase the stability challenge, or add appropriate Resistance Band tension. Increase difficulty only while you can maintain controlled spinal and pelvic positioning.


How to Do Plank Shoulder Taps Correctly: Step-by-Step Guide for Beginners

Plank Shoulder Taps are a dynamic core exercise performed from a high plank position. While supporting your body with one hand, you lift the opposite hand and tap the opposite shoulder before returning it to the floor and repeating on the other side.

Although the movement looks simple, removing one hand from the floor creates an asymmetrical load that encourages your hips and torso to rotate. Your core must resist this movement while your supporting shoulder stabilizes your upper body.

Plank Shoulder Taps are useful for developing core stability, shoulder control, and coordination with little to no equipment. They can also serve as a progression beyond a standard High Plank.


What Are Plank Shoulder Taps?

Plank Shoulder Taps are a bodyweight exercise that combines a High Plank with alternating shoulder taps.

You begin in a Push-Up position with both hands on the floor. Keeping your torso as stable as possible, lift one hand and touch the opposite shoulder. Return the hand to the floor before repeating with the other side.

For example:

  • Right hand taps left shoulder
  • Right hand returns to the floor
  • Left hand taps right shoulder
  • Left hand returns to the floor

The goal is not to perform the taps as quickly as possible. Instead, focus on preventing excessive hip rotation while maintaining a strong plank position.

Plank Shoulder Taps are commonly used in:

  • Core workouts
  • Bodyweight training
  • Calisthenics workouts
  • At-home workouts
  • Upper-body workouts
  • Full-body circuits
  • Warm-up routines
  • Stability and coordination training

Benefits of Plank Shoulder Taps

Plank Shoulder Taps add movement and an anti-rotation challenge to the traditional High Plank.

Benefits include:

  • Strengthens the core
  • Develops anti-rotation control
  • Strengthens and stabilizes the shoulders
  • Trains the chest and triceps isometrically
  • Improves coordination between the upper body and core
  • Develops unilateral support control
  • Reinforces High Plank stability
  • Requires little to no equipment
  • Can be easily modified for different strength levels

The exercise becomes significantly more effective when each tap is performed slowly enough to prevent your hips from rocking excessively from side to side.

Muscles Worked in Plank Shoulder Taps

Plank Shoulder Taps involve several muscle groups working together to maintain body position while you alternate between two-hand and one-hand support.

Primary Muscles
  • Rectus Abdominis
  • Obliques
  • Transverse Abdominis
  • Anterior Deltoids
  • Serratus Anterior
Secondary Muscles
  • Pectoralis Major
  • Triceps Brachii
  • Rotator Cuff Muscles
  • Gluteus Maximus
  • Quadriceps
  • Erector Spinae
  • Forearms

The obliques and other core muscles are particularly important for resisting unwanted rotation when one hand leaves the floor.


How to Do Plank Shoulder Taps (Step-by-Step)

Step 1: Start on Your Hands and Knees

Begin on the floor with your hands underneath or approximately underneath your shoulders.

Spread your fingers comfortably and press your palms firmly into the floor.

Keep your elbows extended without aggressively forcing them backward.

Step 2: Enter a High Plank

Step your feet backward until both legs are extended.

Your body should form a relatively straight line from your head through your shoulders, hips, and heels.

Keep your:

  • Core braced
  • Glutes engaged
  • Legs controlled
  • Shoulders stable
  • Head relatively neutral

Step 3: Adjust Your Foot Position

Place your feet approximately hip-width apart or slightly wider if necessary.

A wider stance generally provides more stability and makes it easier to resist rotation.

As your control improves, you can gradually use a narrower stance.

Step 4: Shift Your Weight Slightly

Before lifting one hand, transfer only enough weight into the supporting hand to remain stable.

Avoid dramatically shifting your entire torso sideways.

Keep your shoulders and hips as controlled as possible.

Step 5: Tap the Opposite Shoulder

Lift one hand from the floor and bring it across your body.

Lightly tap the opposite shoulder.

For example, lift your right hand and tap your left shoulder.

Keep your hips from rotating excessively toward either side.

Step 6: Return Your Hand to the Floor

Place your hand back in approximately its original position underneath the shoulder.

Re-establish stable two-hand support before beginning the next tap.

Avoid rushing directly from one side to the other.

Step 7: Alternate Sides

Lift your opposite hand and tap the other shoulder.

Continue alternating sides while maintaining a controlled High Plank.

One tap with each hand can be counted as two individual taps or one complete right-and-left cycle—just use the same counting method consistently.

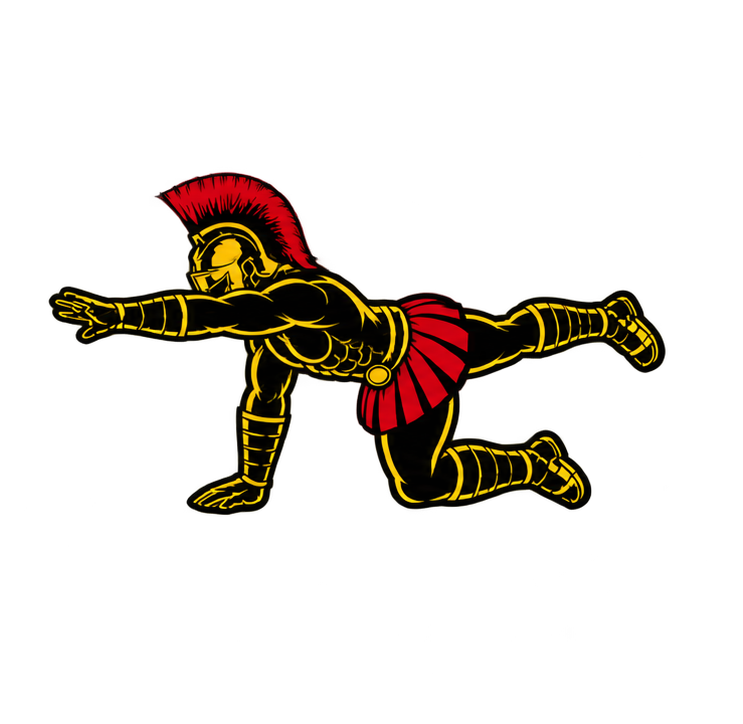
Warrior showcasing How to do Plank Shoulder Taps with proper form.

Plank Shoulder Taps Form Checklist

Use this checklist to maintain proper Plank Shoulder Tap technique.

  • Place your hands shoulder-width apart
  • Keep your hands underneath or close to underneath your shoulders
  • Maintain a relatively straight body line
  • Brace your core throughout the set
  • Engage your glutes
  • Keep your head relatively neutral
  • Keep your shoulders stable
  • Use a stable foot position
  • Shift only as much weight as necessary
  • Tap the opposite shoulder
  • Minimize hip rotation
  • Avoid letting your hips sag
  • Return your hand securely before switching sides
  • Perform each tap under control
  • Stop when you can no longer maintain good plank position

The goal is not to keep your body perfectly motionless, but to minimize unnecessary rotation and weight shifting.


Common Plank Shoulder Taps Mistakes

Rotating the Hips Excessively

Problem: Allowing your hips to twist dramatically every time you lift a hand removes much of the intended anti-rotation challenge.

Fix: Brace your core and glutes, slow down the movement, and widen your feet if necessary.

Letting the Hips Sag

Problem: Allowing your hips to drop can cause you to lose your strong plank position.

Fix: Brace your core and squeeze your glutes while maintaining a relatively straight line through your torso and legs.

Raising the Hips Too High

Problem: Lifting your hips into a pike position reduces the demand on your core and changes the exercise.

Fix: Keep your hips aligned with the rest of your body rather than deliberately pushing them upward.

Performing the Taps Too Quickly

Problem: Rapidly switching hands can create momentum and allow your body to rock from side to side.

Fix: Pause briefly after returning each hand to the floor and establish stability before performing the next tap.

Shifting Too Far Onto the Supporting Arm

Problem: Moving your entire torso sideways before every tap makes the exercise easier by avoiding some of the anti-rotation demand.

Fix: Shift only enough weight to safely lift the opposite hand while keeping your torso relatively centered.

Reaching for the Same-Side Shoulder

Problem: Tapping the shoulder on the same side does not create the same cross-body movement.

Fix: Use your right hand to tap your left shoulder and your left hand to tap your right shoulder.

Continuing After Form Breaks Down

Problem: As fatigue increases, the hips may begin sagging, rotating, or shifting excessively.

Fix: End the set when you can no longer maintain controlled technique. Use an easier variation if necessary.


Plank Shoulder Tap Progressions and Variations

Plank Shoulder Taps can be adjusted to make the exercise easier or more challenging depending on your current core and upper-body stability.

Knee Plank Shoulder Tap

Keeping your knees on the floor reduces the amount of bodyweight supported by your hands and feet.

How to Do Knee Plank Shoulder Taps

  • Begin on your hands and knees.
  • Move your knees backward to create a straight line from your head toward your knees.
  • Brace your core and glutes.
  • Lift one hand from the floor.
  • Tap the opposite shoulder.
  • Return your hand to the starting position.
  • Alternate sides while minimizing torso rotation.

Incline Plank Shoulder Tap

Placing your hands on an elevated surface reduces the difficulty while maintaining the alternating shoulder-tap pattern.

How to Do Incline Plank Shoulder Taps

  • Place your hands on a sturdy elevated surface.
  • Step your feet backward into an Incline Plank.
  • Brace your core and maintain a straight body line.
  • Shift your weight slightly into one hand.
  • Use the opposite hand to tap your shoulder.
  • Return the hand to the elevated surface.
  • Alternate sides under control.

Wide-Stance Plank Shoulder Tap

A wider foot position creates a larger base of support and makes resisting rotation easier.

How to Do Wide-Stance Plank Shoulder Taps

  • Enter a High Plank position.
  • Place your feet wider than hip-width apart.
  • Brace your core and glutes.
  • Lift one hand without excessively shifting your hips.
  • Tap the opposite shoulder.
  • Return your hand to the floor.
  • Alternate sides while maintaining control.

Narrow-Stance Plank Shoulder Tap

Bringing your feet closer together reduces your base of support and increases the stability challenge.

How to Do Narrow-Stance Plank Shoulder Taps

  • Begin in a strong High Plank.
  • Position your feet closer together than usual.
  • Brace your core firmly.
  • Lift one hand slowly from the floor.
  • Tap the opposite shoulder without excessive rotation.
  • Return your hand to its starting position.
  • Alternate sides while maintaining your body line.

Slow-Tempo Plank Shoulder Tap

Slowing the movement increases the amount of time you must stabilize yourself on one arm.

How to Do Slow-Tempo Plank Shoulder Taps

  • Establish a stable High Plank.
  • Brace your core and glutes.
  • Slowly lift one hand from the floor.
  • Tap the opposite shoulder and briefly pause.
  • Slowly return your hand to the floor.
  • Re-establish a stable plank position.
  • Repeat on the opposite side.

Final Thoughts

Plank Shoulder Taps are a simple but challenging progression from the standard High Plank. By repeatedly removing one hand from the floor, you force your core and supporting shoulder to stabilize your body against an asymmetrical load.

They develop:

  • Core strength
  • Anti-rotation control
  • Shoulder stability
  • Upper-body support strength
  • Coordination
  • Body awareness
  • High Plank control
  • Full-body stability

Focus on quality rather than speed. Keep your core and glutes engaged, tap the opposite shoulder deliberately, and minimize unnecessary movement through your hips.

If you cannot yet control the standard version, widen your feet or use Knee or Incline Plank Shoulder Taps. As your stability improves, gradually narrow your stance or slow each repetition to make the exercise more demanding. Learn more about Core Workouts here.

Essential Gear for Plank Shoulder Taps

Plank Shoulder Taps require no mandatory equipment, but a few items can make training more comfortable or provide additional progression options.

  • Exercise Mat: Provides a clean, comfortable, and more forgiving surface for your hands and feet.
  • Workout Bench: A sturdy bench can be used for Incline Plank Shoulder Taps when the floor variation is too difficult.
  • Push-Up Handles: Can provide an alternative wrist position, although you must be able to lift and replace each hand securely on the handles without them shifting.
  • Weighted Vest: An advanced option for increasing resistance after standard Plank Shoulder Taps can be performed with excellent control.

Plank Shoulder Taps FAQ

Q1: Why do my hips rotate during Plank Shoulder Taps?
When one hand leaves the floor, your base of support becomes smaller and asymmetrical. Some movement is natural, but excessive rotation can indicate that the variation is currently too difficult or that you are moving too quickly. Widening your feet and slowing the taps can make the exercise easier to control.

Q2: How many Plank Shoulder Taps should beginners do?
A practical starting point is around 6–10 controlled taps per side for 2–3 sets. Technique matters more than accumulating repetitions, so stop the set if your hips begin rotating or sagging excessively.

Q3: Should my feet be together during Plank Shoulder Taps?
Not necessarily. A hip-width or slightly wider stance is often easier to control. Bringing your feet closer together increases the anti-rotation challenge and can be used as a progression.

Q4: Are Plank Shoulder Taps harder than a regular Plank?
They are generally more challenging for stability because you repeatedly remove one point of support and briefly hold your body with one hand. This creates additional anti-rotation and shoulder-stability demands.

Q5: How can I make Plank Shoulder Taps harder?
You can bring your feet closer together, slow each repetition, pause during each shoulder tap, increase your controlled repetitions, or eventually use a weighted vest. Increase difficulty only while maintaining a stable plank and controlled hip position.


Minimal-Equipment Calisthenics Workout Plan

A Minimal-Equipment Calisthenics Workout Plan is one of the simplest ways to build strength, muscle, endurance, and body control without needing a commercial gym or an expensive home setup.

With only a pull-up bar, resistance bands, and a pair of dip bars or parallettes, you can train nearly every major movement pattern: pushing, pulling, squatting, hinging, unilateral leg work, core stability, and basic calisthenics skills.

This program gives you two ways to train:

  • 3-Day Full-Body Plan – Ideal for beginners, busy trainees, and anyone wanting more recovery
  • 6-Day Push Pull Legs Plan – Ideal for trainees with a solid foundation who prefer more frequent training

Both options use progressive overload so the program can continue challenging you as you become stronger.

Click on any exercise to learn how to do it.

Benefits of Minimal-Equipment Calisthenics

  • Builds functional upper- and lower-body strength
  • Develops muscle using bodyweight resistance
  • Improves relative strength and body control
  • Strengthens the core through compound movements
  • Develops pushing and pulling strength
  • Requires very little equipment
  • Can be performed at home or outdoors
  • Provides clear exercise progressions
  • Offers flexible 3-day and 6-day schedules
  • Creates a foundation for advanced calisthenics skills

What Counts as Minimal-Equipment Calisthenics?

Minimal-equipment calisthenics sits between completely equipment-free training and a fully equipped home gym.

Bodyweight remains your primary resistance, but a few inexpensive pieces of equipment solve one of the biggest limitations of equipment-free training: pulling exercises.

A pull-up bar gives you vertical pulling and hanging work. Resistance bands provide assistance and additional resistance. Dip bars or parallettes expand your pushing, rowing, core, and skill-training options.

You get significantly more exercise variety without needing barbells, machines, or an entire home gym.

Equipment Needed

Essential Equipment

Optional Equipment

  • Exercise Mat
  • Weighted Backpack
  • Stable Chair or Bench
  • Towel for grip training
  • Jump Rope

A weighted backpack becomes particularly useful as normal bodyweight exercises become too easy.


Weekly Training Structure

Option 1 – 3-Day Full-Body Calisthenics

  • Monday – Full Body A
  • Tuesday – Rest
  • Wednesday – Full Body B
  • Thursday – Rest
  • Friday – Full Body C
  • Saturday – Rest or Light Activity
  • Sunday – Rest

This is the recommended option if you’re relatively new to calisthenics, participate in other sports, have limited training time, or simply recover better with fewer sessions.

Option 2 – 6-Day Push Pull Legs

  • Monday – Push A
  • Tuesday – Pull A
  • Wednesday – Legs A
  • Thursday – Push B
  • Friday – Pull B
  • Saturday – Legs B
  • Sunday – Rest

The 6-day option distributes training across shorter, more focused sessions and provides greater exercise variety.

Don’t perform both programs simultaneously. Choose the schedule that fits your experience and recovery.


Pre-Workout Warm-Up Routine

Spend approximately 5–8 minutes preparing before each workout.

You don’t need to perform aggressive static stretching before training. Focus on increasing body temperature and preparing the joints and movements you’ll use.


3-Day Full-Body Calisthenics Workout Plan

Monday – Full Body A

This workout establishes the fundamental push, pull, squat, hinge, and core patterns.

Main Workout

Rest approximately 60–120 seconds between sets.

Core Finisher

Wednesday – Full Body B

Full Body B introduces unilateral leg training and additional vertical pressing.

Main Workout

Rest approximately 60–120 seconds between sets.

Core & Skill Finisher

  • Tuck L-Sit – 3 sets × 10–30 seconds
  • Side Plank – 2–3 sets × 30–45 seconds each side

If a Tuck L-Sit is currently too difficult, use a Supported Knee Raise Hold.

Friday – Full Body C

The final workout introduces additional exercise variations while maintaining balanced full-body training.

Main Workout

Rest approximately 60–120 seconds between sets.

Core & Grip Finisher


6-Day Minimal-Equipment PPL Workout Plan

Push A – Chest, Shoulders & Triceps

Main Workout

  • Push-Ups – 4 sets × 8–15 reps
  • Pike Push-Ups – 3 sets × 6–12 reps
  • Dips – 3 sets × 6–12 reps
  • Resistance Band Shoulder Press – 3 sets × 10–15 reps
  • Resistance Band Lateral Raises – 2 sets × 12–20 reps

Rest approximately 60–120 seconds between sets.

Core Finisher

  • Plank – 3 sets × 45–60 seconds
  • Dead Bug – 2 sets × 10 reps each side

Pull A – Back, Biceps & Grip

Main Workout

Rest approximately 60–120 seconds between sets.

Grip & Core Finisher

Legs A – Quads, Hamstrings, Glutes & Calves

Main Workout

Rest approximately 60–120 seconds between sets.

Core Finisher

Push B – Strength & Body Control

Push B uses more challenging variations to develop pressing strength and prepare you for higher-level calisthenics.

Main Workout

  • Decline Push-Ups – 4 sets × 8–15 reps
  • Feet-Elevated Pike Push-Ups – 3 sets × 6–10 reps
  • Dips – 3 sets × 8–12 reps
  • Diamond Push-Ups – 3 sets × 8–15 reps
  • Resistance Band Tricep Extensions – 3 sets × 10–15 reps

Rest approximately 60–120 seconds between sets.

Skill & Core Finisher

  • Planche Lean – 3 sets × 10–20 seconds
  • Tuck L-Sit – 3 sets × 10–30 seconds

Skill work should remain controlled. Stop before technique breaks down.

Pull B – Back, Arms & Grip

Main Workout

Rest approximately 60–120 seconds between sets.

Grip & Core Finisher

Only perform Towel Dead Hangs from a secure bar with a towel capable of supporting your weight. Use normal Dead Hangs otherwise.

Legs B – Unilateral Strength & Athleticism

Main Workout

Rest approximately 60–120 seconds between sets.

Optional Power Exercise

Perform Jump Squats with maximum control and clean landings. Stop the set when jump height or landing quality noticeably deteriorates.

Core Finisher


Post-Workout Stretch Routine

After training, perform the stretches most relevant to the muscles you trained.

Hold each for approximately 20–30 seconds.

You don’t need to force extreme ranges of motion. Stretch comfortably and consistently.


Exercise Progressions

One of the major advantages of calisthenics is that the exercises themselves can progress as you become stronger.

Push-Up Progression

Wall Push-Ups → Incline Push-Ups → Knee Push-Ups → Standard Push-Ups → Decline Push-Ups → Weighted Push-Ups → Archer Push-Ups

Don’t rush toward advanced variations if your standard repetitions still lack control.

Pull-Up Progression

Dead Hang → Scapular Pull-Ups → Inverted Rows → Band-Assisted Pull-Ups → Pull-Ups → Chest-to-Bar Pull-Ups → Weighted Pull-Ups

Build reliable basic pulling strength before adding load.

Pike Push-Up Progression

Incline Pike Push-Ups → Pike Push-Ups → Feet-Elevated Pike Push-Ups → Wall Handstand Push-Up Progressions

The goal is gradually increasing the amount of bodyweight supported by your upper body.

Dip Progression

Bench-Supported Assistance → Band-Assisted Dips → Dips → Weighted Dips

If you experience shoulder discomfort during dips, don’t force greater depth simply for the sake of range of motion.

Squat Progression

Bodyweight Squats → Backpack Squats → Bulgarian Split Squats → Assisted Pistol Squats → Pistol Squats → Weighted Pistol Squats

Lower-body calisthenics often requires unilateral exercises or external resistance once normal squats become easy.

L-Sit Progression

Supported Knee Raise Hold → Tuck L-Sit → One-Leg L-Sit → Full L-Sit

Prioritize straight-arm support and controlled positioning over simply holding yourself up for longer.


How to Progress With Progressive Overload

Calisthenics still requires progressive overload.

You don’t have to perform hundreds of repetitions to continue improving.

Suppose Pull-Ups are programmed for:

3 sets × 5–10 reps

Your progression might look like:

7, 6, 5 → 8, 7, 6 → 9, 8, 7 → 10, 10, 10

Once you reach the upper end of the range with controlled technique, progress the exercise.

You can make calisthenics harder by:

  • Adding repetitions
  • Adding a set when appropriate
  • Moving to a harder variation
  • Adding weight with a backpack
  • Increasing resistance-band tension
  • Increasing range of motion
  • Improving technique and control

Change only one or two variables at a time so you can actually track progress.

How Hard Should You Train?

You don’t need to take every set to complete muscular failure.

For most working sets, choose a variation that allows you to finish with approximately 1–3 clean repetitions still possible.

As you approach the end of a set, your repetitions should remain controlled.

Stop when maintaining proper technique would require excessive momentum, shortened range of motion, or major compensation.


3-Day vs. 6-Day: Which Should You Choose?

Choose the 3-day Full-Body option if you:

  • Are relatively new to calisthenics
  • Want more recovery between workouts
  • Participate in sports or other physical training
  • Have limited training time
  • Experience significant soreness after workouts
  • Prefer longer full-body sessions

Choose the 6-day PPL option if you:

  • Already have a solid bodyweight-training foundation
  • Recover reliably between sessions
  • Prefer shorter, more focused workouts
  • Want to train movement groups more frequently
  • Enjoy training most days of the week
  • Can support your training with sufficient food and sleep

Six days isn’t automatically better than three.

The better program is the one that provides enough training to make progress without exceeding your ability to recover.


How Long Should You Follow This Plan?

Follow the program for approximately 8–12 weeks before considering major changes.

You can continue considerably longer if you’re still:

  • Adding repetitions
  • Advancing exercise variations
  • Increasing resistance
  • Improving technique
  • Developing skills
  • Recovering properly

Don’t change programs simply because a certain number of weeks has passed.

Progress is the reason to stay.

When Should You Move to More Advanced Calisthenics?

There isn’t a single strength test that determines when you’re an advanced calisthenics athlete.

However, building roughly the following abilities provides a useful foundation for harder training:

  • 20–30 controlled Push-Ups
  • 8–12 strict Pull-Ups
  • 10–15 controlled Dips
  • 8–12 Pike Push-Ups
  • 10–12 Bulgarian Split Squats per leg
  • 30–45 second Dead Hang
  • 20–30 second Tuck L-Sit
  • 45–60 second Plank

These are guidelines, not mandatory entrance tests.

Once basic exercises become consistently easy, start progressing their difficulty rather than simply adding endless repetitions.


Tips for Minimal-Equipment Calisthenics

  • Master basic movement patterns before chasing advanced skills.
  • Keep a training log.
  • Track sets, repetitions, resistance, and exercise variations.
  • Use controlled range of motion.
  • Don’t take every set to failure.
  • Train both vertical and horizontal pulling.
  • Include both squat and hip-hinge movements.
  • Use unilateral leg exercises as basic squats become easy.
  • Progress resistance gradually.
  • Keep skill practice controlled and technically focused.
  • Eat sufficient protein and nutritious foods.
  • Stay adequately hydrated.
  • Aim for approximately 7–9 hours of sleep when possible.
  • Take recovery days seriously.

Final Thoughts

A Minimal-Equipment Calisthenics Workout Plan proves that you don’t need an entire gym to build a capable body.

With a pull-up bar, resistance bands, dip bars or parallettes, and your own bodyweight, you can train nearly every major muscle group while developing strength, muscle, endurance, core stability, and body control.

Choose the 3-day Full-Body plan if you want a simple schedule with plenty of recovery. Choose the 6-day PPL plan if you already have a training foundation and prefer more frequent, focused sessions.

As you become stronger, don’t simply perform more and more repetitions. Progress toward harder variations, additional resistance, greater range of motion, and better control.

The equipment can stay minimal.

Your progression doesn’t have to.


Calorie Surplus Explained: What, Why, When Do You Need It?

If you want to gain muscle or bodyweight, you will eventually hear the same advice:

“Eat in a calorie surplus.”

But what does that actually mean?

A calorie surplus simply means eating more calories than your body uses over time.

That extra energy can help support:

  • Muscle growth
  • Weight gain
  • Hard training
  • Recovery
  • Increased glycogen stores

But a surplus is not a license to eat unlimited food.

Eating more calories than necessary does not force your body to build muscle faster.

The goal is to provide enough extra energy to support progress without creating excessive fat gain.

Quick Answer

You are in a calorie surplus when:

Calories eaten > calories burned

For example, if your body uses around:

2,500 calories per day

and you regularly eat:

2,750 calories per day

you are in approximately a:

250-calorie surplus

A calorie surplus is most useful when:

  • You want to gain muscle.
  • You are trying to increase bodyweight.
  • You are lean and struggling to grow.
  • High training volumes make it difficult to recover.
  • You cannot continue progressing at maintenance calories.

For muscle gain, a small-to-moderate surplus is usually better than eating as much as possible.


What Is a Calorie Surplus?

Your body uses energy every day.

Calories are burned through:

  • Basic body functions
  • Digestion
  • Walking and daily movement
  • Exercise
  • Training
  • Recovery

If you eat roughly the same amount of energy your body uses, your bodyweight tends to remain relatively stable.

This is called maintenance.

If you consistently eat less than you use, you enter a calorie deficit, which generally causes weight loss over time.

If you consistently eat more than you use, you enter a calorie surplus, which generally causes weight gain over time.

The basic relationship looks like this:

Calorie deficit → weight loss

Maintenance calories → weight maintenance

Calorie surplus → weight gain


Why Do You Need a Calorie Surplus?

Your body needs energy to build new tissue.

Muscle growth is an energy-demanding process, especially when combined with hard resistance training.

A calorie surplus can help provide extra energy for:

  • Building muscle tissue
  • Supporting training performance
  • Recovering between sessions
  • Maintaining glycogen stores
  • Supporting overall weight gain

Research shows that being in an energy deficit can reduce gains in lean mass during resistance training, even when strength can still improve.

That is one reason why deliberately gaining muscle is often easier when you are eating enough calories.


Is a Calorie Surplus Required to Build Muscle?

Not always.

This is important.

You can sometimes build muscle without a calorie surplus.

This is especially common in:

  • Beginners
  • People returning after a long training break
  • People carrying more body fat
  • People who previously trained poorly
  • People who previously ate too little protein

These individuals may be able to gain muscle while eating around maintenance calories or even while losing some fat.

However, as you become:

  • More experienced
  • Stronger
  • More muscular
  • Leaner

continued muscle gain becomes harder.

At that point, a controlled calorie surplus can make further progress easier.

Research reviews note that the exact surplus required to maximize muscle hypertrophy is still uncertain, meaning there is no scientifically perfect number that applies to everyone.


The Most Important Principle: More Is Not Always Better

This is where many beginners go wrong.

They hear:

“You need extra calories to build muscle.”

Then they think:

“More extra calories must mean more muscle.”

That is not how it works.

Your body has a limited rate at which it can build muscle.

Once enough energy is available to support training and growth, eating far beyond your needs increasingly contributes to:

  • Body-fat gain
  • Faster waist growth
  • Unnecessary weight gain

Research comparing different surplus sizes found that faster bodyweight gain mainly increased fat gain rather than clearly improving muscle thickness or strength in proportion to the extra calories.

So the goal is not:

Maximum calories.

The goal is:

Enough calories to support growth.


How Large Should Your Calorie Surplus Be?

There is no perfect number.

A practical starting point for many people is around:

200–500 extra calories per day

or approximately:

5–15% above maintenance calories

Recent sports-nutrition reviews commonly place moderate muscle-gain surpluses in roughly this range.

For example, if your maintenance calories are:

2,500 calories

you might begin around:

2,700–2,800 calories per day

rather than jumping straight to 3,500 calories.

Then track your progress.


Example Calorie Surplus Calculation

Imagine someone maintains their bodyweight on approximately:

2,400 calories per day

They decide to use a 10% surplus.

2,400 × 0.10 = 240 calories

2,400 + 240 = 2,640 calories

They could therefore begin around:

2,600–2,650 calories per day

Then monitor their average bodyweight for several weeks.

If weight gradually increases, the surplus is doing its job.

If weight remains unchanged, they may need slightly more food.


How Fast Should You Gain Weight?

A useful general target during a controlled bulk is around:

0.25–0.5% of bodyweight per week

For someone weighing 80 kg:

  • 0.25% = 0.2 kg
  • 0.5% = 0.4 kg

So roughly:

0.2–0.4 kg per week

may be a reasonable starting target.

Beginners may sometimes gain faster.

Advanced lifters generally need to be more conservative because their ability to build additional muscle is lower.


Where Should the Extra Calories Come From?

A calorie surplus should not come entirely from random junk food.

First, make sure your diet already provides enough:

  • Protein
  • Carbohydrates
  • Healthy fats
  • Vitamins
  • Minerals
  • Fiber

Then increase portions where needed.

Useful foods for increasing calories include:

  • Rice
  • Oats
  • Potatoes
  • Pasta
  • Bread
  • Milk
  • Greek yogurt
  • Eggs
  • Chicken
  • Fish
  • Lean beef
  • Nuts
  • Nut butter
  • Olive oil
  • Avocado
  • Fruit

The easiest option is often simply eating slightly larger portions of foods you already eat.


Protein During a Calorie Surplus

Protein remains essential during a surplus.

For most people performing regular resistance training, a practical range is approximately:

1.6–2.2 g/kg of bodyweight per day

For a 75 kg person:

  • 75 × 1.6 = 120 g
  • 75 × 2.2 = 165 g

That gives a range of approximately:

120–165 grams per day

Eating far beyond your protein needs does not mean the extra protein will automatically become new muscle.

Once protein intake is sufficient, additional calories can come from carbohydrates and fats.

Carbohydrates During a Surplus

Carbohydrates are especially useful when gaining muscle because they support:

  • Resistance training
  • High training volume
  • Glycogen storage
  • Recovery
  • High-intensity performance

Useful carbohydrate sources include:

  • Rice
  • Oats
  • Potatoes
  • Pasta
  • Bread
  • Fruit
  • Cereal
  • Quinoa

For many lifters, increasing carbohydrate portions is an easy way to create a surplus while improving training fuel.

Fats During a Surplus

Dietary fat can also help increase calories.

Fat provides more calories per gram than protein or carbohydrate, so smaller portions can add significant energy.

Useful sources include:

  • Nuts
  • Nut butter
  • Olive oil
  • Avocado
  • Seeds
  • Egg yolks
  • Fatty fish

This can be particularly useful if you struggle to eat large amounts of food.


When Do You Need a Calorie Surplus?

A surplus is most useful when your goal is deliberately gaining bodyweight and muscle.

You may benefit from one if:

You Are Lean and Struggling to Gain Muscle

If you train properly but your bodyweight never increases, additional calories may help.

You Are an Intermediate or Advanced Lifter

As training experience increases, muscle gain becomes slower.

A controlled surplus may help create better conditions for continued growth.

You Train With High Volume

Hard training requires energy.

People performing:

  • High-volume resistance training
  • Combat sports
  • Team sports
  • Multiple weekly sessions

may need more food simply to recover properly.

You Are Underweight

Someone below a healthy or desired bodyweight may use a calorie surplus to gradually gain weight.

When Do You NOT Need a Calorie Surplus?

Not everyone should immediately start bulking.

You may not need a deliberate surplus if:

  • You are completely new to resistance training.
  • You currently carry substantial excess body fat.
  • You can gain muscle around maintenance calories.
  • Your main goal is fat loss.
  • Your training is not yet consistent.
  • You are not eating enough protein.

In these situations, fixing training and basic nutrition may matter more than deliberately eating more.


Can You Be in Too Large a Surplus?

Yes.

Signs your surplus may be too large include:

  • Rapid weight gain for several weeks
  • Fast waist-size increases
  • Noticeable body-fat gain
  • Calories far exceeding your target
  • Little additional improvement in training performance

Do not panic over one high weigh-in.

Water, glycogen, food intake, and sodium can make scale weight fluctuate.

Look at your weekly average.

If weight consistently rises much faster than your target, reduce calories slightly.


What If You Are Not Gaining Weight?

If your weekly average bodyweight has remained unchanged for around:

2–3 weeks

despite consistently eating your target calories, increase intake slightly.

A practical increase is:

100–200 calories per day

For example:

  • More rice
  • An extra glass of milk
  • Another slice of toast
  • More oats
  • A small serving of nuts
  • Extra olive oil in a meal

Then monitor progress again.

Small adjustments work better than suddenly adding 1,000 calories.


Calorie Surplus vs Dirty Bulk

A calorie surplus does not automatically mean dirty bulking.

You can maintain a surplus while eating mostly:

  • Whole foods
  • Lean protein
  • Carbohydrates
  • Fruits
  • Vegetables
  • Healthy fats

A dirty bulk usually involves a much larger and less controlled surplus.

The two should not be confused.

A proper calorie surplus is controlled.


Do You Need to Track Calories?

Not necessarily.

Tracking calories makes the process easier to measure, but you can also create a surplus by:

  • Increasing meal portions
  • Adding snacks
  • Adding calorie-dense foods
  • Drinking milk or smoothies
  • Monitoring bodyweight

If your weight rises at an appropriate rate, you are probably eating enough.

If it does not move, increase food slightly.


Common Calorie Surplus Mistakes

Mistake 1: Eating as Much as Possible

More calories do not equal unlimited muscle growth.

Mistake 2: Ignoring Protein

A surplus without enough protein is not an optimal muscle-building strategy.

Mistake 3: Not Training Properly

Extra calories without progressive resistance training mainly encourage weight gain, not maximum muscle growth.

Mistake 4: Expecting Zero Fat Gain

Some fat gain can occur during a successful surplus.

The goal is to limit unnecessary fat, not guarantee zero fat gain.

Mistake 5: Changing Calories Every Few Days

Bodyweight fluctuates.

Give your current intake enough time before adjusting it.

Mistake 6: Using Junk Food as the Entire Surplus

Calorie intake matters, but nutrition quality still matters too.


Practical Tips

Start Small

You can always increase calories later.

Track Weekly Average Weight

This is more useful than obsessing over daily fluctuations.

Prioritize Protein

Hit your protein target every day.

Add Carbohydrates Around Training

They can help support performance.

Use Calorie-Dense Foods if Appetite Is Low

Nuts, nut butter, olive oil, milk, and smoothies can help.

Adjust Slowly

Change calories by small amounts based on real progress.

Keep Training Progressive

Your surplus should support muscle-building training.


Final Thoughts

A calorie surplus simply means eating more calories than your body uses.

It can help create better conditions for:

  • Muscle growth
  • Weight gain
  • Recovery
  • Training performance

But the biggest mistake is assuming that more calories always mean more muscle.

They do not.

A good surplus should be:

  • Controlled
  • Moderate
  • Supported by adequate protein
  • Combined with resistance training
  • Adjusted using your bodyweight trend

For many people trying to gain muscle, around 200–500 extra calories per day can be a practical starting range, but your actual progress matters more than any fixed number.

Eat enough to grow.

Not so much that you create unnecessary fat gain.

Learn more about Nutrition for Workouts here.


FAQ

Q1: Will a calorie surplus make me fat?
Some fat gain can occur, but using a controlled surplus and gaining weight gradually can help limit unnecessary fat accumulation.

Q2: How do I know if I am in a calorie surplus?
If your average bodyweight consistently increases over several weeks, you are likely consuming more energy than you use.

Q3: Can I bulk without counting calories?
Yes. Increase portions or add calorie-dense foods and monitor your bodyweight trend. Calorie tracking simply makes the process easier to measure.

Q4: What should I do if my weight is not increasing?
If your weekly average has not increased for 2–3 weeks, add roughly 100–200 calories per day and monitor again.

Q6: Is a larger calorie surplus better for muscle growth?
Not necessarily. Larger surpluses can increase bodyweight faster, but evidence suggests much of the additional gain may be body fat rather than proportionally greater muscle.


Protein Foods vs Protein Powder: Which Is Better Overall?

Protein is one of the most important nutrients for building muscle, recovering from training, and maintaining strength.

But there are two main ways people usually get it:

Protein-rich whole foods such as eggs, chicken, fish, milk, Greek yogurt, soy, lentils, and beans.

Or:

Protein powders such as whey, casein, soy, pea, and plant protein blends.

Both can help you reach your daily protein target.

But are they equally good?

For most people, the best approach is simple:

Build your diet mainly around protein-rich foods and use protein powder when it makes reaching your protein target easier.

Quick Answer

Protein foods are generally better as the foundation of your diet because they provide protein alongside other nutrients such as:

  • Vitamins
  • Minerals
  • Healthy fats
  • Carbohydrates
  • Fiber, depending on the food
  • Other beneficial compounds

Protein powder has one major advantage:

Convenience.

It is:

  • Quick
  • Portable
  • Easy to measure
  • Usually high in protein
  • Useful when you cannot prepare a meal

For muscle growth, protein powder is not automatically better than food.

If both options provide enough high-quality protein and your total daily intake is adequate, both can support muscle growth.


What Are Protein Foods?

Protein foods are normal foods that naturally contain meaningful amounts of protein.

Examples include:

  • Eggs
  • Chicken
  • Fish
  • Lean beef
  • Milk
  • Greek yogurt
  • Cottage cheese
  • Soy
  • Tofu
  • Tempeh
  • Lentils
  • Beans
  • Chickpeas

These foods provide protein as part of a larger nutritional package.

For example, eggs also provide fats, vitamins, and minerals.

Fish can provide protein along with omega-3 fats.

Greek yogurt can provide protein, calcium, and other nutrients.

Beans and lentils provide protein together with carbohydrates, fiber, vitamins, and minerals.

That is the biggest advantage of whole foods.


What Is Protein Powder?

Protein powder is a concentrated protein product made by extracting protein from foods such as:

  • Milk
  • Soy
  • Peas
  • Rice
  • Eggs

Common types include:

  • Whey protein
  • Casein protein
  • Soy protein
  • Pea protein
  • Plant protein blends

Most protein powders provide about one concentrated serving of protein without requiring a full meal.

They are designed primarily for convenience.

Protein powder should therefore be viewed as:

A convenient protein source—not a requirement for muscle growth.


The Most Important Principle: Total Protein Matters Most

Before deciding whether food or powder is better, make sure you are eating enough protein overall.

For people performing regular resistance training, a practical daily intake is approximately:

1.6–2.2 grams of protein per kilogram of bodyweight per day

For a 70 kg person:

  • 70 × 1.6 = 112 g
  • 70 × 2.2 = 154 g

That gives a useful range of approximately:

112–154 grams of protein per day

If you can comfortably reach that amount through normal food, protein powder is optional.

If reaching that target is difficult, a protein shake can make things much easier.


Protein Foods vs Protein Powder for Muscle Growth

Both can support muscle growth.

Muscle growth depends much more on:

  • Resistance training
  • Total daily protein
  • Enough calories
  • Recovery
  • Consistency

than on whether your protein came from a chicken breast or a shake.

Protein supplements have been shown to improve muscle and strength gains during resistance training when they help increase total protein intake.

But whole protein-rich foods are also effective for stimulating muscle protein synthesis.

So protein powder doesn’t have a special muscle-building ability that whole foods lack.

The key is getting enough high-quality protein consistently.


Protein Quality

Protein quality still matters.

High-quality proteins provide all essential amino acids in sufficient amounts and are well digested.

High-quality whole-food options include:

  • Eggs
  • Dairy
  • Fish
  • Meat
  • Soy

High-quality protein powders include:

  • Whey
  • Casein
  • Soy
  • Well-formulated plant blends

Whey protein is particularly popular because it is:

  • Highly digestible
  • Rich in essential amino acids
  • High in leucine
  • Convenient

But that does not make it superior to every normal meal in every situation.


Nutrition: Whole Foods Win

This is where whole foods have the biggest advantage.

Protein powder primarily gives you protein.

Whole foods usually give you much more.

For example:

Eggs

Provide:

  • Protein
  • Fats
  • Choline
  • Vitamins
  • Minerals

Greek Yogurt

Provides:

  • Protein
  • Calcium
  • Other dairy nutrients

Fish

Can provide:

  • Protein
  • Omega-3 fats
  • Vitamins
  • Minerals

Lentils and Beans

Provide:

  • Protein
  • Fiber
  • Carbohydrates
  • Minerals
  • Plant nutrients

Protein powder may be fortified with certain nutrients, but it generally cannot replace the nutritional variety of a balanced diet.

This is why protein powder should supplement food rather than replace most of it.


Convenience: Protein Powder Wins

Protein powder becomes extremely useful when convenience matters.

Preparing:

  • Chicken
  • Eggs
  • Fish
  • Beef

takes time.

A shake might take less than a minute.

Protein powder can be particularly useful:

  • After training
  • At work
  • At university
  • While traveling
  • When you have little appetite
  • When you do not have time to cook
  • When your remaining protein target is difficult to reach

That is where protein powder earns its place.


Fullness: Protein Foods Usually Win

If you are trying to control hunger, whole food often has an advantage.

Eating:

  • Eggs
  • Chicken
  • Greek yogurt
  • Fish
  • Lentils

usually requires more chewing and provides more food volume than drinking a shake.

A liquid protein shake can be consumed quickly and may not keep everyone as full as a complete meal.

This can make protein foods particularly useful during fat loss.

However, individual responses vary.


Protein Powder During a Bulk

Protein powder can be very useful while bulking.

A shake can add protein without requiring another large meal.

You can also combine it with:

  • Milk
  • Oats
  • Banana
  • Peanut butter

to create a higher-calorie shake.

But do not assume you need three or four shakes every day simply because you are bulking.

Normal food should still provide most of your diet.


Protein Powder During Fat Loss

Protein powder can also be useful while cutting.

A protein shake can provide a relatively large amount of protein for a manageable number of calories.

However, whole protein foods may provide better fullness.

A good fat-loss diet might therefore use:

  • Eggs
  • Chicken
  • Fish
  • Greek yogurt
  • Lean meat
  • Tofu

as the main protein sources while keeping protein powder available for convenience.


Which Is Better After a Workout?

You do not need protein powder immediately after training.

A normal meal containing enough protein works perfectly well.

Examples include:

  • Chicken + rice
  • Eggs + toast
  • Greek yogurt + fruit
  • Fish + potatoes

A protein shake becomes useful when you cannot eat a normal meal soon.

For example:

Whey protein + banana

can be an easy temporary option until your next proper meal.

The important thing is reaching your total daily protein requirement.


Is Protein Powder Natural?

Protein powder is processed, but “processed” does not automatically mean unhealthy.

Many normal foods undergo processing.

Whey protein, for example, comes from milk and is filtered and processed to concentrate the protein.

The important questions are:

  • Does the product provide quality protein?
  • Does it fit your diet?
  • Does it contain ingredients you tolerate?
  • Is it produced by a trustworthy manufacturer?

The fact that something comes in a tub does not automatically make it bad.


Cost: Which Is Cheaper?

This depends heavily on where you live and what foods are available.

In some places, protein powder can provide a relatively inexpensive amount of protein per serving.

In others, foods such as:

  • Eggs
  • Milk
  • Yogurt
  • Lentils
  • Beans

may be more economical.

Instead of comparing the price of the package, compare:

Cost per 20–30 grams of protein.

That gives you a much more useful comparison.


Can You Replace Meals With Protein Shakes?

Occasionally, yes.

Regularly, probably not.

A protein shake does not automatically provide everything found in a balanced meal.

A proper meal may contain:

  • Protein
  • Carbohydrates
  • Fats
  • Fiber
  • Vitamins
  • Minerals

A basic shake may contain little more than protein and flavoring.

If you need a more complete shake, you can add foods such as:

  • Milk
  • Oats
  • Fruit
  • Nut butter
  • Yogurt

But even then, variety across your overall diet remains important.


How Much Protein Powder Should You Use?

There is no mandatory number of scoops.

Use as much as needed to help meet your protein target.

For example, imagine your daily target is:

140 grams

and your normal food provides:

115 grams

A shake providing around:

25 grams of protein

could fill the remaining gap.

You probably do not need to add another three shakes after that.

Protein powder should solve a need, not become a habit with no purpose.


Common Protein Food vs Protein Powder Myths

Myth 1: Protein Powder Builds More Muscle Than Food

Not automatically.

Both provide amino acids that can support muscle growth.

Total protein intake and training matter more.

Myth 2: Protein Powder Is Required to Build Muscle

False.

You can build plenty of muscle without ever using protein powder.

Myth 3: Whole Foods Are Always Better for Muscle Growth

Not necessarily.

A high-quality protein powder can provide an excellent amino acid profile.

Whole foods are generally better for overall nutrition, not because they magically produce more muscle.

Myth 4: Protein Shakes Are Only for Bodybuilders

No.

Anyone who struggles to meet their protein needs can use them.

Myth 5: You Need a Shake Immediately After Training

No.

Your post-workout nutrition window is much more flexible than that.

Myth 6: More Scoops Mean More Muscle

Only up to the point where you actually need the additional protein.

Once your total intake is sufficient, continually adding more protein does not guarantee faster muscle growth.


Practical Tips

Make Whole Foods Your Foundation

Get most of your protein from foods such as:

  • Eggs
  • Dairy
  • Meat
  • Fish
  • Soy
  • Lentils
  • Beans

Use Powder to Fill the Gaps

If your meals leave you short of your protein target, use a shake.

Don’t Replace Every Meal With Shakes

You still need a varied diet.

Check the Protein Per Serving

Look at how many grams of actual protein the product provides rather than judging it by package size.

Choose a Protein You Digest Well

Whey works well for many people, while others may prefer:

  • Whey isolate
  • Soy
  • Pea
  • Plant blends

Don’t Overcomplicate It

Protein powder is food in a convenient form.

Treat it that way.


Protein Foods vs Protein Powder: Which Is Better Overall?

For overall nutrition:

Protein foods win.

They provide protein alongside a wider variety of nutrients and should form the foundation of your diet.

For convenience:

Protein powder wins.

It gives you a quick, concentrated source of protein when normal food is impractical.

For muscle growth:

Both can work extremely well.

What matters most is:

  • Total protein intake
  • Protein quality
  • Training
  • Calories
  • Recovery
  • Consistency

So you do not need to choose one side.

For most people, the best strategy is:

Protein foods first. Protein powder when useful.


Final Thoughts

Protein foods and protein powder serve the same basic purpose:

They help provide the amino acids your body needs.

But they offer different advantages.

Protein-rich foods provide:

  • Protein
  • More complete nutrition
  • Greater variety
  • Often better fullness

Protein powder provides:

  • Convenience
  • Portability
  • Easy protein tracking
  • A quick way to reach your target

You do not need protein powder if your diet already provides enough protein.

But there is also no reason to avoid it if it makes your nutrition easier.

Build your diet around quality foods.

Use protein powder as a tool when you need it.

That gives you the advantages of both without depending too heavily on either one.

Learn more about Nutrition for Workouts here.


FAQ

Q1: Is protein powder better than protein foods for muscle growth?
Not necessarily. Both can support muscle growth when they provide enough high-quality protein. Total daily protein intake and resistance training matter more.

Q2: Can I build muscle without protein powder?
Yes. Protein powder is completely optional. You can meet your protein needs through normal foods.

Q3: Is protein powder as healthy as food?
Protein powder can be a useful part of a healthy diet, but whole foods usually provide a wider range of nutrients, which is why they should generally form the foundation of your diet.

Q4: How many protein shakes should I drink per day?
There is no required number. Use enough protein powder to help reach your daily protein target after accounting for the protein you already get from food.

Q5: Should I drink a protein shake after every workout?
No. A normal protein-rich meal works perfectly well. A shake is simply convenient when food is unavailable or impractical.


How to Do Feet-Elevated Australian Rows Correctly: Step-by-Step Guide for Beginners

Feet-Elevated Australian Rows are an advanced variation of the standard Australian Row, also known as the Inverted Row or Bodyweight Row. Instead of keeping your feet on the floor, you elevate them on a stable bench, box, or platform while pulling your chest toward a horizontal bar.

Elevating your feet allows you to create a more horizontal body position and generally increases the amount of your bodyweight your upper body must pull. This makes Feet-Elevated Australian Rows an effective progression once standard Australian Rows become relatively easy.

The exercise primarily strengthens your lats, upper back, rear shoulders, and arms while requiring your core and glutes to keep your body rigid throughout each repetition.


What Are Feet-Elevated Australian Rows?

Feet-Elevated Australian Rows are a horizontal bodyweight pulling exercise performed underneath a secure low bar with your heels supported on an elevated surface.

You begin underneath the bar with your arms extended and your body relatively straight. From this position, you bend your elbows and pull your chest toward the bar before lowering yourself under control.

When your feet are elevated to approximately the height of the bar, your body can become nearly horizontal. Compared with an easier Australian Row performed at a steeper body angle, this position generally places greater demand on your pulling muscles.

Feet-Elevated Australian Rows are commonly used in:

  • Calisthenics training
  • Back workouts
  • Pull-day workouts
  • Upper-body strength programs
  • Bodyweight workouts
  • Australian Row progressions
  • Pull-Up assistance training
  • Home and gym workouts

The exact difficulty depends on factors such as bar height, foot elevation, body position, and your individual proportions.

Benefits of Feet-Elevated Australian Rows

Feet-Elevated Australian Rows provide a challenging horizontal pulling exercise without requiring heavy weights.

Benefits include:

  • Strengthens the lats and upper back
  • Develops the rhomboids and middle trapezius
  • Strengthens the biceps and other elbow flexors
  • Trains the posterior deltoids
  • Develops horizontal pulling strength
  • Increases difficulty beyond standard Australian Rows
  • Challenges core and glute stability
  • Develops grip and forearm strength
  • Complements vertical pulling exercises such as Pull-Ups

The exercise can also be progressively overloaded through harder body positions, slower repetitions, pauses, or additional external resistance.

Muscles Worked in Feet-Elevated Australian Rows

Feet-Elevated Australian Rows train several major muscles throughout the back, arms, and shoulders.

Primary Muscles
  • Latissimus Dorsi
  • Rhomboids
  • Middle Trapezius
  • Posterior Deltoids
  • Biceps Brachii
Secondary Muscles
  • Brachialis
  • Brachioradialis
  • Teres Major
  • Lower Trapezius
  • Forearms
  • Rotator Cuff Muscles
  • Erector Spinae
  • Core Muscles
  • Glutes

Your core, glutes, and spinal stabilizers primarily work isometrically to maintain your body position while your back and arms perform the rowing movement.


How to Do Feet-Elevated Australian Rows (Step-by-Step)

Step 1: Set Up the Bar and Foot Platform

Use a sturdy horizontal bar positioned low enough to perform Australian Rows.

Place a stable bench, box, or platform where your feet will rest.

Before beginning, make sure:

  • The bar is securely fixed
  • The foot platform cannot slide or tip
  • You have enough space underneath the bar
  • There are no obstacles around your head or torso

Never perform the exercise from an unstable setup.

Step 2: Grip the Bar

Move underneath the bar and grip it with your palms facing away from you.

Place your hands approximately shoulder-width apart or slightly wider.

Wrap your fingers and thumbs securely around the bar.

Step 3: Place Your Heels on the Elevated Surface

Carefully place both heels on the bench, box, or platform.

Extend your legs and position your body beneath the bar.

For a more challenging version, place your feet approximately level with the bar to create a nearly horizontal body position.

Step 4: Establish the Starting Position

Begin with your arms extended while maintaining a strong body position.

Keep your:

  • Head relatively neutral
  • Core braced
  • Glutes engaged
  • Hips extended
  • Legs controlled
  • Heels securely supported

Aim to create a relatively straight line from your shoulders through your hips and legs.

Step 5: Pull Your Chest Toward the Bar

Initiate the row by controlling your shoulder blades and bending your elbows.

Drive your elbows backward as you pull your torso upward.

Keep your core and glutes engaged so your hips rise together with your shoulders.

Avoid using momentum to throw yourself toward the bar.

Step 6: Reach the Top Position

Continue pulling until your chest approaches or lightly touches the bar, as long as you can maintain form.

At the top:

  • Keep your chest lifted
  • Maintain your hip position
  • Keep your core braced
  • Drive your elbows backward
  • Keep your shoulders controlled

Do not extend your neck excessively just to reach the bar.

Step 7: Lower Yourself Under Control

Gradually extend your elbows and lower your body away from the bar.

Maintain your body alignment throughout the descent.

Return to a controlled position with your arms extended before beginning the next repetition.

Warrior showcasing How to do Feet-Elevated Australian Rows with proper form.

Feet-Elevated Australian Rows Form Checklist

Use this checklist to maintain proper Feet-Elevated Australian Row technique.

  • Use a secure horizontal bar
  • Elevate your feet on a stable surface
  • Keep your heels securely supported
  • Grip approximately shoulder-width or slightly wider
  • Begin with your arms extended
  • Keep your head relatively neutral
  • Brace your core
  • Engage your glutes
  • Maintain a relatively straight body position
  • Drive your elbows backward
  • Pull your chest toward the bar
  • Keep your hips from sagging
  • Avoid excessive swinging or momentum
  • Lower yourself under control
  • Maintain consistent form throughout the set

Your shoulders, hips, and legs should move together rather than allowing your hips to remain low while only your chest rises.


Common Feet-Elevated Australian Rows Mistakes

Letting the Hips Sag

Problem: Allowing your hips to drop breaks your straight body position and reduces the full-body stability required by the exercise.

Fix: Brace your core, squeeze your glutes, and maintain hip extension throughout each repetition.

Using an Unstable Platform

Problem: A bench, box, or platform that slides or tips can cause your feet to lose support unexpectedly.

Fix: Use a sturdy, non-slip surface and test its stability before beginning your set.

Pulling Your Chin Toward the Bar

Problem: Extending your neck can make it appear that you have achieved a greater range of motion without actually pulling your torso higher.

Fix: Keep your head relatively neutral and focus on bringing your chest toward the bar.

Using Excessive Momentum

Problem: Jerking or swinging your body upward reduces muscular control and makes your repetitions inconsistent.

Fix: Pull smoothly and keep your torso, hips, and legs controlled throughout the movement.

Performing Partial Repetitions

Problem: Stopping far below your controlled top position or failing to extend your arms at the bottom reduces the range through which you train.

Fix: Use the largest comfortable range you can control while maintaining proper body alignment.

Flaring the Elbows Excessively

Problem: Driving your elbows directly sideways can unnecessarily alter your rowing mechanics.

Fix: Allow your elbows to travel backward at a comfortable angle while pulling your chest toward the bar.

Progressing Too Quickly

Problem: Elevating your feet before you have developed sufficient rowing strength can result in sagging hips, shortened repetitions, and excessive momentum.

Fix: Master standard Australian Rows first and progress to Feet-Elevated Australian Rows when you can maintain good control.


Feet-Elevated Australian Rows Progressions and Variations

You can modify Feet-Elevated Australian Rows according to your current strength and training goals.

Low Feet-Elevated Australian Rows

This variation uses a relatively low platform and provides an easier transition from standard Australian Rows.

How to Do Low Feet-Elevated Australian Rows

  • Position yourself underneath a secure horizontal bar.
  • Place your heels on a low, stable platform.
  • Grip the bar and extend your arms.
  • Brace your core and engage your glutes.
  • Pull your chest toward the bar.
  • Reach your highest controlled position.
  • Lower yourself slowly to the start.

Bar-Height Feet-Elevated Australian Rows

Elevating your heels to approximately bar height creates a challenging, nearly horizontal rowing position.

How to Do Bar-Height Feet-Elevated Australian Rows

  • Place a stable platform near the bar.
  • Position your heels approximately level with the bar.
  • Grip the bar with an overhand grip.
  • Establish a straight and controlled body position.
  • Drive your elbows backward and pull your chest toward the bar.
  • Maintain your body alignment at the top.
  • Lower yourself under control.

Feet-Elevated Underhand Australian Rows

An underhand grip changes your arm position and allows strong involvement from your biceps and other elbow flexors.

How to Do Feet-Elevated Underhand Australian Rows

  • Place your heels securely on the elevated surface.
  • Grip the bar with your palms facing toward you.
  • Begin with your arms extended.
  • Brace your core and maintain hip extension.
  • Pull your chest toward the bar.
  • Keep your torso and legs controlled.
  • Lower yourself slowly to the starting position.

Feet-Elevated Wide-Grip Australian Rows

This variation uses a moderately wider grip to change the pulling position.

How to Do Feet-Elevated Wide-Grip Australian Rows

  • Elevate your heels on a secure platform.
  • Grip the bar moderately wider than shoulder-width.
  • Extend your arms and establish body tension.
  • Pull your chest toward the bar.
  • Keep your shoulders controlled.
  • Reach your highest comfortable position.
  • Lower yourself slowly.

Avoid using an excessively wide grip that prevents you from achieving a useful range of motion.

Weighted Feet-Elevated Australian Rows

This advanced variation adds external resistance after the bodyweight version becomes manageable.

How to Do Weighted Feet-Elevated Australian Rows

  • Secure an appropriate weighted vest before setting up.
  • Place your heels on a stable elevated surface.
  • Grip the horizontal bar securely.
  • Brace your core and maintain a straight body position.
  • Pull your chest toward the bar.
  • Reach the top without allowing your hips to sag.
  • Lower yourself under control.

Final Thoughts

Feet-Elevated Australian Rows are an effective progression for building greater horizontal pulling strength after standard Australian Rows become manageable.

They develop:

  • Lat strength
  • Upper-back strength
  • Rear-delt strength
  • Biceps strength
  • Forearm and grip strength
  • Horizontal pulling ability
  • Core stability
  • Bodyweight control

The key is to keep your body rigid while pulling your chest toward the bar. Brace your core, engage your glutes, maintain your hip position, and control both the pulling and lowering phases.

Start with a manageable foot elevation and progress gradually. As your strength improves, you can use a more demanding body position, slower repetitions, pauses, harder variations, or additional resistance. Learn more about Pull Workouts here.

Essential Gear for Feet-Elevated Australian Rows

Feet-Elevated Australian Rows require a secure pulling setup and a stable surface for supporting your feet.

  • Low Horizontal Bar: The essential piece of equipment for the exercise. It should be securely fixed and capable of safely supporting your bodyweight.
  • Workout Bench: Provides a stable elevated surface for supporting your heels.
  • Plyometric Box: Offers another sturdy option for elevating your feet and can help you adjust the exercise difficulty.
  • Gym Chalk: Can improve your grip on the bar when your hands become sweaty.
  • Weighted Vest: Provides additional resistance for advanced trainees once bodyweight Feet-Elevated Australian Rows become manageable.

Feet-Elevated Australian Rows FAQ

Q1: How high should I elevate my feet?
Start with a height that allows you to maintain good technique. A low elevation provides an easier progression, while placing your heels approximately level with the bar creates a more demanding horizontal position.

Q2: Should my chest touch the bar during Feet-Elevated Australian Rows?
Your chest can lightly touch or approach the bar if you can reach it without craning your neck, sagging your hips, or losing control. Bar contact should not come at the expense of proper form.

Q3: How many Feet-Elevated Australian Rows should beginners do?
If you already have sufficient strength for the exercise, around 6–12 controlled repetitions for 2–3 sets can be a practical starting point. If you cannot maintain your body position, lower your feet or return to standard Australian Rows.

Q4: Can Feet-Elevated Australian Rows improve my Pull-Ups?
They can strengthen many of the back, arm, and grip muscles involved in Pull-Ups. However, Feet-Elevated Australian Rows are a horizontal pull while Pull-Ups are a vertical pull, so they work best as complementary exercises rather than a complete replacement for Pull-Up training.

Q5: How can I make Feet-Elevated Australian Rows harder?
You can use a more demanding body position, slow the lowering phase, pause at the top, increase your repetitions, use harder variations, or add external resistance with a weighted vest.


How to Do Decline Push-Ups Correctly: Step-by-Step Guide for Beginners

Decline Push-Ups are a more challenging Push-Up variation performed with your feet elevated on a stable surface and your hands on the floor. Elevating your feet shifts more of your bodyweight toward your upper body, increasing the difficulty compared with standard Push-Ups.

The exercise primarily trains your chest, shoulders, and triceps while requiring your core to maintain a strong body position. The elevated position generally increases the demand on the shoulders and can emphasize the clavicular, or upper, portion of the chest compared with a standard Push-Up.

Decline Push-Ups are a useful progression once regular Push-Ups become manageable and you want a harder bodyweight pressing exercise without immediately adding external weight.


What Are Decline Push-Ups?

Decline Push-Ups are a bodyweight pressing exercise performed with your feet elevated above your hands.

You place your feet on a stable bench, box, step, or similar elevated surface while keeping your hands on the floor. From this declined body position, you lower your chest toward the floor and then press yourself back to the starting position.

As the elevation of your feet increases, more of your bodyweight is generally shifted toward your hands, making the exercise more demanding. Very high elevations also increasingly change the movement toward a more shoulder-dominant pressing pattern.

Decline Push-Ups are commonly used in:

  • Chest workouts
  • Upper-body workouts
  • Push-day workouts
  • Calisthenics training
  • Home workouts
  • Bodyweight strength programs
  • Push-Up progression programs
  • Shoulder and triceps training

A moderate elevation is usually sufficient. You do not need to place your feet extremely high to make Decline Push-Ups challenging.

Benefits of Decline Push-Ups

Decline Push-Ups provide a simple way to increase the difficulty of Push-Ups without requiring heavy equipment.

Benefits include:

  • Strengthens the chest
  • Increases emphasis on the upper-chest region
  • Strengthens the anterior deltoids
  • Develops triceps strength
  • Increases difficulty compared with standard Push-Ups
  • Challenges core stability
  • Develops bodyweight pressing strength
  • Requires minimal equipment
  • Provides progression toward harder Push-Up variations

The height of your feet provides a simple way to modify the exercise. A small elevation creates a relatively modest progression, while a higher elevation substantially increases the challenge.

Muscles Worked in Decline Push-Ups

Decline Push-Ups primarily train the pressing muscles of the upper body while your core and several stabilizing muscles maintain your body position.

Primary Muscles
  • Pectoralis Major
  • Anterior Deltoids
  • Triceps Brachii

The clavicular, or upper, fibers of the pectoralis major can receive greater relative emphasis as the pressing angle changes compared with a standard Push-Up.

Secondary Muscles
  • Serratus Anterior
  • Rectus Abdominis
  • Obliques
  • Rotator Cuff Muscles
  • Forearms
  • Quadriceps
  • Glutes

Your core, glutes, and legs primarily work isometrically to help maintain a rigid body position.


How to Do Decline Push-Ups (Step-by-Step)

Step 1: Choose a Stable Elevated Surface

Select a sturdy bench, box, step, or other elevated surface that will not slide or tip.

Beginners to Decline Push-Ups should generally start with a relatively low elevation.

Make sure there is enough clear floor space in front of the surface for your hands and body.

Step 2: Place Your Feet on the Elevated Surface

Position your hands on the floor and carefully place your feet on the elevated surface behind you.

Depending on the surface, you can usually support yourself through your toes or the front portion of your shoes.

Make sure your feet cannot easily slip.

Step 3: Establish the Starting Position

Extend your arms and form a straight, controlled line through your body.

Keep your:

  • Hands approximately shoulder-width apart or slightly wider
  • Wrists underneath or comfortably outside your shoulders
  • Core braced
  • Glutes engaged
  • Hips aligned with your torso
  • Head relatively neutral

Avoid allowing your hips to sag or rise excessively.

Step 4: Begin Lowering Your Body

Bend your elbows and lower your chest toward the floor.

Allow your elbows to travel backward at a comfortable angle rather than flaring them directly outward.

Keep your torso and hips moving together as one controlled unit.

Step 5: Reach the Bottom Position

Continue lowering until you reach the deepest position you can control comfortably.

Your chest should approach the floor while your body remains aligned.

Do not force additional depth if it causes shoulder discomfort or makes you lose your body position.

Step 6: Press Back Up

Push firmly through your hands and begin extending your elbows.

Maintain core and glute tension so your hips rise together with your shoulders.

Continue pressing until your arms return to extension.

Step 7: Reset and Repeat

Re-establish your stable plank position at the top.

Check that your hips have not sagged or risen excessively.

Repeat for your desired number of repetitions while maintaining the same controlled technique.

Warrior showcasing How to do Decline Push-ups with proper form.

Decline Push-Ups Form Checklist

Use this checklist to maintain proper Decline Push-Up technique.

  • Use a sturdy elevated surface
  • Make sure your feet cannot easily slip
  • Position your hands around shoulder-width or slightly wider
  • Keep your head relatively neutral
  • Brace your core
  • Engage your glutes
  • Maintain a straight body position
  • Keep your hips from sagging
  • Avoid excessively raising your hips
  • Lower your chest under control
  • Keep your elbows at a comfortable angle
  • Use a controlled range of motion
  • Press your entire body upward together
  • Finish each repetition with controlled arm extension
  • Stop the set when your form begins to deteriorate

Your body should move as a relatively rigid unit rather than allowing your hips and upper body to rise separately.


Common Decline Push-Ups Mistakes

Elevating the Feet Too High

Problem: Using an excessive elevation can dramatically increase the difficulty and shift more of the exercise toward the shoulders before you have developed sufficient strength.

Fix: Start with a low, stable surface and increase the elevation gradually as your strength improves.

Sagging the Hips

Problem: Allowing your hips to drop creates excessive extension through your lower back and breaks your straight body position.

Fix: Brace your core, engage your glutes, and keep your hips aligned with your torso throughout each repetition.

Raising the Hips Too High

Problem: Lifting your hips into a pike position changes the mechanics and begins turning the exercise toward a Pike Push-Up.

Fix: Keep your body relatively straight from your shoulders through your hips and legs.

Flaring the Elbows Directly Outward

Problem: Allowing your elbows to travel directly sideways can create an unnecessarily wide pressing position.

Fix: Allow your elbows to travel backward at a comfortable angle as you lower yourself.

Performing Partial Repetitions

Problem: Stopping well above your controlled bottom position reduces the range through which you train.

Fix: Lower yourself through the largest comfortable range you can control without losing body alignment.

Dropping Too Quickly

Problem: Falling rapidly toward the floor reduces control during the lowering phase.

Fix: Lower yourself deliberately and maintain tension throughout the repetition.

Using an Unstable Surface

Problem: Placing your feet on furniture or equipment that can slide, roll, or tip creates an unnecessary fall risk.

Fix: Use a sturdy, non-slip surface designed or positioned to remain stable under your feet.


Decline Push-Ups Variations

Decline Push-Ups can be adjusted according to your strength and training goals.

Low Decline Push-Ups

A low foot elevation provides the easiest transition from standard Push-Ups.

How to Do Low Decline Push-Ups

  • Choose a low, stable step or platform.
  • Place your feet securely on the surface.
  • Position your hands on the floor.
  • Brace your core and align your body.
  • Lower your chest toward the floor.
  • Press yourself back to the top.
  • Repeat with controlled technique.

Moderate Decline Push-Ups

A higher surface increases the amount of bodyweight supported by your upper body.

How to Do Moderate Decline Push-Ups

  • Place your feet on a stable bench or box.
  • Establish a strong Push-Up position.
  • Keep your core and glutes engaged.
  • Lower your chest under control.
  • Maintain a comfortable elbow position.
  • Press firmly back to arm extension.
  • Repeat without allowing your hips to sag.

Decline Diamond Push-Ups

This variation combines foot elevation with a closer hand position, increasing the challenge to the triceps.

How to Do Decline Diamond Push-Ups

  • Elevate your feet on a secure surface.
  • Position your hands close together beneath your chest.
  • Form a diamond or triangle shape if comfortable.
  • Keep your core braced.
  • Lower yourself with your elbows relatively close to your torso.
  • Press back to the starting position.
  • Repeat with controlled technique.

Your thumbs and index fingers do not need to touch if that position is uncomfortable.

Decline Wide-Grip Push-Ups

This variation uses a moderately wider hand position.

How to Do Decline Wide-Grip Push-Ups

  • Place your feet on a stable elevated surface.
  • Position your hands moderately wider than shoulder-width.
  • Establish a straight body position.
  • Lower your chest toward the floor.
  • Avoid excessively flaring your elbows.
  • Press yourself back upward.
  • Repeat through a comfortable range.

Avoid placing your hands as wide as possible.

Weighted Decline Push-Ups

This advanced variation adds external resistance after bodyweight Decline Push-Ups become manageable.

How to Do Weighted Decline Push-Ups

  • Use a secure weighted vest or another appropriate loading method.
  • Place your feet on a stable elevated surface.
  • Establish a controlled starting position.
  • Brace your core and lower yourself slowly.
  • Reach your comfortable bottom position.
  • Press your body back upward.
  • Repeat while keeping the added resistance secure.

Final Thoughts

Decline Push-Ups are an effective progression for increasing the difficulty of standard Push-Ups while continuing to use your own bodyweight primarily.

They develop:

  • Chest strength
  • Upper-chest strength
  • Shoulder strength
  • Triceps strength
  • Core stability
  • Bodyweight pressing strength
  • Upper-body muscular endurance
  • Push-Up proficiency

Start with a modest foot elevation and focus on maintaining a strong body position. Keep your core and glutes engaged, lower your chest under control, and press your body upward as one unit.

As the exercise becomes easier, you can gradually increase the foot elevation, use more challenging hand positions, increase your training volume, or add external resistance. Learn more about Push Workouts here.

Essential Gear for Decline Push-Ups

Decline Push-Ups require minimal equipment, but your elevated surface should always be stable and secure.

  • Workout Bench: Provides a sturdy elevated surface for your feet and is useful for standard Decline Push-Ups.
  • Plyometric Box: Offers another stable foot platform, particularly when different box heights are available.
  • Exercise Mat: Provides cushioning and additional comfort for your hands or knees while setting up and finishing the exercise.
  • Push-Up Handles: Can provide a neutral wrist position and potentially increase available depth when used securely on a non-slip surface.
  • Weighted Vest: Allows advanced trainees to progressively add resistance without placing loose weights on the back.

Decline Push-Ups FAQ

Q1: Are Decline Push-Ups harder than regular Push-Ups?
Generally, yes. Elevating your feet shifts more of your bodyweight toward your upper body, increasing the resistance your chest, shoulders, and triceps must overcome.

Q2: Do Decline Push-Ups work the upper chest?
Decline Push-Ups can increase the relative emphasis on the clavicular, or upper, portion of the pectoralis major compared with standard Push-Ups because elevating your feet changes the pressing angle. The shoulders and triceps also remain heavily involved.

Q3: How high should my feet be for Decline Push-Ups?
There is no single required height. Start with a low elevation and increase it gradually as your strength improves. Extremely high foot positions increasingly change the mechanics toward a more shoulder-dominant press.

Q4: How many Decline Push-Ups should beginners do?
If you are already strong enough for Decline Push-Ups, a practical starting point is around 6-12 controlled repetitions for 2-3 sets. If you cannot maintain proper form, use a lower elevation or return to standard Push-Ups while building more strength.

Q5: Why do I feel Decline Push-Ups in my shoulders?
Elevating your feet shifts more load toward the upper body and changes the pressing angle, increasing demand on the anterior deltoids. Some muscular effort in the shoulders is expected, but sharp, pinching, or unusual shoulder pain is a reason to stop or modify the exercise.


How to Do High Pull-Ups Correctly: Step-by-Step Guide for Beginners

High Pull-Ups are an advanced Pull-Up variation in which you pull your body significantly higher than during a standard Pull-Up, eventually bringing the bar toward your upper abdomen or waist as your strength and technique improve.

Unlike a Chest-to-Bar Pull-Up, the movement does not finish when your chest reaches the bar. You continue pulling upward, allowing your elbows to travel behind and then below the bar as your torso rises above it. At the highest ranges, your arms approach a position similar to the pulling portion immediately before a Muscle-Up transition.

This makes High Pull-Ups a demanding exercise for developing explosive pulling strength and progressing toward advanced calisthenics skills such as Muscle-Ups.


What Are High Pull-Ups?

High Pull-Ups are an advanced bodyweight pulling exercise performed by accelerating your body upward and pulling substantially beyond normal Pull-Up height.

A standard Pull-Up generally finishes around chin-over-bar height. A Chest-to-Bar Pull-Up progresses farther by bringing the chest toward the bar. A sufficiently advanced High Pull-Up continues upward beyond this point, bringing more of the torso above the bar and potentially pulling the bar toward the upper abdomen or waist.

As you reach these greater heights, the movement naturally changes. Your elbows travel behind and eventually downward relative to the bar, while your torso rises above it. A slight backward lean during the powerful pulling phase, followed by the torso approaching the bar, can occur as part of the movement.

High Pull-Ups are commonly used in:

  • Advanced calisthenics
  • Explosive Pull-Up training
  • Muscle-Up preparation
  • Upper-body power training
  • Back workouts
  • Pull-day workouts
  • Street workout training
  • Advanced bodyweight programs

The exercise requires a strong foundation in strict Pull-Ups before you begin focusing on maximum pulling height.

Benefits of High Pull-Ups

High Pull-Ups provide a progression beyond ordinary Pull-Ups by requiring you to generate enough force to continue raising your torso above the bar.

Benefits include:

  • Develops explosive upper-body pulling strength
  • Strengthens the lats and upper back
  • Builds the biceps and other elbow flexors
  • Develops pulling strength above chest height
  • Challenges grip strength and endurance
  • Improves control during powerful bodyweight movements
  • Provides progression beyond standard and Chest-to-Bar Pull-Ups
  • Develops pulling power useful for Muscle-Ups
  • Provides a measurable way to progress pulling height

As you become stronger, you can measure progress by how far down your torso you can consistently bring the bar while maintaining controlled technique.

Muscles Worked in High Pull-Ups

High Pull-Ups involve many of the same muscles as standard Pull-Ups but require them to generate considerably more force during the upward phase.

Primary Muscles
  • Latissimus Dorsi
  • Biceps Brachii
  • Brachialis
  • Teres Major
  • Trapezius
Secondary Muscles
  • Rhomboids
  • Posterior Deltoids
  • Brachioradialis
  • Forearms
  • Rotator Cuff Muscles
  • Core Muscles

As the body rises higher relative to the bar, the mechanics change from a conventional vertical Pull-Up toward the high pulling position used before a Muscle-Up transition.


How to Do High Pull-Ups (Step-by-Step)

Step 1: Grip the Pull-Up Bar

Grip a secure Pull-Up Bar with your palms facing away from you.

Use approximately a shoulder-width or slightly wider grip.

Wrap your fingers and thumbs securely around the bar and make sure you have enough surrounding clearance for powerful pulling.

Step 2: Establish the Starting Position

Begin underneath the bar with your arms extended.

Keep your:

  • Grip secure
  • Core braced
  • Legs together or controlled
  • Head relatively neutral
  • Shoulders controlled

For strict High Pull-Up training, begin without excessive swinging.

Step 3: Initiate a Powerful Pull

Engage your shoulders and immediately begin pulling forcefully.

Drive your elbows downward while accelerating your body toward the bar.

Unlike a deliberately slow strength Pull-Up, the goal is to produce substantial upward acceleration so your body has enough momentum generated by muscular force to travel beyond normal Pull-Up height.

Step 4: Continue Past the Standard Pull-Up Position

Do not stop when your chin passes the bar.

Continue pulling aggressively as your upper chest approaches and then rises toward the bar.

Drive your elbows backward as your torso continues upward.

The movement should remain one continuous, powerful pull rather than a normal Pull-Up followed by a separate second movement.

Step 5: Pull Your Torso Above the Bar

Continue pulling as high as your strength allows.

As you become more advanced, the bar may move progressively lower relative to your torso:

  • Upper chest
  • Mid-chest
  • Lower chest
  • Upper abdomen
  • Waist region

Your elbows move farther behind and eventually downward relative to the bar as your torso rises.

Do not force a specific height if you cannot reach it without excessive swinging.

Step 6: Reach the Highest Controlled Position

At the top, your torso should be substantially higher than during a standard Pull-Up.

For a highly developed High Pull-Up, the bar can approach the upper abdomen or waist while your arms are bent and your torso rises well above bar level.

This is still a pulling exercise. Do not deliberately press down on the bar and turn the repetition into the transition and support phase of a Muscle-Up.

Step 7: Lower Under Control

Allow your torso to move back below the bar as you extend your elbows.

Control the descent instead of simply dropping.

Return to the hanging position, regain control, and reset before performing another repetition.

Warrior showcasing How to do High Pull-ups with proper form.

High Pull-Ups Form Checklist

Use this checklist to maintain proper High Pull-Up technique.

  • Use a sturdy and secure Pull-Up Bar
  • Grip approximately shoulder-width or slightly wider
  • Begin from a controlled hang
  • Keep your grip secure
  • Brace your core
  • Generate a powerful initial pull
  • Drive your elbows down and backward
  • Continue pulling beyond chin and chest height
  • Raise your torso as high above the bar as possible
  • Keep your legs controlled
  • Minimize unnecessary kipping and kicking
  • Avoid turning the top into a Muscle-Up press
  • Maintain control at your highest position
  • Lower yourself under control
  • Prioritize pulling height and quality over repetition count

The defining goal is to progressively raise more of your torso above the bar through a powerful pull, not merely to touch your chest to it.


Common High Pull-Ups Mistakes

Stopping at Chest Height

Problem: Ending the repetition once your upper chest reaches the bar turns the movement into a Chest-to-Bar Pull-Up rather than training the greater height possible with High Pull-Ups.

Fix: Continue pulling beyond chest height. As your strength improves, aim to bring the bar progressively toward the mid-chest, lower chest, and eventually upper abdomen.

Pulling Too Slowly

Problem: A slow concentric phase makes it considerably harder to generate enough upward velocity to raise your torso far above the bar.

Fix: Pull as powerfully as you can while maintaining control. High Pull-Ups are intended to develop explosive pulling ability.

Using Excessive Kipping

Problem: Large hip swings and aggressive leg kicks can propel your body upward without requiring the same level of upper-body pulling power.

Fix: Keep your body controlled and generate the majority of your height through the pull. A strict High Pull-Up should not depend on a large kip.

Pulling Away From the Bar Too Much

Problem: Excessive backward movement can send your body away from the bar instead of allowing your torso to rise into a useful high-pull position.

Fix: Use only the torso movement necessary for the high pull and keep the bar relatively close as your torso rises.

Trying to Press Over the Bar

Problem: Once you reach sufficient height, you may instinctively begin transitioning your chest over the bar and pressing downward.

Fix: For High Pull-Up training, finish at your highest pulling position and then descend. Save the transition and press for Muscle-Up practice.

Using an Excessively Wide Grip

Problem: A very wide grip can shorten your range of motion and make it more difficult to achieve maximum pulling height.

Fix: Use approximately a shoulder-width or slightly wider grip that allows you to pull powerfully through a large range.

Performing Too Many Fatigued Repetitions

Problem: Explosive pulling performance drops as fatigue accumulates. Later repetitions may become dramatically lower or require more swinging.

Fix: Prioritize a smaller number of powerful, high-quality repetitions and end the set when your pulling height noticeably decreases.


High Pull-Ups Progressions and Variations

High Pull-Ups can be scaled according to your current strength and the height you are capable of achieving.

Band-Assisted High Pull-Ups

A Resistance Band reduces the effective bodyweight you must accelerate.

How to Do Band-Assisted High Pull-Ups

  • Secure a suitable Resistance Band to the Pull-Up Bar.
  • Carefully place your foot or knee into the band.
  • Begin from a controlled hanging position.
  • Pull upward as powerfully as possible.
  • Continue beyond ordinary Pull-Up height.
  • Reach your highest controlled torso position.
  • Lower under control without bouncing on the band.

Chest-to-Bar Pull-Ups

Chest-to-Bar Pull-Ups provide an important progression toward true high pulling.

How to Do Chest-to-Bar Pull-Ups

  • Begin from a controlled overhand hang.
  • Engage your shoulders and brace your core.
  • Pull upward powerfully.
  • Continue beyond chin-over-bar height.
  • Bring your upper chest toward the bar.
  • Maintain control at the top.
  • Lower yourself smoothly.

Abdomen-to-Bar High Pull-Ups

This advanced variation develops the ability to pull significantly beyond chest height.

How to Do Abdomen-to-Bar High Pull-Ups

  • Begin from a controlled hang.
  • Generate a powerful initial pull.
  • Continue pulling beyond your chest.
  • Drive your elbows backward and downward.
  • Raise your torso until the bar approaches your upper abdomen.
  • Keep your body controlled rather than transitioning over the bar.
  • Lower yourself under control.

Band-Assisted Abdomen-to-Bar Pull-Ups

This variation allows you to practice the advanced pulling height with less effective bodyweight.

How to Do Band-Assisted Abdomen-to-Bar Pull-Ups

  • Secure an appropriate Resistance Band to the bar.
  • Carefully enter the band.
  • Establish a controlled hanging position.
  • Accelerate upward with a powerful pull.
  • Continue pulling beyond chest height.
  • Bring your upper abdomen toward the bar.
  • Descend under control and reset.

High Chin-Ups

The underhand grip increases the involvement of the elbow flexors while retaining the goal of maximum pulling height.

How to Do High Chin-Ups

  • Grip the bar with your palms facing you.
  • Begin from a controlled hang.
  • Brace your core and establish shoulder control.
  • Pull upward powerfully.
  • Continue beyond normal Chin-Up height.
  • Raise your torso as high as you can control.
  • Lower yourself smoothly.

Final Thoughts

High Pull-Ups are an advanced pulling exercise designed to take you substantially beyond the range of a standard or basic Chest-to-Bar Pull-Up.

They develop:

  • Explosive pulling strength
  • Lat strength
  • Upper-back strength
  • Biceps strength
  • High-range pulling ability
  • Grip strength
  • Bodyweight control
  • Muscle-Up-specific pulling power

The goal is progressive pulling height. First develop strong standard Pull-Ups, then learn to reach the chest, lower chest, upper abdomen, and eventually even higher positions as your pulling power improves.

Do not confuse height with uncontrolled momentum. Generate your acceleration through a powerful pull, keep unnecessary kicking and swinging to a minimum, and stop your sets when your pulling height begins to deteriorate. Learn more about Pull Workouts here.

Essential Gear for High Pull-Ups

High Pull-Ups require relatively little equipment, but your setup must safely accommodate powerful bodyweight movement.

  • Pull-Up Bar: A strong, securely installed bar is essential. Make sure there is enough clearance above and around the bar for your torso to rise significantly above it.
  • Resistance Bands: Useful for practicing greater pulling heights before you can reach them with your full bodyweight.
  • Gym Chalk: Can improve grip when sweaty hands limit your ability to pull explosively.
  • Wrist Wraps: Protects the Wrists during high repetitions or explosive sets, while allowing grip strength to be improved.
  • Stable Step or Platform: Useful for safely reaching a high bar and entering or exiting Resistance Band-assisted setups.
  • Dip Belt or Weighted Vest: An advanced option for developing additional pulling strength once you have already mastered powerful bodyweight High Pull-Ups.

High Pull-Ups FAQ

Q1: How high should I pull during High Pull-Ups?
Pull as high as you can with good technique. Beginners to high-pull training may initially reach the chest, while advanced athletes can work toward bringing the bar to the lower chest, upper abdomen, or higher.

Q2: Should High Pull-Ups be explosive?
Yes. The upward phase should be powerful because generating greater upward velocity helps your body continue rising beyond ordinary Pull-Up height. However, the movement should still be controlled rather than relying on excessive kipping.

Q3: Do High Pull-Ups help with Muscle-Ups?
Yes. High Pull-Ups develop the powerful pulling ability needed to raise the torso high enough for a Muscle-Up transition. However, the transition and pressing portion of the Muscle-Up must also be trained separately.

Q4: Should beginners perform High Pull-Ups?
Complete beginners should first develop strong standard Pull-Ups. Chest-to-Bar Pull-Ups and Band-Assisted High Pull-Ups can then provide useful progressions toward greater pulling height.

Q5: How can I get higher on High Pull-Ups?
Improve your strict Pull-Up strength, practice explosive pulling while fresh, use assisted high pulls when appropriate, and progressively aim for lower contact points on your torso. Keep your repetitions powerful and stop the set when your pulling height noticeably decreases.