How to Do Sternum Pull-Ups Correctly: Step-by-Step Guide for Beginners

Sternum Pull-Ups are an advanced Pull-Up variation in which you pull your body higher than during a standard Pull-Up while gradually leaning your torso backward and bringing your chest toward the bar.

Instead of ending the repetition when your chin passes the bar, you keep pulling while driving your elbows down and back. This creates a demanding combination of vertical and increasingly horizontal pulling that strongly challenges your lats, upper back, arms, and grip.

Despite this guide’s beginner-friendly format, Sternum Pull-Ups are not a beginner exercise. You should first develop strong, controlled standard Pull-Ups before progressing toward this advanced variation.


What Are Sternum Pull-Ups?

Sternum Pull-Ups are an advanced bodyweight pulling exercise performed on a Pull-Up Bar.

You begin in a controlled hanging position and pull yourself upward similarly to a standard Pull-Up. As you rise, you gradually lean your torso backward and continue pulling higher, bringing your chest toward the bar while your elbows travel down and back.

The goal is to approach the bar with the sternum or lower-chest region rather than simply getting your chin above it. Actual sternum-to-bar contact is not required, and your achievable height will depend on your strength, technique, mobility, and body proportions.

Sternum Pull-Ups are commonly used in:

  • Advanced calisthenics
  • Pull-Up training
  • High Pull-Up training
  • Back workouts
  • Pull-day workouts
  • Bodyweight strength programs
  • Muscle-Up preparation
  • Advanced upper-body training

They require considerably more pulling strength and control than standard Pull-Ups.

Benefits of Sternum Pull-Ups

Sternum Pull-Ups provide an advanced progression for athletes who have already developed a strong foundation in regular Pull-Ups.

Benefits include:

  • Develops advanced bodyweight pulling strength
  • Strengthens the lats
  • Builds the upper and mid-back
  • Strengthens the biceps and other elbow flexors
  • Develops high-range Pull-Up strength
  • Improves scapular control during demanding pulling
  • Challenges grip strength and endurance
  • Provides progression beyond standard Pull-Ups
  • Can help develop high pulling strength useful for Muscle-Up training

Because Sternum Pull-Ups require you to continue pulling beyond ordinary chin-over-bar height, they challenge portions of the Pull-Up range that standard repetitions may not emphasize as strongly.

Muscles Worked in Sternum Pull-Ups

Sternum Pull-Ups train many of the same muscles as standard Pull-Ups, but the higher pulling position and backward torso lean increase the demands on several upper-back muscles.

Primary Muscles
  • Latissimus Dorsi
  • Rhomboids
  • Middle Trapezius
  • Lower Trapezius
  • Biceps Brachii
Secondary Muscles
  • Brachialis
  • Brachioradialis
  • Posterior Deltoids
  • Teres Major
  • Forearms
  • Rotator Cuff Muscles
  • Core Muscles

The muscular emphasis changes throughout the repetition as you transition from a predominantly vertical pull into a higher pulling position with your elbows moving farther behind your torso.


How to Do Sternum Pull-Ups (Step-by-Step)

Step 1: Grip the Pull-Up Bar

Grip a secure Pull-Up Bar with your palms facing away from you.

Position your hands approximately shoulder-width apart or slightly wider.

Wrap your fingers and thumbs securely around the bar and begin with your arms extended.

Avoid using an unnecessarily wide grip, as this can reduce your available range of motion.

Step 2: Establish a Controlled Hang

Hang beneath the bar with your body under control.

Keep your:

  • Arms extended
  • Grip secure
  • Head neutral
  • Core braced
  • Legs controlled

Create light shoulder-blade engagement before initiating the pull rather than suddenly yanking yourself upward from an uncontrolled position.

Step 3: Begin the Pull

Pull your body upward by driving your elbows downward.

The first portion should resemble a strong standard Pull-Up.

Keep your torso controlled and avoid using a large swing or leg kick to generate momentum.

Step 4: Gradually Lean Back

As your body rises, begin leaning your torso backward.

This should occur progressively rather than through a sudden backward swing.

Your legs may naturally move slightly forward to counterbalance your torso.

Maintain core tension so that the position comes from controlled whole-body movement rather than excessive lower-back arching.

Step 5: Drive Your Elbows Down and Back

Continue pulling beyond ordinary Pull-Up height.

As your torso becomes more reclined, drive your elbows downward and backward.

Think about bringing your chest toward the bar rather than simply trying to lift your chin farther above it.

Step 6: Reach Your Highest Controlled Position

Continue pulling until your sternum or lower-chest region approaches the bar as closely as your strength allows.

At the top:

  • Keep your grip secure
  • Maintain torso control
  • Keep your shoulders stable
  • Drive your elbows behind you
  • Keep your chest directed toward the bar

You do not need to force your sternum to physically touch the bar.

Step 7: Lower Under Control

Slowly reverse the movement.

Extend your elbows while gradually returning your torso toward a more vertical position.

Continue lowering until your arms return to extension and you reach a controlled hanging position.

Reset your body before beginning the next repetition.
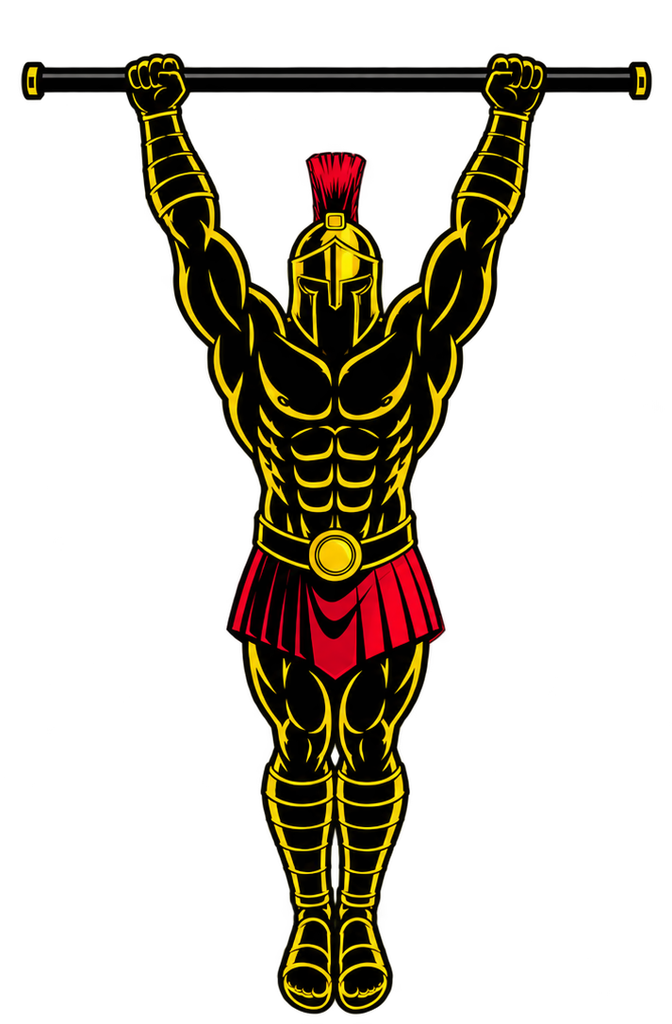
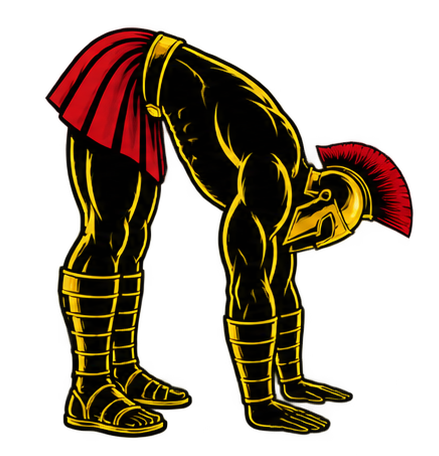
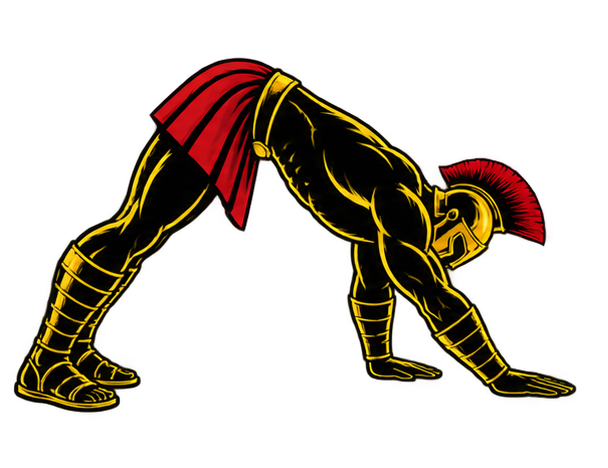
Warrior showcasing How to do Sternum Pull-ups with proper form.

Sternum Pull-Ups Form Checklist

Use this checklist to maintain proper Sternum Pull-Up technique.

  • Use a secure Pull-Up Bar
  • Grip approximately shoulder-width or slightly wider
  • Wrap your thumbs securely around the bar
  • Begin from a controlled hang
  • Establish shoulder control before pulling
  • Keep your core braced
  • Pull strongly through the initial vertical phase
  • Gradually lean your torso backward
  • Drive your elbows down and back
  • Bring your chest toward the bar
  • Keep your movement smooth and controlled
  • Avoid excessive swinging or leg kicking
  • Avoid excessive lower-back arching
  • Do not force sternum-to-bar contact
  • Lower yourself under control

A slightly lower but strict repetition is more useful for developing controlled pulling strength than reaching the bar by swinging or throwing your torso backward.


Common Sternum Pull-Ups Mistakes

Attempting Sternum Pull-Ups Too Early

Problem: Sternum Pull-Ups require considerably more strength than standard Pull-Ups. Attempting them without sufficient pulling strength often results in partial repetitions and excessive momentum.

Fix: Develop consistent standard Pull-Ups first, then progress through High Pull-Ups, Chest-to-Bar Pull-Ups, assisted repetitions, and negatives.

Trying Only to Raise the Chin Higher

Problem: Simply extending your neck or trying to get your chin farther above the bar does not create the characteristic Sternum Pull-Up position.

Fix: Gradually lean backward and focus on bringing your chest toward the bar while driving your elbows down and back.

Swinging Into the Bar

Problem: Using a large swing can provide enough momentum to reach greater height without developing the same strict high-range pulling strength.

Fix: Begin from a controlled hang and minimize momentum. Use an easier progression if you cannot yet reach sufficient height strictly.

Leaning Back Too Early

Problem: Throwing your torso backward at the beginning can disrupt the initial vertical pull and create unnecessary swinging.

Fix: Begin with a strong upward pull and progressively increase your backward lean as you rise.

Excessively Arching the Lower Back

Problem: Overextending your lower back can make your chest appear closer to the bar without actually increasing your pulling height.

Fix: Brace your core and create the torso angle through controlled positioning rather than excessive lumbar extension.

Using an Excessively Wide Grip

Problem: A very wide grip can shorten your pulling range and make it harder to achieve a high chest position.

Fix: Start around shoulder-width or slightly wider and adjust according to your proportions and comfort.

Dropping Quickly From the Top

Problem: Rapidly falling from the top removes control from the eccentric phase and can make the transition back into the hanging position abrupt.

Fix: Lower yourself deliberately while gradually returning your torso toward vertical.


Sternum Pull-Ups Progressions and Variations

Sternum Pull-Ups are advanced, so progressions are particularly useful for building the strength needed to perform them correctly.

Band-Assisted Sternum Pull-Ups

A Resistance Band reduces the amount of bodyweight you must lift and allows you to practice the complete movement.

How to Do Band-Assisted Sternum Pull-Ups

  • Secure a suitable Resistance Band to the Pull-Up Bar.
  • Carefully place your foot or knee into the band.
  • Begin from a controlled hanging position.
  • Pull upward while driving your elbows down.
  • Gradually lean your torso backward.
  • Bring your chest toward the bar.
  • Lower yourself under control.

Inspect the band before use and make sure it is securely attached to minimize the risk of it slipping or snapping back.

High Pull-Ups

High Pull-Ups develop the ability to continue pulling beyond ordinary chin-over-bar height.

How to Do High Pull-Ups

  • Begin from a controlled hang.
  • Establish shoulder control.
  • Pull yourself upward strongly.
  • Drive your elbows downward.
  • Continue pulling beyond normal Pull-Up height.
  • Reach your highest controlled position.
  • Lower yourself slowly.

Chest-to-Bar Pull-Ups

Chest-to-Bar Pull-Ups provide a useful bridge between standard Pull-Ups and Sternum Pull-Ups.

How to Do Chest-to-Bar Pull-Ups

  • Grip the bar securely.
  • Begin from a controlled hang.
  • Pull yourself upward.
  • Continue beyond chin-over-bar height.
  • Direct your upper chest toward the bar.
  • Reach the highest position you can control.
  • Lower yourself slowly.

Negative Sternum Pull-Ups

Negatives emphasize the lowering phase and allow you to practice the high Sternum Pull-Up position.

How to Do Negative Sternum Pull-Ups

  • Use a stable platform to reach the top position.
  • Grip the bar securely.
  • Begin with your chest close to the bar.
  • Establish a controlled backward torso angle.
  • Slowly begin extending your elbows.
  • Gradually return your torso toward vertical.
  • Finish in a controlled hang.

Sternum Chin-Ups

The Sternum Chin-Up uses an underhand grip and increases the contribution of the elbow flexors.

How to Do Sternum Chin-Ups

  • Grip the bar with your palms facing toward you.
  • Begin from a controlled hanging position.
  • Pull upward while keeping your body stable.
  • Gradually lean your torso backward.
  • Drive your elbows down and behind you.
  • Bring your chest toward the bar.
  • Lower yourself under control.

Final Thoughts

Sternum Pull-Ups are an advanced Pull-Up progression that requires considerably more strength and control than simply bringing your chin over the bar.

They develop:

  • Advanced pulling strength
  • Lat strength
  • Upper-back strength
  • Biceps strength
  • High-range Pull-Up strength
  • Grip strength
  • Scapular control
  • Bodyweight pulling control

Focus on earning additional height through strength rather than momentum. Begin from a controlled hang, pull strongly, gradually lean backward, drive your elbows down and back, and direct your chest toward the bar.

If you cannot yet bring your sternum close to the bar, use High Pull-Ups, Chest-to-Bar Pull-Ups, assisted repetitions, and controlled negatives to gradually develop the required strength. Learn more about Pull Workouts here.

Essential Gear for Sternum Pull-Ups

Sternum Pull-Ups require little equipment, but the equipment you do use should be secure enough for advanced bodyweight pulling.

  • Pull-Up Bar: The essential equipment for Sternum Pull-Ups. Use a sturdy, securely installed bar with sufficient space around it for the changing torso angle.
  • Resistance Bands: Useful for reducing the effective load while learning the full Sternum Pull-Up movement.
  • Gym Chalk: Can improve friction between your hands and the bar when grip becomes a limiting factor.
  • Wrist Wraps: Protect the wrists while allowing the grip to improve.
  • Stable Step or Platform: Useful for safely reaching the bar and setting up Negative Sternum Pull-Ups without having to jump into the top position.

Sternum Pull-Ups FAQ

Q1: Does my sternum have to touch the bar?
No. Bringing your sternum or lower chest toward the bar is the goal, but physical contact is not mandatory. Your achievable height depends on your strength, technique, mobility, and body proportions.

Q2: What is the difference between Sternum Pull-Ups and Chest-to-Bar Pull-Ups?
Both involve pulling higher than a standard Pull-Up. Sternum Pull-Ups generally involve a greater backward torso lean and attempt to bring the sternum or lower-chest region toward the bar, while Chest-to-Bar Pull-Ups usually target a higher chest contact point with less pronounced torso recline.

Q3: How many Sternum Pull-Ups should I do?
Because Sternum Pull-Ups are an advanced strength exercise, quality repetitions are more important than accumulating large numbers. Use a repetition range you can perform without swinging or losing the high pulling position, and switch to an easier progression when your technique begins to deteriorate.

Q4: Can Sternum Pull-Ups help with Muscle-Ups?
They can help develop the high pulling strength useful for Muscle-Ups because they train you to pull your torso substantially higher than during a standard Pull-Up. Muscle-Ups still require specific transition technique and pressing strength, so Sternum Pull-Ups are a supporting exercise rather than a complete substitute.

Q5: How can I progress to Sternum Pull-Ups?
First develop strong standard Pull-Ups. Then progressively train High Pull-Ups and Chest-to-Bar Pull-Ups before adding Band-Assisted Sternum Pull-Ups and controlled negatives. Gradually reduce assistance and increase your strict pulling height as your strength improves.


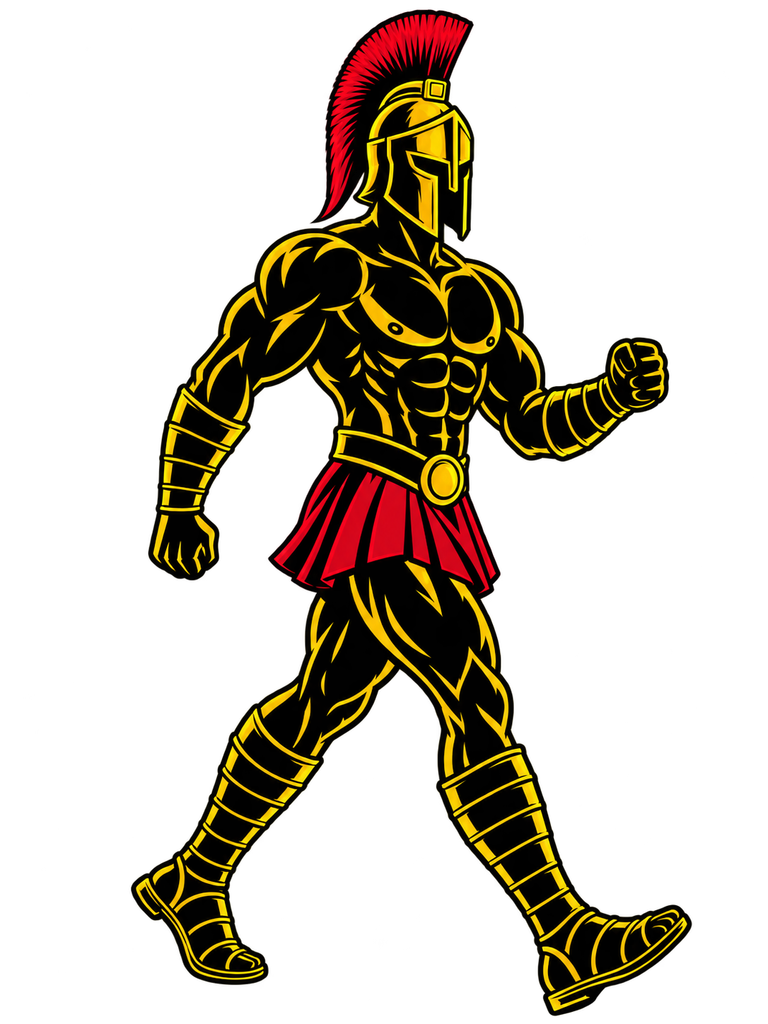
How to Do Brisk Walking Correctly: Step-by-Step Guide for Beginners

Brisk Walking is a simple form of aerobic exercise performed at a faster and more purposeful pace than casual walking. It raises your breathing and heart rate while remaining accessible to beginners and requiring very little equipment.

Unlike running, Brisk Walking maintains walking mechanics, with at least one foot typically remaining in contact with the ground. The goal is not to walk as fast as physically possible but to maintain a purposeful pace that you can sustain with good posture and controlled movement.

Brisk Walking can be performed outdoors, on a treadmill, or on an indoor walking route, making it an adaptable option for improving general fitness and building an aerobic base.


What Is Brisk Walking?

Brisk Walking is purposeful walking performed at a moderate or moderately challenging intensity.

Rather than relying on one exact walking speed, briskness is better judged by your individual effort. A useful practical guide is the talk test: during moderate-intensity Brisk Walking, you should generally be able to talk, but singing would be difficult.

Brisk Walking is commonly used in:

  • Cardiovascular training
  • Beginner fitness programs
  • Aerobic conditioning
  • Active recovery
  • General health and fitness routines
  • Weight-management programs
  • Walking workouts
  • Low-impact conditioning

Your appropriate pace depends on factors such as your current fitness, terrain, incline, and walking experience.

Benefits of Brisk Walking

Brisk Walking provides a straightforward way to increase daily physical activity and train your cardiovascular system.

Benefits include:

  • Improves aerobic fitness
  • Develops cardiovascular endurance
  • Builds walking stamina
  • Increases daily physical activity
  • Trains the lower-body muscles
  • Can support weight management alongside appropriate nutrition
  • Provides a lower-impact alternative to running
  • Can be adjusted to different fitness levels
  • Requires minimal equipment
  • Can be performed indoors or outdoors

Because intensity can be changed simply by adjusting your pace, duration, terrain, or incline, Brisk Walking is easy to progress as your fitness improves.

Muscles Worked in Brisk Walking

Brisk Walking primarily involves the lower-body muscles, while your core and upper body help maintain posture and coordinate movement.

Primary Muscles
  • Quadriceps
  • Hamstrings
  • Gluteus Maximus
  • Calves
Secondary Muscles
  • Hip Flexors
  • Gluteus Medius and Minimus
  • Tibialis Anterior
  • Core Muscles
  • Erector Spinae
  • Shoulders and Arms

Walking uphill or increasing the treadmill incline can alter the muscular demands compared with level walking.


How to Do Brisk Walking (Step-by-Step)

Step 1: Choose a Suitable Walking Route

Select a safe route with enough space to maintain a consistent walking pace.

Good options include:

  • Footpaths
  • Parks
  • Walking tracks
  • Treadmills
  • Indoor walking areas
  • Quiet, pedestrian-friendly routes

If walking outdoors, remain aware of traffic, uneven surfaces, weather conditions, and other people using the route.

Step 2: Begin at an Easy Pace

Start with several minutes of comfortable walking before increasing your speed.

Use this time to settle into your stride and gradually increase your effort.

Keep your:

  • Head upright
  • Gaze forward
  • Shoulders relaxed
  • Arms comfortable
  • Torso naturally upright

There is no need to immediately begin at your fastest walking pace.

Step 3: Establish Good Walking Posture

Maintain a tall but relaxed posture as you walk.

Keep your head approximately over your torso rather than deliberately leaning far forward or looking continuously at the ground.

Avoid excessive tension through your shoulders and neck.

Your posture should feel natural rather than rigid.

Step 4: Increase to a Brisk Pace

Gradually increase your walking speed until your breathing and heart rate noticeably rise.

Aim for a purposeful pace that you can sustain.

At a moderate intensity:

  • Your breathing should become faster
  • You should feel warmer
  • Your heart rate should increase
  • You should generally still be able to speak
  • Singing should become more difficult

Do not force yourself to match someone else’s walking speed. Your brisk pace should reflect your own fitness level.

Step 5: Use a Natural Stride

Allow your feet to land naturally underneath or slightly ahead of your body.

Avoid deliberately reaching far forward with every step in an attempt to walk faster.

Instead, increase your pace through a comfortable combination of stride length and step frequency.

Keep your steps smooth and controlled.

Step 6: Swing Your Arms Naturally

Allow your arms to swing in coordination with your legs.

Keep your elbows comfortably bent and your hands relaxed.

As your walking pace increases, your arm swing may naturally become more active.

Avoid:

  • Clenching your fists
  • Raising your shoulders
  • Swinging your arms excessively across your body
  • Creating exaggerated arm movements

Your arm swing should support your walking rhythm rather than disrupt it.

Step 7: Maintain Your Pace and Finish Gradually

Continue Brisk Walking for your planned duration while maintaining controlled technique.

Beginners can start with manageable sessions and gradually increase their walking time as their fitness improves.

Near the end of your session, reduce your pace and spend a few minutes walking comfortably before stopping.

Warrior showcasing How to do Brisk Walking with proper form

Brisk Walking Form Checklist

Use this checklist to maintain good Brisk Walking technique.

  • Choose a safe walking route
  • Start at an easy pace
  • Keep your head upright
  • Look generally ahead
  • Keep your shoulders relaxed
  • Maintain a naturally upright torso
  • Keep your core comfortably controlled
  • Use a natural stride
  • Avoid deliberately overstriding
  • Let your arms swing naturally
  • Keep your hands relaxed
  • Maintain a purposeful pace
  • Breathe naturally
  • Adjust your pace according to your fitness
  • Slow down gradually at the end

Good Brisk Walking should feel purposeful and energetic without forcing unnatural walking mechanics.


Common Brisk Walking Mistakes

Walking Too Slowly

Problem: A very relaxed pace may not provide enough intensity when your goal is moderate aerobic exercise.

Fix: Gradually increase your pace until your breathing and heart rate noticeably rise while you can still generally maintain a conversation.

Starting Too Fast

Problem: Beginning at an unsustainable pace can cause unnecessary early fatigue and make it difficult to complete your planned walk.

Fix: Start comfortably and gradually increase to your brisk pace.

Overstriding

Problem: Reaching excessively far forward with each step can make your walking pattern feel awkward and inefficient.

Fix: Use a comfortable stride and allow your step frequency to increase naturally as you walk faster.

Looking Down Constantly

Problem: Continuously staring directly at your feet can encourage an unnecessarily hunched posture and reduce awareness of your surroundings.

Fix: Keep your head comfortably upright and look generally ahead while still checking the ground when terrain requires it.

Tensing the Shoulders and Hands

Problem: Shrugging your shoulders or tightly clenching your fists creates unnecessary upper-body tension.

Fix: Relax your shoulders, keep your hands loose, and allow your arms to swing naturally.

Using an Exaggerated Arm Swing

Problem: Forcefully swinging your arms across your torso can waste energy and interfere with your natural walking rhythm.

Fix: Allow your arms to move primarily forward and backward in a comfortable rhythm.

Progressing Too Quickly

Problem: Suddenly adding large amounts of walking time, speed, hills, or incline can create more fatigue than your current fitness can comfortably handle.

Fix: Increase your training demands gradually and adjust your walking volume according to your recovery.


Brisk Walking Variations

Brisk Walking can be modified to change the intensity and provide variety in your training.

Treadmill Brisk Walking

A treadmill allows you to control your walking speed and incline precisely.

How to Do Treadmill Brisk Walking

  • Begin at an easy walking speed.
  • Maintain an upright and relaxed posture.
  • Gradually increase the treadmill speed.
  • Walk at a purposeful but sustainable pace.
  • Avoid unnecessarily holding the handrails.
  • Maintain a natural stride.
  • Reduce your speed gradually when finishing.

Incline Brisk Walking

Adding an incline increases the difficulty without requiring you to run.

How to Do Incline Brisk Walking

  • Begin with a manageable walking pace.
  • Gradually introduce an incline.
  • Keep your torso controlled.
  • Use natural, relatively shorter steps if needed.
  • Maintain a sustainable effort.
  • Avoid relying heavily on treadmill handrails.
  • Reduce the incline or speed if your form deteriorates.

Interval Brisk Walking

Intervals alternate periods of faster and easier walking.

How to Do Interval Brisk Walking

  • Begin with several minutes of easy walking.
  • Increase to a faster walking pace for a set period.
  • Return to an easier pace for recovery.
  • Repeat the faster and easier periods.
  • Keep each faster interval controlled.
  • Finish with easy walking.

Hill Walking

Outdoor hills provide a natural way to increase walking intensity.

How to Do Hill Walking

  • Approach the hill at a controlled pace.
  • Shorten your stride naturally if necessary.
  • Maintain an upright, controlled posture.
  • Increase your effort as you climb.
  • Walk carefully on the descent.
  • Adjust your speed according to the terrain.

Long Brisk Walk

This variation emphasizes sustained aerobic work over a longer duration.

How to Do a Long Brisk Walk

  • Begin at an easy pace.
  • Gradually settle into a sustainable brisk effort.
  • Maintain relaxed posture and natural walking mechanics.
  • Adjust your pace when terrain changes.
  • Take hydration or other practical needs into account on longer sessions.
  • Slow down gradually before finishing.

Final Thoughts

Brisk Walking is one of the simplest ways to develop aerobic fitness without requiring complicated equipment or advanced exercise skills.

It develops:

  • Cardiovascular endurance
  • Aerobic fitness
  • Walking stamina
  • Lower-body endurance
  • General work capacity
  • Daily physical activity

The key is to walk purposefully without turning the movement into an unnatural race. Maintain relaxed posture, use a comfortable stride, allow your arms to swing naturally, and select a pace appropriate for your fitness.

As your endurance improves, you can gradually increase your walking duration, pace, incline, or use intervals to make your sessions more challenging. Learn more about Conditioning Here.

Essential Gear for Brisk Walking

Brisk Walking requires little equipment, but a few items can make regular walking sessions more practical and comfortable.

  • Walking Shoes: Comfortable, well-fitting footwear suitable for your walking surface can make longer sessions more comfortable.
  • Comfortable Clothing: Lightweight clothing that allows unrestricted movement can help you walk comfortably in different conditions.
  • Fitness Watch or Activity Tracker: Optional equipment for tracking walking duration, distance, pace, steps, or heart rate.
  • Water Bottle: Useful for maintaining access to fluids, particularly during longer walks or exercise in warm conditions.

Brisk Walking FAQ

Q1: What counts as Brisk Walking?
Brisk Walking is purposeful walking performed at an intensity noticeably higher than casual walking. At a moderate effort, your breathing and heart rate increase, and you can generally talk but would find singing difficult.

Q2: How fast should I walk during Brisk Walking?
There is no single speed that is appropriate for everyone. Fitness level, age, terrain, incline, and individual walking ability all affect pace. Use your effort and the talk test rather than relying only on a specific speed.

Q3: How long should beginners Brisk Walk?
Beginners can start with a manageable duration such as 10-20 minutes and gradually increase their walking time as their fitness and tolerance improve. Shorter sessions can also be useful when you are first becoming more active.

Q4: Can Brisk Walking help with weight loss?
Brisk Walking increases physical activity and energy expenditure, so it can contribute to weight management or fat loss when combined with an appropriate overall diet and sustained energy balance.

Q5: Is Brisk Walking better than running for beginners?
Brisk Walking is often an accessible starting point because it allows beginners to build aerobic fitness with lower impact and intensity than running. Running provides a higher-intensity stimulus, so the right choice depends on your fitness, goals, and tolerance.


How to Do Child’s Pose Stretch Correctly: Step-by-Step Guide for Beginners

Child’s Pose is a simple floor-based stretch commonly used to relax into a comfortable position while gently stretching areas such as the back, hips, and shoulders.

The stretch begins from a kneeling position. You move your hips toward your heels while reaching your arms forward and lowering your torso toward the floor. The position can easily be adjusted according to your hip, knee, ankle, and shoulder mobility.

Child’s Pose requires no specialized equipment and can fit into post-workout stretching, mobility routines, yoga sessions, or a general flexibility program.


What Is Child’s Pose Stretch?

Child’s Pose, also known as Balasana in yoga, is a kneeling stretch in which you lower your torso toward the floor while your hips move back toward your heels.

The arms can remain extended in front of you or rest alongside your body depending on the variation.

Because the hips, knees, shoulders, and spine are all involved in the position, Child’s Pose can create a gentle stretch across several areas of the body simultaneously.

Child’s Pose is commonly used in:

  • Post-workout stretching
  • Yoga routines
  • Full-body flexibility sessions
  • Back and shoulder stretching
  • Hip mobility routines
  • Cool-down routines
  • Recovery-focused movement sessions

The goal is not to force your hips onto your heels or your forehead onto the floor. Adjust the position to suit your mobility and comfort.

Benefits of Child’s Pose Stretch

Child’s Pose can provide several useful flexibility and mobility benefits when performed comfortably.

Benefits include:

  • Gently stretches the back
  • Stretches the shoulders when the arms are extended
  • Can stretch the lats
  • Encourages comfortable hip flexion
  • Provides a gentle position for spinal flexion
  • Can reduce the feeling of muscular tightness
  • Requires no specialized equipment
  • Can be modified for different mobility levels
  • Fits easily into cool-down and flexibility routines

The relatively relaxed position also makes Child’s Pose useful between more demanding mobility exercises or yoga positions.

Muscles Stretched During Child’s Pose

The exact stretching sensation depends on your arm position, knee width, hip mobility, and individual anatomy.

Primary Muscles
  • Latissimus Dorsi
  • Erector Spinae
  • Gluteal Muscles
Secondary Muscles
  • Posterior Deltoids
  • Teres Major
  • Trapezius
  • Quadriceps
  • Muscles around the hips

With the arms extended forward, the stretch through the lats and shoulders may become more noticeable. Bringing the arms alongside your body generally makes the upper-body position more relaxed.


How to Do Child’s Pose Stretch (Step-by-Step)

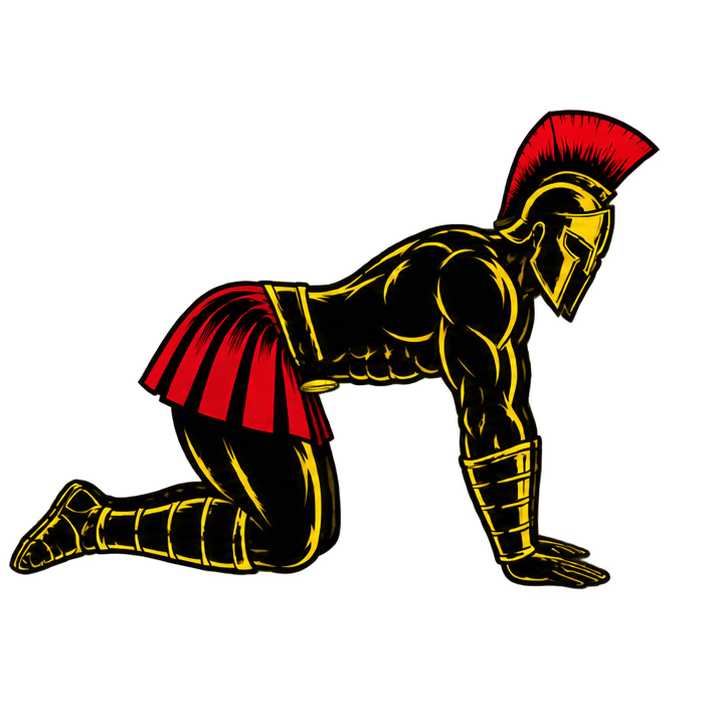
Step 1: Begin on Your Hands and Knees

Start on an exercise mat in a quadruped position.

Place your:

  • Hands approximately underneath your shoulders
  • Knees underneath or slightly wider than your hips
  • Lower legs comfortably on the floor
  • Feet relaxed behind you

Keep your head and spine in a comfortable position.

Step 2: Adjust Your Knees

Choose a knee position that feels comfortable.

You can keep your knees relatively close together or move them farther apart.

A wider knee position may provide additional space for your torso as you move backward.

Avoid forcing your hips or knees into a particular width.

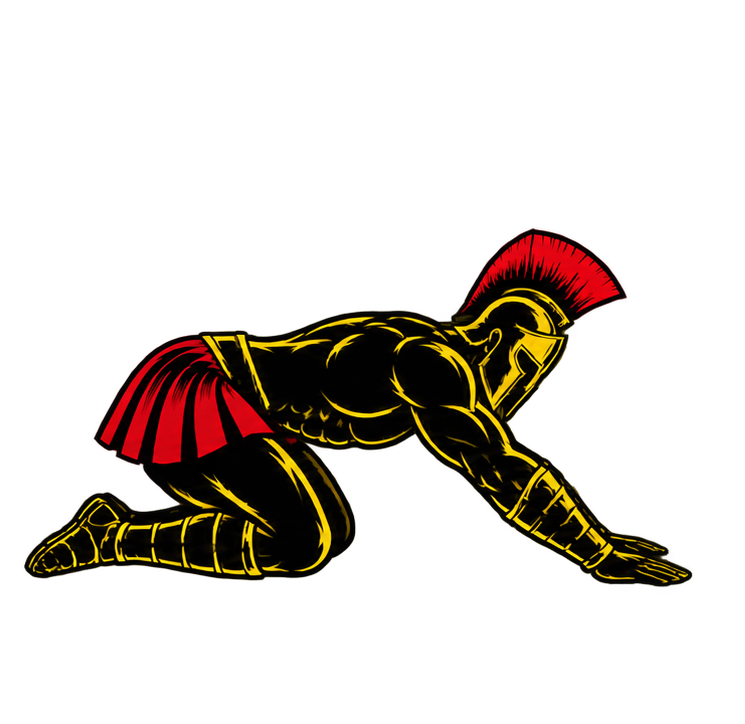
Step 3: Move Your Hips Back

Slowly push your hips backward toward your heels.

Keep the movement controlled.

Your hips do not need to touch your heels. Move only as far as your knees, hips, and ankles comfortably allow.

Step 4: Reach Your Arms Forward

Extend both arms along the floor in front of you.

Keep your palms facing downward and allow your hands to reach forward as your hips continue moving backward.

Maintain:

  • Relaxed neck
  • Comfortable shoulders
  • Controlled breathing
  • Comfortable hip position
  • Gentle stretch intensity

Avoid aggressively forcing your chest toward the floor.

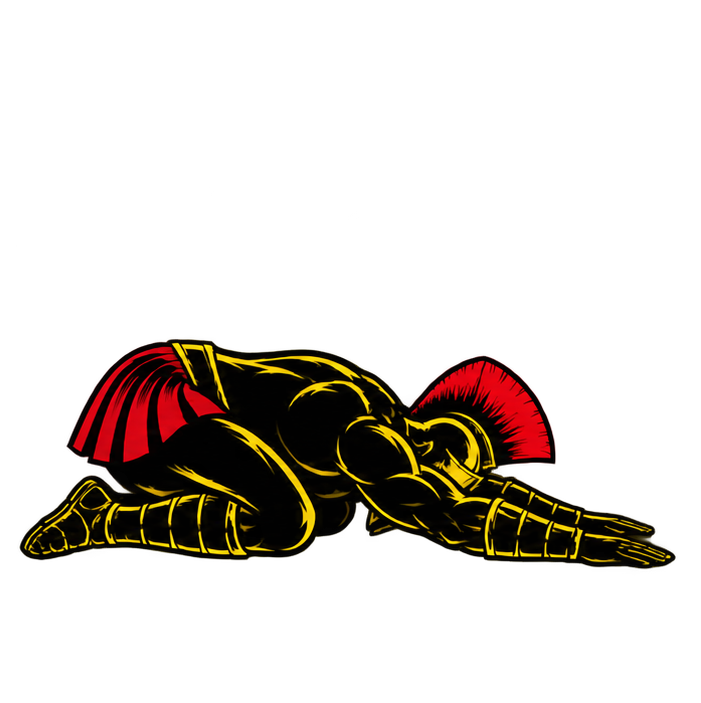
Step 5: Lower Your Torso

Allow your torso to move down between or over your thighs.

Gradually lower your forehead toward the mat.

If your forehead does not comfortably reach the floor, do not force it. A folded towel, yoga block, or cushion can provide support.

Step 6: Settle Into the Stretch

Once you reach a comfortable position, relax into the stretch.

You may feel gentle tension through your:

  • Back
  • Lats
  • Shoulders
  • Glutes
  • Hips

Continue reaching forward if you want more emphasis through the upper body, but keep the stretch comfortable.

Step 7: Hold and Return

Hold Child’s Pose for approximately 20-60 seconds while breathing normally.

When finished, press gently through your hands and gradually bring your torso upright as your hips move forward.

Return to your hands and knees under control rather than suddenly rising from the stretch.

Warrior showcasing How to do Child’s Pose Stretch with proper form

Child’s Pose Stretch Form Checklist

Use this checklist to maintain a comfortable Child’s Pose.

  • Begin from a stable kneeling position
  • Choose a comfortable knee width
  • Move your hips backward gradually
  • Allow your hips to stop before discomfort occurs
  • Extend your arms comfortably
  • Keep your neck relaxed
  • Lower your torso under control
  • Support your forehead if necessary
  • Breathe normally
  • Maintain gentle stretch intensity
  • Avoid bouncing
  • Avoid forcing your hips toward your heels
  • Exit the position gradually
  • Stop if you experience sharp or unusual pain

Child’s Pose should feel like a controlled stretch rather than a test of how deeply you can force yourself into the position.


Common Child’s Pose Stretch Mistakes

Forcing the Hips Onto the Heels

Problem: Trying to make your hips touch your heels despite limited mobility can create unnecessary discomfort around the knees, hips, or ankles.

Fix: Allow your hips to stop wherever the position remains comfortable. Your hips do not need to reach your heels.

Forcing the Forehead to the Floor

Problem: Trying to push your head downward can create unnecessary neck tension and make the position uncomfortable.

Fix: Let your head descend naturally. Use a yoga block, folded towel, or cushion underneath your forehead if needed.

Reaching the Arms Too Aggressively

Problem: Trying to stretch your hands as far forward as possible can create excessive tension through the shoulders.

Fix: Reach only far enough to feel a comfortable stretch. You can also bring your arms alongside your body for a more relaxed variation.

Holding Your Breath

Problem: Holding your breath can create unnecessary tension while you are trying to settle into the stretch.

Fix: Breathe slowly and naturally throughout the hold.

Ignoring Knee Discomfort

Problem: Child’s Pose places the knees into substantial flexion, which may be uncomfortable for some people.

Fix: Reduce how far you sit backward, adjust your knee position, or use appropriate padding. Stop if the position causes sharp or worsening knee pain.

Ignoring Ankle Discomfort

Problem: The kneeling position also places the ankles in plantar flexion, which may feel uncomfortable if your mobility is limited.

Fix: Modify the position or use comfortable padding rather than forcing your ankles into a painful range.

Stretching Through Pain

Problem: Sharp, pinching, radiating, or unusual pain is different from normal stretching tension.

Fix: Reduce the range or leave the position if pain occurs. Persistent or worsening symptoms should not simply be addressed by forcing a deeper stretch.


Child’s Pose Stretch Variations

Child’s Pose can be modified to emphasize different areas or accommodate different mobility levels.

Wide-Knee Child’s Pose

Moving your knees farther apart creates additional space for your torso.

How to Do Wide-Knee Child’s Pose

  • Begin on your hands and knees.
  • Move your knees comfortably apart.
  • Keep your feet positioned comfortably behind you.
  • Push your hips toward your heels.
  • Lower your torso between your thighs.
  • Reach your arms forward.
  • Hold the stretch comfortably.

Arms-Back Child’s Pose

Placing your arms alongside your body reduces the overhead shoulder position.

How to Do Arms-Back Child’s Pose

  • Move into a comfortable Child’s Pose.
  • Bring your arms alongside your body.
  • Turn your palms into a comfortable position.
  • Allow your shoulders to relax.
  • Rest your forehead on the floor or appropriate support.
  • Hold while breathing normally.

Supported Child’s Pose

This variation uses support to make the position more accessible.

How to Do Supported Child’s Pose

  • Begin in a comfortable kneeling position.
  • Place a cushion, bolster, or folded blanket in front of you.
  • Move your hips backward.
  • Lower your torso onto the support.
  • Rest your head comfortably.
  • Allow your arms to relax.
  • Hold without forcing the position.

Side-Reaching Child’s Pose

Moving both hands toward one side can increase the stretch along the opposite side of the torso and lat.

How to Do Side-Reaching Child’s Pose

  • Begin in standard Child’s Pose with your arms extended.
  • Walk both hands gradually toward one side.
  • Keep your hips moving backward comfortably.
  • Feel the stretch along the opposite side of your torso.
  • Hold briefly.
  • Return to the center.
  • Repeat on the opposite side.

Thread-the-Needle Child’s Pose

This variation adds gentle upper-back and shoulder rotation.

How to Do Thread-the-Needle Child’s Pose

  • Begin from your hands and knees.
  • Move one arm underneath the opposite arm.
  • Allow your shoulder and side of your head to move toward the floor.
  • Keep your hips controlled.
  • Stop at a comfortable range.
  • Hold briefly.
  • Return slowly.
  • Repeat on the opposite side.

Final Thoughts

Child’s Pose is a simple floor-based stretch that can be adapted to many different mobility levels.

It can help develop or maintain:

  • Back flexibility
  • Lat flexibility
  • Shoulder mobility
  • Hip mobility
  • Comfortable spinal movement
  • General stretch tolerance

There is no requirement for your hips to touch your heels, your chest to reach the floor, or your forehead to touch the mat. Your anatomy and current mobility determine how the position looks.

Move backward gradually, support yourself when necessary, breathe normally, and focus on a comfortable stretch rather than maximum depth. Learn more about Stretching Here.

Essential Gear for Child’s Pose Stretch

Child’s Pose requires no equipment, but a few simple items can make the stretch more comfortable and accessible.

  • Exercise or Yoga Mat: Provides cushioning for your knees, ankles, hands, and upper body during the stretch.
  • Yoga Block: Can support your forehead when comfortably reaching the floor is difficult.
  • Yoga Bolster or Cushion: Supports your torso during a more relaxed Supported Child’s Pose.
  • Folded Towel or Blanket: Can provide additional padding underneath sensitive knees or ankles.

Child’s Pose Stretch FAQ

Q1: How long should I hold Child’s Pose?
A practical starting point is approximately 20-60 seconds. You can adjust the duration according to your comfort, mobility goals, and the rest of your stretching routine.

Q2: Should my hips touch my heels during Child’s Pose?
No. Your hips should move toward your heels only as far as your knees, hips, and ankles comfortably allow. Touching your heels is not required for the stretch to be useful.

Q3: What should I do if my forehead cannot reach the floor?
Place a yoga block, folded towel, cushion, or other comfortable support underneath your forehead rather than forcing your head toward the floor.


How to Do a Forearm Stretch Correctly: Step-by-Step Guide for Beginners

A Forearm Stretch is a simple upper-body stretch used to lengthen the muscles of the forearms and improve or maintain comfortable movement around the wrists.

Your forearms work extensively during Pull-Ups, Rows, Bicep Curls, Dead Hangs, weight training, calisthenics, and everyday gripping tasks. Stretching them after demanding training can be a useful addition to your flexibility routine, particularly when the muscles feel tight or fatigued.

Forearm Stretches require no specialized equipment and can be performed almost anywhere.


What Is a Forearm Stretch?

A Forearm Stretch is a flexibility exercise that targets the muscles running between your elbow and wrist.

The forearms contain numerous muscles responsible for movements of the wrist, fingers, and forearm. Because different muscles perform different actions, a complete Forearm Stretch routine commonly includes separate positions for the wrist flexors and wrist extensors.

One common method involves extending one arm in front of your body and using the opposite hand to gently move the wrist into either extension or flexion.

Forearm Stretches are commonly used in:

  • Post-workout stretching
  • Upper-body flexibility routines
  • Grip-training cool-downs
  • Calisthenics training
  • Strength-training programs
  • Climbing-related training
  • General mobility routines

The stretch should produce gentle muscular tension through the forearm rather than pain in the wrist, fingers, or elbow.

Benefits of the Forearm Stretch

Forearm Stretches can provide several useful flexibility and mobility benefits when performed gently and consistently.

Benefits include:

  • Stretches the forearm muscles
  • Improves or maintains wrist flexibility
  • Can reduce the feeling of forearm tightness
  • Encourages comfortable wrist movement
  • Complements grip-intensive exercises
  • Can be performed almost anywhere
  • Requires no specialized equipment
  • Fits easily into post-workout stretching routines

Forearm stretching can be particularly useful after exercises that demand prolonged or repeated gripping.

Muscles Stretched During the Forearm Stretch

Different Forearm Stretch positions emphasize different muscles.

Primary Muscles
  • Wrist Flexors
  • Wrist Extensors
  • Finger Flexors
  • Finger Extensors
Secondary Muscles
  • Brachioradialis
  • Pronator Muscles
  • Supinator

The exact muscles emphasized depend on whether your wrist is being moved into flexion or extension, and whether the forearm is rotated.


How to Do a Forearm Stretch (Step-by-Step)

For a more complete Forearm Stretch, perform both a wrist-flexor and wrist-extensor stretch on each arm.

Step 1: Establish Your Starting Position

Stand or sit upright.

Extend one arm straight in front of you approximately at chest or shoulder height.

Keep your:

  • Head neutral
  • Shoulders relaxed
  • Spine neutral
  • Elbow straight but not aggressively locked
  • Arm controlled

Keep your upper body relaxed throughout the stretch.

Step 2: Position Your Hand for the Wrist-Flexor Stretch

Begin with your palm facing upward.

Keep your elbow extended and allow your fingers to point forward initially.

Use your opposite hand to hold the fingers or palm of the extended arm.

Step 3: Stretch the Wrist Flexors

Gently guide your fingers and hand downward and slightly back toward your body, moving your wrist into extension.

Continue only until you feel a comfortable stretch through the palm-side of your forearm.

Maintain:

  • Straight elbow
  • Relaxed shoulder
  • Controlled wrist position
  • Gentle pressure
  • Normal breathing

Do not aggressively pull your fingers backward.

Step 4: Hold and Release

Hold the Wrist Flexor Stretch for approximately 15-30 seconds.

Keep the position steady rather than bouncing.

Slowly release your hand when finished.

Step 5: Position Your Hand for the Wrist-Extensor Stretch

Keep the same arm extended in front of you.

Turn your palm downward.

Gently bend your wrist so your fingers point toward the floor.

Place your opposite hand across the back of the hand or around the fingers.

Step 6: Stretch the Wrist Extensors

Gently guide the hand downward and back toward your body.

You should begin to feel a stretch along the back or outer portion of your forearm.

Keep your elbow extended and shoulder relaxed.

Hold for approximately 15-30 seconds without forcing the position.

Step 7: Switch Arms

Release the stretch slowly.

Repeat both the Wrist Flexor and Wrist Extensor Stretch on your opposite arm.

Try to use a similar duration and comfortable intensity on both sides.

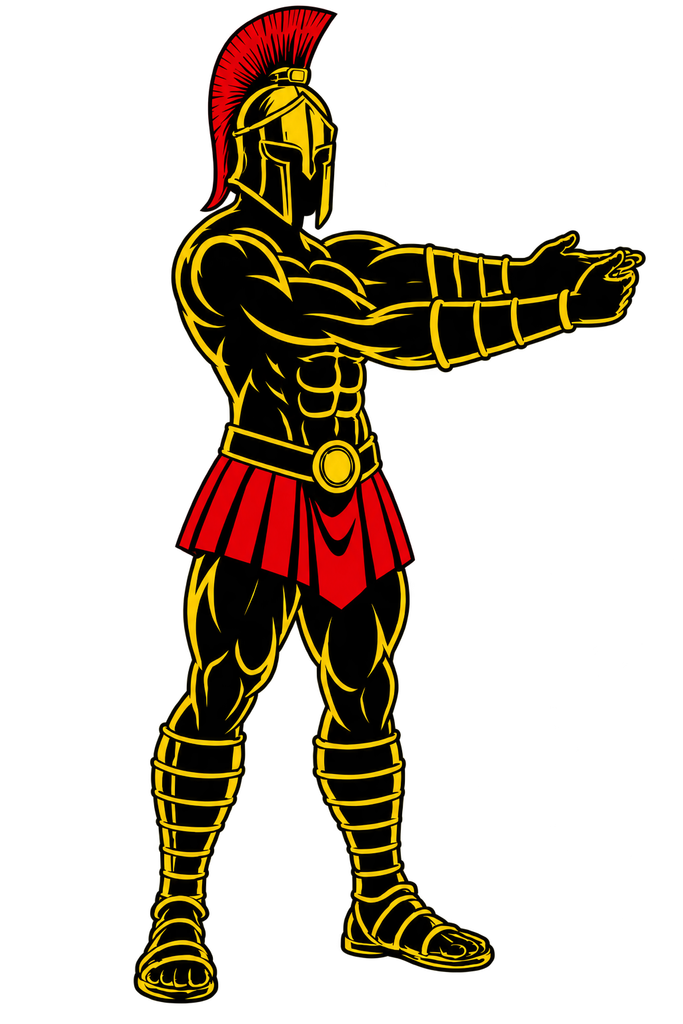
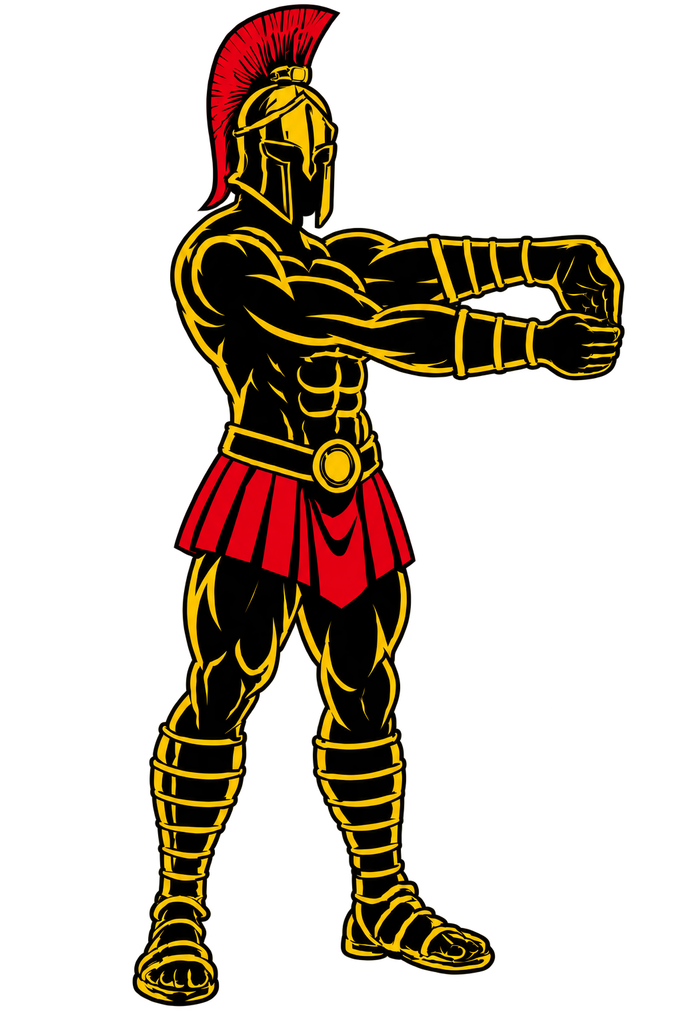
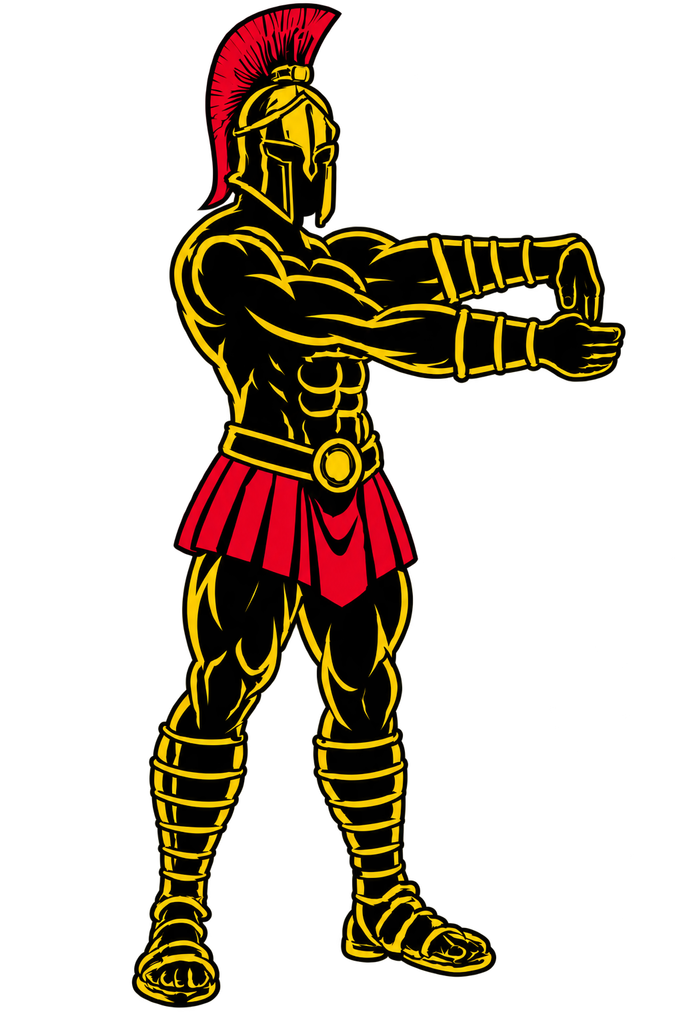
Warrior showcasing How to do Forearm Stretch with proper form

Forearm Stretch Form Checklist

Use this quick checklist to maintain proper Forearm Stretch technique.

  • Stand or sit upright
  • Extend one arm in front of you
  • Keep your elbow straight without forcing it
  • Keep your shoulder relaxed
  • Use your opposite hand for gentle assistance
  • Stretch both the wrist flexors and extensors
  • Move the wrist gradually
  • Keep the stretch comfortable
  • Breathe normally
  • Avoid bouncing
  • Avoid aggressively pulling the fingers
  • Stretch both arms
  • Release each position slowly
  • Stop if you experience sharp or unusual pain

A Forearm Stretch should create controlled muscular tension rather than pain or strong pressure inside the wrist or elbow joint.


Common Forearm Stretch Mistakes

Pulling the Fingers Too Hard

Problem: Aggressively pulling the fingers backward can make the stretch unnecessarily intense and place excessive stress on the fingers or wrist.

Fix: Apply only enough pressure to create a gentle stretch through the forearm.

Bending the Elbow Too Much

Problem: Allowing the elbow to bend can reduce the stretch on some of the targeted forearm muscles.

Fix: Keep your arm extended without aggressively locking or hyperextending the elbow.

Shrugging the Shoulder

Problem: Raising your shoulder toward your ear creates unnecessary upper-body tension.

Fix: Keep your shoulder relaxed while maintaining control of your extended arm.

Stretching Only One Side of the Forearm

Problem: Only performing one wrist position means you may repeatedly stretch the flexor or extensor side while ignoring the other.

Fix: Include both wrist-flexor and wrist-extensor positions when your goal is general Forearm Stretching.

Bouncing Into the Stretch

Problem: Repeatedly bouncing deeper into the position makes the intensity harder to control.

Fix: Move gradually into the stretch and maintain a steady position.

Twisting the Wrist Unnecessarily

Problem: Allowing the wrist to rotate or bend sideways substantially can shift the movement away from the intended stretch.

Fix: Keep the movement controlled and primarily guide the wrist in the intended direction.

Stretching Through Pain

Problem: Sharp, burning, tingling, numb, or unusual pain is different from normal muscular stretching tension.

Fix: Reduce the range or stop the stretch. Persistent pain, numbness, tingling, or weakness should not simply be treated by stretching more aggressively and may warrant appropriate professional assessment.


Forearm Stretch Variations

Several Forearm Stretch variations can target the forearms from different positions.

Wrist Flexor Stretch

This variation emphasizes the muscles along the palm-side of the forearm.

How to Do a Wrist Flexor Stretch

  • Extend one arm in front of you.
  • Turn your palm upward.
  • Keep your elbow straight.
  • Use your opposite hand to gently guide the fingers downward and backward.
  • Stop when you feel a comfortable stretch.
  • Hold before switching sides.

Wrist Extensor Stretch

This variation emphasizes the muscles along the back of the forearm.

How to Do a Wrist Extensor Stretch

  • Extend one arm in front of you.
  • Turn your palm downward.
  • Bend your wrist so your fingers point toward the floor.
  • Use your opposite hand to gently guide the hand toward you.
  • Hold the stretch comfortably.
  • Repeat on the opposite arm.

Wall Forearm Stretch

A wall can provide a stable surface for adjusting the stretch.

How to Do a Wall Forearm Stretch

  • Stand facing a wall.
  • Place one palm against it with your elbow extended.
  • Adjust your hand and finger position comfortably.
  • Gently shift your body position to increase the stretch.
  • Keep your shoulder controlled.
  • Hold before switching arms.

Avoid forcing your wrist flat against the wall if your mobility does not comfortably allow it.

Kneeling Forearm Stretch

This floor-based variation allows you to stretch both forearms simultaneously.

How to Do a Kneeling Forearm Stretch

  • Kneel on an exercise mat.
  • Place your palms on the floor in front of you.
  • Rotate your hands so your fingers point toward your knees if comfortable.
  • Keep your palms controlled against the floor.
  • Slowly shift your hips backward.
  • Stop when you feel a comfortable stretch through your forearms.
  • Hold without forcing your wrists.

Reduce the hand rotation or bodyweight pressure if the position is uncomfortable.

Fist Wrist-Extensor Stretch

Making a gentle fist can alter the sensation through the extensor side of the forearm.

How to Do a Fist Wrist-Extensor Stretch

  • Extend one arm in front of you.
  • Make a gentle fist.
  • Bend your wrist downward.
  • Use your opposite hand to provide light assistance.
  • Keep your elbow extended.
  • Hold the stretch comfortably.
  • Repeat on the other arm.

Final Thoughts

The Forearm Stretch is a simple way to work on flexibility through the muscles surrounding the wrists and forearms.

It can help develop or maintain:

  • Forearm flexibility
  • Wrist flexibility
  • Comfortable wrist movement
  • Stretch tolerance
  • Upper-body mobility

Forearm Stretches can be particularly useful after Pull-Ups, Dead Hangs, Rows, Curls, heavy lifting, and other grip-intensive exercises.

The goal is not to pull your fingers as far backward as possible. Use gentle pressure, keep your shoulder relaxed, and stop once you feel a comfortable stretch through the intended area.

For a more complete routine, include both flexor and extensor stretches and train both arms rather than focusing only on whichever side feels tighter. Learn more about Stretching Here.

Essential Gear for Forearm Stretch

Forearm Stretches require no specialized equipment, but a few simple items can make certain variations more comfortable.

  • Exercise Mat: Provides a comfortable surface for kneeling and floor-based Forearm Stretch variations.
  • Wall: Offers stable support for standing wrist and forearm stretches.
  • Stretching Strap: Can provide gentle assistance for certain upper-body flexibility exercises when additional reach is useful.

Forearm Stretch FAQ

Q1: How long should I hold a Forearm Stretch?
A practical starting point is approximately 15-30 seconds per position on each arm. The appropriate duration can vary according to your flexibility goals, comfort, and overall stretching routine.

Q2: Should I stretch both sides of my forearm?
Yes. If your goal is general forearm flexibility, including both wrist-flexor and wrist-extensor stretches provides a more complete approach than repeatedly stretching only one side.

Q3: Should a Forearm Stretch hurt?
No. You should feel gentle to moderate muscular tension rather than sharp pain, numbness, tingling, or burning. Reduce the stretch or stop if unusual symptoms occur.


How to Do a Glute Stretch Correctly: Step-by-Step Guide for Beginners

A Glute Stretch is a simple lower-body stretch that lengthens the muscles around your buttocks and hips. It can be particularly useful after Squats, Lunges, running, lower-body workouts, or other activities that heavily involve the glutes.

One of the most accessible versions is the lying Figure-Four Glute Stretch. It allows you to control the intensity easily while keeping your upper body supported on the floor.

Glute Stretches require little to no equipment and can easily be included in a post-workout stretching routine, mobility session, or general flexibility program.


What Is a Glute Stretch?

A Glute Stretch is a flexibility exercise designed to place the gluteal muscles and surrounding hip tissues into a lengthened position.

Several variations exist, including lying, seated, standing, and Figure-Four stretches. In the lying Figure-Four variation, you cross one ankle over the opposite thigh and gently draw the supporting leg toward your torso.

Glute Stretches are commonly used in:

  • Post-workout stretching
  • Lower-body flexibility routines
  • Hip mobility sessions
  • Leg-day cool-downs
  • Running cool-downs
  • Calisthenics training
  • General mobility routines

The goal is to create comfortable muscular tension around the glutes and hip rather than forcing your leg into the deepest possible position.

Benefits of the Glute Stretch

Glute Stretches can provide several useful flexibility and mobility benefits when performed consistently and under control.

Benefits include:

  • Stretches the gluteal muscles
  • Improves or maintains hip flexibility
  • Can reduce the feeling of muscular tightness
  • Encourages comfortable hip movement
  • Complements lower-body strength exercises
  • Can be modified for different mobility levels
  • Requires minimal equipment
  • Fits easily into post-workout routines

Static Glute Stretches generally fit better after training or during a separate flexibility session than immediately before demanding strength, sprinting, or explosive exercise.

Muscles Stretched During the Glute Stretch

The exact muscles emphasized depend on the variation, hip angle, and your individual anatomy.

Primary Muscles
  • Gluteus Maximus
  • Gluteus Medius
Secondary Muscles
  • Gluteus Minimus
  • Deep Hip External Rotators

Some Figure-Four variations may also create a noticeable stretch through other tissues around the back and side of the hip.


How to Do a Glute Stretch (Step-by-Step)

Step 1: Lie on Your Back

Begin by lying face-up on an exercise mat or another comfortable surface.

Bend both knees and place your feet flat on the floor.

Keep your:

  • Head relaxed
  • Neck neutral
  • Shoulders comfortable
  • Lower back in a natural position
  • Legs relaxed

Avoid unnecessarily tensing your upper body.

Step 2: Cross One Ankle Over the Opposite Thigh

Lift one foot and place your ankle across the opposite thigh, slightly above the knee.

Your legs should now resemble a Figure-Four position.

Keep the crossed foot controlled rather than aggressively forcing the knee outward.

Step 3: Reach Behind the Supporting Thigh

Lift the supporting foot slightly from the floor.

Reach both hands around the back of that thigh and gently hold it.

If comfortable and accessible, you can alternatively hold around the shin, but holding behind the thigh is often easier for beginners.

Avoid pulling directly on your knee joint.

Step 4: Draw the Leg Toward Your Torso

Slowly pull the supporting thigh toward your chest.

As the leg moves closer, you should begin to feel a stretch through the glute and hip of the crossed leg.

Maintain:

  • Relaxed shoulders
  • Neutral head position
  • Controlled breathing
  • Comfortable hip position
  • Gentle stretch intensity

Do not jerk your leg toward your body.

Step 5: Adjust the Stretch

Continue drawing the supporting leg toward you only until you feel a comfortable stretch.

You may gently allow the knee of the crossed leg to move away from your torso, but do not force it downward with your hand.

The stretch should be felt mainly around the glute and hip rather than as pressure in the knee.

Step 6: Hold the Position

Hold the stretch for approximately 15-30 seconds while breathing normally.

Avoid bouncing or repeatedly pulling yourself deeper into the position.

Keep the stretch steady and controlled.

Step 7: Release and Switch Sides

Slowly release your supporting leg and return both feet to the floor.

Uncross your leg and repeat the same sequence on the opposite side.

Try to use a similar duration and comfortable intensity for both sides.

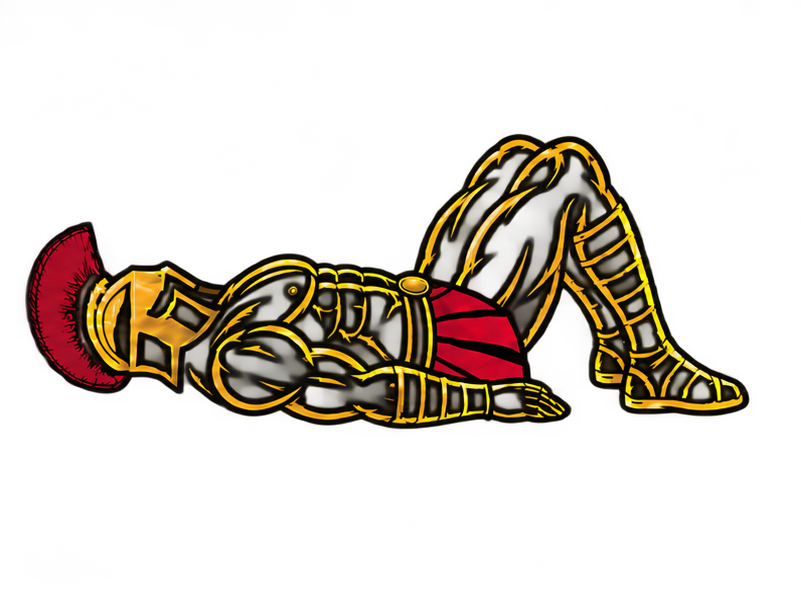
Warrior showcasing How to do Glute Stretch with proper form

Glute Stretch Form Checklist

Use this quick checklist to maintain proper Glute Stretch technique.

  • Lie comfortably on your back
  • Bend both knees
  • Cross one ankle over the opposite thigh
  • Keep the crossed ankle above the knee
  • Hold behind the supporting thigh
  • Draw the supporting leg toward your torso gradually
  • Keep your head and shoulders relaxed
  • Breathe normally
  • Use a comfortable range of motion
  • Keep the movement controlled
  • Avoid bouncing
  • Do not force the crossed knee downward
  • Stretch both sides
  • Stop if you experience sharp or unusual pain

You should feel controlled stretching tension around the glute and hip rather than pain in the knee or hip joint.


Common Glute Stretch Mistakes

Pulling Too Aggressively

Problem: Trying to force the supporting leg as close to your chest as possible can make the stretch unnecessarily intense.

Fix: Pull gradually and stop when you reach a comfortable stretching sensation.

Pressing Down on the Knee

Problem: Using your hand to aggressively push the crossed knee away can place unnecessary stress on the joint.

Fix: Allow the hip to open naturally and adjust the stretch primarily by moving the supporting leg toward your torso.

Placing the Foot Directly on the Knee

Problem: Resting the crossed ankle directly on the knee joint may create unnecessary pressure.

Fix: Place your ankle across the opposite thigh just above the knee.

Lifting the Head and Shoulders

Problem: Tensing your neck and repeatedly lifting your head from the floor can make the stretch less comfortable.

Fix: Keep your head and shoulders supported and relaxed whenever possible.

Bouncing Into the Stretch

Problem: Repeated bouncing makes it harder to control the intensity of a static stretch.

Fix: Move gradually into the position and maintain a steady hold.

Holding Your Breath

Problem: Holding your breath creates unnecessary tension during the stretch.

Fix: Breathe slowly and naturally throughout the entire hold.

Stretching Through Pain

Problem: Sharp, pinching, burning, or unusual joint pain is different from normal muscular stretching tension.

Fix: Reduce the range or stop the stretch if you experience pain. Persistent or worsening hip, knee, or radiating leg symptoms may require appropriate professional assessment rather than deeper stretching.


Glute Stretch Variations

Several Glute Stretch variations can be used depending on your mobility, environment, and preferred position.

Lying Figure-Four Glute Stretch

This is the standard beginner-friendly variation described above.

How to Do a Lying Figure-Four Glute Stretch

  • Lie on your back with both knees bent.
  • Cross one ankle over the opposite thigh.
  • Reach behind the supporting thigh.
  • Draw the leg gently toward your chest.
  • Hold the stretch comfortably.
  • Release slowly.
  • Repeat on the opposite side.

Seated Figure-Four Glute Stretch

This variation can be performed on a chair or bench.

How to Do a Seated Figure-Four Glute Stretch

  • Sit upright on a stable chair.
  • Place one ankle across the opposite thigh.
  • Keep your spine long.
  • Hinge slightly forward from your hips.
  • Stop when you feel a comfortable glute stretch.
  • Hold before switching sides.

Avoid aggressively rounding your back simply to move farther forward.

Standing Figure-Four Glute Stretch

This variation adds a balance component.

How to Do a Standing Figure-Four Glute Stretch

  • Stand upright near a stable support.
  • Shift your weight onto one leg.
  • Cross the opposite ankle over your supporting thigh.
  • Push your hips backward.
  • Bend your supporting knee slightly.
  • Lower only until you feel a comfortable stretch.
  • Hold onto a stable surface if necessary.
  • Repeat on the other side.

Pigeon Stretch

This is a more demanding floor-based variation that requires greater hip mobility.

How to Do a Pigeon Stretch

  • Begin on your hands and knees.
  • Bring one knee forward.
  • Position the lower leg in a comfortable angle in front of your body.
  • Extend the opposite leg behind you.
  • Keep your hips controlled rather than forcing them square.
  • Remain upright or gradually lower your torso if comfortable.
  • Hold before changing sides.

Your front shin does not need to be parallel with the front of the mat. Use a position appropriate for your mobility and avoid forcing the knee.

Supine Knee-to-Opposite-Side Glute Stretch

This variation combines hip movement with gentle trunk rotation.

How to Do a Supine Knee-to-Opposite-Side Glute Stretch

  • Lie on your back.
  • Bend one knee.
  • Guide that leg gently across your body.
  • Keep the movement controlled.
  • Allow your torso to rotate only within a comfortable range.
  • Hold the stretch.
  • Return slowly.
  • Repeat on the opposite side.

Final Thoughts

The Glute Stretch is a simple way to work on flexibility around the glutes and hips after lower-body training or as part of a dedicated mobility routine.

It can help develop or maintain:

  • Glute flexibility
  • Hip flexibility
  • Comfortable hip movement
  • Stretch tolerance
  • Lower-body mobility

You do not need to force your knee downward or pull your leg as close to your chest as possible. The goal is simply to reach a comfortable position that produces a controlled stretch through the glutes.

Move gradually, breathe normally, and use a range appropriate for your current mobility. Consistent, comfortable stretching is more useful than trying to force a dramatic range in a single session. Learn more about Stretching Here.

Essential Gear for Glute Stretch

The Glute Stretch requires no specialized equipment, but a few simple items can make certain variations more comfortable or accessible.

  • Exercise Mat: Provides a comfortable, non-slip surface for lying and floor-based Glute Stretches.
  • Stretching Strap: Can provide extra reach if you struggle to comfortably hold your supporting leg during the Figure-Four Stretch.
  • Yoga Block: Can provide support during floor-based variations such as the Pigeon Stretch when additional elevation makes the position more comfortable.
  • Stable Chair or Bench: Useful for seated Figure-Four Stretches and as support during standing variations.

Glute Stretch FAQ

Q1: How long should I hold a Glute Stretch?
A practical starting point is approximately 15-30 seconds per side. The appropriate duration can vary depending on your flexibility goals, comfort, and overall stretching routine.

Q2: Why can’t I bring my leg very close to my chest?
Your current hip mobility, anatomy, and muscular flexibility can all affect your range. You do not need to pull your leg close to your chest; stop once you reach a comfortable glute stretch.

Q3: Should I push my knee down during a Glute Stretch?
Avoid aggressively pressing the knee downward. During a Figure-Four Stretch, you can usually adjust the intensity more safely by gradually drawing the supporting leg toward your torso while allowing the crossed hip to open comfortably.


How to Do Resistance Band Face Pulls Correctly: Step-by-Step Guide for Beginners

Resistance Band Face Pulls are an upper-body pulling exercise that primarily targets the rear shoulders and upper back while also involving muscles that control and externally rotate the shoulder.

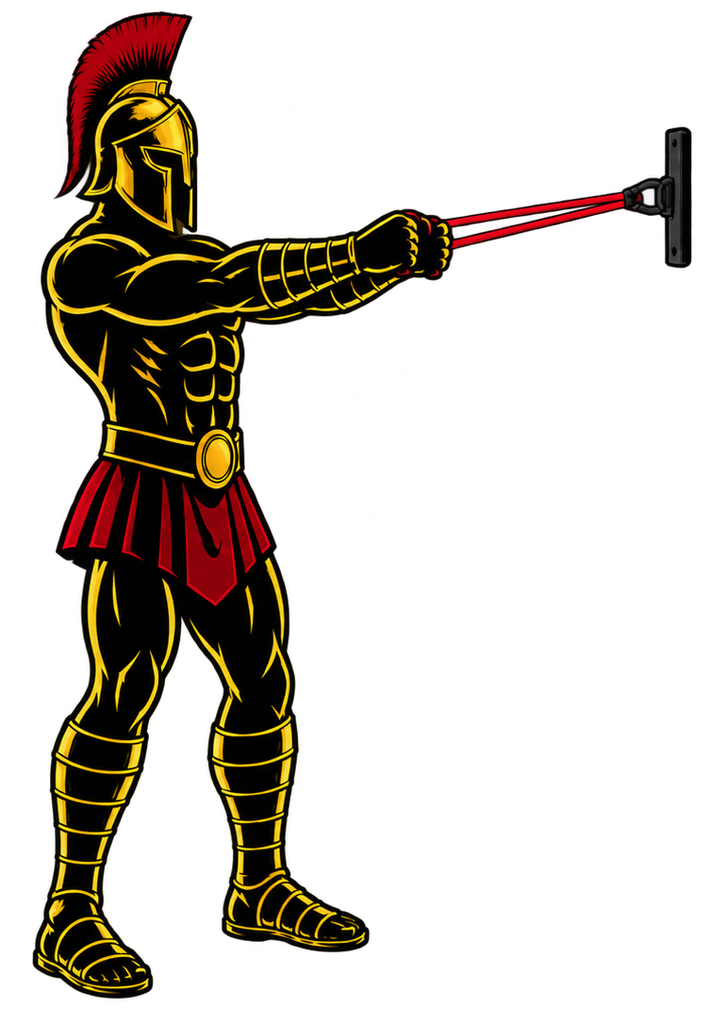
The exercise requires only a resistance band and a secure anchor, making it useful for home workouts, resistance-band routines, and as an accessory exercise alongside Push-Ups, Pull-Ups, Rows, and pressing movements.

Proper technique is more important than using maximum resistance. With a controlled pull, suitable anchor height, and stable torso, Resistance Band Face Pulls can be an effective addition to balanced upper-body training.


What Are Resistance Band Face Pulls?

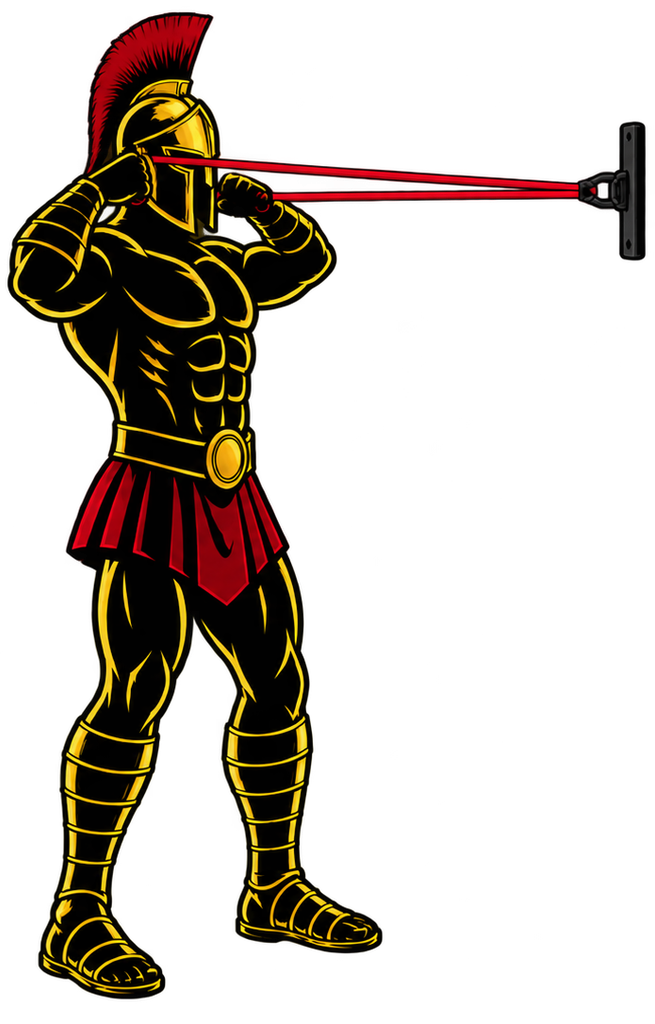
Resistance Band Face Pulls are performed by securing a resistance band around approximately face-to-upper-chest height, holding the band with both hands, and pulling it toward your face while your elbows travel outward.

Near the end of the movement, your hands separate toward either side of your face as your upper arms and shoulders move into external rotation.

Unlike a standard Resistance Band Row, where the elbows usually remain closer to the torso and the hands travel toward the ribs or abdomen, Face Pulls use a higher pulling path and place greater emphasis on the rear deltoids and upper-back muscles.

Resistance Band Face Pulls are commonly used in:

  • Upper-body workouts
  • Pull-day workouts
  • Shoulder training
  • Rear-delt training
  • Resistance-band workouts
  • Home workouts
  • Strength-training programs
  • Calisthenics accessory training

The resistance should be light enough that you can maintain controlled shoulder movement without leaning backward or turning the exercise into a Row.

Benefits of Resistance Band Face Pulls

Resistance Band Face Pulls provide several useful upper-body training benefits.

Benefits include:

  • Strengthens the rear deltoids
  • Trains the upper-back muscles
  • Strengthens the shoulder external rotators
  • Develops scapular control
  • Trains the rhomboids and trapezius
  • Complements pressing exercises
  • Requires minimal equipment
  • Allows resistance to be adjusted easily
  • Works well in home-training programs

Face Pulls are particularly useful as an accessory exercise because they train several muscles around the rear shoulders and upper back that contribute to controlled shoulder movement.

Muscles Worked in Resistance Band Face Pulls

Resistance Band Face Pulls train several muscles around the shoulders and upper back.

Primary Muscles
  • Posterior Deltoids
  • Rhomboids
  • Middle Trapezius
Secondary Muscles
  • Lower Trapezius
  • Infraspinatus
  • Teres Minor
  • Biceps Brachii
  • Brachialis
  • Forearms

The infraspinatus and teres minor are part of the rotator cuff and contribute to the external-rotation component of the exercise.


How to Do Resistance Band Face Pulls (Step-by-Step)

Step 1: Inspect Your Resistance Band

Before beginning, inspect the entire band and any attachments you plan to use.

Look for:

  • Cracks
  • Tears
  • Fraying
  • Damaged handles
  • Weak attachment points
  • Excessive wear

Do not use a visibly damaged resistance band.

Step 2: Secure the Resistance Band

Attach the middle of the resistance band to a stable anchor approximately at face-to-upper-chest height.

Make sure the anchor is suitable for resistance-band training and capable of handling force in the direction you will pull.

If you use a door anchor, install it according to the manufacturer’s instructions and make sure the door and anchor are secure before placing the band under significant tension.

Step 3: Establish Your Starting Position

Hold one end or handle of the band in each hand and step backward until the band has light tension with your arms extended.

Stand approximately hip- to shoulder-width apart with your knees slightly bent.

Keep your:

  • Head neutral
  • Chest naturally upright
  • Core braced
  • Spine neutral
  • Shoulders controlled
  • Wrists neutral

Do not stand so close to the anchor that the band hangs completely slack.

Step 4: Begin the Pull

Pull your hands toward your face while bending your elbows and allowing them to travel outward.

Keep your torso stable rather than leaning backward to overcome the resistance.

As you pull:

  • Keep your shoulders controlled
  • Draw your shoulder blades back
  • Let your elbows travel outward
  • Maintain a neutral head position
  • Avoid shrugging toward your ears

Use a smooth, controlled motion.

Step 5: Pull Toward Your Face

Continue pulling until your hands approach either side of your face.

Allow your hands to separate as your elbows remain elevated and your shoulders externally rotate.

Near the end position:

  • Keep your elbows bent
  • Keep your shoulders away from your ears
  • Bring your hands toward the sides of your face
  • Keep your torso upright
  • Maintain control of the band

Think about pulling the band apart as well as pulling it toward you.

Step 6: Reach the Contracted Position

Briefly pause in the end position and contract your rear shoulders and upper-back muscles.

Your forearms should move toward a more upright orientation rather than allowing your hands to collapse forward below your elbows.

Do not force your shoulders into an uncomfortable range simply to pull the band farther backward.

Step 7: Return Under Control

Slowly extend your arms and allow your shoulder blades to move naturally as you return toward the starting position.

Resist the band’s pull rather than allowing it to snap your arms forward.

Return to controlled arm extension while maintaining light band tension before beginning your next repetition.

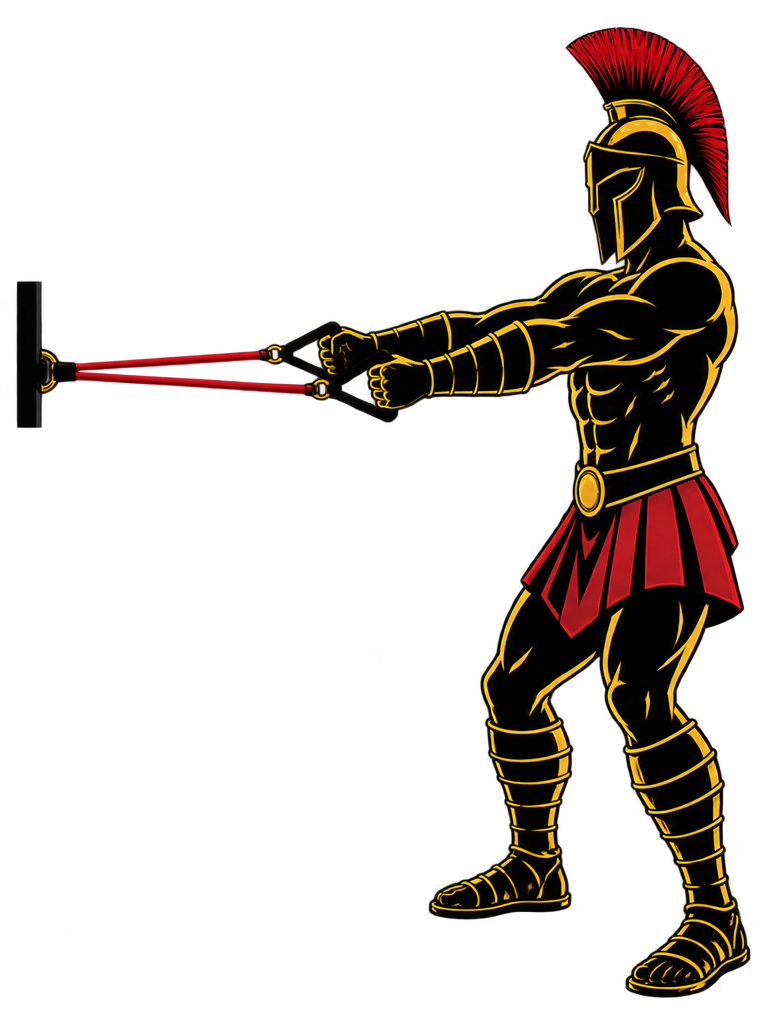
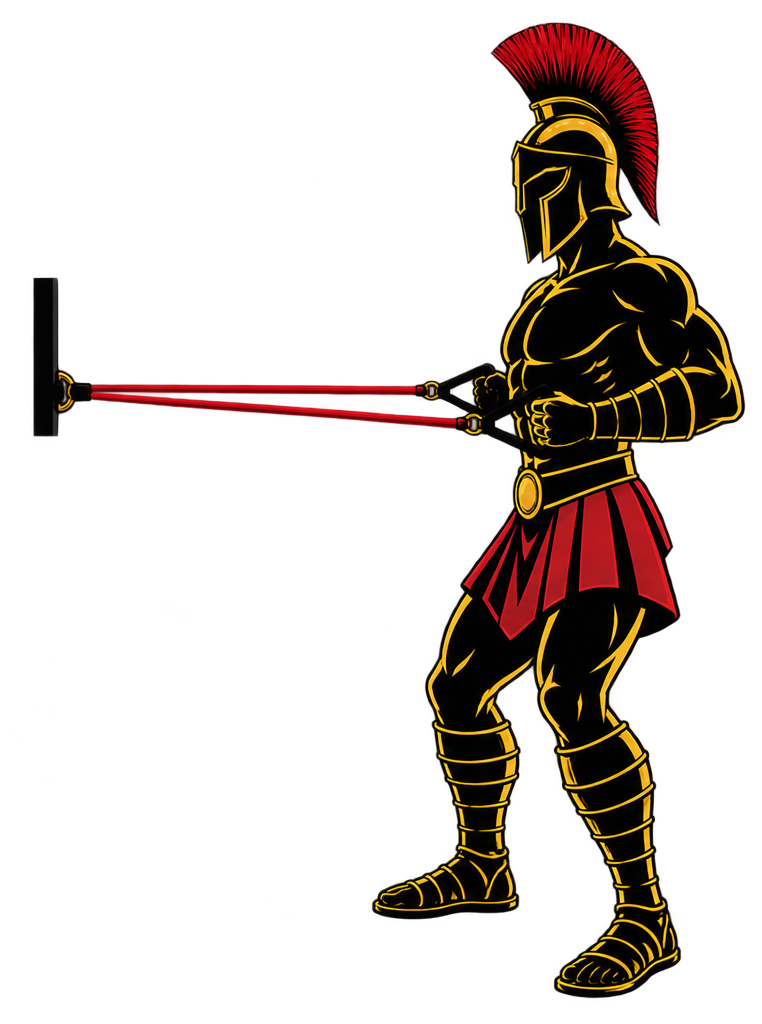
Warrior showcasing How to do Resistance Band Face Pulls with proper form

Resistance Band Face Pulls Form Checklist

Use this checklist to maintain proper Resistance Band Face Pull technique.

  • Inspect your resistance band before training
  • Use a secure anchor
  • Position the anchor around face to upper-chest height
  • Begin with light band tension
  • Keep your feet stable
  • Brace your core
  • Maintain a neutral spine
  • Keep your torso relatively still
  • Pull toward your face
  • Let your elbows travel outward
  • Keep your shoulders away from your ears
  • Separate your hands near your face
  • Maintain controlled external rotation
  • Contract your rear shoulders and upper back
  • Control the return phase
  • Never suddenly release a stretched band

The goal is controlled shoulder and upper-back movement, not moving the strongest band possible.


Common Resistance Band Face Pulls Mistakes

Using Too Much Resistance

Problem: An excessively strong band can cause you to lean backward, shorten the movement, shrug your shoulders, or turn the exercise into a Row.

Fix: Choose a lighter band that allows you to reach the end position with controlled technique.

Using an Unsafe Anchor

Problem: A weak or improperly installed anchor can come loose while the resistance band is stretched.

Fix: Use an anchor suitable for resistance-band training, inspect the setup before every set, and follow the manufacturer’s instructions for any anchoring equipment.

Pulling Toward the Chest

Problem: Pulling the band toward your lower chest or abdomen makes the movement more similar to a standard Resistance Band Row.

Fix: Use a higher pulling path and bring your hands toward the sides of your face.

Keeping the Hands Too Close Together

Problem: Simply pulling both hands straight toward your face can reduce the external-rotation component of the movement.

Fix: Allow your hands to separate toward either side of your face as you reach the contracted position.

Shrugging the Shoulders

Problem: Raising your shoulders toward your ears creates unnecessary upper-trapezius involvement and can interfere with controlled shoulder mechanics.

Fix: Keep your shoulders controlled and away from your ears throughout the exercise.

Leaning Backward

Problem: Using your bodyweight to lean away from the anchor creates momentum and makes it easier to move excessive resistance.

Fix: Brace your core and keep your torso relatively stationary. Reduce the resistance if necessary.

Letting the Band Snap Forward

Problem: Relaxing immediately after the pull allows the elastic resistance to rapidly pull your arms toward the anchor.

Fix: Control the return phase until your arms reach the starting position.


Resistance Band Face Pull Variations

Resistance Band Face Pulls can be modified according to your equipment, strength, and training goals.

Seated Resistance Band Face Pull

Sitting can make it easier to focus on upper-body movement without using the legs for assistance.

How to Do a Seated Resistance Band Face Pull

  • Secure the band around face height while seated.
  • Sit upright on a stable chair or bench.
  • Hold one end in each hand.
  • Brace your core.
  • Pull your hands toward either side of your face.
  • Keep your elbows outward.
  • Return under control.

Half-Kneeling Resistance Band Face Pull

This variation provides a stable base while challenging your core to maintain torso position.

How to Do a Half-Kneeling Resistance Band Face Pull

  • Secure the band around face height.
  • Assume a half-kneeling position.
  • Keep your torso upright.
  • Brace your core.
  • Pull the band toward your face.
  • Separate your hands at the end of the movement.
  • Return slowly.

Single-Arm Resistance Band Face Pull

Training one arm at a time adds a unilateral challenge and requires greater control against torso rotation.

How to Do a Single-Arm Resistance Band Face Pull

  • Secure the band to a stable anchor.
  • Hold the band in one hand.
  • Step backward to create light tension.
  • Brace your core.
  • Pull your hand toward the side of your face.
  • Allow controlled shoulder external rotation.
  • Slowly return your arm.
  • Repeat equally on both sides.

Resistance Band Face Pull With External Rotation

This variation emphasizes the rotational component at the end of the pull.

How to Do a Resistance Band Face Pull With External Rotation

  • Secure the band around face height.
  • Begin with your arms extended.
  • Pull your elbows outward and backward.
  • Bring your hands toward your face.
  • Continue rotating your forearms toward a more upright position.
  • Pause briefly under control.
  • Reverse the movement slowly.

Use lighter resistance if necessary to maintain proper shoulder positioning.

Split-Stance Resistance Band Face Pull

A staggered stance can provide additional stability when band tension increases.

How to Do a Split-Stance Resistance Band Face Pull

  • Secure the band to a stable anchor.
  • Step backward and place one foot slightly behind the other.
  • Brace your core.
  • Keep your torso upright.
  • Pull the band toward your face.
  • Separate your hands near the end position.
  • Return under control.
  • Alternate your lead leg between sets if desired.

Final Thoughts

Resistance Band Face Pulls are a useful accessory exercise for training the rear shoulders, upper back, and muscles involved in controlled shoulder external rotation.

They develop:

  • Rear-delt strength
  • Upper-back strength
  • Shoulder external-rotation strength
  • Scapular control
  • Upper-body muscular control
  • Resistance-band proficiency

Face Pulls are not an exercise where maximum resistance should be the priority. A lighter band performed through a controlled range is generally more useful than a stronger band that forces you to lean backward, shrug, or shorten the movement.

Keep your torso stable, pull toward your face rather than your chest, separate your hands near the end position, and control the band throughout both directions of every repetition. Learn more about Pull Workouts here.

Essential Gear for Resistance Band Face Pulls

Resistance Band Face Pulls require minimal equipment, but the right setup makes the exercise easier to perform and progress.

  • Resistance Bands: The essential equipment for the exercise. Multiple resistance levels allow you to choose an appropriate challenge and progressively increase resistance.
  • Door Anchor: Provides an adjustable anchor point when a suitable fixed structure is unavailable. Install it according to the manufacturer’s instructions and confirm that the door and anchor are secure.
  • Resistance Band Handles: Compatible handles can provide a comfortable grip, although many Face Pull variations can also be performed by safely gripping the band itself.
  • Stable Anchor Point: A sturdy post, rack, or other suitable fixed structure can provide an alternative attachment point when it is designed or appropriate to withstand the direction of force.

Resistance Band Face Pulls FAQ

Q1: How many Resistance Band Face Pulls should beginners do?
Beginners can start with approximately 10-15 controlled repetitions for 2-3 sets using a light or moderate band. Prioritize movement quality over using heavy resistance.

Q2: Why do I feel Resistance Band Face Pulls mostly in my arms?
You may be using excessive resistance, pulling primarily with your hands, or failing to control your shoulder blades and upper arms. Try a lighter band and focus on driving your elbows outward and backward while contracting your rear shoulders and upper back.

Q3: Are Resistance Band Face Pulls the same as Resistance Band Rows?
No. Both are pulling exercises, but Rows generally use a lower pulling path with the elbows closer to the torso, while Face Pulls bring the hands toward the face with the elbows traveling outward and include more shoulder external rotation.


How to Do Resistance Band Rows Correctly: Step-by-Step Guide for Beginners

Resistance Band Rows are a simple and effective pulling exercise for strengthening your back, biceps, and rear shoulders without requiring heavy gym equipment.

By pulling an anchored resistance band toward your torso, you train many of the same major muscle groups involved in other horizontal pulling exercises. Resistance Band Rows are easy to perform at home, while traveling, or as part of a resistance-band workout.

With a secure setup and proper technique, they can be adapted from beginner-friendly resistance levels to more challenging variations as your strength improves.


What Are Resistance Band Rows?

Resistance Band Rows are a horizontal pulling exercise performed by pulling an elastic resistance band toward your torso while keeping your upper body controlled.

They can be performed with the band secured around your feet, attached to a suitable anchor, or positioned using another safe setup depending on the variation.

During a standard repetition, you pull your elbows backward and bring your hands toward your torso before slowly extending your arms again.

Unlike free weights, resistance bands generally provide increasing resistance as they stretch farther. This means the exercise often becomes more challenging as you approach the contracted position.

Resistance Band Rows are commonly used in:

  • Back workouts
  • Pull-day workouts
  • Home workouts
  • Resistance band training
  • Calisthenics accessory training
  • General strength training
  • Travel workouts
  • Upper-body training

They are particularly useful when you want a horizontal pulling exercise but do not have access to barbells, dumbbells, cable machines, or a suitable setup for bodyweight Rows.

Benefits of Resistance Band Rows

Resistance Band Rows provide several upper-body strength and training benefits while requiring very little equipment.

Benefits include:

  • Strengthens the upper and mid-back
  • Trains the lats
  • Strengthens the biceps
  • Develops the rear shoulders
  • Trains the shoulder-blade retractors
  • Builds horizontal pulling strength
  • Provides progressively increasing band tension
  • Allows resistance to be adjusted easily
  • Requires minimal equipment
  • Works well for home workouts

Resistance Band Rows can also complement Pull-Ups and Chin-Ups by adding a horizontal pulling pattern to your training.

Muscles Worked in Resistance Band Rows

Resistance Band Rows train several muscles across the back, arms, and shoulders.

Primary Muscles
  • Latissimus Dorsi
  • Rhomboids
  • Middle Trapezius
  • Biceps Brachii
Secondary Muscles
  • Rear Deltoids
  • Brachialis
  • Brachioradialis
  • Lower Trapezius
  • Forearms
  • Rotator Cuff Muscles

Your core and spinal stabilizers may also work isometrically to help maintain your torso position, particularly during standing variations.


How to Do Resistance Band Rows (Step-by-Step)

Step 1: Inspect Your Resistance Band

Before beginning, check the entire band for signs of damage.

Look for:

  • Cracks
  • Tears
  • Fraying
  • Damaged handles
  • Weak attachment points
  • Excessive wear

Do not use a visibly damaged resistance band.

Step 2: Secure the Resistance Band

Attach the middle of the band to a stable anchor approximately at lower-chest to waist height.

Make sure the anchor is designed or suitable to withstand the direction and amount of force you will apply.

If using a door anchor, install it according to the manufacturer’s instructions and confirm that the door and anchor are secure before applying significant tension.

Hold one end or handle in each hand.

Step 3: Establish Your Starting Position

Step backward until the band has light tension with your arms extended.

Stand approximately hip- to shoulder-width apart with your knees slightly bent.

Keep your:

  • Head neutral
  • Chest naturally upright
  • Shoulders controlled
  • Core braced
  • Spine neutral
  • Wrists straight

Avoid standing so close to the anchor that the band becomes completely slack.

Step 4: Initiate the Row

Begin the pulling motion by allowing your shoulder blades to move back as your elbows start traveling behind you.

Keep your shoulders away from your ears.

Avoid dramatically throwing your chest forward or leaning backward to create momentum.

Step 5: Pull the Band Toward Your Torso

Continue bending your elbows and pull the handles toward the sides of your lower ribs or upper abdomen.

During the pull:

  • Drive your elbows backward
  • Keep your wrists neutral
  • Keep your torso stable
  • Avoid shrugging your shoulders
  • Maintain controlled band tension

Your exact hand position may vary slightly depending on the band, handle design, and grip you use.

Step 6: Reach the Contracted Position

At the end of the row, your elbows should be behind or approximately alongside your torso depending on your proportions and technique.

Briefly contract your back muscles without excessively arching your lower back.

Tip: Think about pulling your elbows behind you rather than simply pulling the handles with your hands.

Step 7: Return Under Control

Slowly extend your elbows and allow your shoulder blades to move naturally as you return toward the starting position.

Do not suddenly relax and allow the band to snap your arms forward.

Reach a controlled arm-extended position while maintaining tension and posture before beginning the next repetition.
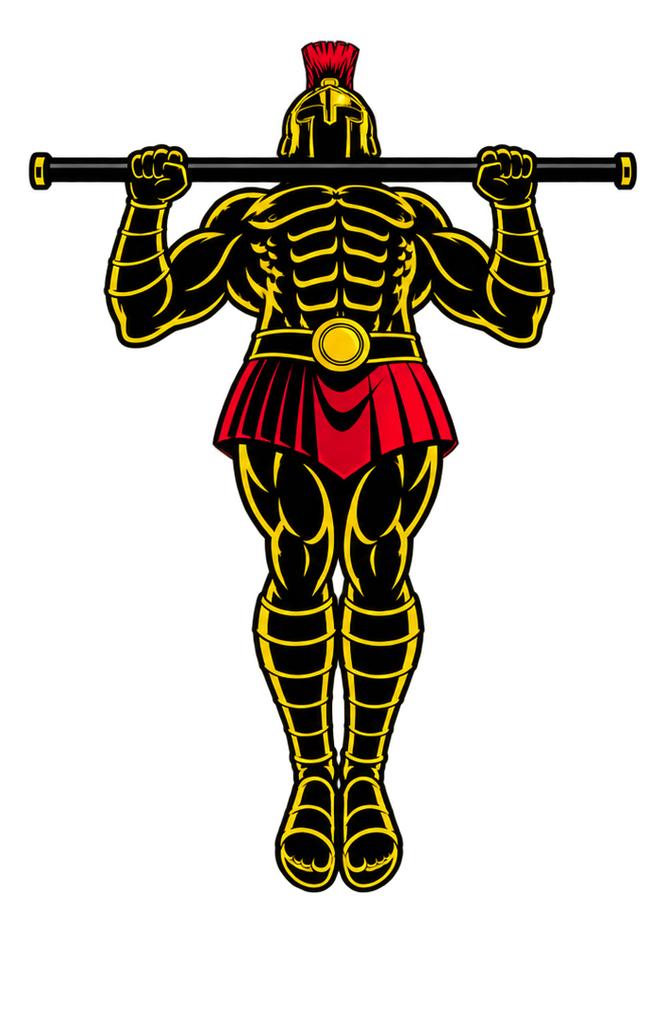
Warrior showcasing How to do Resistance Band Rows with proper form

Resistance Band Rows Form Checklist

Use this checklist to keep your Resistance Band Rows controlled and effective.

  • Inspect the band before training
  • Use a secure anchor
  • Begin with light band tension
  • Keep your feet stable
  • Maintain a neutral spine
  • Brace your core
  • Keep your chest naturally upright
  • Pull your elbows backward
  • Keep your shoulders away from your ears
  • Maintain neutral wrists
  • Keep your torso relatively still
  • Contract your back at the end of the pull
  • Control the return phase
  • Never suddenly release a stretched band

Proper technique should determine your resistance level. If you have to swing or lean excessively to complete each repetition, use less resistance.


Common Resistance Band Rows Mistakes

Using an Unsafe Anchor

Problem: Attaching the band to an unstable object or improperly installed anchor creates a risk of the setup coming loose while the band is stretched.

Fix: Use a secure anchor appropriate for resistance-band training, inspect the setup before every set, and follow the equipment manufacturer’s instructions.

Leaning Back to Pull the Band

Problem: Using your entire body to rock backward turns the exercise into a momentum-assisted movement rather than a controlled Row.

Fix: Brace your core and keep your torso relatively stable while your arms and shoulder blades perform the pulling movement.

Shrugging the Shoulders

Problem: Pulling your shoulders toward your ears creates unnecessary tension and changes the movement.

Fix: Keep your shoulders controlled and away from your ears as your elbows travel backward.

Flaring the Elbows Too Far Out

Problem: Allowing your elbows to travel directly sideways changes the emphasis of the exercise and may make the position less comfortable for some trainees.

Fix: For a standard Resistance Band Row, keep your elbows relatively close to your torso while allowing them to follow a natural path.

Starting With Too Much Slack

Problem: A large amount of slack can leave the beginning of each repetition with very little resistance.

Fix: Step farther from the anchor or adjust the band’s effective length until you have light tension at the starting position.

Using Too Much Resistance

Problem: An excessively strong band can cause shortened repetitions, torso swinging, shrugging, and poor control.

Fix: Use a resistance level that allows you to complete the entire movement with strict technique.

Letting the Band Snap Forward

Problem: Suddenly relaxing after the pull allows the elastic tension to rapidly pull your arms toward the anchor.

Fix: Control the band throughout the return phase until your arms are extended.


Resistance Band Row Variations

Resistance Band Rows can be modified by changing your body position, grip, or training setup.

Seated Resistance Band Row

This variation can be performed with the band looped securely around your feet.

How to Do a Seated Resistance Band Row

  • Sit on the floor with your legs extended or slightly bent.
  • Loop the middle of the band securely around both feet.
  • Hold one end or handle in each hand.
  • Sit tall and brace your core.
  • Pull your elbows backward.
  • Bring your hands toward your torso.
  • Return under control.

Make sure the band is positioned securely so it cannot slip off your feet.

Single-Arm Resistance Band Row

Training one side at a time increases the demand on your core to resist torso rotation.

How to Do a Single-Arm Resistance Band Row

  • Secure the band to a stable anchor.
  • Hold the band in one hand.
  • Step backward to create tension.
  • Brace your core.
  • Pull your elbow backward.
  • Keep your torso from rotating excessively.
  • Slowly extend your arm again.
  • Complete the same work on both sides.

Resistance Band High Row

A higher pulling path places relatively more emphasis on the upper back and rear shoulders.

How to Do a Resistance Band High Row

  • Secure the band around upper-chest height.
  • Hold both handles.
  • Step backward until the band is under light tension.
  • Pull your elbows backward and somewhat outward.
  • Bring the band toward your upper torso.
  • Keep your shoulders controlled.
  • Return slowly.

Resistance Band Low Row

Changing the anchor and pulling angle creates another useful rowing variation.

How to Do a Resistance Band Low Row

  • Secure the band to a low stable anchor.
  • Hold one end in each hand.
  • Step backward to create tension.
  • Maintain an upright, stable torso.
  • Pull the handles toward your lower ribs or waist.
  • Contract your back.
  • Return under control.

Heavy Resistance Band Row

A stronger band can provide a progression once standard Band Rows become easy.

How to Do a Heavy Resistance Band Row

  • Select an appropriately stronger band.
  • Secure it to a stable anchor.
  • Establish a strong starting position.
  • Brace your core.
  • Pull without leaning backward for momentum.
  • Briefly contract your back.
  • Control the return phase.

Only increase resistance if you can maintain the same movement quality.


Final Thoughts

Resistance Band Rows are a practical horizontal pulling exercise for developing the back and arms without requiring traditional gym equipment.

They develop:

  • Back strength
  • Lat strength
  • Biceps strength
  • Rear-shoulder strength
  • Horizontal pulling strength
  • Upper-body muscular control
  • Resistance-band proficiency

For effective Resistance Band Rows, focus on a secure setup, controlled shoulder-blade movement, and driving your elbows backward without turning the exercise into a full-body swing.

Choose a band that challenges you without compromising technique. As you become stronger, gradually increase the resistance or starting tension while maintaining complete control over both the pulling and returning phases. Learn more about Pull Workouts here.

Essential Gear for Resistance Band Rows

Resistance Band Rows require minimal equipment, but a few items can make the exercise safer and provide more training options.

  • Resistance Bands: The essential equipment for the exercise. A set containing multiple resistance levels makes it easier to progressively increase the difficulty.
  • Resistance Band Handles: Compatible handles can provide a comfortable and secure grip during higher-repetition or heavier Band Rows.
  • Door Anchor: Allows you to create different pulling angles when a suitable fixed anchor is unavailable. Install it according to the manufacturer’s instructions and make sure the door and anchor are secure.
  • Exercise Mat: Useful for seated Resistance Band Rows and other floor-based band exercises.

Resistance Band Row FAQ

Q1: Are Resistance Band Rows good for beginners?
Yes. Beginners can use lighter resistance and gradually progress as their strength and technique improve. The exercise is also relatively easy to perform at home with minimal equipment.

Q2: How many Resistance Band Rows should beginners do?
A practical starting point is approximately 8-15 controlled repetitions for 2-3 sets using resistance that allows proper form. Adjust the resistance and volume according to your ability and training program.

Q3: Where should I pull the band during Resistance Band Rows?
For a standard Row, pulling toward the lower ribs or upper abdomen is a useful general target. Your exact pulling position can vary somewhat according to your proportions, grip, and the variation being performed.


How to Do Resistance Band Bicep Curls Correctly: Step-by-Step Guide for Beginners

Learn how to do Resistance Band Bicep Curls with proper form, avoid common mistakes, and discover useful variations for building stronger biceps with simple, portable equipment.

Resistance Band Bicep Curls recreate the fundamental curling motion using elastic resistance instead of dumbbells or a barbell. As the band stretches, resistance generally increases, making the upper portion of the curl progressively more demanding.

Whether you’re training at home, traveling, or adding resistance bands to your regular strength workouts, Band Bicep Curls provide a simple way to directly train your arms without requiring heavy weights.


What Are Resistance Band Bicep Curls?

Resistance Band Bicep Curls are an isolation-focused arm exercise performed by standing on or securely anchoring a resistance band and bending your elbows against the band’s tension.

The basic movement is similar to a traditional Bicep Curl:

  • Begin with your arms extended
  • Keep your upper arms relatively stationary
  • Bend your elbows
  • Curl your hands toward your shoulders
  • Contract your biceps
  • Lower your hands under control

Unlike free weights, resistance bands become progressively harder to stretch as they lengthen. This creates variable resistance throughout the movement.

Resistance Band Bicep Curls are commonly used in:

  • Home workouts
  • Resistance band training
  • Pull-day workouts
  • Arm workouts
  • Calisthenics accessory training
  • Travel workouts
  • General strength training

Band thickness, length, and starting position can all affect how much resistance you experience.

Benefits of Resistance Band Bicep Curls

Resistance Band Bicep Curls provide several strength and muscle-building benefits.

Benefits include:

  • Strengthens the biceps
  • Builds elbow-flexion strength
  • Trains the forearms
  • Provides progressive band tension
  • Allows easy resistance adjustments
  • Requires minimal equipment
  • Works well for home training
  • Provides a portable Bicep Curl option
  • Can complement Pull-Ups, Chin-Ups, and Rows

Because resistance bands are lightweight and portable, they provide a practical way to directly train the biceps almost anywhere.

Muscles Worked in Resistance Band Bicep Curls

Resistance Band Bicep Curls primarily train the elbow flexors while your forearms and upper body help stabilize the movement.

Primary Muscles
  • Biceps Brachii
  • Brachialis
Secondary Muscles
  • Brachioradialis
  • Forearm Flexors
  • Forearm Stabilizers

Your core, shoulders, and upper back also contribute isometrically to maintaining a stable body position during standing curls.


How to Do Resistance Band Bicep Curls (Step-by-Step)

Step 1: Inspect Your Resistance Band

Before beginning, check your band for:

  • Cracks
  • Tears
  • Fraying
  • Damaged handles
  • Weak attachment points
  • Excessive wear

Do not train with a visibly damaged resistance band.

Step 2: Stand Securely on the Band

Place the middle of the resistance band underneath one or both feet, depending on the type of band and resistance you need.

Stand approximately hip-width apart.

Make sure the band is securely trapped underneath your feet and cannot unexpectedly slip free.

Hold one end or handle in each hand.

Step 3: Set Your Starting Position

Stand upright with your arms extended toward your sides.

Keep your:

  • Head neutral
  • Chest naturally upright
  • Shoulders relaxed
  • Core braced
  • Elbows close to your sides
  • Wrists neutral

There should ideally be some tension in the band at the bottom rather than a large amount of slack.

Step 4: Curl the Band Upward

Bend your elbows and curl your hands upward toward your shoulders.

Focus on moving primarily through your elbows.

As you curl:

  • Keep your upper arms relatively stationary
  • Keep your elbows near your torso
  • Avoid swinging your body
  • Maintain neutral wrists
  • Keep your shoulders controlled

The resistance should increase as the band stretches.

Step 5: Reach the Top Position

Continue curling until you reach the top of your comfortable range.

Contract your biceps while keeping your elbows controlled.

Avoid moving your elbows dramatically forward simply to bring your hands higher.

Tip: Focus on shortening the biceps rather than trying to make your hands physically touch your shoulders.

Step 6: Lower the Band Under Control

Slowly extend your elbows and allow your hands to return toward the starting position.

Resist the band rather than allowing it to rapidly pull your arms downward.

Maintain:

  • Stable torso
  • Controlled elbows
  • Neutral wrists
  • Smooth movement

Step 7: Reset and Repeat

Return to the starting position with your arms extended while maintaining control of the band.

Reset your posture and perform the next repetition.

Never suddenly release a stretched resistance band.

Warrior showcasing How to do Resistance Band Bicep Curls with proper form

Resistance Band Bicep Curl Form Checklist

Use this quick checklist to ensure proper Resistance Band Bicep Curl form.

  • Inspect the band before training
  • Secure the band underneath your feet
  • Stand upright
  • Brace your core
  • Keep your shoulders controlled
  • Keep your elbows near your sides
  • Maintain neutral wrists
  • Curl primarily through elbow flexion
  • Avoid swinging your torso
  • Contract your biceps at the top
  • Lower the band slowly
  • Maintain tension throughout the movement
  • Never suddenly release a stretched band

Controlled repetitions are more important than using the strongest resistance band you can handle.


Common Resistance Band Bicep Curl Mistakes

Using Too Much Resistance

Problem: An excessively strong band can cause you to swing your torso, move your elbows, shorten your range of motion, or lose control.

Fix: Choose a resistance that allows you to perform every repetition with controlled technique.

Using Too Little Tension

Problem: If the band is extremely loose at the starting position, the beginning of the curl may provide very little resistance.

Fix: Adjust your stance, shorten the usable band length, or use an appropriate band so there is useful tension through your intended range of motion.

Swinging the Torso

Problem: Leaning backward or using momentum turns the movement into a full-body motion rather than a controlled curl.

Fix: Brace your core, remain upright, and reduce the resistance if you cannot curl without swinging.

Moving the Elbows Forward

Problem: Allowing your elbows to travel substantially forward changes the movement and reduces the emphasis on strict elbow flexion.

Fix: Keep your upper arms relatively stationary and your elbows near your sides.

Bending the Wrists

Problem: Allowing your wrists to fold backward or forward creates unnecessary wrist movement.

Fix: Keep your wrists approximately neutral and aligned with your forearms.

Letting the Band Snap Down

Problem: Relaxing at the top and allowing the band to rapidly pull your hands downward removes control from the eccentric phase.

Fix: Actively resist the band as you lower your hands.

Standing on the Band Insecurely

Problem: If the band slips from beneath your feet while stretched, it can recoil unexpectedly.

Fix: Make sure the band is securely positioned beneath your feet before beginning every set and never use a damaged band.


Resistance Band Bicep Curl Variations

Resistance Band Bicep Curls can be modified to change your grip, body position, or training emphasis.

Single-Arm Resistance Band Bicep Curl

This variation allows you to train each arm independently.

How to Do a Single-Arm Resistance Band Bicep Curl

  • Secure one end of the band beneath your foot.
  • Hold the other end with one hand.
  • Keep your elbow near your side.
  • Curl your hand toward your shoulder.
  • Contract your biceps.
  • Lower under control.
  • Complete both sides evenly.

Resistance Band Hammer Curl

A neutral grip increases the involvement of the brachialis and brachioradialis.

How to Do a Resistance Band Hammer Curl

  • Stand securely on the resistance band.
  • Hold the handles with your palms facing inward.
  • Keep your elbows near your sides.
  • Curl your hands upward.
  • Maintain the neutral grip.
  • Lower under control.

Seated Resistance Band Bicep Curl

Sitting can provide another stable position for performing Band Curls.

How to Do a Seated Resistance Band Bicep Curl

  • Sit upright on a sturdy bench or chair.
  • Secure the band underneath your feet.
  • Hold the band in both hands.
  • Keep your upper arms controlled.
  • Curl your hands upward.
  • Lower slowly to the starting position.

Resistance Band Concentration Curl

This variation trains one arm at a time with additional upper-arm support.

How to Do a Resistance Band Concentration Curl

  • Sit on a stable chair or bench.
  • Secure the band beneath one foot.
  • Hold the band with the hand on the same side.
  • Position your upper arm against the inside of your thigh.
  • Curl your hand upward.
  • Contract your biceps.
  • Lower under control.

High-Tension Resistance Band Bicep Curl

A stronger band or shorter effective band length increases resistance for more advanced trainees.

How to Do a High-Tension Resistance Band Bicep Curl

  • Choose an appropriate heavier resistance band.
  • Secure it firmly beneath your feet.
  • Maintain an upright posture.
  • Curl without swinging your torso.
  • Contract your biceps at the top.
  • Control the band throughout the descent.

Only increase resistance when you can maintain strict form throughout your current variation.


Final Thoughts

Resistance Band Bicep Curls are a simple and effective way to directly train your biceps without requiring dumbbells, barbells, or gym machines.

They develop:

  • Biceps strength
  • Arm muscular development
  • Elbow-flexion strength
  • Forearm strength
  • Muscular control
  • Resistance-band proficiency

The key is treating the resistance band like real strength-training equipment rather than simply pulling it as quickly as possible.

Secure the band properly, keep your elbows controlled, curl without swinging, and resist the band throughout the lowering phase.

As you become stronger, progressively increase the resistance while keeping your technique strict. Learn more about Pull Workouts here.

Essential Gear for Resistance Band Bicep Curls

Resistance Band Bicep Curls require only basic equipment, although several band options can make your training more versatile.

  • Resistance Bands: The essential equipment for the exercise. Using several resistance levels allows you to progressively increase difficulty as your biceps become stronger.
  • Resistance Band Handles: Provide a comfortable and secure grip when using compatible tube-style resistance bands.
  • Door Anchor: Allows compatible resistance bands to be anchored at different heights for additional Bicep Curl variations. Always use it according to the manufacturer’s instructions with a secure door and setup.
  • Gym Gloves or Chalk: Optional for improving grip if sweaty hands make it difficult to securely hold your resistance band or handles.

Resistance Band Bicep Curl FAQ

Q1: Are Resistance Band Bicep Curls as effective as dumbbell curls?
Both can effectively train the biceps, but they provide different resistance profiles. Dumbbells provide resistance through gravity, while bands generally increase resistance as they stretch. Either can be useful when resistance and training volume are appropriately progressed.

Q2: How many Resistance Band Bicep Curls should beginners do?
Beginners can start with approximately 8-15 controlled repetitions for 2-3 sets using a band that allows proper technique. Increase the resistance progressively as those repetitions become comfortably manageable.

Q3: Should my elbows move during Resistance Band Bicep Curls?
Your elbows should remain relatively close to your sides during strict Band Bicep Curls. Small natural movement can occur, but avoid deliberately driving your elbows substantially forward to complete each repetition.


Best Weighted Vests for Calisthenics & Home Workouts (2026)

Once bodyweight exercises become easier, doing more and more reps is not always the answer.

You can make the exercise harder instead.

⇛ That’s where a weighted vest becomes one of the most useful pieces of equipment for calisthenics.

Wear it during exercises you already perform and your body now has additional resistance to move.

Weighted:

  • Push-ups
  • Pull-ups
  • Dips
  • Squats
  • Lunges
  • Step-ups

But there’s a problem:

Not every weighted vest gives you the same progression.

Some offer relatively light loading.

Others can be progressively loaded to seriously heavy resistance.

And some don’t include weights at all—you fill them yourself.

This guide keeps things simple.


Quick Answer (Don’t Overthink It)

⇛ Want the best overall weighted vest?
Go for the 15–50KG Adjustable Weighted Vest.

Its biggest advantage is progression. Multiple maximum-load configurations are available, and the listing also offers compatible steel weights, giving you a more complete weighted-training setup.

⇛ Want a cheaper and simpler option?
Go for the 1–110LBS Adjustable Weighted Vest.

It comes in several load configurations and gives you plenty of room to progress without going straight for the heavier premium option.

⇛ Want something completely different?
Check out the Custom-Fill Weighted Vest in the Worthy Mention section.

Instead of relying on proprietary plates, its compartments can be filled with materials such as sand or steel ball bearings.


Why a Weighted Vest Is a Game-Changer

Calisthenics begins with your own bodyweight.

But eventually, your body adapts.

You might go from struggling with five push-ups to comfortably performing twenty.

Or from your first pull-up to sets of ten.

At that point, you have two choices:

Do more reps…

Or make each rep harder.

⇛ A weighted vest gives you the second option.

Because the load sits around your torso, you can add resistance while keeping your hands free.

That makes weighted vests useful for:

  • Weighted pull-ups
  • Weighted chin-ups
  • Weighted dips
  • Weighted push-ups
  • Squats
  • Lunges
  • Step-ups
  • Walking
  • General conditioning

Instead of abandoning the exercises that built your strength, you can continue progressing them.


1. 15–50KG Adjustable Weighted Vest (Best Overall)

Key Features:

  • Adjustable weighted-vest design
  • Multiple maximum-load options
  • 15KG, 20KG, 35KG, and 50KG configurations shown
  • Multiple weight pockets around the torso
  • Oxford-cloth construction
  • Compatible steel weights available from the same listing
  • Designed for progressive resistance training

Why This One Wins:

This is the strongest overall choice of the three for one major reason:

⇛ Long-term progression.

You’re not buying a vest that becomes useless as soon as you outgrow a light resistance level.

The listing offers versions designed around maximum loads of:

  • 15KG
  • 20KG
  • 35KG
  • 50KG

That gives beginners, intermediates, and advanced athletes different options depending on how far they want to take weighted training.

Even better, Product 1 also sells the steel weights designed for the vest.

That matters.

You don’t necessarily have to source your own filler or improvise weights. You can buy the vest and compatible steel loading pieces from the same product listing.

For someone who plans on progressively adding resistance to calisthenics exercises over the long term, Product 1 makes the most sense.

Best For:

  • Weighted calisthenics
  • Pull-ups
  • Chin-ups
  • Dips
  • Push-ups
  • Squats and lunges
  • Progressive overload
  • Intermediate and advanced trainees
  • Long-term home training

Pros:

✓ Very high maximum loading options
✓ Several configurations available
✓ Steel weights available separately
✓ Excellent progression potential
✓ Weight distributed through multiple pockets
✓ Suitable for much more than one exercise

Cons:

❌ Heavier configurations may be unnecessary for beginners
❌ Total cost increases as you add more weight
❌ Heavy loading requires a strong strength foundation and controlled progression

Best Weighted Vest for Calisthenics(First)

2. 1–110LBS Adjustable Weighted Vest (Best Value)

Key Features:

  • Adjustable loading system
  • Multiple weight configurations
  • 1–3KG option shown
  • 1–15KG option shown
  • 1–20KG option shown
  • 1–35KG option shown
  • Polyester construction
  • Adjustable fit around the torso
  • Compact weighted-vest design

Why Choose This:

Not everyone needs a vest capable of going all the way to 50KG.

For many home trainees, Product 2 offers the more practical entry point.

The listing provides multiple configurations, meaning you can choose something appropriate for your current training instead of immediately buying the heaviest possible setup.

That makes it particularly useful if you’re moving from:

Bodyweight training → weighted calisthenics.

Start conservatively.

Build strength.

Then gradually increase the resistance.

Its design also keeps the weight close to the torso, which is exactly what you want from a basic weighted vest.

Best For:

  • Beginners to weighted calisthenics
  • Push-ups
  • Pull-ups
  • Dips
  • Squats
  • Lunges
  • Walking
  • General home fitness

Pros:

✓ Multiple loading configurations
✓ Beginner-friendly options available
✓ Adjustable design
✓ Compact construction
✓ Good progression range
✓ Lower barrier to weighted training

Cons:

❌ Lower maximum practical progression than Product 1 depending on the selected version
❌ You need to carefully check which weight configuration you’re ordering

Best Weighted Vest for Calisthenics(Second)

Worthy Mention – Custom-Fill Weighted Vest

This one doesn’t take the #1 or #2 position.

But it was too different to leave out.

What Makes It Different?

Unlike the two conventional adjustable weighted vests above, this design lets you add your own filling material to create the resistance.

The vest can be filled using materials such as:

  • Sand
  • Steel ball bearings

This gives it a completely different appeal.

Instead of buying a conventional plate-loading system, you can determine the load through the material placed inside its compartments.

Key Features:

  • Custom-fill design
  • Fillable weight compartments
  • Can use sand or steel ball bearings
  • Adjustable fit
  • Compact torso design
  • Suitable for running and general training
  • Distinctive open-sided shape

Why It Earns a Worthy Mention:

⇛ Flexibility.

If you already have access to suitable filling material, this design gives you an unusual amount of freedom.

Want inexpensive resistance?

Sand can make sense.

Want more weight without requiring as much volume?

Steel ball bearings are considerably denser.

The open-sided design is also noticeably different from Products 1 and 2, making this an interesting alternative for someone who doesn’t want the traditional pocket-covered weighted vest.

But there is an important trade-off:

⇛ You are responsible for the loading system.

The filler needs to be securely contained and distributed evenly. Loose or poorly secured material can shift during movement and make training uncomfortable or unpredictable.

For that reason, I wouldn’t rank it above Products 1 and 2 for most people.

But as an alternative?

It absolutely deserves a place here.

Pros:

✓ Custom-fillable
✓ Can use sand or steel ball bearings
✓ Unusual and versatile design
✓ Adjustable fit
✓ Doesn’t lock you into one proprietary weight system

Cons:

❌ Filler must be sourced separately
❌ Loading is less convenient than dedicated removable weights
❌ Poorly distributed filler may shift during exercise

Best Weighted Vest for Calisthenics(Third)

Comparison – Choose Your Arsenal

Feature15–50KG Vest1–110LBS VestCustom-Fill Vest
WBA PickBest OverallBest ValueWorthy Mention
Loading StyleRemovable weightsAdjustable loadingUser-filled
Listed Range/OptionsUp to 50KGMultiple options up to 35KG shownDepends on filler
Steel Weights AvailableYesVaries by optionUse your own
Beginner FriendlyYes, with lighter loadingExcellentModerate
Advanced PotentialExcellentHighDepends on loading
ConvenienceHighHighModerate
Best ForLong-term progressionMost home traineesDIY/custom loading

How to Start Training With a Weighted Vest

The biggest mistake you can make is buying a heavy vest and immediately trying to prove how much weight you can handle.

Don’t.

If you can already perform an exercise confidently with your bodyweight, begin with a relatively small additional load.

For example, use your vest with:

⇛ Keep your normal technique.

⇛ Add weight gradually.

⇛ Increase resistance only when you can control your current load.

The goal isn’t simply to wear the heaviest vest possible.

The goal is to make your exercises progressively harder without destroying your form.


Before You Buy

Pay particular attention to the variation you select.

Weighted-vest listings often contain several versions under one product page, and the headline maximum weight doesn’t necessarily mean every option includes that amount of resistance.

Before ordering, check:

  • Which vest configuration you’ve selected
  • Whether weights are included or sold separately
  • Maximum supported load
  • Number and position of weight pockets
  • How the vest adjusts around your torso
  • Whether replacement/additional weights are available
  • Current product price and shipping cost

For Product 1 specifically, the availability of separate steel weights is a major advantage—but make sure you’re selecting the vest, weights, or combination you actually intend to buy before checkout.


Weighted Vest Safety

Weighted training rewards patience.

A weighted vest changes the resistance your muscles and joints have to control, so don’t jump straight from bodyweight exercises to extremely heavy loading.

Use a load that allows you to maintain:

  • Controlled repetitions
  • Stable posture
  • Full-body tension
  • Proper exercise technique
  • A comfortable, secure vest fit

If the vest is bouncing, shifting excessively, changing your technique, or forcing you into sloppy repetitions, reduce the load.

And don’t assume that because a vest can theoretically hold 35KG or 50KG, you should actually train with that much.

⇛ Capacity is not a recommendation.

Earn the heavier loads gradually.


Final Verdict

⇛ Want the best weighted vest for serious long-term progression?
Go for Product 1 – 15–50KG Adjustable Weighted Vest.

The multiple maximum-load configurations and availability of matching steel weights make it the strongest overall choice.

⇛ Want the best value and a more accessible starting point?
Go for Product 2 – 1–110LBS Adjustable Weighted Vest.

Its multiple configurations make it especially attractive for someone beginning weighted calisthenics.

⇛ Want to build your own loading setup?
Consider the Custom-Fill Weighted Vest – Worthy Mention.

Its sand/steel-ball filling system makes it genuinely different from the other two.


Final Words

Eventually, bodyweight gets easier.

That’s a victory.

But it also means it’s time to progress.

You don’t need to abandon calisthenics.

You can make calisthenics harder.

Add resistance.

Keep your form.

Progress gradually.

And turn the same fundamental exercises into a new challenge.

Affiliate Disclosure: WarriorBodyAcademy may earn a commission when you purchase through affiliate links in this article, at no extra cost to you. We only recommend products that we believe are useful for our readers and training community.


How to Do Inchworms Correctly: Step-by-Step Guide for Beginners

Learn how to do Inchworms with proper form, avoid common mistakes, and discover useful variations for improving mobility, core stability, shoulder strength, and full-body coordination.

Inchworms are a dynamic bodyweight exercise that combines a standing forward fold, hand walkout, high plank, and return to standing. This combination makes them particularly useful during warm-ups because they move multiple joints while engaging both the upper and lower body.

They require no specialized equipment and can be performed almost anywhere with enough floor space.


What Are Inchworms?

Inchworms are a dynamic full-body exercise performed by bending forward from a standing position, placing your hands on the floor, walking them forward into a high plank, and then reversing the movement or walking your feet toward your hands.

The movement gets its name from the crawling motion of an inchworm.

Unlike a static stretch, Inchworms continuously move your body through several positions. They combine mobility with active muscular control, making them useful before many types of training.

Inchworms are commonly used in:

  • Dynamic warm-ups
  • Calisthenics training
  • Full-body workouts
  • Mobility routines
  • Athletic conditioning
  • Circuit training
  • Home workouts

They can also be modified according to your hamstring mobility, core strength, and training experience.

Benefits of Inchworms

Inchworms provide several mobility, stability, and full-body training benefits.

Benefits include:

  • Dynamically stretches the hamstrings
  • Develops core stability
  • Strengthens the shoulders
  • Trains the arms
  • Improves full-body coordination
  • Moves the hips and shoulders through useful ranges of motion
  • Reinforces the high-plank position
  • Raises general activity before training
  • Requires no specialized equipment

Because Inchworms combine movement and muscular engagement, they are particularly useful when you want a dynamic exercise rather than a prolonged static stretch before training.

Muscles Worked in Inchworms

Inchworms involve several muscle groups as you transition between standing, forward-fold, and plank positions.

Primary Muscles
  • Core Muscles
  • Anterior Deltoids
  • Triceps
  • Hamstrings
Secondary Muscles
  • Pectoralis Major
  • Serratus Anterior
  • Glutes
  • Quadriceps
  • Calves
  • Hip Flexors
  • Forearms

The hamstrings are primarily lengthened during the forward-fold portions, while your shoulders, arms, and core work actively as your hands travel toward and away from the plank position.


How to Do Inchworms (Step-by-Step)

Step 1: Stand Upright

Begin standing with your feet approximately hip-width apart.

Keep your:

  • Head neutral
  • Shoulders relaxed
  • Core lightly engaged
  • Feet firmly planted
  • Knees straight or softly bent

Make sure you have enough open floor space in front of you.

Step 2: Hinge Forward

Push your hips backward and fold your torso toward the floor.

Reach your hands toward the ground in front of your feet.

Maintain control throughout the movement.

If your hamstring mobility prevents you from reaching the floor comfortably, bend your knees slightly rather than forcing the stretch.

Step 3: Place Your Hands on the Floor

Place both palms firmly on the floor in front of your feet.

Keep your:

  • Fingers spread naturally
  • Hands stable
  • Shoulders controlled
  • Knees softly bent if necessary

Shift enough weight toward your hands to begin walking them forward.

Step 4: Walk Your Hands Forward

Take small alternating steps with your hands while keeping your feet in place.

Continue walking your hands away from your feet as your body lengthens toward the floor.

Keep your movement controlled rather than rushing toward the plank.

Step 5: Reach a High Plank

Continue until your body reaches a strong high-plank position.

Your hands should be approximately underneath your shoulders.

Keep your:

  • Arms straight
  • Core braced
  • Glutes engaged
  • Hips controlled
  • Legs extended
  • Head neutral

Your body should form approximately a straight line from your head to your heels.

Avoid walking your hands so far forward that your lower back begins to sag.

Step 6: Return Toward Your Feet

From the plank, walk your hands backward toward your feet using small controlled steps.

As your hands approach your feet, allow your hips to rise.

Keep your feet planted while returning to the forward-fold position.

Alternatively, some Inchworm variations keep the hands stationary and walk the feet toward the hands.

Step 7: Return to Standing

Once your hands are close to your feet, gradually lift your torso and return to an upright position.

Reset your posture before beginning the next repetition.

Perform each repetition smoothly rather than trying to complete the movement as quickly as possible.

Warrior showcasing How to do Inchworms with proper form

Inchworms Form Checklist

Use this quick checklist to ensure proper Inchworm form.

  • Start from a stable standing position
  • Hinge forward under control
  • Bend your knees slightly if necessary
  • Place your palms firmly on the floor
  • Walk your hands using small controlled steps
  • Keep your shoulders stable
  • Brace your core
  • Reach a strong high plank
  • Keep your hips from sagging
  • Keep your head neutral
  • Reverse the movement under control
  • Breathe naturally
  • Avoid rushing the exercise

Every repetition should move smoothly between the standing, fold, and plank positions.


Common Inchworms Mistakes

Forcing Straight Knees

Problem: Trying to keep your knees completely straight despite limited hamstring mobility can make it difficult to reach the floor comfortably and may cause you to compensate elsewhere.

Fix: Use a slight knee bend when necessary and gradually work on your mobility rather than forcing the position.

Letting the Hips Sag in the Plank

Problem: Allowing your hips to drop can cause your lower back to excessively extend and reduces your ability to maintain a strong plank.

Fix: Brace your core and squeeze your glutes as you reach the high-plank position.

Walking the Hands Too Far Forward

Problem: Continuing beyond a strong plank position increases the demand on your shoulders and core and may cause your torso to sag.

Fix: For the standard Inchworm, stop when you reach a controlled high plank with your hands approximately beneath your shoulders.

Rushing the Movement

Problem: Moving your hands quickly and carelessly reduces control and can make it difficult to maintain proper positions.

Fix: Use deliberate hand steps and maintain control throughout every phase.

Dropping Into the Forward Fold

Problem: Suddenly collapsing your torso toward the floor removes control from the movement.

Fix: Fold forward gradually and bend your knees slightly when your mobility requires it.

Shrugging the Shoulders

Problem: Allowing your shoulders to collapse toward your ears can create unnecessary upper-body tension during the hand walkout.

Fix: Maintain active, controlled shoulders while supporting your bodyweight.

Holding Your Breath

Problem: Holding your breath unnecessarily can make the movement feel more difficult and tense.

Fix: Breathe naturally throughout the entire repetition.


Inchworm Variations

Inchworms can be modified to change their difficulty or add additional exercises to the movement.

Short-Range Inchworm

A beginner-friendly variation that reduces the distance of the hand walkout.

How to Do a Short-Range Inchworm

  • Stand upright.
  • Fold forward and place your hands on the floor.
  • Walk your hands forward a manageable distance.
  • Stop before your form begins breaking down.
  • Walk your hands back.
  • Return to standing.

Gradually increase your range as your mobility and strength improve.

Inchworm to Push-Up

This variation adds an upper-body strength exercise at the end of each walkout.

How to Do an Inchworm to Push-Up

  • Perform an Inchworm until you reach a high plank.
  • Brace your core.
  • Perform one controlled Push-Up.
  • Return to the high plank.
  • Walk your hands back toward your feet.
  • Return to standing.

Inchworm With Feet Walk-In

Instead of walking your hands back, this variation moves your feet toward your hands.

How to Do an Inchworm With Feet Walk-In

  • Fold forward and place your hands on the floor.
  • Walk your hands forward into a high plank.
  • Keep your hands planted.
  • Take small steps forward with your feet.
  • Raise your hips as your feet approach your hands.
  • Repeat the sequence to travel forward.

Inchworm to Downward Dog

This variation adds an additional mobility position after reaching the plank.

How to Do an Inchworm to Downward Dog

  • Walk your hands forward into a high plank.
  • Push your hips upward and backward.
  • Allow your torso to move toward your thighs.
  • Hold briefly without forcing your heels toward the floor.
  • Return to the high plank.
  • Complete the Inchworm.

Inchworm to Shoulder Tap

This variation increases the core-stability demand.

How to Do an Inchworm to Shoulder Tap

  • Walk your hands forward into a high plank.
  • Brace your core and keep your hips level.
  • Lift one hand and tap the opposite shoulder.
  • Return your hand to the floor.
  • Repeat with the opposite hand.
  • Walk your hands back and return to standing.

Final Thoughts

Inchworms are a simple full-body exercise that combines dynamic mobility with active shoulder, arm, and core engagement.

They develop or improve:

  • Dynamic hamstring mobility
  • Core stability
  • Shoulder strength
  • Upper-body control
  • Plank stability
  • Full-body coordination
  • Movement preparation

Their combination of mobility and muscular engagement makes them particularly useful in dynamic warm-ups before calisthenics, strength training, running, and other athletic activities.

Move through every stage under control, bend your knees when your mobility requires it, and focus on reaching a strong plank rather than walking your hands as far forward as possible. Learn more about Stretching Here.

Essential Gear for Inchworms

Inchworms require no equipment, but a few simple items can make the exercise more comfortable or provide additional progression options.

  • Exercise Mat: Provides a comfortable, non-slip surface for your hands and feet during the walkout.
  • Push-Up Handles: Can provide a more neutral wrist position for Inchworm variations when they are stable enough to be repositioned safely between movements.
  • Weighted Vest: Can increase the difficulty for advanced trainees, although standard bodyweight Inchworms should be mastered first.

Inchworms FAQ

Q1: Are Inchworms a stretch or an exercise?
They can serve as both a dynamic mobility drill and a bodyweight exercise. The forward fold dynamically stretches the posterior legs, while the hand walkout and plank require active upper-body and core strength.

Q2: Should my legs stay completely straight during Inchworms?
Not necessarily. Keep your legs as straight as is comfortable, but use a slight knee bend if needed to reach the floor without forcing your hamstrings or compromising your movement.

Q3: How many Inchworms should beginners do?
Beginners can start with around 5-8 controlled repetitions. When using them as part of a warm-up, focus on movement quality rather than performing a large number of repetitions.