
Learn how to do Band-Assisted Pull-Ups with proper form, avoid common mistakes, and use resistance bands effectively to build the strength needed for unassisted Pull-Ups.
Band-Assisted Pull-Ups are one of the best Pull-Up progressions for beginners. A resistance band supports part of your bodyweight, letting you practice the full pulling movement while gradually building your back, biceps, grip, and upper-body pulling strength.
Whether you’re working toward your first Pull-Up or trying to increase your number of strict repetitions, Band-Assisted Pull-Ups can help bridge the gap between easier Pull-Up progressions and full bodyweight Pull-Ups.
What Are Band-Assisted Pull-Ups?
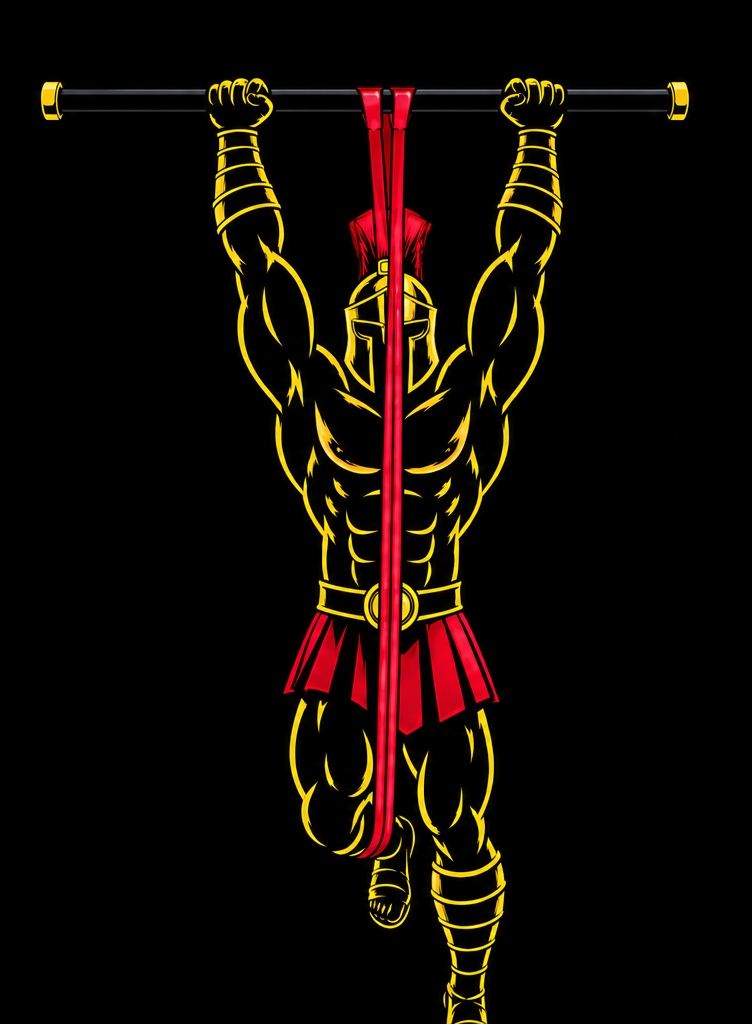
Band-Assisted Pull-Ups are a Pull-Up variation performed with a resistance band attached to a Pull-Up bar. The band stretches as you descend and provides upward assistance as you pull yourself toward the bar.
This reduces the amount of bodyweight you have to lift while allowing you to practice a movement pattern similar to a regular Pull-Up.
Band-Assisted Pull-Ups are commonly used in:
- Beginner calisthenics training
- Pull-Up progression programs
- Home workouts
- Strength training
- Upper-body workouts
- High-repetition Pull-Up training
Different band resistance levels allow you to adjust the amount of assistance according to your current strength.
Benefits of Band-Assisted Pull-Ups
Band-Assisted Pull-Ups offer several benefits for beginners and anyone working to improve their Pull-Ups.
Benefits include:
- Builds back strength
- Strengthens the biceps
- Develops grip strength
- Helps beginners learn Pull-Up technique
- Allows practice through a full range of motion
- Makes Pull-Ups accessible at lower strength levels
- Helps build pulling endurance
- Provides adjustable assistance
- Helps bridge the gap toward unassisted Pull-Ups
As you become stronger, you can gradually use lighter resistance bands until you no longer need assistance.
Muscles Worked in Band-Assisted Pull-Ups
Band-Assisted Pull-Ups train essentially the same major muscle groups as regular Pull-Ups, although the resistance band reduces the amount of load you must lift.
Primary Muscles
- Latissimus Dorsi
- Biceps Brachii
- Brachialis
- Brachioradialis
Secondary Muscles
- Trapezius
- Rhomboids
- Rear Deltoids
- Forearms
- Core Muscles
Your abdominals, obliques, and other stabilizing muscles also help control your body and reduce unnecessary swinging.
How to Do Band-Assisted Pull-Ups (Step-by-Step)
Step 1: Attach the Resistance Band
Loop a suitable resistance band securely around the center of a stable Pull-Up bar.
Pull one end of the band through the other to create a secure loop.
Before starting:
- Check the band for cracks, tears, or excessive wear
- Make sure it is securely attached
- Confirm the Pull-Up bar is stable
- Choose an appropriate resistance level
Never use a visibly damaged resistance band.
Step 2: Position Yourself in the Band
Carefully place one foot or knee into the hanging loop of the resistance band, depending on the band setup and your preference.
Keep the band centered and controlled.
Avoid twisting the band unnecessarily.
Tip: Be especially careful when entering and exiting a stretched resistance band. Maintain control so the band does not snap back toward you.
Step 3: Grip the Pull-Up Bar
Grip the bar slightly wider than shoulder-width apart with your palms facing away from you.
Start from a controlled hanging position.
Maintain:
- Firm grip
- Straight arms
- Engaged shoulders
- Tight core
- Controlled legs
Avoid beginning the repetition with excessive swinging.
Step 4: Initiate the Pull
Begin by drawing your shoulder blades down and back slightly before bending your elbows.
Then pull your body upward.
Think about driving your elbows down toward your sides rather than simply trying to bring your chin over the bar.
Step 5: Pull Yourself Toward the Bar
Continue pulling until your chin reaches or passes the height of the bar.
At the top:
- Keep your chest controlled
- Keep your shoulders active
- Maintain core tension
- Avoid excessive kicking
- Keep the band stable
Do not crane your neck simply to get your chin over the bar.
Step 6: Lower Yourself Under Control
Slowly extend your elbows and lower yourself toward the starting position.
Continue descending until your arms reach full extension while maintaining active shoulder control.
Avoid simply dropping into the bottom position.
Pause briefly and repeat for the desired number of repetitions.
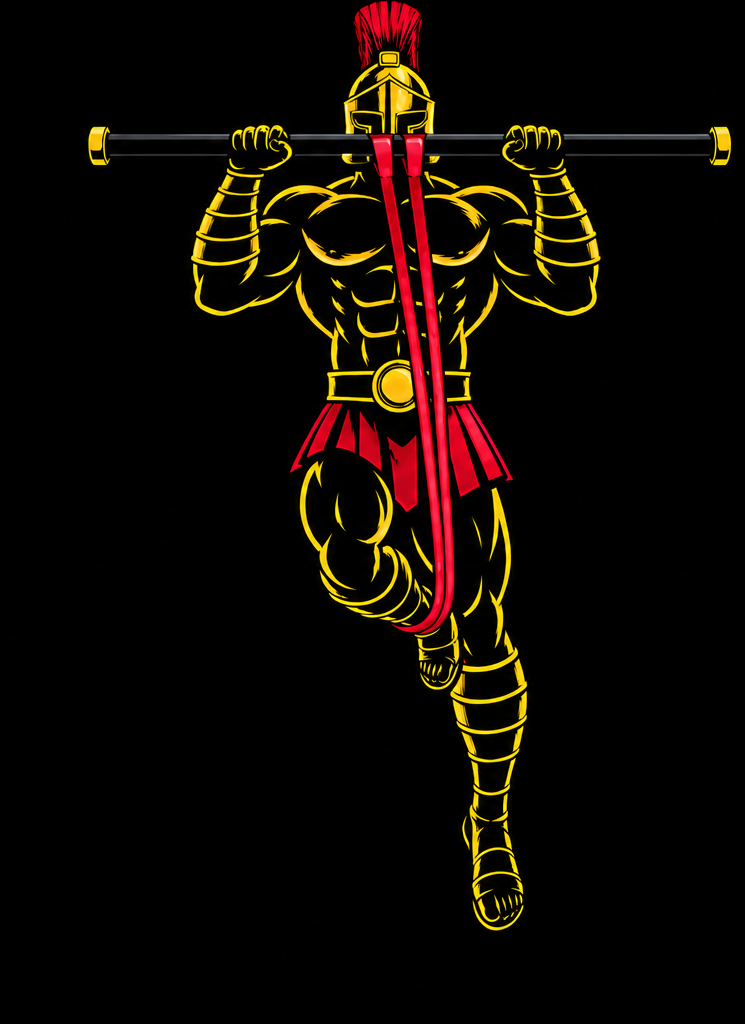
Band-Assisted Pull-Up Form Checklist
Use this quick checklist to ensure proper Band-Assisted Pull-Up form.
- Secure the resistance band properly
- Check the band for damage before training
- Grip the bar firmly
- Start from a controlled hang
- Keep your core engaged
- Initiate the pull with your back and shoulders
- Drive your elbows downward
- Avoid excessive swinging
- Bring your chin to bar height without craning your neck
- Lower yourself under control
- Use a full, comfortable range of motion
Treat assisted repetitions like strict Pull-Ups rather than allowing the band to bounce you through the movement.
Common Band-Assisted Pull-Up Mistakes
Using Too Much Band Assistance
Problem:An excessively strong band can make the exercise too easy and reduce the amount of strength you need to produce.
Fix: Choose a band that provides enough assistance to perform clean repetitions while still making the set challenging.
Using Too Little Assistance
Problem: A band that provides insufficient assistance may cause you to compensate with swinging, kicking, or partial repetitions.
Fix: Use a slightly stronger band until you can complete controlled repetitions through a full comfortable range of motion.
Bouncing Out of the Bottom
Problem: Allowing the stretched band to rapidly launch you upward reduces muscular control.
Fix: Pause briefly at the bottom and initiate each repetition deliberately.
Swinging the Body
Problem: Kicking and swinging create momentum that reduces the amount of work performed by your pulling muscles.
Fix: Brace your core, control your legs, and perform each repetition without unnecessary momentum.
Performing Partial Repetitions
Problem: Only training the easiest portion of the movement can limit your development through the full Pull-Up range.
Fix: Use enough assistance to perform controlled repetitions from the bottom position to chin height.
Dropping Too Quickly
Problem: Falling rapidly into the bottom position reduces control and wastes the strength-building potential of the lowering phase.
Fix: Lower yourself slowly until your arms are extended before beginning the next repetition.
Using a Damaged Resistance Band
Problem: Resistance bands can weaken over time, and damaged bands may break when stretched.
Fix: Inspect your band before every workout and replace it if you notice cracks, tears, thinning, or other significant damage.
Band-Assisted Pull-Up Variations
Band assistance can be used with several Pull-Up variations depending on your goals and current strength.
Heavy Band-Assisted Pull-Ups
A beginner-friendly version that provides greater assistance.
How to Do Heavy Band-Assisted Pull-Ups
- Attach a strong resistance band to the bar.
- Place your foot or knee securely in the band.
- Grip the bar slightly wider than shoulder-width.
- Pull yourself toward the bar.
- Lower yourself under control.
Use this variation when you’re still developing basic Pull-Up strength.
Light Band-Assisted Pull-Ups
A more advanced progression toward unassisted Pull-Ups.
How to Do Light Band-Assisted Pull-Ups
- Attach a lighter resistance band to the bar.
- Position yourself securely in the band.
- Perform strict Pull-Ups.
- Avoid using momentum.
- Control both the upward and downward phases.
Progress to lighter bands as your pulling strength improves.
Band-Assisted Chin-Ups
Uses an underhand grip to place greater emphasis on the biceps.
How to Do Band-Assisted Chin-Ups
- Secure the resistance band to the bar.
- Grip the bar with your palms facing you.
- Keep your core tight.
- Pull your chin toward the bar.
- Lower yourself slowly to the starting position.
Band-Assisted Neutral-Grip Pull-Ups
A useful alternative when a neutral-grip bar is available.
How to Do Band-Assisted Neutral-Grip Pull-Ups
- Attach the band securely.
- Grip the parallel handles with your palms facing each other.
- Pull your body upward.
- Bring your chin toward the handle height.
- Lower yourself under control.
Tempo Band-Assisted Pull-Ups
Slows the movement to increase muscular control.
How to Do Tempo Band-Assisted Pull-Ups
- Set up for a normal Band-Assisted Pull-Up.
- Pull yourself upward under control.
- Pause briefly at the top.
- Lower yourself slowly for 3-5 seconds.
- Repeat without bouncing from the bottom.
Final Thoughts
Band-Assisted Pull-Ups are one of the most useful progressions for anyone working toward stronger, cleaner, and eventually unassisted Pull-Ups.
They develop:
- Back strength
- Biceps strength
- Grip strength
- Pulling endurance
- Pull-Up technique
- Upper-body control
The key is to treat the resistance band as assistance rather than allowing it to do most of the work.
Start with enough resistance to perform clean repetitions. As you become stronger, progressively move to lighter bands while maintaining the same strict technique. You can then begin combining assisted repetitions with Dead Hangs, Scapular Pull-Ups, Negative Pull-Ups, and attempts at unassisted Pull-Ups.
Use less assistance as you get stronger, and eventually the band becomes unnecessary. Learn more about Pull Workouts here.
Essential Gear for Band-Assisted Pull-Ups
Band-Assisted Pull-Ups require only a few pieces of equipment.
- Pull-Up Bar: Provides the stable overhead anchor and gripping surface required to perform the exercise.
- Resistance Bands: Provide adjustable assistance. Having multiple resistance levels makes it easier to progressively reduce assistance as you become stronger.
- Gymnastics Rings: An optional alternative that allows assisted pulling exercises with freely rotating handles.
- Gym Chalk: Can improve grip when your hands become sweaty during Pull-Up training.
- Wrist Wraps: Protect the wrists during long sets while not sacrificing grip strength development.
Band-Assisted Pull-Up FAQ
Q1: What resistance band should I use for Band-Assisted Pull-Ups?
Use a band that provides enough assistance for you to perform clean repetitions through a full, comfortable range of motion without excessive swinging or kicking.
Q2: How many Band-Assisted Pull-Ups should beginners do?
Beginners can start with approximately 5-8 controlled repetitions for 2-4 sets using enough assistance to maintain proper form throughout each set.
Q3: Should I put my foot or knee in the resistance band?
Either setup can work depending on the type and length of your band. The most important factors are that the band remains secure, you can control your body, and you can safely enter and exit the setup.