How to Do a Biceps Stretch Correctly: Step-by-Step Guide for Beginners

Learn how to do a Biceps Stretch with proper form, avoid common mistakes, and discover useful variations for improving flexibility through the front of your upper arms and shoulders.

The Biceps Stretch is a simple upper-body stretch that lengthens the biceps by combining elbow extension with an appropriate shoulder position. It can be particularly useful after Pull-Ups, Chin-Ups, Rows, Bicep Curls, and other exercises that heavily involve the elbow flexors.

No specialized equipment is required for the basic stretch, making it easy to include in post-workout stretching or a dedicated flexibility routine.


What Is a Biceps Stretch?

A Biceps Stretch is an upper-body flexibility exercise primarily designed to stretch the biceps brachii at the front of the upper arm.

Because the biceps crosses both the elbow and shoulder joints, positioning the arm behind the body while keeping the elbow straight can place the muscle in a lengthened position.

One common standing version involves extending one arm behind you, straightening the elbow, and using a wall or other stable surface for support while gently rotating your body away.

Biceps Stretches are commonly used in:

  • Post-workout stretching
  • Upper-body flexibility routines
  • Pull-day cool-downs
  • Calisthenics training
  • Strength-training programs
  • General mobility routines

The movement should produce a gentle stretch rather than pain in the shoulder or elbow.

Benefits of the Biceps Stretch

The Biceps Stretch provides several flexibility and mobility benefits when performed with control.

Benefits include:

  • Stretches the biceps
  • Improves or maintains upper-arm flexibility
  • Can reduce the feeling of muscular tightness
  • Encourages comfortable shoulder extension
  • Complements pulling and arm exercises
  • Requires little or no equipment
  • Can be performed almost anywhere
  • Fits easily into post-workout stretching routines

Static Biceps Stretches are generally better suited to your cool-down or a separate flexibility session than immediately before demanding pulling or strength exercises.

Muscles Stretched During the Biceps Stretch

The Biceps Stretch primarily targets muscles along the front of the upper arm, although the exact sensation depends on the variation and your individual mobility.

Primary Muscles
  • Biceps Brachii
  • Long Head of the Biceps
  • Short Head of the Biceps
Secondary Muscles
  • Brachialis
  • Anterior Deltoid
  • Pectoralis Major
  • Pectoralis Minor
  • Forearm Flexors

Some variations may create a noticeable stretch through the chest and front of the shoulder as well as the biceps.


How to Do a Biceps Stretch (Step-by-Step)

Step 1: Stand Upright

Begin standing next to a wall or another stable vertical surface.

Keep your:

  • Head neutral
  • Chest naturally upright
  • Shoulders relaxed
  • Core lightly engaged
  • Spine neutral

Position yourself close enough to comfortably place one hand against the surface.

Step 2: Extend One Arm Behind You

Move one arm slightly behind your torso.

Straighten your elbow without aggressively locking the joint.

Keep your shoulder controlled rather than allowing it to shrug upward.

Step 3: Place Your Hand on the Wall

Place your palm against the wall with your arm extended.

Depending on your mobility and comfort, your fingers can point backward, downward, or into another comfortable position that allows you to maintain the stretch without wrist discomfort.

Keep your palm in controlled contact with the surface.

Step 4: Gently Rotate Away

Slowly rotate your torso away from the extended arm.

Move only until you feel a gentle stretch through the front of your upper arm and possibly the front of your shoulder or chest.

Maintain:

  • Straight elbow
  • Relaxed shoulder
  • Upright posture
  • Controlled breathing
  • Gentle stretch intensity

Do not aggressively twist your torso to increase the stretch.

Step 5: Hold the Stretch

Hold the position for approximately 15-30 seconds.

Breathe normally and allow the stretch to remain steady.

Avoid bouncing or repeatedly forcing yourself deeper into the position.

Step 6: Release and Switch Arms

Slowly rotate back toward the wall before releasing your hand.

Repeat the stretch on your opposite arm using the same controlled technique.

Try to stretch both sides for a similar duration.
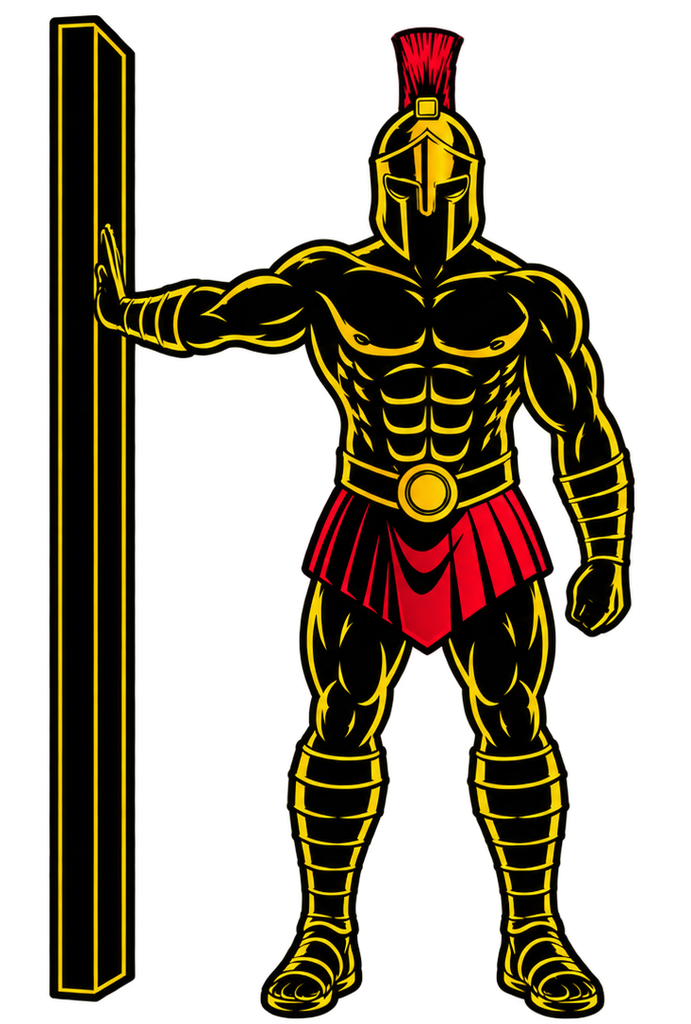
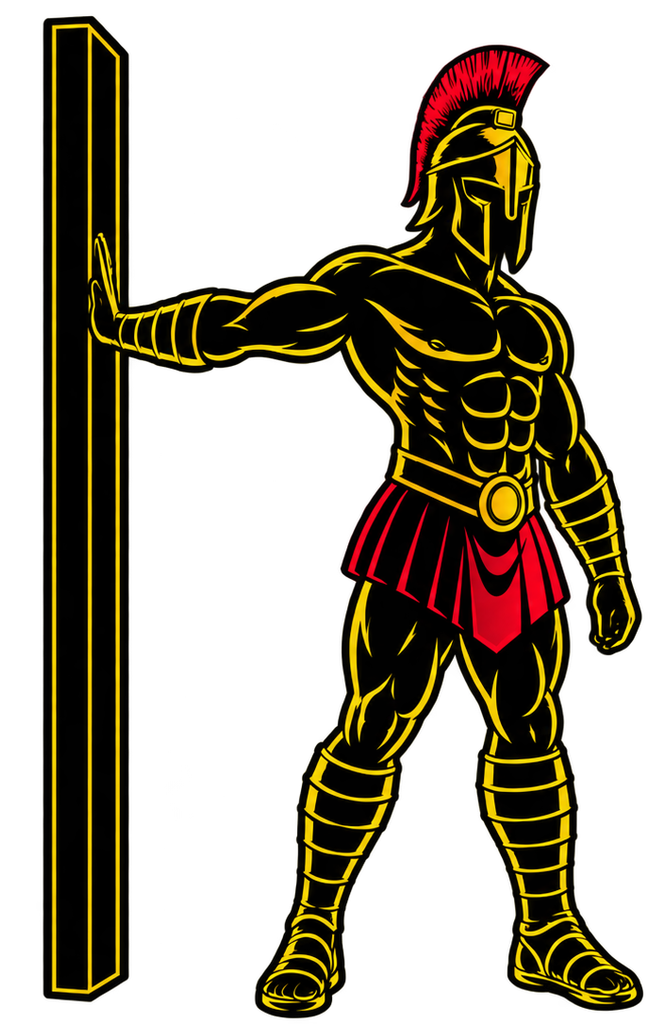
Warrior showcasing How to do Biceps Stretch with proper form

Biceps Stretch Form Checklist

Use this quick checklist to ensure proper Biceps Stretch form.

  • Stand upright
  • Extend one arm behind your body
  • Keep your elbow straight
  • Place your palm securely against a stable surface
  • Keep your shoulder relaxed
  • Rotate away gradually
  • Maintain a neutral spine
  • Keep your chest controlled
  • Breathe normally
  • Hold the stretch steadily
  • Avoid bouncing
  • Stretch both arms
  • Stop if you experience sharp or unusual pain

You should feel controlled muscular tension through the front of your upper arm rather than pain in your shoulder or elbow.


Common Biceps Stretch Mistakes

Rotating Too Far

Problem: Aggressively turning away from your arm can make the stretch unnecessarily intense and may create discomfort around the shoulder or elbow.

Fix: Rotate only until you feel a gentle to moderate stretch through the biceps.

Bending the Elbow

Problem: Allowing your elbow to bend reduces the lengthening effect on the biceps.

Fix: Keep your arm straight while avoiding aggressive hyperextension of the elbow.

Shrugging the Shoulder

Problem: Allowing your shoulder to rise toward your ear creates unnecessary upper-body tension.

Fix: Keep your shoulder controlled and relaxed as you move into the stretch.

Placing the Arm Too High

Problem: Positioning your arm excessively high can turn the movement into a more demanding shoulder and chest stretch and may be uncomfortable for some people.

Fix: Begin around shoulder height or lower and adjust the position according to your mobility and comfort.

Forcing the Wrist Position

Problem: Trying to force your palm or fingers into a specific orientation can cause unnecessary wrist discomfort.

Fix: Use a hand position that allows you to maintain comfortable tension through the biceps without forcing your wrist.

Bouncing Into the Stretch

Problem: Repeatedly bouncing deeper into a static stretch makes it harder to control the intensity.

Fix: Enter the stretch gradually and hold the position steadily.

Stretching Through Pain

Problem: Sharp, pinching, or unusual pain is different from normal muscular stretching tension.

Fix: Immediately reduce the range or stop the stretch if it causes pain. Do not force your shoulder or elbow into an uncomfortable position.


Biceps Stretch Variations

Several Biceps Stretch variations can be used depending on your mobility, environment, and preferred position.

Wall Biceps Stretch

The standard supported variation.

How to Do a Wall Biceps Stretch

  • Stand beside a wall.
  • Extend one arm behind you.
  • Place your palm against the wall.
  • Keep your elbow straight.
  • Slowly rotate your torso away.
  • Hold before switching arms.

Standing Hands-Behind-Back Biceps Stretch

This variation stretches both arms simultaneously without requiring a wall.

How to Do a Standing Hands-Behind-Back Biceps Stretch

  • Stand upright.
  • Bring both hands behind your body.
  • Interlace your fingers if comfortable.
  • Straighten your elbows.
  • Gently move your arms backward and slightly upward.
  • Stop when you feel a comfortable stretch.
  • Hold the position without forcing your shoulders.

Seated Biceps Stretch

A floor-based variation that uses your hands for support behind your body.

How to Do a Seated Biceps Stretch

  • Sit on the floor with your knees bent.
  • Place your hands on the floor behind you.
  • Keep your arms relatively straight.
  • Position your fingers in a comfortable direction.
  • Slowly move your hips forward while keeping your hands planted.
  • Stop when you feel a gentle stretch through your biceps and shoulders.
  • Hold under control.

Doorway Biceps Stretch

A doorway or sturdy vertical frame can provide another convenient support.

How to Do a Doorway Biceps Stretch

  • Stand beside a sturdy doorway.
  • Extend one arm behind you.
  • Place your hand against the frame.
  • Keep your elbow straight.
  • Slowly turn your torso away.
  • Hold the stretch comfortably.
  • Repeat on the opposite side.

Final Thoughts

The Biceps Stretch is a simple addition to an upper-body flexibility routine, particularly after workouts involving substantial pulling or elbow flexion.

It can help develop or maintain:

  • Biceps flexibility
  • Upper-arm mobility
  • Shoulder extension mobility
  • Stretch tolerance
  • Comfortable upper-body movement

The goal is not to twist your body as far as possible or force your arm behind you. You only need enough movement to create a comfortable stretch through the front of the upper arm.

Keep your elbow straight, your shoulder controlled, and your movement gradual. Hold the position without bouncing and allow your flexibility to improve progressively over time. Learn more about Stretching Here.

Essential Gear for Biceps Stretch

The Biceps Stretch requires no specialized equipment, but a few simple items can provide support or allow you to perform different variations.

  • Wall: Provides a stable surface for the traditional single-arm Biceps Stretch.
  • Doorway: Offers another stable support for adjusting your arm position and stretch intensity.
  • Stretching Strap: Can provide additional reach during assisted upper-body stretching variations.
  • Exercise Mat: Provides a comfortable surface for seated Biceps Stretch variations and other floor-based mobility exercises.

Biceps Stretch FAQ

Q1: How long should I hold a Biceps Stretch?
A practical starting point is approximately 15-30 seconds per side. The appropriate duration can vary depending on your flexibility, comfort, and overall stretching routine.

Q2: Should my elbow be straight during a Biceps Stretch?
Yes. Keeping your elbow straight helps lengthen the biceps because the muscle contributes to elbow flexion. However, do not aggressively force your elbow into hyperextension.

Q3: Why do I feel the Biceps Stretch in my shoulder or chest?
Some Biceps Stretch variations also place the shoulder into extension and can lengthen tissues through the front of your shoulder and chest. Mild stretching tension can occur, but sharp, pinching, or unusual shoulder pain is a reason to reduce the range or stop.
How to Do a Triceps Stretch Correctly: Step-by-Step Guide for Beginners

Learn how to do a Triceps Stretch with proper form, avoid common mistakes, and discover useful variations for improving flexibility and reducing tightness in the back of your upper arms.

The Triceps Stretch is a simple upper-body stretch that can be performed almost anywhere without equipment. By positioning one arm overhead and bending the elbow behind your head, you can gently lengthen the triceps while also involving tissues around the shoulder.

It can be useful after upper-body workouts, as part of a dedicated flexibility routine, or whenever your arms feel tight after pressing and arm exercises.


What Is a Triceps Stretch?

The Triceps Stretch is an upper-body flexibility exercise primarily used to stretch the triceps brachii, the large muscle located along the back of your upper arm.

The most common version is the Overhead Triceps Stretch. You raise one arm overhead, bend your elbow so your hand moves behind your upper back, and use the opposite hand to gently guide the elbow into a comfortable stretch.

The Triceps Stretch is commonly used in:

  • Post-workout stretching
  • Upper-body flexibility routines
  • Cool-down routines
  • Calisthenics training
  • Strength-training programs
  • General mobility routines

Because the long head of the triceps crosses the shoulder joint, placing your upper arm overhead helps place it in a lengthened position.

Benefits of the Triceps Stretch

The Triceps Stretch provides several flexibility and mobility benefits when performed gently and consistently.

Benefits include:

  • Stretches the triceps
  • Improves or maintains upper-arm flexibility
  • Can reduce the feeling of muscular tightness
  • Encourages comfortable overhead arm positioning
  • Complements pressing and triceps exercises
  • Requires no equipment
  • Can be performed almost anywhere
  • Fits easily into post-workout stretching routines

Static stretching is generally better suited to a cool-down or separate flexibility session than immediately before demanding strength or power work.

Muscles Stretched During the Triceps Stretch

The Triceps Stretch primarily targets the back of the upper arm, while other tissues around the shoulder may also experience some stretch depending on your mobility and positioning.

Primary Muscles

  • Triceps Brachii
  • Long Head of the Triceps

Secondary Muscles

  • Latissimus Dorsi
  • Teres Major
  • Muscles and connective tissues around the shoulder

The exact sensation varies depending on your anatomy, flexibility, and arm position.


How to Do a Triceps Stretch (Step-by-Step)

Step 1: Stand or Sit Upright

Begin in a comfortable standing or seated position.

Keep your:

  • Head neutral
  • Chest naturally upright
  • Shoulders relaxed
  • Core lightly engaged
  • Spine neutral

Avoid excessively arching your lower back.

Step 2: Raise One Arm Overhead

Lift one arm straight above your head.

Keep your upper arm relatively close to your head rather than allowing it to drift excessively outward.

Your shoulder should remain comfortable throughout the movement.

Step 3: Bend Your Elbow

Bend your raised elbow and allow your hand to move behind your head toward your upper back.

Your fingers should point downward along your spine.

Do not force your hand farther down than your mobility comfortably allows.

Step 4: Position Your Opposite Hand

Bring your opposite hand across and place it gently on or near the raised elbow.

Do not aggressively pull on the joint.

Your opposite hand should provide only enough assistance to deepen the stretch slightly.

Step 5: Gently Guide the Elbow

Apply light pressure to guide the raised elbow slightly backward and inward until you feel a comfortable stretch along the back of your upper arm.

Maintain:

  • Relaxed shoulders
  • Neutral spine
  • Controlled breathing
  • Comfortable stretch intensity

You should feel tension, not sharp pain.

Step 6: Hold the Stretch

Hold the position for approximately 15-30 seconds while breathing normally.

Avoid bouncing or repeatedly forcing the arm deeper into the stretch.

Release slowly when finished.

Step 7: Switch Arms

Lower your first arm and repeat the stretch on the opposite side.

Try to use the same controlled technique and similar duration for both arms.

Warrior showcasing How to do Triceps Stretch with proper form

Triceps Stretch Form Checklist

Use this quick checklist to ensure proper Triceps Stretch form.

  • Stand or sit upright
  • Raise one arm overhead
  • Bend your elbow behind your head
  • Keep your upper arm relatively close to your head
  • Use the opposite hand for gentle assistance
  • Keep your shoulders relaxed
  • Maintain a neutral spine
  • Avoid excessive lower-back arching
  • Breathe normally
  • Hold the stretch steadily
  • Avoid bouncing
  • Stretch both arms
  • Stop if you experience sharp or unusual pain

A Triceps Stretch should create comfortable muscular tension rather than pain.


Common Triceps Stretch Mistakes

Pulling the Elbow Too Hard

Problem: Aggressively pulling the elbow can turn a gentle stretch into an uncomfortable position for the arm or shoulder.

Fix: Apply only light pressure with your opposite hand and gradually increase the stretch within a comfortable range.

Arching the Lower Back

Problem: Leaning backward and excessively arching your spine can compensate for limited shoulder mobility.

Fix: Keep your ribs controlled, lightly engage your core, and remain upright while stretching.

Shrugging the Shoulder

Problem: Allowing the raised shoulder to tense excessively can make the position less comfortable.

Fix: Keep your shoulder controlled and as relaxed as the position comfortably allows.

Flaring the Elbow Excessively

Problem: Allowing your elbow to drift far away from your head can reduce the intended triceps stretch.

Fix: Keep your upper arm relatively close to your head without forcing it into an uncomfortable position.

Bouncing During the Stretch

Problem: Repeatedly bouncing into a static stretch makes it harder to control the intensity.

Fix: Move gradually into the position and maintain a steady, comfortable hold.

Holding Your Breath

Problem: Holding your breath can create unnecessary tension during the stretch.

Fix: Breathe slowly and naturally throughout the entire hold.

Forcing Through Pain

Problem: Sharp or unusual pain is different from the mild tension expected during stretching.

Fix: Reduce the range or stop the stretch if it causes pain. Persistent shoulder, elbow, or arm pain should not be treated simply by forcing deeper stretches.


Triceps Stretch Variations

Several Triceps Stretch variations can be used depending on your mobility and available equipment.

Standing Overhead Triceps Stretch

The standard version of the exercise.

How to Do a Standing Overhead Triceps Stretch

  • Stand upright.
  • Raise one arm overhead.
  • Bend your elbow behind your head.
  • Use your opposite hand to gently guide the elbow.
  • Hold the stretch comfortably.
  • Repeat on the opposite side.

Seated Triceps Stretch

This variation uses the same arm position while sitting.

How to Do a Seated Triceps Stretch

  • Sit upright on a chair or bench.
  • Raise one arm overhead.
  • Bend your elbow behind your head.
  • Gently guide the elbow with your opposite hand.
  • Keep your torso upright.
  • Hold before switching sides.

Towel-Assisted Triceps Stretch

A towel can make the stretch more accessible if reaching your hands behind your back is difficult.

How to Do a Towel-Assisted Triceps Stretch

  • Hold one end of a towel overhead.
  • Bend that elbow so the towel hangs behind your back.
  • Reach behind your lower back with your opposite hand.
  • Grip the lower end of the towel.
  • Use gentle tension to adjust the position.
  • Hold comfortably before switching sides.

Avoid aggressively pulling the towel.

Wall-Assisted Triceps Stretch

A wall can provide support while you position your arm overhead.

How to Do a Wall-Assisted Triceps Stretch

  • Stand facing a wall.
  • Raise one arm and bend the elbow.
  • Place the elbow or upper arm gently against the wall.
  • Adjust your body position until you feel a comfortable stretch.
  • Keep your spine controlled.
  • Hold before changing sides.

Do not force your shoulder into an uncomfortable overhead position.


Final Thoughts

The Triceps Stretch is a simple way to work on flexibility through the back of your upper arms and complement demanding pushing and arm workouts.

It can help develop or maintain:

  • Triceps flexibility
  • Upper-arm mobility
  • Comfortable overhead positioning
  • Stretch tolerance
  • Post-workout relaxation

The goal is not to force your hand as far down your back as possible. A successful stretch requires only enough range to create comfortable tension through the triceps while maintaining good posture.

Keep your shoulder relaxed, apply gentle pressure, breathe normally, and give your flexibility time to develop. Learn more about Stretching Here.

Essential Gear for Triceps Stretch

The standard Triceps Stretch requires no equipment, but a few simple items can make certain variations more accessible or comfortable.

  • Stretching Strap: Provides additional reach for assisted variations when your shoulder mobility makes it difficult to comfortably position your arms.
  • Towel: A simple alternative to a stretching strap for performing assisted Triceps Stretches.
  • Exercise Mat: Provides a comfortable surface when incorporating the stretch into seated, kneeling, or floor-based mobility routines.

Triceps Stretch FAQ

Q1: How long should I hold a Triceps Stretch?
A practical starting point is around 15-30 seconds per arm. The appropriate duration can vary depending on your flexibility routine and goals.

Q2: Should the Triceps Stretch hurt?
No. You should feel mild to moderate stretching tension rather than sharp, pinching, or unusual pain. Reduce the range or stop if the position is painful.

Q3: Can I do the Triceps Stretch every day?
Gentle stretching can often be performed regularly if it feels comfortable and does not cause pain or excessive soreness. Your ideal frequency depends on your mobility needs, training program, and recovery.


How to Do Wide-Grip Push-Ups Correctly: Step-by-Step Guide for Beginners

Wide-Grip Push-Ups are a bodyweight exercise that primarily targets the chest, shoulders, and triceps. They are performed with your hands positioned wider than shoulder-width apart, creating a different pressing angle compared with standard Push-Ups.

The wider hand placement changes the movement’s mechanics, potentially increasing the relative contribution of the chest while reducing the amount of elbow movement required. However, excessively wide hand positions can place unnecessary stress on your shoulders.

Wide-Grip Push-Ups are commonly included in calisthenics, home workouts, and upper-body training programs. The key to performing them correctly is maintaining a stable body position, choosing a comfortable hand width, and controlling each repetition.


What Are Wide-Grip Push-Ups?

Wide-Grip Push-Ups are a variation of the standard Push-Up performed with your hands placed moderately wider than your shoulders.

You begin in a High Plank position with your palms firmly planted on the floor. From this position, bend your elbows and lower your chest toward the ground before pressing yourself back to the starting position.

The wider hand placement changes the shoulder and elbow angles compared with standard Push-Ups.

Wide-Grip Push-Ups are commonly used in:

  • Chest workouts
  • Upper-body strength training
  • Calisthenics programs
  • Push-day routines
  • At-home workouts
  • Bodyweight training
  • Muscular endurance workouts
  • Push-Up variation training

Although Wide-Grip Push-Ups are often described as chest-focused, the triceps and anterior deltoids remain important contributors to the pressing movement.

The exercise does not completely isolate the chest, and a wider grip does not automatically produce greater muscle growth.

Benefits of Wide-Grip Push-Ups

Wide-Grip Push-Ups provide another way to challenge your upper-body pressing muscles using bodyweight resistance.

Benefits include:

  • Strengthens the pectoralis major
  • Develops upper-body pushing strength
  • Trains the anterior deltoids
  • Strengthens the triceps
  • Improves upper-body muscular endurance
  • Develops core stability
  • Reinforces full-body coordination
  • Provides variety in chest training
  • Requires minimal equipment

Wide-Grip Push-Ups can contribute to strength and muscle development when performed with sufficient difficulty, appropriate training volume, and progressive overload.

However, using an excessively wide grip is unnecessary. A moderate hand-width increase is generally sufficient to change the pressing mechanics.

Muscles Worked in Wide-Grip Push-Ups

Wide-Grip Push-Ups primarily train the muscles responsible for pressing your body away from the floor.

The wider hand position changes the relative mechanical demands on the chest, shoulders, and triceps compared with standard Push-Ups.

Primary Muscles
  • Pectoralis Major
  • Anterior Deltoids
  • Triceps Brachii
Secondary Muscles
  • Serratus Anterior
  • Rotator Cuff Muscles
  • Rectus Abdominis
  • Obliques
  • Gluteus Maximus
  • Quadriceps
  • Forearm Muscles

The pectoralis major contributes substantially to the pressing movement, while the anterior deltoids assist with shoulder movement.
The triceps extend your elbows as you push upward.
Meanwhile, the core, glutes, and legs help maintain a stable plank position throughout each repetition.


How to Do Wide-Grip Push-Ups (Step-by-Step)

Step 1: Start on Your Hands and Knees

Begin on the floor or an Exercise Mat.

Place your hands slightly wider than shoulder-width apart.

Spread your fingers comfortably and keep your palms firmly planted.

Avoid positioning your hands excessively far apart.

Step 2: Adjust Your Hand Placement

Move your hands outward until you find a comfortable wider-than-normal pressing position.

Your hands should generally remain around chest to shoulder level.

Keep your wrists in a comfortable position and avoid forcing your arms into an excessively wide angle.

Step 3: Enter a High Plank

Extend your legs backward and support your body on your hands and toes.

Maintain a relatively straight line from your head through your shoulders, hips, knees, and ankles.

Position your feet approximately hip-width apart or slightly wider for additional stability.

Step 4: Establish Your Starting Position

Before lowering your body, create a stable plank position.

Keep your:

  • Core braced
  • Glutes engaged
  • Legs controlled
  • Head relatively neutral
  • Hands firmly planted
  • Shoulders stable

Avoid allowing your hips to sag or rise excessively.

Step 5: Lower Your Chest Toward the Floor

Slowly bend your elbows and begin lowering your body.

Allow your elbows to move outward naturally without forcing them directly sideways.

Keep your shoulders, chest, and hips moving together.

Maintain a comfortable shoulder position throughout the lowering phase.

Step 6: Reach the Bottom Position

Continue lowering until your chest approaches the floor or you reach the deepest comfortable range you can control.

Keep your core engaged and avoid allowing your hips to drop.

Do not force additional depth if your shoulders become uncomfortable.

Step 7: Press Back to the Starting Position

Push firmly through your palms and begin extending your elbows.

Raise your chest and hips together while maintaining your body alignment.

Continue pressing until your arms return to a comfortable extended position.

Reset your plank and repeat for your planned repetitions.

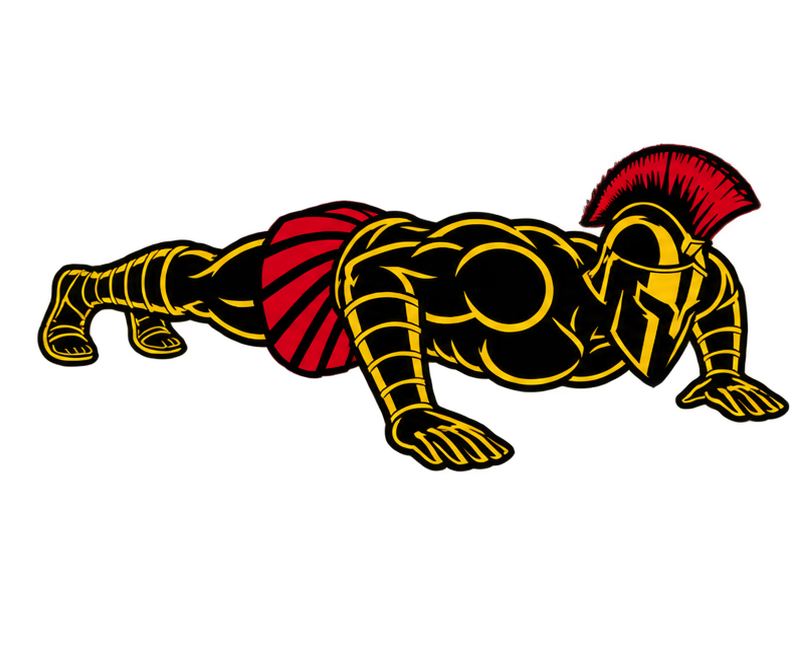
Warrior showcasing How to do Wide-Grip Push-Ups with proper form

Wide-Grip Push-Up Form Checklist

Use this checklist to maintain proper Wide-Grip Push-Up technique.

  • Position your hands moderately wider than shoulder-width
  • Keep your palms firmly planted
  • Maintain a relatively straight body line
  • Brace your core and engage your glutes
  • Keep your head relatively neutral
  • Avoid forcing your elbows directly sideways
  • Lower your chest through a comfortable range
  • Keep your hips from sagging or rising excessively
  • Press evenly through both hands
  • Perform each repetition under control

The goal is to perform controlled repetitions with a wider hand position while maintaining comfortable shoulder mechanics and stable body alignment.


Common Wide-Grip Push-Up Mistakes

Placing the Hands Too Wide

Problem: Positioning your hands excessively far apart can create an uncomfortable shoulder angle and limit your ability to control the pressing movement.

Fix: Use a moderately wide hand position rather than the widest possible grip. Adjust your hand placement until you can perform controlled repetitions comfortably.

Flaring the Elbows Excessively

Problem: Allowing your elbows to point directly sideways can create an awkward pressing position and may cause shoulder discomfort.

Fix: Allow your elbows to move outward naturally without forcing them into a straight sideways position.

Letting the Hips Sag

Problem: Allowing your hips to drop toward the floor disrupts your plank position and increases unnecessary movement through your lower back.

Fix: Brace your core and engage your glutes to maintain a relatively straight body line throughout each repetition.

Raising the Hips Too High

Problem: Pushing your hips upward changes your body angle and reduces the similarity to a standard Wide-Grip Push-Up.

Fix: Keep your hips aligned with your torso and legs while lowering and pressing your body.

Performing Partial Repetitions

Problem: Lowering only a few centimeters limits the range through which your chest, shoulders, and triceps work.

Fix: Lower your chest through the deepest comfortable range you can control. If necessary, perform an easier variation to improve your technique.

Leading With the Head

Problem: Reaching your head toward the floor creates the appearance of greater depth without properly lowering your chest.

Fix: Keep your head relatively neutral and guide your chest toward the floor instead.

Raising the Chest Before the Hips

Problem: Pressing your upper body upward while leaving your hips low causes your body alignment to break down.

Fix: Maintain core tension and raise your chest and hips together as one controlled unit.


Wide-Grip Push-Up Progressions and Variations

Wide-Grip Push-Ups can be modified to reduce or increase their difficulty depending on your current strength and training experience.

Wall Wide-Grip Push-Up

Wall Wide-Grip Push-Ups reduce the amount of bodyweight supported by your upper body, making them useful for beginners.

How to Do Wall Wide-Grip Push-Ups

  • Stand facing a sturdy wall.
  • Place your hands moderately wider than shoulder-width against the wall.
  • Step your feet backward into a comfortable lean.
  • Brace your core and maintain a straight body line.
  • Bend your elbows and lower your chest toward the wall.
  • Press through your palms until your arms extend.
  • Repeat while maintaining controlled technique.

Incline Wide-Grip Push-Up

Incline Wide-Grip Push-Ups reduce the difficulty by placing your hands on a stable elevated surface.

How to Do Incline Wide-Grip Push-Ups

  • Choose a sturdy elevated surface.
  • Place your hands moderately wider than shoulder-width.
  • Walk your feet backward into an inclined plank.
  • Brace your core and maintain a straight body line.
  • Bend your elbows and lower your chest toward the surface.
  • Press through your palms until your arms extend.
  • Repeat while maintaining controlled body alignment.

Knee Wide-Grip Push-Up

Knee Wide-Grip Push-Ups reduce the amount of bodyweight supported by your arms while maintaining a wider pressing position.

How to Do Knee Wide-Grip Push-Ups

  • Begin on your hands and knees.
  • Position your hands moderately wider than shoulder-width.
  • Move your knees backward until your body forms a relatively straight line from your head to your knees.
  • Brace your core and keep your hips extended.
  • Bend your elbows and lower your chest toward the floor.
  • Press through your palms until your arms extend.
  • Repeat without allowing your hips to sag.

Slow-Tempo Wide-Grip Push-Up

This variation increases time under tension by slowing the lowering and pressing phases.

How to Do Slow-Tempo Wide-Grip Push-Ups

  • Begin in a stable Wide-Grip Push-Up position.
  • Brace your core and maintain a straight body line.
  • Slowly lower your chest toward the floor over several seconds.
  • Pause briefly at a comfortable bottom position.
  • Press yourself upward in a controlled manner.
  • Return to the starting position without raising your hips excessively.
  • Repeat while maintaining the same deliberate tempo.

Decline Wide-Grip Push-Up

Decline Wide-Grip Push-Ups increase the difficulty by elevating your feet above your hands, shifting more bodyweight toward your upper body.

How to Do Decline Wide-Grip Push-Ups

  • Choose a sturdy elevated surface for your feet.
  • Place your hands moderately wider than shoulder-width on the floor.
  • Position your feet securely on the elevated surface.
  • Brace your core and maintain a straight body line.
  • Bend your elbows and lower your chest toward the floor.
  • Press through your palms until your arms extend.
  • Repeat while keeping your hips and shoulders controlled.

Final Thoughts

Wide-Grip Push-Ups are a useful bodyweight exercise for developing chest strength, upper-body pressing performance, and muscular endurance.

They develop:

  • Chest strength
  • Anterior deltoid strength
  • Triceps strength
  • Upper-body pushing strength
  • Core stability
  • Muscular endurance
  • Bodyweight coordination
  • Foundational calisthenics strength

The most important part of performing Wide-Grip Push-Ups correctly is maintaining a stable body position while using a comfortable, moderately wide hand placement.

If standard Wide-Grip Push-Ups are too difficult, begin with Wall, Incline, or Knee Wide-Grip Push-Ups. As your strength improves, gradually progress toward full Wide-Grip Push-Ups and more challenging variations. Learn more about Push Workouts Here.

Useful Gear for Wide-Grip Push-Ups

Wide-Grip Push-Ups require no mandatory equipment, but a few items can improve comfort, provide easier progressions, or increase the difficulty.

  • Exercise Mat: Provides a comfortable, non-slip surface for performing Wide-Grip Push-Ups and Knee Wide-Grip Push-Ups.
  • Workout Bench: Offers a stable elevated surface for Incline Wide-Grip Push-Ups or foot elevation during Decline Wide-Grip Push-Ups.
  • Push-Up Handles: Provide an alternative wrist position and may allow a greater range of motion when positioned securely at a comfortable width.
  • Resistance Band: Can provide additional resistance during advanced Wide-Grip Push-Ups or assistance in certain modified setups.
  • Weighted Vest: An advanced option for increasing resistance once standard Wide-Grip Push-Ups become consistently manageable.

Wide-Grip Push-Up FAQ

Q1: Are Wide-Grip Push-Ups better for the chest than regular Push-Ups?
Wide-Grip Push-Ups change the pressing mechanics and may increase the relative contribution of the chest in some circumstances. However, they are not automatically better for chest growth. Both variations can effectively train the chest when performed with sufficient difficulty and appropriate training volume.

Q2: Are Wide-Grip Push-Ups good for beginners?
Yes, although standard Wide-Grip Push-Ups may be challenging for some beginners. Wall, Incline, and Knee Wide-Grip Push-Ups are useful starting variations for developing strength and learning the movement.

Q3: How wide should my hands be during Wide-Grip Push-Ups?
Your hands should generally be moderately wider than shoulder-width apart. The exact distance depends on your shoulder width, arm length, mobility, and comfort. Avoid placing your hands excessively far apart.

Q4: How many Wide-Grip Push-Ups should beginners do?
A practical starting point is around 5–10 controlled repetitions for 2–3 sets, provided you can maintain proper technique. If standard Wide-Grip Push-Ups are too difficult, choose an easier variation that allows approximately 8–15 controlled repetitions.

Q5: How can I make Wide-Grip Push-Ups harder?
You can perform slower repetitions, add controlled pauses, elevate your feet for Decline Wide-Grip Push-Ups, or increase resistance using a Weighted Vest. Progress gradually while maintaining proper body alignment and comfortable shoulder positioning..


How to Do Romanian Deadlifts Correctly: Step-by-Step Guide for Beginners

Learn how to do Romanian Deadlifts with proper form, avoid common mistakes, and discover the best Romanian Deadlift variations to build stronger hamstrings, glutes, and posterior-chain strength.

The Romanian Deadlift, commonly called the RDL, is one of the most effective lower-body exercises for training the hip hinge. Unlike a conventional Deadlift, the movement begins from a standing position and involves pushing your hips backward while keeping only a slight bend in your knees.

Whether you’re training your legs at home or in the gym, Romanian Deadlifts are an excellent addition to lower-body workouts because they strongly target the hamstrings and glutes while teaching you how to produce force through hip extension.


What are Romanian Deadlifts?

The Romanian Deadlift is a hip-hinge exercise in which you lower a weight in front of your legs by pushing your hips backward while maintaining a neutral spine and slightly bent knees.

Once you reach the bottom of your available hip-hinge range, you drive your hips forward and return to standing.

Unlike a conventional Deadlift, the weight generally does not return to the floor between repetitions. The movement also involves much less knee bending, shifting greater emphasis toward the hamstrings and glutes.

Romanian Deadlifts are commonly used in:

  • Leg workouts
  • Strength training
  • Hypertrophy training
  • Athletic conditioning
  • Posterior-chain training
  • Home workouts

They can be performed with a barbell, dumbbells, kettlebells, resistance bands, or other safely controlled resistance.

Benefits of Romanian Deadlifts

Romanian Deadlifts provide several lower-body strength and muscle-building benefits.

Benefits include:

  • Strengthens the hamstrings
  • Builds the glutes
  • Develops hip-extension strength
  • Strengthens the posterior chain
  • Teaches the hip-hinge movement pattern
  • Develops grip strength
  • Challenges core stability
  • Can help improve strength for other lower-body exercises
  • Can be performed with several types of resistance

Because the RDL primarily involves movement through the hips rather than deep knee flexion, it complements squat and lunge variations particularly well in a complete leg-training program.

Muscles Worked in Romanian Deadlifts

Romanian Deadlifts primarily target the muscles responsible for extending the hips and controlling the hip hinge.

Primary Muscles
  • Hamstrings
  • Gluteus Maximus
  • Adductor Magnus
Secondary Muscles
  • Erector Spinae
  • Core Muscles
  • Trapezius
  • Forearms
  • Latissimus Dorsi

Your back and core work primarily to maintain a stable torso while your hamstrings and glutes produce and control movement at the hips.


How to Do Romanian Deadlifts (Step-by-Step)

Step 1: Set Your Starting Position

Stand upright with your feet approximately hip-width apart.

Hold your weight in front of your thighs.

Keep your:

  • Feet firmly planted
  • Knees slightly bent
  • Chest controlled
  • Spine neutral
  • Core braced
  • Shoulders controlled

If you’re using a barbell, hold it approximately shoulder-width apart with your palms facing your body.

Step 2: Brace Your Core

Take a controlled breath and brace your abdominal muscles before beginning the repetition.

Maintain a stable torso throughout the movement.

Keep your shoulders controlled and engage your lats to help keep the weight close to your body.

Step 3: Push Your Hips Back

Begin the movement by pushing your hips backward.

Maintain a small amount of knee bend rather than turning the movement into a Squat.

Think about reaching your hips toward the wall behind you.

As your hips move backward, allow your torso to naturally incline forward while maintaining a neutral spine.

Step 4: Lower the Weight

Continue pushing your hips backward while lowering the weight close to your legs.

The weight should travel downward rather than drifting far in front of you.

Maintain:

  • Neutral spine
  • Braced core
  • Slight knee bend
  • Weight close to the legs
  • Feet firmly planted

You should feel increasing tension through your hamstrings as you descend.

Step 5: Stop at Your Natural Range

Stop descending when you can no longer push your hips farther backward without losing your spinal position or significantly increasing knee bend.

For many people, the weight may reach somewhere around the knees to mid-shin area, but the exact depth varies depending on body proportions, mobility, and technique.

Tip: The goal is not to make the weight touch the floor. Lower only as far as you can maintain a strong hip hinge and neutral spine.

Step 6: Drive Your Hips Forward

Push through your feet and extend your hips to begin returning to standing.

Contract your glutes as your hips move forward.

Keep the weight close to your body throughout the ascent.

Step 7: Finish Upright

Return to a tall standing position with your hips and knees extended.

Avoid aggressively leaning backward or hyperextending your lower back at the top.

Reset your brace and repeat for the desired number of repetitions.

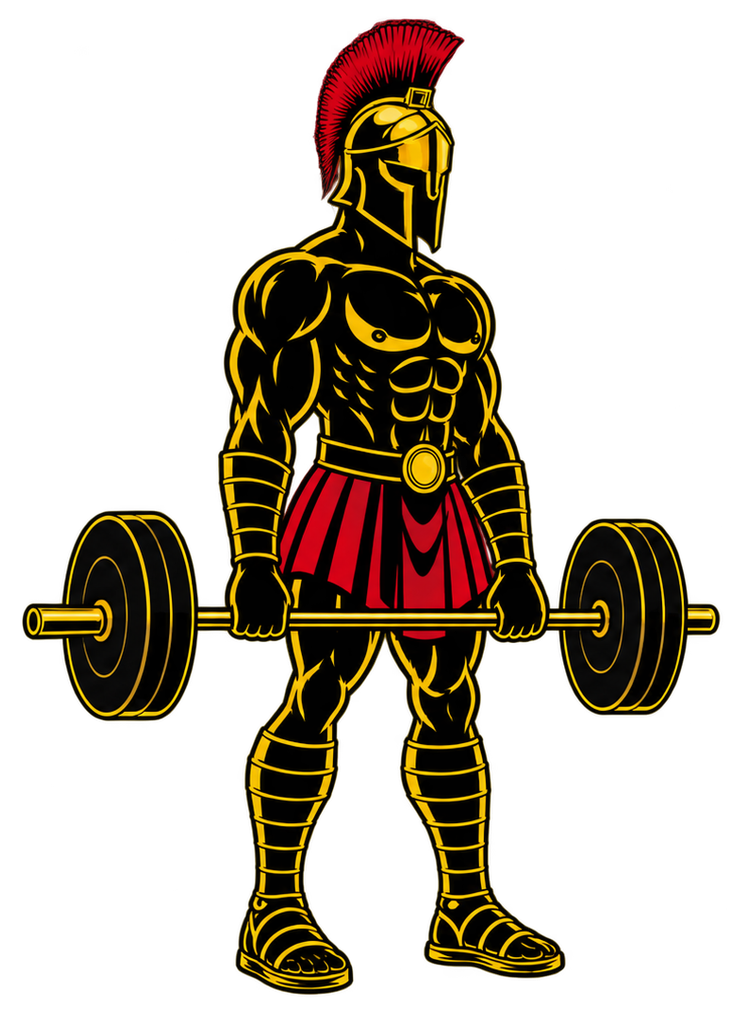
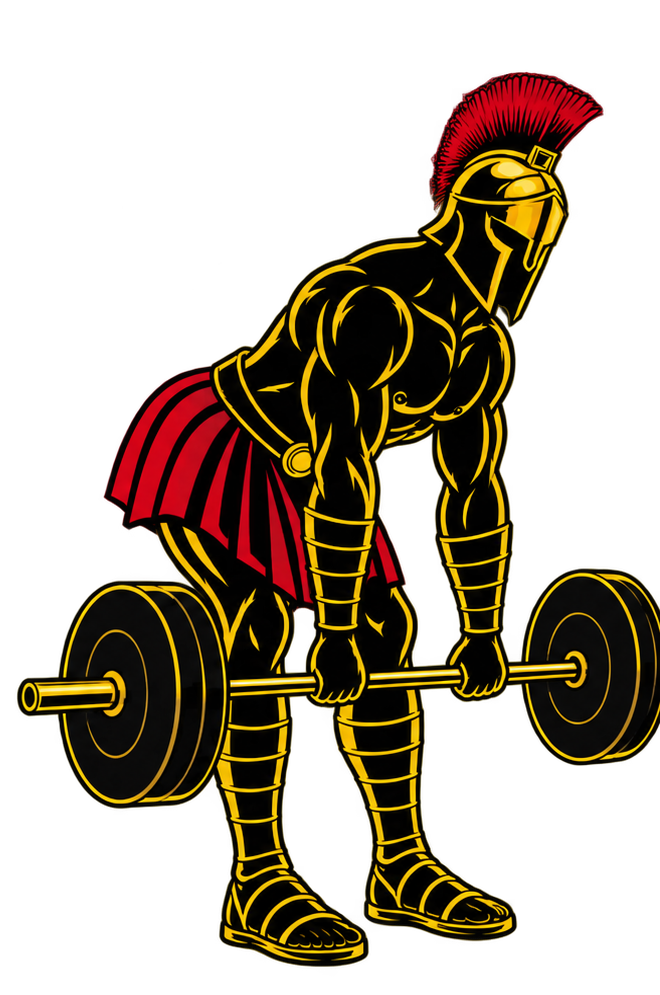
Warrior showcasing How to do Romanian Deadlifts with proper form

Romanian Deadlifts Form Checklist

Use this quick checklist to ensure proper Romanian Deadlift form.

  • Keep your feet approximately hip-width apart
  • Maintain a slight bend in your knees
  • Brace your core
  • Keep your spine neutral
  • Push your hips backward
  • Keep the weight close to your legs
  • Maintain tension through your hamstrings
  • Stop before your lower back begins rounding
  • Drive your hips forward to stand
  • Squeeze your glutes at the top
  • Avoid leaning backward at lockout
  • Control both the lowering and lifting phases

Think about moving your hips backward and forward rather than simply moving the weight up and down.


Common Romanians Deadlifts Mistakes

Squatting the Weight Down

Problem: Excessively bending your knees turns the RDL into more of a squat-like movement and reduces the hip-hinge emphasis.

Fix: Keep only a slight knee bend and focus on pushing your hips backward as you descend.

Rounding the Lower Back

Problem: Losing your neutral spinal position under load reduces control and can unnecessarily increase stress on your lower back.

Fix: Brace your core, keep the load manageable, and stop descending when you reach the limit of your controlled hip hinge.

Lowering Too Far

Problem: Trying to force the weight toward the floor can cause you to lose your hip hinge and round your back.

Fix: Use your hamstring tension and ability to maintain a neutral spine to determine your bottom position rather than aiming for a predetermined depth.

Letting the Weight Drift Forward

Problem: Holding the weight far away from your legs increases the demand on your back and makes the movement less efficient.

Fix: Keep the barbell, dumbbells, or other resistance close to your legs throughout the repetition.

Keeping the Knees Completely Locked

Problem: Forcing your knees completely straight can make it difficult to perform a comfortable hip hinge.

Fix: Maintain a slight, controlled bend in your knees throughout the movement.

Leaning Back at the Top

Problem: Hyperextending your lower back at lockout does not improve the exercise and adds unnecessary movement.

Fix: Finish standing tall with your hips fully extended and ribs controlled.

Using Too Much Weight

Problem: Excessive resistance can cause your grip, back position, or hip-hinge technique to break down.

Fix: Start with a manageable load and increase resistance only when you can consistently perform controlled repetitions with proper form.


Romanian Deadlifts Variations

Romanian Deadlifts can be performed with different equipment and positions depending on your experience and training goals.

Bodyweight Romanian Deadlift

An excellent variation for learning the hip hinge before adding resistance.

How to Do Bodyweight Romanian Deadlifts

  • Stand with your feet hip-width apart.
  • Keep your knees slightly bent.
  • Push your hips backward.
  • Allow your torso to incline forward while maintaining a neutral spine.
  • Stop when you feel strong hamstring tension.
  • Drive your hips forward to return to standing.

Dumbbell Romanian Deadlift

A convenient variation for home or gym training.

How to Do Dumbbell Romanian Deadlifts

  • Hold a dumbbell in each hand.
  • Position the weights in front of your thighs.
  • Brace your core.
  • Push your hips backward.
  • Lower the dumbbells close to your legs.
  • Drive your hips forward to stand.

Barbell Romanian Deadlift

The traditional loaded variation and an excellent option for progressive overload.

How to Do Barbell Romanian Deadlifts

  • Hold a barbell in front of your thighs.
  • Stand approximately hip-width apart.
  • Brace your core and engage your lats.
  • Push your hips backward.
  • Keep the bar close to your legs as it descends.
  • Extend your hips to return to standing.

Banded Romanian Deadlift

A useful option when training with limited equipment.

How to Do Banded Romanian Deadlifts

  • Stand securely on the middle of a resistance band.
  • Hold the ends of the band in your hands.
  • Push your hips backward into a hinge.
  • Maintain a neutral spine.
  • Drive your hips forward against the band’s resistance.
  • Finish upright under control.

Single-Leg Romanian Deadlift

An advanced unilateral variation that adds a significant balance challenge.

How to Do Single-Leg Romanian Deadlifts

  • Stand primarily on one leg.
  • Maintain a slight bend in the supporting knee.
  • Push your hips backward.
  • Allow your opposite leg to extend behind you as your torso inclines forward.
  • Keep your hips controlled rather than rotating open.
  • Drive through the standing leg and extend your hip to return upright.

Start with bodyweight or light resistance until you can maintain balance and control.


Final Thoughts

The Romanian Deadlift is one of the most valuable leg exercises for developing the hamstrings, glutes, and overall posterior chain.

It develops:

  • Hamstring strength
  • Glute strength
  • Hip-extension strength
  • Posterior-chain strength
  • Hip-hinge technique
  • Core stability
  • Grip strength

The most important part of the RDL is understanding that it is a hip hinge, not a Squat and not a competition to lower the weight as close to the floor as possible.

Push your hips backward, keep the weight close, maintain a stable spine, and stop when you’ve reached the limit of your controlled hip hinge.

Master the movement with lighter resistance first, then progressively add load while keeping every repetition clean. Learn more about Leg Workouts Here.

Essential Gear for Romanian Deadlifts

Romanian Deadlifts require some form of resistance once you progress beyond learning the bodyweight hip hinge.

  • Barbell and Weight Plates: Ideal for progressively loading traditional Romanian Deadlifts and developing greater posterior-chain strength.
  • Dumbbells: Provide a simple and accessible alternative for performing loaded RDLs at home or in the gym.
  • Kettlebells: Can be used for Romanian Deadlifts when a barbell or dumbbells are unavailable.
  • Resistance Bands: Provide a portable option for adding resistance to the hip-hinge movement.
  • Weightlifting Straps: Optional for heavier RDLs when grip fatigue limits your ability to adequately train your hamstrings and glutes.

Romanian Deadlifts FAQ

Q1: What is the difference between a Romanian Deadlift and a conventional Deadlift?
A conventional Deadlift typically begins with the weight on the floor and involves substantial movement through both the knees and hips. The Romanian Deadlift generally starts from standing, uses only a slight knee bend, and emphasizes the hip hinge and posterior chain.

Q2: How low should I go during a Romanian Deadlift?
Lower the weight only as far as you can maintain a neutral spine and proper hip hinge. For many people, this places the weight around the knees or mid-shin, but your individual range may differ.

Q3: Should I feel Romanian Deadlifts in my hamstrings?
Yes. You should normally feel substantial tension through your hamstrings as you push your hips backward. Your glutes should also contribute strongly as you extend your hips and return to standing.

Best Push-Up Handles for Home Workouts (2026) – Build Strength with Better Form

Want stronger push-ups, more comfortable wrist positioning, and a simple way to upgrade your home workouts…

Without buying expensive gym equipment?

⇛ Then push-up handles are worth considering.

They raise your hands off the floor and give you a dedicated handle to grip while performing push-ups.

But here’s the problem:

Most beginners either:

  • Buy flimsy handles
  • Choose uncomfortable grips
  • Pay too much for a basic pair
  • Or buy equipment they don’t actually need

This guide keeps it simple.

Here are 2 push-up handle options for home workouts and calisthenics.


Quick Answer

⇛ Want the best overall option?
Go for the H-Shaped Non-Slip Push-Up Handles.

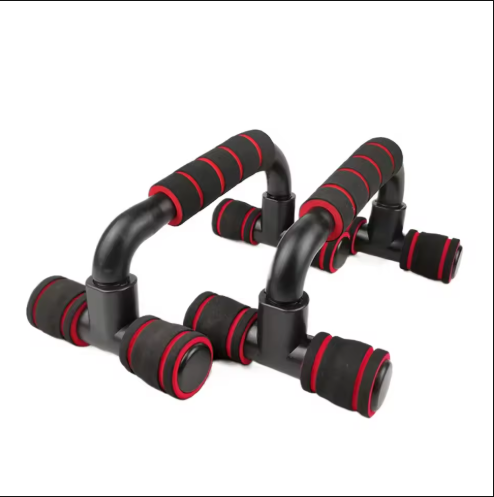
You get a stable-looking H-shaped design, padded grip areas, four color options, and a reasonable price.

⇛ Want something simple and compact?
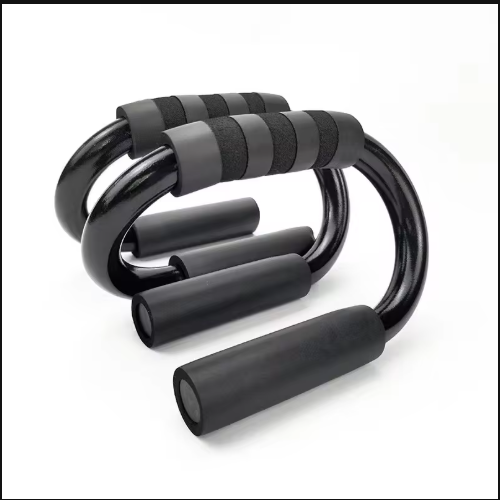
Go for the S-Type Carbon Steel Push-Up Handles.

They’re straightforward, compact, and designed specifically for push-up training.


Why Push-Up Handles Are Useful

Regular push-ups are already one of the best bodyweight exercises you can perform.

But push-up handles can make them even more practical.

They can give you:

  • A neutral-style grip instead of placing your palms flat on the floor
  • Extra clearance between your body and the ground
  • A comfortable gripping surface
  • More room for a deeper push-up range of motion when appropriate
  • A portable tool for home workouts
  • An easy way to add variety to your push-up training

⇛ And unlike large gym equipment, they take up very little space.


1. H-Shaped Non-Slip Push-Up Handles (Best Overall)

Key Features:

  • H-shaped support design
  • Multiple foam-covered grip and contact points
  • Non-slip design
  • Compact home-training setup
  • Four color options
  • Orange, blue, red, and green options

Why This One Wins:

For most people, this is the pair I’d choose.

The H-shaped structure gives you a broad base on the floor, while the padded areas provide dedicated surfaces for your hands and contact points underneath.

But there’s another simple advantage:

⇛ You actually get some choice.

Instead of being stuck with one design, Product 1 comes in:

  • Orange
  • Blue
  • Red
  • Green

For a simple piece of home workout equipment, that makes Product 1 a strong overall package.

Best For:

  • Standard push-ups
  • Deep push-ups
  • Home workouts
  • Calisthenics beginners
  • People who prefer padded handles
  • Anyone wanting multiple color choices

Pros:

✓ Four color options
✓ H-shaped base
✓ Multiple padded contact areas
✓ Compact and portable
✓ Reasonably priced

Cons:

❌ Foam grips can wear over time
❌ Still limited mainly to floor-based exercises

Best Push-Up Handles for Home Workouts(First)

2. S-Type Carbon Steel Push-Up Handles (Simple & Strong)

Key Features:

  • S-type frame
  • Carbon steel construction
  • Foam-covered handles
  • Compact design
  • Designed for push-up training
  • Black finish

Why Choose This:

Maybe you don’t care about multiple colors or a more elaborate H-shaped design.

You just want:

⇛ A simple pair of handles for your push-ups.

That’s where Product 2 makes sense.

The S-shaped carbon steel frame keeps the design straightforward, while the padded upper handles give your hands a dedicated gripping surface.

They’re also compact, making them easy to keep around a home workout area without taking up much room.

Best For:

  • Standard push-ups
  • Home strength training
  • Chest workouts
  • Triceps training
  • Beginners
  • Simple workout setups

Pros:

✓ Carbon steel construction
✓ Simple S-shaped design
✓ Padded handles
✓ Compact and easy to store
✓ Straightforward push-up tool

Cons:

❌ Only one color option shown
❌ Less versatile than Product 1

Best Push-Up Handles for Home Workouts(Second)

Comparison – Choose Your Arsenal

FeatureH-Shaped HandlesS-Type Handles
DesignH-shapedS-shaped
MaterialFitness support frame with foam gripsCarbon steel
GripPaddedPadded
Color OptionsOrange, Blue, Red, GreenBlack
PortabilityHighHigh
Best ForOverall home trainingSimple push-up training
WBA PickBest OverallSimple & Strong

Beginner Plan

Listen carefully—this is where most people fail.

Even with the BEST push-up handles, you won’t get stronger if you don’t train consistently.

Start with:

⇛ Train 3–4 times/week

Start simple.

Build your chest, triceps, shoulders, and core strength.

Then gradually progress toward harder push-up variations.


Important Buying Advice

Before you click:

Make sure you choose handles that suit your training.

Check:

  • The handles sit firmly on your floor
  • The bases don’t wobble
  • The grip feels comfortable
  • The handles don’t slide during push-ups
  • Both handles are positioned evenly before every set
  • The product option you want is available before purchasing

And remember:

⇛ Push-up handles don’t automatically fix your form.

Keep your body controlled, brace your core, and don’t turn the extra height into an excuse to excessively flare your elbows or lose your body position.

If the increased range of motion feels uncomfortable, don’t force yourself as deep as possible.

Use a range you can control.


Final Verdict

⇛ Want the best overall package?
Go for the H-Shaped Non-Slip Push-Up Handles.

The H-shaped design, padded contact areas, four color choices, and reasonable pricing make Product 1 my pick for most home trainees.

⇛ Want simple and strong?
Go for the S-Type Carbon Steel Push-Up Handles.

The carbon steel construction, compact S-shaped frame, and padded handles make them a straightforward option if all you want is a dedicated pair of push-up handles.


Final Words

You don’t need expensive equipment to build a strong upper body.

You need:

  • Push-up handles
  • Proper form
  • Progressive training
  • Consistency
  • Discipline

Start with basic push-ups.

Build your strength.

Progress to harder variations.

And keep earning every rep.

Affiliate Disclosure: WarriorBodyAcademy may earn a commission when you purchase through affiliate links in this article, at no extra cost to you. We only recommend products that we believe are useful for our readers and training community.

How to Do Staggered Push-Ups Correctly: Step-by-Step Guide for Beginners

Learn how to do Staggered Push-Ups with proper form, avoid common mistakes, and discover the best variations to build stronger chest, triceps, shoulders, and core while introducing an asymmetrical challenge to your Push-Up training.

Staggered Push-Ups are a Push-Up variation where one hand is positioned slightly ahead of the other. This offset position changes how your upper body handles the movement and challenges you to resist unwanted rotation while maintaining proper Push-Up form.

Whether you’re looking for a progression beyond regular Push-Ups or want to add more variety to your calisthenics workouts, Staggered Push-Ups are a simple exercise that requires no specialized equipment.


What Are Staggered Push-Ups?

Staggered Push-Ups are performed with your hands in an offset position rather than directly beside each other. One hand is placed slightly forward while the other is positioned slightly behind.

You then lower and raise your body while maintaining this staggered hand position.

Because your hands are asymmetrical, the exercise challenges your upper body and core differently from a standard Push-Up.

Staggered Push-Ups are commonly used in:

  • Calisthenics training
  • Bodyweight workouts
  • Push-Up progression programs
  • Upper-body strength training
  • Home workouts
  • Core stability training

Switching which hand is forward between sets or repetitions helps ensure that both sides receive equal training.

Benefits of Staggered Push-Ups

Staggered Push-Ups provide several upper-body strength and stability benefits.

Benefits include:

  • Strengthens the chest
  • Builds triceps strength
  • Develops the shoulders
  • Challenges core stability
  • Improves upper-body control
  • Introduces asymmetrical loading
  • Adds variety to Push-Up training
  • Helps prepare for harder unilateral Push-Up variations
  • Requires no specialized equipment

The staggered position makes your body resist rotation and uneven loading while you continue performing the fundamental Push-Up movement.

Muscles Worked in Staggered Push-Ups

Staggered Push-Ups train many of the same muscles as standard Push-Ups while placing additional demands on the muscles responsible for stabilization.

Primary Muscles
  • Pectoralis Major
  • Triceps Brachii
  • Anterior Deltoids
Secondary Muscles
  • Serratus Anterior
  • Core Muscles
  • Obliques
  • Forearms
  • Rotator Cuff Muscles

Your glutes and other stabilizing muscles also work isometrically to keep your hips and torso controlled throughout each repetition.


How to Do Staggered Push-Ups (Step-by-Step)

Step 1: Get Into a High Plank

Start on your hands and knees before extending both legs behind you into a high plank.

Keep your:

  • Arms straight
  • Core engaged
  • Glutes tight
  • Legs extended
  • Head neutral

Your body should form a straight line from your head to your heels.

Step 2: Stagger Your Hands

Move one hand slightly forward and the other slightly backward from your normal Push-Up position.

Keep the offset moderate rather than placing your hands extremely far apart.

Both palms should remain firmly planted on the floor.

Tip: Start with a small stagger. You can experiment with the distance between your hands as you become more comfortable with the exercise.

Step 3: Brace Your Body

Tighten your core and squeeze your glutes before beginning the repetition.

Keep your hips level and avoid rotating your torso toward either side.

Maintain:

  • Stable shoulders
  • Tight core
  • Neutral spine
  • Controlled hips
  • Firm hand contact

Step 4: Lower Your Body

Bend both elbows and lower your chest toward the floor.

As you descend:

  • Keep your body rigid
  • Maintain the staggered hand position
  • Keep your elbows controlled
  • Resist torso rotation
  • Keep your hips level

Lower yourself through the deepest comfortable range you can control.

Step 5: Reach the Bottom Position

At the bottom of the repetition, keep your chest close to the floor without resting on it.

Maintain tension throughout your body.

Avoid shifting excessively toward either hand simply to make the repetition easier.

Step 6: Push Back Up

Press firmly through both palms and extend your elbows.

Raise your body until your arms return to full extension.

Keep your core engaged and prevent your torso from twisting during the ascent.

Complete your repetitions before switching which hand is forward, or alternate the staggered position between repetitions if you can do so without sacrificing control.

Warrior showcasing How to do Staggered Push-Ups with proper form

Staggered Push-Ups Form Checklist

Use this quick checklist to ensure proper Staggered Push-Up form.

  • Place one hand slightly forward
  • Position the other hand slightly backward
  • Keep both palms firmly planted
  • Maintain a straight body line
  • Brace your core
  • Squeeze your glutes
  • Keep your hips level
  • Resist torso rotation
  • Keep your elbows controlled
  • Lower yourself through a comfortable range
  • Press back to full arm extension
  • Train both hand positions evenly

The goal is controlled asymmetry, not twisting your entire body to follow your hand position.


Common Staggered Push-Ups Mistakes

Staggering the Hands Too Far

Problem: Placing one hand extremely far forward and the other far behind can make the movement awkward and difficult to control.

Fix: Begin with a moderate offset and only increase it if you can maintain comfortable, controlled technique.

Rotating the Torso

Problem: Allowing your chest and hips to twist toward one side reduces stability and changes the intended movement.

Fix: Brace your core and keep your chest and hips facing the floor throughout each repetition.

Letting the Hips Sag

Problem: Dropping your hips breaks your body alignment and reduces core engagement.

Fix: Tighten your abdominals and squeeze your glutes to maintain a straight body line.

Raising the Hips Too High

Problem: Elevating your hips changes the pressing angle and makes the movement less like a standard Staggered Push-Ups.

Fix: Keep your shoulders, hips, knees, and ankles aligned throughout the exercise.

Flaring the Elbows Excessively

Problem: Allowing your elbows to flare directly outward can make the movement less controlled.

Fix: Let your elbows travel backward at a comfortable angle as you lower yourself.

Favoring One Side

Problem: Repeatedly using the same hand position can create an unnecessarily uneven training stimulus.

Fix: Perform an equal number of repetitions with your left and right hands in the forward position.

Rushing the Repetitions

Problem: Moving too quickly makes it easier for your hips to rotate and your body alignment to break down.

Fix: Lower yourself under control and press smoothly back to the starting position.


Staggered Push-Up Variations

Staggered Push-Ups can be adjusted according to your current strength and experience.

Knee Staggered Push-Ups

A beginner-friendly progression that reduces the amount of bodyweight you need to press.

How to Do Knee Staggered Push-Ups

  • Place your knees on the floor.
  • Position one hand slightly ahead of the other.
  • Maintain a straight line from your knees to your shoulders.
  • Lower your chest under control.
  • Press yourself back up.
  • Switch hand positions evenly.

Incline Staggered Push-Ups

Another useful progression for beginners.

How to Do Incline Staggered Push-Ups

  • Place your hands on a stable elevated surface.
  • Position one hand slightly ahead of the other.
  • Extend your legs behind you.
  • Lower your chest toward the surface.
  • Press back to full arm extension.
  • Switch hand positions after completing your repetitions.

Standard Staggered Push-Ups

The traditional version of the exercise.

How to Do Standard Staggered Push-Ups

  • Start in a high plank.
  • Move one hand slightly forward and the other backward.
  • Brace your core and glutes.
  • Lower your chest toward the floor.
  • Press yourself back up.
  • Train both hand positions equally.

Alternating Staggered Push-Ups

This variation changes the hand position between repetitions.

How to Do Alternating Staggered Push-Ups

  • Perform one Staggered Push-Up.
  • Return to the top position.
  • Switch which hand is forward and which is backward.
  • Perform another repetition.
  • Continue alternating while maintaining control.

Do not rush the hand transition.

Weighted Staggered Push-Ups

An advanced progression for increasing resistance.

How to Do Weighted Staggered Push-Ups

  • Wear a securely fitted weighted vest.
  • Assume the Staggered Push-Up position.
  • Brace your core.
  • Lower yourself under control.
  • Press back to full arm extension.
  • Train both hand positions evenly.

Only add resistance after you can perform strict bodyweight Staggered Push-Ups consistently.


Final Thoughts

Staggered Push-Ups are an effective progression beyond standard Push-Ups for developing upper-body strength while introducing asymmetrical loading and additional stability demands.

They develop:

  • Chest strength
  • Triceps strength
  • Shoulder strength
  • Core stability
  • Anti-rotation control
  • Upper-body pushing strength
  • Body control

The key is keeping the stagger moderate and maintaining the same strong body position you would use during a regular Push-Up.

Start with a small offset between your hands, train both sides equally, and gradually progress only when you can perform clean repetitions without twisting or losing your body alignment.

Control the asymmetry, keep your technique strict, and make both sides work. Learn more about Push Workouts here.

Essential Gear for Staggered Push-Ups

Staggered Push-Ups require no equipment, but a few pieces of gear can make the exercise more comfortable or provide additional progression options.

  • Exercise Mat: Provides a comfortable, non-slip surface for your hands and body during training.
  • Push-Up Handles: Can provide a neutral wrist position when arranged securely in a staggered setup.
  • Resistance Band: Can be positioned across your upper back to add resistance as bodyweight repetitions become easier.
  • Weighted Vest: Provides a convenient way for advanced trainees to progressively overload Staggered Push-Ups.
  • Wrist Wraps: Protect wrists during long staggers and rep-heavy sets.

Staggered Push-Up FAQ

Q1: How far apart should my hands be during Staggered Push-Ups?
Start with one hand only slightly ahead of the other. There is no universal distance because comfortable positioning depends on your proportions and mobility. Avoid creating such a large stagger that you lose control or experience discomfort.

Q2: How many Staggered Push-Ups should beginners do?
Beginners who already have a foundation of standard Push-Ups can start with around 5-10 controlled repetitions per hand position for 2-3 sets. Use an easier variation if you cannot maintain proper form.

Q3: Can Staggered Push-Ups help with One-Arm Push-Ups?
They can help introduce asymmetrical pressing and anti-rotation demands, making them a useful stepping stone. However, more specific progressions such as Archer Push-Ups and assisted One-Arm Push-Ups are also valuable when working toward a full One-Arm Push-Up.

Creatine vs Protein Powder: What’s the Difference?

Creatine and protein powder are two of the most popular supplements in fitness.

Both are commonly used by people trying to build muscle, improve performance, and recover from training.

But they do completely different jobs.

Protein powder helps you reach your daily protein intake by providing amino acids your body can use to build and maintain muscle.

Creatine helps increase the amount of rapidly available energy your muscles can use during short, intense efforts such as lifting, sprinting, jumping, and explosive calisthenics.

So asking whether creatine or protein powder is “better” is a bit like asking whether food or training equipment is better.

They solve different problems.

Quick Answer

The main difference is simple:

Protein powder provides protein. Creatine improves your muscles’ ability to produce energy during high-intensity exercise.

Protein powder is most useful if:

  • You struggle to eat enough protein.
  • You want a convenient protein source.
  • Muscle growth or muscle retention is a priority.

Creatine is most useful if:

  • You perform resistance training.
  • You want to improve strength and power.
  • You want to support muscle gain over time.
  • You perform repeated high-intensity exercise.

You can use:

  • Protein powder alone
  • Creatine alone
  • Both together
  • Neither

depending on your diet and goals.

Neither supplement replaces proper training, food, or recovery.


What Is Creatine?

Creatine is a naturally occurring compound stored mainly inside your muscles.

Your body produces some creatine on its own, and you can also obtain it from foods such as meat and fish.

Inside muscle cells, creatine helps regenerate ATP, which is the immediate energy source your muscles use during short, intense efforts.

That makes creatine particularly useful for activities such as:

  • Weightlifting
  • Calisthenics
  • Sprinting
  • Jumping
  • Combat sports
  • Repeated explosive efforts

Creatine does not provide protein.

It does not directly replace food.

Instead, it helps your muscles perform repeated high-intensity work more effectively.


What Is Protein Powder?

Protein powder is simply a concentrated source of dietary protein.

Common types include:

  • Whey protein
  • Casein protein
  • Soy protein
  • Pea protein
  • Plant protein blends

Protein supplies amino acids that your body uses for:

  • Muscle repair
  • Muscle growth
  • Enzymes
  • Hormones
  • Other tissues and biological processes

Protein powder is not fundamentally different from protein found in foods such as:

  • Eggs
  • Chicken
  • Fish
  • Milk
  • Greek yogurt
  • Lentils
  • Soy

Its main advantage is convenience.


The Most Important Difference

Creatine and protein powder work through completely different mechanisms.

Protein Powder

Provides the raw material needed to build muscle proteins.

Creatine

Helps your muscles regenerate energy for high-intensity exercise and may allow you to perform slightly more high-quality work over time.

That extra training capacity can contribute to better strength and muscle gains when combined with resistance training.

So:

Protein supports the building process.

Creatine supports performance.

Both can contribute to muscle growth, but they do so in different ways.


Creatine vs Protein Powder for Muscle Growth

Both can help with muscle growth.

Protein supplementation can improve gains in muscle mass when it helps bring total daily protein intake into an appropriate range. A large meta-analysis of resistance-training studies found that protein supplementation improved gains in fat-free mass and strength, with benefits leveling off around a total intake of approximately 1.6 g of protein per kilogram of bodyweight per day for many healthy adults.

Creatine can also support muscle growth, but not because it contains building blocks for muscle.

Instead, creatine can help you:

  • Perform more high-quality repetitions
  • Maintain power during repeated efforts
  • Improve training performance
  • Increase strength over time

That improved training stimulus can contribute to greater gains in lean mass.


Creatine vs Protein Powder for Strength

Creatine generally has the more direct advantage for strength and explosive performance.

This is especially relevant during:

  • Heavy lifting
  • Short sprints
  • Jumps
  • Repeated sets
  • Explosive calisthenics

Protein powder can still support strength indirectly by helping you recover and build muscle.

But drinking an extra protein shake will not immediately improve your ability to produce high-intensity energy during a set.

Creatine is designed for that role much more directly.


Creatine vs Protein Powder for Recovery

Protein powder is more directly useful for muscle recovery because it supplies amino acids.

If your normal diet already contains enough protein, though, adding another shake may provide little additional benefit.

Creatine can also support training adaptation and recovery indirectly, but it should not be thought of as a replacement for adequate protein intake.

For recovery, your priorities remain:

  • Enough daily protein
  • Enough calories
  • Carbohydrates
  • Hydration
  • Sleep

Supplements come afterward.


Which Is Better for Beginners?

That depends on what the beginner is missing.

If You Do Not Eat Enough Protein

Protein powder may be more useful.

For example, if your target is around:

120 grams of protein per day

but your normal meals only provide 80–90 grams, a protein shake can help close the gap.

If Your Protein Intake Is Already Good

Creatine may provide more additional benefit.

If you already consistently eat enough protein through normal food, adding another shake is not necessarily useful.

Creatine can then offer a different advantage by supporting high-intensity performance.


Can You Take Creatine and Protein Powder Together?

Yes.

There is no need to choose one or the other.

Many people take both because they serve different purposes.

For example:

  • Protein powder helps meet daily protein needs.
  • Creatine supports strength and repeated high-intensity performance.

You can even mix creatine into a protein shake if that is convenient.

There is no special muscle-building advantage to mixing them together, but there is nothing wrong with doing so.


Do You Need Protein Powder?

No.

Protein powder is optional.

If you already eat enough protein from foods such as:

  • Eggs
  • Meat
  • Fish
  • Dairy
  • Soy
  • Lentils
  • Beans

you may not need it.

Protein powder becomes useful when it makes your diet easier.

For example:

  • You have little time to cook.
  • You struggle to eat enough protein.
  • You need a portable protein source.
  • You have little appetite.
  • You want a quick post-workout option.

Think of protein powder as convenient food, not a magical muscle-building substance.

Do You Need Creatine?

No.

You can build muscle and strength without creatine.

But creatine is one of the most evidence-supported sports supplements available and can provide a meaningful performance advantage for people doing repeated high-intensity training.

It is particularly relevant for:

  • Lifters
  • Calisthenics athletes
  • Sprinters
  • Combat-sports athletes
  • Team-sport athletes

If your training is mostly low-intensity endurance work, the benefits may be less noticeable.


How Much Creatine Should You Take?

For creatine monohydrate, a common daily maintenance dose is:

3–5 grams per day

A loading phase is optional. A loading phase is a short period, usually about 5–7 days, where you take a higher daily creatine dose to saturate your muscles faster before switching to a normal maintenance dose.

However, taking 3–5 grams consistently will also increase muscle creatine stores over time.

Consistency matters more than taking it at a perfect time.

How Much Protein Powder Should You Take?

There is no mandatory amount.

Use only enough to help meet your total daily protein target.

For people performing regular resistance training, a practical daily protein range is approximately:

1.6–2.2 g/kg of bodyweight

For a 70 kg person:

  • 70 × 1.6 = 112 g
  • 70 × 2.2 = 154 g

If normal food already gives you around 130 grams per day, you may not need protein powder at all.

If you only reach 100 grams, one shake containing around 25–30 grams of protein could help close the gap.


Does Creatine Cause Weight Gain?

It can increase bodyweight slightly.

This often happens because creatine increases water stored inside muscle cells.

That is not the same thing as gaining body fat.

Some people notice the scale increase relatively soon after starting creatine.

Over time, improved training performance may also contribute to additional muscle gain.

Does Protein Powder Make You Gain Weight?

Protein powder only contributes to weight gain if it helps push your total calorie intake above what your body uses.

Protein contains calories just like other foods.

A shake can therefore fit into:

  • A muscle-gain diet
  • A maintenance diet
  • A fat-loss diet

depending on your total intake.

Protein powder does not automatically make you bulky or fat.


Which Is Better During a Bulk?

Both can be useful.

Protein powder helps make it easier to reach a high protein intake.

Creatine helps support strength and training performance.

During a bulk, however, your main priorities are still:

  • Calorie surplus
  • Enough protein
  • Progressive training
  • Carbohydrates
  • Recovery

Neither supplement replaces those fundamentals.

Which Is Better During Fat Loss?

Protein powder can be particularly convenient during a cut because it provides a large amount of protein without requiring a large meal.

Creatine can also remain useful during fat loss because maintaining strength and training quality helps support muscle retention.

There is generally no need to stop taking creatine simply because you are cutting.


Creatine vs Protein Powder: Cost and Value

This depends on local prices, but creatine and protein powder serve very different purposes.

Protein powder is essentially replacing protein you would otherwise need to obtain from food.

Creatine adds something different to your diet.

If money is limited:

  1. Make sure your normal food intake is good.
  2. Make sure you get enough protein.
  3. Consider creatine if your training goals suit it.
  4. Use protein powder only if it makes reaching your protein target easier.

A supplement should solve a real problem.

Do not buy it just because everyone at the gym uses it.


Common Creatine vs Protein Powder Myths

Myth 1: Creatine Is a Type of Protein

False.

Creatine is not protein and does not count toward your daily protein intake.

Myth 2: Protein Powder Works Like Creatine

No.

They work differently.

Protein supplies amino acids, while creatine supports rapid energy production during high-intensity exercise.

Myth 3: You Must Choose One

No.

You can use both.

Myth 4: Protein Powder Is Required to Build Muscle

False.

Whole-food protein works perfectly well.

Myth 5: Creatine Immediately Builds Muscle

Creatine can increase water stored inside muscle and support better training performance, but muscle growth still requires time and resistance training.

Myth 6: You Must Take Both Immediately After Training

No.

Protein timing is flexible when your total daily intake is good, and creatine timing matters far less than consistent daily use.


Practical Tips

Fix Your Diet First

Neither supplement can rescue poor nutrition.

Check Your Protein Intake

If you already eat enough protein, protein powder may offer little extra benefit.

Choose Creatine Monohydrate

You do not need expensive exotic forms of creatine.

Take Creatine Consistently

Daily consistency matters more than perfect timing.

Use Protein Powder for Convenience

Use it when normal meals are impractical or insufficient.

Keep Training the Priority

Resistance training is still the main stimulus for becoming stronger and building muscle.

Protein supplementation can help, but even the large meta-analysis showing a benefit found that resistance training itself accounted for far more of the strength improvement than adding protein supplementation.


Creatine vs Protein Powder: Which Should You Choose?

If you can only choose one, ask yourself a simple question:

Am I already eating enough protein?

If the answer is no, protein powder may be more useful because adequate protein is a basic requirement for muscle growth.

If the answer is yes, creatine may offer more additional benefit because it provides something your high-protein diet does not already cover.

For someone who trains seriously and can afford both:

Using both is completely reasonable.

They are complementary rather than competing supplements.


Final Thoughts

Creatine and protein powder are not substitutes.

They perform different jobs.

Protein powder:

  • Helps you meet your daily protein target.
  • Provides amino acids.
  • Supports muscle growth and recovery.
  • Is mainly a convenience tool.

Creatine:

  • Supports rapid energy production.
  • Can improve strength and high-intensity performance.
  • Can help increase training capacity.
  • May support greater muscle gain over time.

If your diet lacks protein, fix that first.

If your protein intake is already sufficient and you want an evidence-backed performance supplement, creatine is a strong option.

And if your nutrition, training, and budget allow it, there is no reason you cannot use both.

Just remember:

Training creates the stimulus. Food provides the foundation. Supplements only help around the edges.

Learn more about Nutrition for Workouts here.


FAQ

Q1: Is creatine better than protein powder for muscle growth?
Neither is universally better. Protein powder helps when your daily protein intake is too low, while creatine can improve training performance and support additional muscle gain over time.

Q2: Should beginners take creatine or protein powder first?
If a beginner is not eating enough protein, correcting protein intake should come first. If protein intake is already sufficient, creatine may provide more additional benefit.

Q3: Does creatine contain protein?
No. Creatine is not protein and does not contribute toward your daily protein target..

How to Do Distance Running Correctly: Step-by-Step Guide for Beginners

Learn how to do Distance Running with proper form, control your pace, improve endurance, and avoid common mistakes that can make longer runs unnecessarily difficult.

Distance Running is one of the simplest and most effective ways to develop cardiovascular endurance and aerobic fitness. Unlike sprinting, the goal is not maximum speed. Instead, you maintain a sustainable effort over a longer distance or period of time.

Whether you’re preparing for your first 5K, improving your general fitness, building stamina for sports, or simply trying to run farther without stopping, mastering the fundamentals of Distance Running can make your training more efficient and sustainable.


What Is Distance Running?

Distance Running is continuous running performed over longer distances at an effort that can be sustained significantly longer than a sprint.

There is no single distance that defines every distance-running workout. Depending on your fitness level and goals, it may involve anything from a beginner’s continuous run to longer endurance sessions and competitive races.

Distance Running is commonly used in:

  • Endurance training
  • 5K and 10K preparation
  • Half-marathon and marathon training
  • Military and fitness preparation
  • General cardiovascular training
  • Athletic conditioning

The key is controlling your effort so you can maintain your running form and pace throughout the intended distance.

Benefits of Distance Running

Distance Running provides several cardiovascular, endurance, and fitness benefits.

Benefits include:

  • Improves aerobic endurance
  • Builds cardiovascular fitness
  • Develops running stamina
  • Strengthens the lower body
  • Improves running efficiency
  • Increases work capacity
  • Supports general fitness
  • Can help prepare you for longer races
  • Requires relatively little equipment

Consistent Distance Running can gradually improve your ability to maintain physical activity for longer periods without becoming exhausted as quickly.

Muscles Worked in Distance Running

Distance Running primarily trains the lower body, while the core and upper body help maintain posture and efficient movement.

Primary Muscles
  • Quadriceps
  • Hamstrings
  • Glutes
  • Calves
Secondary Muscles
  • Hip Flexors
  • Tibialis Anterior
  • Core Muscles
  • Hip Stabilizers
  • Lower Back
  • Shoulders and Arms

Although running is dominated by the lower body, your entire body contributes to maintaining balance, posture, rhythm, and forward movement.


How to Do Distance Running (Step-by-Step)

Step 1: Warm Up

Begin with several minutes of easy movement before starting your main run.

Your warm-up can include:

  • Brisk walking
  • Easy jogging
  • Leg swings
  • Hip circles
  • Ankle circles
  • Walking lunges

Gradually increase your movement intensity rather than immediately beginning at your planned running pace.

Step 2: Establish Your Running Posture

Stand tall while maintaining a relaxed posture.

Keep your:

  • Head neutral
  • Eyes looking ahead
  • Shoulders relaxed
  • Chest naturally upright
  • Core lightly engaged
  • Arms relaxed

Avoid excessively leaning backward or bending forward from your waist.

A slight forward inclination of the whole body can occur naturally while running.

Step 3: Use a Comfortable Arm Swing

Bend your elbows naturally and allow your arms to swing alongside your body.

Keep your hands relaxed rather than tightly clenched.

Your arms should primarily move forward and backward instead of swinging excessively across your torso.

Step 4: Run With a Natural Stride

Allow your feet to land naturally underneath or relatively close to your body’s center of mass.

Focus on:

  • Smooth steps
  • Controlled foot contact
  • Relaxed movement
  • Comfortable stride length
  • Consistent rhythm

There is no need to deliberately force a particular foot-strike pattern if your natural stride is comfortable and controlled.

Step 5: Control Your Pace

Start slower than you think you need to, particularly when you’re new to Distance Running.

For easier endurance runs, choose an effort that allows you to maintain control without becoming exhausted early.

Tip: On many easy runs, you should be able to speak in short sentences or hold a basic conversation. If you’re gasping for air early in the run, your pace may be too aggressive for an easy endurance session.

Step 6: Maintain Relaxed Breathing

Breathe naturally and rhythmically while running.

Avoid unnecessarily forcing yourself to breathe only through your nose or only through your mouth.

As your effort increases, breathing through both your nose and mouth may help you comfortably meet your oxygen demands.

Step 7: Maintain Your Form

As fatigue develops, continue paying attention to your posture and movement.

Try to maintain:

  • Relaxed shoulders
  • Controlled arm swing
  • Stable torso
  • Natural stride
  • Consistent rhythm

If your form begins breaking down significantly, reduce your pace rather than forcing yourself to maintain an unsustainable speed.

Step 8: Finish and Cool Down

Avoid treating every run like a finishing sprint.

After completing your planned distance, gradually reduce your pace and walk for several minutes.

Allow your breathing and heart rate to settle before finishing your session.

Warrior showcasing How to do Distance Running with proper form

Distance Running Form Checklist

Use this quick checklist to maintain proper Distance Running form.

  • Keep your head neutral
  • Look ahead
  • Relax your shoulders
  • Keep your hands relaxed
  • Maintain a controlled arm swing
  • Keep your torso stable
  • Use a natural stride
  • Avoid excessive overstriding
  • Maintain a sustainable pace
  • Breathe naturally
  • Stay relaxed as fatigue develops
  • Slow down if your form deteriorates significantly

Efficient Distance Running should feel controlled rather than tense and forced.


Common Distance Running Mistakes

Starting Too Fast

Problem: Running aggressively at the beginning can cause you to fatigue long before reaching your planned distance.

Fix: Begin conservatively and allow yourself time to settle into a sustainable pace.

Overstriding

Problem: Reaching your foot excessively far ahead of your body can create unnecessary braking forces and make your stride less efficient.

Fix: Use a comfortable, natural stride and avoid deliberately reaching forward with each step.

Tensing the Upper Body

Problem: Clenched fists, raised shoulders, and excessive upper-body tension waste energy.

Fix: Relax your hands, shoulders, jaw, and arms while maintaining good posture.

Increasing Distance Too Quickly

Problem: Suddenly adding large amounts of running volume can exceed your current ability to recover.

Fix: Increase your training gradually and allow your body time to adapt. There is no single progression percentage that is appropriate for every runner.

Running Every Session Hard

Problem: Treating every run like a race can create unnecessary fatigue and make consistent training difficult.

Fix: Keep many endurance runs at an easy, sustainable effort and reserve harder sessions for appropriate parts of your training program.

Ignoring Pain

Problem: Continuing to run through sharp, worsening, or unusual pain can aggravate an existing problem.

Fix: Stop or reduce your training when necessary. Persistent or significant pain should be assessed by an appropriate healthcare professional.

Wearing Unsuitable Shoes

Problem: Shoes that fit poorly or are inappropriate for your running environment can make longer runs uncomfortable.

Fix: Use running shoes that fit securely and comfortably and are appropriate for the surfaces you regularly run on.


Distance Running Variations

Distance Running can be structured in several ways depending on your experience and training goals.

Run-Walk Training

An excellent progression for beginners who cannot yet run continuously for their target duration.

How to Do Run-Walk Training

  • Begin with an easy jog.
  • Run for a manageable period.
  • Switch to brisk walking before becoming exhausted.
  • Resume running after recovering.
  • Repeat the intervals for your planned session.

Gradually increase the running portions as your endurance improves.

Easy Distance Running

The foundation of many endurance programs.

How to Do Easy Distance Running

  • Warm up gradually.
  • Settle into a comfortable pace.
  • Maintain an effort you can sustain without excessive fatigue.
  • Keep your breathing controlled.
  • Complete your planned distance and cool down.

Long Runs

Long Runs extend your normal endurance training and prepare your body for prolonged running.

How to Do Long Runs

  • Choose an appropriate distance for your current fitness level.
  • Begin at a conservative pace.
  • Maintain a sustainable effort.
  • Pay attention to hydration and fueling on sufficiently long sessions.
  • Finish under control rather than racing the final section.

Increase Long Run distance gradually as your endurance develops.

Tempo Runs

Tempo Runs introduce sustained faster running into an endurance program.

How to Do Tempo Runs

  • Begin with an easy warm-up.
  • Increase to a controlled, comfortably hard effort.
  • Maintain the planned effort without sprinting.
  • Reduce your pace after completing the faster section.
  • Finish with an easy cool-down.

Tempo training is more demanding than normal easy Distance Running and should be programmed accordingly.

Trail Distance Running

Trail Running adds changing terrain, elevation, and surface conditions.

How to Do Trail Distance Running

  • Choose a trail appropriate for your experience.
  • Reduce your pace on difficult terrain.
  • Watch your footing carefully.
  • Adjust your stride to hills and uneven surfaces.
  • Maintain control throughout the run.

Do not expect your normal road-running pace to remain the same on challenging trails.


Final Thoughts

Distance Running is one of the most effective ways to develop cardiovascular endurance, stamina, and general aerobic fitness.

It develops:

  • Aerobic endurance
  • Cardiovascular fitness
  • Running stamina
  • Lower-body endurance
  • Pacing ability
  • Movement efficiency
  • Mental discipline

The key to improving is not turning every session into a test of how far or fast you can run.

Start at a distance you can handle, keep most beginner endurance work controlled, and gradually increase your workload as your body adapts. Consistency over weeks and months matters more than destroying yourself during a single run.

Find your rhythm, control your pace, and let the miles build your endurance one run at a time. Learn more about Conditioning Here.

Essential Gear for Distance Running

Distance Running requires relatively little equipment, but the right gear can make longer runs more comfortable and practical.

  • Running Shoes: Well-fitting shoes appropriate for your running surface provide comfort and traction throughout your runs.
  • Running Clothing: Lightweight, breathable clothing can help you remain comfortable during longer sessions and changing weather conditions.
  • Running Socks: Properly fitting moisture-managing socks can improve comfort and help reduce friction during longer runs.
  • Running Watch: An optional watch can help track distance, pace, duration, and training progress.
  • Hydration Belt or Running Vest: Useful for carrying fluids during longer runs, particularly when water is not readily available along your route.

Distance Running FAQ

Q1: How far should a beginner run?
There is no single ideal starting distance. Begin with a distance or duration you can complete with controlled effort and good form. If continuous running is too difficult, use Run-Walk intervals and gradually increase your running time.

Q2: How many times per week should beginners do Distance Running?
Many beginners can start with around 2-3 running sessions per week, allowing recovery between sessions. Your ideal frequency depends on your current fitness, training volume, other activities, and recovery.

Q3: Should I run for distance or time as a beginner?
Either can work, but training by time can be especially simple for beginners because it removes pressure to hit a particular distance or pace. For example, you can gradually build your ability to remain active for longer periods before focusing heavily on mileage.

Roadmap to Your First L-Sit

The Complete Beginner’s Guide to Mastering Your First L-Sit

This Roadmap to Your First L-Sit is built to take you from basic core strength to your first clean, controlled L-Sit — one step, one second, and one victory at a time.

No gym membership required.
No expensive equipment needed.

Just consistency, discipline, and effort.


Why the L-Sit Matters

The L-Sit is one of the most important foundational skills in calisthenics.

It may look simple: support yourself on your hands while holding both legs straight in front of you. But once you try it, you’ll quickly discover how much strength and control it actually demands.

The L-Sit combines core strength, hip flexor strength, straight-arm support, compression, mobility, and total-body tension into one powerful static hold.

Mastering the L-Sit develops:

  • Core strength
  • Hip flexor strength
  • Straight-arm support strength
  • Shoulder stability
  • Compression strength
  • Hamstring mobility
  • Body control
  • Balance

Building a strong L-Sit can also prepare you for more advanced skills such as:

  • V-Sits
  • L-Sit to Handstand
  • Press to Handstand
  • L-Sit Pull-Ups
  • L-Sit Dips
  • Manna Progressions
  • Advanced Core Skills

The L-Sit is more than an ab exercise. It teaches you to create and maintain tension throughout your entire body — a skill that carries over into advanced calisthenics.


Skill Difficulty

CategoryDetails
Difficulty★★★☆☆ (Intermediate)
Estimated Time4–12 Weeks
EquipmentFloor or Two Sturdy Chairs; Parallettes or Dip Bars (Recommended)
Prerequisites30-Second Plank, Basic Support Strength, Comfortable Hamstring Mobility
UnlocksV-Sit, L-Sit Pull-Ups, L-Sit Dips, L-Sit to Handstand, Press to Handstand, Manna Progressions

Why Most People Can’t Do an L-Sit

The L-Sit demands several abilities at the same time.

You might have strong abs and still struggle to lift your legs. You might have powerful arms but lack the mobility needed to straighten your knees.

Here are some of the most common reasons beginners struggle.

Weak Hip Flexors

Your hip flexors must work extremely hard to keep your legs lifted in front of you.

Poor Compression Strength

Compression strength is your ability to actively pull your legs toward your torso. This is one of the most important and commonly overlooked requirements of the L-Sit.

Weak Core

Your abs must remain strongly engaged throughout the hold.

Weak Support Position

Your shoulders, triceps, and arms must support your entire bodyweight while your feet remain off the floor.

Tight Hamstrings

Limited hamstring flexibility can make straightening your legs significantly harder.

Poor Scapular Control

Allowing your shoulders to collapse upward toward your ears makes maintaining the position much more difficult.


L-Sit Form Basics

Before beginning the roadmap, understand what a proper L-Sit should look like.

Correct L-Sit Form

  • Hands firmly planted beside your hips
  • Arms completely straight
  • Elbows locked
  • Shoulders pushed down away from your ears
  • Core tightly braced
  • Hips lifted from the ground
  • Legs together
  • Knees straight
  • Legs approximately parallel to the floor
  • Toes pointed

Think about pushing the floor away while simultaneously pulling your thighs toward your chest.


Equipment Needed

You can train the L-Sit at home with minimal equipment.

This roadmap can be performed using:

  • Floor space

Recommended:

Parallettes make the early progressions easier because the extra clearance gives your legs and hips more room.

However, the ultimate goal is to develop enough strength and compression to perform an L-Sit even from the floor.


Weekly Training Schedule

Train your L-Sit three times per week.

Example Schedule

DayTraining
MondayL-Sit Training
WednesdayL-Sit Training
FridayL-Sit Training

Allow at least one recovery day between sessions.

Because the L-Sit places considerable stress on your hip flexors, shoulders, triceps, and core, more training is not always better.

Quality matters more than endless attempts.


Pre-Workout Warm-Up

Prepare your wrists, shoulders, hips, and core before beginning.

Wrist and Shoulder Warm-Up

Hip and Hamstring Warm-Up

  • Leg Swings × 15 per leg
  • Seated Forward Fold × 20 seconds
  • Alternating Pike Reaches × 10 per side

Core Activation


Phase 1 – Master the Support Hold

Goal

Build the straight-arm support strength required to lift your body.

How to Do a Support Hold

  • Place your hands on parallettes, dip bars, yoga blocks, or two stable elevated surfaces.
  • Lock your elbows completely.
  • Push downward through your hands.
  • Depress your shoulders by keeping them away from your ears.
  • Brace your core.
  • Lift your body and hold yourself above the supports.

Workout

Support Holds

  • 5 sets × 15–30 seconds

Progression Goal

Hold a strong support position for 30 seconds without bending your elbows or shrugging your shoulders.


Phase 2 – Build Compression Strength

Goal

Develop the strength needed to lift your legs toward your torso.

How to Do Seated Leg Lifts

  • Sit on the floor with both legs extended straight in front of you.
  • Place your hands beside your thighs.
  • Keep your knees completely straight.
  • Brace your core.
  • Lift both heels from the floor.
  • Lower them slowly without losing control.

If lifting both legs is too difficult, begin with one leg at a time.

Workout

Seated Leg Lifts

  • 4 sets × 8–12 reps

Hollow Body Hold

  • 3 sets × 20–30 seconds

Progression Goal

Perform 12 clean double-leg lifts without bending your knees.


Phase 3 – Tuck L-Sit

Goal

Support your entire bodyweight while keeping your feet off the ground.

Shortening the lever by bending your knees makes this considerably easier than a full L-Sit.

How to Do a Tuck L-Sit

  • Begin in a strong support position.
  • Lock your elbows.
  • Push your shoulders down.
  • Bring both knees toward your chest.
  • Lift your feet completely from the floor.
  • Keep your core tight.
  • Hold the position without swinging.

Workout

Tuck L-Sit

  • 5 sets × 10–20 seconds

Progression Goal

Hold a controlled Tuck L-Sit for 20 seconds.


Phase 4 – One-Leg L-Sit

Goal

Gradually introduce the leverage of straight legs.

How to Do a One-Leg L-Sit

  • Begin in a Tuck L-Sit.
  • Keep one knee tucked toward your chest.
  • Slowly extend the opposite leg forward.
  • Straighten the extended knee completely.
  • Keep your hips elevated.
  • Alternate legs between sets.

Workout

One-Leg L-Sit

  • 4 sets × 10–15 seconds per leg

Seated Leg Lifts

  • 3 sets × 10 reps

Progression Goal

Hold each leg fully extended for 15 seconds without losing your support position.


Phase 5 – Alternating L-Sit Extensions

Goal

Prepare your body to support both straight legs simultaneously.

How to Do Alternating L-Sit Extensions

  • Start in a strong Tuck L-Sit.
  • Extend one leg completely.
  • Return it to the tuck position.
  • Extend the opposite leg.
  • Continue alternating slowly.
  • Keep your hips lifted and your shoulders depressed throughout the movement.

Workout

Alternating L-Sit Extensions

  • 4 sets × 8 extensions per leg

Tuck L-Sit

  • 3 sets × 20 seconds

Progression Goal

Extend each leg smoothly without your hips dropping or your elbows bending.


Phase 6 – Your First Full L-Sit

The moment you’ve been working toward.

Checklist Before Attempting

✓ 30-Second Support Hold

✓ 12 Controlled Seated Double-Leg Lifts

✓ 20-Second Tuck L-Sit

✓ 15-Second One-Leg L-Sit on Each Side

✓ Controlled Alternating Leg Extensions

If you’ve achieved these milestones, you’re ready to attempt your first Full L-Sit.

How to Do a Full L-Sit

  • Place your hands beside your hips.
  • Press firmly through your hands.
  • Lock your elbows.
  • Push your shoulders down.
  • Brace your abs hard.
  • Lift your hips from the floor.
  • Extend both legs straight in front of you.
  • Keep your knees locked and legs together.
  • Hold your legs approximately parallel to the floor.
  • Point your toes and maintain full-body tension.

Your first hold might last only one or two seconds.

That’s enough.

You’ve achieved your first L-Sit.

Now build it.

Workout

Full L-Sit Attempts

  • 6–8 attempts × 5–10 seconds

Tuck L-Sit

  • 3 sets × 20 seconds

Seated Leg Lifts

  • 3 sets × 12 reps

Hollow Body Hold

  • 3 sets × 30 seconds

Train three times each week.


Post-Workout Stretch Routine

Repeat after every session.


How Long Does It Take to Get Your First L-Sit?

The L-Sit is considerably more achievable than skills like the Planche, but it still requires patience.

Your progress depends on:

  • Core strength
  • Hip flexor strength
  • Compression strength
  • Hamstring mobility
  • Support strength
  • Body proportions
  • Consistency

Estimated Timelines

Starting LevelTime Estimate
Complete Beginner8–16 Weeks
Some Calisthenics Experience4–10 Weeks
Strong Core and Good Mobility2–6 Weeks

Don’t become obsessed with the timeline.

Your goal is not simply to reach the L-Sit as quickly as possible. Your goal is to build the strength required to own it.


Common L-Sit Mistakes

Bending Your Knees

If you cannot straighten your legs yet, continue training compression strength and hamstring mobility rather than forcing poor form.

Shrugging Your Shoulders

Push downward hard and keep your shoulders away from your ears.

Bending Your Arms

Keep your elbows completely locked during the hold.

Leaning Too Far Back

Excessive backward lean often compensates for insufficient compression strength.

Ignoring Hamstring Mobility

Tight hamstrings can make an otherwise strong athlete struggle with the L-Sit.

Only Training L-Sit Attempts

Repeatedly attempting the full skill isn’t enough.

Train the weaknesses preventing you from achieving it.


Nutrition Tips for Faster Progress

Your core and hip flexors need recovery just like every other muscle group.

Prioritize:

  • High-quality protein
  • Complex carbohydrates
  • Fruits and vegetables
  • Healthy fats
  • Plenty of water
  • 7–9 hours of quality sleep

Consistent training creates the stimulus.

Proper recovery allows your body to adapt.


Final Thoughts

The L-Sit may look simple from the outside, but earning your first clean hold requires strength, mobility, patience, and control.

Every support hold strengthens your arms.

Every leg lift builds your compression.

Every Tuck L-Sit teaches you to control your body.

And every failed attempt brings you one step closer.

  • Trust the roadmap.
  • Build the foundation.
  • Keep showing up.

Soon, your feet won’t touch the ground.

Lean Bulk vs Dirty Bulk: What’s the Difference?

When people decide to bulk, they usually take one of two approaches.

One person carefully increases calories, keeps protein high, tracks bodyweight, and tries to gain muscle slowly.

Another starts eating everything in sight because “you have to eat big to get big.”

These approaches are commonly called a lean bulk and a dirty bulk.

Both create a calorie surplus and can increase bodyweight.

But the rate of weight gain, food quality, and amount of body fat gained can be very different.

So which approach is better for building muscle?

For most people, the answer is simple:

A controlled lean bulk is usually the better long-term strategy.

Quick Answer

A lean bulk uses a small-to-moderate calorie surplus with controlled weight gain and a diet based mostly on nutritious foods.

A dirty bulk uses a much larger surplus with less concern about calorie intake or food quality.

Both can help you gain muscle if you train properly and eat enough protein.

However:

  • A dirty bulk usually increases bodyweight faster.
  • Faster weight gain does not automatically mean faster muscle growth.
  • Large surpluses tend to increase unnecessary body-fat gain.
  • A lean bulk makes it easier to remain relatively lean while gaining muscle.
  • Dirty bulking may make eating enough easier for people with very low appetites, but the surplus still does not need to become extreme.

For most lifters, slow and controlled weight gain wins.


What Is a Lean Bulk?

A lean bulk is a muscle-gain phase in which you intentionally maintain a relatively small calorie surplus.

The goal is to provide enough extra energy for:

  • Muscle growth
  • Hard training
  • Recovery
  • Strength progression

while limiting unnecessary body-fat gain.

A typical lean bulk focuses on:

  • A modest calorie surplus
  • Adequate protein
  • Plenty of carbohydrates for training
  • Healthy dietary fats
  • Mostly nutrient-dense foods
  • Slow weight gain
  • Progressive resistance training

The word “lean” does not mean you will gain zero fat.

Some body-fat gain is normal during most bulking phases.

The goal is simply to keep it under control.

Advantages of a Lean Bulk

A lean bulk generally offers:

  • Less unnecessary fat gain
  • Better control over bodyweight
  • Easier tracking
  • Better diet quality
  • Shorter future cutting phases
  • Easier maintenance of a leaner appearance

It can also teach you how your body actually responds to different calorie levels.

If weight stops increasing, you add a little food.

If weight increases too quickly, you reduce calories slightly.

Simple.

Disadvantages of a Lean Bulk

A lean bulk is not perfect.

It requires more:

  • Patience
  • Tracking
  • Meal planning
  • Consistency

Weight gain can also feel frustratingly slow.

If you judge your progress only by the scale, you may feel like nothing is happening.

But muscle itself grows slowly.

Slow scale progress is not necessarily a problem.


What Is a Dirty Bulk?

A dirty bulk takes a much less controlled approach.

The goal is usually to eat a large amount of food and make bodyweight increase quickly.

People dirty bulking may regularly rely on:

  • Fast food
  • Pizza
  • Burgers
  • Fried foods
  • Desserts
  • Sugary drinks
  • Large snacks
  • Very large portions

Dirty bulking does not necessarily mean every meal is junk food.

The main difference is that calorie intake is much less controlled and the surplus is usually much larger.

This can certainly make gaining weight easier.

But gaining weight and gaining muscle are not the same thing.

Advantages of a Dirty Bulk

Dirty bulking does have some practical advantages.

It can make it easier to:

  • Reach a high calorie intake
  • Gain bodyweight
  • Eat enough with a low appetite
  • Fuel extremely high activity levels

Someone who genuinely struggles to eat enough may benefit from including more calorie-dense foods.

The mistake is assuming they need an uncontrolled surplus.

You can increase calories efficiently without turning every meal into fast food.

Disadvantages of a Dirty Bulk

The main problems include:

  • Faster body-fat gain
  • Longer cutting phases later
  • Harder calorie control
  • Potentially poorer diet quality
  • Greater changes in waist size and appearance
  • Mistaking scale weight for muscle growth

The psychological side matters too.

Seeing the scale rise quickly can feel productive.

But if much of the additional weight is fat, the speed is misleading.


The Most Important Difference: Surplus Size

Muscle growth requires adequate energy, but your body has a limited rate at which it can build new muscle.

Eating far beyond that requirement does not force your muscles to grow twice as quickly.

Research on intentional weight gain supports using additional energy during muscle-gain phases, but the exact ideal surplus varies between individuals. Reviews commonly discuss increases of around 300–500 calories per day while emphasizing that actual responses should be monitored and adjusted.

More recent research comparing different rates of weight gain found that larger surpluses primarily increased fat gain, without clearly producing proportionally greater muscle thickness or strength improvements.

That is the main problem with dirty bulking.

Once you have enough calories to support productive muscle growth, continuously adding more food gives diminishing returns.


Lean Bulk vs Dirty Bulk: Muscle Gain

Both approaches can build muscle.

If two people:

  • Train progressively
  • Eat enough protein
  • Recover properly
  • Maintain a calorie surplus

both can make progress.

However, there is little reason to assume that the person eating dramatically more calories will build dramatically more muscle.

The extra surplus can instead increase:

  • Fat mass
  • Waist size
  • Total bodyweight

without producing an equivalent increase in muscle.

This makes the lean bulk more efficient for most people.

You gain weight somewhat more slowly, but a larger percentage of your progress is more likely to be useful.


Lean Bulk vs Dirty Bulk: Fat Gain

This is where the difference becomes obvious.

Lean Bulk

You deliberately control the surplus.

Weight rises gradually, making it easier to monitor whether you are gaining too quickly.

Dirty Bulk

Calories can exceed your needs by hundreds or even thousands per day.

Bodyweight rises faster, but so can body fat.

The faster you accumulate unnecessary fat, the more fat you may eventually need to lose during a cutting phase.

That can turn a short-term “easy bulk” into a much longer diet later.


Food Quality Matters Too

A calorie surplus controls whether you gain weight, but food quality still matters for health and performance.

A good bulking diet should provide:

  • Protein
  • Carbohydrates
  • Healthy fats
  • Fiber
  • Vitamins
  • Minerals
  • Fruits
  • Vegetables

A lean bulk usually makes these foods the foundation of the diet.

That might include:

  • Eggs
  • Chicken
  • Fish
  • Lean beef
  • Greek yogurt
  • Milk
  • Rice
  • Potatoes
  • Oats
  • Pasta
  • Fruit
  • Vegetables
  • Nuts
  • Olive oil

A dirty bulk may still include some of these foods, but highly processed, calorie-dense foods often take up a much larger share of the diet.


Does a Lean Bulk Mean Eating Only “Clean” Foods?

No.

This is an important distinction.

A lean bulk does not require:

  • Plain chicken at every meal
  • Zero desserts
  • Zero fast food
  • No pizza
  • No chocolate
  • Perfect eating every day

You can still enjoy calorie-dense foods.

The difference is that they fit within a controlled overall diet rather than becoming an excuse to eat unlimited calories.

For example, a mostly nutritious bulking diet can easily include:

  • A burger
  • Ice cream
  • Pizza
  • Chocolate
  • Other foods you enjoy

as long as your overall calories, protein, fiber, and micronutrient intake remain appropriate.


Example Lean Bulk

Imagine someone maintains their weight around:

2,500 calories per day

They begin eating:

2,750 calories per day

They keep protein high, train progressively, and monitor their weekly average bodyweight.

If weight rises slowly, they continue.

If it stalls for several weeks, they might add another 100–200 calories.

This is controlled bulking.

Example Dirty Bulk

The same person maintains around:

2,500 calories

but begins eating:

3,500–4,000 calories per day

because they want to gain as quickly as possible.

Their bodyweight may increase rapidly.

But their muscles cannot necessarily use the entire 1,000–1,500 calorie surplus to build new tissue.

Much of the extra energy can eventually contribute to fat storage.

That is why faster scale gain is not automatically better.


How Fast Should You Gain Weight?

There is no perfect rate for everyone.

A useful starting target for many people is approximately:

0.25–0.5% of bodyweight per week

For a 70 kg person:

  • 0.25% = about 0.18 kg per week
  • 0.5% = about 0.35 kg per week

Beginners may sometimes tolerate somewhat faster gains because they have greater muscle-building potential.

More advanced lifters usually benefit from slower weight gain because their rate of muscle growth is lower.


Which Approach Is Better for Beginners?

For most beginners:

Lean bulk.

Beginners already have strong muscle-building potential.

They do not need an enormous surplus to force progress.

A moderate surplus combined with:

  • Progressive resistance training
  • Adequate protein
  • Carbohydrates
  • Sleep
  • Consistency

is usually enough.

The exception may be a very lean beginner who struggles badly to eat enough.

Even then, increasing calorie density is usually smarter than abandoning calorie control entirely.


What If You Struggle to Eat Enough?

Instead of dirty bulking, add more calorie-dense nutritious foods.

Examples include:

  • Peanut butter
  • Nuts
  • Whole milk
  • Olive oil
  • Avocado
  • Granola
  • Dried fruit
  • Rice
  • Pasta
  • Smoothies

A shake containing:

  • Milk
  • Oats
  • Banana
  • Peanut butter
  • Whey protein

can add substantial calories without requiring another enormous solid meal.

This gives you the convenience of dirty bulking without needing an excessive surplus.


Can You Gain Zero Fat on a Lean Bulk?

Probably not consistently.

A perfect bulk in which every kilogram gained is pure muscle is unrealistic for most people.

Your scale weight can increase because of:

  • Muscle
  • Glycogen
  • Water
  • Food mass
  • Body fat

The goal is not zero fat gain.

The goal is:

Reasonable muscle gain with manageable fat gain.


Common Lean Bulk and Dirty Bulk Mistakes

Thinking More Calories Always Mean More Muscle

They do not.

Once energy needs are covered, a larger surplus increasingly promotes fat gain.

Making a Lean Bulk Too Lean

If you are so afraid of fat gain that your bodyweight never increases, you may not actually be bulking.

Track your weight and adjust calories when necessary.

Calling Everything a Dirty Bulk

Eating pizza once does not turn your diet into a dirty bulk.

The overall calorie surplus and dietary pattern matter.

Ignoring Protein

Neither approach works well for maximizing muscle if protein intake is inadequate.

Not Training Progressively

A calorie surplus without a strong resistance-training stimulus is mainly a recipe for gaining weight.

Judging Progress Only by Bodyweight

Also track:

  • Strength
  • Repetitions
  • Measurements
  • Progress photos
  • Training performance

The scale cannot tell you what every kilogram consists of.


Practical Tips for a Better Bulk

Start Conservatively

You can always add more calories later.

Track Weekly Bodyweight

Do not react to one unusually high or low weigh-in.

Keep Protein High

Aim for roughly:

1.6–2.2 g/kg of bodyweight per day

for most resistance-trained people.

Use Carbohydrates to Fuel Training

Rice, potatoes, oats, pasta, bread, and fruit can make hitting your calorie target easier while supporting hard training.

Include Foods You Enjoy

A good bulk should be sustainable.

Adjust Slowly

If weight does not increase for 2–3 weeks, add around:

100–200 calories per day

If weight is rising much faster than intended for several weeks, reduce calories slightly.


Lean Bulk vs Dirty Bulk: Which Should You Choose?

For most people trying to build muscle:

Choose a lean bulk.

A dirty bulk does not unlock a secret level of muscle growth.

It mostly makes it easier to eat more food.

A controlled surplus already gives your body additional energy to support muscle growth and resistance-training demands. Larger surpluses can increase weight faster, but available research suggests much of the additional gain may simply be body fat.

That does not mean you should become obsessed with eating perfectly.

A good lean bulk can still contain enjoyable, calorie-dense foods.

The goal is simply to keep the overall process controlled.


Final Thoughts

Both lean bulking and dirty bulking can increase bodyweight and support muscle gain.

The difference is how much control you maintain.

A lean bulk emphasizes:

  • Moderate calorie surplus
  • Slow weight gain
  • Adequate protein
  • Nutritious foods
  • Progressive training
  • Limited unnecessary fat gain

A dirty bulk emphasizes:

  • Large calorie intake
  • Rapid weight gain
  • Less calorie control
  • Greater flexibility with food quality
  • Higher risk of unnecessary fat gain

For most lifters, there is little advantage in rushing.

Muscle growth is slow regardless of how fast you can make the scale move.

Give your body enough calories to grow, train hard enough to make those calories useful, and adjust your intake according to your actual results.

That is a much better strategy than simply eating everything you can find.

Learn more about Nutrition for Workouts here.


FAQ

Q1: Is a lean bulk better than a dirty bulk?
For most people, yes. A lean bulk provides enough additional calories to support muscle growth while reducing unnecessary fat gain.

Q2: Does a dirty bulk build muscle faster?
Not necessarily. A larger surplus can make bodyweight rise faster, but research suggests much of the additional weight gained from larger surpluses may be body fat rather than extra muscle.

Q3: Is dirty bulking good for hard gainers?
Hard gainers may benefit from more calorie-dense foods and liquid calories, but they still do not need an uncontrolled surplus.