How to Do a Back Lever Correctly: Step-by-Step Guide for Beginners

Learn how to do a Back Lever with proper form, avoid common mistakes, and follow the right progressions to develop the shoulder strength, core stability, straight-arm strength, and body control required for this advanced calisthenics skill.

The Back Lever is an impressive static hold where you suspend your body horizontally beneath a bar or gymnastics rings while facing the floor. Your arms remain straight behind your body as your entire body forms a rigid line roughly parallel to the ground.

Although it can look simple once mastered, the Back Lever places significant demands on your shoulders, elbows, upper body, and core. Beginners should develop the necessary mobility and strength progressively instead of immediately attempting the full position.


What Is a Back Lever?

The Back Lever is an advanced static calisthenics exercise performed while hanging from a Pull-Up bar or gymnastics rings.

You move through an inverted position before lowering your body behind your arms until your torso and legs become approximately parallel to the floor.

A strong Back Lever position generally involves:

  • Straight arms
  • Controlled shoulders
  • Tight core
  • Engaged glutes
  • Straight legs
  • Legs together
  • Body approximately parallel to the floor

Back Levers are commonly used in:

  • Calisthenics
  • Street workout
  • Gymnastics
  • Bodyweight strength training
  • Static skill training
  • Advanced core training

Because your arms are positioned behind your torso, the Back Lever requires substantial shoulder control and straight-arm strength in addition to a strong core.

Benefits of the Back Lever

Back Lever training provides several advanced strength and body-control benefits.

Benefits include:

  • Develops straight-arm strength
  • Strengthens the shoulders
  • Builds upper-back strength
  • Develops core stability
  • Improves scapular control
  • Strengthens the arms
  • Develops full-body tension
  • Improves body awareness
  • Builds advanced calisthenics control

The progressive nature of Back Lever training allows you to develop these qualities gradually before attempting the full skill.

Muscles Worked in the Back Lever

The Back Lever is a full-body isometric exercise requiring several muscle groups to work together to maintain the horizontal position.

Primary Muscles
  • Latissimus Dorsi
  • Deltoids
  • Pectoralis Major
  • Core Muscles
Secondary Muscles
  • Trapezius
  • Rhomboids
  • Triceps
  • Biceps
  • Forearms
  • Glutes
  • Hamstrings

Your shoulders and arms stabilize the upper body while your core, glutes, and legs maintain a rigid horizontal position.


How to Do a Back Lever (Step-by-Step)

Step 1: Grip the Bar

Grip a secure Pull-Up bar approximately shoulder-width apart with an overhand grip.

Start from a controlled Dead Hang.

Keep your:

  • Grip firm
  • Arms straight
  • Core engaged
  • Legs together

Make sure there is plenty of clear space underneath and behind you.

Step 2: Move Into an Inverted Position

Tuck your knees toward your chest and begin rotating backward underneath the bar.

Bring your hips upward as your legs travel between your arms and toward the space behind you.

Move slowly and maintain control throughout the rotation.

Step 3: Establish the German Hang Position

Continue rotating until your arms are positioned behind your torso.

Your shoulders will move into considerable extension in this position.

Do not force yourself deeper than your current mobility allows.

Tip: Build comfort with German Hangs and easier Back Lever progressions before attempting a Full Back Lever. Stop if you experience sharp or unusual shoulder, elbow, or arm pain.

Step 4: Engage Your Shoulders and Core

Before lowering into the Lever, create full-body tension.

Keep your:

  • Arms straight
  • Shoulders controlled
  • Core braced
  • Glutes engaged
  • Legs controlled

Avoid relaxing into the shoulder joints.

Step 5: Lower Into the Back Lever

From the inverted position, slowly lower your body behind your arms.

Maintain straight elbows as your hips move downward.

Continue until your body approaches a horizontal position.

Beginners should perform an appropriate tucked progression instead of extending both legs immediately.

Step 6: Hold the Position

Once you reach your chosen Back Lever progression, maintain maximum body tension.

In a Full Back Lever:

  • Your arms remain straight
  • Your shoulders stay controlled
  • Your hips remain level
  • Your knees remain straight
  • Your legs stay together
  • Your body remains approximately parallel to the floor

Breathe under control while maintaining the hold.

Step 7: Exit Under Control

When your form begins to break down, return toward the inverted position under control.

Tuck your legs if necessary and carefully rotate back toward a hanging position.

Avoid suddenly dropping out of the Back Lever.

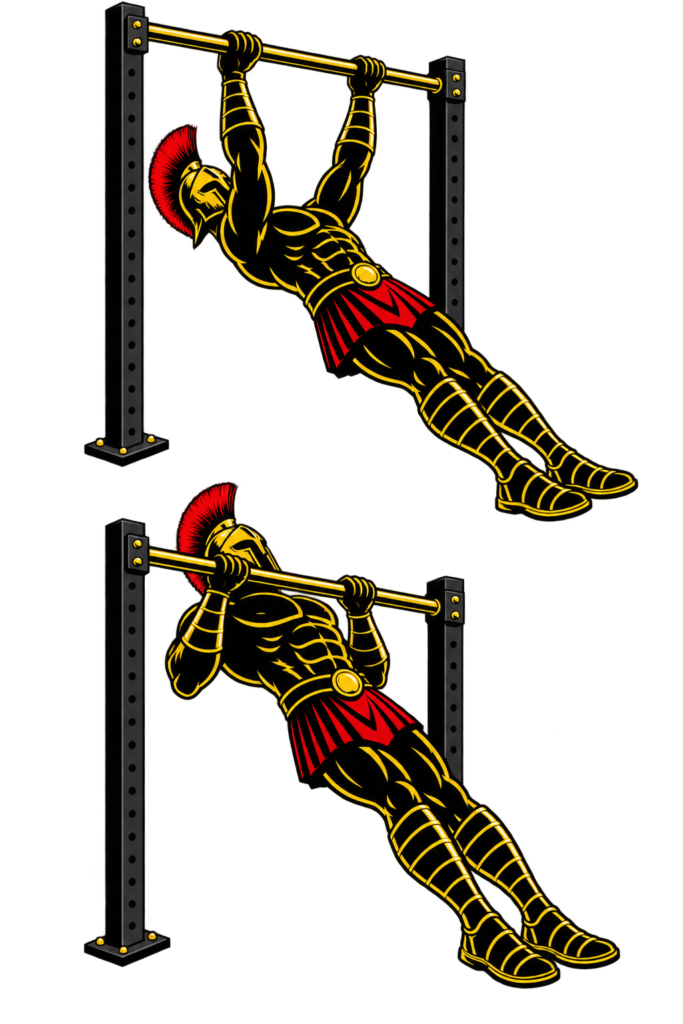
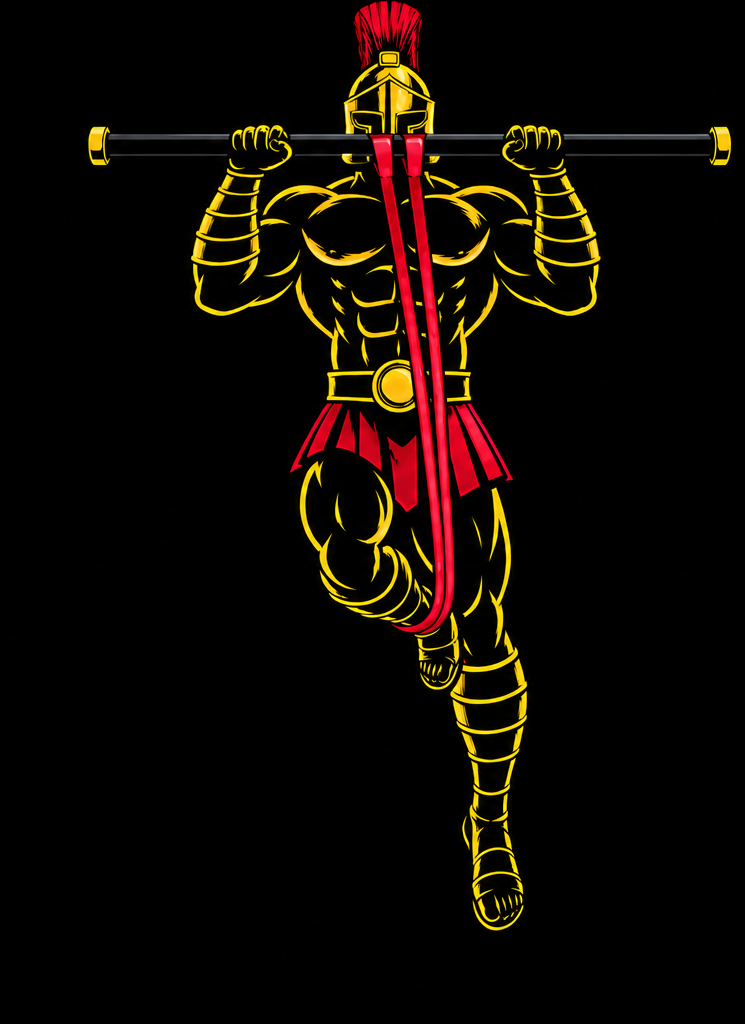
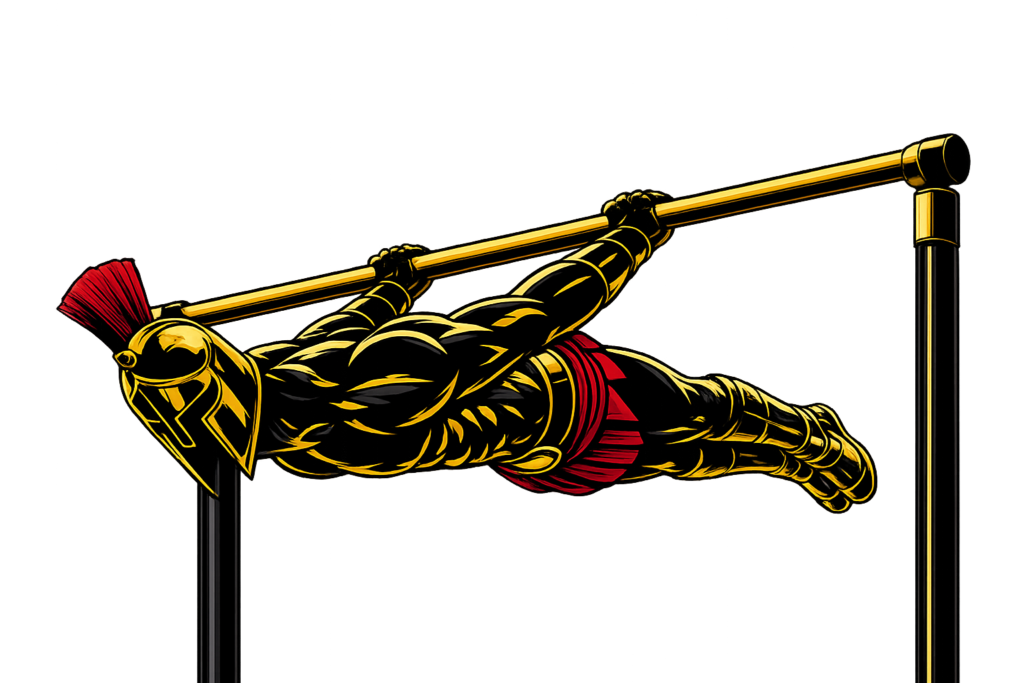
Warrior showcasing How to do Back Lever with proper form

Back Lever Form Checklist

Use this quick checklist to ensure proper Back Lever form.

  • Grip the bar securely
  • Keep your arms straight
  • Maintain controlled shoulders
  • Brace your core
  • Squeeze your glutes
  • Keep your hips from sagging
  • Keep your legs together
  • Straighten your knees in the full progression
  • Maintain full-body tension
  • Keep your body approximately parallel to the floor
  • Enter and exit the position under control
  • Never force your shoulder range of motion

Clean positioning is more important than holding a harder progression with poor form.


Common Back Lever Mistakes

Bending the Arms

Problem: Bending your elbows changes the exercise and reduces the straight-arm strength demands of the Back Lever.

Fix: Keep your elbows extended and use an easier progression if you cannot maintain straight arms.

Letting the Hips Sag

Problem: Dropping your hips prevents your body from forming a clean horizontal line.

Fix: Brace your abs, squeeze your glutes, and use a progression you can hold with proper alignment.

Forcing Shoulder Mobility

Problem: The Back Lever requires significant shoulder extension. Forcing yourself into a range you cannot comfortably control can place unnecessary stress on the shoulders.

Fix: Develop shoulder mobility gradually and become comfortable with controlled German Hangs before progressing.

Progressing Too Quickly

Problem: Moving directly toward the Full Back Lever before developing sufficient strength often causes bent arms, poor alignment, and uncontrolled movement.

Fix: Master easier progressions before increasing the lever length.

Losing Core Tension

Problem: Relaxing your core can cause your lower back to arch and your hips to drop.

Fix: Brace your abs and squeeze your glutes throughout the entire hold.

Dropping Out of the Position

Problem: Suddenly releasing tension can make the exit difficult to control.

Fix: End the hold before complete fatigue and return through your progression slowly.

Ignoring Elbow Discomfort

Problem: Back Lever training creates significant straight-arm loading, particularly as the progressions become harder.

Fix: Build training volume gradually and stop if you experience sharp or persistent elbow pain rather than repeatedly training through it.


Back Lever Progressions and Variations

The Back Lever should be developed gradually. Progress only when you can maintain your current variation with straight arms and good body control.

Skin the Cat

Skin the Cat helps develop familiarity with the rotation and shoulder positions used during Back Lever training.

How to Do Skin the Cat

  • Hang from a secure bar or rings.
  • Tuck your knees toward your chest.
  • Rotate your legs between your arms.
  • Lower carefully toward a German Hang.
  • Reverse the movement under control.
  • Return to the starting hang.

Use only a comfortable shoulder range.

Tuck Back Lever

The primary beginner Back Lever progression.

How to Do a Tuck Back Lever

  • Rotate into an inverted position.
  • Keep your knees tucked toward your chest.
  • Maintain straight arms.
  • Lower your torso toward horizontal.
  • Keep your shoulders controlled.
  • Hold the position under control.

The tucked position shortens the lever and significantly reduces the difficulty.

Advanced Tuck Back Lever

This progression increases the leverage by moving your knees farther away from your chest.

How to Do an Advanced Tuck Back Lever

  • Begin from a Tuck Back Lever.
  • Move your knees farther away from your torso.
  • Maintain straight arms.
  • Keep your back and hips controlled.
  • Hold your torso approximately parallel to the floor.

Straddle Back Lever

The Straddle Back Lever extends both legs while keeping them spread apart to reduce the effective leverage.

How to Do a Straddle Back Lever

  • Establish a controlled Back Lever position.
  • Extend both legs outward.
  • Spread your legs into a wide straddle.
  • Keep your knees straight.
  • Brace your core and glutes.
  • Maintain a horizontal body position.

Gradually narrow the straddle as your strength improves.

Full Back Lever

The complete version of the skill.

How to Do a Full Back Lever

  • Rotate into the Back Lever position.
  • Keep your arms completely straight.
  • Extend both legs behind you.
  • Bring your legs together.
  • Brace your core and squeeze your glutes.
  • Maintain a straight horizontal body line.
  • Hold the position without allowing your hips to sag.

Final Thoughts

The Back Lever is an advanced calisthenics skill that combines straight-arm strength, shoulder control, core stability, and full-body tension.

It develops:

  • Straight-arm strength
  • Shoulder strength
  • Upper-body strength
  • Core stability
  • Scapular control
  • Full-body tension
  • Advanced body control

Don’t rush into the Full Back Lever. Build sufficient shoulder mobility, become comfortable with Skin the Cat and German Hang positions, and progressively develop your Tuck, Advanced Tuck, and Straddle Back Lever.

Your shoulders and elbows also need time to adapt to the straight-arm loading involved, so progression should be gradual rather than forced.

Master each stage with clean technique, respect your shoulder mobility, and earn the Full Back Lever one progression at a time. Learn more about Calisthenics Skills here.

Essential Gear for Back Lever

Back Lever training requires relatively little equipment, but a secure and appropriate setup is essential.

  • Pull-Up Bar: Provides a stable overhead structure for practicing Back Lever progressions and holds.
  • Gymnastics Rings: Excellent for Skin the Cat, German Hang, and Back Lever training while allowing the hands and rings to rotate naturally.
  • Gymnastics Grips: Help improve grip security and protect your hands from blisters and calluses during long lever practice sessions, allowing you to train more comfortably.
  • Resistance Bands: Can provide assistance during Back Lever progressions while you develop sufficient strength for harder variations.
  • Wrist Wraps: Provide additional wrist support during advanced lever progressions, especially when training on rings or performing long static holds that place significant stress on the wrists.
  • Gym Chalk: Can improve grip when your hands become sweaty during demanding Lever sessions.

Back Lever FAQ

Q1: How long does it take to learn a Back Lever?
There is no fixed timeline. Depending on your existing strength, shoulder mobility, body composition, training experience, and consistency, developing a Full Back Lever may take several months or longer.

Q2: Is the Back Lever easier than the Front Lever?
Many athletes find the Back Lever easier to achieve than the Front Lever, but this varies considerably depending on individual pulling strength, shoulder mobility, straight-arm conditioning, technique, and training background.

Q3: How long should I hold a Back Lever progression?
Beginners can aim for several clean holds of roughly 5-10 seconds using a progression they can control. End the hold when your arms bend, hips sag, or body position begins to break down.

Plant vs Animal Protein: Which Is Better for Muscle Growth?

Protein is essential for building and maintaining muscle, but not all protein sources are exactly the same.

Animal proteins such as eggs, dairy, chicken, beef, and fish generally contain more essential amino acids, more leucine, and are easier to digest.

Plant proteins such as soy, lentils, beans, chickpeas, peas, tofu, and grains can still build muscle effectively, but some require slightly larger servings or more variety.

So which one is actually better?

The answer is simple:

Animal protein is generally more efficient per gram, but plant protein can still support excellent muscle growth when total protein intake is high enough.

Quick Answer

Animal protein generally has a small advantage because it tends to provide:

  • More essential amino acids
  • More leucine
  • Higher digestibility
  • More complete protein per serving

However, plant protein can still build muscle very effectively.

Soy performs especially well, and a well-planned plant-based diet can provide enough high-quality protein for muscle growth and strength.

For most people, total daily protein intake, resistance training, calories, and consistency matter more than whether every protein source comes from plants or animals.


What Is Animal Protein?

Animal protein comes from foods such as:

  • Eggs
  • Milk
  • Greek yogurt
  • Chicken
  • Beef
  • Fish
  • Whey protein

Most animal proteins are complete proteins, meaning they contain all nine essential amino acids in useful amounts.

They are also generally highly digestible and rich in leucine, which makes them very efficient for muscle building.

What Is Plant Protein?

Plant protein comes from foods such as:

  • Soy
  • Tofu
  • Tempeh
  • Lentils
  • Beans
  • Chickpeas
  • Peas
  • Nuts
  • Seeds
  • Whole grains
  • Plant protein powders

Plant proteins vary more in quality.

Some contain lower amounts of certain essential amino acids, and whole plant foods are often slightly less digestible than animal foods.

That does not make them ineffective.

Eating enough total protein and using a variety of plant protein sources can overcome much of the difference.


The Most Important Principle: Total Protein Comes First

Before worrying about whether plant or animal protein is better, make sure you are eating enough protein overall.

For people performing regular resistance training, a practical target is approximately:

1.6–2.2 grams of protein per kilogram of bodyweight per day

For a 70 kg person:

  • 70 × 1.6 = 112 g
  • 70 × 2.2 = 154 g

That gives a useful daily range of approximately:

112–154 grams of protein

If your daily protein intake is too low, choosing a supposedly superior protein source will not compensate for it.

Total intake comes first.


Protein Quality: Why Animal Protein Usually Has an Advantage

Protein quality mainly depends on three things:

  • Essential amino acid content
  • Leucine content
  • Digestibility

Animal proteins usually perform well in all three areas.

Plant proteins can also provide all the amino acids needed for muscle growth, but the amount and balance vary between foods.

That is why 25 grams of protein from whey and 25 grams from a lower-quality plant source may not always produce exactly the same response.

Essential Amino Acids and Leucine

Essential amino acids are amino acids that your body cannot make by itself and therefore must obtain from food.

Leucine is especially important because it helps stimulate muscle protein synthesis.

Animal proteins such as:

  • Whey
  • Milk
  • Eggs
  • Beef
  • Chicken

typically contain strong amounts of leucine and other essential amino acids.

Some plant proteins contain less leucine per gram, which means a slightly larger serving may sometimes be useful.

Soy is one of the strongest plant protein options because its amino acid profile is better than many other plant sources.

Digestibility

Animal protein is generally easier for the body to digest and absorb.

Whole plant foods contain fiber and other compounds that can slightly reduce protein digestibility.

However, processed plant proteins such as:

  • Soy protein isolate
  • Pea protein isolate
  • Plant protein blends

are much more concentrated and can provide high-quality protein.

So the digestibility gap becomes smaller when comparing animal protein with well-formulated plant protein products.


Which Builds More Muscle?

Research generally shows that animal protein may have a small advantage for muscle growth when equal amounts are compared.

This is likely because animal proteins usually provide more leucine, essential amino acids, and digestible protein per serving.

However, the difference is not huge.

Research comparing soy protein with dairy protein has often found similar long-term muscle-building results when total protein intake is adequate.

That means plant protein should not be viewed as ineffective or inferior in every situation.

A better conclusion is:

Animal protein is generally more efficient, but high-quality plant protein can produce very similar results when enough is consumed.


What About Strength?

The difference between plant and animal protein appears even smaller when looking at strength.

Research has generally found little or no meaningful difference in strength gains when total protein intake and resistance training are similar.

Strength depends on many factors besides protein source, including:

  • Training quality
  • Technique
  • Nervous-system adaptations
  • Recovery
  • Training experience

So protein source alone is unlikely to determine whether you become stronger.


Best Animal Protein Sources

Good choices include:

  • Eggs
  • Chicken
  • Fish
  • Lean beef
  • Milk
  • Greek yogurt
  • Cottage cheese
  • Whey protein

These foods provide high-quality protein and are easy to use in a muscle-building diet.

Best Plant Protein Sources

Useful plant protein sources include:

  • Soy
  • Tofu
  • Tempeh
  • Lentils
  • Beans
  • Chickpeas
  • Pea protein
  • Soy protein
  • Plant protein blends

Soy is one of the most useful plant proteins because it provides a strong essential amino acid profile and has performed well in muscle-building research.


Should Plant-Based Lifters Eat More Protein?

In many cases, slightly more protein can be useful.

Plant-based lifters may benefit from aiming toward the higher end of their protein range because some plant proteins are:

  • Less digestible
  • Lower in leucine
  • Lower in one or more essential amino acids

For example, someone eating mostly animal protein may do well around:

1.6–1.8 g/kg per day

while someone relying mainly on plant protein may prefer something closer to:

1.8–2.2 g/kg per day

This is not a strict rule, but it is a useful practical strategy.


Do You Need to Combine Plant Proteins?

You do not need to carefully combine specific plant proteins at every meal.

Eating a varied diet throughout the day is usually enough.

For example, using different foods such as:

  • Soy
  • Lentils
  • Beans
  • Chickpeas
  • Whole grains

helps provide a broader amino acid profile.

The important point is variety, not perfect meal-by-meal combinations.


Can You Build Serious Muscle on a Vegan Diet?

Yes.

A vegan diet can support muscle growth when it provides:

  • Enough calories
  • Enough total protein
  • High-quality plant protein sources
  • Progressive resistance training
  • Proper recovery

It simply requires slightly more planning than a diet containing animal protein.

Foods such as soy, tofu, tempeh, seitan, lentils, beans, chickpeas, and plant protein powders can make reaching higher protein targets easier.


Common Plant vs Animal Protein Myths

Myth 1: Plant Protein Cannot Build Muscle

False.

Plant protein can absolutely support muscle growth when total protein intake is adequate.

Myth 2: Animal Protein Always Produces More Muscle

Not necessarily.

Animal protein is generally more efficient, but the difference becomes much smaller when plant protein intake is high enough and good-quality sources are used.

Myth 3: Soy Lowers Testosterone

Normal soy intake has not been shown to meaningfully lower testosterone in men.

Soy can be an effective muscle-building protein source.

Myth 4: You Must Combine Plant Proteins at Every Meal

No.

Eating a variety of plant protein sources throughout the day is generally sufficient.

Myth 5: Protein Source Does Not Matter at All

Protein quality can matter.

But it matters less than:

  • Total daily protein intake
  • Resistance training
  • Calories
  • Recovery
  • Consistency

Practical Tips

Hit Your Daily Protein Target First

This matters more than obsessing over individual foods.

Use High-Quality Protein Sources

Choose foods such as:

  • Eggs
  • Dairy
  • Meat
  • Fish
  • Soy
  • Tofu
  • Tempeh

Use Variety

Do not rely on one protein source for your entire diet.

Increase Plant Protein Portions When Needed

Slightly larger servings can help compensate for differences in protein quality.

Keep the Rest of Your Diet Balanced

Muscle growth also depends on:

  • Calories
  • Carbohydrates
  • Fats
  • Vitamins
  • Minerals
  • Hydration

Protein is only one part of the picture.


Which Is Better for Muscle Growth?

If you compare equal amounts directly:

Animal protein generally wins.

It tends to provide:

  • Better digestibility
  • More leucine
  • More essential amino acids
  • More high-quality protein per serving

But that does not mean plant protein is poor.

The better practical conclusion is:

Animal protein is more efficient per gram, while plant protein can still produce excellent muscle and strength gains when the diet provides enough high-quality protein.

If you eat both animal and plant foods, there is no reason to choose only one category.

Using a mixture can give you:

  • High-quality protein
  • Fiber
  • Vitamins
  • Minerals
  • Greater food variety

If you follow a vegetarian or vegan diet, simply pay more attention to total protein intake and protein quality.


Final Thoughts

Animal protein has a small overall advantage for muscle building because it is generally higher in essential amino acids, leucine, and digestibility.

But the difference is far smaller than many fitness debates make it sound.

Plant protein can absolutely build muscle.

Your biggest priorities remain:

  • Eat enough total protein.
  • Train with progressive resistance.
  • Consume enough calories for your goal.
  • Choose quality protein sources.
  • Stay consistent.

If you eat animal foods, use them alongside nutritious plant foods.

If you eat only plant foods, prioritize higher-quality plant proteins and consider slightly larger protein servings.

The best protein source is ultimately one that helps you consistently reach your protein needs while fitting your diet and lifestyle.

Learn more about Nutrition for Workouts here.


FAQ

Q1: Is animal protein better than plant protein for muscle growth?
Animal protein is generally more efficient because it contains more leucine, essential amino acids, and highly digestible protein. However, plant protein can still produce excellent results when enough high-quality protein is consumed.

Q2: Do vegans need more protein?
They may benefit from eating slightly more protein because some plant proteins are less digestible or lower in certain essential amino acids.

Q3: Which protein source is best for muscle growth?
There is no single best source. Whey, eggs, dairy, meat, fish, soy, and well-formulated plant protein blends can all work well.

How to Bulk Properly: Complete Beginner Guide

Building muscle requires more than simply training harder.

Your body also needs enough energy, protein, carbohydrates, nutrients, and recovery to support the process of adding new muscle tissue.

That is where bulking comes in.

A properly designed bulk gives your body slightly more energy than it needs to maintain its current weight while combining that extra food with progressive resistance training.

But there is an important difference between bulking and simply gaining weight.

Eating everything in sight may make the scale rise quickly, but a large percentage of that extra weight may be body fat rather than muscle.

The goal of a good bulk is therefore simple:

Gain muscle and strength while keeping unnecessary fat gain under control.

This complete beginner guide explains how many calories to eat, how quickly to gain weight, how much protein you need, what foods to choose, how to structure meals, how to train, and how to adjust your bulk when progress slows.

Quick Answer

To bulk properly:

  • Eat in a small-to-moderate calorie surplus.
  • Aim for slow and controlled weight gain.
  • Eat around 1.6–2.2 g of protein per kilogram of bodyweight per day.
  • Eat enough carbohydrates to fuel hard training.
  • Include sufficient dietary fats.
  • Follow a progressive resistance-training program.
  • Sleep and recover properly.
  • Track your average bodyweight over several weeks.
  • Increase calories gradually if your weight is not moving.
  • Avoid turning a bulk into an excuse to eat unlimited junk food.

For most beginners, gaining weight slowly is better than trying to become as heavy as possible as quickly as possible.


What Is Bulking?

Bulking is a period in which you intentionally eat more calories than your body uses while performing resistance training with the goal of gaining muscle and strength.

The extra calories create a calorie surplus.

During a bulk, your bodyweight will usually increase because you are gaining a combination of:

  • Muscle
  • Glycogen
  • Water
  • Some body fat

Some fat gain during a bulk is normal.

The goal is not to eliminate fat gain completely.

Instead, the goal is to provide enough extra energy to support muscle growth without consuming so many unnecessary calories that body-fat gain becomes excessive.

Why Bulking Helps Build Muscle

Your body can build muscle without a large calorie surplus, and some people—particularly beginners—may even gain muscle around maintenance calories or while losing fat.

However, consistently providing enough energy generally makes maximizing muscle growth easier.

Better Training Performance

A well-fueled athlete can usually train harder.

More available energy and carbohydrates can help support:

  • Heavier training
  • More repetitions
  • More sets
  • Better recovery between sessions
  • Higher training volume

Better training creates a stronger stimulus for muscle growth.

Better Recovery

Training creates fatigue and stimulates your muscles to adapt.

Your body requires:

  • Calories
  • Protein
  • Carbohydrates
  • Fats
  • Vitamins
  • Minerals
  • Sleep

to recover properly.

Chronically under-eating can make recovery more difficult.

Greater Potential for Muscle Growth

Resistance training stimulates muscle growth.

Protein supplies the amino acids needed to build muscle proteins.

Adequate energy gives your body the resources required to support the overall process.

All three work together.

Eating extra food without resistance training primarily encourages weight gain.

Training hard without adequate nutrition can limit your ability to gain weight and recover.


The Most Important Principle: Use a Controlled Calorie Surplus

The foundation of a bulk is eating slightly more energy than your body uses.

But more calories do not automatically mean more muscle.

Your body can only build muscle so quickly.

Once your calorie surplus becomes much larger than necessary, the extra energy becomes increasingly likely to contribute to body-fat gain rather than faster muscle growth.

This is why a controlled bulk is usually better than a massive surplus.

How Many Calories Should You Eat to Bulk?

First, estimate your maintenance calories.

Then add a modest surplus.

A practical starting point for many people is approximately:

5–15% above maintenance calories

For example, imagine your maintenance intake is:

2,500 calories per day

A 10% surplus would be:

2,500 × 0.10 = 250 calories

2,500 + 250 = 2,750 calories per day

You could therefore begin around 2,700–2,800 calories per day and monitor your bodyweight.

Your starting number is only an estimate.

Your weight trend tells you whether it is actually enough.

Do You Need a 500-Calorie Surplus?

Not necessarily.

The traditional recommendation of adding around 500 calories per day can work for some people.

However, it may be unnecessarily large for someone who is smaller, less active, or already gains weight easily.

Likewise, someone with extremely high activity levels may eventually need more food.

A better approach is:

  1. Start with a modest surplus.
  2. Track bodyweight.
  3. Evaluate progress over several weeks.
  4. Add more food only when necessary.

Do not automatically assume that twice the surplus will produce twice the muscle.

It will not.


How Fast Should You Gain Weight?

The goal of a bulk is not to make the scale increase as rapidly as possible.

A slower rate generally makes it easier to limit unnecessary fat gain.

A practical starting target for many people is approximately:

0.25–0.5% of bodyweight per week

For someone weighing 70 kg:

  • 0.25% = about 0.18 kg per week
  • 0.5% = about 0.35 kg per week

This means roughly 0.2–0.35 kg per week could be a reasonable target.

Beginners may be able to gain muscle relatively quickly and can sometimes tolerate the upper part of the range.

More experienced lifters usually gain muscle more slowly and often benefit from using a smaller surplus.


Protein: The Foundation of Your Bulk

Protein is essential for muscle growth.

Resistance training stimulates muscle protein synthesis, while dietary protein provides the amino acids required to support it.

A practical daily protein target for most people performing resistance training is approximately:

1.6–2.2 grams of protein per kilogram of bodyweight per day

For a 70 kg person:

70 × 1.6 = 112 g

70 × 2.2 = 154 g

That gives a practical range of:

112–154 grams of protein per day

You do not need to consume as much protein as physically possible.

Once protein intake is sufficient, adding hundreds of additional grams does not suddenly make muscle growth dramatically faster.

Those calories could often be used more effectively for carbohydrates and fats.

Good Protein Sources for Bulking

  • Chicken
  • Turkey
  • Eggs
  • Lean beef
  • Fish
  • Milk
  • Greek yogurt
  • Cottage cheese
  • Tuna
  • Lentils
  • Beans
  • Chickpeas
  • Tofu
  • Tempeh
  • Whey protein
  • Plant-protein powder

Choose a mixture that fits your preferences, budget, and diet.

Spread Protein Across the Day

Instead of consuming almost your entire protein intake at dinner, distribute protein between several meals.

For example:

Breakfast

Eggs + milk

Lunch

Chicken + rice

Snack

Greek yogurt

Dinner

Fish + potatoes

This makes it easier to reach your daily protein target and gives your body repeated servings of amino acids throughout the day.

Around 20–40 grams of quality protein per meal is practical for many people, depending on body size and number of meals.


Carbohydrates: Your Main Training Fuel

Carbohydrates are extremely useful during a bulk.

They help support:

  • Resistance training
  • Calisthenics
  • Sprinting
  • Combat sports
  • Conditioning
  • High training volumes

Carbohydrates also replenish muscle glycogen used during hard training.

If you have already consumed enough protein and fat, increasing carbohydrates is often one of the easiest ways to create the additional calories required for a bulk.

Good Carbohydrate Sources

  • Rice
  • Oats
  • Potatoes
  • Sweet potatoes
  • Pasta
  • Bread
  • Cereal
  • Fruit
  • Bananas
  • Dates
  • Beans
  • Lentils
  • Quinoa

There is nothing inherently wrong with using some faster-digesting carbohydrates either.

White rice, bread, cereal, fruit juice, or similar foods can occasionally make it easier to consume enough calories, particularly for people with very high energy requirements.

The majority of your diet should still provide adequate nutrients and fiber.


Dietary Fat During a Bulk

Fat is essential for overall health and also makes increasing calorie intake easier because it is energy-dense.

Good fat sources include:

  • Olive oil
  • Nuts
  • Nut butter
  • Seeds
  • Avocado
  • Egg yolks
  • Fatty fish

Because fat provides approximately 9 calories per gram, relatively small portions can contribute many calories.

This makes foods such as nuts and nut butter particularly useful for people who struggle to eat enough.

However, do not let fat completely replace carbohydrates.

Hard resistance training still benefits from adequate carbohydrate intake.


What Should Your Macros Be?

You do not need a perfect bodybuilding macro split.

A simple hierarchy works better.

1. Set Calories

Eat enough to create a controlled surplus.

2. Set Protein

Aim for approximately:

1.6–2.2 g/kg per day

3. Include Enough Dietary Fat

Do not follow an unnecessarily ultra-low-fat diet.

4. Use Carbohydrates for the Remaining Calories

This usually provides plenty of training fuel.

You can adjust carbohydrate and fat according to:

  • Preference
  • Digestion
  • Training style
  • Appetite
  • Food availability

Total calories and protein are generally more important than achieving a magical percentage split.


What Foods Should You Eat While Bulking?

A good bulk should still be built largely around nutritious food.

Useful staples include:

Protein

  • Eggs
  • Chicken
  • Beef
  • Fish
  • Greek yogurt
  • Cottage cheese
  • Milk
  • Tofu
  • Beans
  • Lentils

Carbohydrates

  • Rice
  • Oats
  • Potatoes
  • Pasta
  • Bread
  • Fruit
  • Cereal
  • Quinoa

Fats

  • Nuts
  • Nut butter
  • Olive oil
  • Seeds
  • Avocado
  • Eggs
  • Fatty fish

Fruit and Vegetables

Include a variety for:

  • Fiber
  • Vitamins
  • Minerals
  • Overall health

Bulking is not an excuse to stop caring about nutrition quality.


Clean Bulk vs Dirty Bulk

You will often hear people talk about:

  • Clean bulking
  • Dirty bulking

These terms are not very scientific, but they describe two different approaches.

Clean Bulk

A controlled calorie surplus based mostly on nutrient-dense foods.

The goal is slow weight gain with limited unnecessary fat gain.

Dirty Bulk

Eating very large amounts of food with little concern for calorie intake or food quality.

This may include frequent:

  • Fast food
  • Desserts
  • Sugary drinks
  • Fried foods
  • Massive portions

A dirty bulk can make gaining weight easier.

The problem is that your body cannot convert unlimited extra calories into muscle.

A very large surplus generally means faster fat gain.

You may then need a much longer fat-loss phase later.


Does Every Food Need to Be Clean?

No.

You do not need a diet consisting entirely of chicken, rice, vegetables, and oats.

That can become unnecessarily restrictive.

A more realistic approach might be:

80–90% nutritious staple foods

with some room for:

  • Desserts
  • Pizza
  • Burgers
  • Chocolate
  • Snacks
  • Other foods you enjoy

As long as the overall diet provides adequate:

  • Protein
  • Fiber
  • Micronutrients
  • Calories
  • Fruits and vegetables

You do not need to fear occasional less-nutritious foods.


High-Calorie Foods for Hard Gainers

Some people struggle to gain weight because they have:

  • Low appetite
  • High activity levels
  • Large calorie requirements
  • Naturally filling diets

If eating enough is difficult, choose foods that provide more calories without requiring enormous food volume.

Useful options include:

  • Peanut butter
  • Nuts
  • Olive oil
  • Whole milk
  • Dried fruit
  • Granola
  • Avocado
  • Cheese
  • Rice
  • Pasta
  • Smoothies

Adding small amounts of calorie-dense foods can make a large difference.

For example:

  • Add olive oil to meals.
  • Add nut butter to oats.
  • Drink milk with meals.
  • Add dried fruit to yogurt.
  • Use larger rice or pasta portions.

Liquid Calories for Bulking

Liquid calories can be extremely useful during a bulk.

Drinking calories generally feels less filling than eating the same calories as solid food.

A homemade bulking shake might include:

  • Milk
  • Banana
  • Oats
  • Peanut butter
  • Greek yogurt
  • Whey protein

You can adjust the ingredients depending on how many calories and how much protein you need.

However, do not replace your entire diet with shakes.

Whole foods should still provide most of your nutrition.


Practical Bulking Meal Ideas

Portions should be adjusted according to your individual calorie target.

Breakfast Option 1

  • Eggs
  • Whole-grain toast
  • Banana
  • Milk

Breakfast Option 2

  • Oats
  • Milk
  • Banana
  • Peanut butter
  • Greek yogurt

Lunch Option 1

  • Chicken
  • Rice
  • Vegetables
  • Olive oil

Lunch Option 2

  • Lean beef
  • Pasta
  • Vegetables

Snack Option 1

  • Greek yogurt
  • Granola
  • Fruit
  • Nuts

Snack Option 2

  • Peanut butter sandwich
  • Milk
  • Banana

Dinner Option 1

  • Fish
  • Potatoes
  • Vegetables
  • Olive oil

Dinner Option 2

  • Chicken or beef
  • Rice
  • Vegetables
  • Avocado

Before-Bed Option

  • Greek yogurt
  • Cottage cheese
  • Milk
  • Fruit
  • Nuts

You do not need to eat before bed specifically to gain muscle, but it can be a convenient opportunity to add calories and protein.


Example Beginner Bulking Day

This is an example structure, not a universal meal plan.

Breakfast

  • 3 eggs
  • Oats with milk
  • Banana
  • Peanut butter

Mid-Morning Snack

  • Greek yogurt
  • Granola
  • Fruit

Lunch

  • Grilled chicken
  • Rice
  • Vegetables
  • Olive oil

Pre-Workout Snack

  • Banana
  • Toast
  • Yogurt

Post-Workout / Dinner

  • Lean beef or fish
  • Potatoes or rice
  • Vegetables

Evening Snack

  • Milk
  • Peanut butter sandwich

Adjust food quantities based on your calorie needs.


Pre-Workout Nutrition While Bulking

A bulk gives you an excellent opportunity to train properly fueled.

Around a few hours before training, choose a meal containing:

  • Carbohydrates
  • Protein

Examples:

  • Chicken + rice
  • Eggs + toast + fruit
  • Oats + milk + banana
  • Greek yogurt + cereal + fruit

If you are eating closer to training, use something smaller and easier to digest.

Examples:

  • Banana + yogurt
  • Toast + honey
  • Whey protein + fruit

You do not need to stuff yourself immediately before lifting.

Training quality matters more than forcing another meal into an already full stomach.

Post-Workout Nutrition While Bulking

After training, focus on:

  • Protein
  • Carbohydrates
  • Fluids
  • Reaching your total daily calorie target

Examples:

  • Chicken + rice
  • Beef + potatoes
  • Fish + pasta
  • Eggs + toast + fruit
  • Greek yogurt + oats
  • Whey protein + banana when a meal is not convenient

You do not need to consume a shake within 30 minutes.

Your total daily nutrition remains more important.


How Many Meals Should You Eat While Bulking?

There is no required meal frequency.

You can bulk with:

  • 3 meals
  • 4 meals
  • 5 meals
  • More frequent smaller meals

However, people struggling with appetite often find it easier to distribute calories over several meals rather than forcing three enormous ones.

For example:

Breakfast → Snack → Lunch → Pre-Workout → Dinner → Evening Snack

can make a high-calorie intake much easier.

Choose the schedule that helps you consistently reach your target.


Training While Bulking

Food alone does not create an effective bulk.

You need progressive resistance training.

Your program should be built around movements such as:

  • Squats
  • Deadlift variations
  • Bench press
  • Overhead press
  • Rows
  • Pull-ups
  • Chin-ups
  • Dips
  • Push-ups
  • Lunges
  • Isolation exercises
  • Weighted calisthenics

The exact exercises matter less than following a structured program that progressively challenges your muscles.

Progressive Overload

Your muscles need a reason to adapt.

Over time, try to improve your performance by increasing one or more of the following:

  • Weight
  • Repetitions
  • Sets
  • Exercise difficulty
  • Range of motion
  • Technique
  • Control

You do not need to improve every workout forever.

But your training should show long-term progression.

If your bodyweight increases for six months but your lifts and exercise performance barely improve, much of that weight gain may not be productive muscle.

How Hard Should You Train?

Training should be challenging enough to stimulate muscle growth.

However, you do not need to take every single set to complete failure.

Use good form, train consistently, and accumulate enough challenging work across the week.

Recovery matters too.

The purpose of eating more is to support productive training—not to compensate for badly designed training.

Cardio While Bulking

You do not have to stop doing cardio.

Moderate cardio can support:

  • Cardiovascular fitness
  • Work capacity
  • General health
  • Conditioning

The issue arises when enormous amounts of cardio make it difficult to recover or maintain your calorie surplus.

If you enjoy:

  • Running
  • Cycling
  • Swimming
  • Combat sports
  • Conditioning

you can keep them.

You may simply need to eat more to compensate for the additional energy expenditure.


Sleep and Recovery

Muscle growth does not happen only while lifting weights.

Recovery is essential.

Aim for consistent, high-quality sleep.

Poor sleep can negatively affect:

  • Training performance
  • Recovery
  • Motivation
  • Appetite regulation
  • Overall health

No supplement or bulking shake can replace proper recovery.


How to Track Your Bulk

Do not judge your bulk using one weigh-in.

Weigh yourself consistently, ideally under similar conditions.

For example:

  • In the morning
  • After using the bathroom
  • Before eating or drinking

Track several measurements throughout the week and calculate your average.

Then compare weekly averages.

This reduces confusion caused by daily changes in:

  • Water
  • Glycogen
  • Sodium
  • Food intake
  • Digestion

Track More Than Bodyweight

The scale is useful but not enough.

Also monitor:

  • Strength
  • Repetitions
  • Measurements
  • Progress photos
  • Clothing fit
  • Training performance

A successful bulk should generally involve improvements in both bodyweight and training performance over time.


Why Weight Jumps at the Beginning of a Bulk

Do not panic if your weight increases quickly during the first week or two.

When you eat more food and carbohydrates, your body may store more:

  • Glycogen
  • Water
  • Food in the digestive system

Therefore, the first increase on the scale is not necessarily all new muscle or body fat.

Wait for your bodyweight trend to stabilize before making dramatic calorie changes.

What If You Are Not Gaining Weight?

If your weekly average has not increased for 2–3 weeks despite good consistency, you probably need more food.

Increase daily calories slightly.

A practical adjustment could be approximately:

100–200 additional calories per day

You might add:

  • An extra glass of milk
  • More rice
  • An extra slice of bread with peanut butter
  • More oats
  • A handful of nuts

Then monitor the trend again.

Do not immediately add another 1,000 calories.

What If You Are Gaining Too Fast?

If bodyweight is rising substantially faster than your target for several weeks, reduce the surplus slightly.

For example:

  • Remove around 100–200 calories per day.

Then continue tracking.

Some faster weight gain during the first week can simply be water and glycogen, so do not overreact immediately.


How Long Should You Bulk?

There is no universal length.

Bulks can last:

  • Several months
  • Six months
  • Longer

depending on:

  • Starting body-fat level
  • Training experience
  • Goal
  • Rate of weight gain
  • Personal preference

Muscle growth is slow.

Constantly switching between two weeks of bulking and two weeks of cutting makes progress unnecessarily difficult.

Give your body enough time to actually build muscle.


When Should You Stop Bulking?

Consider ending or pausing the bulk when:

  • You have reached your desired bodyweight.
  • Body-fat gain has become higher than you are comfortable with.
  • Training goals change.
  • You want to begin a fat-loss phase.
  • Health or athletic requirements require a different weight.

You do not need to bulk until you become uncomfortable with your body composition.

Should You Bulk If You Already Have High Body Fat?

Not necessarily.

Someone carrying substantial excess body fat may be better served by:

  • Eating around maintenance
  • Losing fat first
  • Beginning resistance training
  • Keeping protein high

Beginners can often build meaningful muscle without deliberately entering a large surplus.

A dedicated bulk becomes more useful when additional calorie intake is genuinely needed to support continued muscle and strength gain.


Can Beginners Gain Muscle Without Bulking?

Yes.

Beginners often respond extremely well to resistance training.

Some beginners can gain muscle:

  • At maintenance calories
  • During a small deficit
  • During a small surplus

Especially if they previously performed little resistance training.

However, if a beginner is already lean and struggles to gain bodyweight, a controlled surplus can make muscle gain considerably easier.


Can You Bulk With Calisthenics?

Absolutely.

Muscles do not know whether resistance comes from:

  • Barbells
  • Dumbbells
  • Machines
  • Weighted vests
  • Bodyweight

Progressive calisthenics can build substantial muscle.

Useful exercises include:

  • Pull-ups
  • Chin-ups
  • Dips
  • Push-up variations
  • Rows
  • Pistol squat progressions
  • Bulgarian split squats
  • Handstand push-up progressions
  • Weighted calisthenics

The same nutritional principles apply.


Do You Need Supplements While Bulking?

No.

Supplements are optional.

Protein Powder

Protein powder can make reaching your daily protein target easier.

It is not mandatory.

Creatine

Creatine monohydrate is one of the most evidence-supported sports supplements.

A common intake is:

3–5 grams per day

It can support improvements in strength, high-intensity performance, and lean mass when combined with resistance training.

Mass Gainers

Mass-gainer powders provide large amounts of calories, usually from carbohydrates and protein.

They can be useful for someone who genuinely struggles to eat enough.

However, they are not necessary.

A homemade shake using:

  • Milk
  • Oats
  • Banana
  • Peanut butter
  • Whey

can often serve the same purpose.

Pre-Workout Supplements

Optional.

Proper calories, carbohydrates, hydration, sleep, and training matter much more.


Common Bulking Mistakes and Myths

Eating as Much as Possible

Your body cannot convert unlimited calories into muscle.

An unnecessarily large surplus usually means more fat gain.

Not Eating Enough

Some people claim to be bulking but continue eating around maintenance.

If your average bodyweight has not changed for months, you probably are not consistently in a surplus.

Obsessing Over Protein

Protein matters, but you do not need absurd quantities.

Once protein needs are covered, carbohydrates and fats provide useful calories and training fuel.

Living on Junk Food

A calorie surplus does not make nutrition quality irrelevant.

You still need:

  • Fiber
  • Vitamins
  • Minerals
  • Fruits
  • Vegetables
  • Quality protein

Avoiding Cardio Completely

Reasonable cardio will not automatically destroy your gains.

Just account for the additional activity.

Not Training Hard Enough

Eating more without progressive resistance training is simply weight gain.

The surplus needs a strong training stimulus.

Changing Calories Every Few Days

Daily weight fluctuations are normal.

Evaluate several weeks of data before making adjustments.

Expecting Only Muscle Gain

Even an excellent bulk may include some body-fat gain.

The goal is to manage it, not pretend it can always be completely eliminated.

Constantly Bulking and Cutting

Muscle building takes time.

Repeatedly changing goals every few weeks can prevent meaningful progress in either direction.

Ignoring Sleep

Recovery is part of muscle growth.

Eating 4,000 calories will not compensate for consistently poor sleep and bad training.


Practical Bulking Tips

Increase Calories Gradually

Do not completely redesign your diet overnight.

Add food in manageable amounts.

Use Larger Portions

If you already eat good meals, simply increase:

  • Rice
  • Potatoes
  • Pasta
  • Oats
  • Bread

Add Calorie-Dense Foods

Use:

  • Nuts
  • Nut butter
  • Olive oil
  • Avocado
  • Whole milk

to increase calories without gigantic meals.

Use Smoothies When Appetite Is Low

Liquid calories are often easier to consume.

Keep Easy Foods Available

Useful staples include:

  • Eggs
  • Milk
  • Oats
  • Rice
  • Chicken
  • Greek yogurt
  • Bananas
  • Bread
  • Potatoes
  • Peanut butter
  • Frozen vegetables

Prepare Meals Ahead

Running out of food makes maintaining a surplus unnecessarily difficult.

Prioritize Your Training

The entire purpose of the extra food is to help you build muscle and perform better.

Be Patient

Muscle gain is slow.

A good bulk is measured in months, not days.


Final Thoughts

Bulking properly is not about becoming as heavy as possible.

It is about creating an environment where your body has enough energy and nutrients to support muscle growth while keeping unnecessary fat gain under control.

Focus on the fundamentals:

  • Maintain a small-to-moderate calorie surplus.
  • Gain weight gradually.
  • Eat enough protein.
  • Use carbohydrates to fuel training.
  • Include healthy fats.
  • Eat mostly nutritious foods.
  • Follow progressive resistance training.
  • Sleep and recover properly.
  • Track your bodyweight and performance.
  • Adjust calories gradually based on real results.

Do not rush the process.

A controlled bulk may look slower on the scale, but it can leave you with substantially less unnecessary fat to remove later.

Train to give your body a reason to grow.

Eat enough to give it the resources.

Then stay consistent long enough for muscle growth to happen.

Learn more about Nutrition for Workouts here.


FAQ

Q1: How many calories should I eat to bulk?
Start by estimating your maintenance calories and adding a modest surplus. Around 5–15% above maintenance is a practical starting range for many people, but adjust according to your actual bodyweight trend.

Q2: Can I bulk with calisthenics instead of weights?
Yes. Progressive calisthenics can build muscle effectively as long as exercises become sufficiently challenging over time and your nutrition supports recovery.

Q3: What should I do if I am not gaining weight?
If your average bodyweight has remained unchanged for 2–3 weeks despite consistent eating, increase daily calories slightly—around 100–200 calories is a reasonable adjustment—then monitor your trend again.

How to Do Incline Push-Ups Correctly: Step-by-Step Guide for Beginners

Incline Push-Ups are a Push-Up variation performed with your hands on a stable elevated surface and your feet on the floor. Raising your upper body reduces the proportion of your bodyweight you have to press compared with a standard floor Push-Up.

This makes Incline Push-Ups an excellent progression between Wall Push-Ups and standard Push-Ups. They let beginners build chest, shoulder, triceps, and core strength while practicing the same basic body position and pressing pattern used in regular Push-Ups.

The height of the surface determines much of the difficulty. Higher surfaces generally make the exercise easier, while gradually lowering your hands increases the amount of bodyweight your upper body must handle.


What Are Incline Push-Ups?

Incline Push-Ups are a bodyweight pressing exercise in which your hands are placed on a secure elevated surface such as a workout bench, sturdy box, or fixed bar.

From an inclined plank position, you bend your elbows and lower your chest toward the elevated surface. You then press through your hands until your arms return to extension.

Because your hands are higher than your feet, Incline Push-Ups are generally easier than standard floor Push-Ups.

Incline Push-Ups are commonly used in:

  • Beginner strength training
  • Push-Up progression programs
  • Chest workouts
  • Upper-body workouts
  • Calisthenics training
  • At-home workouts
  • Warm-up routines
  • High-repetition bodyweight training

They are particularly useful because their difficulty can be adjusted simply by changing the height of the surface.

Benefits of Incline Push-Ups

Incline Push-Ups provide an accessible way to develop pressing strength while practicing proper Push-Up mechanics.

Benefits include:

  • Strengthens the chest
  • Develops the triceps
  • Strengthens the front of the shoulders
  • Builds foundational pushing strength
  • Reinforces proper Push-Up technique
  • Develops core and body-position control
  • Provides a progression toward standard Push-Ups
  • Allows easy adjustment of exercise difficulty
  • Requires minimal equipment

As you become stronger, gradually lowering the incline provides a simple form of progressive overload.

Muscles Worked in Incline Push-Ups

Incline Push-Ups primarily train the major upper-body pushing muscles while requiring your core and lower body to stabilize your position.

Primary Muscles
  • Pectoralis Major
  • Triceps Brachii
  • Anterior Deltoids
Secondary Muscles
  • Serratus Anterior
  • Rotator Cuff Muscles
  • Rectus Abdominis
  • Obliques
  • Gluteus Maximus
  • Quadriceps
  • Forearms

Although Incline Push-Ups are easier than standard Push-Ups at typical incline heights, the exact muscular demands change somewhat with the height of the surface and your body position.


How to Do Incline Push-Ups (Step-by-Step)

Step 1: Choose a Stable Elevated Surface

Select a sturdy elevated surface that will not move when you press against it.

Suitable options can include:

  • Workout bench
  • Secure box
  • Fixed horizontal bar
  • Sturdy countertop
  • Stable railing designed to support your weight

Avoid lightweight furniture or anything that could slide, tip, collapse, or move unexpectedly.

Step 2: Position Your Hands

Place both hands on the elevated surface approximately shoulder-width apart or slightly wider.

Keep your fingers comfortably spread and establish firm contact with the surface.

Your hands should be positioned symmetrically.

Step 3: Walk Your Feet Back

Step backward until your arms are extended and your body forms an inclined plank.

Keep your feet securely planted on the floor.

The farther your body extends behind the surface, the more important it becomes to maintain full-body tension.

Step 4: Establish Your Body Position

Create a relatively straight line from your head through your shoulders, hips, knees, and ankles.

Keep your:

  • Core braced
  • Glutes engaged
  • Legs controlled
  • Head relatively neutral
  • Shoulders stable
  • Hands firmly planted

Avoid allowing your hips to sag or rise excessively.

Step 5: Lower Your Chest

Bend your elbows and lower your body toward the elevated surface.

Allow your elbows to travel backward and outward at a comfortable angle rather than flaring directly sideways.

Keep your entire body moving together instead of dropping only your chest.

Step 6: Reach the Bottom Position

Lower until your chest approaches or lightly reaches the surface, provided you can maintain good alignment and a comfortable range of motion.

Keep your:

  • Core engaged
  • Hips controlled
  • Head neutral
  • Shoulders stable
  • Feet planted

Do not force additional depth if it causes discomfort or loss of position.

Step 7: Press Back Up

Push firmly through your hands and extend your elbows.

Keep your torso and hips moving together as you return to the starting position.

Finish with your arms extended and body controlled before beginning the next repetition.

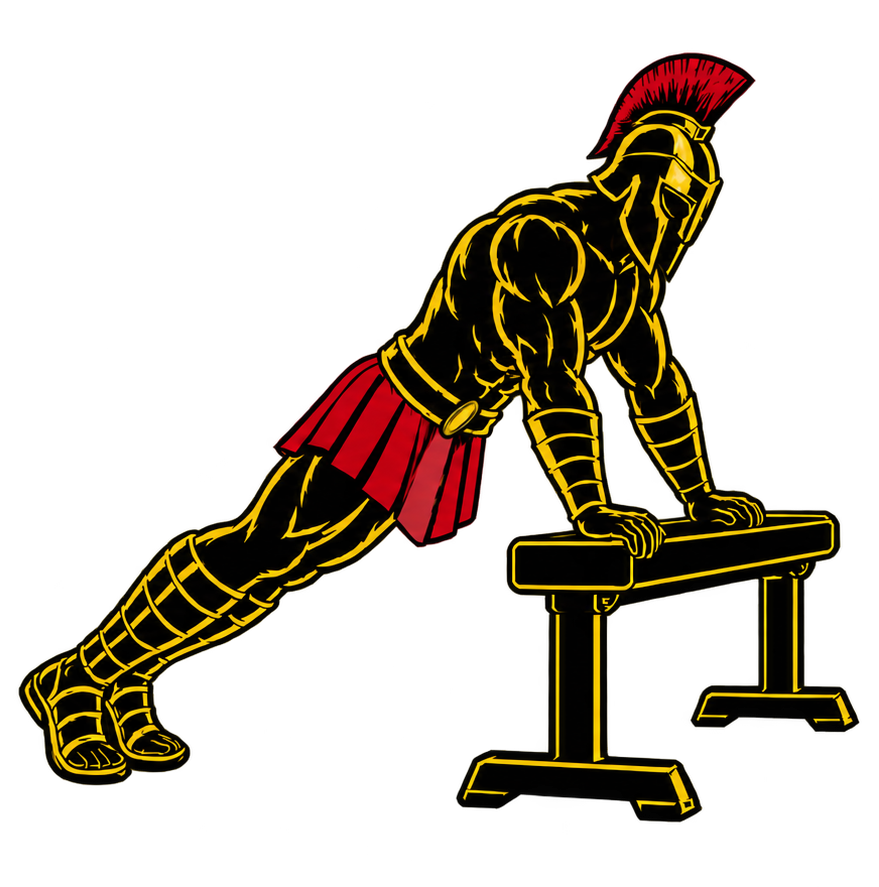
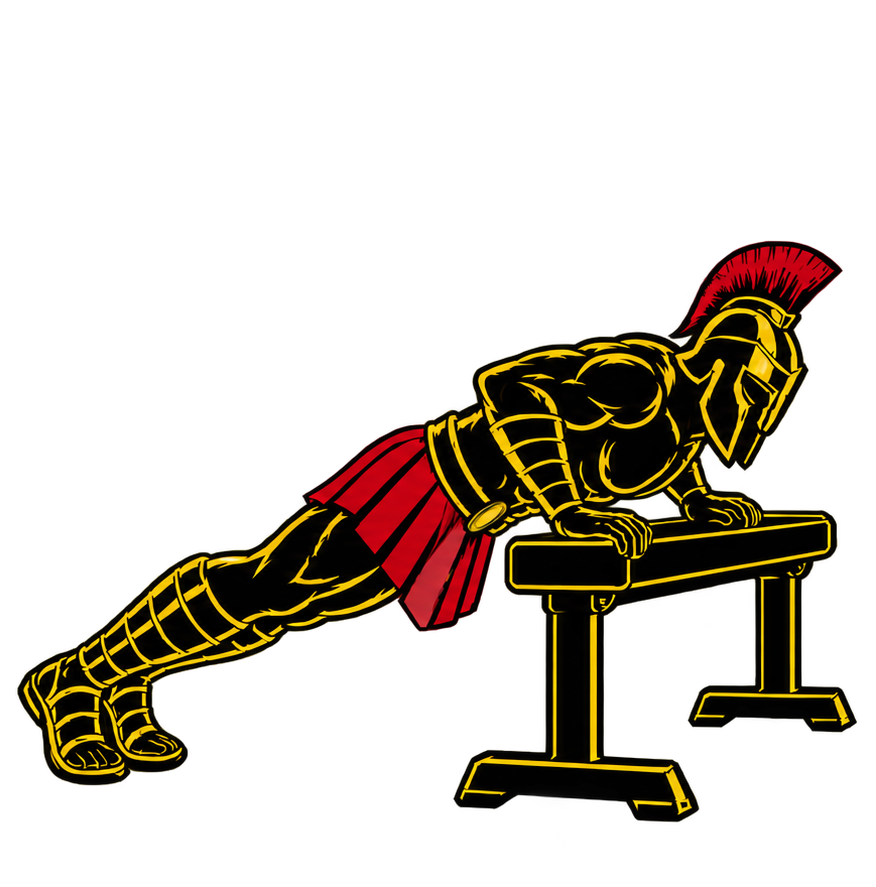
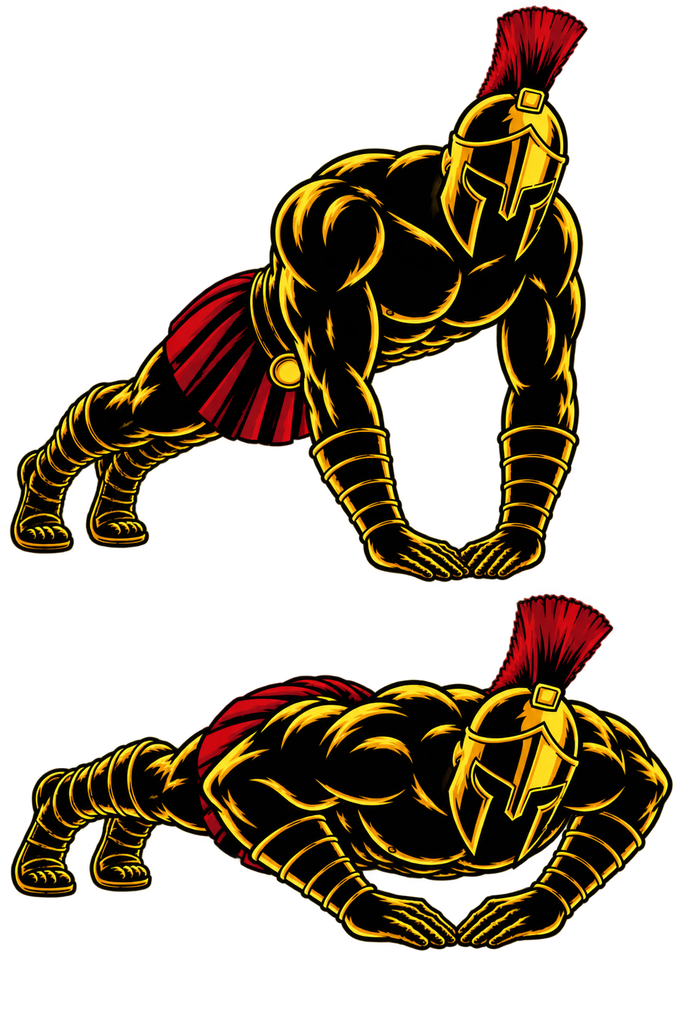
Warrior showcasing How to do Incline Push-Ups with proper form.

Incline Push-Ups Form Checklist

Use this checklist to maintain proper Incline Push-Up technique.

  • Use a sturdy and stable elevated surface
  • Keep your hands approximately shoulder-width or slightly wider
  • Keep your feet securely planted
  • Maintain a straight body line
  • Brace your core
  • Engage your glutes
  • Keep your head relatively neutral
  • Keep your shoulders controlled
  • Avoid excessive elbow flare
  • Lower your chest toward the surface
  • Keep your hips from sagging
  • Avoid raising your hips excessively
  • Press evenly through both hands
  • Extend your arms under control
  • Use a controlled range of motion

If you cannot maintain these positions, use a higher surface until your strength and technique improve.


Common Incline Push-Ups Mistakes

Using an Unstable Surface

Problem: A bench, box, table, or other surface that slides or tips can make the exercise unsafe.

Fix: Use a solid, stationary surface that can comfortably support the forces produced during the exercise.

Letting the Hips Sag

Problem: Allowing your hips to drop creates excessive movement through your trunk and causes you to lose your plank position.

Fix: Brace your core and squeeze your glutes to maintain a relatively straight body line.

Raising the Hips Too High

Problem: Pushing your hips upward changes the body angle and can reduce the intended pressing demand.

Fix: Keep your hips aligned with your torso and legs throughout the repetition.

Flaring the Elbows Excessively

Problem: Allowing your elbows to point directly outward can create an awkward pressing position.

Fix: Let your elbows travel backward and outward at a comfortable angle rather than forcing them directly sideways.

Performing Partial Repetitions

Problem: Lowering only a few centimeters limits the range through which your muscles work.

Fix: Lower your chest toward the elevated surface through the deepest comfortable range you can control.

Leading With the Head

Problem: Reaching your head toward the surface can create the appearance of greater depth without actually lowering your torso properly.

Fix: Keep your head relatively neutral and guide your chest toward the surface.

Using an Incline That Is Too Low

Problem: A very low surface may make the exercise too difficult, causing your hips to sag or your repetitions to become partial.

Fix: Use a higher surface and gradually lower the incline as your strength improves.


Incline Push-Up Progressions and Variations

Incline Push-Ups can be modified according to your current strength and used as part of a gradual progression toward harder Push-Up variations.

High Incline Push-Up

A higher hand position reduces the amount of bodyweight your upper body must press.

How to Do High Incline Push-Ups

  • Choose a sturdy surface around waist height or higher.
  • Place your hands approximately shoulder-width apart.
  • Walk your feet backward into an inclined plank.
  • Brace your core and glutes.
  • Lower your chest toward the surface.
  • Press through your hands until your arms extend.
  • Repeat while maintaining your body alignment.

Low Incline Push-Up

Lowering your hands closer to the floor increases the difficulty and moves you closer to a standard Push-Up.

How to Do Low Incline Push-Ups

  • Choose a low, sturdy elevated surface.
  • Place your hands securely on the surface.
  • Walk your feet backward into a straight body position.
  • Brace your core and glutes.
  • Lower your chest toward the surface.
  • Press yourself back to arm extension.
  • Maintain controlled technique throughout the set.

Incline Close-Grip Push-Up

Bringing your hands closer together changes the pressing position and can increase the relative demand on the triceps.

How to Do Incline Close-Grip Push-Ups

  • Place your hands closer than shoulder-width on a stable surface.
  • Step your feet backward into an inclined plank.
  • Brace your core and maintain body alignment.
  • Bend your elbows while keeping them relatively close to your torso.
  • Lower your chest toward your hands.
  • Press through your palms to extend your arms.
  • Repeat without allowing your hips to sag.

Incline Wide-Grip Push-Up

A moderately wider hand position provides another way to vary your Incline Push-Up training.

How to Do Incline Wide-Grip Push-Ups

  • Place your hands moderately wider than shoulder-width.
  • Establish a secure inclined plank position.
  • Brace your core and glutes.
  • Lower your chest toward the surface.
  • Keep your elbows at a comfortable angle.
  • Press evenly through both hands.
  • Return to the starting position under control.

Avoid making the grip excessively wide.

Slow-Tempo Incline Push-Up

Slowing the repetition increases time under tension and encourages greater movement control.

How to Do Slow-Tempo Incline Push-Ups

  • Set up on a stable elevated surface.
  • Establish a strong inclined plank.
  • Lower yourself slowly for several seconds.
  • Reach your deepest controlled position.
  • Pause briefly near the bottom.
  • Press yourself upward smoothly.
  • Repeat while maintaining the same tempo.

Final Thoughts

Incline Push-Ups are one of the most useful Push-Up progressions for building the strength and technique needed for standard floor Push-Ups.

They develop:

  • Chest strength
  • Triceps strength
  • Shoulder strength
  • Core stability
  • Pressing strength
  • Body-position control
  • Push-Up technique
  • Foundational calisthenics strength

The biggest advantage of Incline Push-Ups is their adjustability. Instead of jumping from an easy variation directly to a difficult one, you can progressively lower your hand position as your strength improves.

Begin with a surface that allows clean repetitions. Once that height becomes consistently easy, move to a slightly lower surface. Continue this process until you can transition confidently toward standard Push-Ups. Learn more about Push Workouts here.

Essential Gear for Incline Push-Ups

Incline Push-Ups require only a stable elevated surface, although a few pieces of equipment can provide useful training options.

  • Workout Bench: Provides a convenient elevated surface for standard or lower Incline Push-Ups.
  • Plyometric Box: Different box heights can help you progressively adjust the difficulty of the exercise.
  • Push-Up Handles: Can provide an alternative wrist position when placed securely on a sufficiently large, stable elevated surface.
  • Resistance Band: Can be positioned appropriately to add resistance once standard Incline Push-Ups become easy.

Whatever surface you use, stability is more important than the specific piece of equipment.


Incline Push-Ups FAQ

Q1: Are Incline Push-Ups good for beginners?
Yes. Incline Push-Ups are highly adjustable and generally easier than standard floor Push-Ups, making them useful for beginners developing their pressing strength and technique.

Q2: How high should the surface be for Incline Push-Ups?
There is no single ideal height. Use a surface high enough that you can perform controlled repetitions with good alignment. As you become stronger, gradually use lower surfaces.

Q3: How many Incline Push-Ups should beginners do?
A practical starting point is around 8–15 controlled repetitions for 2–3 sets. Adjust the incline and repetitions according to your strength and ability to maintain proper form.

Q4: When should I progress from Incline Push-Ups to regular Push-Ups?
Once you can perform clean repetitions on a low incline without sagging, shortening the range of motion, or losing control, begin practicing standard Push-Ups. You can continue using Incline Push-Ups for additional training volume.

Q5: How can I make Incline Push-Ups harder?
Gradually lower the height of your hands, slow the lowering phase, add pauses, increase your controlled repetitions, or eventually add resistance. Lowering the incline is particularly useful because it progressively moves the exercise toward a standard floor Push-Up.


How to Do Australian Rows Correctly: Step-by-Step Guide for Beginners

Learn how to do Australian Rows with proper form, avoid common mistakes, and discover the best Australian Row variations to build a stronger back, biceps, grip, and upper-body pulling strength.

Australian Rows, also known as Inverted Rows or Bodyweight Rows, are one of the best beginner-friendly pulling exercises in calisthenics. Instead of pulling your entire body vertically toward a Pull-Up bar, you position yourself underneath a lower bar and pull your chest toward it.

Whether you’re working toward your first Pull-Up, building a stronger back at home, or adding horizontal pulling to your calisthenics workouts, Australian Rows are an excellent exercise to master.


What Are Australian Rows?

Australian Rows are a horizontal bodyweight pulling exercise performed underneath a low horizontal bar, gymnastics rings, or another secure setup.

You grip the bar, extend your body underneath it, and pull your chest toward the bar while keeping your body rigid. You then lower yourself under control until your arms are extended again.

The exercise is commonly known by several names, including:

  • Australian Rows
  • Inverted Rows
  • Bodyweight Rows
  • Horizontal Rows

Australian Rows are commonly used in:

  • Beginner calisthenics training
  • Pull-Up progression programs
  • Bodyweight workouts
  • Back workouts
  • Home workouts
  • Upper-body strength training

The difficulty can easily be adjusted by changing your body angle or elevating your feet.

Benefits of Australian Rows

Australian Rows provide several strength and muscle-building benefits.

Benefits include:

  • Builds back strength
  • Strengthens the biceps
  • Develops horizontal pulling strength
  • Improves grip strength
  • Strengthens the rear shoulders
  • Develops scapular control
  • Strengthens the core
  • Helps prepare beginners for Pull-Ups
  • Can be easily progressed or regressed

Australian Rows are particularly useful for beginners because you can adjust the amount of bodyweight being lifted simply by changing your body position.

Muscles Worked in Australian Rows

Australian Rows train several major pulling muscles throughout the back and arms.

Primary Muscles
  • Latissimus Dorsi
  • Rhomboids
  • Trapezius
  • Biceps Brachii
Secondary Muscles
  • Rear Deltoids
  • Brachialis
  • Brachioradialis
  • Forearms
  • Core Muscles

Your glutes, abdominals, and other stabilizing muscles also work isometrically to maintain a rigid body position throughout the exercise.


How to Do Australian Rows (Step-by-Step)

Step 1: Set Up the Bar

Use a secure horizontal bar positioned around waist height or another height appropriate for your strength level.

Before starting:

  • Make sure the bar is stable
  • Ensure there is enough space underneath it
  • Check that your feet will not slide
  • Adjust the bar height if possible

A higher bar generally makes the exercise easier, while a lower bar makes it more difficult.

Step 2: Grip the Bar

Position yourself underneath the bar and grip it slightly wider than shoulder-width apart with your palms facing away from you.

Keep your hands firmly wrapped around the bar.

Your arms should be straight in the starting position.

Step 3: Establish Your Body Position

Extend your legs in front of you and place your heels on the floor.

Keep your:

  • Head neutral
  • Shoulders active
  • Core engaged
  • Glutes tight
  • Legs straight

Your body should form a straight line from your head to your heels.

Tip: If straight-leg Australian Rows are too difficult, bend your knees and place your feet flat on the floor to reduce the difficulty.

Step 4: Initiate the Pull

Begin the movement by drawing your shoulder blades back and down.

Then bend your elbows and start pulling your chest toward the bar.

Avoid shrugging your shoulders toward your ears.

Step 5: Pull Your Chest Toward the Bar

Continue pulling until your chest approaches or lightly touches the bar.

At the top:

  • Keep your core tight
  • Squeeze your shoulder blades together
  • Keep your hips from sagging
  • Maintain a neutral neck
  • Keep your elbows controlled

Avoid reaching your chin toward the bar to create the appearance of a greater range of motion.

Step 6: Lower Yourself Under Control

Slowly extend your elbows and lower your body back toward the starting position.

Continue until your arms are straight while keeping your shoulders controlled.

Do not allow your hips to collapse as you descend.

Pause briefly and repeat for the desired number of repetitions.

Warrior showcasing How to do Australian Rows with proper form

Australian Rows Form Checklist

Use this quick checklist to ensure proper Australian Row form.

  • Use a stable horizontal bar
  • Grip the bar firmly
  • Keep your body straight
  • Brace your core
  • Squeeze your glutes
  • Keep your shoulders active
  • Pull your chest toward the bar
  • Squeeze your shoulder blades together
  • Avoid excessive swinging
  • Lower yourself under control
  • Fully extend your arms at the bottom

Think about moving your entire body as one rigid unit rather than pulling your upper body while allowing your hips to sag.


Common Australian Rows Mistakes

Letting the Hips Sag

Problem: Allowing your hips to drop breaks your straight body position and reduces core involvement.

Fix: Brace your abs, squeeze your glutes, and maintain a straight line from your shoulders to your heels.

Pulling With the Arms Only

Problem: Focusing entirely on bending your elbows can reduce involvement from the larger muscles of your back.

Fix: Initiate each repetition by controlling your shoulder blades, then drive your elbows backward as you pull.

Shrugging the Shoulders

Problem: Allowing your shoulders to rise toward your ears can reduce efficient scapular control.

Fix: Keep your shoulders controlled and avoid unnecessary shrugging during the pull.

Performing Partial Repetitions

Problem: Stopping well before your chest approaches the bar or failing to extend your arms at the bottom reduces your effective range of motion.

Fix: Use a body angle that allows you to perform controlled repetitions through a full, comfortable range.

Using Momentum

Problem: Swinging your hips or jerking your torso makes the exercise easier without developing the same level of controlled pulling strength.

Fix: Keep your entire body rigid and perform each repetition smoothly.

Flaring the Elbows Excessively

Problem: Allowing your elbows to flare far outward can alter the movement and reduce control.

Fix: Keep your elbows at a comfortable angle and drive them backward as you pull your chest toward the bar.

Setting the Exercise Too Difficult

Problem: Using an excessively low bar or horizontal body position before you’re strong enough can lead to poor form and incomplete repetitions.

Fix: Raise the bar or move your feet closer to your body to create a more upright angle. Gradually make your body more horizontal as your strength improves.


Australian Row Variations

Australian Rows can easily be modified for different strength levels.

Bent-Knee Australian Rows

An excellent beginner variation.

How to Do Bent-Knee Australian Rows

  • Grip a stable horizontal bar.
  • Bend your knees and place your feet flat on the floor.
  • Keep your hips and torso controlled.
  • Pull your chest toward the bar.
  • Lower yourself slowly until your arms are straight.

The bent-knee position reduces the leverage and makes the movement easier.

Incline Australian Rows

Another beginner-friendly progression performed with a more upright body angle.

How to Do Incline Australian Rows

  • Use a relatively high horizontal bar.
  • Grip the bar and lean backward.
  • Keep your body straight.
  • Pull your chest toward the bar.
  • Lower yourself under control.

Gradually use a lower bar as you become stronger.

Standard Australian Rows

The traditional bodyweight variation.

How to Do Standard Australian Rows

  • Position yourself underneath a horizontal bar.
  • Extend your legs with your heels on the floor.
  • Keep your body rigid.
  • Pull your chest toward the bar.
  • Squeeze your shoulder blades together.
  • Lower yourself until your arms are extended.

Feet-Elevated Australian Rows

A harder progression that increases the amount of bodyweight you must pull.

How to Do Feet-Elevated Australian Rows

  • Place your heels on a stable elevated surface.
  • Grip the horizontal bar.
  • Keep your body straight.
  • Pull your chest toward the bar.
  • Lower yourself slowly to the starting position.

Keep the elevated surface secure throughout the exercise.

Ring Australian Rows

Gymnastics rings allow your hands and wrists to rotate naturally during the movement.

How to Do Ring Australian Rows

  • Set the rings to an appropriate height.
  • Grip one ring in each hand.
  • Lean backward while keeping your body straight.
  • Pull your chest toward the rings.
  • Squeeze your back at the top.
  • Lower yourself under control.

You can walk your feet forward or backward to adjust the difficulty.


Final Thoughts

Australian Rows are one of the most useful beginner pulling exercises in calisthenics and an excellent foundation for developing a stronger back and progressing toward Pull-Ups.

They develop:

  • Back strength
  • Biceps strength
  • Grip strength
  • Horizontal pulling power
  • Scapular control
  • Core stability
  • Upper-body control

The exercise is also highly scalable. Beginners can start with a higher bar or bent knees, while stronger trainees can lower the bar, elevate their feet, or use more challenging variations.

Focus on keeping your body rigid, pulling your chest toward the bar, squeezing your back at the top, and controlling every descent.

Master your Australian Rows, progressively increase the difficulty, and build the pulling foundation needed for harder calisthenics exercises. Learn more about Pull Workouts here.

Essential Gear for Australian Rows

Australian Rows require a secure pulling surface, with several equipment options available depending on your training setup.

  • Low Horizontal Bar: The standard equipment for Australian Rows, providing a stable surface for horizontal pulling.
  • Gymnastics Rings: Allow you to perform Ring Australian Rows while naturally adjusting your hand position throughout the movement.
  • Parallettes or Dip Bars: Tall, securely positioned bars can provide an alternative setup for Australian Rows when they offer sufficient clearance and stability.
  • Weighted Vest: Allows advanced trainees to progressively add resistance once standard Australian Rows become easy.

Australian Row FAQ

Q1: Do Australian Rows help with Pull-Ups?
Yes. Australian Rows build back, arm, grip, and scapular strength that can support your progression toward Pull-Ups, although vertical pulling exercises and Pull-Up-specific progressions should also be included.

Q2: How many Australian Rows should beginners do?
Beginners can start with approximately 8-12 controlled repetitions for 2-4 sets. Adjust your body angle so you can complete each repetition with proper form.

Q3: Are Australian Rows the same as Inverted Rows?
Yes. Australian Rows and Inverted Rows generally refer to the same horizontal bodyweight pulling exercise, although the terminology used can vary between training communities.


How to Do Band-Assisted Pull-Ups Correctly: Step-by-Step Guide for Beginners

Learn how to do Band-Assisted Pull-Ups with proper form, avoid common mistakes, and use resistance bands effectively to build the strength needed for unassisted Pull-Ups.

Band-Assisted Pull-Ups are one of the best Pull-Up progressions for beginners. A resistance band supports part of your bodyweight, letting you practice the full pulling movement while gradually building your back, biceps, grip, and upper-body pulling strength.

Whether you’re working toward your first Pull-Up or trying to increase your number of strict repetitions, Band-Assisted Pull-Ups can help bridge the gap between easier Pull-Up progressions and full bodyweight Pull-Ups.


What Are Band-Assisted Pull-Ups?

Band-Assisted Pull-Ups are a Pull-Up variation performed with a resistance band attached to a Pull-Up bar. The band stretches as you descend and provides upward assistance as you pull yourself toward the bar.

This reduces the amount of bodyweight you have to lift while allowing you to practice a movement pattern similar to a regular Pull-Up.

Band-Assisted Pull-Ups are commonly used in:

  • Beginner calisthenics training
  • Pull-Up progression programs
  • Home workouts
  • Strength training
  • Upper-body workouts
  • High-repetition Pull-Up training

Different band resistance levels allow you to adjust the amount of assistance according to your current strength.

Benefits of Band-Assisted Pull-Ups

Band-Assisted Pull-Ups offer several benefits for beginners and anyone working to improve their Pull-Ups.

Benefits include:

  • Builds back strength
  • Strengthens the biceps
  • Develops grip strength
  • Helps beginners learn Pull-Up technique
  • Allows practice through a full range of motion
  • Makes Pull-Ups accessible at lower strength levels
  • Helps build pulling endurance
  • Provides adjustable assistance
  • Helps bridge the gap toward unassisted Pull-Ups

As you become stronger, you can gradually use lighter resistance bands until you no longer need assistance.

Muscles Worked in Band-Assisted Pull-Ups

Band-Assisted Pull-Ups train essentially the same major muscle groups as regular Pull-Ups, although the resistance band reduces the amount of load you must lift.

Primary Muscles
  • Latissimus Dorsi
  • Biceps Brachii
  • Brachialis
  • Brachioradialis
Secondary Muscles
  • Trapezius
  • Rhomboids
  • Rear Deltoids
  • Forearms
  • Core Muscles

Your abdominals, obliques, and other stabilizing muscles also help control your body and reduce unnecessary swinging.


How to Do Band-Assisted Pull-Ups (Step-by-Step)

Step 1: Attach the Resistance Band

Loop a suitable resistance band securely around the center of a stable Pull-Up bar.

Pull one end of the band through the other to create a secure loop.

Before starting:

  • Check the band for cracks, tears, or excessive wear
  • Make sure it is securely attached
  • Confirm the Pull-Up bar is stable
  • Choose an appropriate resistance level

Never use a visibly damaged resistance band.

Step 2: Position Yourself in the Band

Carefully place one foot or knee into the hanging loop of the resistance band, depending on the band setup and your preference.

Keep the band centered and controlled.

Avoid twisting the band unnecessarily.

Tip: Be especially careful when entering and exiting a stretched resistance band. Maintain control so the band does not snap back toward you.

Step 3: Grip the Pull-Up Bar

Grip the bar slightly wider than shoulder-width apart with your palms facing away from you.

Start from a controlled hanging position.

Maintain:

  • Firm grip
  • Straight arms
  • Engaged shoulders
  • Tight core
  • Controlled legs

Avoid beginning the repetition with excessive swinging.

Step 4: Initiate the Pull

Begin by drawing your shoulder blades down and back slightly before bending your elbows.

Then pull your body upward.

Think about driving your elbows down toward your sides rather than simply trying to bring your chin over the bar.

Step 5: Pull Yourself Toward the Bar

Continue pulling until your chin reaches or passes the height of the bar.

At the top:

  • Keep your chest controlled
  • Keep your shoulders active
  • Maintain core tension
  • Avoid excessive kicking
  • Keep the band stable

Do not crane your neck simply to get your chin over the bar.

Step 6: Lower Yourself Under Control

Slowly extend your elbows and lower yourself toward the starting position.

Continue descending until your arms reach full extension while maintaining active shoulder control.

Avoid simply dropping into the bottom position.

Pause briefly and repeat for the desired number of repetitions.

Warrior showcasing How to do Assisted Pull-Ups with proper form

Band-Assisted Pull-Up Form Checklist

Use this quick checklist to ensure proper Band-Assisted Pull-Up form.

  • Secure the resistance band properly
  • Check the band for damage before training
  • Grip the bar firmly
  • Start from a controlled hang
  • Keep your core engaged
  • Initiate the pull with your back and shoulders
  • Drive your elbows downward
  • Avoid excessive swinging
  • Bring your chin to bar height without craning your neck
  • Lower yourself under control
  • Use a full, comfortable range of motion

Treat assisted repetitions like strict Pull-Ups rather than allowing the band to bounce you through the movement.


Common Band-Assisted Pull-Up Mistakes

Using Too Much Band Assistance

Problem: An excessively strong band can make the exercise too easy and reduce the amount of strength you need to produce.

Fix: Choose a band that provides enough assistance to perform clean repetitions while still making the set challenging.

Using Too Little Assistance

Problem: A band that provides insufficient assistance may cause you to compensate with swinging, kicking, or partial repetitions.

Fix: Use a slightly stronger band until you can complete controlled repetitions through a full comfortable range of motion.

Bouncing Out of the Bottom

Problem: Allowing the stretched band to rapidly launch you upward reduces muscular control.

Fix: Pause briefly at the bottom and initiate each repetition deliberately.

Swinging the Body

Problem: Kicking and swinging create momentum that reduces the amount of work performed by your pulling muscles.

Fix: Brace your core, control your legs, and perform each repetition without unnecessary momentum.

Performing Partial Repetitions

Problem: Only training the easiest portion of the movement can limit your development through the full Pull-Up range.

Fix: Use enough assistance to perform controlled repetitions from the bottom position to chin height.

Dropping Too Quickly

Problem: Falling rapidly into the bottom position reduces control and wastes the strength-building potential of the lowering phase.

Fix: Lower yourself slowly until your arms are extended before beginning the next repetition.

Using a Damaged Resistance Band

Problem: Resistance bands can weaken over time, and damaged bands may break when stretched.

Fix: Inspect your band before every workout and replace it if you notice cracks, tears, thinning, or other significant damage.


Band-Assisted Pull-Up Variations

Band assistance can be used with several Pull-Up variations depending on your goals and current strength.

Heavy Band-Assisted Pull-Ups

A beginner-friendly version that provides greater assistance.

How to Do Heavy Band-Assisted Pull-Ups

  • Attach a strong resistance band to the bar.
  • Place your foot or knee securely in the band.
  • Grip the bar slightly wider than shoulder-width.
  • Pull yourself toward the bar.
  • Lower yourself under control.

Use this variation when you’re still developing basic Pull-Up strength.

Light Band-Assisted Pull-Ups

A more advanced progression toward unassisted Pull-Ups.

How to Do Light Band-Assisted Pull-Ups

  • Attach a lighter resistance band to the bar.
  • Position yourself securely in the band.
  • Perform strict Pull-Ups.
  • Avoid using momentum.
  • Control both the upward and downward phases.

Progress to lighter bands as your pulling strength improves.

Band-Assisted Chin-Ups

Uses an underhand grip to place greater emphasis on the biceps.

How to Do Band-Assisted Chin-Ups

  • Secure the resistance band to the bar.
  • Grip the bar with your palms facing you.
  • Keep your core tight.
  • Pull your chin toward the bar.
  • Lower yourself slowly to the starting position.

Band-Assisted Neutral-Grip Pull-Ups

A useful alternative when a neutral-grip bar is available.

How to Do Band-Assisted Neutral-Grip Pull-Ups

  • Attach the band securely.
  • Grip the parallel handles with your palms facing each other.
  • Pull your body upward.
  • Bring your chin toward the handle height.
  • Lower yourself under control.

Tempo Band-Assisted Pull-Ups

Slows the movement to increase muscular control.

How to Do Tempo Band-Assisted Pull-Ups

  • Set up for a normal Band-Assisted Pull-Up.
  • Pull yourself upward under control.
  • Pause briefly at the top.
  • Lower yourself slowly for 3-5 seconds.
  • Repeat without bouncing from the bottom.

Final Thoughts

Band-Assisted Pull-Ups are one of the most useful progressions for anyone working toward stronger, cleaner, and eventually unassisted Pull-Ups.

They develop:

  • Back strength
  • Biceps strength
  • Grip strength
  • Pulling endurance
  • Pull-Up technique
  • Upper-body control

The key is to treat the resistance band as assistance rather than allowing it to do most of the work.

Start with enough resistance to perform clean repetitions. As you become stronger, progressively move to lighter bands while maintaining the same strict technique. You can then begin combining assisted repetitions with Dead Hangs, Scapular Pull-Ups, Negative Pull-Ups, and attempts at unassisted Pull-Ups.

Use less assistance as you get stronger, and eventually the band becomes unnecessary. Learn more about Pull Workouts here.

Essential Gear for Band-Assisted Pull-Ups

Band-Assisted Pull-Ups require only a few pieces of equipment.

  • Pull-Up Bar: Provides the stable overhead anchor and gripping surface required to perform the exercise.
  • Resistance Bands: Provide adjustable assistance. Having multiple resistance levels makes it easier to progressively reduce assistance as you become stronger.
  • Gymnastics Rings: An optional alternative that allows assisted pulling exercises with freely rotating handles.
  • Gym Chalk: Can improve grip when your hands become sweaty during Pull-Up training.
  • Wrist Wraps: Protect the wrists during long sets while not sacrificing grip strength development.

Band-Assisted Pull-Up FAQ

Q1: What resistance band should I use for Band-Assisted Pull-Ups?
Use a band that provides enough assistance for you to perform clean repetitions through a full, comfortable range of motion without excessive swinging or kicking.

Q2: How many Band-Assisted Pull-Ups should beginners do?
Beginners can start with approximately 5-8 controlled repetitions for 2-4 sets using enough assistance to maintain proper form throughout each set.

Q3: Should I put my foot or knee in the resistance band?
Either setup can work depending on the type and length of your band. The most important factors are that the band remains secure, you can control your body, and you can safely enter and exit the setup.


How to Do Walking Lunges Correctly: Step-by-Step Guide for Beginners

Learn how to do Walking Lunges with proper form, avoid common mistakes, and discover the best Walking Lunge variations to build stronger legs and glutes while improving balance, coordination, and lower-body control.

Walking lunges are a dynamic unilateral leg exercise that combines the strength-building benefits of lunges with continuous forward movement. Unlike stationary lunges, you step directly from one lunge into the next, requiring greater balance, coordination, and control.

Whether you’re training at home, in the gym, for calisthenics, or for athletic performance, Walking Lunges are an excellent exercise for developing powerful and balanced legs.


What Are Walking Lunges?

Walking Lunges are a dynamic lunge variation where you step forward with one leg, lower your body into a lunge, push yourself upward, and immediately step forward with the opposite leg.

Instead of returning to the original starting position after each repetition, you continue traveling forward.

Walking Lunges are commonly used in:

  • Bodyweight workouts
  • Calisthenics training
  • Strength training
  • Athletic conditioning
  • Lower-body workouts
  • Warm-up routines

They can be performed using only your bodyweight or progressively loaded with dumbbells, kettlebells, or a weighted vest.

Benefits of Walking Lunges

Walking Lunges provide several strength, balance, and athletic benefits.

Benefits include:

  • Strengthens the quadriceps
  • Builds stronger glutes
  • Develops the hamstrings
  • Improves single-leg balance
  • Develops coordination
  • Strengthens the core
  • Helps address strength imbalances
  • Improves lower-body stability
  • Requires no equipment

Because you continuously alternate between legs while moving forward, Walking Lunges also challenge your ability to maintain control during dynamic movement.

Muscles Worked in Walking Lunges

Walking Lunges recruit several major muscles throughout the lower body.

Primary Muscles
  • Quadriceps
  • Gluteus Maximus
  • Hamstrings
Secondary Muscles
  • Gluteus Medius
  • Adductors
  • Calves
  • Hip Flexors
  • Core Muscles

Your core, hips, and smaller stabilizing muscles also work continuously to maintain balance as you transition from one leg to the other.


How to Do Walking Lunges (Step-by-Step)

Step 1: Stand Upright

Stand with your feet approximately hip-width apart.

Maintain:

  • Chest upright
  • Core engaged
  • Shoulders relaxed
  • Spine neutral
  • Eyes looking forward

Allow your arms to rest naturally by your sides or place your hands on your hips.

Step 2: Step Forward

Take a controlled step forward with your right leg.

Plant your entire front foot firmly on the floor.

Choose a step length that allows you to lower comfortably without losing balance.

Tip: Avoid taking an excessively short or long step. Your ideal stride length depends on your height, mobility, and individual body proportions.

Step 3: Lower Into the Lunge

Bend both knees and lower your hips toward the floor.

As you descend:

  • Keep your front foot planted
  • Keep your front knee tracking with your toes
  • Lower your rear knee toward the floor
  • Keep your torso controlled
  • Maintain core tension

Your front thigh can approach parallel to the floor if your mobility and strength allow.

Step 4: Reach the Bottom Position

Lower your rear knee until it approaches the floor.

At the bottom:

  • Keep your front heel planted
  • Keep your front knee controlled
  • Maintain a neutral spine
  • Keep your core engaged
  • Avoid letting your rear knee crash into the floor

Pause briefly if necessary to maintain balance.

Step 5: Drive Forward

Push through your front foot and begin straightening your front leg.

Instead of stepping backward to the original position, bring your rear leg forward.

Use your front leg to drive your body into the next step.

Step 6: Lunge With the Opposite Leg

Step forward with your left leg and repeat the same movement.

Continue alternating legs as you travel forward.

Each lunge should remain controlled rather than turning the exercise into a series of rushed steps.

Warrior showcasing How to do Walking Lunges with proper form

Walking Lunges Form Checklist

Use this quick checklist to ensure proper Walking Lunge form.

  • Keep your chest upright
  • Brace your core
  • Take controlled steps
  • Plant your entire front foot
  • Keep your front knee aligned with your toes
  • Lower your rear knee under control
  • Push through your front foot
  • Maintain balance between repetitions
  • Use equal repetitions on both legs

Smooth transitions and proper alignment are more important than moving quickly.


Common Walking Lunges Mistakes

Taking Steps That Are Too Short

Problem: A very short stride can make the lunge feel cramped and may cause excessive forward movement at the knee.

Fix: Take a slightly longer step that allows both knees to bend comfortably while keeping your front foot planted.

Taking Steps That Are Too Long

Problem: An excessively long stride can make it difficult to maintain balance and control.

Fix: Use a natural stride length that allows you to descend smoothly and push forward efficiently.

Letting the Front Knee Collapse Inward

Problem: Knee collapse reduces stability and creates poor lower-body alignment.

Fix: Keep your knee tracking in the same general direction as your toes throughout the repetition.

Leaning Excessively Forward

Problem: Excessive torso movement can make the exercise harder to control.

Fix: Keep your torso controlled and your core engaged. A small natural forward lean is acceptable, but avoid collapsing over your front leg.

Slamming the Rear Knee Into the Floor

Problem: Dropping too quickly removes muscular control and can cause discomfort.

Fix: Slow your descent and stop your rear knee just above the floor.

Rushing Between Repetitions

Problem: Moving too quickly can cause you to lose balance and shorten your range of motion.

Fix: Establish control before transitioning into each new step.

Pushing Mostly With the Rear Leg

Problem: Relying excessively on the trailing leg reduces the work performed by the front leg.

Fix: Drive primarily through your planted front foot as you move into the next repetition.


Walking Lunges Variations

Once you master standard Walking Lunges, these variations can help you adjust or increase the difficulty.

Assisted Walking Lunge

A useful beginner progression.

How to Do Assisted Walking Lunges

  • Perform the exercise beside a wall or sturdy support.
  • Step forward into a lunge.
  • Use the support lightly if you lose balance.
  • Push through your front foot and continue forward.
  • Gradually reduce assistance as your balance improves.

Bodyweight Walking Lunge

The standard variation.

How to Do Bodyweight Walking Lunges

  • Stand upright.
  • Step forward with one leg.
  • Lower your rear knee toward the floor.
  • Push through your front foot.
  • Bring the opposite leg forward into the next lunge.
  • Continue alternating legs.

Dumbbell Walking Lunge

Adds external resistance.

How to Do Dumbbell Walking Lunges

  • Hold a dumbbell in each hand.
  • Keep your arms naturally by your sides.
  • Step forward and lower into a controlled lunge.
  • Drive through your front foot.
  • Continue alternating legs while maintaining an upright torso.

Goblet Walking Lunge

Adds resistance while challenging your core.

How to Do Goblet Walking Lunges

  • Hold a dumbbell or kettlebell close to your chest.
  • Brace your core.
  • Perform alternating Walking Lunges.
  • Keep the weight stable throughout each repetition.

Weighted Vest Walking Lunge

An advanced progression that keeps your hands free.

How to Do Weighted Vest Walking Lunges

  • Secure a weighted vest around your torso.
  • Perform standard Walking Lunges.
  • Maintain your normal stride and posture.
  • Gradually increase the load as your strength improves.

Final Thoughts

Walking Lunges are one of the best unilateral lower-body exercises for combining strength, balance, coordination, and dynamic movement.

They develop:

  • Quadriceps strength
  • Glute strength
  • Hamstring strength
  • Single-leg stability
  • Balance
  • Coordination
  • Lower-body control

Unlike stationary lunges, Walking Lunges require you to repeatedly stabilize your body while moving forward, making them particularly useful for developing dynamic lower-body control. Learn more about Leg Workouts here.

Start with bodyweight repetitions, master your stride and balance, and gradually add resistance as you become stronger.

Control every step, train both legs equally, and make each repetition count.

Essential Gear for Walking Lunges

Walking Lunges require no equipment, but a few pieces of gear can provide additional resistance and progression options.

  • Dumbbells: Provide simple, adjustable resistance for progressively overloading Walking Lunge.
  • Kettlebell: Hold at your chest for Goblet Walking Lunges and added core engagement.
  • Weighted Vest: Adds resistance while keeping your hands free and maintaining a natural Walking Lunge pattern.
  • Resistance Bands: Can provide additional resistance and be incorporated into lower-body training progressions.

Walking Lunges FAQ

Q1: Are Walking Lunges better than regular Lunges?
Neither variation is universally better. Walking Lunges add continuous forward movement and greater dynamic balance demands, while stationary Lunges can be easier to control and perform in limited space.

Q2: Should my knee touch the floor during Walking Lunges?
No. Your rear knee can approach the floor, but it does not need to touch it. Lower through the deepest comfortable range you can control without slamming your knee down.

Q3: Why do I lose balance during Walking Lunges?
Common causes include taking excessively long or narrow steps, rushing between repetitions, or lacking single-leg stability. Slow down, use a comfortable stride, and briefly stabilize yourself between steps until your balance improves.

Beginner Calisthenics Workout Plan at Home

Starting calisthenics doesn’t require advanced skills, expensive equipment, or years of training. This Beginner Calisthenics Workout Plan at Home is designed to help new trainees build the strength, mobility, endurance, and body control needed to establish a solid calisthenics foundation.

The program focuses on fundamental movements such as push-ups, assisted pull-ups, squats, rows, dips, and core exercises while gradually introducing beginner calisthenics skills such as the Frog Hold, Dead Hang, and L-Sit progressions.

You can choose between a 3-day routine for more recovery or a 6-day Push Pull Legs (PPL) routine for more frequent training.

Click on any exercise to know How to do it.


What Is Beginner Calisthenics Training?

Calisthenics is a form of resistance training that primarily uses your bodyweight to develop strength, endurance, mobility, and control.

A beginner program focuses on mastering fundamental movement patterns before progressing toward advanced exercises and skills.

These foundations include:

  • Push – Push-Ups and their variations
  • Pull – Rows, Assisted Pull-Ups, and Pull-Ups
  • Legs – Squats, Lunges, and Glute exercises
  • Core – Planks, Leg Raises, and Hollow Holds
  • Skills – Frog Holds, Dead Hangs, and L-Sit progressions

Mastering these basics prepares your body for more difficult calisthenics movements such as Handstands, Muscle-Ups, Front Levers, Back Levers, and Planche progressions later in your journey.

Benefits of a Beginner Calisthenics Workout Plan

  • Builds foundational bodyweight strength
  • Develops muscular endurance
  • Strengthens the core
  • Improves balance and body control
  • Increases mobility and flexibility
  • Introduces basic calisthenics skills
  • Builds a foundation for advanced skills
  • Requires minimal equipment
  • Can be performed at home

Equipment Needed

Beginner calisthenics requires very little equipment.

If you cannot perform pull-ups yet, resistance bands are particularly useful for assisted pull-ups and other pulling exercises.


Weekly Training Structure

Option 1 – 3-Day Beginner Full-Body Split

  • Monday – Full Body + Push Skill
  • Wednesday – Full Body + Pull Skill
  • Friday – Full Body + Core & Balance Skill
  • Tuesday, Thursday, Saturday & Sunday – Rest or Light Activity

The 3-day option is recommended for complete beginners because it provides plenty of recovery between workouts.

Option 2 – 6-Day Beginner PPL Split

  • Monday – Push
  • Tuesday – Pull
  • Wednesday – Legs
  • Thursday – Push
  • Friday – Pull
  • Saturday – Legs
  • Sunday – Rest

The 6-day option is suitable for beginners who already have a basic fitness foundation and prefer shorter, more frequent workouts.


Pre-Workout Stretch & Mobility Routine

Perform this warm-up before every workout for 5–8 minutes.

Pay particular attention to warming up your wrists and shoulders before skill training.


3-Day Beginner Calisthenics Workout Plan

Monday – Full Body + Push Skill

Skill Training

  • Frog Hold – 3 sets × 10–20 seconds
  • Incline Planche Lean – 3 sets × 10–15 seconds

Focus on balance, straight arms, and controlled positioning rather than extending your holds until your form collapses.

Main Workout

  • Incline Push-Ups – 3 sets × 8–12 reps
  • Assisted Pull-Ups – 3 sets × 5–8 reps
  • Bodyweight Squats – 3 sets × 15 reps
  • Glute Bridges – 3 sets × 15 reps
  • Resistance Band Rows – 3 sets × 10–12 reps

Rest 60–90 seconds between sets.

Core Finisher

Wednesday – Full Body + Pull Skill

Skill Training

Main Workout

Rest 60–90 seconds between sets.

Core Finisher

Friday – Full Body + Core & Balance Skill

Skill Training

Use parallettes, dip bars, or another stable setup for the Tuck L-Sit if necessary.

Main Workout

Rest 60–90 seconds between sets.

Core Finisher


6-Day Beginner Calisthenics PPL Workout Plan

Monday & Thursday – Push Day

Skill Training

  • Frog Hold – 3 sets × 10–20 seconds
  • Incline Planche Lean – 3 sets × 10–15 seconds

Main Workout

Rest 60–90 seconds between sets.

Core Finisher

  • Plank – 3 sets × 30 seconds
  • Dead Bug – 2 sets × 10 reps each side

Tuesday & Friday – Pull Day

Skill Training

Main Workout

  • Assisted Pull-Ups – 3 sets × 5–8 reps
  • Assisted Chin-Ups – 3 sets × 5–8 reps
  • Inverted Rows – 3 sets × 8–12 reps
  • Resistance Band Rows – 3 sets × 10–15 reps
  • Resistance Band Bicep Curls – 2 sets × 10–15 reps

Rest 60–90 seconds between sets.

Core Finisher

Wednesday & Saturday – Legs Day

Skill Training

  • Deep Squat Hold – 3 sets × 20–30 seconds
  • Single-Leg Balance Hold – 3 sets × 20 seconds each leg

Main Workout

Rest 60–90 seconds between sets.

Core Finisher

  • Reverse Crunches – 3 sets × 10–15 reps
  • Side Plank – 2 sets × 20–30 seconds each side
  • Bird Dog – 2 sets × 10 reps each side

Post-Workout Stretch Routine

Perform each stretch for approximately 30 seconds after training.

This routine helps maintain the mobility needed for calisthenics while allowing your body to cool down after training.


How to Progress in Beginner Calisthenics

Calisthenics becomes effective when exercises gradually become more challenging as you get stronger.

Progress using:

  • More repetitions
  • Longer holds
  • Better range of motion
  • Slower and more controlled repetitions
  • Less assistance
  • Harder exercise variations

For example:

Wall Push-Ups → Incline Push-Ups → Knee Push-Ups → Push-Ups → Decline Push-Ups

For pulling strength:

Dead Hang → Scapular Pull-Ups → Inverted Rows → Assisted Pull-Ups → Pull-Ups

For L-Sits:

Supported Knee Raises → Tuck L-Sit → One-Leg L-Sit → Full L-Sit

Don’t rush into advanced skills before developing the strength needed to perform them safely.

Beginner Calisthenics Goals

Before moving into an intermediate calisthenics program, aim to develop a foundation such as:

  • 15–20 clean Push-Ups
  • 5–8 Pull-Ups
  • 10–15 Dips
  • 20 Bodyweight Squats
  • 60-Second Plank
  • 20–30 Second Frog Hold
  • 15–20 Second Tuck L-Sit
  • 30–45 Second Dead Hang

These aren’t strict requirements, but they provide useful milestones for judging your progress.

Tips for Beginner Calisthenics Training

  • Master basic exercises before chasing advanced skills.
  • Prioritize clean technique over high repetitions.
  • Use resistance bands when an exercise is currently too difficult.
  • Train skills near the beginning of your workout while you’re fresh.
  • Don’t take every set to failure.
  • Give your joints time to adapt to bodyweight training.
  • Pay extra attention to wrist and shoulder mobility.
  • Eat enough protein and nutritious foods to support recovery.
  • Get adequate sleep each night.
  • Track your reps, holds, and exercise progressions.

Consistency is far more important than rushing toward advanced movements.


Final Thoughts

A Beginner Calisthenics Workout Plan at Home gives you the foundation needed to eventually master impressive bodyweight exercises while building strength, endurance, mobility, balance, and complete body control.

Choose the 3-day option if you’re completely new to calisthenics, need more recovery, or have limited training time. Choose the 6-day PPL option if you already tolerate regular exercise and prefer shorter, more frequent sessions.

Don’t worry about Muscle-Ups, Planche Holds, Front Levers, or other advanced skills yet. First master your Push-Ups, Pull-Ups, Squats, Dips, core exercises, and beginner holds.

Build the foundation first. The advanced skills will follow.

How to Do Diamond Push-Ups Correctly: Step-by-Step Guide for Beginners

Diamond Push-Ups are a challenging bodyweight exercise that primarily targets the triceps, chest, and shoulders. They are performed with your hands positioned close together beneath your chest, creating a diamond or triangle shape with your thumbs and index fingers.

Unlike regular Push-Ups, which typically use a wider hand position, Diamond Push-Ups place greater emphasis on elbow extension and can increase the relative demand on your triceps. They also require good upper-body strength, wrist comfort, and core stability.

Although Diamond Push-Ups require no equipment, proper technique is important. The key is to keep your body stable, control your elbows, and lower your chest through a comfortable range without forcing your wrists or shoulders into awkward positions.


What Are Diamond Push-Ups?

Diamond Push-Ups are a close-grip variation of the standard Push-Up that involves placing your hands close together beneath your chest.
You begin in a High Plank position with your thumbs and index fingers positioned near each other, forming a diamond or triangle shape.
From this position, bend your elbows and lower your chest toward your hands before pressing yourself back to the starting position.

The closer hand placement changes the pressing mechanics and generally increases the relative contribution of the triceps compared with a conventional Push-Up.

Diamond Push-Ups are commonly used in:

  • Triceps workouts
  • Chest workouts
  • Upper-body strength training
  • Calisthenics programs
  • Push-day routines
  • At-home workouts
  • Bodyweight training
  • Muscular endurance workouts

Diamond Push-Ups are generally more challenging than standard Push-Ups, particularly for individuals who are still developing triceps strength and close-grip pressing control.

However, your fingers do not need to touch to perform an effective close-grip Push-Up. A slightly wider hand position may be more comfortable for your wrists and shoulders.

Benefits of Diamond Push-Ups

Diamond Push-Ups provide an effective way to challenge your upper-body pressing muscles using bodyweight resistance.

Benefits include:

  • Strengthens the triceps
  • Develops chest strength
  • Strengthens the anterior deltoids
  • Builds upper-body pushing strength
  • Improves close-grip pressing control
  • Develops core stability
  • Improves upper-body muscular endurance
  • Provides a challenging progression from standard Push-Ups
  • Requires minimal equipment

Diamond Push-Ups can contribute to muscle growth and strength development when performed with sufficient difficulty, appropriate training volume, and progressive overload.

Muscles Worked in Diamond Push-Ups

Diamond Push-Ups primarily train the muscles responsible for extending your elbows and pressing your body away from the floor.

The close-grip hand position places substantial demand on the triceps while the chest and shoulders continue contributing to the pressing movement.

Primary Muscles
  • Triceps Brachii
  • Pectoralis Major
  • Anterior Deltoids
Secondary Muscles
  • Serratus Anterior
  • Rotator Cuff Muscles
  • Rectus Abdominis
  • Obliques
  • Gluteus Maximus
  • Quadriceps
  • Forearm Muscles

The triceps play an important role in extending your elbows during the upward phase.
Meanwhile, the chest and anterior deltoids contribute to pressing your body away from the floor.
Your core, glutes, and lower-body muscles help maintain a stable plank position throughout each repetition.


How to Do Diamond Push-Ups (Step-by-Step)

Step 1: Start on Your Hands and Knees

Begin on the floor or an Exercise Mat.

Place your hands beneath your chest, closer together than you would for a standard Push-Up.

Position your thumbs and index fingers near each other to form a diamond or triangle shape.

If this position feels uncomfortable, separate your hands slightly while maintaining a close-grip position.

Step 2: Position Your Hands Correctly

Keep your palms firmly planted and distribute pressure comfortably across your hands.

Your fingers should point generally forward or slightly outward, depending on your wrist comfort.

Avoid forcing your thumbs and index fingers together if doing so creates unnecessary wrist strain.

Step 3: Enter a High Plank

Extend your legs backward and support your body on your hands and toes.

Maintain a relatively straight line from your head through your shoulders, hips, knees, and ankles.

Keep your feet approximately hip-width apart or slightly wider if you need additional stability.

Step 4: Establish Your Starting Position

Before lowering your body, create a stable plank position.

Keep your:

  • Core braced
  • Glutes engaged
  • Legs controlled
  • Head relatively neutral
  • Hands firmly planted
  • Shoulders stable

Avoid allowing your hips to sag or rise excessively.

Step 5: Lower Your Chest Toward Your Hands

Slowly bend your elbows and begin lowering your body.

Allow your elbows to travel backward and slightly outward through a comfortable path.

Keep your upper arms relatively close to your torso without forcing your elbows tightly against your ribs.

Lower your chest toward your hands while keeping your body aligned.

Step 6: Reach the Bottom Position

Continue lowering until your chest approaches your hands or you reach the deepest comfortable position you can control.

Keep your elbows, wrists, and shoulders aligned comfortably.

Avoid collapsing onto your hands or allowing your hips to drop.

Your chest does not need to touch your hands if doing so causes discomfort or loss of technique.

Step 7: Press Back to the Starting Position

Push firmly through your palms and begin extending your elbows.

Raise your chest and hips together while maintaining a stable body position.

Continue pressing until your arms return to a comfortable extended position.

Reset your plank and repeat for your planned repetitions.

Warrior showcasing How to do Diamond Push-Ups with proper form.

Diamond Push-Ups Form Checklist

Use this checklist to maintain proper Diamond Push-Up technique.

  • Position your hands close together beneath your chest
  • Keep your palms firmly planted
  • Maintain a relatively straight body line
  • Brace your core and engage your glutes
  • Keep your head relatively neutral
  • Allow your elbows to travel backward through a comfortable path
  • Lower your chest toward your hands under control
  • Avoid excessive wrist or shoulder strain
  • Raise your chest and hips together
  • Perform each repetition through a consistent, comfortable range of motion

The goal is to perform controlled close-grip Push-Ups while maintaining stable body alignment and comfortable joint positioning.


Common Diamond Push-Ups Mistakes

Forcing the Hands Too Close Together

Problem: Trying to make a perfect diamond shape can place your wrists in an uncomfortable position, particularly if your wrist mobility is limited.

Fix: Separate your hands slightly while maintaining a close-grip position. Your thumbs and index fingers do not need to touch for the exercise to be effective.

Flaring the Elbows Excessively

Problem: Allowing your elbows to point directly sideways can create an awkward pressing position and make the movement harder to control.

Fix: Allow your elbows to travel backward and slightly outward at a comfortable angle rather than forcing them directly sideways.

Letting the Hips Sag

Problem: Allowing your hips to drop toward the floor disrupts your plank position and increases unnecessary movement through your lower back.

Fix: Brace your core and engage your glutes to maintain a relatively straight body line throughout each repetition.

Raising the Hips Too High

Problem: Pushing your hips upward changes your body angle and reduces the similarity to a standard Diamond Push-Up.

Fix: Keep your hips aligned with your torso and legs while lowering and pressing your body.

Performing Partial Repetitions

Problem: Lowering only a few centimeters limits the range through which your triceps, chest, and shoulders work.

Fix: Lower your chest through the deepest comfortable range you can control. If you cannot maintain proper technique, perform an easier variation.

Leading With the Head

Problem: Reaching your head toward your hands can create the appearance of greater depth without properly lowering your chest.

Fix: Keep your head relatively neutral and guide your chest toward your hands instead.

Raising the Chest Before the Hips

Problem: Pressing your upper body upward while leaving your hips low causes your body alignment to break down.

Fix: Maintain core tension and raise your chest and hips together as one controlled unit.


Diamond Push-Up Progressions and Variations

Diamond Push-Ups can be modified to reduce or increase their difficulty depending on your current strength and training experience.

Wall Diamond Push-Up

Wall Diamond Push-Ups reduce the amount of bodyweight supported by your upper body, making them a useful starting variation.

How to Do Wall Diamond Push-Ups

  • Stand facing a sturdy wall.
  • Place your hands close together against the wall at approximately chest height.
  • Form a comfortable diamond or triangle shape with your fingers.
  • Step your feet backward into a controlled lean.
  • Bend your elbows and lower your chest toward your hands.
  • Press through your palms until your arms extend.
  • Repeat while maintaining a straight body line.

Incline Diamond Push-Up

Incline Diamond Push-Ups reduce the difficulty by placing your hands on a stable elevated surface.

How to Do Incline Diamond Push-Ups

  • Choose a sturdy elevated surface.
  • Place your hands close together on the surface.
  • Walk your feet backward into an inclined plank.
  • Brace your core and maintain a straight body line.
  • Bend your elbows and lower your chest toward your hands.
  • Press through your palms until your arms extend.
  • Repeat while maintaining controlled technique.

Knee Diamond Push-Up

Knee Diamond Push-Ups reduce the amount of bodyweight supported by your arms while maintaining the close-grip pressing movement.

How to Do Knee Diamond Push-Ups

  • Begin on your hands and knees.
  • Position your hands close together beneath your chest.
  • Move your knees backward until your body forms a relatively straight line from your head to your knees.
  • Brace your core and keep your hips extended.
  • Bend your elbows and lower your chest toward your hands.
  • Press through your palms until your arms extend.
  • Repeat without allowing your hips to sag.

Slow-Tempo Diamond Push-Up

This variation increases time under tension by slowing the lowering and pressing phases.

How to Do Slow-Tempo Diamond Push-Ups

  • Begin in a stable Diamond Push-Up position.
  • Brace your core and maintain a straight body line.
  • Slowly lower your chest toward your hands over several seconds.
  • Pause briefly at a comfortable bottom position.
  • Press yourself upward in a controlled manner.
  • Return to the starting position without raising your hips excessively.
  • Repeat while maintaining the same deliberate tempo.

Decline Diamond Push-Up

Decline Diamond Push-Ups increase the difficulty by elevating your feet above your hands, shifting more bodyweight toward your upper body.

How to Do Decline Diamond Push-Ups

  • Choose a sturdy elevated surface for your feet.
  • Place your hands close together on the floor.
  • Position your feet securely on the elevated surface.
  • Brace your core and maintain a straight body line.
  • Bend your elbows and lower your chest toward your hands.
  • Press through your palms until your arms extend.
  • Repeat while keeping your hips and shoulders controlled.

Final Thoughts

Diamond Push-Ups are a challenging bodyweight exercise for developing triceps strength, chest strength, and upper-body pressing performance.

They develop:

  • Triceps strength
  • Chest strength
  • Anterior deltoid strength
  • Close-grip pressing strength
  • Core stability
  • Upper-body muscular endurance
  • Bodyweight coordination
  • Foundational calisthenics strength

The most important part of performing Diamond Push-Ups correctly is maintaining a stable body position while lowering and pressing through a comfortable range of motion.

If standard Diamond Push-Ups are too difficult, begin with Wall, Incline, or Knee Diamond Push-Ups. As your strength improves, gradually progress toward full Diamond Push-Ups and more challenging variations. Learn more about Push Workouts here.

Useful Gear for Diamond Push-Ups

Diamond Push-Ups require no mandatory equipment, but a few items can improve comfort, provide easier progressions, or increase the difficulty.

  • Exercise Mat: Provides a comfortable, non-slip surface for performing Diamond Push-Ups and Knee Diamond Push-Ups.
  • Workout Bench: Offers a stable elevated surface for Incline Diamond Push-Ups or foot elevation during Decline Diamond Push-Ups.
  • Push-Up Handles: Compatible handles can provide an alternative wrist position during close-grip Push-Up variations when placed securely and close enough together.
  • Resistance Band: Can provide assistance during modified Diamond Push-Ups or additional resistance when positioned securely.
  • Weighted Vest: An advanced option for increasing resistance once standard Diamond Push-Ups become consistently manageable.

Diamond Push-Up FAQ

Q1: Are Diamond Push-Ups good for beginners?
Diamond Push-Ups can be challenging for beginners who have not yet developed sufficient upper-body pressing strength. Wall, Incline, and Knee Diamond Push-Ups are useful starting variations before progressing to the standard exercise.

Q2: How many Diamond Push-Ups should beginners do?
A practical starting point is around 5–10 controlled repetitions for 2–3 sets, provided you can maintain proper technique. If standard Diamond Push-Ups are too difficult, choose an easier variation that allows approximately 8–15 controlled repetitions.

Q3: Do Diamond Push-Ups build bigger triceps?
Yes. Diamond Push-Ups can contribute to triceps muscle growth when performed with sufficient difficulty, appropriate training volume, and progressive overload. As the exercise becomes easier, more challenging variations or added resistance can help maintain the training stimulus.

Q4: Should my hands form a perfect diamond during Diamond Push-Ups?
No. Your thumbs and index fingers do not need to touch. A slightly wider close-grip position can still effectively train your triceps while allowing a more comfortable wrist and shoulder position.

Q5: How can I make Diamond Push-Ups harder?
You can perform slower repetitions, add controlled pauses, elevate your feet for Decline Diamond Push-Ups, or increase resistance using a Weighted Vest. Progress gradually while maintaining proper body alignment and comfortable wrist, elbow, and shoulder positioning.


How to Do Reverse Lunges Correctly: Step-by-Step Guide for Beginners

Learn how to do Reverse Lunges with proper form, avoid common mistakes, and discover the best Reverse Lunge variations to build stronger legs, improve balance, and develop better lower-body control.

The Reverse Lunge is a simple but highly effective unilateral leg exercise. Unlike a forward lunge, you step backward into the lunge position, which can make it easier to control your movement while placing significant emphasis on the quadriceps, glutes, and hamstrings.

Whether you’re training at home, in the gym, or as part of a calisthenics routine, Reverse Lunges are an excellent addition to your lower-body workouts.


What Is a Reverse Lunge?

A Reverse Lunge is a unilateral lower-body exercise where you step one leg backward, lower your hips toward the floor, and then drive through your front foot to return to the starting position.

The movement trains one side of the body at a time, making it useful for developing balanced leg strength and stability.

Reverse Lunges are commonly used in:

  • Bodyweight workouts
  • Calisthenics training
  • Strength training
  • Athletic conditioning
  • Lower-body mobility routines
  • Home workouts

The exercise can be performed with bodyweight or progressed by holding dumbbells, kettlebells, or other forms of resistance.

Benefits of Reverse Lunges

Reverse Lunges provide several strength, balance, and coordination benefits.

Benefits include:

  • Strengthens the quadriceps
  • Builds stronger glutes
  • Works the hamstrings
  • Improves single-leg balance
  • Develops lower-body stability
  • Improves coordination
  • Helps correct strength imbalances
  • Requires minimal equipment

Because each leg works independently, Reverse Lunges can help you identify and improve differences in strength and control between your legs.

Muscles Worked in Reverse Lunges

Reverse Lunges recruit several major muscles throughout the lower body.

Primary Muscles
  • Quadriceps
  • Gluteus Maximus
  • Hamstrings
Secondary Muscles
  • Gluteus Medius
  • Calves
  • Hip Flexors
  • Core Muscles

Your core and stabilizing muscles work continuously to keep your torso balanced while you step backward and return to standing.


How to Do Reverse Lunges (Step-by-Step)

Step 1: Stand Upright

Stand with your feet approximately hip-width apart.

Keep your:

  • Chest upright
  • Core engaged
  • Back neutral
  • Arms relaxed

Look straight ahead and establish a stable starting position.

Step 2: Step Back

Take a controlled step backward with your right leg.

Place the ball of your right foot on the floor behind you.

Keep most of your weight centered over your front leg.

Step 3: Lower Into the Lunge

Bend both knees and lower your hips toward the floor.

As you descend:

  • Keep your front foot firmly planted
  • Keep your front knee tracking with your toes
  • Maintain an upright torso
  • Control your back knee as it moves toward the floor

Your front thigh should approach a roughly parallel position with the floor if your mobility and strength allow.

Step 4: Reach the Bottom Position

Continue lowering until your back knee is close to the floor.

At the bottom:

  • Keep your front heel planted
  • Keep your front knee controlled
  • Maintain a neutral spine
  • Keep your core engaged

Avoid allowing your front knee to collapse inward.

Step 5: Drive Back to Standing

Push firmly through the front foot.

Straighten your front leg and bring your rear leg forward to return to the starting position.

Keep the movement controlled rather than using momentum.

Step 6: Switch Legs

Repeat the movement with your opposite leg.

You can alternate legs each repetition or complete a full set on one side before switching.

Warrior showcasing How to do Reverse Lunges with proper form.

Reverse Lunge Form Checklist

Use this quick checklist to ensure proper Reverse Lunge form.

  • Start with a stable stance
  • Step backward under control
  • Keep your front foot firmly planted
  • Keep your front knee aligned with your toes
  • Maintain an upright torso
  • Lower your rear knee toward the floor
  • Brace your core
  • Push through your front foot to stand

Focus on smooth, controlled repetitions rather than taking unnecessarily large steps.


Common Reverse Lunges Mistakes

Taking Too Short a Step

Problem: A very short step can cause your front knee to travel excessively forward and make the movement feel cramped.

Fix: Take a controlled step backward that allows both knees to bend comfortably.

Taking Too Long a Step

Problem: An excessively long step can make it difficult to maintain balance and control.

Fix: Experiment with your step length until you can comfortably lower and rise while keeping your torso stable.

Letting the Front Knee Collapse Inward

Problem: This reduces lower-body stability and can place unnecessary stress on the knee.

Fix: Keep your front knee tracking in the same general direction as your toes.

Leaning Too Far Forward

Problem: Excessive forward lean can shift your balance and change the movement pattern.

Fix: Keep your chest lifted and maintain a controlled, neutral torso position.

Dropping the Back Knee Hard

Problem: Allowing your rear knee to crash into the floor reduces control.

Fix: Lower your back knee slowly and stop just above the floor.

Pushing Off the Back Leg

Problem: Using the rear leg to drive yourself upward reduces the workload on the front leg.

Fix: Focus on pushing through the front foot to return to standing.


Reverse Lunge Variations

Once you master the basic Reverse Lunge, these variations can help you progress.

Assisted Reverse Lunges

An excellent beginner variation.

How to Do Assisted Reverse Lunges

  • Stand beside a sturdy support.
  • Hold the support lightly with one hand.
  • Step one leg backward.
  • Lower into the lunge.
  • Push through the front foot to return to standing.
  • Gradually reduce your reliance on the support.

Bodyweight Reverse Lunges

The standard variation.

How to Do Bodyweight Reverse Lunges

  • Stand upright with your feet hip-width apart.
  • Step one foot backward.
  • Bend both knees and lower your body.
  • Push through your front foot.
  • Return to standing and switch legs.

Deficit Reverse Lunges

Increases the range of motion and can provide a greater challenge.

How to Do Deficit Reverse Lunges

  • Stand on a stable elevated platform.
  • Step one leg backward and toward the floor.
  • Lower yourself under control.
  • Drive through your front foot to return to the platform.

Only use a stable surface and an elevation appropriate for your strength and balance.

Dumbbell Reverse Lunges

Adds resistance to the standard movement.

How to Do Dumbbell Reverse Lunges

  • Hold a dumbbell in each hand.
  • Stand upright with your feet hip-width apart.
  • Step one leg backward.
  • Lower into the lunge.
  • Push through the front foot to return to standing.

Increase the weight gradually while maintaining proper form.

Walking Reverse Lunges

Adds a dynamic balance challenge.

How to Do Walking Reverse Lunges

  • Begin standing upright.
  • Step backward into a Reverse Lunge.
  • Return to standing.
  • Continue by alternating legs.
  • Move through each repetition under control.

Final Thoughts

The Reverse Lunge is one of the best unilateral exercises for developing stronger legs, glutes, balance, and lower-body control.

It develops:

  • Quadriceps strength
  • Glute strength
  • Hamstring strength
  • Single-leg stability
  • Balance
  • Coordination

Its backward stepping pattern also makes it a useful alternative to forward lunges and a great addition to home or gym-based leg workouts. Learn more about Leg Workouts here.

Start with bodyweight Reverse Lunges, master your balance and technique, and gradually add resistance as your strength improves.

Control every repetition, keep both legs working evenly, and focus on building strength through a full comfortable range of motion.

Essential Gear for Reverse Lunges

Reverse Lunges can be performed without equipment, but these pieces of gear can make your training more comfortable and provide options for progression.

  • Exercise Mat: Provides a comfortable, non-slip surface for bodyweight lunges.
  • Dumbbells: An effective way to add resistance once bodyweight Reverse Lunges become easy.
  • Kettlebell: Can be held at the chest or by the sides for additional resistance.
  • Resistance Bands: Can add resistance or provide assistance depending on how they are used.

Reverse Lunge FAQ

Q1: Are Reverse Lunges easier than Forward Lunges?
Many people find Reverse Lunges easier to control because stepping backward can reduce the forward momentum associated with Forward Lunges. However, difficulty depends on your strength, balance, and technique.

Q2: How many Reverse Lunges should I do?
Beginners can start with 8-12 repetitions per leg for 2-3 sets. As you become stronger, you can increase repetitions, add resistance, or use a more challenging variation.

Q3: Can I do Reverse Lunges every day?
You can practice bodyweight lunges frequently, but your muscles still need recovery after challenging training sessions. For strength-focused workouts, allow adequate recovery between demanding leg sessions.