No-Equipment Home Workout Plan

You don’t need a gym, weights, or expensive equipment to build a stronger and more athletic body. This No-Equipment Home Workout Plan uses bodyweight exercises to train your chest, back, shoulders, arms, legs, and core while improving endurance and mobility.

The program gives you two weekly options: a 3-day full-body plan for beginners or people with limited time, and a 6-day split for trainees who prefer more frequent workouts.

Bodyweight training can be an effective form of resistance training, and current guidance from the American College of Sports Medicine emphasizes that consistency matters more than complicated programming.

Click on any exercise to know How to do it.


What Is a No-Equipment Workout?

A no-equipment workout uses your own bodyweight as resistance instead of dumbbells, barbells, machines, or resistance bands.

This program uses different movement patterns to train the entire body:

  • Push – Chest, shoulders, and triceps
  • Pull – Back and biceps through bodyweight alternatives
  • Squat – Quads and glutes
  • Lunge – Legs and unilateral strength
  • Core – Abdominals and trunk stability
  • Conditioning – Cardiovascular endurance and work capacity

Because you can make exercises easier or harder by changing the angle, range of motion, tempo, or leverage, you can adapt the program to different fitness levels.

Benefits of a No-Equipment Home Workout Plan

  • Builds full-body strength
  • Improves muscular endurance
  • Develops a stronger core
  • Improves cardiovascular fitness
  • Enhances mobility and coordination
  • Can be performed almost anywhere
  • Requires no gym membership or equipment
  • Makes it easier to stay consistent

Equipment Needed

None.

You only need:

  • A small amount of open floor space
  • A sturdy surface for certain exercises if needed

A towel or exercise mat is optional for comfort, but neither is required.


Weekly Training Structure

Option 1 – 3-Day Full-Body Plan

  • Monday – Full Body Strength
  • Wednesday – Full Body Strength + Conditioning
  • Friday – Full Body Strength + Core

Rest or perform light activity on the other days.

This is the recommended option for beginners because it provides regular training while allowing plenty of recovery.

Option 2 – 6-Day Split

  • Monday – Push + Core
  • Tuesday – Legs
  • Wednesday – Conditioning + Core
  • Thursday – Push + Core
  • Friday – Legs
  • Saturday – Full Body Conditioning
  • Sunday – Rest

The 6-day option is better suited to trainees who already have a basic fitness foundation and can recover well between sessions.


Pre-Workout Stretch & Mobility Routine

Perform this 5–8 minute warm-up before every workout.

This prepares the muscles and joints for training and gradually raises your heart rate.


3-Day No-Equipment Workout

Monday – Full Body Strength

Main Workout

Rest 60–90 seconds between sets.

Core Finisher

Wednesday – Full Body Strength + Conditioning

Main Workout

  • Incline Push-Ups or Push-Ups – 3 sets × 10–15 reps
  • Split Squats – 3 sets × 10 reps each leg
  • Diamond Push-Ups – 3 sets × 6–12 reps
  • Single-Leg Glute Bridges – 3 sets × 10 reps each leg
  • Superman Raises – 3 sets × 12 reps
  • Calf Raises – 3 sets × 20 reps

Rest 60–90 seconds between sets.

Conditioning Finisher

Complete 3 rounds:

Friday – Full Body Strength + Core

Main Workout

Rest 60–90 seconds between sets.

Core Finisher


6-Day No-Equipment Workout

Monday – Push + Core

Main Workout

  • Push-Ups – 4 sets × 8–15 reps
  • Decline Push-Ups – 3 sets × 6–12 reps
  • Pike Push-Ups – 3 sets × 8–12 reps
  • Diamond Push-Ups – 3 sets × 8–12 reps
  • Plank Shoulder Taps – 3 sets × 20 reps

Core Finisher

Tuesday – Legs

Main Workout

Leg Finisher

  • Wall Sit – 3 sets × 30–60 seconds

Wednesday – Conditioning + Core

Conditioning Circuit

Complete 4 rounds:

Rest 60–90 seconds between rounds.

Core Finisher

Thursday – Push + Core

Main Workout

  • Wide Push-Ups – 4 sets × 10–15 reps
  • Close-Grip Push-Ups – 3 sets × 8–12 reps
  • Pike Push-Ups – 4 sets × 8–12 reps
  • Push-Up Hold – 3 sets × 20 seconds
  • Plank Shoulder Taps – 3 sets × 20 reps

Core Finisher

Friday – Legs

Main Workout

Rest 60–90 seconds between sets.

Saturday – Full Body Conditioning

Complete 4 rounds:

Rest 90 seconds between rounds.

Sunday is a complete rest day.


Post-Workout Stretch Routine

Perform each stretch for approximately 30 seconds.

This helps maintain mobility and provides a dedicated cooldown after training.


How to Progress Without Equipment

No equipment doesn’t mean no progressive overload.

When an exercise becomes easy, progress by:

  • Increasing repetitions
  • Adding another set
  • Slowing down the lowering phase
  • Pausing at the hardest position
  • Increasing range of motion
  • Using a harder variation
  • Reducing rest periods slightly

For example, progress from:

Wall Push-Ups → Incline Push-Ups → Knee Push-Ups → Push-Ups → Decline Push-Ups

You can use the same principle with squats, lunges, core exercises, and other movements.

Avoid turning every workout into a test of maximum reps. Consistent, challenging training that you can recover from is more useful than constantly training to failure.

No-Equipment Training Tips

  • Focus on controlled, technically sound repetitions.
  • Choose an exercise variation that matches your current ability.
  • Leave enough energy to maintain good form throughout the workout.
  • Increase difficulty gradually rather than making sudden jumps in volume.
  • Stay active on rest days with walking or light mobility work.
  • Prioritize adequate sleep, hydration, and nutrition.
  • Track your reps so you can see your progress over time.

Final Thoughts

A No-Equipment Home Workout Plan proves that you don’t need a gym to build a stronger, fitter, and more athletic body. With nothing more than your own bodyweight and some floor space, you can train every major muscle group while improving strength, endurance, mobility, and conditioning.

Choose the 3-day plan if you’re a beginner, short on time, or want more recovery between workouts. Choose the 6-day plan if you already have a fitness foundation and prefer shorter, more frequent sessions.

The best program is ultimately the one you can perform consistently. Train hard, progress gradually, recover properly, and keep building your body one workout at a time.
How to Do Handstand Push-Ups Correctly: Step-by-Step Guide for Beginners

Learn how to do Handstand Push-Ups with proper form, avoid common mistakes, and discover the best Handstand Push-Up progressions to build powerful shoulders, stronger triceps, better balance, and advanced bodyweight control.

The Handstand Push-Up is one of the most challenging upper-body exercises in calisthenics. It combines the strength demands of a vertical press with the balance and body control required to hold a handstand.

Whether you’re training for calisthenics, gymnastics, athletic performance, or advanced bodyweight strength, mastering Handstand Push-Ups can take your shoulder and pressing strength to another level.


What Is a Handstand Push-Up?

A Handstand Push-Up is an advanced bodyweight pressing exercise performed while upside down in a handstand position. You lower your head toward the floor by bending your elbows, then press your body back up until your arms are straight.

Unlike a regular push-up, the Handstand Push-Up places most of your bodyweight through your hands and shoulders, making it a highly demanding vertical pressing movement.

Handstand Push-Ups are commonly used in:

  • Calisthenics training
  • Gymnastics
  • Bodyweight strength programs
  • Cross-training
  • Advanced shoulder workouts
  • Handstand skill development

Beginners should first develop a solid handstand, strong shoulders, and sufficient pressing strength before attempting unsupported repetitions.

Benefits of Handstand Push-Ups

Handstand Push-Ups provide several strength, balance, and skill-development benefits.

Benefits include:

  • Builds powerful shoulders
  • Strengthens the triceps
  • Develops upper-body pressing strength
  • Improves handstand balance
  • Strengthens the core
  • Improves body control
  • Builds muscular endurance
  • Requires minimal equipment

The combination of strength and balance makes Handstand Push-Ups particularly valuable for advanced calisthenics athletes.

Muscles Worked in Handstand Push-Ups

Handstand Push-Ups heavily involve the muscles responsible for vertical pressing and stabilization.

Primary Muscles
  • Deltoids
  • Triceps
  • Upper Chest
Secondary Muscles
  • Trapezius
  • Serratus Anterior
  • Core Muscles
  • Forearms
  • Glutes

Your shoulders perform most of the pressing work, while your triceps extend the elbows and your core helps maintain a stable inverted position.


How to Do Handstand Push-Ups (Step-by-Step)

Step 1: Set Up Against a Wall

Start with a sturdy wall behind you.

Place your hands on the floor approximately shoulder-width apart.

Keep your fingers spread and actively grip the floor.

Tip: Use a wall when learning Handstand Push-Ups. It provides stability while you develop the strength and technique required for the movement.

Step 2: Kick Up Into a Handstand

Kick your feet up against the wall and establish a stable handstand position.

Your body should be as straight as possible.

Focus on:

  • Hands firmly planted
  • Arms straight
  • Core engaged
  • Glutes tight
  • Legs together
  • Eyes focused between your hands

Avoid excessive arching through your lower back.

Step 3: Brace Your Body

Before beginning the repetition, create full-body tension.

Keep your:

  • Abs engaged
  • Glutes squeezed
  • Legs controlled
  • Shoulders active

Think about keeping your body stacked rather than allowing your hips to drift away from the wall.

Step 4: Lower Yourself

Slowly bend your elbows and lower your head toward the floor.

Keep your elbows controlled rather than allowing them to flare excessively outward.

Descend under control until your head approaches the floor or your chosen range of motion.

Step 5: Press Back Up

Drive your hands firmly into the floor and extend your elbows.

Push your body upward until your arms return to full extension.

Keep your core tight and maintain your handstand position throughout the repetition.

Step 6: Reset and Repeat

At the top, stabilize your body before beginning another repetition.

Perform each repetition individually if necessary rather than rushing through multiple repetitions.

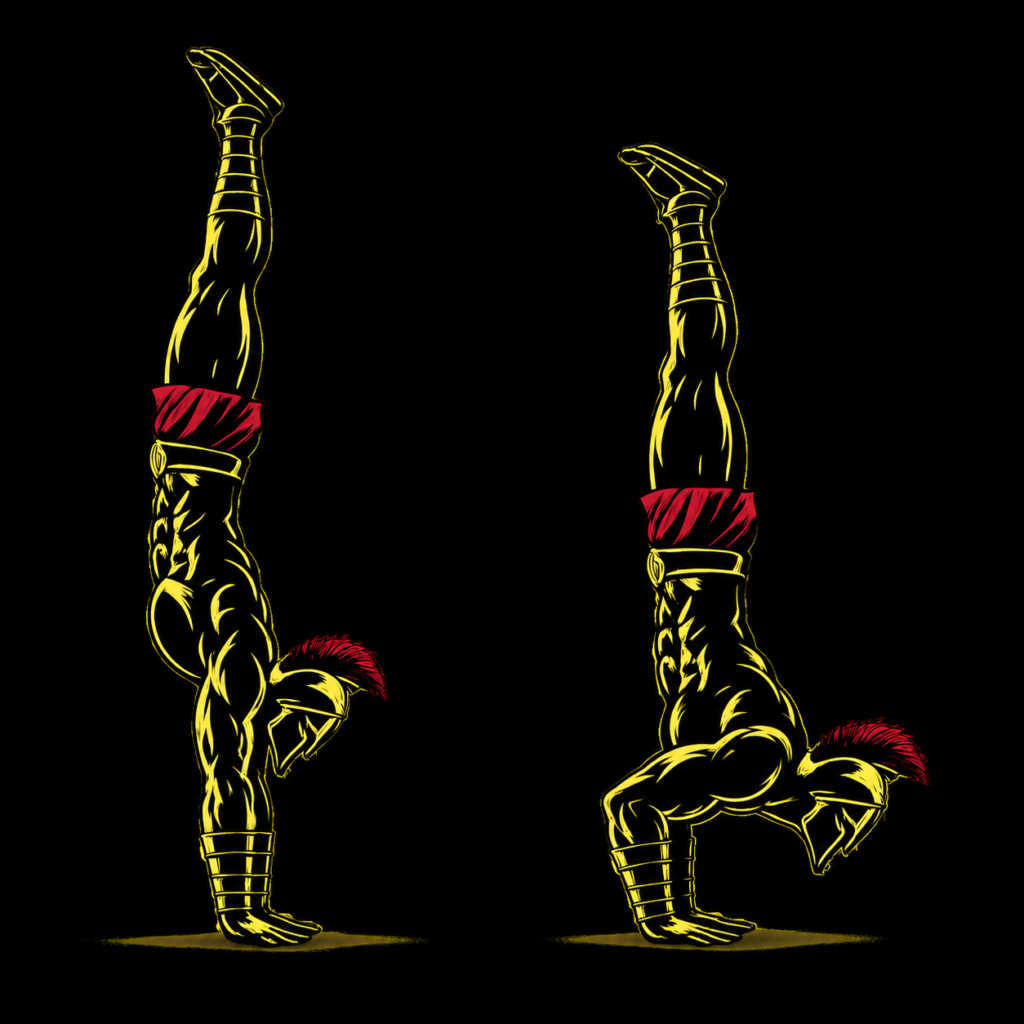
Warrior showcasing How to do Handstand Push-Ups with proper form.

Handstand Push-Up Form Checklist

Use this quick checklist to ensure proper Handstand Push-Up form.

  • Place your hands approximately shoulder-width apart
  • Spread your fingers for stability
  • Keep your core tight
  • Squeeze your glutes
  • Keep your body controlled
  • Lower yourself slowly
  • Keep your elbows controlled
  • Press strongly through your hands
  • Avoid excessive lower-back arching

Proper alignment and control are more important than performing a large number of repetitions.


Common Handstand Push-Up Mistakes

Excessive Lower-Back Arch

Problem: Allowing your ribs and hips to flare creates an excessive banana-shaped handstand and reduces efficient body positioning.

Fix: Brace your abs, squeeze your glutes, and actively keep your ribs controlled.

Flaring the Elbows

Problem: Excessively flared elbows can reduce pressing efficiency and make the movement harder to control.

Fix: Keep your elbows at a controlled angle and allow them to track naturally during the press.

Dropping Too Quickly

Problem: A fast descent reduces control and can place unnecessary stress on the shoulders.

Fix: Lower yourself slowly and deliberately.

Using a Partial Range Without Progressing

Problem: Partial repetitions can be useful for building strength, but relying on them indefinitely may limit your development.

Fix: Gradually increase your range of motion as your strength and control improve.

Losing Hand Pressure

Problem: Relaxing your hands and fingers can make the handstand less stable.

Fix: Spread your fingers and actively grip the floor throughout the movement.

Attempting Freestanding Repetitions Too Early

Problem: Trying unsupported Handstand Push-Ups before developing sufficient handstand control can cause you to lose balance.

Fix: Master wall-supported repetitions and progressively develop your freestanding handstand first.


Handstand Push-Up Progressions and Variations

Once you develop the necessary foundation, these progressions can help you work toward full Handstand Push-Ups.

Pike Push-Ups

A useful beginner progression for developing vertical pressing strength.

How to Do Pike Push-Up

  • Start in a pike position.
  • Raise your hips high.
  • Bend your elbows and lower your head toward the floor.
  • Press back up.
  • Keep your core engaged throughout the movement.

Elevated Pike Push-Ups

A more challenging progression that places greater emphasis on the shoulders.

How to Do Elevated Pike Push-Up

  • Place your feet on a stable elevated surface.
  • Keep your hands on the floor.
  • Raise your hips into a pike position.
  • Lower your head toward the floor.
  • Press back to the starting position.

Wall Handstand Hold

Develops the balance, shoulder endurance, and body control needed for Handstand Push-Ups.

How to Do a Wall Handstand Hold

  • Place your hands on the floor near a wall.
  • Kick your feet up.
  • Establish a stable handstand.
  • Brace your core and squeeze your glutes.
  • Hold the position for a controlled amount of time.

Partial Handstand Push-Up

Builds pressing strength through a limited range of motion.

How to Do Partial Handstand Push-Up

  • Kick into a wall-supported handstand.
  • Lower yourself partway toward the floor.
  • Press back up.
  • Gradually increase your depth as your strength improves.

Full Wall Handstand Push-Up

The standard beginner-accessible version of the full movement.

How to Do Full Wall Handstand Push-Up

  • Kick into a stable wall handstand.
  • Brace your entire body.
  • Lower your head toward the floor.
  • Press strongly through your hands.
  • Return to a straight-arm handstand.

Freestanding Handstand Push-Up

The advanced variation.

How to Do Freestanding Handstand Push-Up

  • Establish a stable freestanding handstand.
  • Maintain balance using your hands and fingers.
  • Bend your elbows and lower under control.
  • Press back upward without touching a wall.
  • Stabilize at the top before repeating.

Freestanding Handstand Push-Ups require exceptional balance, pressing strength, and body control.


Final Thoughts

The Handstand Push-Up is one of the ultimate bodyweight exercises for developing shoulder strength, pressing power, balance, and full-body control.

It develops:

  • Shoulder strength
  • Triceps strength
  • Upper-body pressing power
  • Handstand balance
  • Core stability
  • Body control

Don’t rush toward freestanding repetitions. Build your foundation with Pike Push-Ups, Elevated Pike Push-Ups, Handstand Holds, and Wall Handstand Push-Ups before progressing to unsupported repetitions. Learn more about Calisthenics Skills here.

Focus on clean technique, controlled movement, and gradual progression.

Master the handstand first. Then earn the press.

Essential Gear for Handstand Push-Ups

Handstand Push-Ups require very little equipment, but the right gear can make training safer and more comfortable.

  • Exercise Mat: Provides cushioning beneath your head and hands during training.
  • Wall: Essential for practicing supported Handstand Push-Ups and handstand holds.
  • Parallettes: Can provide a comfortable neutral grip and increase the available range of motion.
  • Handstand Blocks: Useful for improving hand positioning and developing advanced pressing strength.
  • Resistance Bands: Can be used for assistance by tying them to a Pull-Up Bar/Sturdy Elevated Object to learn the movement’s progression.

Handstand Push-Up FAQ

Q1: Are Handstand Push-Ups harder than regular push-ups?
Yes. Handstand Push-Ups are significantly more demanding because they require you to support and press a large portion of your bodyweight vertically using your shoulders and arms.

Q2: Can beginners do Handstand Push-Ups?
Beginners should first build the required strength and balance through Pike Push-Ups, Elevated Pike Push-Ups, Wall Handstand Holds, and partial Handstand Push-Ups before attempting full repetitions.

Q3: How many Handstand Push-Ups should I do?
Beginners working toward the movement can start with 3-5 controlled repetitions for 2-3 sets using an appropriate progression. Advanced trainees can increase repetitions gradually while maintaining strict form.

How to Do Dive Bomber Push-Ups Correctly: Step-by-Step Guide for Beginners

Learn how to do Dive Bomber Push-Ups with proper form, avoid common mistakes, and discover the best Dive Bomber Push-Up variations to build upper-body strength, improve shoulder mobility, and develop better body control.

The Dive Bomber Push-Up is a dynamic bodyweight exercise that combines elements of a push-up with a sweeping, dive-like movement. Unlike a standard push-up, your body travels forward and upward as you move from a pike-like starting position through a low position and into an upward-facing position.

Whether you’re training for calisthenics, martial arts, general fitness, or upper-body conditioning, Dive Bomber Push-Ups can add a demanding combination of strength and mobility to your workouts.


What Is a Dive Bomber Push-Up?

A Dive Bomber Push-Up is an advanced push-up variation performed by starting with your hips raised, diving your chest forward and close to the floor, and then extending your arms as your chest rises.

The movement creates a continuous arc through your shoulders, chest, arms, and torso rather than simply moving straight up and down.

Dive Bomber Push-Ups are commonly used in:

  • Calisthenics training
  • Bodyweight workouts
  • Martial arts conditioning
  • Upper-body strength training
  • Dynamic mobility routines
  • Full-body conditioning

The exercise requires both strength and mobility, making proper technique especially important.

Benefits of Dive Bomber Push-Ups

Dive Bomber Push-Ups provide several strength, mobility, and conditioning benefits.

Benefits include:

  • Strengthens the chest
  • Builds triceps strength
  • Develops shoulder strength
  • Improves shoulder mobility
  • Strengthens the core
  • Improves body control
  • Trains multiple movement patterns
  • Requires no equipment

The continuous movement also makes Dive Bomber Push-Ups more dynamic than conventional push-ups.

Muscles Worked in Dive Bomber Push-Ups

Dive Bomber Push-Ups engage several major muscles throughout the movement.

Primary Muscles
  • Pectoralis Major
  • Triceps
  • Anterior Deltoids
Secondary Muscles
  • Serratus Anterior
  • Core Muscles
  • Latissimus Dorsi
  • Glutes
  • Hip Flexors

Your shoulders and chest work heavily during the forward dive, while your arms and core help control the transition through the entire range of motion.


How to Do Dive Bomber Push-Ups (Step-by-Step)

Step 1: Start in a Pike Position

Begin in a high-pike position with your hands and feet on the floor.

Position yourself with:

  • Hands approximately shoulder-width apart
  • Arms straight
  • Hips raised high
  • Legs extended
  • Head positioned between your arms

Keep your core engaged before beginning the movement.

Step 2: Move Your Chest Forward

Bend your elbows and begin shifting your body forward.

As you move:

  • Lower your chest toward the floor
  • Move your head forward between your hands
  • Keep your hips traveling toward the floor
  • Maintain control throughout the transition

Think of your chest moving forward rather than simply dropping downward.

Step 3: Dive Forward and Low

Continue sweeping your chest forward while keeping it close to the floor.

Your body should travel in a smooth arc.

Focus on:

  • Keeping your elbows controlled
  • Moving your chest forward
  • Avoiding a sudden drop
  • Maintaining a strong core

Your hips should gradually lower as your chest moves forward.

Step 4: Extend Into the Upward Position

Continue the forward movement until your arms straighten and your chest rises.

Your hips will be closer to the floor while your chest is lifted.

Avoid forcing excessive spinal extension. Move only through a range that feels comfortable and controlled.

Step 5: Return to the Starting Position

To complete the repetition, reverse the movement.

Bend your elbows and bring your chest back toward the floor while shifting your hips upward.

Return to the pike position under control.

One complete forward-and-back movement counts as one repetition.

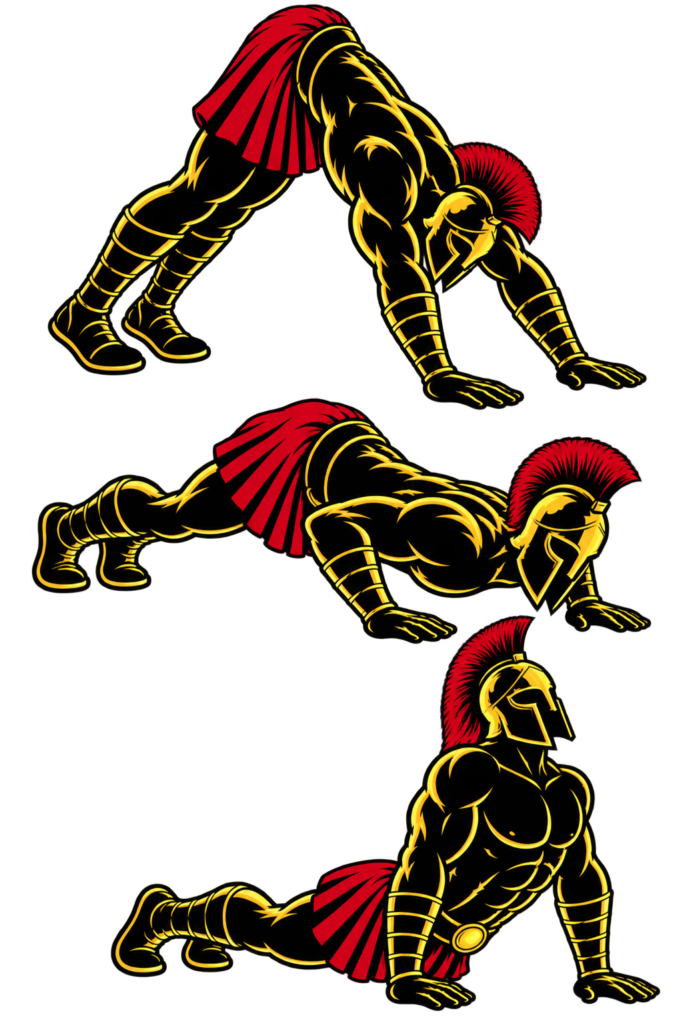
Warrior showcasing How to do Dive Bomber Push-Ups with proper form.

Dive Bomber Push-Up Form Checklist

Use this quick checklist to ensure proper Dive Bomber Push-Up form.

  • Start with your hips raised
  • Keep your hands firmly planted
  • Move your chest forward rather than straight down
  • Keep your elbows controlled
  • Maintain a smooth body arc
  • Keep your core engaged
  • Avoid forcing your lower back into excessive extension
  • Control both directions of the movement

The goal is to make the movement fluid rather than turning it into a series of disconnected positions.


Common Dive Bomber Push-Up Mistakes

Dropping Straight Down

Problem: Moving directly downward removes much of the diving motion and turns the exercise into an awkward push-up.

Fix: Think about moving your chest forward and close to the floor as you descend.

Moving Too Quickly

Problem: Fast repetitions reduce control and make it harder to maintain proper positioning.

Fix: Perform each phase slowly until you can smoothly connect the entire movement.

Flaring the Elbows Excessively

Problem: Excessive elbow flare can reduce control and place unnecessary stress on the shoulders.

Fix: Keep your elbows at a controlled angle and allow them to track naturally as you move forward.

Forcing the Upward Position

Problem: Trying to lift the chest excessively can create unnecessary strain in the lower back.

Fix: Lift your chest only as far as your mobility allows comfortably.

Losing Core Tension

Problem: A loose midsection makes the movement less coordinated and harder to control.

Fix: Brace your core throughout the entire repetition.

Performing an Incomplete Dive

Problem: Stopping the forward movement too early reduces the range of motion and limits the exercise’s benefits.

Fix: Practice controlled repetitions through your comfortable range and gradually improve your mobility.


Dive Bomber Push-Up Variations

Once you master the basic movement, these variations can help you build strength and control.

Incline Dive Bomber Push-Up

An excellent beginner variation.

How to Do Incline Dive Bomber Push-Ups

  • Place your hands on a sturdy elevated surface.
  • Raise your hips into a modified pike position.
  • Dive your chest forward and downward.
  • Extend your arms as you move through the bottom position.
  • Reverse the movement back to the starting position.

The elevated surface reduces the amount of bodyweight you need to control.

Partial Dive Bomber Push-Up

Builds strength through a shorter range of motion.

How to Do Partial Dive Bomber Push-Ups

  • Start in the standard pike position.
  • Perform the forward diving motion.
  • Stop before reaching your deepest position.
  • Return to the starting position under control.

Gradually increase your range of motion as your strength improves.

Full Dive Bomber Push-Up

The standard variation.

How to Do Full Dive Bomber Push-Ups

  • Begin in a high-pike position.
  • Dive your chest forward and close to the floor.
  • Extend your arms as your chest rises.
  • Reverse the movement smoothly.
  • Return to the pike position.

Weighted Dive Bomber Push-Up

An advanced strength variation.

How to Do Weighted Dive Bomber Push-Ups

  • Place a suitable amount of resistance across your upper back.
  • Begin in the standard pike position.
  • Perform the Dive Bomber Push-Up with complete control.
  • Keep the resistance stable throughout the movement.

Only add external resistance after mastering the bodyweight version.


Final Thoughts

The Dive Bomber Push-Up is an excellent advanced bodyweight exercise for combining upper-body strength, mobility, and coordination.

It develops:

  • Chest strength
  • Triceps strength
  • Shoulder strength
  • Shoulder mobility
  • Core control
  • Upper-body endurance

Unlike a conventional push-up, the Dive Bomber Push-Up requires your body to travel through a smooth, sweeping path. This makes technique and mobility just as important as raw strength. Learn more about Push Workouts here.

Start with an easier variation if necessary, master the movement slowly, and gradually increase your range of motion.

Don’t chase speed. Master the movement first, and let strength follow.

Essential Gear for Dive Bomber Push-Ups

Dive Bomber Push-Ups require no equipment, but a few pieces of gear can improve comfort and help you progress.

  • Exercise Mat: Provides cushioning and grip during floor-based training.
  • Push-Up Handles: Can provide a more comfortable hand position for some trainees.
  • Resistance Band: Can be used for assisted or resistance-based progressions.
  • Weight Vest: Useful for advanced trainees who want to progressively overload the movement.

Dive Bomber Push-Up FAQ

Q1: Are Dive Bomber Push-Ups good for shoulder mobility?
They can help develop shoulder mobility when performed through a controlled and comfortable range of motion. They should not be forced into positions that cause pain.

Q2: How many Dive Bomber Push-Ups should I do?
Beginners can start with 5-8 controlled repetitions for 2-3 sets. More advanced trainees can gradually increase repetitions while maintaining smooth technique.

Q3: Should my chest touch the floor during a Dive Bomber Push-Up?
No. Your chest should travel close to the floor during the diving portion, but you do not need to touch the floor. Focus on maintaining control and a smooth movement path.

How to Do Sumo Squats Correctly: Step-by-Step Guide for Beginners

Learn how to do Sumo Squats with proper form, avoid common mistakes, and discover the best Sumo Squat variations to build stronger legs, develop your glutes, and improve lower-body mobility.

The Sumo Squat is a wide-stance squat variation that places greater emphasis on the inner thighs, glutes, and hips compared with a traditional squat. Its wider stance also allows you to train your lower body through a different movement pattern while challenging your core and balance.

Whether you’re training for strength, muscle growth, calisthenics, or general fitness, learning the Sumo Squat can add useful variety to your lower-body workouts.


What Is a Sumo Squat?

A Sumo Squat is a squat variation performed with your feet positioned significantly wider than shoulder-width apart and your toes turned outward. You lower your hips between your legs while keeping your chest controlled, then drive through your feet to return to standing.

The wide stance increases the involvement of the hip adductors and glutes while still heavily training the quadriceps.

Sumo Squats are commonly used in:

  • Bodyweight workouts
  • Strength training
  • Lower-body hypertrophy programs
  • Calisthenics training
  • Mobility routines
  • Athletic conditioning

The exercise can be performed with bodyweight or progressively loaded with equipment such as dumbbells and kettlebells.

Benefits of Sumo Squats

Sumo Squats provide several benefits for strength, mobility, and lower-body conditioning.

Benefits include:

  • Strengthens the quadriceps
  • Builds stronger glutes
  • Targets the inner thighs
  • Improves hip mobility
  • Strengthens the hamstrings
  • Develops lower-body stability
  • Improves squat mechanics
  • Can be performed with or without equipment

The Sumo Squat is especially useful when you want to train your lower body through a wider stance and place greater emphasis on the hips and inner thighs.

Muscles Worked in Sumo Squats

Sumo Squats engage several major muscles throughout the lower body.

Primary Muscles
  • Quadriceps
  • Gluteus Maximus
  • Adductors
Secondary Muscles
  • Hamstrings
  • Gluteus Medius
  • Calves
  • Hip Flexors
  • Core Muscles

The adductors work particularly hard to help control the wide stance and stabilize the hips throughout the movement.


How to Do Sumo Squats (Step-by-Step)

Step 1: Set Your Stance

Stand upright with your feet wider than shoulder-width apart.

Turn your toes outward slightly.

Maintain:

  • Chest lifted
  • Core engaged
  • Back neutral
  • Feet firmly planted

Tip: Your exact stance width will depend on your hip structure and mobility. Choose a position that allows you to squat comfortably without losing control.

Step 2: Brace Your Core

Before descending, tighten your abdominal muscles.

Keep your:

  • Spine neutral
  • Shoulders relaxed
  • Chest controlled
  • Eyes looking forward

A strong core will help you maintain stability throughout the movement.

Step 3: Lower Into the Squat

Bend your knees and push your hips downward between your legs.

As you descend:

  • Keep your knees tracking in the same direction as your toes
  • Keep your heels planted
  • Maintain a controlled torso position
  • Lower your hips under control

Think about pushing your knees outward rather than allowing them to collapse inward.

Step 4: Reach the Bottom Position

Continue lowering until your thighs reach a comfortable depth.

At the bottom:

  • Keep both feet firmly planted
  • Keep your knees aligned with your toes
  • Maintain a neutral spine
  • Keep your chest controlled

You do not need to force an extremely deep squat if your mobility does not allow it comfortably.

Step 5: Drive Back Up

Push through your entire foot, especially the midfoot and heel.

Extend your knees and hips simultaneously to return to the starting position.

Squeeze your glutes at the top without excessively leaning backward.

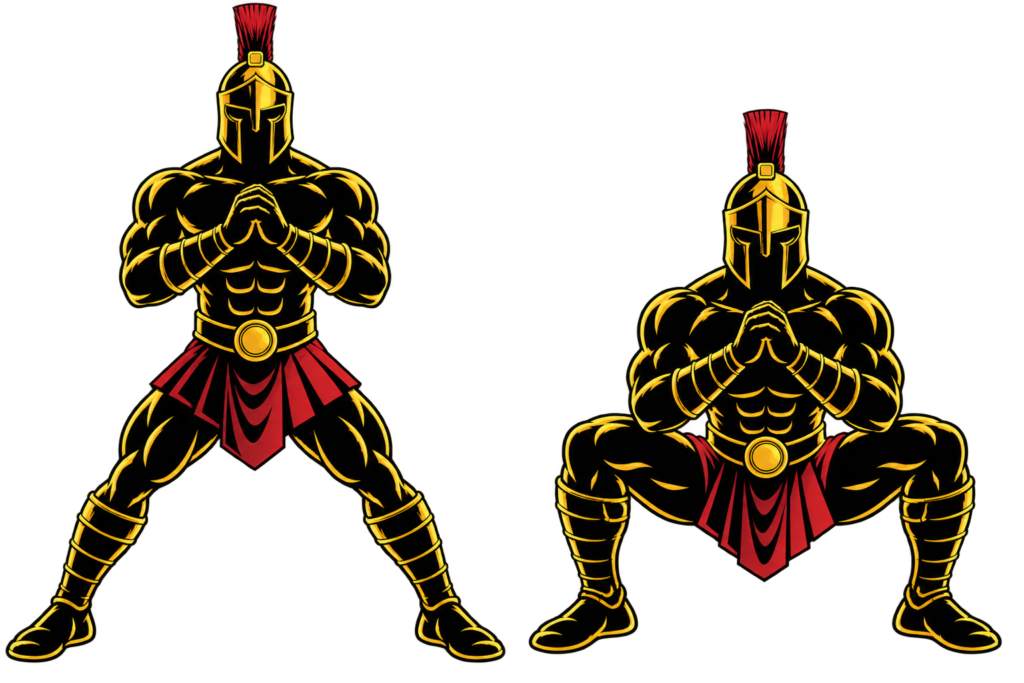
Warrior showcasing How to do Sumo Squats with proper form.

Sumo Squats Form Checklist

Use this quick checklist to ensure proper Sumo Squat form.

  • Stand with a comfortably wide stance
  • Turn your toes outward naturally
  • Keep your heels planted
  • Keep your knees aligned with your toes
  • Brace your core
  • Maintain a neutral spine
  • Control both the descent and ascent
  • Avoid forcing excessive depth

Good technique allows you to train the intended muscles while maintaining stability throughout every repetition.


Common Sumo Squats Mistakes

Using an Extremely Wide Stance

Problem: A stance that is too wide can restrict your movement and make it difficult to maintain proper alignment.

Fix: Use a stance that allows you to descend comfortably while keeping your feet stable.

Letting the Knees Collapse Inward

Problem: This reduces stability and can place unnecessary stress on the knees.

Fix: Keep your knees tracking in the same direction as your toes throughout the movement.

Lifting the Heels

Problem: Raising your heels reduces stability and changes your squat mechanics.

Fix: Keep your entire foot connected to the floor and work on your ankle mobility if necessary.

Rounding the Lower Back

Problem: Excessive spinal rounding can reduce control and make the movement less efficient.

Fix: Brace your core and maintain a neutral spinal position throughout the squat.

Forcing Depth

Problem: Trying to squat deeper than your mobility allows can cause you to lose proper positioning.

Fix: Use a comfortable range of motion and gradually improve your hip and ankle mobility over time.


Sumo Squats Variations

Once you master the bodyweight Sumo Squat, these variations can help you progress.

Assisted Sumo Squats

An excellent beginner variation.

How to Do Assisted Sumo Squats

  • Stand in a comfortable wide stance.
  • Hold a sturdy support with both hands.
  • Lower into the squat while maintaining proper knee alignment.
  • Use the support only as much as necessary.
  • Return to standing under control.

Bodyweight Sumo Squats

The standard variation.

How to Do Bodyweight Sumo Squats

  • Stand with your feet wide and toes turned outward.
  • Lower your hips between your legs.
  • Keep your knees tracking with your toes.
  • Drive through your feet to return to standing.

Goblet Sumo Squats

Adds resistance while keeping the movement simple.

How to Do Goblet Sumo Squats

  • Hold a dumbbell or kettlebell close to your chest.
  • Take a wide stance with your toes turned outward.
  • Squat down under control.
  • Drive through your feet to return to standing.

Sumo Squat Pulses

Increases muscular endurance and time under tension.

How to Do Sumo Squat Pulses

  • Lower into a comfortable Sumo Squat.
  • Maintain the bottom position.
  • Perform small controlled movements up and down.
  • Avoid bouncing or losing your knee alignment.

Weighted Sumo Squats

The advanced strength variation.

How to Do Weighted Sumo Squats

  • Hold a dumbbell, kettlebell, or other suitable weight.
  • Perform the Sumo Squat with controlled technique.
  • Keep the weight centered and your torso stable.
  • Gradually increase resistance as your strength improves.

Final Thoughts

The Sumo Squat is an excellent lower-body exercise for building strength while placing significant emphasis on the glutes and inner thighs.

It develops:

  • Quadriceps strength
  • Glute strength
  • Inner-thigh strength
  • Hip mobility
  • Lower-body stability
  • Squatting control

Its wide stance makes it a useful complement to traditional squats and other lower-body movements.

Start with bodyweight Sumo Squats, master your stance and knee alignment, and gradually add resistance as your strength improves. Learn more about Leg Workout here.

Strong legs are built through consistent training, controlled movement, and proper technique.

Essential Gear for Sumo Squats

Sumo Squats can be performed without equipment, but these pieces of gear can make your training more comfortable and provide options for progression.

  • Exercise Mat: Provides a stable and comfortable surface for bodyweight Sumo Squats.
  • Dumbbell: An easy way to add resistance with Goblet Sumo Squats.
  • Kettlebell: Excellent for loading Sumo Squats while keeping the weight centered.
  • Resistance Band: Can be used for additional resistance during advanced bodyweight variations.

Sumo Squats FAQ

Q1: How wide should my stance be for Sumo Squats?
Your feet should generally be wider than shoulder-width apart, but there is no single perfect width. Choose a stance that allows you to squat comfortably while keeping your knees aligned with your toes.

Q2: Are Sumo Squats better than regular squats?
Neither is universally better. Sumo Squats emphasize the adductors, glutes, and hips differently, while regular squats provide a different lower-body stimulus. Both can be valuable parts of a balanced training program.

Q3: How many Sumo Squats should I do?
Beginners can start with 10-15 repetitions for 2-3 sets using bodyweight. As your strength improves, you can increase resistance or adjust your repetitions according to your training goals.

How to Do Korean Dips Correctly: Step-by-Step Guide for Beginners

Learn how to do Korean Dips with proper form, avoid common mistakes, and discover the best Korean Dip progressions to build upper-body strength, improve shoulder stability, and develop advanced calisthenics control.

The Korean Dip is an advanced bodyweight exercise that combines the strength demands of a dip with a challenging shoulder and chest position. Unlike standard dips, Korean Dips are performed with the body positioned behind the bars, creating a deeper shoulder extension and requiring significantly more control.

Whether you’re training for calisthenics, gymnastics-style strength, or advanced bodyweight skills, mastering the Korean Dip can help you develop the strength and control needed for more demanding movements.


What Is a Korean Dip?

A Korean Dip is an advanced dip variation performed on parallel bars while keeping your body behind the bars as you lower and raise yourself. The movement places the shoulders into a greater degree of extension than a conventional dip and requires strong triceps, chest, shoulders, and core control.

Because of the demanding shoulder position, Korean Dips are best suited to experienced trainees who already have a strong foundation in regular dips.

Korean Dips are commonly used in:

  • Calisthenics training
  • Advanced bodyweight workouts
  • Gymnastics-style strength training
  • Dip progression programs
  • Upper-body skill development

The exercise should be approached gradually because poor control or insufficient shoulder mobility can place unnecessary stress on the shoulders.

Benefits of Korean Dips

Korean Dips provide several strength and skill-development benefits.

Benefits include:

  • Builds triceps strength
  • Strengthens the chest and shoulders
  • Improves shoulder stability
  • Develops advanced dip strength
  • Improves body control
  • Strengthens the core
  • Builds confidence on parallel bars
  • Requires minimal equipment

Korean Dips are particularly valuable for advanced calisthenics athletes who want to develop greater control through challenging shoulder positions.

Muscles Worked in Korean Dips

Korean Dips recruit several major upper-body muscles.

Primary Muscles
  • Triceps
  • Pectoralis Major
  • Anterior Deltoids
Secondary Muscles
  • Latissimus Dorsi
  • Serratus Anterior
  • Core Muscles
  • Forearm and Grip Muscles

The core and shoulders also work continuously to keep the body controlled behind the bars.


How to Do Korean Dips (Step-by-Step)

Step 1: Set Up on the Parallel Bars

Grip the parallel bars firmly and support your body above them.

Position yourself with:

  • Arms extended
  • Shoulders controlled
  • Core engaged
  • Body positioned behind the bars

Tip: Start with a stable, comfortable grip and make sure the bars are secure before attempting the exercise.

Step 2: Position Your Body Behind the Bars

Unlike a regular dip, allow your body to remain behind the bars rather than directly between them.

Keep your:

  • Chest controlled
  • Core tight
  • Legs stable
  • Shoulders active

This position creates the unique shoulder angle that distinguishes the Korean Dip from a standard dip.

Step 3: Begin the Descent

Slowly bend your elbows and lower your body.

As you descend:

  • Keep your body behind the bars
  • Control your shoulders
  • Keep your elbows under control
  • Maintain a strong core

Do not drop rapidly into the bottom position.

Step 4: Reach the Bottom Position

Lower yourself only as far as you can comfortably control.

At the bottom:

  • Maintain control of your shoulders
  • Keep your elbows stable
  • Avoid forcing excessive depth
  • Keep your body positioned behind the bars

The range of motion should be appropriate for your strength and shoulder mobility.

Step 5: Press Back Up

Drive through your hands and extend your elbows.

Use your triceps, chest, and shoulders to push your body back to the starting position.

Keep the movement controlled from beginning to end.

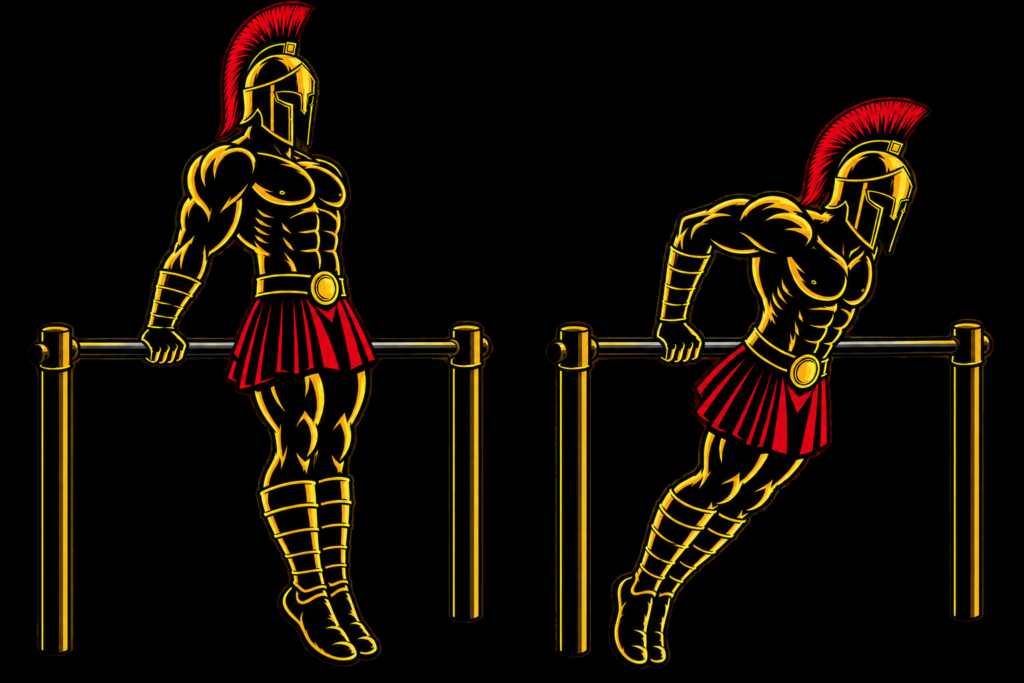
Warrior showcasing How to do Korean Dips with proper form.

Korean Dips Form Checklist

Use this quick checklist to ensure proper Korean Dip form.

  • Grip the bars firmly
  • Keep your core engaged
  • Maintain your body behind the bars
  • Control the descent
  • Keep your shoulders stable
  • Avoid dropping into the bottom position
  • Use a comfortable range of motion
  • Press smoothly back to the top

The Korean Dip is an advanced movement, so quality repetitions are much more valuable than chasing maximum depth or repetitions.


Common Korean Dip Mistakes

Dropping Too Quickly

Problem: Dropping into the bottom position can place excessive stress on the shoulders.

Fix: Lower yourself slowly and maintain muscular control throughout the entire descent.

Going Too Deep

Problem: Forcing excessive shoulder extension can cause discomfort and reduce control.

Fix: Use a range of motion that your current shoulder mobility and strength can safely control.

Losing Core Tension

Problem: A loose midsection makes the movement harder to control.

Fix: Brace your core and keep your body stable throughout every repetition.

Using Momentum

Problem: Swinging or bouncing reduces muscular control and can increase stress on the shoulders.

Fix: Perform each repetition slowly and deliberately.

Attempting Korean Dips Too Early

Problem: Insufficient dip strength or shoulder mobility can make this exercise unnecessarily risky and difficult.

Fix: Build a strong foundation with regular dips, assisted Korean Dips, and other controlled progressions before attempting full repetitions.

Advanced exercises should be earned through progressive strength development.


Korean Dip Progressions and Variations

Once you have developed a strong foundation, these progressions can help you work toward a full Korean Dip.

Assisted Korean Dips

The best starting progression for learning the movement.

How to Do Assisted Korean Dip

  • Use a resistance band for assistance.
  • Position your body behind the bars.
  • Lower yourself slowly.
  • Use the band to reduce the amount of bodyweight you need to control.
  • Gradually reduce assistance as you become stronger.

Negative Korean Dips

Builds strength during the lowering phase.

How to Do Negative Korean Dip

  • Start at the top position with assistance if necessary.
  • Position your body behind the bars.
  • Slowly lower yourself toward the bottom.
  • Take several seconds to complete the descent.
  • Return to the top using assistance.

Partial Korean Dips

Allows you to develop strength without immediately using the full range of motion.

How to Do Partial Korean Dip

  • Start in the Korean Dip position.
  • Lower yourself through a comfortable range.
  • Pause briefly.
  • Press yourself back up.
  • Gradually increase your depth as your strength improves.

Full Korean Dips

The advanced variation.

How to Do Full Korean Dip

  • Support yourself on the parallel bars.
  • Position your body behind the bars.
  • Lower yourself under complete control.
  • Maintain stable shoulders and a tight core.
  • Press through the bars to return to the starting position.

Only perform full Korean Dips when you can control the movement without pain or excessive shoulder stress.


Final Thoughts

The Korean Dip is a challenging advanced calisthenics exercise that demands considerable upper-body strength, shoulder mobility, and body control.

It develops:

  • Triceps strength
  • Chest strength
  • Shoulder stability
  • Core control
  • Dip strength
  • Advanced bodyweight coordination

If you’re new to Korean Dips, don’t rush straight into full repetitions. Build your foundation with regular dips, assisted variations, and controlled negatives before progressing to the complete movement. Learn more about Push Workouts here.

Most importantly, never force the range of motion. The goal is to become stronger while maintaining control and healthy movement.

Master the basics, respect the progression, and let your strength earn the advanced skill.

Essential Gear for Korean Dips

Korean Dips require stable equipment because the exercise places significant demands on your upper body and shoulders.

  • Parallel Dip Bars: The primary equipment required for performing Korean Dips.
  • Resistance Band: Useful for assisted Korean Dips and controlled progression work.
  • Gymnastics Rings: Can be used for advanced variations, although they significantly increase the demands on stability.
  • Exercise Mat: Provides cushioning underneath the bars during training and progression drills.
  • Gym Chalk: Enhances grip and prevents slipping during sets.

Korean Dip FAQ

Q1: Are Korean Dips harder than regular dips?
Yes. Korean Dips are considerably more demanding because they place the body behind the bars and require greater shoulder control, mobility, and upper-body strength.

Q2: Should beginners do Korean Dips?
Beginners should first develop a strong foundation with regular dips and basic upper-body strength. Assisted Korean Dips and negative repetitions can then be used as progressions.

Q3: How many Korean Dips should I do?
Because Korean Dips are an advanced exercise, start with 2-5 controlled repetitions for 2-3 sets. Prioritize technique and shoulder control rather than high repetition counts.

How to Do Sissy Squats Correctly: Step-by-Step Guide for Beginners

Learn how to do Sissy Squats with proper form, avoid common mistakes, and discover the best Sissy Squat variations to build stronger quadriceps, improve lower-body control, and develop impressive leg strength.

The Sissy Squat is an advanced bodyweight leg exercise that places significant emphasis on the quadriceps while challenging your balance, ankle mobility, and core stability. Unlike a traditional squat, the Sissy Squat involves leaning the body backward while allowing the knees to travel forward as you lower toward the floor.

Whether you’re training for calisthenics, bodybuilding, athletic performance, or simply want stronger legs without heavy equipment, learning the Sissy Squat can add a unique challenge to your lower-body training.


What Is a Sissy Squat?

A Sissy Squat is a bodyweight squat variation performed by rising onto the balls of your feet, bending your knees forward, and leaning your torso backward while keeping your body aligned. You then lower your body under control before driving through your feet to return to the starting position.

The movement places a strong emphasis on the quadriceps and requires considerable ankle mobility, balance, and body control.

Sissy Squats are commonly used in:

  • Calisthenics training
  • Bodyweight leg workouts
  • Bodybuilding routines
  • Quadriceps-focused training
  • Advanced lower-body conditioning

Because the exercise can place substantial stress on the knees when performed incorrectly, beginners should start with an assisted variation and gradually progress.

Benefits of Sissy Squats

Sissy Squats offer several lower-body strength and control benefits.

Benefits include:

  • Builds strong quadriceps
  • Improves lower-body control
  • Strengthens the hip flexors
  • Challenges balance and coordination
  • Improves ankle mobility
  • Develops muscular endurance
  • Requires minimal equipment

Few bodyweight exercises isolate the quadriceps as strongly as a properly performed Sissy Squat.

Muscles Worked in Sissy Squats

Sissy Squats primarily target the muscles responsible for extending the knee.

Primary Muscles
  • Quadriceps
  • Rectus Femoris
  • Vastus Lateralis
  • Vastus Medialis
Secondary Muscles
  • Gluteus Maximus
  • Hip Flexors
  • Calves
  • Core Muscles

The core and lower-leg muscles work continuously to stabilize your body while you lean backward and control the movement.


How to Do Sissy Squats (Step-by-Step)

Step 1: Stand Upright

Stand with your feet approximately hip-width apart.

Maintain:

  • Chest upright
  • Core engaged
  • Feet firmly planted
  • Eyes looking forward

Tip: Stand next to a sturdy support when learning the movement.

Step 2: Rise Onto the Balls of Your Feet

Slowly raise your heels from the floor so that you are standing on the balls of your feet.

Keep your body controlled and your feet stable.

Step 3: Lean Your Body Back

Begin bending your knees while slowly leaning your torso backward.

Focus on:

  • Keeping your hips extended
  • Maintaining a straight line from your knees through your shoulders
  • Keeping your heels elevated
  • Moving slowly

Your knees will travel forward as your torso moves backward.

Step 4: Lower Into the Squat

Continue lowering your body toward the floor under control.

Descend only as far as you can while maintaining:

  • Stable feet
  • Controlled knee movement
  • A strong core
  • Proper body alignment

You do not need to reach maximum depth to perform an effective Sissy Squat.

Step 5: Push Back Up

Drive through the balls of your feet and straighten your knees.

Use your quadriceps to raise your body back to the starting position.

Keep the movement smooth and controlled.


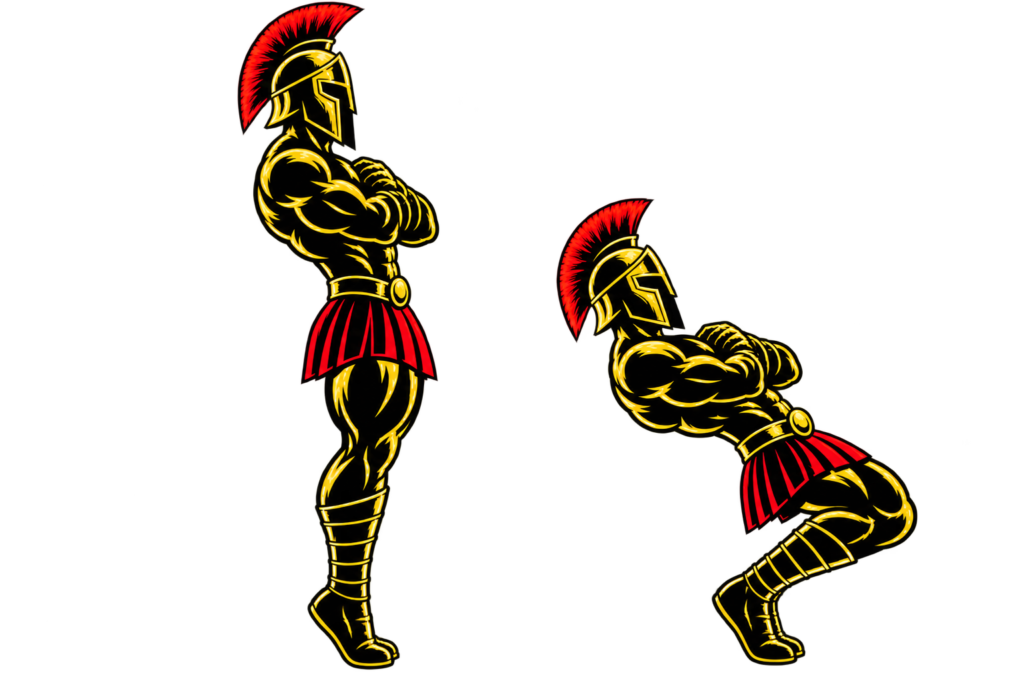
Warrior showcasing How to do Sissy Squats with proper form.

Sissy Squats Form Checklist

Use this quick checklist to ensure proper Sissy Squat form.

  • Keep your core engaged
  • Maintain an upright and controlled body line
  • Keep your heels elevated
  • Move slowly through the entire range
  • Avoid forcing maximum depth
  • Keep your knees tracking consistently

Good technique is especially important because the Sissy Squat places substantial demand on the knees and quadriceps.


Common Sissy Squats Mistakes

Dropping Too Quickly

Problem: A fast descent reduces muscular control and can place unnecessary stress on the knees.

Fix: Lower your body slowly and deliberately.

Going Too Deep Too Soon

Problem: Insufficient strength or mobility can make excessive depth difficult to control.

Fix: Start with a partial range of motion and gradually increase your depth.

Losing Body Alignment

Problem: Excessive bending at the hips changes the movement and reduces quadriceps involvement.

Fix: Keep your hips extended and maintain a controlled backward lean.

Allowing the Knees to Collapse

Problem: Poor knee tracking can reduce stability and increase unnecessary joint stress.

Fix: Keep your knees aligned with your feet throughout the movement.

Attempting the Exercise Without Enough Strength

Problem: The Sissy Squat is significantly more demanding than a standard squat.

Fix: Begin with an assisted variation and build your strength before performing unsupported repetitions.

Never sacrifice control simply to perform a deeper repetition.


Sissy Squat Variations

Once you master the basic movement, these variations can help you progress safely.

Assisted Sissy Squats

The ideal beginner progression.

How to Do Assisted Sissy Squats

  • Hold a sturdy support with one or both hands.
  • Rise onto the balls of your feet.
  • Bend your knees and lean backward while using the support for balance.
  • Return to the starting position under control.

Use as little assistance as necessary.

Partial Sissy Squats

Builds strength through a manageable range of motion.

How to Do Partial Sissy Squats

  • Begin in the standard starting position.
  • Lower only partway toward the floor.
  • Maintain control throughout the movement.
  • Gradually increase your depth as your strength improves.

Full Sissy Squats

The standard advanced variation.

How to Do Full Sissy Squats

  • Rise onto the balls of your feet.
  • Lean backward while bending your knees.
  • Lower your body toward the floor.
  • Return to standing using your quadriceps.

Only perform the full range if you can maintain excellent control.

Weighted Sissy Squats

The advanced strength progression.

How to Do Weighted Sissy Squats

  • Hold a light dumbbell or weight plate against your chest.
  • Perform a controlled Sissy Squat.
  • Maintain proper alignment throughout the movement.
  • Increase the resistance gradually.

Weighted Sissy Squats should only be attempted after mastering the bodyweight version.


Final Thoughts

The Sissy Squat is one of the most challenging bodyweight exercises for developing powerful quadriceps and lower-body control.

It develops:

  • Quadriceps strength
  • Leg endurance
  • Ankle mobility
  • Balance
  • Body control

Because of the unique position of the knees and torso, the Sissy Squat requires more control than a conventional squat. Start with an assisted variation, master the technique, and gradually increase your range of motion. Learn more about Leg Workouts here.

Never force the exercise through pain or sacrifice proper form for greater depth.

Strong legs are built through disciplined progression, not reckless intensity.

Essential Gear for Sissy Squats

Sissy Squats can be performed without equipment, but a few pieces of gear can make training more comfortable and allow you to progress.

  • Exercise Mat: Provides cushioning and a non-slip surface during lower-body workouts.
  • Sturdy Support: A squat rack, pole, or other stable object can provide assistance while learning the movement.
  • Resistance Band: Can provide additional assistance during beginner progressions.
  • Dumbbell: Useful for adding resistance once you have mastered the bodyweight variation.

Sissy Squat FAQ

Q1: Are Sissy Squats good for building bigger quads?
Yes. Sissy Squats place a strong emphasis on the quadriceps and can be an effective addition to a leg-training program when performed with proper technique and appropriate progression.

Q2: Are Sissy Squats bad for your knees?
Sissy Squats are not inherently harmful, but they place significant demands on the knees. Start with an assisted variation, use controlled movement, and avoid forcing depth or training through pain.

Q3: Should beginners do Sissy Squats?
Beginners should start with assisted or partial Sissy Squats rather than immediately attempting the full movement. Building basic squat strength and gradually increasing the range of motion is a safer approach.

Q4: How many Sissy Squats should I do?
Beginners can start with 5-10 controlled repetitions for 2-3 sets using an assisted variation. More advanced athletes can gradually increase repetitions or add light resistance.

Q5: What muscles do Sissy Squats work?
Sissy Squats primarily target the quadriceps while also engaging the hip flexors, glutes, calves, and core for stabilization.

Best Parallettes for Calisthenics (2026) – Start Your Calisthenics Journey

If you’re serious about starting calisthenics, building upper-body strength, and mastering bodyweight skills…

You need ONE thing:

A good pair of parallettes.

No gym. No complicated machines.

Just your bodyweight, a stable surface, and the right equipment.

But here’s the problem:

Most beginners either:

  • Buy unstable parallettes
  • Choose the wrong height
  • Or spend too much on equipment they barely use

This guide fixes that.


Quick Answer (Don’t Overthink It)

⇛ Want the BEST overall setup?
Go for the Beech Wood Parallettes with Non-Slip Handles

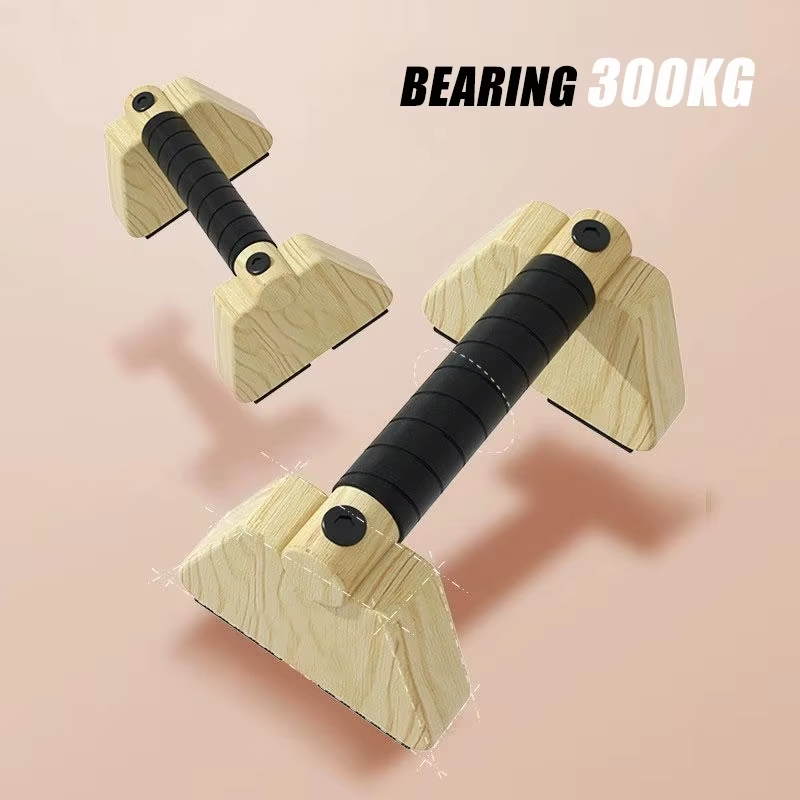
They have more size options, a much stronger review history, and a listed load capacity of up to 300 kg.

⇛ Want something simpler and cheaper?
Go for the Classic Wooden Parallettes

They offer the essential features you need without the higher price.


Why Parallettes are Non-Negotiable

Parallettes aren’t just for fancy calisthenics skills.

They make basic exercises more comfortable while opening the door to more advanced movements.

You can use them for:

And the best part?

⇛ You can train almost anywhere at home.

A good pair of parallettes can become one of the most versatile pieces of equipment in your calisthenics setup.


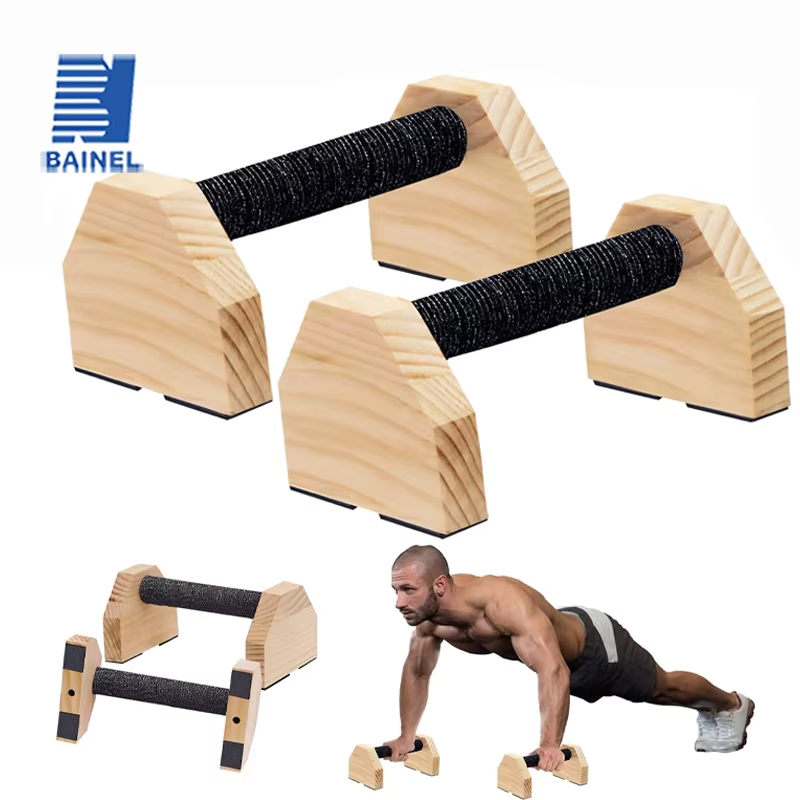
1. Beech Wood Parallettes with Non-Slip Handles (Best Overall)

Key Features:

  • Durable beech wood construction
  • Available in 20 cm, 30 cm, 40 cm, and 50 cm lengths
  • Listed support capacity of up to 300 kg
  • Non-slip cotton grip
  • Includes non-slip stickers
  • Stable wooden bases
  • Designed for home strength training and calisthenics

Why This One Wins:

This is the pair I’d choose for someone who wants to take calisthenics seriously.

The biggest advantage is the range of length options.

You can choose between 20 cm, 30 cm, 40 cm, and 50 cm, allowing you to select the size that best fits your preferred hand position and training space.

And don’t confuse the length with the height.

For example, the 50 cm version shown in the listing measures approximately 500 mm long, 105 mm wide, and 95 mm high.

So these are still relatively low-profile parallettes despite offering a longer handle.

The beech wood construction also gives them a sturdy, natural feel, while the non-slip grip helps keep your hands secure during training.

The bases are designed to provide a stable platform, which is exactly what you want when you’re supporting your entire bodyweight.

And because you have four length options, you aren’t locked into a single configuration.

Pros:

✓ Durable beech wood construction
✓ Four length options
✓ Listed 300 kg support capacity
✓ Non-slip grip
✓ Non-slip stickers included
✓ Stable base design
✓ Suitable for beginner-to-advanced calisthenics

Cons:

❌ More expensive than the basic option
❌ Longer versions take up more floor space

best parallettes for calisthenics(First)

2. Classic Wooden Parallettes (Simple & Affordable)

Key Features:

  • Solid wooden construction
  • Available in 20 cm, 30 cm, and 40 cm lengths
  • Non-slip surface
  • Designed for strength training and calisthenics
  • Compact design
  • Lightweight setup
  • Includes two parallettes

Why Choose This:

If you want:

⇛ “Just give me a simple pair of parallettes that gets the job done.”

This is it.

There are no unnecessary extras.

You get a straightforward wooden design that can be used for push-ups, L-sits, holds, handstand practice, and other bodyweight exercises.

The three available lengths — 20 cm, 30 cm, and 40 cm — give you enough choice for most home calisthenics setups.

The shorter options are particularly convenient if you’re working with limited space, while the longer versions give you more room for your hands.

The wooden construction also provides a firm base, while the non-slip design helps keep the parallettes planted during your workouts.

If you’re just getting started and don’t need the additional size option offered by Product 1, this is a straightforward choice.

Pros:

✓ Simple and practical
✓ Three length options
✓ Wooden construction
✓ Non-slip design
✓ Compact setup
✓ Good for beginners
✓ Lower-cost option

Cons:

❌ Only three length options
❌ Fewer features than the first option
❌ Less versatile for users who want the 50 cm option

best parallettes for calisthenics(Second)

Comparison – Choose Your Arsenal

FeatureBeech Wood ParallettesClassic Wooden Parallettes
Length Options20, 30, 40, 50 cm20, 30, 40 cm
ConstructionBeech woodSolid wood
Non-Slip GripYesYes
Non-Slip FeaturesGrip + stickersYes
Listed Support CapacityUp to 300 kgNot specified
Number of Parallettes22
Best ForSerious calisthenicsBeginners & budget buyers
Main AdvantageMore size options & featuresSimple & affordable

Beginner Plan

Listen carefully—this is where most people fail.

Even with the BEST parallettes, you won’t progress if you don’t train smart.

Start with:

⇛ Train 3–4 times/week

Start simple.

Build your wrist, shoulder, core, and pressing strength.

Then gradually move toward harder calisthenics skills.


Important Buying Advice

Before you click:

Make sure you choose the right length for your training.

20 cm:

A compact option for basic exercises and smaller training spaces.

30 cm:

A balanced middle-ground option for general calisthenics training.

40 cm:

More room for your hands and a little more versatility.

50 cm:

The longest option offered by Product 1, giving you additional handle length while still keeping the parallettes relatively low to the ground.

Also check:

  • The bases are stable
  • The grip feels comfortable
  • The parallettes don’t slide during training
  • The length fits your preferred hand position
  • You have enough floor space
  • Your preferred size is available before purchasing

And remember:

⇛ Longer doesn’t automatically mean better.

Choose the length that fits your training style and available space.


Final Verdict

⇛ Want maximum versatility?
Go for the Beech Wood Parallettes with Non-Slip Handles.

The combination of beech wood construction, four length options, non-slip grip, stable bases, and a listed 300 kg support capacity makes it the better overall package.

⇛ Want simple and affordable?
Go for the Classic Wooden Parallettes.

They’re straightforward, compact, and give you everything you need to start practicing the fundamentals of calisthenics.

But if the price difference isn’t a deal-breaker?

I’d take the first pair.


Final Words

You don’t need a gym to start calisthenics.

You don’t need expensive machines.

You need:

  • A pair of parallettes
  • A basic training plan
  • Consistency
  • Discipline

Start with the basics.

Build your strength.

Master your body.

Then take your calisthenics training to the next level.

Affiliate Disclosure: WarriorBodyAcademy may earn a commission when you purchase through affiliate links in this article, at no extra cost to you. We only recommend products that we believe are useful for our readers and training community.

How to Do Shrimp Squats Correctly: Step-by-Step Guide for Beginners

Learn how to do Shrimp Squats with perfect form, avoid common mistakes, and discover the best Shrimp Squat variations to build single-leg strength, improve balance, and develop exceptional lower-body control.

The Shrimp Squat is an advanced unilateral bodyweight exercise that challenges your quadriceps, glutes, balance, mobility, and coordination. Unlike a traditional squat, the Shrimp Squat requires you to balance on one leg while the opposite leg is bent behind your body.

Whether you’re training for calisthenics, martial arts, athletic performance, or general strength, mastering the Shrimp Squat can help you develop powerful and well-balanced legs without requiring weights.


What Is a Shrimp Squat?

A Shrimp Squat is an advanced single-leg squat variation where you stand on one leg while bending the opposite leg behind you and bringing its knee toward the floor. The working leg performs the majority of the movement while your free leg remains folded behind your body.

The movement requires a combination of strength, balance, ankle mobility, hip mobility, and body control.

Shrimp Squats are commonly used in:

  • Calisthenics training
  • Functional strength workouts
  • Martial arts conditioning
  • Athletic training
  • Single-leg strength programs

Because the exercise places almost all of your bodyweight on one leg, it is considerably more demanding than a standard bodyweight squat.

Benefits of Shrimp Squats

Shrimp Squats offer several strength, mobility, and performance benefits.

Benefits include:

  • Builds powerful single-leg strength
  • Strengthens the quadriceps and glutes
  • Improves balance and coordination
  • Develops ankle and hip mobility
  • Corrects lower-body strength imbalances
  • Improves body control
  • Requires no equipment

Few bodyweight exercises challenge unilateral leg strength and balance as effectively as the Shrimp Squat.

Muscles Worked in Shrimp Squats

Shrimp Squats heavily recruit the muscles responsible for extending and stabilizing the lower body.

Primary Muscles
  • Quadriceps
  • Gluteus Maximus
  • Gluteus Medius
Secondary Muscles
  • Hamstrings
  • Calves
  • Hip Flexors
  • Adductors
  • Core Muscles

The supporting muscles of the ankle and foot also work continuously to maintain balance throughout each repetition.


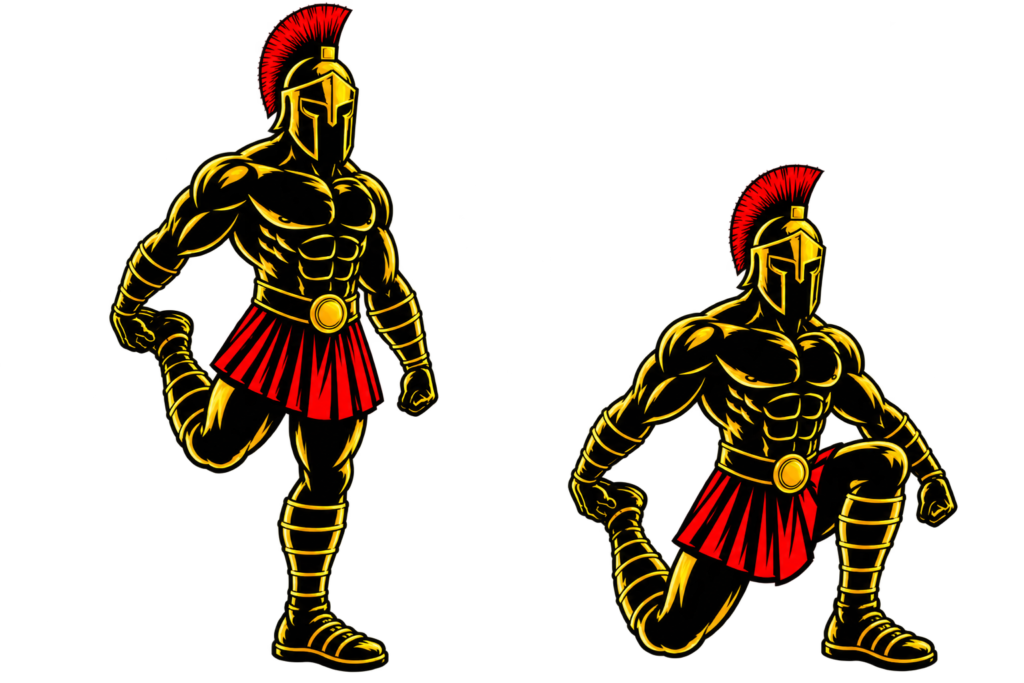
How to Do Shrimp Squats (Step-by-Step)

Step 1: Stand on One Leg

Stand upright with your feet together.

Shift your weight onto your right leg and lift your left foot from the floor.

Maintain:

  • Chest upright
  • Core engaged
  • Standing foot firmly planted
  • Eyes looking forward

Tip: Practice near a sturdy support when learning the movement.

Step 2: Bend Your Free Leg Behind You

Bend your left knee and bring your left foot behind your body.

Reach backward with your left hand and hold the top of your left foot or ankle.

Keep your right leg straight and your torso upright.

Step 3: Begin the Descent

Slowly bend your right knee and lower your body toward the floor.

As you descend:

  • Keep your supporting heel planted
  • Keep your chest lifted
  • Keep your core tight
  • Maintain control of your free leg

Your rear knee should travel downward toward the floor behind your supporting foot.

Step 4: Reach the Bottom Position

Continue lowering until your rear knee approaches or lightly touches the floor.

At the bottom:

  • Keep your supporting foot stable
  • Maintain an upright torso
  • Keep your working knee controlled
  • Avoid collapsing inward

Only descend as deeply as you can while maintaining proper form.

Step 5: Push Back Up

Drive through the heel and midfoot of your supporting leg.

Straighten your working knee and return to the starting position.

Release your rear foot once you are fully upright if necessary.

Complete your repetitions before switching legs.

Warrior showcasing How to do Shrimp Squats with proper form.

Shrimp Squats Form Checklist

Use this quick checklist to ensure proper Shrimp Squat form.

  • Keep your supporting heel planted
  • Keep your chest upright
  • Brace your core
  • Control the entire descent
  • Keep your supporting knee aligned with your toes
  • Avoid using momentum
  • Train both legs evenly

Good technique is more important than achieving maximum depth.


Common Shrimp Squats Mistakes

Losing Balance

Problem: Poor balance can cause you to fall forward or sideways during the movement.

Fix: Practice assisted Shrimp Squats while holding a sturdy support until your balance improves.

Letting the Supporting Knee Collapse Inward

Problem: Reduces stability and can place unnecessary stress on the knee.

Fix: Keep your knee tracking in the same direction as your toes.

Dropping Too Quickly

Problem: Makes the movement harder to control and reduces muscular tension.

Fix: Lower yourself slowly and deliberately.

Lifting the Supporting Heel

Problem: Reduces stability and makes it difficult to generate force.

Fix: Keep your heel firmly planted throughout the movement.

Forcing the Bottom Position

Problem: Limited mobility can cause you to lose balance or compensate with poor technique.

Fix: Use an easier variation and gradually increase your range of motion.

Master the movement before chasing depth.


Shrimp Squat Variations

Once you develop the necessary strength and balance, these variations can help you progress.

Assisted Shrimp Squats

The ideal beginner progression.

How to Do Assisted Shrimp Squats

  • Stand near a sturdy support.
  • Hold the support with one hand.
  • Perform the Shrimp Squat while using the support for balance.
  • Gradually reduce your assistance as you become stronger.

Partial Shrimp Squats

Builds strength through a limited range of motion.

How to Do Partial Shrimp Squats

  • Perform the Shrimp Squat without descending all the way to the floor.
  • Control the movement throughout the available range.
  • Gradually increase your depth as your strength and mobility improve.

Full Shrimp Squats

The standard advanced variation.

How to Do Full Shrimp Squats

  • Hold your rear foot with your hand.
  • Lower your rear knee toward the floor.
  • Keep your supporting foot planted.
  • Push through your working leg to return to standing.

Weighted Shrimp Squats

The advanced strength progression.

How to Do Weighted Shrimp Squats

  • Hold a dumbbell or kettlebell close to your chest.
  • Perform a controlled Shrimp Squat.
  • Keep your balance and maintain proper alignment.
  • Increase resistance gradually.

Only add weight once you can perform strict bodyweight Shrimp Squats with excellent technique.


Final Thoughts

The Shrimp Squat is one of the best advanced bodyweight exercises for developing single-leg strength and lower-body control.

It develops:

  • Quadriceps strength
  • Glute strength
  • Balance
  • Mobility
  • Coordination
  • Unilateral leg control

Although the movement can be difficult to master, consistent practice with easier progressions will gradually build the strength and mobility required for a full Shrimp Squat. Learn more about Leg Workouts here.

Focus on control, stability, and proper alignment rather than rushing toward the hardest variation.

A warrior builds strength one leg at a time.

Essential Gear for Shrimp Squat

Shrimp Squats require no equipment, but a few pieces of gear can make training more comfortable and allow you to progress.

  • Exercise Mat: Provides cushioning for the rear knee when practicing Shrimp Squats.
  • Resistance Band: Can provide assistance while learning the movement.
  • Dumbbell: Useful for adding resistance once you master the bodyweight version.
  • Kettlebell: Provides another effective option for weighted Shrimp Squats.

Shrimp Squats FAQ

Q1: Are Shrimp Squats harder than regular squats?
Yes. Shrimp Squats are considerably more difficult because one leg must support nearly your entire bodyweight while you also maintain balance and control.

Q2: Should beginners do Shrimp Squats?
Beginners should start with assisted or partial Shrimp Squats. Build sufficient single-leg strength and balance before attempting the full movement.

Q3: How many Shrimp Squats should I do?
Beginners can start with 3-6 repetitions per leg for 2-3 sets using an assisted variation. As your strength improves, gradually work toward 6-10 strict repetitions per leg.

.

How to Do Cossack Squats Correctly: Step-by-Step Guide for Beginners

Learn how to do Cossack Squats with perfect form, avoid common mistakes, and discover the best Cossack Squat variations to build lower-body strength, improve hip mobility, and develop greater balance and flexibility.

The Cossack Squat is a powerful bodyweight exercise that combines strength, mobility, balance, and coordination. Unlike a traditional squat, the Cossack Squat trains one leg while the opposite leg remains extended, creating a deep lateral movement that challenges your hips, adductors, hamstrings, and ankles.

Whether you’re training for calisthenics, martial arts, athletic performance, or general fitness, mastering the Cossack Squat can improve both your lower-body strength and movement quality.


What Is a Cossack Squat?

A Cossack Squat is a unilateral squat variation performed by shifting your body weight onto one bent leg while extending the opposite leg out to the side. The working leg bends deeply while the extended leg remains relatively straight, with the foot either planted or turned upward depending on your mobility and technique.

Unlike forward or backward lunges, the Cossack Squat moves laterally and places a greater emphasis on hip mobility and the inner thighs.

Cossack Squats are commonly used in:

  • Calisthenics training
  • Mobility routines
  • Martial arts conditioning
  • Athletic strength programs
  • Warm-up and movement preparation
  • Functional lower-body workouts

The exercise is especially valuable for athletes who need strength and mobility in multiple planes of movement.

Benefits of Cossack Squats

Cossack Squats offer several strength, mobility, and athletic benefits.

Benefits include:

  • Builds single-leg strength
  • Improves hip mobility
  • Stretches the inner thighs
  • Improves ankle mobility
  • Strengthens the quadriceps and glutes
  • Develops balance and coordination
  • Improves lateral movement ability
  • Requires no equipment

Few bodyweight exercises combine lower-body strength and lateral mobility as effectively as the Cossack Squat.

Muscles Worked in Cossack Squats

Cossack Squats engage several major muscles throughout the lower body.

Primary Muscles
  • Quadriceps
  • Gluteus Maximus
  • Adductors
  • Hamstrings
Secondary Muscles
  • Gluteus Medius
  • Calves
  • Hip Flexors
  • Tibialis Anterior
  • Core Muscles

The extended leg also receives a significant stretch, making the Cossack Squat both a strengthening exercise and a mobility movement.


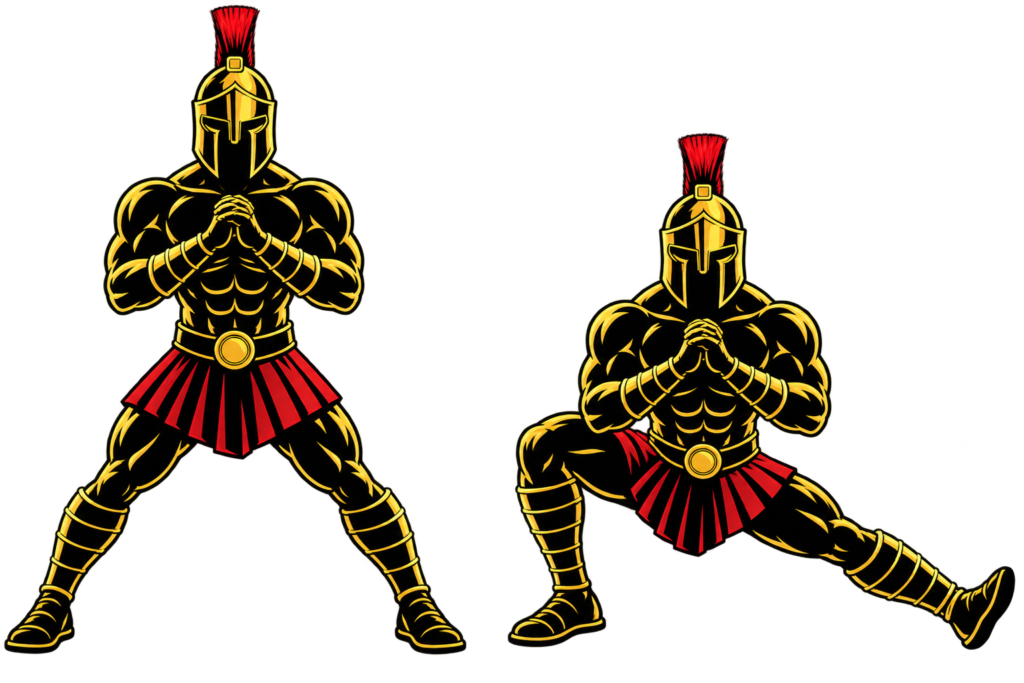
How to Do Cossack Squats (Step-by-Step)

Step 1: Stand With a Wide Stance

Stand upright with your feet considerably wider than shoulder-width apart.

Maintain:

  • Chest lifted
  • Core engaged
  • Toes pointing mostly forward or slightly outward
  • Weight distributed evenly between both feet

Tip: Use a stance wide enough to allow you to descend comfortably without forcing your hips.

Step 2: Shift Your Weight to One Side

Slowly transfer your body weight onto your right leg.

Keep your left leg extended to the side.

As you shift:

  • Keep your right foot flat
  • Keep your left leg straight
  • Maintain an upright torso
  • Keep your core engaged

Step 3: Lower Into the Cossack Squat

Bend your right knee and lower your hips toward the floor.

Focus on:

  • Keeping your working heel planted
  • Driving your knee in the same direction as your toes
  • Keeping your extended leg straight
  • Maintaining control throughout the descent

Descend only as deeply as your mobility allows.

Step 4: Reach the Bottom Position

At the bottom:

  • Keep your working foot firmly planted
  • Keep your extended leg straight
  • Keep your chest lifted
  • Maintain a neutral spine

Your extended leg may remain flat on the floor or have the heel lifted, depending on your mobility and the variation being performed.

Pause briefly if you can maintain good form.

Step 5: Push Back to the Starting Position

Drive through the heel and midfoot of your working leg.

Straighten your working knee and shift your body back to the center.

Return to the starting position before repeating on the opposite side.

Perform equal repetitions on both sides.

Warrior showcasing How to do Cossack Squats with proper form.

Cossack Squats Form Checklist

Use this quick checklist to ensure proper Cossack Squat form.

  • Start with a wide stance
  • Keep your working heel planted
  • Keep your extended leg straight
  • Keep your chest lifted
  • Keep your knee aligned with your toes
  • Control the descent and ascent
  • Never force your range of motion

Good technique allows you to develop strength while gradually improving mobility.


Common Cossack Squats Mistakes

Using a Stance That Is Too Narrow

Problem: Limits your range of motion and makes it difficult to reach a deep position.

Fix: Widen your stance until you can comfortably shift your hips toward one side.

Letting the Working Heel Lift

Problem: Reduces stability and can make the movement less controlled.

Fix: Work on ankle mobility and keep the working heel firmly connected to the floor.

Collapsing the Working Knee Inward

Problem: Reduces stability and places unnecessary stress on the knee.

Fix: Keep your knee tracking in the same direction as your toes.

Rounding the Back Excessively

Problem: Reduces control and can make the bottom position uncomfortable.

Fix: Keep your chest lifted and maintain a controlled, neutral spinal position.

Forcing the Depth

Problem: Insufficient hip or ankle mobility can make a deep Cossack Squat uncomfortable.

Fix: Only descend as far as you can while maintaining proper technique. Gradually increase your range of motion as your mobility improves.

Controlled movement is more important than achieving maximum depth.


Cossack Squat Variations

Once you master the basic Cossack Squat, these variations can help you progress.

Assisted Cossack Squats

The ideal beginner progression.

How to Do Assisted Cossack Squats

  • Hold onto a sturdy object for balance.
  • Perform the Cossack Squat while using your arms for minimal assistance.
  • Gradually reduce the amount of support as your mobility and strength improve.

Bodyweight Cossack Squats

The standard variation.

How to Do Bodyweight Cossack Squats

  • Start with a wide stance.
  • Shift your weight onto one leg.
  • Lower into the squat while extending the opposite leg.
  • Push back to the center and switch sides.

Goblet Cossack Squats

Adds resistance to the movement.

How to Do Goblet Cossack Squats

  • Hold a kettlebell or dumbbell close to your chest.
  • Perform a controlled Cossack Squat.
  • Keep your chest upright throughout the movement.

The added resistance increases the strength demands on the working leg.

Weighted Cossack Squats

The advanced progression.

How to Do Weighted Cossack Squats

  • Hold a dumbbell, kettlebell, or other suitable weight.
  • Perform a full Cossack Squat through your comfortable range of motion.
  • Maintain control throughout every repetition.

Increase the resistance gradually while preserving proper form.


Final Thoughts

The Cossack Squat is one of the best bodyweight exercises for developing lower-body strength and lateral mobility.

It improves:

  • Single-leg strength
  • Hip mobility
  • Ankle mobility
  • Balance
  • Lateral movement
  • Lower-body flexibility

Unlike traditional squats, the Cossack Squat challenges your body in the frontal plane while simultaneously strengthening one leg and stretching the other. Learn more about Leg Workouts here.

Start with a comfortable range of motion and gradually work toward greater depth. Never sacrifice control simply to reach the floor.

Strong legs are important, but a warrior who can move freely is even harder to stop.

Essential Gear for Cossack Squats

Cossack Squats require no equipment, but a few pieces of gear can make your training more comfortable and allow you to progress.

  • Exercise Mat: Provides cushioning and grip during mobility-focused Cossack Squat sessions.
  • Kettlebell: Excellent for adding resistance with Goblet Cossack Squats.
  • Dumbbell: Provides another simple option for progressively loading the movement.
  • Resistance Band: Can be used for assisted Cossack Squats or added resistance during advanced variations.

Cossack Squat FAQ

Q1: Are Cossack Squats good for beginners?
Yes. Beginners can perform assisted Cossack Squats while holding a sturdy support. Start with a comfortable range of motion and gradually build strength and mobility.

Q2: Why can’t I get very low in a Cossack Squat?
Limited hip, ankle, or inner-thigh mobility can restrict your depth. Use an assisted variation and gradually increase your range of motion instead of forcing yourself into a deeper position.

Q3: Should my extended foot stay flat on the floor?
It depends on your mobility and the variation. Keeping the extended leg straight is more important than forcing the entire foot to remain flat. Allow your foot to adjust naturally if necessary.

Best Yoga Blocks for Exercises (2026) – Improve Mobility Fast

If you’re serious about improving your mobility, flexibility, balance, and exercise form…

You need one simple piece of equipment:

Yoga blocks.

No expensive equipment.

No complicated setup.

But here’s the problem:

Most people either:

  • Buy a flimsy block that doesn’t provide enough support
  • Buy an overpriced set they don’t actually need
  • Or have no idea which type is best for exercise

This guide fixes that.


Quick Answer (Don’t Overthink It)

⇛ Want the BEST overall yoga block?
Go for the EVA Foam Yoga Block Props Brick
(Simple, versatile, affordable)

⇛ Want more equipment in one package?
Go for the 2pcs Yoga Kneeling Mat + 2pcs EVA Gym Blocks Set
(Two blocks + two kneeling pads)


Why Yoga Blocks are Non-Negotiable

Yoga blocks aren’t just for yoga.

They can make a huge difference when you’re working on:

  • Flexibility
  • Mobility
  • Balance
  • Stretching
  • Exercise modifications
  • Floor-based exercises
  • Difficult positions

A block essentially brings the floor closer to you.

That means you don’t have to force your body into a position it isn’t ready for.

⇛ Better support = better positioning.

And better positioning means you can focus on performing the movement correctly instead of fighting against your lack of mobility.


Best Yoga Blocks for Exercises

1. EVA Foam Yoga Block Props Brick (Best Overall)

Key Features:

  • EVA foam construction
  • Lightweight and easy to carry
  • Rectangular design
  • Multiple height positions
  • Suitable for stretching and mobility
  • Available in multiple colors
  • Extremely affordable

Why This One Wins:

This is the yoga block we would pick for most people.

Why?

Because it keeps things simple.

You get one solid EVA foam block that can be used for:

  • Hamstring stretches
  • Hip mobility
  • Balance exercises
  • Yoga positions
  • Flexibility training
  • Exercise modifications

You can also rotate the block to change its effective height.

⇛ That’s a BIG advantage when you’re gradually improving your mobility.

You don’t need some giant, complicated accessory.

You need a stable block that does its job.

Pros:

✓ Excellent price
✓ Simple and versatile
✓ Lightweight
✓ Multiple positioning options
✓ Great for beginners
✓ Takes up almost no storage space

Cons:

❌ Only one block included
❌ No kneeling pads
❌ You’ll need a second block for exercises requiring symmetrical support

First of the Best Yoga Blocks for Exercises

2. 2pcs Yoga Kneeling Mat + 2pcs EVA Gym Blocks (Best Value Set)

Key Features:

  • 2 EVA foam yoga blocks
  • 2 kneeling pads
  • Designed for home exercise
  • Useful for stretching and mobility
  • More versatile than a single block
  • Multiple color options

Why Choose This:

If the first option is about simplicity, this one is about versatility.

You’re getting:

⇛ 2 yoga blocks + 2 kneeling pads

That’s a lot more useful if you’re building your home workout setup from scratch.

Two blocks are especially handy for movements that require equal support on both sides.

And the kneeling pads?

They’re useful when your workout involves spending a significant amount time on your knees.

So instead of buying several accessories separately, you get everything in one package.

Pros:

✓ Two blocks included
✓ Two kneeling pads included
✓ More versatile setup
✓ Great for floor-based training
✓ Excellent for mobility and stretching

Cons:

❌ More expensive than a single block
❌ Takes up more storage space
❌ Kneeling pads may be unnecessary if you already own a good exercise mat

Second of the Best Yoga Blocks for Exercises

Comparison – Choose Your Arsenal

FeatureEVA Foam Block2 Blocks + Kneeling Pads
Blocks12
Kneeling PadsNoYes
VersatilityHighVery High
Mobility WorkExcellentExcellent
StretchingExcellentExcellent
Beginner FriendlyYesYes
StorageMinimalModerate
Best ForSimple setupComplete home setup

Beginner Plan

Listen carefully—this is where most people misuse yoga blocks.

Don’t use a block to force yourself deeper into a stretch.

Use it to make the movement more manageable.

Start with:

  • Use a block to bring the floor closer during forward stretches
  • Use it as support during balance exercises
  • Place your hands on the blocks during mobility drills when reaching the floor is difficult
  • Use two blocks when you need symmetrical support
  • Gradually reduce your reliance on the blocks as your mobility improves

⇛ Start with 10–15 minutes of mobility work, 3–5 times per week.

That’s it.

Consistency beats forcing a deeper stretch.


Important Buying Advice

Before you click:

Make sure:

  • The block is made from reasonably firm EVA foam
  • You choose the correct quantity for your training
  • You have enough floor space to use it safely
  • You don’t buy extra accessories you already own
  • You pair it with a stable exercise surface

And remember:

⇛ One good block is better than a huge pile of equipment you never use.

If you’re only interested in stretching and mobility, the single EVA block is enough for most people.

If you’re building a more complete home setup, the two-block set makes more sense.


Final Verdict

⇛ Want simple, affordable, and effective?
Go for the EVA Foam Yoga Block Props Brick

⇛ Want maximum versatility?
Go for the 2pcs Yoga Kneeling Mat + 2pcs EVA Gym Blocks Set

For most WarriorBodyAcademy readers, the EVA Foam Yoga Block is our Best Overall pick.

It’s inexpensive, compact, versatile, and does exactly what a yoga block needs to do.

But if you’re starting your home gym from scratch and want two blocks plus knee support, the four-piece set is the better value.


Final Words

You don’t need a fancy yoga studio.

You don’t need expensive mobility equipment.

You need:

  • A good yoga block
  • Consistent mobility work
  • Patience
  • Discipline

Use the block to make difficult positions more accessible.

Then, as your mobility improves, reduce the assistance.

And because yoga blocks are primarily used during floor-based training, pairing them with a quality Exercise Mat makes your setup even better. Exercise Mats

Build your equipment wisely.

Train consistently.

And keep getting stronger.

Affiliate Disclosure: WarriorBodyAcademy may earn a commission when you purchase through affiliate links in this article, at no extra cost to you. We only recommend products that we believe are useful for our readers and training community.