How to Do Wrist Extensor Stretch Correctly: Step-by-Step Guide for Beginners

Learn how to do Wrist Extensor Stretch with perfect form, avoid common mistakes, and discover the best Wrist Extensor Stretch variations to improve wrist mobility, reduce forearm tightness, and maintain healthy wrists for calisthenics, strength training, sports, and everyday activities.

The Wrist Extensor Stretch is one of the most effective mobility exercises for improving flexibility in the muscles along the top of the forearm. It is especially beneficial for people who regularly perform pull-ups, push-ups, weightlifting, climbing, racket sports, or spend long hours typing or using a computer mouse. Performing this stretch regularly helps maintain healthy wrists, improve range of motion, and reduce the risk of overuse injuries.


What Is the Wrist Extensor Stretch?

The Wrist Extensor Stretch is a static stretching exercise that targets the wrist extensor muscles located along the top of the forearm. It is performed by extending one arm in front of your body with the palm facing downward while gently bending the wrist downward using the opposite hand.

This movement lengthens the muscles responsible for extending the wrist and fingers, helping improve flexibility and relieve muscle tightness.

The Wrist Extensor Stretch is commonly used in:

  • Warm-up routines
  • Cool-down sessions
  • Calisthenics training
  • Weightlifting programs
  • Rehabilitation exercises
  • Office mobility breaks

It is one of the simplest and most effective stretches for maintaining wrist and forearm health.

Benefits of the Wrist Extensor Stretch

The Wrist Extensor Stretch offers several mobility and recovery benefits.

Benefits include:

  • Improves wrist flexibility
  • Reduces forearm tightness
  • Increases wrist range of motion
  • Promotes muscle recovery
  • Helps prevent overuse injuries
  • Improves comfort during gripping exercises
  • Requires no equipment

Few stretches are as effective for improving wrist mobility as the Wrist Extensor Stretch.

Muscles Stretched During the Wrist Extensor Stretch

The Wrist Extensor Stretch primarily targets the muscles on the back of the forearm.

Primary Muscles
  • Extensor Carpi Radialis Longus
  • Extensor Carpi Radialis Brevis
  • Extensor Carpi Ulnaris
  • Extensor Digitorum
Secondary Muscles
  • Extensor Indicis
  • Extensor Digiti Minimi
  • Wrist and Finger Tendons

Because of this muscle involvement, the Wrist Extensor Stretch is especially beneficial after exercises that heavily tax your grip and forearms.


How to Do the Wrist Extensor Stretch (Step-by-Step)

Step 1: Extend Your Arm

Stand or sit comfortably.

Extend one arm straight in front of your body.

Maintain:

  • Elbow fully extended
  • Palm facing downward
  • Shoulder relaxed

Tip: Keep your arm at shoulder height to maximize the effectiveness of the stretch.

Step 2: Position Your Wrist

Allow your wrist to bend downward naturally.

Keep:

  • Fingers together
  • Arm straight
  • Shoulder relaxed

Avoid rotating your arm during the movement.

Step 3: Apply Gentle Pressure

Use your opposite hand to gently pull the back of your hand downward toward your body.

Focus on:

  • Feeling the stretch along the top of your forearm
  • Applying slow, gentle pressure
  • Avoiding pain or discomfort

The stretch should feel comfortable and controlled.

Step 4: Hold the Stretch

Maintain the position for:

  • 20-30 seconds
  • Slow, controlled breathing
  • Relaxed shoulders

Avoid bouncing or forcing the stretch.

Step 5: Repeat on the Opposite Side

Slowly release the stretch.

Switch arms and repeat using the same technique.

Perform 2-4 rounds on each side.
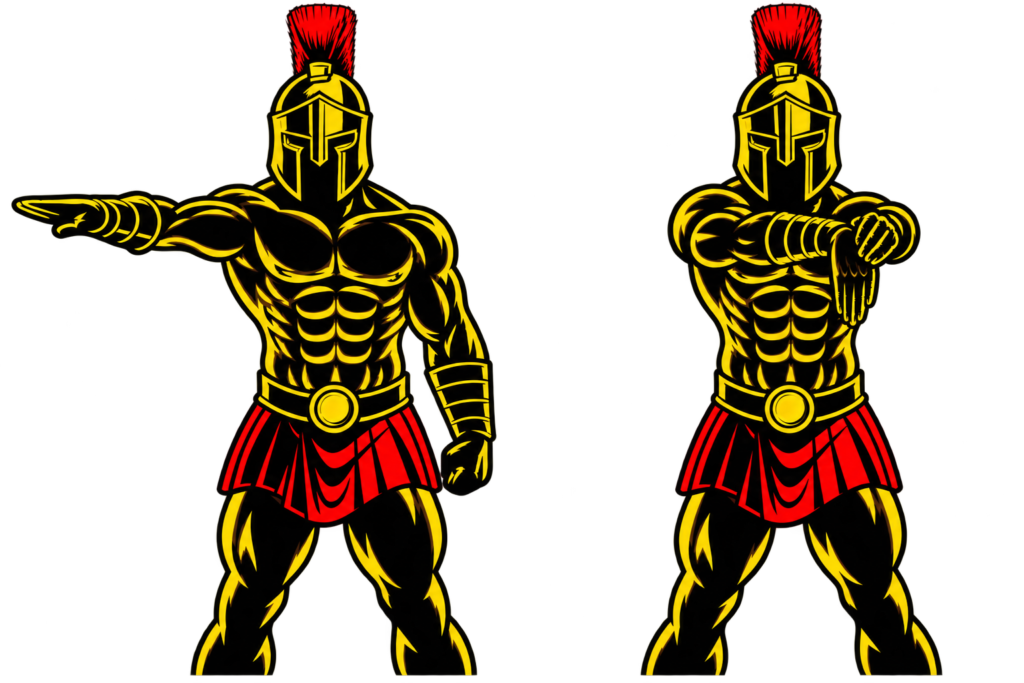
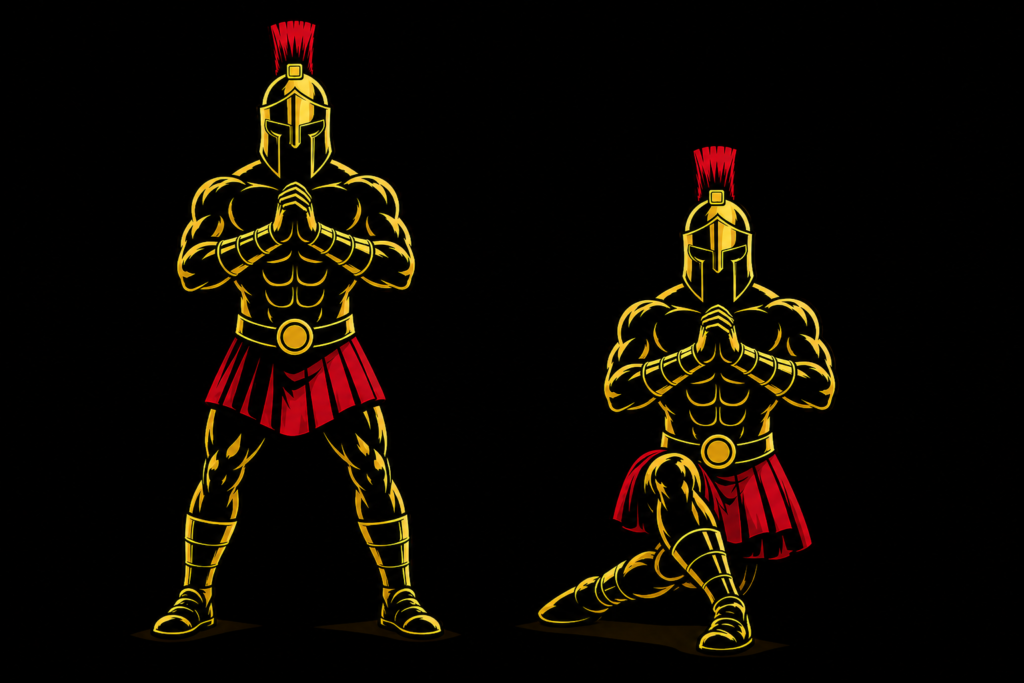
Warrior showcasing How to do Wrist Extensor Stretch with proper form.

Wrist Extensor Stretch Form Checklist

Use this quick checklist to ensure perfect Wrist Extensor Stretch form.

  • Keep your elbow straight
  • Keep your palm facing downward
  • Stretch gently without forcing the movement
  • Relax your shoulders
  • Breathe normally throughout the stretch

Proper technique improves flexibility while minimizing unnecessary joint stress.


Common Wrist Extensor Stretch Mistakes

Pulling Too Hard

Problem: Using excessive force may irritate the wrist or forearm muscles.

Fix: Stretch only until you feel gentle tension.

Bending the Elbow

Problem: Reduces the effectiveness of the stretch.

Fix: Keep your arm fully extended throughout the exercise.

Rotating the Forearm

Problem: Changes the target muscles and reduces the quality of the stretch.

Fix: Keep your palm facing downward for the entire movement.

Bouncing During the Stretch

Problem: Can increase the risk of muscle irritation.

Fix: Hold the stretch steadily without bouncing.

Holding Your Breath

Problem: Creates unnecessary muscle tension.

Fix: Take slow, controlled breaths throughout the stretch.

A slow, controlled stretch always produces better results than forcing a greater range of motion.


Wrist Extensor Stretch Variations

Once you master the standard Wrist Extensor Stretch, these variations can further improve wrist mobility.

Kneeling Wrist Extensor Stretch

Provides a deeper stretch.

How to Do the Kneeling Wrist Extensor Stretch

  • Kneel on the floor.
  • Place the backs of your hands on the floor with your fingers pointing toward your knees.
  • Slowly shift your body backward until you feel a stretch across the tops of your forearms.
  • Hold the position comfortably.

Wall Wrist Extensor Stretch

Ideal for beginners.

How to Do the Wall Wrist Extensor Stretch

  • Place the back of your hand lightly against a wall.
  • Keep your elbow straight.
  • Lean your body slightly until you feel a comfortable stretch.

Fist Wrist Stretch

Improves wrist mobility through a slightly different angle.

How to Do the Fist Wrist Stretch

  • Make a gentle fist.
  • Use your opposite hand to bend your wrist downward.
  • Hold the stretch without forcing the movement.

Assisted Wrist Extensor Stretch

Provides greater control over the stretch intensity.

How to Do the Assisted Wrist Extensor Stretch

  • Perform the standard Wrist Extensor Stretch.
  • Adjust the pressure using your opposite hand.
  • Hold the stretch for the desired duration.

Final Thoughts

The Wrist Extensor Stretch is one of the most effective mobility exercises for improving forearm flexibility and maintaining healthy wrists.

It improves:

  • Wrist flexibility
  • Forearm mobility
  • Muscle recovery
  • Grip comfort
  • Injury prevention

Whether you train with weights, practice calisthenics, climb, play sports, or work at a computer, regularly performing the Wrist Extensor Stretch can help keep your wrists healthy and pain-free. Learn more about Stretching Here,

Focus on gentle, controlled stretching and never force your range of motion.

A warrior maintains flexibility to preserve strength for every challenge ahead.

Essential Gear for the Wrist Extensor Stretch

Although the Wrist Extensor Stretch requires no equipment, these items can complement your mobility routine.

  • Exercise Mat: Provides a comfortable surface for kneeling wrist stretch variations.
  • Foam Roller: Helps loosen tight forearm muscles before stretching.
  • Massage Ball: Allows targeted release of tight spots in the wrist extensor muscles.
  • Wrist Wraps: Can provide additional wrist support during heavy training sessions, though regular stretching should remain your primary method for maintaining wrist mobility.

Wrist Extensor Stretch FAQ

Q1: When should I perform the Wrist Extensor Stretch?
The Wrist Extensor Stretch is best performed after workouts, during cool-downs, or after activities that heavily use the forearms, such as typing, climbing, racquet sports, or strength training.

Q2: How long should I hold the Wrist Extensor Stretch?
Most people should hold the stretch for 20-30 seconds per side and repeat it 2-4 times while maintaining gentle, steady tension.

Q3: Can the Wrist Extensor Stretch help reduce forearm tightness?
Yes. Regularly performing the Wrist Extensor Stretch can improve flexibility, reduce muscle tightness, and help maintain healthy wrist function. If you experience persistent pain or an existing injury, consult a qualified healthcare professional before beginning a stretching routine.
How to Do Wrist Flexor Stretch Correctly: Step-by-Step Guide for Beginners

Learn how to do Wrist Flexor Stretch with perfect form, avoid common mistakes, and discover the best Wrist Flexor Stretch variations to improve wrist flexibility, reduce forearm tightness, and maintain healthy wrists for strength training, calisthenics, and everyday activities.

The Wrist Flexor Stretch is one of the most effective mobility exercises for improving wrist flexibility and reducing tension in the forearm muscles. It is especially beneficial for athletes who perform pull-ups, push-ups, climbing, weightlifting, racket sports, or spend long hours typing at a computer. Regularly performing this stretch helps maintain healthy wrists, improve range of motion, and reduce the risk of overuse injuries.


What Is the Wrist Flexor Stretch?

The Wrist Flexor Stretch is a static stretching exercise that targets the wrist flexor muscles located along the inside of the forearm. It is performed by extending one arm in front of the body with the palm facing upward while gently pulling the fingers downward using the opposite hand.

This movement lengthens the muscles responsible for wrist flexion and gripping, helping restore flexibility after training or prolonged repetitive use.

The Wrist Flexor Stretch is commonly used in:

  • Warm-up routines
  • Cool-down sessions
  • Calisthenics training
  • Weightlifting programs
  • Rehabilitation exercises
  • Office mobility breaks

It is one of the simplest and most effective stretches for maintaining healthy wrists and forearms.

Benefits of the Wrist Flexor Stretch

The Wrist Flexor Stretch provides several important mobility and recovery benefits.

Benefits include:

  • Improves wrist flexibility
  • Reduces forearm tightness
  • Increases wrist range of motion
  • Promotes faster muscle recovery
  • Helps prevent overuse injuries
  • Improves grip comfort during training
  • Requires no equipment

Few stretches are as beneficial for wrist health as the Wrist Flexor Stretch.

Muscles Stretched During the Wrist Flexor Stretch

The Wrist Flexor Stretch primarily lengthens the muscles on the front of the forearm.

Primary Muscles
  • Flexor Carpi Radialis
  • Flexor Carpi Ulnaris
  • Palmaris Longus
  • Flexor Digitorum Superficialis
Secondary Muscles
  • Flexor Digitorum Profundus
  • propagator Teres
  • Wrist and Finger Tendons

Because of this muscle involvement, the Wrist Flexor Stretch is particularly useful after exercises requiring strong grip strength.


How to Do the Wrist Flexor Stretch (Step-by-Step)

Step 1: Extend Your Arm

Stand or sit comfortably.

Extend one arm straight in front of your body.

Maintain:

  • Elbow fully extended
  • Palm facing upward
  • Shoulder relaxed

Tip: Keep your arm at shoulder height for the most effective stretch.

Step 2: Position Your Hand

Allow your wrist to bend backward naturally.

Keep:

  • Fingers together
  • Arm straight
  • Shoulder relaxed

Avoid locking your shoulder or shrugging.

Step 3: Apply Gentle Pressure

Use your opposite hand to pull your fingers downward toward the floor gently.

Focus on:

  • Feeling the stretch along the inside of your forearm
  • Applying slow, gentle pressure
  • Avoiding pain

You should feel a comfortable stretch, not discomfort.

Step 4: Hold the Stretch

Maintain the position for:

  • 20-30 seconds
  • Steady breathing
  • Relaxed shoulders

Avoid bouncing during the stretch.

Step 5: Repeat on the Opposite Side

Slowly release the stretch.

Switch arms and repeat using the same technique.

Perform 2-4 rounds on each side.

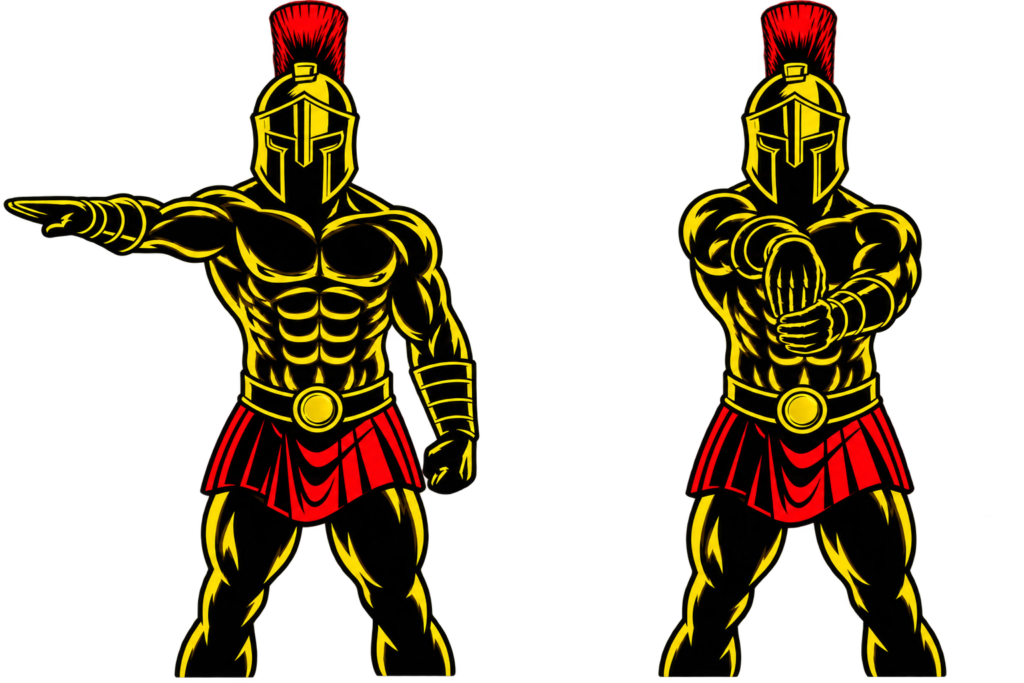
Warrior showcasing How to do Wrist Flexor Stretch with proper form.

Wrist Flexor Stretch Form Checklist

Use this quick checklist to ensure perfect Wrist Flexor Stretch form.

  • Keep your elbow straight
  • Keep your palm facing upward
  • Stretch gently without forcing the movement
  • Relax your shoulders
  • Breathe normally throughout the stretch

Proper technique improves flexibility while minimizing unnecessary stress on the joints.


Common Wrist Flexor Stretch Mistakes

Pulling Too Hard

Problem: Excessive force may irritate the wrist or forearm muscles.

Fix: Stretch only until you feel mild to moderate tension.

Bending the Elbow

Problem: Reduces the effectiveness of the stretch.

Fix: Keep your arm fully extended throughout the movement.

Shrugging the Shoulders

Problem: Creates unnecessary upper-body tension.

Fix: Relax your shoulders and keep your neck neutral.

Bouncing During the Stretch

Problem: May increase the risk of muscle irritation.

Fix: Hold the stretch steadily without any bouncing.

Holding Your Breath

Problem: Creates unnecessary muscle tension.

Fix: Take slow, controlled breaths throughout the stretch.

A gentle, controlled stretch is always more effective than forcing a greater range of motion.


Wrist Flexor Stretch Variations

Once you master the standard Wrist Flexor Stretch, these variations can further improve wrist mobility.

Kneeling Wrist Flexor Stretch

Provides a deeper stretch.

How to Do the Kneeling Wrist Flexor Stretch

  • Kneel on the floor.
  • Place your palms on the ground with your fingers pointing toward your knees.
  • Slowly shift your body backward until you feel a stretch in your forearms.
  • Hold the position comfortably.

Wall Wrist Flexor Stretch

Ideal for beginners.

How to Do the Wall Wrist Flexor Stretch

  • Place your palm against a wall with your fingers pointing downward.
  • Keep your elbow straight.
  • Lean gently away from the wall until you feel a stretch.

Prayer Stretch

Improves flexibility in both wrists simultaneously.

How to Do the Prayer Stretch

  • Place your palms together in front of your chest.
  • Slowly lower your hands while keeping your palms pressed together.
  • Hold the stretch comfortably.

Assisted Wrist Flexor Stretch

Provides greater control.

How to Do the Assisted Wrist Flexor Stretch

  • Perform the standard stretch.
  • Use your opposite hand to adjust the amount of pressure gradually.
  • Hold for the desired duration.

Final Thoughts

The Wrist Flexor Stretch is one of the simplest yet most valuable mobility exercises for maintaining healthy wrists and forearms.

It improves:

  • Wrist flexibility
  • Forearm mobility
  • Recovery
  • Grip comfort
  • Injury prevention

Whether you train with weights, practice calisthenics, climb, or spend hours using a keyboard, adding the Wrist Flexor Stretch to your daily routine can help keep your wrists healthy and mobile. Learn more about Stretching Here.

Focus on slow, controlled stretches and never force your range of motion.

A warrior protects his joints as carefully as he builds his strength.

Essential Gear for the Wrist Flexor Stretch

Although this stretch requires no equipment, the right accessories can make your mobility sessions more comfortable and help support long-term wrist health.

  • Exercise Mat: Provides a comfortable surface if performing kneeling wrist stretch variations.
  • Foam Roller: Helps release tension in the forearms before stretching.
  • Massage Ball: Useful for targeting tight spots in the forearm muscles before or after stretching.
  • Wrist Wraps: Can provide additional support during heavy training sessions, though they should not replace regular mobility work.

Wrist Flexor Stretch FAQ

Q1: When should I perform the Wrist Flexor Stretch?
The Wrist Flexor Stretch is best performed after workouts, during cool-downs, or after long periods of repetitive wrist activity such as typing or gripping. It can also be included in a mobility routine on rest days.

Q2: How long should I hold the Wrist Flexor Stretch?
Most people should hold the stretch for 20-30 seconds per side and repeat it 2-4 times while maintaining gentle, steady tension.

Q3: Can the Wrist Flexor Stretch help prevent wrist pain?
Yes. Regularly stretching the wrist flexor muscles can improve flexibility, reduce muscle tightness, and lower the risk of overuse injuries. However, if you have persistent wrist pain or an existing injury, consult a qualified healthcare professional before stretching.

Grip Slipping During Workouts? Here’s How to Fix It

Grip slipping during workouts is one of the most frustrating problems you can face in the gym.

Whether you’re doing pull-ups, chin-ups, deadlifts, rows, or climbing, losing your grip can end your set before your muscles are actually tired.

The good news?

You don’t always need stronger hands.

Sometimes, you simply need better grip.


Why Your Grip Keeps Slipping

If your hands keep slipping during workouts, it’s usually because of:

  • Sweaty palms
  • Humid weather
  • Smooth or painted bars
  • Long training sessions
  • Moisture reducing friction between your hands and the equipment

A weak grip isn’t always the problem.

Often, it’s your hands losing traction.

This can lead to:

  • ❌ Missed reps
  • ❌ Poor workout performance
  • ❌ Less muscle activation
  • ❌ Higher risk of losing control of the bar

The Simple Fix

Instead of squeezing the bar harder…

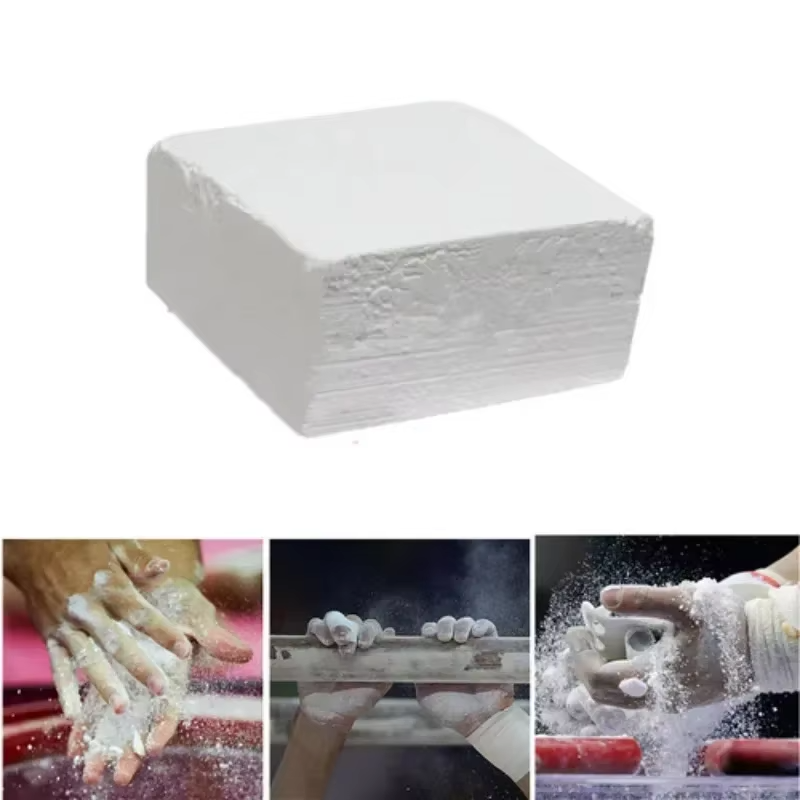
Use Gym Chalk (Magnesium Chalk).

Gym chalk absorbs moisture from your hands, creating more friction between your skin and the bar so you can hold on longer and train with confidence.

It’s one of the simplest and most effective upgrades for:

  • Pull-ups
  • Chin-ups
  • Deadlifts
  • Barbell Rows
  • Climbing
  • Gymnastics
  • Calisthenics
  • Powerlifting

Best Gym Chalk to Improve Your Grip

1. Weight Lifting Magnesium Chalk Block (Best Budget Choice)

Why This Works

This traditional magnesium chalk block delivers reliable grip at an affordable price.

Rub a small amount onto your palms before training, and it quickly absorbs sweat to help you maintain a secure hold throughout your workout.

Key Benefits

  • Excellent grip on bars and weights
  • Budget-friendly
  • Long-lasting block
  • Trusted by lifters, climbers, and calisthenics athletes

Best For:

  • Beginners
  • Home gym users
  • Outdoor calisthenics
  • Budget-conscious athletes

Reality:

If you’re looking for the most affordable way to stop your hands from slipping, this chalk block gets the job done.

First of the Gym Chalk(Grip Slipping during Workouts)

2. Dry Hands Liquid Chalk (Best Overall)

Why This is Better

If you train regularly or have naturally sweaty hands, liquid chalk offers a cleaner and longer-lasting solution.

It dries within seconds and creates a strong grip without covering your equipment or clothes in chalk dust.

Key Benefits

  • Excellent sweat resistance
  • Long-lasting grip
  • Less mess than traditional chalk
  • Easy to carry in your gym bag
  • Quick-drying formula

Best For:

  • Regular gym-goers
  • Calisthenics athletes
  • Climbers
  • Powerlifters
  • Anyone with sweaty hands

Reality:

If you want maximum performance with minimal mess, liquid chalk is the better investment.

Second of the Gym Chalk(Grip Slipping during Workouts)

Which One Should You Choose?

Just starting? → Choose the Chalk Block.

It’s affordable, effective, and perfect for most beginners.

Train regularly or have sweaty hands? → Choose Dry Hands Liquid Chalk.

It lasts longer on your hands and keeps your workouts cleaner.


How to Prevent Your Grip from Slipping

Follow these simple steps:

Before Training

  • Wash and dry your hands.
  • Apply a small amount of chalk.
  • Allow liquid chalk to dry completely before grabbing the bar.

During Training

  • Reapply only when needed.
  • Wipe excessive sweat from your hands between sets.

After Training

  • Wash off the chalk thoroughly.
  • Apply moisturizer if your skin feels dry.

Mistakes That Make Your Grip Worse

Avoid these common mistakes:

  • ❌ Using far too much chalk
  • ❌ Training with sweaty hands
  • ❌ Relying on lifting straps for every exercise
  • ❌ Ignoring grip-strength training

Remember, gym chalk improves your grip—but building stronger forearms and hands should still be part of your training.


Final Verdict

If your grip is slipping during workouts, the solution may be simpler than you think.

The Weight Lifting Magnesium Chalk Block is an excellent budget-friendly option that provides dependable grip for most athletes.

If you prefer a cleaner experience and train frequently, Dry Hands Liquid Chalk offers longer-lasting performance with less mess.

Both options help you hold onto the bar longer, perform more reps, and train with greater confidence.


Final Words

Your grip shouldn’t be the reason your workout ends early.

Whether you’re lifting weights, training calisthenics, or working toward your first pull-up, the right gym chalk can help you stay locked onto the bar and focused on your performance.

Choose the option that fits your training style, stay consistent, and keep getting stronger.

If you’re struggling to improve your pulling strength, check out our How to Do More Pull-Ups guide for practical tips to increase your reps.

Affiliate Disclosure: WarriorBodyAcademy may earn a commission when you purchase through affiliate links in this article, at no extra cost to you. We only recommend products that we believe are useful for our readers and training community.

How to Do Chin-Ups Correctly: Step-by-Step Guide for Beginners

Chin-Ups are a compound bodyweight exercise that strengthens your back, biceps, forearms, and other upper-body pulling muscles. They are performed by hanging from a bar with an underhand grip and pulling your body upward until your chin reaches or passes the bar.

The underhand grip distinguishes Chin-Ups from standard Pull-Ups and places the arms in a position that allows substantial involvement from the biceps and other elbow flexors. Many beginners find this grip easier for developing their first bodyweight vertical pulling repetitions, although individual differences matter.

Chin-Ups require only a secure Pull-Up Bar and can be progressed from assisted repetitions to weighted and advanced variations as your strength improves.


What Are Chin-Ups?

Chin-Ups are a vertical pulling exercise in which you hang from an overhead bar with a supinated, or underhand, grip. Your palms face toward you as you pull your body upward by bending your elbows and using your back and arm muscles.

A standard repetition begins with your arms extended. You then pull upward until your chin reaches or clears the bar before lowering yourself under control.

The primary difference between Chin-Ups and Pull-Ups is the grip. Chin-Ups use an underhand grip, whereas standard Pull-Ups generally use an overhand grip with the palms facing away.

Chin-Ups are commonly used in:

  • Calisthenics training
  • Back workouts
  • Biceps training
  • Pull-day workouts
  • Upper-body strength programs
  • Bodyweight workouts
  • Military-style fitness training
  • Pull-Up progression programs

Both Chin-Ups and Pull-Ups train the back and arms, but the change in grip alters the mechanics and relative muscular contribution.

Benefits of Chin-Ups

Chin-Ups provide an efficient way to train several upper-body muscle groups using your bodyweight.

Benefits include:

  • Strengthens the latissimus dorsi
  • Builds the biceps and other elbow flexors
  • Develops upper-back strength
  • Improves vertical pulling strength
  • Develops grip strength and endurance
  • Strengthens the forearms
  • Builds bodyweight control
  • Requires minimal equipment
  • Provides a foundation for harder pulling exercises

Chin-Ups can also be progressively overloaded by increasing repetitions, improving range and control, or eventually adding external resistance.

Muscles Worked in Chin-Ups

Chin-Ups are a compound exercise involving muscles throughout your back, arms, shoulders, and trunk.

Primary Muscles
  • Latissimus Dorsi
  • Biceps Brachii
  • Brachialis
  • Teres Major
Secondary Muscles
  • Brachioradialis
  • Trapezius
  • Rhomboids
  • Posterior Deltoids
  • Forearms
  • Rotator Cuff Muscles
  • Core Muscles

The underhand grip places the biceps in a mechanically favorable position to contribute strongly to elbow flexion, but Chin-Ups remain a compound back-and-arm exercise rather than simply a biceps exercise.


How to Do Chin-Ups (Step-by-Step)

Step 1: Grip the Bar

Stand underneath a secure Pull-Up Bar.

Grip the bar with your palms facing toward you.

Use approximately a shoulder-width grip or slightly narrower, according to what feels comfortable for your wrists, elbows, and shoulders.

Wrap your fingers and thumbs securely around the bar.

Step 2: Establish the Starting Position

Hang underneath the bar with your arms extended.

Keep your:

  • Grip secure
  • Head relatively neutral
  • Core braced
  • Legs controlled
  • Body underneath the bar

Avoid beginning with unnecessary swinging.

If the bar is difficult to reach, use a stable step or platform instead of repeatedly jumping onto it.

Step 3: Establish Shoulder Control

Before beginning the main pull, establish control around your shoulders and shoulder blades.

Avoid suddenly yanking yourself upward from an uncontrolled hanging position.

Keep your torso stable and prepare to pull smoothly.

Step 4: Pull Your Body Upward

Begin bending your elbows while driving them down toward your sides.

Pull your body upward using your back and arms.

As you rise:

  • Keep your grip secure
  • Brace your core
  • Keep your legs controlled
  • Avoid excessive swinging
  • Keep your shoulders controlled

Do not kick your legs to generate momentum during a strict Chin-Up.

Step 5: Reach the Top Position

Continue pulling until your chin reaches or passes the height of the bar.

Keep your head relatively neutral rather than aggressively extending your neck to reach over the bar.

At the top, your elbows should be strongly flexed, and your body should remain controlled.

Step 6: Lower Yourself Slowly

Reverse the movement by gradually extending your elbows.

Control your descent rather than simply dropping from the top position.

Continue lowering until your arms return to extension.

Step 7: Reset and Repeat

Stabilize your body at the bottom.

Minimize any swinging generated during the previous repetition before pulling again.

Continue for your desired number of repetitions while maintaining consistent technique.

Warrior showcasing How to do Chin-ups with proper form.

Chin-Ups Form Checklist

Use this checklist to maintain proper Chin-Up technique.

  • Use a secure Pull-Up Bar
  • Grip the bar with your palms facing you
  • Keep your hands around shoulder-width apart
  • Wrap your thumbs securely around the bar
  • Begin with your arms extended
  • Establish shoulder control before pulling
  • Brace your core
  • Drive your elbows downward
  • Pull smoothly toward the bar
  • Keep your head relatively neutral
  • Minimize swinging and leg kicking
  • Bring your chin to or above bar height
  • Lower yourself under control
  • Return to a controlled hanging position

Prioritize complete, controlled repetitions instead of using momentum to increase your repetition count.


Common Chin-Ups Mistakes

Using Excessive Momentum

Problem: Swinging your torso or kicking your legs can help propel you upward without requiring the same amount of strict pulling strength.

Fix: Brace your core, control your legs, and begin each repetition from a stable position.

Using an Uncomfortable Grip Width

Problem: An excessively wide or narrow underhand grip can make the movement uncomfortable for some people’s wrists, elbows, or shoulders.

Fix: Start around shoulder-width and adjust slightly until you find a comfortable position that allows a strong range of motion.

Performing Partial Repetitions

Problem: Consistently avoiding the bottom or top of the movement limits the range through which you train.

Fix: Use the largest controlled range you can perform comfortably. If full repetitions are too difficult, use an assisted variation.

Craning the Neck Over the Bar

Problem: Throwing your head backward can make your chin appear to clear the bar even though your torso has not reached the same height.

Fix: Keep your head relatively neutral and reach the top by pulling your body higher.

Shrugging Without Control

Problem: Beginning each repetition without controlling your shoulders can make the movement less stable.

Fix: Establish shoulder control before initiating your main pull and maintain it throughout the repetition.

Dropping From the Top

Problem: Rapidly falling into the bottom position removes control from the eccentric portion of the exercise.

Fix: Lower yourself deliberately until your elbows return to extension.

Continuing After Technique Breaks Down

Problem: As fatigue increases, strict Chin-Ups can become progressively shorter and more dependent on swinging or kicking.

Fix: End your set when you can no longer maintain your intended technique, or switch to an easier assisted variation.


Chin-Ups Progressions and Variations

Chin-Ups can be modified for beginners or progressed for stronger trainees.

Band-Assisted Chin-Ups

A Resistance Band reduces the effective load and helps you practice the full Chin-Up movement.

How to Do Band-Assisted Chin-Ups

  • Secure a suitable Resistance Band around the Pull-Up Bar.
  • Carefully place your foot or knee into the band.
  • Grip the bar with your palms facing you.
  • Begin from a controlled hanging position.
  • Pull until your chin reaches or passes the bar.
  • Lower yourself under control.
  • Repeat without bouncing against the band.

Always inspect your Resistance Band and make sure it is securely attached before use.

Negative Chin-Ups

Negative Chin-Ups emphasize the lowering phase and are useful when you cannot yet perform a complete repetition.

How to Do Negative Chin-Ups

  • Use a stable platform to reach the top position.
  • Grip the bar with your palms facing you.
  • Begin with your chin above the bar.
  • Stabilize your shoulders and torso.
  • Slowly lower your body.
  • Continue until your arms reach extension.
  • Step back onto the platform and reset.

Close-Grip Chin-Ups

A somewhat narrower grip changes the arm position while maintaining the underhand Chin-Up mechanics.

How to Do Close-Grip Chin-Ups

  • Grip the bar with your palms facing you.
  • Position your hands somewhat closer than shoulder-width.
  • Begin from a controlled hang.
  • Brace your core and drive your elbows downward.
  • Pull until your chin reaches or passes the bar.
  • Pause briefly under control.
  • Lower yourself slowly.

Use a grip width that remains comfortable for your wrists and elbows.

Tempo Chin-Ups

Tempo Chin-Ups deliberately slow portions of the repetition to increase time under tension and movement control.

How to Do Tempo Chin-Ups

  • Begin from a controlled underhand hang.
  • Establish shoulder control.
  • Pull yourself upward smoothly.
  • Reach the top without using momentum.
  • Pause briefly if prescribed.
  • Lower yourself slowly for several seconds.
  • Reset before beginning the next repetition.

Weighted Chin-Ups

Weighted Chin-Ups increase the resistance after bodyweight Chin-Ups become sufficiently manageable.

How to Do Weighted Chin-Ups

  • Secure a modest additional load using appropriate equipment.
  • Grip the bar with an underhand grip.
  • Begin from a controlled hang.
  • Brace your core and pull upward.
  • Bring your chin to or above the bar.
  • Keep the added weight controlled.
  • Lower yourself slowly.

Add resistance gradually and maintain the same controlled technique you use for bodyweight Chin-Ups.


Final Thoughts

Chin-Ups are a foundational bodyweight pulling exercise for developing your back, biceps, forearms, and grip.

They develop:

  • Lat strength
  • Biceps strength
  • Upper-back strength
  • Forearm strength
  • Grip strength
  • Vertical pulling ability
  • Bodyweight control
  • Calisthenics pulling strength

The key is to perform each repetition through a controlled range rather than relying on swinging or leg momentum. Use a comfortable underhand grip, drive your elbows downward, bring your chin to or above the bar, and control your descent.

If you cannot perform a full Chin-Up yet, assisted repetitions, Australian Rows, Dead Hangs, Scapular Pull-Ups, and controlled negatives can help build the strength needed for your first repetition. Learn more about Pull Workouts here.

Essential Gear for Chin-Ups

Chin-Ups require minimal equipment, but a few items can make progression and training more practical.

  • Pull-Up Bar: The essential equipment for Chin-Ups. Use a sturdy, securely installed bar with sufficient space for your full range of motion.
  • Resistance Bands: Useful for assisted Chin-Ups when you cannot yet lift your entire bodyweight.
  • Gym Chalk: Can improve friction between your hands and the bar when grip becomes limiting.
  • Wrist Wraps: Protects the Wrists during high repetitions or explosive sets, while allowing grip strength to be improved.
  • Stable Step or Platform: Useful for safely reaching a high bar and setting up Negative Chin-Ups.
  • Dip Belt or Weighted Vest: Useful for advanced trainees who want to progressively add resistance after mastering bodyweight Chin-Ups.

Chin-Ups FAQ

Q1: What is the difference between Chin-Ups and Pull-Ups?
Chin-Ups use an underhand grip with your palms facing you, while standard Pull-Ups use an overhand grip with your palms facing away. Both train the back and arms, but their grip positions alter the mechanics and relative muscular contribution.

Q2: Are Chin-Ups easier than Pull-Ups?
Many people can perform more Chin-Ups than overhand Pull-Ups because the underhand grip allows strong contribution from the elbow flexors, including the biceps. However, which exercise feels easier can vary between individuals.

Q3: How many Chin-Ups should beginners do?
If you can perform full Chin-Ups, start with a manageable number of clean repetitions and stop before your technique breaks down. If you cannot perform one yet, use assisted or negative repetitions rather than forcing incomplete reps.

Q4: Should my chin go above the bar during Chin-Ups?
For a conventional full Chin-Up, bringing your chin to or above bar height is a useful standard. Reach this position by pulling your body upward rather than aggressively extending your neck.

Q5: How can I improve my Chin-Ups?
Practice Chin-Ups consistently, strengthen your back and elbow flexors, develop your grip, and use appropriate progressions such as Band-Assisted and Negative Chin-Ups. As you become stronger, gradually increase high-quality repetitions or add external resistance.


At-Home Commando Workout Plan

A commando isn’t defined by muscles alone—it’s built through strength, endurance, resilience, speed, agility, and unwavering mental toughness. This At-Home Commando Workout Plan is inspired by the physical qualities developed by elite military units worldwide. Rather than copying the exact training of any specific military force, this program focuses on the common physical abilities required across many commando and special operations selection courses.

Using bodyweight exercises, running, functional strength training, loaded carries, and conditioning circuits, this plan develops a well-rounded tactical athlete capable of handling physically demanding challenges.

Click on any exercise to know How to do it.


What Is a Commando-Style Training Program?

Commando-style training develops the physical abilities commonly required during military training and tactical occupations.

This includes:

  • Functional strength
  • Running endurance
  • Muscular endurance
  • Explosive power
  • Agility
  • Grip strength
  • Core stability
  • Mental toughness

Rather than training individual muscles, this program emphasizes movement, work capacity, and total-body conditioning.

Benefits of a Commando Workout Plan

  • Builds full-body functional strength
  • Improves cardiovascular endurance
  • Develops muscular endurance
  • Increases speed and agility
  • Strengthens grip and core
  • Improves balance and coordination
  • Builds mental resilience and discipline
  • Enhances overall athletic performance

Equipment Needed

This at-home program uses simple equipment.


Weekly Training Structure

Option 1 – 3 Day Commando Split

  • Monday – Functional Strength
  • Wednesday – Endurance & Conditioning
  • Friday – Tactical Full Body

Option 2 – 6 Day Commando Split

  • Monday – Push Strength + Core
  • Tuesday – Pull Strength + Grip
  • Wednesday – Legs + Running
  • Thursday – Tactical Conditioning
  • Friday – Upper Body Endurance
  • Saturday – Endurance Challenge
  • Sunday – Rest

The 6-day option closely reflects the frequent, varied training used by many military organizations while still allowing adequate recovery.


Pre-Workout Stretch & Mobility Routine

Perform this warm-up before every workout (5–10 minutes).

This warm-up prepares your joints and muscles for demanding physical activity.


Monday – Push Strength + Core

Main Workout

  • Push-Ups – 5 sets × 15–20 reps
  • Decline Push-Ups – 4 sets × 12 reps
  • Pike Push-Ups – 4 sets × 10 reps
  • Dips – 4 sets × 12 reps
  • Backpack Overhead Press – 3 sets × 12 reps

Rest 60–90 seconds between sets.

Core Finisher

Tuesday – Pull Strength + Grip

Main Workout

  • Pull-Ups – 5 sets × Max Reps
  • Chin-Ups – 3 sets × Max Reps
  • Inverted Rows – 4 sets × 12 reps
  • Backpack Rows – 3 sets × 15 reps
  • Resistance Band Face Pulls – 3 sets × 15 reps

Rest 60–90 seconds between sets.

Grip Finisher

  • Dead Hangs – 3 sets × Max Hold
  • Backpack Farmer Carries – 4 × 40 meters
  • Towel Grip Holds – 3 × 30 seconds

Wednesday – Legs + Running

Main Workout

Rest 60 seconds between sets.

Running Session

  • 400-meter Warm-Up Jog
  • 4 × 400-meter Fast Runs
  • Rest 90 seconds
  • 1-Mile Steady Run

Thursday – Tactical Conditioning

Complete 5 rounds:

Rest 90 seconds between rounds.

Friday – Upper Body Endurance

Main Workout

  • Push-Ups – 3 sets × Max Reps
  • Pull-Ups – 3 sets × Max Reps
  • Dips – 3 sets × Max Reps
  • Pike Push-Ups – 3 sets × 12 reps
  • Resistance Band Rows – 3 sets × 15 reps

Core Finisher

Saturday – Endurance Challenge

Choose ONE challenge each week.

Option A

  • 3–5 Mile Run

Option B

Complete 5 rounds:

Option C

Weighted Backpack March

  • 30–45 minutes at a brisk walking pace using a comfortable load that allows you to maintain good posture and steady movement.

The goal is to improve endurance and work capacity—not to rush through the session.


Post-Workout Stretch Routine

Hold each stretch for 30 seconds.

Stretching improves mobility, flexibility, and recovery.


Performance Goals

After 12–16 weeks of consistent training, many trainees may work toward goals such as:

  • 50+ consecutive Push-Ups
  • 10–15 Pull-Ups
  • 2-Minute Plank Hold
  • 3–5 Mile Continuous Run
  • Improved agility, endurance, and overall work capacity

Individual progress varies based on experience, consistency, nutrition, recovery, and fitness level.


Final Thoughts

This At-Home Commando Workout Plan is designed to develop the physical qualities that are valued across many military and tactical environments: strength, endurance, speed, agility, resilience, and discipline.

By combining functional strength training, running, conditioning circuits, core development, and mobility work, you’ll build a strong foundation for tackling physically demanding challenges while improving your overall fitness.

Train consistently, recover well, and embrace the mindset of continuous improvement—because becoming stronger is a journey, not a single workout.

Commando Training Tips

  • Prioritize excellent technique before increasing intensity.
  • Progress gradually by adding reps, distance, or backpack weight over time.
  • Maintain a balanced training schedule with proper recovery.
  • Stay hydrated and consume enough protein to support recovery.
  • Aim for 7–9 hours of sleep each night.
  • Practice discipline by staying consistent with your workouts.

How to Do One-Arm Pull-Ups Correctly: Step-by-Step Guide for Beginners

One-Arm Pull-Ups are one of the most advanced bodyweight pulling exercises in calisthenics. Instead of distributing your bodyweight between two arms, you hang from the bar with one hand and pull your body upward using that arm until your chin reaches or passes the bar.

This dramatically increases the strength required from the lats, biceps, forearms, grip, and other pulling muscles. Your core and upper body must also control the rotation created by hanging and pulling with only one arm.

A One-Arm Pull-Up should be treated as a long-term strength skill rather than simply attempted repeatedly. Strong two-arm Pull-Ups, Weighted Pull-Ups, Archer Pull-Ups, assisted one-arm work, and controlled negatives can help build the strength required for a full repetition.


What Is a One-Arm Pull-Up?

A One-Arm Pull-Up is a unilateral vertical pulling exercise performed while hanging from a Pull-Up Bar with only one hand.

From a controlled one-arm hang, you engage the working shoulder and pull your body upward by bending the elbow and driving it downward toward your side. The repetition continues until your chin reaches or passes approximately bar height before you lower yourself under control.

The free arm does not hold the bar, wrist, or working arm during a true unassisted One-Arm Pull-Up.

One-Arm Pull-Ups are commonly used in:

  • Advanced calisthenics
  • Street workout training
  • Unilateral strength training
  • Advanced Pull-Up programs
  • Grip-strength training
  • Bodyweight skill training
  • Climbing-oriented strength training
  • Upper-body strength programs

Because of the enormous increase in relative loading, most trainees need dedicated progressions before attempting full One-Arm Pull-Ups.

Benefits of One-Arm Pull-Ups

One-Arm Pull-Ups provide an extremely demanding unilateral pulling challenge for advanced trainees.

Benefits include:

  • Develops exceptional unilateral pulling strength
  • Strengthens the lats and upper back
  • Develops the biceps and other elbow flexors
  • Builds powerful grip and forearm strength
  • Challenges shoulder and scapular control
  • Develops core and anti-rotation strength
  • Helps expose side-to-side strength differences
  • Provides an advanced progression beyond standard Pull-Ups
  • Develops high-level bodyweight control

The One-Arm Pull-Up is primarily a maximal-strength skill, so quality and progressive overload are generally more important than performing large numbers of repetitions.

Muscles Worked in One-Arm Pull-Ups

One-Arm Pull-Ups train many of the same muscles as conventional Pull-Ups, but the working arm must handle substantially more of the load.

Primary Muscles
  • Latissimus Dorsi
  • Biceps Brachii
  • Brachialis
  • Teres Major
Secondary Muscles
  • Brachioradialis
  • Trapezius
  • Rhomboids
  • Posterior Deltoids
  • Forearm and Grip Muscles
  • Rotator Cuff Muscles
  • Obliques
  • Rectus Abdominis
  • Other Core Stabilizers

The core works to control unwanted rotation, while the muscles surrounding the shoulder blade help stabilize and position the working shoulder throughout the pull.


How to Do One-Arm Pull-Ups (Step-by-Step)

Step 1: Grip the Pull-Up Bar

Stand underneath a sturdy Pull-Up Bar and grip it securely with one hand.

A pronated grip, with your palm facing away, is typically used when specifically performing a One-Arm Pull-Up. A supinated one-arm pull is commonly referred to as a One-Arm Chin-Up.

Wrap your thumb and fingers securely around the bar.

Step 2: Establish a Controlled One-Arm Hang

Gradually transfer your bodyweight onto the working arm rather than jumping suddenly into the hang.

Keep your:

  • Grip secure
  • Working arm extended
  • Core braced
  • Legs controlled
  • Head relatively neutral

Allow your free arm to remain off the bar.

Step 3: Establish Shoulder Control

Before bending your elbow aggressively, establish control through the working shoulder.

Avoid simply collapsing passively into the joint under your entire bodyweight.

Create tension through your shoulder and upper back while keeping the movement controlled.

Step 4: Begin the Pull

Start pulling your body upward by bending the working elbow and driving it downward toward your side.

Use your lat and upper back together with your elbow flexors.

Brace your core as your body begins to rise.

Step 5: Control Your Rotation

Some rotation can occur naturally during a One-Arm Pull-Up because your body is suspended from a single point.

Do not waste strength trying to remain perfectly square if your body naturally rotates slightly. Instead, prevent excessive swinging or uncontrolled twisting.

Keep the free arm and legs controlled rather than throwing them around for momentum.

Step 6: Reach the Top Position

Continue pulling until your chin reaches or passes approximately bar height.

At the top:

  • Keep your grip secure
  • Maintain control of the working shoulder
  • Keep the elbow strongly flexed
  • Avoid aggressively craning your neck
  • Minimize unnecessary swinging

Reach the top through pulling strength rather than stretching your chin toward the bar.

Step 7: Lower Under Control

Gradually extend your working elbow and lower your body.

Maintain shoulder and core control throughout the descent.

Return to the bottom position without suddenly dropping onto the working shoulder.

Complete your planned training on both sides rather than training only your stronger arm.

Warrior showcasing How to do One-Arm Pull-Ups with proper form.

One-Arm Pull-Ups Form Checklist

Use this checklist when training the full One-Arm Pull-Up or its advanced progressions.

  • Use a sturdy and secure Pull-Up Bar
  • Grip the bar firmly with one hand
  • Wrap your thumb securely around the bar
  • Enter the one-arm hang gradually
  • Maintain control through the working shoulder
  • Brace your core
  • Drive the working elbow downward
  • Keep the free hand off the bar during a full repetition
  • Minimize swinging and kicking
  • Control excessive torso rotation
  • Pull your chin to or above bar height
  • Avoid craning your neck
  • Lower yourself under control
  • Train both arms
  • Stop when technique significantly deteriorates

A clean One-Arm Pull-Up is a controlled strength movement, not a jump, kick, or swing toward the bar.


Common One-Arm Pull-Ups Mistakes

Attempting the Full Exercise Too Early

Problem: Repeatedly attempting One-Arm Pull-Ups without sufficient strength often produces little useful training and may overload the working arm.

Fix: Build a foundation with strong Pull-Ups, Weighted Pull-Ups, Archer Pull-Ups, assisted One-Arm Pull-Ups, and controlled eccentric work before prioritizing full attempts.

Starting With a Sudden Drop Into the Shoulder

Problem: Jumping onto the bar and abruptly loading one arm places your full bodyweight onto the grip and shoulder without a controlled setup.

Fix: Use a stable platform when necessary and gradually transfer your weight onto the working arm.

Using Excessive Momentum

Problem: Kicking the legs, swinging, or violently rotating the torso can help propel your body upward without developing the intended strict pulling strength.

Fix: Brace your core and keep your lower body controlled. Use assistance if you cannot complete the repetition without excessive momentum.

Pulling With Only the Arm

Problem: Thinking only about bending the elbow can make it harder to coordinate the powerful back muscles needed for the exercise.

Fix: Think about driving your elbow downward while using your lat and upper back to pull your body toward the bar.

Forcing the Body Perfectly Square

Problem: A One-Arm Pull-Up naturally creates rotational forces, and trying to eliminate every degree of torso rotation can make the movement unnecessarily awkward.

Fix: Control excessive rotation without assuming that your torso must remain perfectly square throughout the entire repetition.

Dropping Through the Negative

Problem: Reaching the top and then falling quickly to the bottom removes control from the eccentric phase and can abruptly load the working arm.

Fix: Lower yourself deliberately and use assistance if you cannot control the descent.

Training Only the Stronger Arm

Problem: Repeatedly prioritizing your stronger side can increase the difference between your arms.

Fix: Train both sides consistently. Adjust assistance when necessary so each arm can perform high-quality work.


One-Arm Pull-Up Progressions and Variations

The One-Arm Pull-Up usually requires a progression system rather than jumping directly from normal Pull-Ups to the full skill.

Band-Assisted One-Arm Pull-Up

A Resistance Band can reduce the effective load while allowing the working arm to practice the complete pulling motion.

How to Do Band-Assisted One-Arm Pull-Ups

  • Secure an appropriate Resistance Band to the bar.
  • Grip the bar with your working hand.
  • Use the band to provide controlled assistance.
  • Begin from a stable hanging position.
  • Drive your working elbow downward and pull upward.
  • Reach your highest controlled position.
  • Lower yourself slowly before switching sides.

One-Arm Pull-Up With Hand Assistance

Your free hand can provide adjustable assistance by holding a strap, towel, band, or similar secure support rather than the main bar.

How to Do Assisted One-Arm Pull-Ups

  • Grip the Pull-Up Bar with your working hand.
  • Hold a secure assistance point with your opposite hand.
  • Position the assisting hand lower to reduce its mechanical advantage when appropriate.
  • Begin from a controlled hanging position.
  • Pull primarily with the working arm.
  • Use only as much assistance as necessary.
  • Lower under control and repeat on the opposite side.

Archer Pull-Up

Archer Pull-Ups shift much of your bodyweight toward one arm while the opposite arm remains on the bar for assistance.

How to Do Archer Pull-Ups

  • Take a wide overhand grip on the bar.
  • Begin from a controlled two-arm hang.
  • Pull your torso upward and toward one hand.
  • Bend the working arm strongly.
  • Allow the assisting arm to extend outward along the bar.
  • Reach your highest controlled position.
  • Lower smoothly and train both sides.

One-Arm Negative Pull-Up

One-Arm Negatives develop eccentric strength by beginning at the top and lowering with one arm.

How to Do One-Arm Negative Pull-Ups

  • Use a stable platform to reach the top position.
  • Grip the bar securely with one hand.
  • Begin with your chin above the bar.
  • Gradually transfer your weight onto the working arm.
  • Lower yourself as slowly as you can control.
  • Continue through your available range.
  • Use the platform to reset rather than repeatedly jumping to the top.

Weighted Pull-Up

Weighted Pull-Ups develop greater bilateral pulling strength and can provide useful strength preparation for One-Arm Pull-Up training.

How to Do Weighted Pull-Ups

  • Secure a manageable load with a dip belt or weighted vest.
  • Grip the bar with both hands.
  • Begin from a controlled hang.
  • Brace your core and pull upward.
  • Drive both elbows downward.
  • Bring your chin to or above bar height.
  • Lower yourself slowly to the starting position.

Final Thoughts

The One-Arm Pull-Up is one of the highest-level bodyweight pulling skills and requires considerably more than simply being good at regular Pull-Ups.

It develops:

  • Unilateral pulling strength
  • Lat and upper-back strength
  • Biceps strength
  • Forearm strength
  • Grip strength
  • Shoulder control
  • Core stability
  • Anti-rotation strength
  • Advanced bodyweight control

Progress patiently rather than testing the full movement every workout. Build your two-arm pulling strength, gradually shift more load toward one arm, strengthen your assisted and eccentric One-Arm Pull-Ups, and reduce assistance as you improve.

A single controlled repetition is more valuable than forcing an incomplete rep with excessive kicking, swinging, or uncontrolled loading. Learn more about Pull Workouts here.

Essential Gear for One-Arm Pull-Ups

The right equipment can help you safely build the strength, grip, and control needed for one-arm pull-ups while making advanced progressions more effective. Here are the essentials every warrior should consider.

  • Pull-Up Bar: A sturdy pull-up bar is essential for practicing one-arm pull-up progressions, archer pull-ups, negatives, and weighted pull-ups.
  • Resistance Bands: Perfect for assisted one-arm pull-ups, allowing you to gradually reduce assistance as your unilateral strength improves.
  • Gymnastics Rings: Excellent for improving grip strength, shoulder stability, and unilateral pulling control while allowing a more natural wrist position during advanced pulling exercises.
  • Liquid Chalk or Gym Chalk: Improves grip by reducing moisture on your hands, helping you maintain a secure hold during high-intensity unilateral pulling.
  • Stable Step or Platform: Particularly useful for safely setting up One-Arm Negative Pull-Ups without repeatedly jumping to the bar.
  • Dip Belt or Weighted Vest: A great choice for advanced athletes who want to add heavier weight to pull-ups, helping develop the elite pulling power needed for one-arm pull-ups while maintaining a full range of motion.

One-Arm Pull-Up FAQ

Q1: How strong do I need to be before training One-Arm Pull-Ups?
There is no universal number of regular or Weighted Pull-Ups that guarantees a One-Arm Pull-Up. You should first have strong, controlled Pull-Ups and enough unilateral strength to perform exercises such as Archer Pull-Ups and progressively assisted One-Arm Pull-Ups with good technique.

Q2: Should my body rotate during a One-Arm Pull-Up?
Some rotation can occur naturally because your entire body is suspended from one hand. The goal is not necessarily to eliminate all rotation but to prevent excessive twisting, swinging, or momentum from replacing controlled pulling strength.

Q3: Are Archer Pull-Ups good for learning One-Arm Pull-Ups?
Yes. Archer Pull-Ups are a useful progression because they shift more of your bodyweight toward one arm while the opposite hand remains on the bar for assistance. Gradually reducing dependence on the assisting arm can help develop unilateral pulling strength.

Q4: Are One-Arm Negative Pull-Ups useful?
Yes. Controlled negatives can develop the eccentric strength needed for One-Arm Pull-Ups. They are demanding, however, so they should be introduced progressively rather than performed with uncontrolled drops or excessive volume.

Q5: How can I get my first One-Arm Pull-Up?
Build strong Pull-Ups and Weighted Pull-Ups, develop Archer Pull-Ups, progressively reduce assistance during One-Arm Pull-Ups, practice controlled negatives, strengthen your grip, and train both sides consistently. Gradual increases in one-arm loading are generally more productive than repeatedly attempting a full repetition before you are ready.


How to Do a Dragon Squat Correctly: Step-by-Step Guide for Beginners

Learn how to do a Dragon Squat with perfect form, avoid common mistakes, and discover the best Dragon Squat variations to build single-leg strength, improve hip mobility, and develop exceptional balance and coordination.

The Dragon Squat is one of the most advanced lower-body exercises in calisthenics. Combining strength, flexibility, balance, and coordination, this movement challenges your entire body while building powerful legs and outstanding body control. Whether you’re training for calisthenics, martial arts, military fitness, or athletic performance, mastering the Dragon Squat is an impressive milestone.


What Is a Dragon Squat?

A Dragon Squat is an advanced single-leg squat variation where one leg supports your entire body while the opposite leg crosses behind the standing leg as you descend into a deep squat. Throughout the movement, your torso remains upright while your hips, knees, and ankles work together to maintain balance.

Unlike a Pistol Squat, the Dragon Squat places greater emphasis on rotational control, hip mobility, and balance rather than pure leg strength.

Dragon Squats are commonly used in:

  • Advanced calisthenics training
  • Martial arts conditioning
  • Functional strength workouts
  • Athletic performance programs
  • Mobility and balance training

Because of its complexity, the Dragon Squat should only be attempted after mastering basic single-leg exercises.

Benefits of Dragon Squats

Dragon Squats provide numerous athletic benefits beyond simply strengthening the legs.

Benefits include:

  • Builds exceptional single-leg strength
  • Improves balance and coordination
  • Increases hip mobility
  • Develops ankle stability
  • Strengthens the glutes and quadriceps
  • Improves lower-body control
  • Requires no equipment

Few bodyweight exercises develop lower-body strength and balance as effectively as the Dragon Squat.

Muscles Worked in Dragon Squats

Dragon Squats activate nearly every major muscle in the lower body.

Primary Muscles
  • Quadriceps
  • Gluteus Maximus
  • Gluteus Medius
Secondary Muscles
  • Hamstrings
  • Adductors
  • Calves
  • Hip Flexors
  • Core Muscles
  • Tibialis Anterior

Because of this muscle activation, Dragon Squats are one of the best exercises for developing functional lower-body strength.


How to Do a Dragon Squat (Step-by-Step)

Step 1: Stand on One Leg

Stand upright on one foot.

Maintain:

  • Chest lifted
  • Core engaged
  • Standing knee slightly unlocked
  • Eyes looking forward

Lift your non-working foot slightly off the floor.

Tip: Perform the exercise barefoot or with flat shoes for better balance.

Step 2: Cross the Free Leg Behind You

Slowly move your free leg behind your supporting leg.

Keep:

  • Your hips square
  • Torso upright
  • Your movements slow and controlled

Allow the free leg to wrap naturally behind the standing leg.

Step 3: Lower Into the Squat

Bend your supporting knee while lowering your body.

Focus on:

  • Keeping your heel firmly on the floor
  • Maintaining an upright chest
  • Controlling the descent
  • Keeping your core tight

Lower until your free knee lightly touches or comes close to the floor behind your supporting foot.

Step 4: Pause Briefly

At the bottom position:

  • Maintain your balance
  • Keep your supporting knee aligned with your toes
  • Avoid collapsing inward

Pause briefly while staying under control.

Step 5: Return to the Starting Position

Drive through your supporting heel to stand back up.

Maintain:

  • Full-body tension
  • A controlled ascent
  • Stable hips
  • Smooth movement

Complete all repetitions before switching to the opposite leg.

Warrior showcasing How to do Dragon Squats with proper form

Dragon Squat Form Checklist

Use this quick checklist to ensure perfect Dragon Squat form.

  • Keep your chest upright
  • Brace your core throughout
  • Keep your supporting heel on the floor
  • Control both the descent and ascent
  • Perform equal repetitions on both legs

Perfect form builds strength, mobility, and long-term joint health.


Common Dragon Squat Mistakes

Losing Balance

Problem: Rushing the movement causes instability.

Fix: Slow down every repetition and focus on maintaining control.

Letting the Supporting Knee Collapse Inward

Problem: Places unnecessary stress on the knee joint.

Fix: Keep your knee tracking in line with your toes throughout the movement.

Leaning Too Far Forward

Problem: Reduces balance and shifts tension away from the legs.

Fix: Keep your chest lifted and your spine neutral.

Lifting the Heel

Problem: Reduces stability and limits force production.

Fix: Keep your supporting heel planted firmly on the floor.

Attempting the Exercise Too Soon

Problem: Insufficient mobility and strength increase the risk of losing balance.

Fix: Master split squats, Bulgarian split squats, and pistol squats before progressing to Dragon Squats.

Quality repetitions always outperform rushed repetitions.


Dragon Squat Variations

Once you develop the necessary strength and mobility, these variations can help you progress safely.

Assisted Dragon Squats

The ideal beginner progression.

How to Do Assisted Dragon Squats

  • Hold onto a sturdy pole, suspension trainer, or door frame.
  • Perform the Dragon Squat while using minimal assistance for balance.
  • Gradually reduce the amount of support over time.

Partial Range Dragon Squats

Builds confidence and control.

How to Do Partial Range Dragon Squats

  • Perform the movement through a comfortable range of motion.
  • Descend only as far as your mobility allows.
  • Increase your depth gradually over time.

Deficit Dragon Squats

Increases mobility demands.

How to Do Deficit Dragon Squats

  • Stand on a low platform or sturdy step.
  • Perform a full Dragon Squat while maintaining control.
  • Return to the starting position under control.

This variation increases the available range of motion.

Weighted Dragon Squats

The most advanced progression.

How to Do Weighted Dragon Squats

  • Hold a kettlebell or dumbbell close to your chest.
  • Perform strict Dragon Squats with perfect form.
  • Maintain balance throughout every repetition.

This variation develops exceptional lower-body strength and stability.


Final Thoughts

The Dragon Squat is one of the most advanced bodyweight leg exercises you can master.

It develops:

  • Single-leg strength
  • Balance
  • Hip mobility
  • Ankle stability
  • Athletic coordination

Although the Dragon Squat requires patience to learn, the rewards are well worth the effort. Focus on mastering the movement with complete control before adding more repetitions or external resistance. Learn more about Leg Workouts here.

Perfect technique is always more important than depth or speed.

A warrior’s balance is just as powerful as his strength.

Essential Gear for Dragon Squats

Using the right equipment can make Dragon Squat training safer, more effective, and easier to progress as your strength, balance, and mobility improve.

  • Athletic Training Shoes: Provide the grip and stability needed to maintain balance while performing controlled single-leg movements. Flat, stable shoes are ideal for this exercise.
  • Resistance Bands: Perfect for warming up the hips and glutes before training, helping improve stability and movement quality throughout the exercise.
  • Parallettes or Suspension Trainer: Excellent for assisted Dragon Squats, allowing you to reduce the amount of support as your balance and strength improve.
  • Exercise Step or Plyometric Box: Ideal for performing deficit Dragon Squat variations, increasing the range of motion while maintaining proper control.
  • Kettlebell or Dumbbell: Perfect for advanced athletes looking to add resistance and continue building lower-body strength once bodyweight Dragon Squats become easier.
  • Exercise Mat: Provides a comfortable surface for warm-ups, mobility drills, and assisted Dragon Squat progressions, making practice more comfortable on hard floors.

Dragon Squat FAQ

Q1: Is the Dragon Squat harder than the Pistol Squat?
Yes. While both are advanced exercises, the Dragon Squat generally requires greater balance, hip mobility, coordination, and rotational control than the Pistol Squat.

Q2: What exercises should I master before attempting Dragon Squats?
You should first become proficient with bodyweight squats, Bulgarian split squats, lunges, step-ups, and pistol squats before attempting Dragon Squats.

Q3: Are Dragon Squats good for athletes?
Yes. Dragon Squats improve single-leg strength, balance, joint stability, mobility, and coordination, making them highly beneficial for martial artists, runners, calisthenics athletes, military personnel, and field sport athletes.

How to Do a One-Arm Plank Correctly: Step-by-Step Guide for Beginners

Learn how to do a one-arm plank with perfect form, avoid common mistakes, and discover the best one-arm plank variations to build core strength, improve shoulder stability, and develop total-body balance.

The one-arm plank is an advanced core exercise that challenges your stability by reducing your base of support. Unlike a standard plank, lifting one arm forces your core to resist rotation while your supporting arm and shoulder stabilize your entire body weight. Whether you’re training for calisthenics, military fitness, combat sports, or general athletic performance, mastering the one-arm plank will improve your balance, coordination, and core strength.


What Is a One-Arm Plank?

A one-arm plank is an advanced variation of the traditional plank performed by supporting your body with one hand while the opposite arm is extended forward or placed alongside your body.

Because only one arm supports the upper body, the exercise significantly increases the demand on your core, shoulders, and stabilizing muscles.

One-arm planks are commonly used in:

  • Calisthenics training
  • Military fitness programs
  • Functional strength workouts
  • Athletic conditioning
  • Core stability training

The one-arm plank is an excellent progression once you have mastered the standard plank.

Benefits of One-Arm Planks

One-arm planks provide numerous strength and stability benefits.

Benefits include:

  • Builds exceptional core strength
  • Improves anti-rotation stability
  • Strengthens the shoulders
  • Develops balance and coordination
  • Increases body awareness
  • Improves overall athletic performance
  • Requires no equipment

Few bodyweight exercises challenge your core and shoulder stability as effectively as the one-arm plank.

Muscles Worked in One-Arm Planks

One-arm planks engage nearly every major stabilizing muscle throughout the body.

Primary Muscles
  • Rectus Abdominis
  • Transverse Abdominis
  • Internal and External Obliques
  • Anterior Deltoids
Secondary Muscles
  • Serratus Anterior
  • Pectoralis Major
  • Triceps Brachii
  • Gluteus Maximus
  • Quadriceps
  • Lower Back Muscles

Because of this muscle activation, one-arm planks are one of the best exercises for developing full-body stability.


How to Do a One-Arm Plank (Step-by-Step)

Step 1: Begin in a High Plank

Start in a standard high plank position.

Place:

  • One hand directly beneath your shoulder
  • Feet wider than shoulder-width apart
  • Body in a straight line from head to heels

Tip: A wider foot position provides greater stability while learning the exercise.

Step 2: Brace Your Core

Before lifting your arm:

  • Tighten your abdominal muscles
  • Squeeze your glutes
  • Keep your legs straight
  • Maintain a neutral neck

Your body should remain rigid throughout the exercise.

Step 3: Lift One Arm

Slowly lift one hand off the floor.

Either:

  • Extend the arm straight in front of you
  • Keep it resting alongside your body

Avoid shifting your hips or rotating your torso.

Step 4: Hold the Position

Maintain the plank while focusing on:

  • Keeping your hips level
  • Breathing steadily
  • Maintaining shoulder stability
  • Keeping your core fully engaged

Hold for the desired amount of time.

Step 5: Return and Switch Sides

Slowly place your hand back on the floor.

Reset your position before repeating the hold on the opposite arm.

Alternate sides evenly.

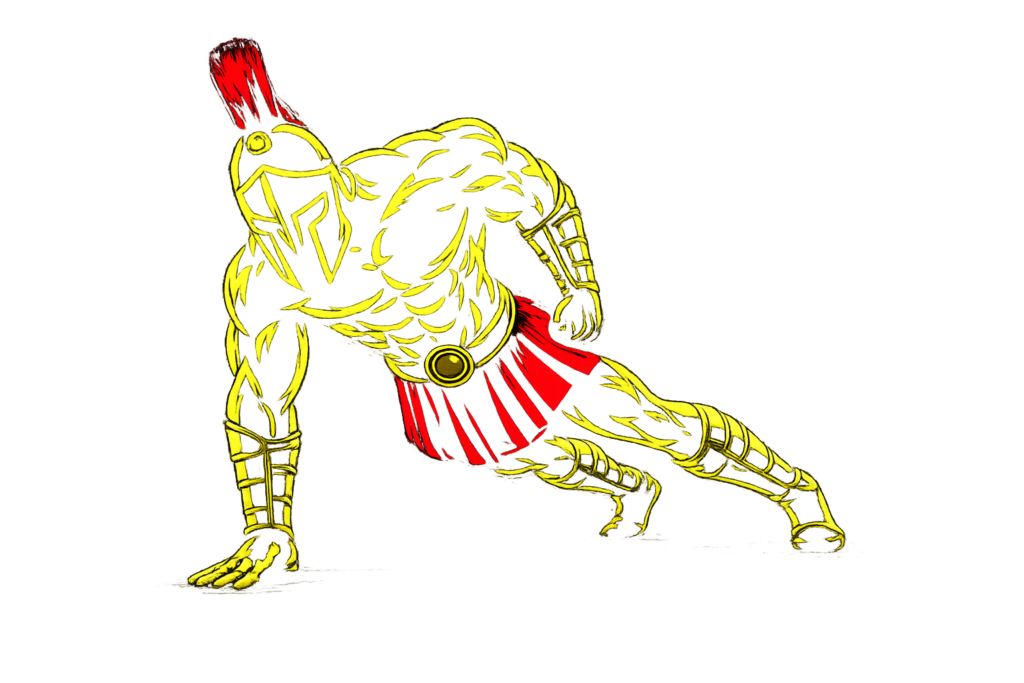
Warrior showcasing How to do a One-Arm Plank with proper form

One-Arm Plank Form Checklist

Use this quick checklist to ensure perfect one-arm plank form.

  • Keep your body straight
  • Brace your core throughout
  • Keep your hips level
  • Support yourself directly under your shoulder
  • Breathe normally during the hold

Perfect form develops greater stability while reducing unnecessary strain.


Common One-Arm Plank Mistakes

Rotating the Hips

Problem: Reduces core activation and makes the exercise less effective.

Fix: Keep your hips square to the floor throughout the hold.

Raising the Hips Too High

Problem: Reduces tension on the core.

Fix: Maintain a straight line from your head to your heels.

Letting the Hips Sag

Problem: Places unnecessary stress on the lower back.

Fix: Brace your core and squeeze your glutes throughout the exercise.

Holding Your Breath

Problem: Creates unnecessary tension and reduces endurance.

Fix: Take slow, controlled breaths throughout the hold.

Looking Forward

Problem: Places unnecessary strain on the neck.

Fix: Keep your head neutral and look at the floor a short distance in front of your supporting hand.

Controlled holds build more stability than longer holds with poor form.


One-Arm Plank Variations

Once you master the standard one-arm plank, these variations can further improve your stability and core strength.

Knee One-Arm Plank

The easiest progression.

How to Do Knee One-Arm Planks

  • Begin on your knees instead of your toes
  • Lift one hand while maintaining a straight line from your head to your knees
  • Hold under control

This variation reduces the amount of bodyweight you must stabilize.

One-Arm Plank with Shoulder Tap

Builds dynamic stability.

How to Do One-Arm Plank with Shoulder Taps

  • Begin in a high plank
  • Lift one hand and tap the opposite shoulder
  • Return to the floor and alternate sides

This variation improves coordination and anti-rotation strength.

One-Arm Side Plank

Increases oblique activation.

How to Do One-Arm Side Planks

  • Rotate into a side plank
  • Support yourself on one hand
  • Extend your free arm toward the ceiling
  • Hold under control

This variation emphasizes lateral core stability.

One-Arm Plank with Leg Lift

The most advanced progression.

How to Do One-Arm Plank with Leg Lift

  • Perform a one-arm plank
  • Lift the opposite leg slightly off the floor
  • Maintain a stable body position throughout the hold

This variation significantly increases the balance and core demands.


Final Thoughts

The one-arm plank is one of the best bodyweight exercises for building total-body stability and core strength.

It develops:

  • Core strength
  • Shoulder stability
  • Balance
  • Anti-rotation control
  • Athletic performance

Although it is an advanced exercise, mastering the one-arm plank will improve your performance in countless sports and bodyweight movements. Focus on maintaining perfect alignment rather than holding the position for excessive time. Learn more about Core Workouts here.

Quality always beats duration.

A warrior’s strength is measured by the control he maintains under pressure.

Essential Gear for One-Arm Planks

While one-arm planks require no equipment, a few training tools can make your workouts more comfortable, improve stability, and help you progress toward more advanced variations.

  • Exercise Mat: Cushions your hands, wrists, and elbows while providing a stable, non-slip surface for planks and other floor exercises.
  • Resistance Bands: Great for improving shoulder stability, strengthening the core, and assisting with progression exercises that build toward one-arm planks.
  • Medicine Ball: Adds an extra stability challenge during advanced plank variations and core training.
  • Push-Up Handles or Pallettes: Help keep your wrists in a more neutral position during high plank variations while increasing comfort during longer training sessions.

Explore more equipment recommendations in our Equipment Guides to support your core strength and bodyweight training journey.


One-Arm Plank FAQ

Q1: Is a one-arm plank harder than a regular plank?
Yes. A one-arm plank is significantly more challenging because supporting your body with one arm greatly increases the demand on your core, shoulders, and stabilizing muscles.

Q2: How long should beginners hold a one-arm plank?
Most beginners should aim to hold the position for 10-20 seconds per side for 2-4 sets while maintaining perfect form.

Q3: Do one-arm planks help improve sports performance?
Yes. One-arm planks improve balance, anti-rotation strength, shoulder stability, and core control, making them beneficial for calisthenics, martial arts, running, climbing, military fitness, and many other athletic activities.

How to Do Wall Push-Ups Correctly: Step-by-Step Guide for Beginners

Wall Push-Ups are a beginner-friendly Push-Up variation performed while standing and pressing against a wall. Because your body remains much more upright than during a standard floor Push-Up, your arms support a smaller portion of your bodyweight.

This makes Wall Push-Ups an excellent starting point for people who are not yet ready for Incline, Knee, or standard Push-Ups. They train the chest, shoulders, triceps, and supporting muscles while allowing you to learn the basic Push-Up movement with manageable resistance.

As your strength improves, you can make Wall Push-Ups more challenging by moving your feet farther from the wall before progressing to lower elevated surfaces.


What Are Wall Push-Ups?

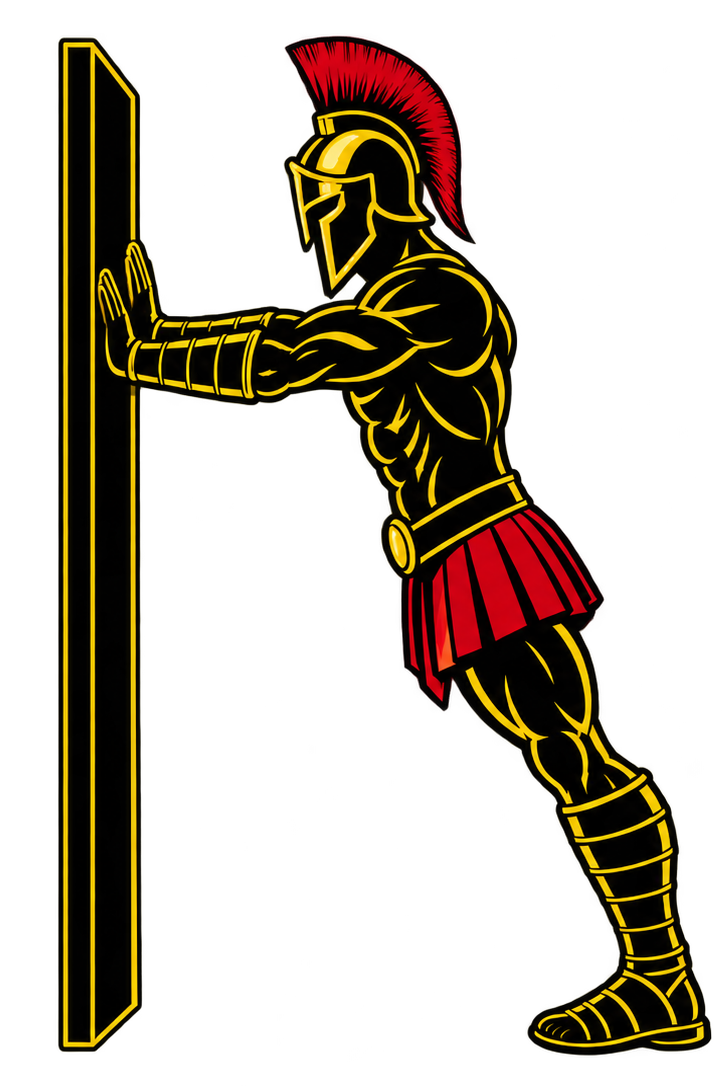
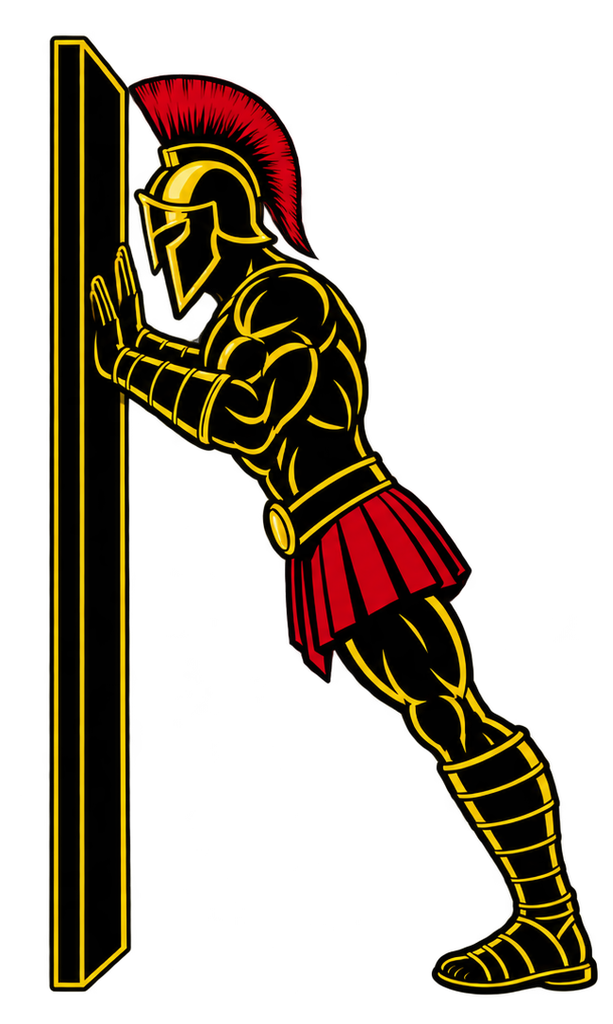
Wall Push-Ups are a bodyweight pressing exercise performed with your hands against a sturdy wall rather than on the floor.

You begin standing in front of the wall with your arms extended and hands approximately shoulder-width apart. Keeping your body controlled, you bend your elbows and bring your chest toward the wall before pressing yourself back to the starting position.

The upright body angle reduces the amount of bodyweight your upper body must move compared with lower-angle Push-Up variations.

Wall Push-Ups are commonly used in:

  • Beginner strength training
  • At-home workouts
  • Push-Up progression programs
  • Chest workouts
  • Upper-body workouts
  • Warm-up routines
  • Bodyweight training
  • Calisthenics preparation

They can also help beginners practice body alignment, elbow control, and pressing mechanics before progressing toward harder Push-Up variations.

Benefits of Wall Push-Ups

Wall Push-Ups provide an accessible introduction to bodyweight pressing while still training several major upper-body muscles.

Benefits include:

  • Strengthens the chest
  • Develops the triceps
  • Strengthens the front of the shoulders
  • Introduces the Push-Up movement pattern
  • Allows beginners to build pressing strength progressively
  • Develops basic core and body-position control
  • Places less bodyweight through the arms than floor Push-Ups
  • Requires little to no equipment
  • Provides an easy-to-adjust Push-Up progression

The exercise can be made easier by standing closer to the wall or harder by moving your feet farther away while maintaining proper form and secure footing.

Muscles Worked in Wall Push-Ups

Wall Push-Ups train the same general pushing muscles used during other Push-Up variations, although the upright position substantially reduces the resistance.

Primary Muscles
  • Pectoralis Major
  • Triceps Brachii
  • Anterior Deltoids
Secondary Muscles
  • Serratus Anterior
  • Rotator Cuff Muscles
  • Rectus Abdominis
  • Obliques
  • Forearms
  • Other Core Stabilizers

Your core helps maintain a controlled body position while your shoulder stabilizers support the pressing movement.


How to Do Wall Push-Ups (Step-by-Step)

Step 1: Choose a Stable Wall

Use a solid wall with enough clear space for both hands.

Avoid:

  • Unstable surfaces
  • Slippery surfaces
  • Doors that could unexpectedly open
  • Fragile panels
  • Areas containing objects that interfere with your movement

Make sure your shoes or feet also have secure contact with the floor.

Step 2: Position Your Hands

Face the wall and place your palms against it at approximately chest to shoulder height.

Position your hands approximately shoulder-width apart or slightly wider.

Keep your fingers comfortably spread and your hands firmly against the wall.

Step 3: Step Your Feet Back

Walk your feet backward until your body leans toward the wall with your arms extended.

The farther your feet move away from the wall, the more demanding the exercise generally becomes.

Begin with a distance that allows you to maintain complete control.

Step 4: Establish Your Starting Position

Create a relatively straight line through your head, torso, hips, and legs.

Keep your:

  • Core lightly braced
  • Glutes controlled
  • Head relatively neutral
  • Shoulders away from your ears
  • Hands firmly against the wall
  • Feet planted securely

Avoid bending excessively at the hips.

Step 5: Lower Toward the Wall

Bend your elbows and allow your body to move toward the wall as one controlled unit.

Let your elbows travel backward and outward at a comfortable angle rather than flaring directly sideways.

Bring your chest toward the wall while maintaining your body position.

Step 6: Reach Your Controlled Bottom Position

Lower until your chest approaches the wall or until you reach your comfortable range of motion.

Keep your:

  • Core engaged
  • Hips controlled
  • Heels and feet stable
  • Wrists comfortable
  • Head neutral

Do not reach your head forward just to touch the wall.

Step 7: Press Back to the Starting Position

Push firmly through your palms and extend your elbows.

Move your entire body away from the wall rather than pushing your shoulders back while leaving your hips behind.

Return to the starting position under control and repeat.

Warrior showcasing How to do Wall Push-Ups with proper form.

Wall Push-Up Form Checklist

Use this checklist to maintain proper Wall Push-Up technique.

  • Use a solid and stable wall
  • Keep your feet securely planted
  • Position your hands around chest to shoulder height
  • Keep your hands approximately shoulder-width or slightly wider
  • Maintain a controlled body line
  • Brace your core
  • Keep your head relatively neutral
  • Bend your elbows smoothly
  • Avoid excessive elbow flare
  • Lower your chest toward the wall
  • Keep your hips from sagging toward the wall
  • Avoid pushing your hips backward
  • Press evenly through both hands
  • Extend your arms under control
  • Use a controlled tempo throughout each repetition

Once you can perform Wall Push-Ups easily with consistent technique, consider progressing the exercise rather than simply performing increasingly large numbers of repetitions.


Common Wall Push-Up Mistakes

Standing Too Close to the Wall

Problem: Standing very close to the wall can make the exercise so easy that there is little challenge for your pushing muscles.

Fix: Gradually move your feet farther from the wall while maintaining secure footing and proper body alignment.

Flaring the Elbows Directly Sideways

Problem: Allowing your elbows to flare excessively can create an awkward pressing position.

Fix: Allow your elbows to travel backward and outward at a comfortable angle instead of forcing them directly sideways.

Bending at the Hips

Problem: Sending your hips backward while your upper body approaches the wall reduces the amount of bodyweight your arms must control.

Fix: Keep your torso, hips, and legs moving together as one controlled unit.

Leading With the Head

Problem: Pushing your head forward can make it appear that you have reached the wall without completing the intended range of motion.

Fix: Keep your head relatively neutral and bring your chest toward the wall.

Performing Partial Repetitions

Problem: Only bending your elbows slightly limits the range through which your pushing muscles work.

Fix: Use the deepest comfortable range you can control while maintaining proper alignment.

Rushing the Repetitions

Problem: Dropping quickly toward the wall and bouncing back reduces muscular control.

Fix: Lower yourself deliberately, briefly control the bottom position, and press back smoothly.

Using an Unstable Surface

Problem: Performing Wall Push-Ups against a door or unstable object can cause the surface to move unexpectedly.

Fix: Use a solid, stationary wall that can safely support the force you apply to it.


Wall Push-Up Progressions and Variations

Wall Push-Ups can be adjusted according to your current strength and used as the beginning of a complete Push-Up progression.

Close-Grip Wall Push-Up

Bringing your hands closer together changes the pressing position and can increase the demand on the triceps.

How to Do Close-Grip Wall Push-Ups

  • Stand facing a sturdy wall.
  • Place your hands closer than shoulder-width apart.
  • Step your feet backward into a comfortable lean.
  • Brace your core and maintain a controlled body line.
  • Bend your elbows and lower toward the wall.
  • Press through your palms to extend your arms.
  • Repeat while keeping your elbows controlled.

Wide-Grip Wall Push-Up

This variation uses a moderately wider hand position.

How to Do Wide-Grip Wall Push-Ups

  • Face the wall and establish secure footing.
  • Place your hands moderately wider than shoulder-width.
  • Step backward until your body leans toward the wall.
  • Brace your core and maintain body alignment.
  • Lower your chest toward the wall.
  • Avoid excessively flaring your elbows.
  • Press back to the starting position under control.

Do not place your hands as wide as possible. Use a comfortable width that allows smooth shoulder movement.

Slow-Tempo Wall Push-Up

Slowing each repetition increases time under tension and helps reinforce technique.

How to Do Slow-Tempo Wall Push-Ups

  • Set up in your normal Wall Push-Up position.
  • Brace your core and maintain a straight body line.
  • Lower yourself slowly for several seconds.
  • Reach your controlled bottom position.
  • Pause briefly near the wall.
  • Press yourself away smoothly.
  • Repeat without rushing between repetitions.

Single-Arm Assisted Wall Push-Up

This progression shifts more work toward one arm while the opposite hand continues providing assistance.

How to Do Single-Arm Assisted Wall Push-Ups

  • Place both hands against the wall.
  • Position one hand normally and the assisting hand farther outward or in a less advantageous position.
  • Keep your feet stable and brace your core.
  • Shift more of the pressing demand toward the working arm.
  • Lower your body toward the wall under control.
  • Press yourself back to the starting position.
  • Train both sides evenly.

Avoid excessive torso rotation while using this progression.

Incline Push-Up

Incline Push-Ups are a natural next progression after Wall Push-Ups because lowering the hand position increases the amount of bodyweight supported by the upper body.

How to Do Incline Push-Ups

  • Choose a sturdy elevated surface.
  • Place your hands approximately shoulder-width apart.
  • Walk your feet backward until your body forms a straight line.
  • Brace your core and glutes.
  • Lower your chest toward the elevated surface.
  • Press through your hands until your arms extend.
  • Gradually use lower surfaces as your strength improves.

Final Thoughts

Wall Push-Ups are a simple and effective starting point for learning the Push-Up movement pattern and developing basic upper-body pressing strength.

They develop:

  • Chest strength
  • Triceps strength
  • Shoulder strength
  • Basic core stability
  • Body-position control
  • Pressing technique
  • Push-Up confidence
  • Foundational bodyweight strength

Start at a distance from the wall that allows controlled repetitions. As the exercise becomes easier, move your feet farther away or progress to an Incline Push-Up on a sturdy elevated surface.

The long-term goal should be progressive resistance rather than simply accumulating hundreds of easy repetitions. Gradually moving from Wall Push-Ups to lower Incline Push-Ups, Knee Push-Ups when appropriate, and eventually standard Push-Ups can provide a clear progression path. Learn more about Push Workouts here.

Essential Gear for Wall Push-Ups

Wall Push-Ups require almost no equipment, making them particularly convenient for home workouts.

  • Stable Wall: A solid, stationary wall with enough clear space for your hands is the primary requirement.
  • Training Shoes: Shoes with reliable traction can help prevent your feet from slipping as you increase your distance from the wall.
  • Exercise Mat: An optional mat can provide a defined training area and may improve comfort depending on the floor surface.
  • Push-Up Handles: Help keep your wrists in a more neutral position, reducing strain and making the transition to incline and standard push-ups more comfortable.
  • Wrist Wraps: Provide additional wrist support and stability during higher-volume push-up training or for individuals who experience mild wrist discomfort while performing pressing exercises.

Wall Push-Up FAQ

Q1: How many Wall Push-Ups should a beginner do?
A practical starting point is around 8–15 controlled repetitions for 2–3 sets. Adjust the number of repetitions and your distance from the wall according to your current strength and technique.

Q2: How far should I stand from the wall?
There is no single correct distance because body proportions and strength differ. Start close enough to perform controlled repetitions, then gradually move your feet farther away as the exercise becomes easier.

Q3: When should I progress from Wall Push-Ups?
When you can perform your Wall Push-Ups comfortably with consistent technique and the exercise no longer provides much challenge, progress by increasing your lean or moving to Incline Push-Ups on a stable elevated surface.

Q4: Are Wall Push-Ups easier than Knee Push-Ups?
Wall Push-Ups are generally easier because your body remains much more upright and your upper body supports a smaller proportion of your weight. The exact difficulty depends on your setup and body position.

Q5: Can Wall Push-Ups help me perform regular Push-Ups?
Yes. They can teach basic pressing mechanics and build initial chest, shoulder, and triceps strength. Progressively moving from the wall to lower elevated surfaces and eventually floor-based Push-Up variations can help you work toward standard Push-Ups.


How to Do an Active Hang Correctly: Step-by-Step Guide for Beginners

Learn how to do an active hang with perfect form, avoid common mistakes, and discover the best active hang variations to build stronger shoulders, improve grip strength, and develop the foundation for pull-ups, muscle-ups, and advanced calisthenics skills.

The active hang is one of the most important foundational exercises in calisthenics. While it may look similar to a dead hang, the active hang requires you to engage your shoulders and upper back throughout the movement. This develops the scapular strength and stability needed for safe, powerful pulling exercises.

Whether you’re training for pull-ups, climbing, gymnastics, or military fitness, mastering the active hang is essential.


What Is an Active Hang?

An active hang is a bodyweight exercise where you hang from a pull-up bar with your arms fully extended while actively depressing and slightly retracting your shoulder blades. Unlike a dead hang, your shoulders remain engaged rather than relaxed.

This creates a stable shoulder position and strengthens the muscles responsible for controlling your scapulae during pulling movements.

Active hangs are commonly used in:

  • Pull-up progression programs
  • Calisthenics training
  • Gymnastics strength development
  • Climbing preparation
  • Shoulder stability routines

The active hang serves as the bridge between a passive dead hang and the first phase of a pull-up.

Benefits of Active Hangs

Active hangs are one of the best exercises for developing healthy, strong shoulders.

Benefits include:

  • Improves shoulder stability
  • Strengthens the scapular muscles
  • Builds grip strength and endurance
  • Enhances pull-up performance
  • Reduces shoulder instability during pulling exercises
  • Improves body awareness and control

Few exercises prepare your shoulders for pull-ups as effectively as active hangs.

Muscles Worked in Active Hangs

Active hangs activate numerous muscles throughout the upper body.

Primary Muscles
  • Latissimus Dorsi
  • Lower Trapezius
  • Serratus Anterior
Secondary Muscles
  • Rhomboids
  • Rotator Cuff Muscles
  • Forearm Flexors
  • Biceps
  • Rear Deltoids
  • Core Muscles

Because of this muscle activation, active hangs are one of the best exercises for developing shoulder control and pulling strength.


How to Do an Active Hang (Step-by-Step)

Step 1: Grip the Pull-Up Bar

Grab the pull-up bar with:

  • Hands slightly wider than shoulder-width apart
  • Overhand grip
  • Thumbs wrapped securely around the bar

Allow your body to hang with your arms fully extended.

Tip: Begin in a dead hang before activating your shoulders.

Step 2: Engage Your Core

Before activating your shoulders:

  • Brace your abdominal muscles
  • Keep your legs together
  • Point your toes slightly downward
  • Keep your neck neutral

Avoid excessive swinging.

Step 3: Activate Your Shoulders

Without bending your elbows:

  • Pull your shoulder blades downward
  • Slightly draw your shoulder blades together
  • Lift your body just a few centimeters

Your arms should remain completely straight.

This small movement is driven entirely by your shoulder blades—not your elbows.

Step 4: Hold the Position

Maintain the active hang by:

  • Keeping your shoulders depressed
  • Maintaining straight elbows
  • Breathing steadily
  • Staying completely controlled

Hold for the desired amount of time.

Step 5: Return to a Dead Hang

Slowly relax your shoulder muscles.

Allow:

  • Your shoulders to elevate naturally
  • Your body to return to a passive dead hang

Repeat for the desired number of repetitions or hold duration.

Warrior showcasing How to do an Active Hang with proper form

Active Hang Form Checklist

Use this quick checklist to ensure perfect active hang form.

  • Keep your elbows completely straight
  • Pull your shoulders down away from your ears
  • Brace your core
  • Avoid swinging
  • Maintain smooth, controlled breathing

Perfect form develops stronger shoulders and safer pulling mechanics.


Common Active Hang Mistakes

Bending the Elbows

Problem: Turns the exercise into the beginning of a pull-up.

Fix: Keep your elbows fully locked throughout the movement.

Shrugging the Shoulders

Problem: Reduces scapular engagement.

Fix: Actively pull your shoulders away from your ears.

Using Momentum

Problem: Reduces muscle activation.

Fix: Perform slow, controlled shoulder movements without swinging.

Holding Your Breath

Problem: Increases unnecessary tension.

Fix: Breathe naturally throughout each hold.

Activating Too Aggressively

Problem: Causes excessive tension and poor mechanics.

Fix: Lift your body only slightly by engaging your shoulder blades, not by pulling with your arms.

Small, controlled movements develop stronger shoulders than exaggerated ones.


Active Hang Variations

Once you master the standard active hang, these progressions can further improve your pulling strength.

Dead Hangs

The easiest progression.

How to Do Dead Hangs

  • Hang with your arms fully extended
  • Allow your shoulders to relax naturally
  • Hold for time

This variation develops grip strength and shoulder mobility.

Scapular Pull-Ups

Builds scapular strength dynamically.

How to Do Scapular Pull-Ups

  • Begin in an active hang
  • Lower into a dead hang
  • Pull your shoulders down again without bending your elbows
  • Repeat for repetitions

This variation strengthens the initial phase of every pull-up.

Active Hang Shoulder Taps

Improves shoulder stability.

How to Do Active Hang Shoulder Taps

  • Hold an active hang
  • Briefly release one hand to touch your shoulder if your strength allows
  • Re-grip the bar and repeat on the opposite side

This advanced variation develops exceptional shoulder control.

Weighted Active Hangs

The most challenging progression.

How to Do Weighted Active Hangs

  • Wear a weighted vest or attach weight using a dip belt
  • Perform a strict active hang
  • Maintain shoulder engagement throughout

This variation develops elite scapular strength and pulling stability.


Final Thoughts

The active hang is one of the most overlooked yet essential exercises in calisthenics.

It builds:

  • Shoulder stability
  • Scapular control
  • Grip strength
  • Pull-up readiness
  • Joint resilience

Although the movement is small, its impact on your pulling strength is enormous. Mastering the active hang will improve nearly every upper-body pulling exercise you perform. Learn more about Pull Workouts here.

Focus on controlled shoulder movement, straight elbows, and consistent practice.

A warrior’s pull begins long before the first repetition—it begins with complete control of the shoulders.

Essential Gear for Active Hangs

Using the right equipment can improve your shoulder engagement, enhance grip endurance, and help you build the strength needed for pull-ups and other advanced pulling exercises.

  • Pull-Up Bar: The essential piece of equipment for performing active hangs. Choose a sturdy doorway, wall-mounted, or freestanding pull-up bar that allows you to hang with your arms fully extended.
  • Resistance Bands: Excellent for beginners who need assistance maintaining proper shoulder engagement while developing scapular strength and stability.
  • Gymnastics Rings: Allow your hands to rotate naturally, reducing wrist strain while improving shoulder stability and control during active hangs.
  • Weighted Vest or Dip Belt: Ideal for advanced athletes who want to increase resistance and further develop grip strength, scapular control, and upper-body stability.
  • Gym Chalk or Liquid Chalk: Helps improve grip by reducing moisture on your hands, allowing you to focus on maintaining proper shoulder position instead of worrying about slipping.

Active Hang FAQ

Q1: What is the difference between an active hang and a dead hang?
A dead hang allows your shoulders to relax and elevate naturally, while an active hang keeps your shoulder blades depressed and slightly retracted. Dead hangs primarily improve grip strength and shoulder mobility, whereas active hangs develop shoulder stability and prepare you for pull-ups.

Q2: Should my elbows bend during an active hang?
No. Your elbows should remain fully extended throughout the exercise. The movement comes entirely from your shoulder blades, not your arms.

Q3: How long should beginners hold an active hang?
Most beginners should aim for 10-20 seconds per set for 2-4 sets. As your shoulder strength improves, gradually increase your hold time to 30-60 seconds while maintaining perfect form.