How to Do Hanging Leg Raises Correctly: Step-by-Step Guide for Beginners

Learn how to do hanging leg raises with perfect form, avoid common mistakes, and discover the best hanging leg raise variations to build a stronger core, improve grip strength, and develop exceptional body control.

Hanging leg raises are one of the most effective bodyweight core exercises for developing the lower abdominals, hip flexors, and grip strength. Whether you are training for calisthenics, military fitness, gymnastics, or athletic performance, mastering hanging leg raises is essential.


What Are Hanging Leg Raises?

A hanging leg raise is a bodyweight exercise performed while hanging from a pull-up bar, where you raise your straight legs until they are parallel to the floor or higher while keeping your body under control.

Hanging leg raises are considered one of the best core exercises because they challenge the abdominals through a large range of motion while requiring significant grip strength and shoulder stability.

Hanging leg raises are commonly used in:

  • Calisthenics training
  • Gymnastics programs
  • Military fitness preparation
  • Core strengthening routines

Unlike floor-based abdominal exercises, hanging leg raises train the core while your body resists swinging, making them highly functional.

Benefits of Hanging Leg Raises

Hanging leg raises are one of the most effective exercises for building functional core strength.

Benefits include:

  • Builds powerful lower abdominal muscles
  • Improves grip strength
  • Strengthens the hip flexors
  • Enhances shoulder stability
  • Develops body control
  • Improves performance in advanced calisthenics skills

Few bodyweight exercises develop core strength as effectively as hanging leg raises.

Muscles Worked in Hanging Leg Raises

Hanging leg raises activate several muscles throughout the body simultaneously.

Primary Muscles
  • Rectus Abdominis
  • Hip Flexors
Secondary Muscles
  • Transverse Abdominis
  • Internal and External Obliques
  • Forearms and Grip Muscles
  • Latissimus Dorsi
  • Anterior Deltoids
  • Serratus Anterior

Because of this muscle activation, hanging leg raises are one of the best exercises for building a strong and stable core.


How to Do Hanging Leg Raises (Step-by-Step)

Step 1: Grip the Pull-Up Bar

Grab the pull-up bar with:

  • Hands approximately shoulder-width apart
  • Palms facing away from you
  • A firm, secure grip

Tip: Use an active hang by pulling your shoulders slightly down instead of relaxing completely.

Step 2: Start in an Active Hang

Begin with:

  • Arms fully extended
  • Legs together
  • Core engaged
  • Body completely still

Avoid swinging before beginning the movement.

Step 3: Raise Your Legs

Keeping your legs as straight as possible, lift them in front of your body.

Focus on:

  • Using your abdominal muscles
  • Keeping your knees extended
  • Moving slowly and under control

Raise your legs until they reach at least parallel to the floor.

Step 4: Pause at the Top

At the highest position:

  • Briefly squeeze your abdominal muscles
  • Keep your body stable
  • Avoid swinging backward

Maintain full control before lowering.

Step 5: Lower With Control

Slowly lower your legs back to the starting position.

Return to a stable active hang before beginning the next repetition.
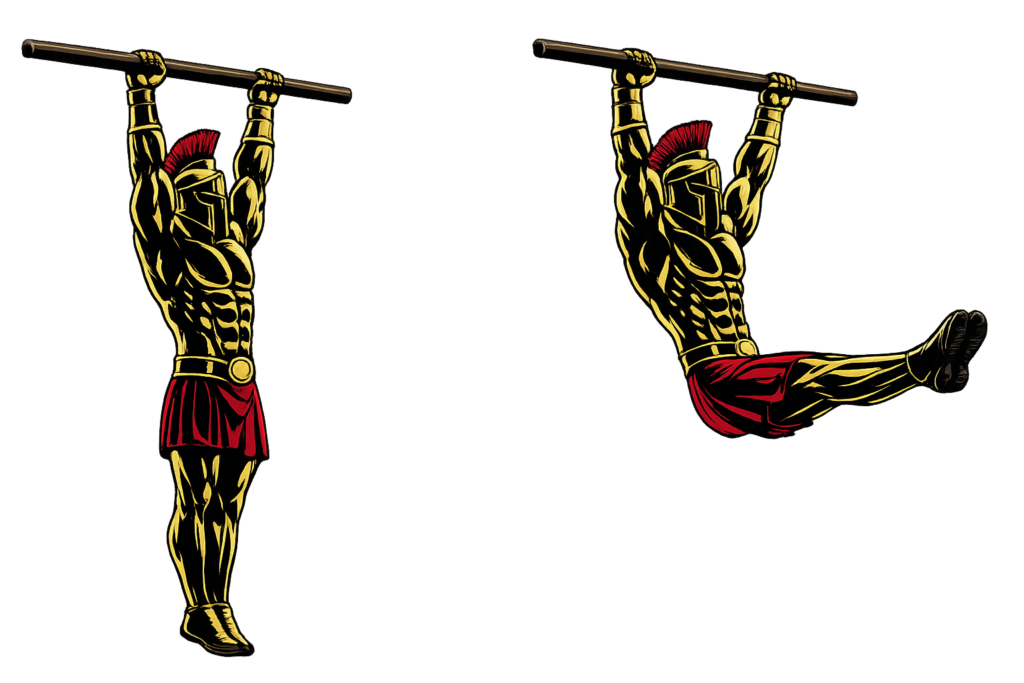
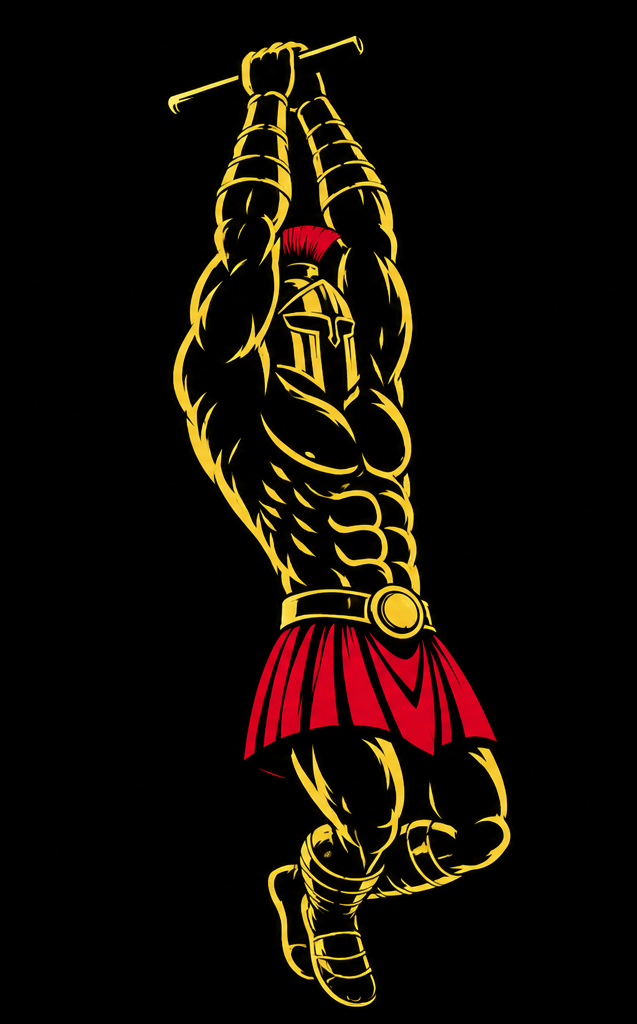
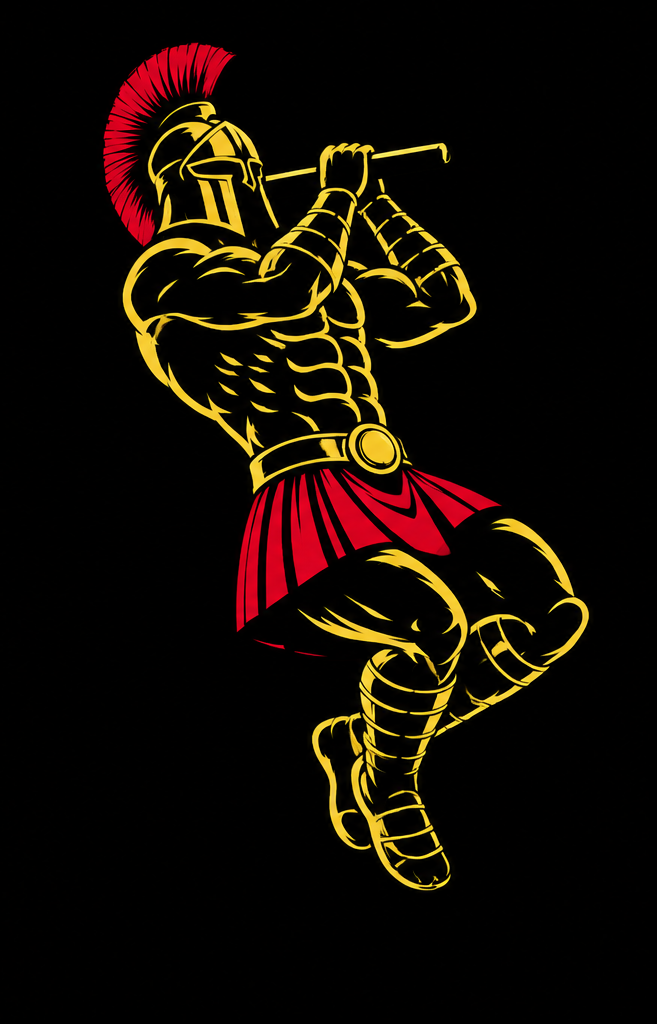
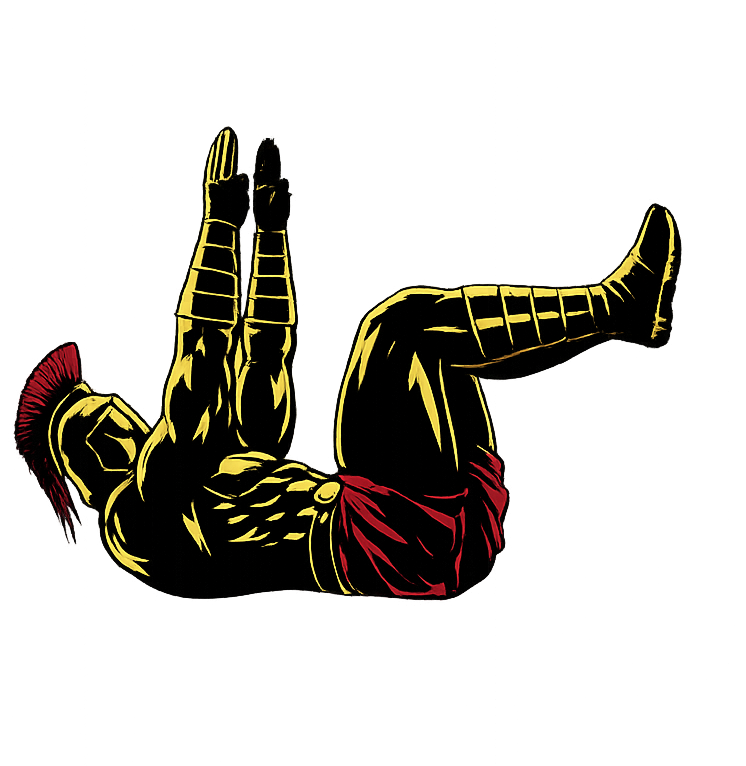
Warrior showcasing How to do Hanging Leg Raises with proper form

Hanging Leg Raise Form Checklist

Use this quick checklist to ensure perfect hanging leg raise form.

  • Start from an active hang
  • Keep your legs together
  • Raise your legs using your core
  • Minimize swinging
  • Control every repetition

Perfect form builds stronger abs and better body control.


Common Hanging Leg Raise Mistakes

Swinging the Body

Problem: Momentum reduces core activation.

Fix: Pause between repetitions until your body becomes still.

Bending the Knees Excessively

Problem: Makes the exercise easier and reduces abdominal demand.

Fix: Keep your legs as straight as your mobility allows.

Using Momentum

Problem: Transfers the workload away from the core.

Fix: Lift and lower your legs under complete control.

Lowering Too Quickly

Problem: Reduces time under tension.

Fix: Lower your legs slowly over two to three seconds.

Shrugging the Shoulders

Problem: Places unnecessary stress on the neck and shoulders.

Fix: Keep your shoulders active by pulling them slightly downward throughout the exercise.

Controlled repetitions always build more strength than fast ones.


Hanging Leg Raise Variations

Once you master the basic hanging leg raise, different variations can help increase strength and develop advanced core control.

Hanging Knee Raises

The easiest progression.

How to Do Hanging Knee Raises

  • Bend your knees
  • Raise them toward your chest
  • Lower under control

This variation builds the foundational strength needed for straight-leg raises.

Alternating Hanging Leg Raises

Improves coordination and unilateral strength.

How to Do Alternating Hanging Leg Raises

  • Raise one straight leg at a time
  • Alternate sides
  • Minimize body movement

This variation develops better balance and control.

Toes-to-Bar

An advanced progression.

How to Do Toes-to-Bar

  • Raise your straight legs until your toes touch the pull-up bar
  • Keep the movement controlled
  • Lower slowly

This variation requires exceptional core strength and flexibility.

L-Sit Leg Raises

Develops static and dynamic core strength.

How to Do L-Sit Leg Raises

  • Hold an L-sit position while hanging
  • Perform small controlled leg raises
  • Maintain full-body tension

This variation significantly increases core and hip flexor demand.


Final Thoughts

Hanging leg raises are one of the most effective bodyweight core exercises you can master.

They build:

  • Core strength
  • Lower abdominal development
  • Grip strength
  • Hip flexor strength
  • Functional body control

Progress may feel challenging at first because hanging leg raises demand strength, coordination, and stability simultaneously. However, with consistent training and proper technique, your core strength and athletic performance will steadily improve. Learn more about Core Workouts here.

Every controlled repetition builds a stronger foundation than a rushed set.

Focus on smooth movement, minimal swinging, and full-body tension.

A warrior controls every inch of every movement.

Essential Gear for Hanging Leg Raises

While hanging leg raises only require a pull-up bar, the right equipment can improve your grip, increase comfort, and help you progress toward more advanced hanging core exercises.

  • Pull-Up Bar: The essential piece of equipment for hanging leg raises, providing a sturdy platform to build core strength, grip endurance, and full-body control.
  • Wrist Wraps: Provide additional wrist support during hanging exercises, helping improve comfort and stability during longer training sessions.
  • Resistance Bands: Excellent for assisted hanging exercises, improving grip endurance, and progressing toward hanging leg raises, toes-to-bar, and other advanced calisthenics skills.
  • Exercise Mat: Cushions your landing area and provides a comfortable surface for warm-ups, mobility work, and core exercises before or after hanging leg raises.
  • Lifting Straps: Help reduce grip fatigue during high-volume hanging training, allowing you to focus more on your core when appropriate.

Explore more equipment recommendations in our Equipment Guides to support your core strength and calisthenics training journey.


Hanging Leg Raise FAQ

Q1: Are hanging leg raises better than lying leg raises?
Yes. Hanging leg raises are generally more challenging because they require greater core activation, grip strength, and shoulder stability while eliminating support from the floor.

Q2: How many hanging leg raises should beginners do?
Most beginners should start with 6-10 controlled repetitions for 2-4 sets. If straight-leg raises are too difficult, begin with hanging knee raises.

Q3: Do hanging leg raises build visible abs?
Yes. Hanging leg raises strengthen the entire abdominal wall, particularly the lower portion of the rectus abdominis. Combined with proper nutrition and a healthy body fat percentage, they can help develop more defined abdominal muscles.
How to Do a Dead Bug Correctly: Step-by-Step Guide for Beginners

Learn how to do a dead bug with perfect form, avoid common mistakes, and discover the best dead bug variations to build a stronger core, improve stability, and enhance total-body coordination.

The dead bug is one of the most effective bodyweight core exercises for developing abdominal strength, spinal stability, and movement coordination. Whether you are training for military fitness, calisthenics, strength training, or injury prevention, mastering the dead bug is essential.


What Is a Dead Bug?

A dead bug is a bodyweight core exercise performed while lying on your back, where you simultaneously lower one arm and the opposite leg while keeping your lower back pressed firmly against the floor.

The dead bug is considered one of the best core stability exercises because it strengthens the deep abdominal muscles while teaching your body to resist unwanted spinal movement.

Dead bugs are commonly used in:

  • Core strengthening programs
  • Athletic performance training
  • Rehabilitation and injury prevention
  • Calisthenics and strength training

Unlike traditional abdominal exercises that emphasize spinal flexion, the dead bug focuses on anti-extension, making it highly effective for building a stable and resilient core.

Benefits of Dead Bugs

Dead bugs are one of the most effective exercises for developing functional core strength.

Benefits include:

  • Strengthens the deep core muscles
  • Improves spinal stability
  • Enhances coordination and balance
  • Helps reduce lower back discomfort
  • Improves posture
  • Requires no equipment

Few bodyweight exercises build core stability as effectively as the dead bug.

Muscles Worked in Dead Bugs

Dead bugs activate several muscles throughout the core and lower body.

Primary Muscles
  • Transverse Abdominis
  • Rectus Abdominis
  • Internal and External Obliques
Secondary Muscles
  • Hip Flexors
  • Erector Spinae
  • Serratus Anterior
  • Quadriceps
  • Shoulder Stabilizers

Because of this muscle activation, dead bugs are one of the best exercises for improving core endurance and movement control.


How to Do a Dead Bug (Step-by-Step)

Step 1: Lie on Your Back

Begin with:

  • Knees bent to approximately 90 degrees
  • Hips bent to 90 degrees
  • Arms extended straight toward the ceiling
  • Lower back pressed firmly into the floor
  • Core engaged

Tip: Imagine pressing your belly button toward the floor throughout the exercise.

Step 2: Brace Your Core

Before moving:

  • Tighten your abdominal muscles
  • Maintain steady breathing
  • Keep your lower back flat against the floor

Your spine should remain neutral throughout the movement.

Step 3: Extend Opposite Arm and Leg

Slowly lower one arm behind your head while simultaneously extending the opposite leg toward the floor.

Focus on:

  • Moving both limbs at the same speed
  • Keeping your lower back pressed into the floor
  • Performing the movement slowly and under control

Only lower your leg as far as you can without lifting your lower back.

Step 4: Return to the Starting Position

Bring your arm and leg back to the starting position.

At this stage:

  • Maintain full-body control
  • Keep your core tight
  • Avoid rushing the movement

Pause briefly before switching sides.

Step 5: Repeat on the Opposite Side

Lower the opposite arm and leg while maintaining the same controlled movement.

Continue alternating sides for the desired number of repetitions.

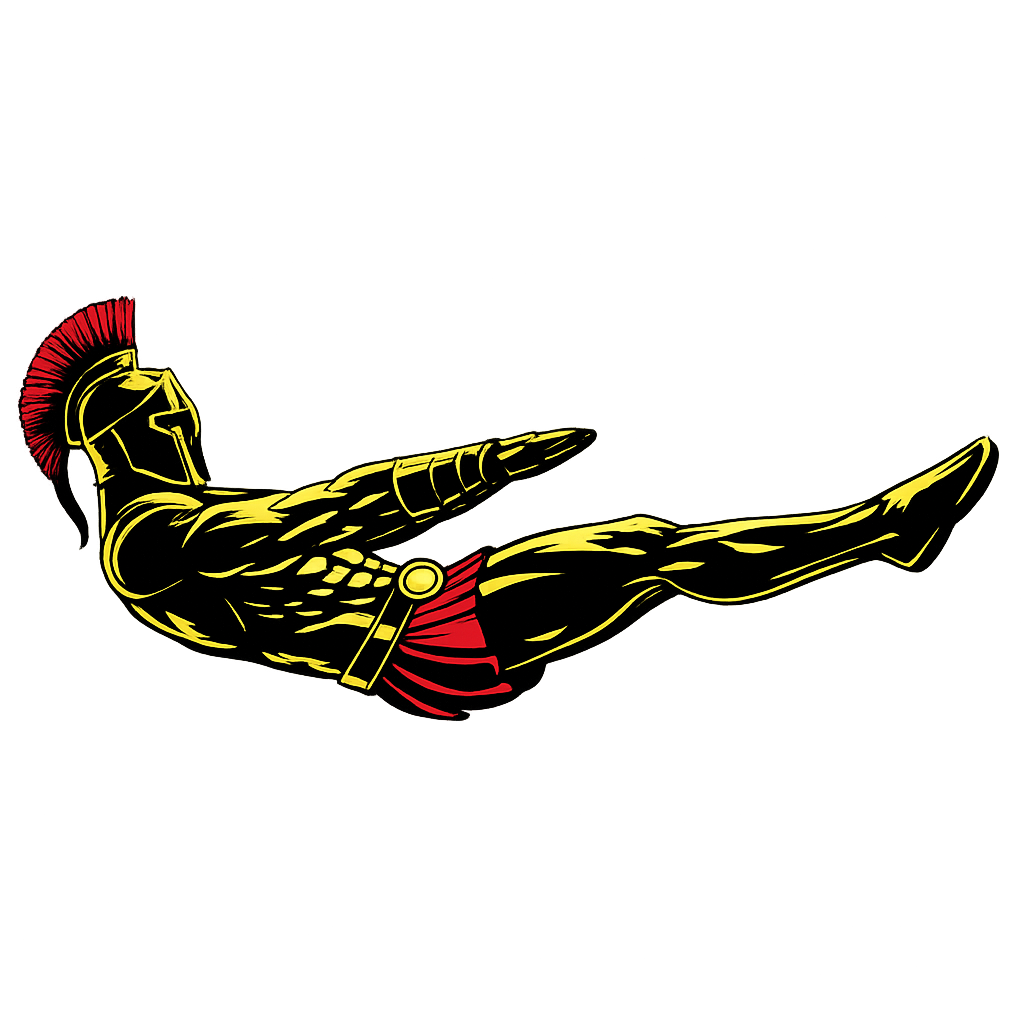
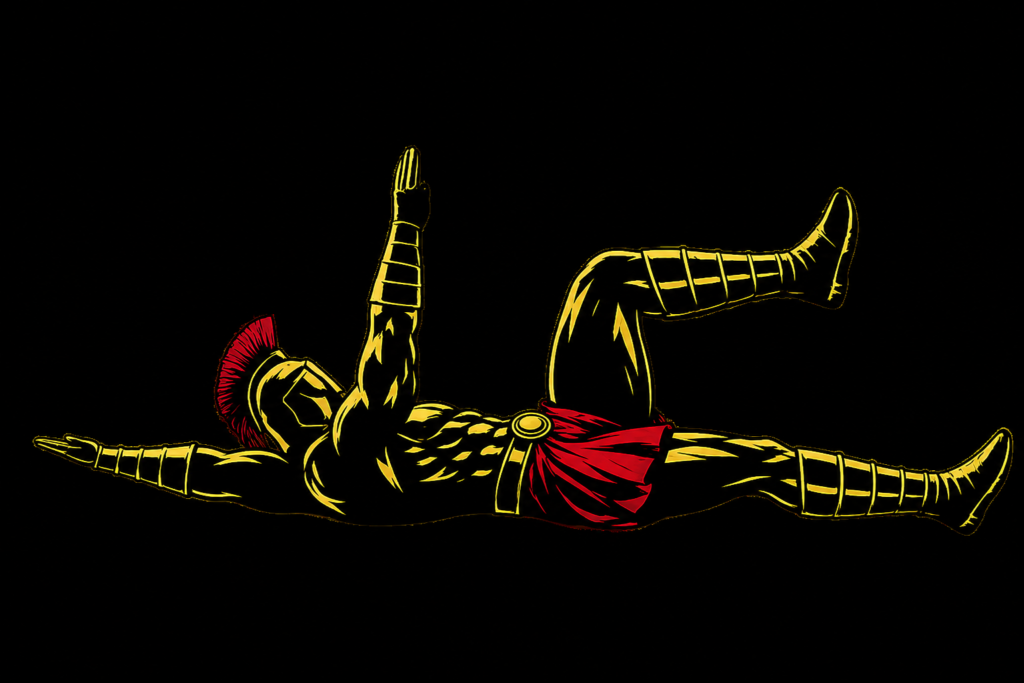
Warrior showcasing How to do a Dead Bug with proper form

Dead Bug Form Checklist

Use this quick checklist to ensure perfect dead bug form.

  • Keep your lower back pressed into the floor
  • Move slowly and with control
  • Keep your core fully engaged
  • Coordinate opposite arm and leg movement
  • Maintain steady breathing

Perfect form develops stronger core stability and better movement control.


Common Dead Bug Mistakes

Letting the Lower Back Arch

Problem: Reduces core activation and places stress on the spine.

Fix: Keep your lower back firmly pressed into the floor throughout every repetition.

Moving Too Quickly

Problem: Reduces stability and coordination.

Fix: Perform each repetition slowly and deliberately.

Lowering the Leg Too Far

Problem: Causes the lower back to lift off the floor.

Fix: Only extend your leg as far as you can while maintaining proper spinal position.

Holding Your Breath

Problem: Increases tension and reduces endurance.

Fix: Breathe naturally throughout each repetition.

Bending the Arms or Legs Excessively

Problem: Changes the intended movement pattern.

Fix: Keep your movements smooth while maintaining the recommended joint angles.

Controlled repetitions always beat fast repetitions.


Dead Bug Variations

Once you master the basic dead bug, different variations can help improve core strength and stability.

Bent-Knee Dead Bug

A beginner-friendly variation.

How to Do a Bent-Knee Dead Bug

  • Lower only your arms while keeping both knees bent
  • Alternate sides
  • Focus on maintaining spinal stability

This variation reduces the difficulty while reinforcing proper technique.

Straight-Leg Dead Bug

Increases the challenge.

How to Do a Straight-Leg Dead Bug

  • Keep both legs straight throughout the movement
  • Alternate opposite arm and leg
  • Maintain lower-back contact with the floor

This variation increases core demand.

Stability Ball Dead Bug

Improves coordination.

How to Do a Stability Ball Dead Bug

  • Hold a stability ball between your hands and knees
  • Extend the opposite arm and leg
  • Maintain pressure on the ball throughout

This variation improves total-body coordination.

Resistance Band Dead Bug

An advanced progression.

How to Do a Resistance Band Dead Bug

  • Attach a resistance band overhead
  • Hold the band while performing the dead bug movement
  • Maintain constant tension throughout

This variation increases upper-body and core engagement.


Final Thoughts

The dead bug is one of the most effective exercises you can master for developing a strong, stable core.

It builds:

  • Core strength
  • Spinal stability
  • Coordination
  • Balance
  • Functional athletic control

Progress may seem gradual because the dead bug focuses on stability rather than heavy resistance. However, with consistent practice and proper form, your core strength, posture, and movement quality will steadily improve. Learn more about Core Workouts here.

A strong core is built through control, not speed.

Focus on smooth repetitions, steady breathing, and complete body control.

A warrior’s power begins with an unshakable foundation.

Essential Gear for Dead Bugs

Using the right equipment can make dead bug training more comfortable, effective, and easier to progress as your core strength and stability improve.

  • Exercise Mat: The most essential piece of equipment for dead bugs. It provides a comfortable, cushioned surface that supports your back and elbows while performing the exercise on the floor.
  • Resistance Bands: Perfect for resistance band dead bug variations, adding upper-body tension and increasing the challenge to your core stability.
  • Stability Ball: Ideal for stability ball dead bug variations, helping improve coordination, balance, and total-body control.
  • Foam Roller: Excellent for loosening tight hip flexors and improving mobility before core training, allowing for smoother and more controlled movement.
  • Yoga Block: Useful for beginners learning proper core bracing by placing it between the hands and knees, encouraging better body awareness and control during the exercise.

Dead Bug FAQ

Q1: Is the dead bug good for beginners?
Yes. The dead bug is one of the safest and most effective beginner core exercises because it teaches spinal stability while strengthening the deep abdominal muscles.

Q2: How many dead bugs should I do?
Most beginners should perform 8-12 repetitions per side for 2-4 sets while maintaining perfect form.

Q3: Does the dead bug help reduce lower back pain?
Yes. When performed correctly, the dead bug strengthens the core muscles that stabilize the spine, which can help reduce lower back discomfort and improve posture. Always consult a healthcare professional if you have persistent or severe back pain.

At-Home Six-Pack Workout Plan

Getting a visible six-pack is about more than doing endless crunches. It requires building strong abdominal muscles while reducing overall body fat through consistent training, proper nutrition, and recovery.

This At-Home Six-Pack Workout Plan combines targeted core exercises, full-body workouts, cardio sessions, and mobility training to strengthen your entire core while maximizing calorie burn. Whether you’re just starting your fitness journey or looking to finally reveal your abs, this program provides a structured approach to achieving a lean, athletic physique.

Benefits of an At-Home Six-Pack Workout Plan

  • Builds stronger and more defined abdominal muscles
  • Burns calories to support fat loss
  • Strengthens the entire core
  • Improves posture and spinal stability
  • Enhances athletic performance
  • Develops endurance and functional strength
  • Requires little to no equipment

What Does It Take to Get a Six-Pack?

Visible abs are built through two key factors:

  • Developing your abdominal muscles through progressive core training.
  • Reducing body fat through proper nutrition and regular exercise.

This workout plan focuses on both by combining direct ab training with full-body conditioning and cardio to maximize fat burning.

Equipment Needed

This workout requires minimal equipment.


How Long Will It Take to Achieve a Six-Pack?

The time required depends mainly on your starting body fat percentage, nutrition, training consistency, sleep, and genetics.

Typical timelines are:

Starting Body FatEstimated Time*
25–30%6–12 months
20–25%4–8 months
15–20%2–5 months
Below 15%1–3 months

*These estimates assume consistent training, a calorie-controlled diet, adequate protein intake, and proper recovery.

For most men, visible abs begin to appear around 10–15% body fat. For most women, visible abdominal definition generally appears around 18–22% body fat, though this varies by individual.


Weekly Training Structure

Option 1 – 3-Day Beginner Split

  • Monday – Upper Abs + Cardio
  • Wednesday – Lower Abs + Full Body
  • Friday – Core Stability + HIIT

Option 2 – 6-Day Six-Pack Split

  • Monday – Upper Abs
  • Tuesday – Lower Abs
  • Wednesday – Obliques & Cardio
  • Thursday – Upper Abs + HIIT
  • Friday – Lower Abs + Core Stability
  • Saturday – Full Core Circuit + Cardio
  • Sunday – Rest

The 6-day option provides higher training frequency for faster core development while allowing one full recovery day.


Pre-Workout Stretch & Warm-Up Routine

Perform this warm-up before every workout (5–8 minutes).

This routine prepares your muscles, raises your heart rate, and reduces injury risk.


Monday & Thursday – Upper Abs

Main Workout

  • Crunches – 4 sets × 20 reps
  • Sit-Ups – 3 sets × 15 reps
  • Toe Touch Crunches – 3 sets × 20 reps
  • V-Ups – 3 sets × 12 reps
  • Plank Shoulder Taps – 3 sets × 20 reps

Rest 45–60 seconds between sets.

Cardio Finisher

  • Jump Rope – 10 minutes

or

  • Brisk Walk/Jog – 15 minutes

Tuesday & Friday – Lower Abs + Core Stability

Main Workout

Rest 45–60 seconds between sets.

Core Finisher


Wednesday – Obliques & Cardio

Main Workout

  • Russian Twists – 4 sets × 25 reps
  • Side Plank Hip Dips – 3 sets × 12 reps each side
  • Standing Oblique Crunches – 3 sets × 20 reps each side
  • Bicycle Crunches – 3 sets × 25 reps
  • Woodchoppers (Resistance Band) – 3 sets × 15 reps each side

Rest 45–60 seconds between sets.

Cardio Session

Choose ONE:

  • 20–30 minute brisk walk
  • 20-minute jog
  • 15-minute jump rope
  • Cycling

Saturday – Full Core Circuit

Complete 4 rounds:

Rest 90 seconds between rounds.


Post-Workout Stretch Routine

Perform each stretch for 30 seconds.

Stretching helps reduce soreness and improve flexibility.


Nutrition Tips for Visible Abs

No workout can out-train a poor diet. To reveal your abs:

  • Eat in a moderate calorie deficit if your goal is fat loss.
  • Consume plenty of lean protein to preserve muscle.
  • Eat whole foods such as fruits, vegetables, whole grains, and healthy fats.
  • Limit sugary drinks and highly processed foods.
  • Drink at least 2–3 liters of water daily.
  • Aim for 7–9 hours of quality sleep each night.

Nutrition is just as important as your workouts when building a six-pack.


Advanced Tips for Faster Results

  • Focus on progressive overload by increasing reps or exercise difficulty over time.
  • Train your core 3–6 times per week.
  • Include regular cardio alongside strength training.
  • Stay active outside your workouts.
  • Be patient—visible abs are earned through consistency.
  • Track your waist measurements and progress photos every 2–4 weeks.

Final Thoughts

A six-pack isn’t built by doing hundreds of crunches—it is earned through consistent core training, smart nutrition, regular cardio, and disciplined recovery.

This At-Home Six-Pack Workout Plan provides a complete weekly routine to strengthen your core, burn body fat, and build the abdominal definition you’re working toward. Stay consistent, fuel your body properly, and remember that lasting results come from sustainable habits.

How to Do Commando Pull-Ups Correctly: Step-by-Step Guide for Beginners

Commando Pull-Ups are a challenging Pull-Up variation performed with your body positioned lengthwise beneath the bar and your hands gripping the bar from opposite sides. This creates a narrow, neutral-like mixed grip in which your palms generally face toward each other around the bar.

Instead of pulling your chin directly over the front of the bar, you pull upward and bring your head to one side of the bar. You can alternate sides between repetitions to train the movement more evenly.

Commando Pull-Ups strengthen the back, biceps, forearms, and grip while also challenging your core to resist unwanted rotation. They provide an effective variation for anyone who has already developed a solid foundation with standard Pull-Ups and Chin-Ups.


What Are Commando Pull-Ups?

Commando Pull-Ups are a bodyweight vertical pulling exercise performed while facing along the length of a Pull-Up Bar rather than facing directly toward it.

Place both hands close together around the bar, with one hand positioned in front of the other. Because you grip the same straight bar from opposite sides, one forearm is positioned differently from the other, producing a close, neutral-like mixed grip.

From the hanging position, pull yourself upward until your head passes beside the bar. Lower yourself under control and either alternate the side of your head on the next repetition or complete your planned repetitions before changing sides.

Commando Pull-Ups are commonly used in:

  • Calisthenics training
  • Pull-Up workouts
  • Back workouts
  • Pull-day workouts
  • Biceps and forearm training
  • Grip-strength training
  • Upper-body strength programs
  • Military-style fitness training

Because the hand position and body orientation are different from conventional Pull-Ups, Commando Pull-Ups also require additional control to prevent excessive twisting.

Benefits of Commando Pull-Ups

Commando Pull-Ups provide many of the benefits of conventional Pull-Ups while introducing a different grip and pulling position.

Benefits include:

  • Strengthens the lats and upper back
  • Develops the biceps and other elbow flexors
  • Builds grip and forearm strength
  • Develops vertical pulling strength
  • Challenges core and anti-rotation control
  • Provides variety beyond standard Pull-Ups and Chin-Ups
  • Trains the upper body through a close-grip pulling position
  • Requires minimal equipment
  • Develops bodyweight pulling control

Alternating which side of the bar your head passes can also help you avoid repeatedly performing the exercise with exactly the same rotational pattern.

Muscles Worked in Commando Pull-Ups

Commando Pull-Ups are a compound exercise involving the back, arms, shoulders, forearms, and core.

Primary Muscles
  • Latissimus Dorsi
  • Biceps Brachii
  • Brachialis
  • Teres Major
Secondary Muscles
  • Brachioradialis
  • Trapezius
  • Rhomboids
  • Posterior Deltoids
  • Forearms
  • Rotator Cuff Muscles
  • Core Muscles
  • Obliques

Your core and obliques help stabilize your torso and limit excessive rotation as you pull your head past either side of the bar.


How to Do Commando Pull-Ups (Step-by-Step)

Step 1: Position Yourself Along the Bar

Stand underneath the Pull-Up Bar with your body facing along its length rather than directly toward it.

Your head and torso should be positioned beneath the bar so you have room to pull your head up beside it.

Make sure the bar is secure and that there is sufficient clearance around your head.

Step 2: Take the Commando Grip

Reach up and place both hands close together on the bar, one in front of the other.

Grip opposite sides of the bar securely.

Keep your:

  • Hands close together
  • Fingers firmly wrapped around the bar
  • Wrists controlled
  • Grip comfortable
  • Shoulders underneath the bar

Avoid stacking your hands directly on top of each other.

Step 3: Establish the Hanging Position

Carefully transfer your bodyweight onto the bar.

Extend your arms and establish a controlled hang.

Keep your:

  • Core braced
  • Legs controlled
  • Head relatively neutral
  • Grip secure
  • Shoulders controlled

Avoid beginning the repetition with unnecessary swinging.

Step 4: Pull Yourself Upward

Begin bending your elbows and pull your body upward.

Drive your elbows downward while using your back and arms to raise your torso.

Keep your core braced to limit excessive twisting as you approach the bar.

Step 5: Bring Your Head Beside the Bar

As you reach the top, move your head slightly to one side so it can pass beside the bar.

Continue pulling until your chin reaches or passes approximately bar height.

Do not aggressively crane your neck just to create the appearance of additional range.

Step 6: Lower Under Control

Reverse the movement by gradually extending your elbows.

Lower yourself smoothly until your arms return to extension.

Control any rotation or swinging that develops during the descent.

Step 7: Alternate Sides

On the next repetition, pull your head toward the opposite side of the bar.

Continue alternating sides while maintaining controlled technique.

Because one hand is positioned in front of the other, you can also periodically reverse which hand is forward between sets to expose yourself to both grip orientations.

Warrior showcasing How to do Commando Pull-Ups with proper form.

Commando Pull-Ups Form Checklist

Use this checklist to maintain proper Commando Pull-Up technique.

  • Use a sturdy and secure Pull-Up Bar
  • Position your body along the length of the bar
  • Keep your hands close together
  • Grip opposite sides of the bar securely
  • Begin from a controlled hang
  • Establish shoulder control before pulling
  • Brace your core
  • Drive your elbows downward
  • Pull your body upward smoothly
  • Bring your head beside the bar
  • Minimize excessive torso rotation
  • Avoid swinging or kicking
  • Lower yourself under control
  • Alternate the side of your head
  • Reverse your hand orientation between sets when appropriate

The goal is a controlled vertical pull with only the movement needed to clear your head around the bar.


Common Commando Pull-Ups Mistakes

Pulling to Only One Side

Problem: Always bringing your head past the same side of the bar repeatedly trains the same movement pattern.

Fix: Alternate the side of your head between repetitions or use equal repetitions on each side.

Ignoring Hand Orientation

Problem: Keeping the same hand forward during every Commando Pull-Up session can repeatedly expose each arm to the same grip position.

Fix: Reverse which hand is positioned forward between sets or sessions while keeping your training controlled.

Using Excessive Torso Rotation

Problem: Twisting aggressively around the bar changes the exercise and can compensate for insufficient pulling strength.

Fix: Brace your core and keep your torso relatively controlled. Only move enough to allow your head to pass safely beside the bar.

Swinging the Legs

Problem: Kicking or swinging your legs creates momentum that assists the upward movement.

Fix: Keep your legs controlled and generate the pull primarily through your back and arms.

Craning the Neck

Problem: Reaching aggressively with your chin can make it appear that you have achieved a complete repetition without actually pulling your body high enough.

Fix: Keep your head relatively neutral and reach the top by pulling your torso higher.

Dropping From the Top

Problem: Rapidly falling into the bottom position removes control from the eccentric portion of the exercise.

Fix: Lower yourself deliberately until your arms return to extension.

Placing the Hands Uncomfortably

Problem: Forcing your hands into an awkward position can create unnecessary discomfort in the wrists, elbows, or shoulders.

Fix: Use a secure but comfortable hand position. Stop or adjust the exercise if the grip produces sharp or unusual joint pain.


Commando Pull-Ups Progressions and Variations

Commando Pull-Ups can be modified according to your current pulling strength and training goals.

Band-Assisted Commando Pull-Ups

A Resistance Band reduces the effective load and can help you learn the Commando Pull-Up movement.

How to Do Band-Assisted Commando Pull-Ups

  • Secure an appropriate Resistance Band to the bar.
  • Carefully place your foot or knee into the band.
  • Take the close Commando grip.
  • Begin from a controlled hanging position.
  • Pull your head toward one side of the bar.
  • Lower yourself slowly.
  • Alternate sides while keeping the band controlled.

Inspect the band before use and make sure it is securely attached.

Negative Commando Pull-Ups

Negative repetitions emphasize the lowering phase and provide an easier strength progression.

How to Do Negative Commando Pull-Ups

  • Use a stable platform to reach the top position.
  • Take a secure Commando grip.
  • Position your head beside the bar.
  • Brace your core and stabilize your shoulders.
  • Slowly lower your body.
  • Continue until your arms reach extension.
  • Step back onto the platform and reset.

Alternating Commando Pull-Ups

This is the classic alternating variation in which your head changes sides on every repetition.

How to Do Alternating Commando Pull-Ups

  • Begin from a controlled Commando hang.
  • Pull your head past the right side of the bar.
  • Lower yourself under control.
  • Stabilize your body at the bottom.
  • Pull your head past the left side of the bar.
  • Lower yourself smoothly again.
  • Continue alternating for your planned repetitions.

Slow-Tempo Commando Pull-Ups

Slowing the exercise increases time under tension and requires greater positional control.

How to Do Slow-Tempo Commando Pull-Ups

  • Take your normal Commando grip.
  • Begin from a controlled hang.
  • Pull yourself upward slowly.
  • Bring your head beside the bar.
  • Pause briefly at your highest controlled position.
  • Lower yourself slowly for several seconds.
  • Alternate sides while maintaining the same tempo.

Weighted Commando Pull-Ups

Weighted Commando Pull-Ups add external resistance for advanced trainees.

How to Do Weighted Commando Pull-Ups

  • Secure a modest load using a dip belt or weighted vest.
  • Take a comfortable Commando grip.
  • Begin from a stable hanging position.
  • Brace your core and pull upward.
  • Bring your head beside the bar.
  • Keep the additional weight controlled.
  • Lower yourself slowly to the starting position.

Master controlled bodyweight Commando Pull-Ups before adding external resistance.


Final Thoughts

Commando Pull-Ups are a useful Pull-Up variation for developing your back, arms, forearms, grip, and overall bodyweight pulling strength through a different grip and body orientation.

They develop:

  • Lat strength
  • Upper-back strength
  • Biceps strength
  • Forearm strength
  • Grip strength
  • Vertical pulling ability
  • Core stability
  • Anti-rotation control

The key is to keep the movement controlled. Position your body along the bar, use a secure close grip, pull your head beside the bar, and avoid turning the exercise into an uncontrolled twisting or swinging movement.

Alternate sides consistently and periodically reverse which hand is positioned forward to train both orientations.

Essential Gear for Commando Pull-Ups

Using the right equipment can make commando pull-up training safer, improve your grip endurance, and help you build the strength needed for more advanced pulling exercises.

  • Pull-Up Bar: The most essential piece of equipment for performing commando pull-ups. Choose a sturdy doorway, wall-mounted, or freestanding pull-up bar that provides enough space for a neutral, side-facing grip.
  • Resistance Bands: Ideal for assisted commando pull-ups, helping you develop the strength and coordination needed to perform strict bodyweight repetitions.
  • Gym Chalk or Liquid Chalk: Improves grip by reducing moisture on your hands, allowing you to maintain a secure hold during challenging neutral-grip pulling exercises.
  • Weighted Vest or Dip Belt: Perfect for advanced athletes who want to increase resistance and continue building upper-body pulling strength after mastering bodyweight commando pull-ups.
  • Training Towel: Useful for towel commando pull-up variations, significantly increasing grip strength and forearm endurance while adding variety to your training.
  • Stable Step or Platform: Useful for safely reaching a high bar and performing Negative Commando Pull-Ups.

Commando Pull-Ups FAQ

Q1: How are Commando Pull-Ups different from regular Pull-Ups?
Regular Pull-Ups are generally performed facing the bar with a wider overhand grip. Commando Pull-Ups position your body along the length of the bar with your hands close together on opposite sides, and your head passes beside the bar at the top.

Q2: Should I alternate sides during Commando Pull-Ups?
Alternating the side of your head is a practical way to train both directions. You can alternate every repetition or perform equal repetitions toward each side.

Q3: Should I switch which hand is in front during Commando Pull-Ups?
It is useful to train both hand orientations rather than always placing the same hand forward. You can reverse your grip orientation between sets or sessions while maintaining equal, controlled training.

Q4: Are Commando Pull-Ups harder than regular Pull-Ups?
They can feel harder or simply different because of the close mixed grip, body orientation, and additional stabilization required. The relative difficulty depends on your Pull-Up strength, grip strength, technique, and familiarity with the movement.

Q5: How can I make Commando Pull-Ups harder?
You can perform slower repetitions, add pauses at the top, increase your controlled training volume, or eventually add external resistance with a weighted vest or dip belt.


Roadmap to Your First Planche

The Complete Beginner’s Guide to Mastering Your First Planche

This Roadmap to Your First Planche is built to take you from foundational calisthenics strength to your first true Planche hold—one step, one second, and one victory at a time.

No gym membership required.
No expensive machines needed.

Just consistency, discipline, and effort.


Why the Planche Matters

The Planche is one of the most prestigious skills in calisthenics.

Supporting your entire body parallel to the ground using only your hands requires an exceptional combination of strength, balance, mobility, and body control. Few bodyweight skills demand as much total-body tension and dedication as the Planche.

Mastering the Planche develops:

  • Incredible shoulder strength
  • Elite core stability
  • Straight-arm strength
  • Wrist strength
  • Scapular control
  • Body awareness
  • Mental discipline

The Planche also improves performance in:

  • Handstand Pushups
  • Planche Pushups
  • Maltese Progressions
  • Press to Handstand
  • One Arm Handstand Training
  • Advanced Ring Strength

The Planche isn’t just another exercise—it’s one of the ultimate demonstrations of bodyweight mastery.


Skill Difficulty

CategoryDetails
Difficulty★★★★★ (Elite)
Estimated Time1–3+ Years
EquipmentParallettes (Recommended), Floor, Resistance Bands (Optional)
Prerequisites30-Second Handstand, 20-Second Frog Hold, 15 Pike Pushups, Strong Hollow Hold, Excellent Wrist Mobility
UnlocksPlanche Pushups, Straddle Planche, Full Planche Variations, Maltese Progressions, Elite Straight-Arm Skills

Why Most People Can’t Do a Planche

The Planche is extremely demanding.

Even experienced athletes may spend years developing it.

Common reasons include:

Insufficient Straight-Arm Strength

The Planche relies heavily on straight-arm pushing strength rather than bent-arm pressing.

Weak Shoulders

Your shoulders must support nearly your entire bodyweight while leaning far forward.

Weak Core

A relaxed core causes your hips to sag, making the skill nearly impossible.

Poor Wrist Mobility

Your wrists must tolerate significant forward loading.

Lack of Lean Strength

Most beginners haven’t developed enough strength in the Planche Lean position.

Rushing Progressions

Many athletes attempt advanced variations before mastering the fundamentals.


Planche Form Basics

Before beginning the roadmap, understand proper Planche technique.

Correct Planche Form

  • Hands shoulder-width apart
  • Fingers spread wide
  • Arms fully locked
  • Shoulders pushed forward (protracted)
  • Lean forward aggressively
  • Core fully braced
  • Glutes squeezed
  • Legs straight
  • Toes pointed

Equipment Needed

This roadmap requires:

  • Open floor space

Recommended:


Weekly Training Schedule

Train three times each week.

Example Schedule

DayTraining
MondayPlanche Training
WednesdayPlanche Training
FridayPlanche Training

Allow at least one recovery day between sessions.


Pre-Workout Warm-Up

Wrist Mobility

  • Wrist Circles × 30 seconds
  • Palm Pulses × 20
  • Finger Pulses × 20
  • Wrist Stretch × 30 seconds

Shoulder Activation

Core Activation


Phase 1 – Master the Planche Lean

Goal

Develop straight-arm pushing strength.

The Planche Lean teaches your shoulders and wrists to support increasing amounts of bodyweight.

How to Do a Planche Lean

  • Place your hands beneath your shoulders.
  • Lock your elbows.
  • Protract your shoulders.
  • Lean your body forward until your wrists feel loaded.
  • Hold while maintaining a straight body.

Workout

Planche Leans

  • 5 sets × 15–30 seconds

Progression Goal

Hold a strong lean for 30 seconds.


Phase 2 – Master the Frog Hold

Goal

Develop bodyweight balance and wrist confidence.

How to Do a Frog Hold

  • Place your hands on the floor shoulder-width apart.
  • Bend your knees and rest them on the backs of your upper arms.
  • Lean your weight forward slowly and carefully.
  • Lift your feet off the floor while keeping your balance.
  • Hold the position with your core engaged and your gaze slightly forward.

Workout

Frog Hold

  • 5 sets × 20–30 seconds

Progression Goal

Comfortably hold for 30 seconds.


Phase 3 – Tuck Planche Holds

Goal

Begin supporting your body entirely on your hands.

How to Do a Tuck Planche

  • Place your hands on the floor or parallettes shoulder-width apart.
  • Lock your elbows and push your shoulders forward into a strong protracted position.
  • Bring your knees tightly toward your chest to shorten the lever.
  • Lift both feet from the floor while keeping your hips elevated and your core braced.
  • Hold the tuck position with a rounded upper back, straight arms, and full body tension.

Workout

Tuck Planche Holds

  • 6 sets × 5–10 seconds

Progression Goal

Hold for 15 seconds.


Phase 4 – Advanced Tuck Planche

Goal

Increase leverage while maintaining control.

How to Do an Advanced Tuck Planche

  • Start in a strong tuck planche position with your arms locked and shoulders protracted.
  • Move your knees slightly farther away from your chest to increase the lever length.
  • Keep your hips lifted so your body stays parallel and controlled.
  • Maintain full core tension so your lower back does not collapse.
  • Hold the position with steady breathing, straight arms, and maximum shoulder engagement.

Workout

Advanced Tuck Planche

  • 5 sets × 8–12 seconds

Progression Goal

Hold for 15 seconds with excellent form.


Phase 5 – Straddle Planche Progression

Goal

Reduce leverage by opening the legs.

How to Do a Straddle Planche Hold

  • Begin from a strong tuck or advanced tuck planche with locked elbows and protracted shoulders.
  • Slowly extend both legs outward into a wide straddle while keeping your hips lifted.
  • Keep your legs straight and your toes pointed to maintain tension through the entire body.
  • Push hard through the floor so your shoulders stay elevated and your torso remains parallel.
  • Hold the straddle position with control, avoiding hip sag, bent arms, or loss of balance.

Workout

Straddle Planche Holds

  • 5 sets × Maximum Hold

Planche Leans

  • 3 sets × 30 seconds

Pseudo Planche Pushups

  • 4 sets × 8 reps

Progression Goal

Hold a controlled Straddle Planche for 10 seconds.


Phase 6 – Your First Full Planche

The moment you’ve spent months—or even years—working toward.

Checklist Before Attempting

✓ 30-Second Planche Lean

✓ 30-Second Frog Hold

✓ 15-Second Tuck Planche

✓ 15-Second Advanced Tuck Planche

✓ Controlled Straddle Planche

If you’ve reached these milestones, you’re ready to attempt a Full Planche.

How to Do a Full Planche

  • Lock your elbows completely.
  • Push your shoulders forward.
  • Brace your core.
  • Squeeze your glutes.
  • Extend both legs fully.
  • Keep your body parallel to the floor.
  • Maintain tension from fingertips to toes.

Congratulations.

You’ve achieved one of the greatest milestones in calisthenics.

Workout

Planche Attempts

  • 8–10 attempts

Advanced Tuck Planche

  • 4 sets × 10 seconds

Pseudo Planche Pushups

  • 4 sets × 8 reps

Planche Leans

  • 3 sets × 30 seconds

Train three times each week.


Post-Workout Stretch Routine

Repeat after every session.


How Long Does It Take to Get Your First Planche?

The Planche is a long-term skill.

Your timeline depends on:

  • Relative strength
  • Bodyweight
  • Mobility
  • Training quality
  • Consistency

Estimated Timelines

Starting LevelTime Estimate
Complete Beginner1.5–3+ Years
Intermediate Calisthenics Athlete8–18 Months
Advanced Athlete4–12 Months

Progress is rarely linear.

Stay patient and trust the process.


Common Planche Mistakes

Bent Arms

Straight-arm strength is essential.

Relaxing the Core

Every muscle must stay engaged.

Skipping Wrist Conditioning

Healthy wrists are non-negotiable.

Progressing Too Quickly

Master each progression before moving on.

Neglecting Shoulder Protraction

Always push the floor away.


Nutrition Tips for Faster Progress

The Planche requires years of consistent strength development.

Support your training by prioritizing:

  • High-quality protein
  • Complex carbohydrates
  • Healthy fats
  • Plenty of water
  • 7–9 hours of sleep each night

Recovery is just as important as training.


Final Thoughts

The Planche is one of the hardest skills you’ll ever learn.

It will challenge your patience, discipline, and determination as much as your strength.

There will be setbacks, plateaus, and countless failed attempts—but every second spent leaning, balancing, and holding brings you closer to success.

  • Trust the roadmap.
  • Train smart.
  • Stay consistent.

The strongest athletes aren’t defined by talent—they’re defined by persistence.

How to Do a Hollow Hold Correctly: Step-by-Step Guide for Beginners

Learn how to do a hollow hold with perfect form, avoid common mistakes, and discover the best hollow hold variations to build a stronger core and improve total-body control.

The hollow hold is one of the most effective bodyweight core exercises for developing abdominal strength, spinal stability, and body tension. Whether you are training for calisthenics, gymnastics, military fitness, or general athletic performance, mastering the hollow hold is essential.


What Is a Hollow Hold?

A hollow hold is an isometric core exercise where you lie on your back and hold your body in a curved “hollow” position with your lower back pressed firmly into the floor.

The hollow hold is considered one of the best core exercises because it teaches full-body tension while strengthening the muscles responsible for stabilizing the spine.

Hollow holds are commonly used in:

  • Calisthenics training
  • Gymnastics programs
  • Military fitness preparation
  • Core strengthening routines

Unlike traditional abdominal exercises that involve repeated movement, the hollow hold develops static strength and body control.

Benefits of Hollow Holds

Hollow holds are one of the most effective exercises for building functional core strength.

Benefits include:

  • Builds a stronger core
  • Improves body tension and control
  • Enhances spinal stability
  • Strengthens the hip flexors
  • Improves performance in calisthenics skills
  • Requires no equipment

Few exercises develop total-body core stability as effectively as the hollow hold.

Muscles Worked in Hollow Holds

Hollow holds activate several muscles throughout the body simultaneously.

Primary Muscles
  • Rectus Abdominis
  • Transverse Abdominis
  • Hip Flexors
Secondary Muscles
  • Internal Obliques
  • External Obliques
  • Quadriceps
  • Serratus Anterior
  • Lower Back Stabilizers

Because of this muscle activation, hollow holds are one of the best exercises for developing core endurance and body control.


How to Do a Hollow Hold (Step-by-Step)

Step 1: Lie Flat on Your Back

Begin with:

  • Legs fully extended
  • Arms extended overhead
  • Lower back pressed firmly into the floor
  • Core engaged

Tip: Flatten your lower back against the floor before lifting your arms or legs.

Step 2: Lift Your Shoulders

Raise your head and shoulder blades slightly off the floor.

Focus on:

  • Looking toward your feet
  • Keeping your neck neutral
  • Maintaining lower-back contact with the floor

Avoid pulling your head forward.

Step 3: Lift Your Legs

Raise both legs a few inches off the floor.

Focus on:

  • Keeping your legs straight
  • Pointing your toes
  • Maintaining full-body tension

Only lift your legs as low as you can while keeping your lower back flat.

Step 4: Reach Your Arms

Extend your arms overhead beside your ears or slightly forward if needed.

At this stage:

  • Keep your core fully braced
  • Maintain steady breathing
  • Hold the position without losing form

Your body should resemble a shallow banana shape.

Step 5: Hold the Position

Maintain the hollow position for the desired duration.

Stay tight from your fingertips to your toes while keeping your lower back firmly pressed into the floor.

Warrior showcasing How to do a Hollow Hold with proper form

Hollow Hold Form Checklist

Use this quick checklist to ensure perfect hollow hold form.

  • Keep your lower back pressed into the floor
  • Maintain straight legs
  • Keep your core fully engaged
  • Breathe steadily throughout the hold
  • Maintain full-body tension

Perfect form builds stronger abs and improves athletic performance.


Common Hollow Hold Mistakes

Letting the Lower Back Lift

Problem: Reduces core activation and places stress on the spine.

Fix: Press your lower back firmly into the floor before lifting your legs.

Raising the Legs Too Low

Problem: Causes your lower back to arch.

Fix: Lift your legs slightly higher until you can maintain proper positioning.

Holding Your Breath

Problem: Reduces endurance and stability.

Fix: Take slow, controlled breaths throughout the hold.

Relaxing the Core

Problem: Reduces muscle activation.

Fix: Brace your abs continuously from start to finish.

Looking Straight Up

Problem: Creates unnecessary neck tension.

Fix: Keep your eyes directed toward your feet while maintaining a neutral neck.

Quality holds always beat longer holds with poor form.


Hollow Hold Variations

Once you master the basic hollow hold, different variations can help build greater core strength and body control.

Tuck Hollow Hold

The easiest progression.

How to Do a Tuck Hollow Hold

  • Bend your knees toward your chest
  • Keep your lower back pressed into the floor
  • Hold the position under control

This variation reduces the leverage and makes the exercise easier.

One-Leg Hollow Hold

Builds strength gradually.

How to Do a One-Leg Hollow Hold

  • Extend one leg while keeping the other bent
  • Alternate sides between sets
  • Maintain full-body tension

This variation bridges the gap between tuck and full hollow holds.

Hollow Rocks

Adds movement to the exercise.

How to Do Hollow Rocks

  • Hold the hollow position
  • Rock gently forward and backward
  • Maintain body tension throughout

This variation develops dynamic core control.

Weighted Hollow Hold

An advanced progression.

How to Do a Weighted Hollow Hold

  • Hold a light weight plate or medicine ball overhead
  • Maintain the hollow position
  • Keep your lower back firmly against the floor

This variation significantly increases core demand.


Final Thoughts

The hollow hold is one of the most valuable core exercises you can master.

It builds:

  • Core strength
  • Body tension
  • Spinal stability
  • Hip flexor strength
  • Functional athletic control

Progress may feel challenging because the hollow hold demands full-body engagement. However, with consistent practice and proper form, your core endurance, body control, and athletic performance will steadily improve. Learn more about Core Workouts here.

A shorter hold with perfect technique is always better than a longer hold with poor form.

Focus on quality holds, steady breathing, and complete body tension.

A warrior’s strength begins at the core.

Essential Gear for Hollow Holds

Using the right equipment can make hollow hold training more comfortable, effective, and easier to progress as your core strength and body control improve.

  • Exercise Mat: The most essential piece of equipment for hollow holds. It provides a comfortable, cushioned surface that supports your back, elbows, and tailbone during floor-based core training.
  • Resistance Bands: Perfect for assisted hollow hold progressions and mobility drills, helping beginners develop the strength needed for more advanced variations.
  • Medicine Ball or Weight Plate: Ideal for weighted hollow hold variations, increasing the challenge and helping build greater core strength and stability.
  • Foam Roller: Excellent for improving thoracic spine and hip flexor mobility before training, making it easier to maintain proper hollow body positioning.
  • Yoga Block: Useful for beginner progressions and body awareness drills, helping reinforce proper positioning and full-body tension throughout the exercise.

Hollow Hold FAQ

Q1: Is the hollow hold good for beginners?
Yes. Beginners can start with easier variations such as the tuck hollow hold before progressing to the full version.

Q2: How long should I hold a hollow hold?
Most beginners should aim for 15–30 seconds per set. As your strength improves, work toward holding the position for 45–60 seconds with perfect form.

Q3: Does the hollow hold help with calisthenics?
Yes. The hollow hold is one of the most important foundational exercises for calisthenics skills such as pull-ups, handstands, front levers, muscle-ups, and planche progressions because it develops the body tension needed for advanced movements.

Roadmap to Your First Squat

The Complete Beginner’s Guide to Mastering Your First Bodyweight Squat

This Roadmap to Your First Squat is built to take you from beginner-level leg strength and mobility to your first clean, controlled bodyweight squat — one step, one rep, and one victory at a time.

No gym needed.
No expensive equipment required.

Just consistency, discipline, and effort.


Why the Squat Matters

The squat is one of the most important movement patterns your body can learn.

Every day, you squat when sitting down, standing up, lifting objects, or climbing stairs. Mastering the bodyweight squat improves lower-body strength, mobility, balance, and coordination while preparing you for more advanced leg exercises.

Learning the squat develops:

  • Leg strength
  • Glute strength
  • Core stability
  • Hip mobility
  • Knee stability
  • Balance
  • Coordination

It also prepares you for advanced skills such as:

  • Jump Squats
  • Bulgarian Split Squats
  • Pistol Squats
  • Shrimp Squats
  • Jump Lunges
  • Explosive Lower-Body Training

A strong squat is the foundation of powerful athletic movement.


Skill Difficulty

CategoryDetails
Difficulty★☆☆☆☆ (Beginner)
Estimated Time1–4 Weeks
EquipmentNone
PrerequisitesNone
UnlocksJump Squats, Bulgarian Split Squats, Pistol Squats, Shrimp Squats, Explosive Leg Training

Why Most People Can’t Do a Proper Squat

If squats feel awkward or uncomfortable, you’re not alone.

Most beginners struggle because of one or more of the following reasons.

Poor Hip Mobility

Tight hips make it difficult to squat to full depth.

Limited Ankle Mobility

Restricted ankles often cause the heels to lift off the ground.

Weak Leg Muscles

Your quadriceps, glutes, and hamstrings may not yet be strong enough.

Poor Balance

Maintaining balance throughout the movement takes practice.

Incorrect Technique

Many beginners squat with poor posture or allow their knees to collapse inward.


Squat Form Basics

Before beginning the roadmap, learn proper squat technique.

Correct Squat Form

  • Stand with your feet about shoulder-width apart.
  • Point your toes slightly outward.
  • Brace your core.
  • Keep your chest up.
  • Push your hips back and bend your knees together.
  • Lower until your thighs are at least parallel to the floor.
  • Keep your heels flat.
  • Drive through your heels to return to standing.

Tip: Move your chest and glutes at the same time when lowering.


Equipment Needed

This roadmap requires:

  • Open floor space

Optional:


Weekly Training Schedule

Train three times per week.

Example Schedule

DayTraining
MondaySquat Training
WednesdaySquat Training
FridaySquat Training

Recovery is just as important as training.


Pre-Workout Warm-Up

Mobility Warm-Up

Activation Warm-Up


Phase 1 – Master the Chair Squat

Goal

Learn the basic squat movement safely.

A chair provides feedback while building confidence.

How to Do a Chair Squat

  • Stand in front of a chair.
  • Sit back slowly until you lightly touch the chair.
  • Stand back up without using your hands.

Workout

Chair Squats

  • 4 sets × 12–15 reps

Progression Goal

Complete every repetition with control and without dropping onto the chair.


Phase 2 – Build Strength with Wall Sits

Goal

Develop leg endurance and improve squat stability.

How to Do a Wall Sit

  • Lean against a wall.
  • Slide down until your knees reach roughly 90 degrees.
  • Keep your back flat.
  • Hold the position.

Workout

Wall Sits

  • 4 sets × 30–45 seconds

Progression Goal

Hold a wall sit for one full minute.


Phase 3 – Master Assisted Squats

Goal

Practice full-depth squats while improving balance.

How to Do an Assisted Squat

  • Hold onto a sturdy object or door frame.
  • Lower into a deep squat.
  • Use only enough assistance to maintain balance.
  • Stand back up under control.

Workout

Assisted Squats

  • 4 sets × 10–12 reps

Progression Goal

Reach full depth with proper control.


Phase 4 – Bodyweight Squats

Goal

Perform full bodyweight squats independently.

How to Do a Bodyweight Squat

  • Stand shoulder-width apart.
  • Brace your core.
  • Lower until your thighs are parallel to the floor or lower.
  • Keep your heels planted.
  • Return to standing.

Workout

Bodyweight Squats

  • 4 sets × 10–15 reps

Progression Goal

Complete 15 perfect repetitions.


Phase 5 – Tempo Squats

Goal

Build strength and control through slower repetitions.

How to Do a Tempo Squat

  • Lower for 3 seconds.
  • Pause for 1 second.
  • Stand up in 2 seconds.

Workout

Tempo Squats

  • 4 sets × 8 reps

Progression Goal

Maintain perfect technique throughout every repetition.


Phase 6 – Your First Perfect Squat

The moment you’ve been working toward.

Checklist Before Attempting

✓ Comfortable Chair Squats

✓ 60-Second Wall Sit

✓ Controlled Assisted Squats

✓ 15 Full Bodyweight Squats

✓ Controlled Tempo Squats

If you’ve achieved these milestones, you’re ready.

How to Perform the Perfect Squat

  • Stand tall.
  • Brace your core.
  • Sit your hips back and down.
  • Keep your knees tracking over your toes.
  • Reach full depth while maintaining a neutral spine.
  • Drive through your heels to stand.

Congratulations.

You’ve mastered your first proper bodyweight squat.

Workout

Bodyweight Squats

  • 4 sets × 15 reps

Tempo Squats

  • 3 sets × 8 reps

Wall Sits

  • 3 sets × 45 seconds

Walking Lunges

  • 3 sets × 10 per leg

Train this workout three times each week.


Post-Workout Stretch Routine

Repeat after every workout.


How Long Does It Take to Get Your First Squat?

Progress depends on:

  • Leg strength
  • Mobility
  • Balance
  • Consistency

Estimated Timelines

Starting LevelTime Estimate
Complete Beginner1–4 Weeks
Some Fitness Experience1–2 Weeks
Active IndividualsA Few Days

Consistency is the fastest path to improvement.


Common Squat Mistakes

Lifting Your Heels

Keep your feet firmly planted throughout the movement.

Allowing the Knees to Collapse Inward

Push your knees in line with your toes.

Rounding the Lower Back

Maintain a neutral spine.

Looking Down

Keep your chest proud and your eyes forward.

Rushing the Movement

Controlled repetitions build better strength and technique.


Nutrition Tips for Faster Progress

Strong legs require proper recovery.

Prioritize:

  • Lean protein
  • Complex carbohydrates
  • Healthy fats
  • Plenty of water
  • 7–9 hours of quality sleep

Train consistently.

Recover completely.

Grow stronger.


Final Thoughts

Your first squat is more than just bending your knees.

It’s the foundation of lower-body strength, athletic movement, and lifelong mobility.

Every repetition improves your balance, confidence, and ability to move with strength and control.

  • Trust the roadmap.
  • Stay consistent.
  • Keep practicing.

The strongest legs are built one squat at a time.

How to Do Knee Push-Ups Correctly: Step-by-Step Guide for Beginners

Knee Push-Ups are a beginner-friendly Push-Up variation performed with your knees on the floor instead of supporting your lower body through your toes. This reduces the amount of bodyweight your upper body must press while still training the fundamental Push-Up movement.

They primarily strengthen the chest, triceps, and shoulders while requiring your core to maintain a stable position from your head through your knees. Knee Push-Ups can be particularly useful for people who are not yet strong enough to perform controlled standard Push-Ups.

The key is to treat Knee Push-Ups as proper Push-Ups from the knees rather than simply dropping your knees from an unstable plank. Maintain a straight line from your head through your hips to your knees as you lower and press your body.


What Are Knee Push-Ups?

Knee Push-Ups are a modified bodyweight pressing exercise in which your hands and knees remain in contact with the floor.

You begin with your hands approximately shoulder-width apart or slightly wider and your knees resting on the floor. Your hips remain extended so your head, shoulders, torso, hips, and knees form a relatively straight line.

From this position, bend your elbows and lower your chest toward the floor. Then press through your hands until your arms return to extension.

Knee Push-Ups are commonly used in:

  • Beginner strength training
  • Push-Up progression programs
  • Chest workouts
  • Upper-body workouts
  • Calisthenics training
  • At-home workouts
  • Bodyweight training
  • High-repetition Push-Up workouts

They can help develop the pressing strength needed for harder Push-Up variations when combined with progressive training.

Benefits of Knee Push-Ups

Knee Push-Ups reduce the resistance of a standard Push-Up while preserving much of the basic pressing movement.

Benefits include:

  • Strengthens the chest
  • Develops the triceps
  • Strengthens the front of the shoulders
  • Builds foundational pushing strength
  • Reinforces basic Push-Up mechanics
  • Develops upper-body muscular endurance
  • Provides an accessible Push-Up progression
  • Requires minimal equipment
  • Can help prepare for standard Push-Ups

As your strength improves, Knee Push-Ups can be combined with Incline Push-Ups, negatives, and full Push-Up practice to continue progressing.

Muscles Worked in Knee Push-Ups

Knee Push-Ups train many of the same upper-body muscles as standard Push-Ups, but with reduced overall resistance.

Primary Muscles
  • Pectoralis Major
  • Triceps Brachii
  • Anterior Deltoids
Secondary Muscles
  • Serratus Anterior
  • Rotator Cuff Muscles
  • Rectus Abdominis
  • Obliques
  • Forearms
  • Gluteus Maximus
  • Other Core Stabilizers

Because your knees support part of your bodyweight, the core and lower body are generally challenged less than during a standard Push-Up, but they still help maintain proper alignment.


How to Do Knee Push-Ups (Step-by-Step)

Step 1: Start on Your Hands and Knees

Begin on all fours on the floor or an Exercise Mat.

Place your hands approximately underneath your shoulders or slightly wider.

Keep your fingers comfortably spread and your palms firmly planted.

Step 2: Move Your Knees Back

Walk your knees backward until your body forms a relatively straight line from your head through your shoulders and hips to your knees.

Do not keep your hips directly above your knees as you would in an all-fours position.

Your knees become the lower contact point for the Push-Up.

Step 3: Establish Your Starting Position

Extend your arms and stabilize your body.

Keep your:

  • Core braced
  • Glutes controlled
  • Hips extended
  • Head relatively neutral
  • Shoulders stable
  • Hands firmly planted

Avoid allowing your hips to sag or bend backward.

Step 4: Begin Lowering

Bend your elbows and lower your entire upper body toward the floor.

Allow your elbows to travel backward and outward at a comfortable angle rather than flaring directly sideways.

Your shoulders, torso, and hips should descend together.

Step 5: Reach the Bottom Position

Continue lowering until your chest approaches the floor or until you reach the deepest comfortable range you can control.

Keep your:

  • Core engaged
  • Hips aligned
  • Head relatively neutral
  • Knees planted
  • Shoulders controlled

Avoid reaching your head toward the floor to create the appearance of additional depth.

Step 6: Press Yourself Up

Push firmly through both palms and begin extending your elbows.

Raise your chest and hips together rather than pressing your upper body up while leaving your hips behind.

Continue until your arms return to extension.

Step 7: Reset and Repeat

Re-establish your body position at the top.

Maintain tension through your core and repeat the movement for your planned number of repetitions.

Stop the set when you can no longer maintain consistent technique.

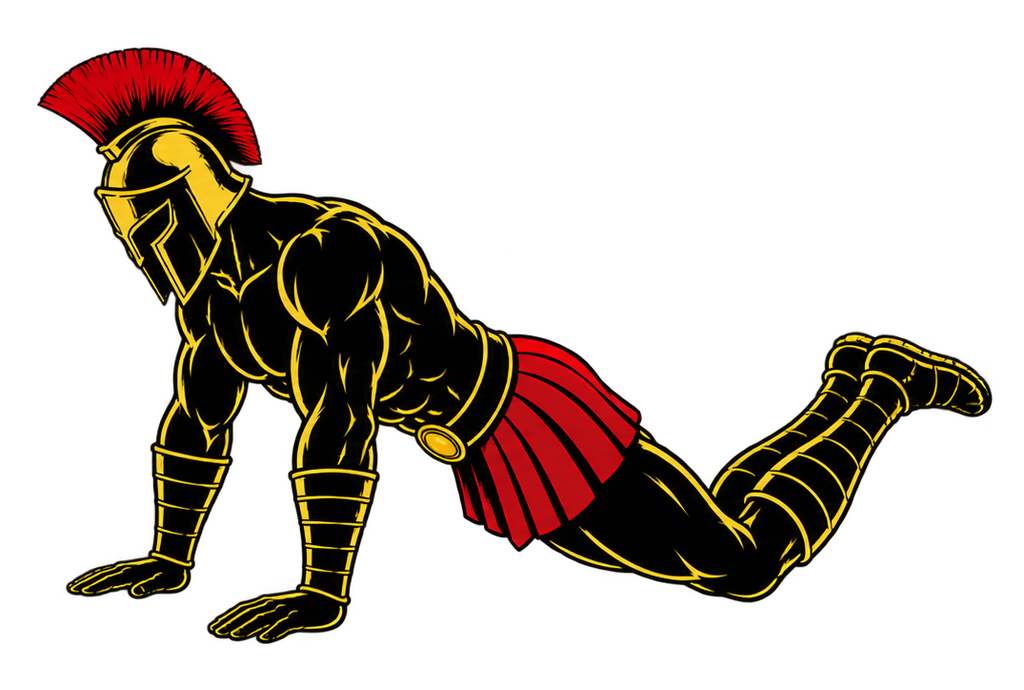
Warrior showcasing How to do Knee Push-Ups with proper form.

Knee Push-Up Form Checklist

Use this checklist to maintain proper Knee Push-Up technique.

  • Keep your hands approximately shoulder-width or slightly wider
  • Position your knees far enough back to create a straight body line
  • Keep your hips extended
  • Brace your core
  • Keep your head relatively neutral
  • Maintain stable shoulders
  • Keep your palms firmly planted
  • Lower your chest toward the floor
  • Avoid excessive elbow flare
  • Move your torso and hips together
  • Avoid sagging through the hips
  • Use a comfortable range of motion
  • Press evenly through both hands
  • Extend your arms under control
  • Maintain consistent technique throughout the set

Think of the movement as a standard Push-Up performed from your knees rather than a completely different pressing exercise.


Common Knee Push-Up Mistakes

Keeping the Hips Too Far Back

Problem: Leaving your hips behind your torso creates a bent body position and makes the exercise less similar to a standard Push-Up.

Fix: Move your knees backward and extend your hips until your head, torso, hips, and knees form a relatively straight line.

Letting the Hips Sag

Problem: Allowing your hips to drop while your chest remains high causes you to lose your stable body position.

Fix: Brace your core and keep your hips aligned with your torso throughout the repetition.

Flaring the Elbows Excessively

Problem: Pointing your elbows directly sideways can create an awkward pressing position.

Fix: Allow your elbows to move backward and outward at a comfortable angle.

Performing Partial Repetitions

Problem: Only slightly bending your elbows limits the range through which your pushing muscles work.

Fix: Lower your chest through the deepest comfortable range you can control while maintaining proper alignment.

Leading With the Head

Problem: Reaching your head toward the floor makes the repetition appear deeper without actually lowering your chest properly.

Fix: Keep your head relatively neutral and lower your chest toward the floor.

Raising the Chest Before the Hips

Problem: Pressing your upper body upward while leaving your hips low causes your body position to collapse.

Fix: Keep your torso and hips connected and raise them together.

Staying With Knee Push-Ups Without Progressing

Problem: Performing only increasingly large numbers of easy Knee Push-Ups may eventually provide limited progression toward harder Push-Ups.

Fix: Once your Knee Push-Ups become consistently easy, introduce harder variations such as lower Incline Push-Ups, controlled Push-Up negatives, or standard Push-Ups.


Knee Push-Up Progressions and Variations

Knee Push-Ups can be modified to match different strength levels or provide a pathway toward standard Push-Ups.

Incline Knee Push-Up

Elevating your hands while keeping your knees supported makes the movement easier.

How to Do Incline Knee Push-Ups

  • Place your hands on a sturdy elevated surface.
  • Position your knees on a comfortable surface behind you.
  • Create a straight line from your head through your hips to your knees.
  • Brace your core.
  • Lower your chest toward the elevated surface.
  • Press through your hands until your arms extend.
  • Repeat while maintaining your body alignment.

Close-Grip Knee Push-Up

Bringing your hands closer together changes the pressing position and increases the relative involvement of the triceps.

How to Do Close-Grip Knee Push-Ups

  • Begin in a proper Knee Push-Up position.
  • Position your hands closer than shoulder-width apart.
  • Brace your core and maintain hip extension.
  • Bend your elbows while keeping them relatively close to your torso.
  • Lower your chest toward your hands.
  • Press through your palms until your arms extend.
  • Repeat without allowing your hips to sag.

Wide-Grip Knee Push-Up

This variation uses a moderately wider hand position.

How to Do Wide-Grip Knee Push-Ups

  • Begin on your hands and knees.
  • Move your knees backward into the proper body position.
  • Place your hands moderately wider than shoulder-width.
  • Brace your core and maintain a straight line to your knees.
  • Lower your chest toward the floor.
  • Press evenly through both hands.
  • Return to the starting position under control.

Avoid placing your hands excessively wide.

Slow-Tempo Knee Push-Up

Slowing the movement increases time under tension and encourages greater control.

How to Do Slow-Tempo Knee Push-Ups

  • Establish a strong Knee Push-Up position.
  • Brace your core and glutes.
  • Lower your chest slowly for several seconds.
  • Reach your deepest controlled position.
  • Pause briefly near the bottom.
  • Press yourself upward smoothly.
  • Repeat while maintaining the same controlled tempo.

Negative Push-Up

Push-Up negatives are a useful progression toward full Push-Ups because you lower yourself from a standard plank position before using your knees to reset.

How to Do Negative Push-Ups

  • Begin in a standard High Plank on your hands and toes.
  • Brace your core and glutes.
  • Slowly bend your elbows.
  • Lower your entire body toward the floor under control.
  • Place your knees down after completing the lowering phase.
  • Return to the starting position safely.
  • Reset in a full plank before beginning the next negative.

Final Thoughts

Knee Push-Ups are an effective beginner Push-Up variation for developing upper-body pressing strength while learning the fundamental mechanics of the movement.

They develop:

  • Chest strength
  • Triceps strength
  • Shoulder strength
  • Basic core stability
  • Upper-body endurance
  • Pressing technique
  • Body-position control
  • Foundational Push-Up strength

Keep your body aligned from your head through your hips to your knees, lower your chest through a controlled range, and press your torso and hips upward together.

As Knee Push-Ups become easier, continue progressing. Incline Push-Ups at progressively lower heights, Push-Up negatives, and full Push-Up attempts can help bridge the gap between modified and standard Push-Ups. Learn more about Push Workouts here.

Essential Gear for Knee Push-Ups

The right equipment can make knee push-ups more comfortable, improve your technique, and help you progress toward full push-ups faster. Here are the essentials every warrior should consider.

  • Exercise Mat: Provides cushioning for your knees, wrists, and hands, making knee push-ups more comfortable while protecting your joints.
  • Push-Up Board: Helps guide proper hand placement, targets different upper-body muscles, and reduces wrist discomfort during push-up training.
  • Resistance Bands: Useful for strengthening the chest, shoulders, and triceps with accessory exercises that improve push-up performance.
  • Wrist Wraps: Offer additional wrist support and stability if you experience discomfort during higher-volume training.
  • Push-Up Handles: Keep your wrists in a more neutral position, increase your range of motion, and reduce pressure on the wrists during pressing exercises.
  • Knee Pad: Offers additional cushioning if pressure on your knees is uncomfortable.

Knee Push-Up FAQ

Q1: Are Knee Push-Ups good for beginners?
Yes. Knee Push-Ups reduce the amount of bodyweight that must be pressed compared with standard Push-Ups, making them an accessible option for developing basic pushing strength.

Q2: Are Knee Push-Ups easier than regular Push-Ups?
Yes. Supporting your lower body through your knees shortens the effective lever and reduces the resistance your upper body must overcome compared with a standard Push-Up from the toes.

Q3: How many Knee Push-Ups should beginners do?
A practical starting point is around 8–15 controlled repetitions for 2–3 sets. Adjust your repetitions according to your current strength and stop before your technique significantly deteriorates.

Q4: Should my hips be bent during Knee Push-Ups?
No. Your hips should generally remain extended so your head, torso, hips, and knees form a relatively straight line. Keeping your hips pushed backward turns the movement into a less effective Push-Up variation.

Q5: When should I progress from Knee Push-Ups?
When you can perform clean sets of Knee Push-Ups through a comfortable range without losing alignment, begin introducing harder Push-Up progressions. The goal is to gradually increase the amount of bodyweight your upper body can control rather than remaining indefinitely with the easiest variation.


Roadmap to Your First Muscle-Up

The Complete Beginner’s Guide to Mastering Your First Muscle-Up

This Roadmap to Your First Muscle-Up is built to take you from strong pull-ups and dips to your first clean, explosive Muscle-Up — one step, one rep, and one victory at a time.

No gym membership required.
No fancy machines needed.

Just consistency, discipline, and effort.


Why the Muscle-Up Matters

The Muscle-Up is one of the most iconic achievements in calisthenics.

It combines explosive pulling power, upper-body strength, coordination, timing, and technique into one incredible movement. Unlike a pull-up or dip alone, the Muscle-Up requires you to pull yourself above the bar before pressing into a dip.

Mastering the Muscle-Up develops:

  • Explosive pulling power
  • Upper-body strength
  • Grip strength
  • Shoulder stability
  • Coordination
  • Athleticism
  • Confidence

It also unlocks more advanced skills such as:

  • Bar Muscle-Up Variations
  • Ring Muscle-Ups
  • Weighted Muscle-Ups
  • One Arm Muscle-Up Progressions
  • Front Lever
  • Back Lever

For many athletes, the first Muscle-Up marks the transition from beginner to intermediate calisthenics.


Skill Difficulty

CategoryDetails
Difficulty★★★★☆ (Advanced Beginner / Intermediate)
Estimated Time3–9 Months
EquipmentPull-Up Bar, Resistance Band (Optional)
Prerequisites10 Strict Pull-Ups, 15 Strict Dips, Chest-to-Bar Pull-Up, 30-Second Dead Hang
UnlocksRing Muscle-Ups, Weighted Muscle-Ups, Front Lever Training, Advanced Bar Skills

Why Most People Can’t Do a Muscle-Up

The Muscle-Up is not simply a higher pull-up.

Common reasons people struggle include:

Insufficient Pulling Strength

Most beginners cannot pull high enough above the bar.

Weak Transition

Moving from the pull-up into the dip is often the hardest part.

Poor Explosiveness

Muscle-Ups require speed as well as strength.

Weak Dips

Locking out above the bar demands strong triceps and shoulders.

Poor Timing

Even strong athletes can fail if their technique is off.


Muscle-Up Form Basics

Before beginning the roadmap, understand the movement.

A Muscle-Up consists of three phases:

Pull Phase

Explosively pull your chest toward the bar.

Transition Phase

Lean your chest over the bar while rotating your wrists.

Dip Phase

Press yourself to full elbow lockout above the bar.


Equipment Needed

This roadmap requires:

Optional:


Weekly Training Schedule

Train three times weekly.

Example Schedule

DayTraining
MondayMuscle-Up Training
WednesdayMuscle-Up Training
FridayMuscle-Up Training

Recovery is essential between sessions.


Pre-Workout Warm-Up

Mobility Warm-Up

Activation Warm-Up


Phase 1 – Master Strict Pull-Ups

Goal

Develop the pulling strength required for explosive movements.

How to Do a Strict Pull-Up

  • Grip the bar slightly wider than shoulder-width.
  • Pull until your chin clears the bar.
  • Lower under control.
  • Avoid swinging.

Workout

Strict Pull-Ups

  • 5 sets × 6–10 reps

Progression Goal

Complete 10 clean pull-ups.


Phase 2 – Build Strong Dips

Goal

Develop pressing strength for the lockout phase.

How to Do a Dip

  • Lower until your upper arms are roughly parallel to the floor.
  • Press back to full lockout.
  • Stay controlled.

Workout

Bodyweight Dips

  • 5 sets × 10–15 reps

Progression Goal

Complete 15 strict dips.


Phase 3 – Master Chest-to-Bar Pull-Ups

Goal

Learn to pull higher than a standard pull-up.

This develops the height needed for a successful transition.

Workout

Chest-to-Bar Pull-Ups

  • 5 sets × 5 reps

Progression Goal

Touch your lower chest to the bar consistently.


Phase 4 – Learn the Transition

Goal

Master the hardest part of the Muscle-Up.

How to Practice

  • Use a low bar or resistance band.
  • Pull explosively.
  • Lean your chest over the bar.
  • Rotate your wrists.
  • Finish in the top dip position.

Workout

Band-Assisted Muscle-Up Transitions

  • 5 sets × 5 reps

Progression Goal

Perform smooth, controlled transitions.


Phase 5 – Explosive Pull-Ups

Goal

Develop the speed needed to clear the bar.

Workout

Explosive Pull-Ups

  • 5 sets × 3–5 reps

Aim to pull your chest or stomach toward the bar.

Progression Goal

Pull consistently to chest height or above.


Phase 6 – Your First Muscle-Up

The moment you’ve been training for.

Checklist Before Attempting

✓ 10 Strict Pull-Ups

✓ 15 Strict Dips

✓ Chest-to-Bar Pull-Ups

✓ Smooth Transition Drills

✓ Explosive High Pulls

If you’ve achieved these milestones, you’re ready.

How to Do Your First Muscle-Up

  • Grip the bar firmly.
  • Pull explosively toward your lower chest.
  • Lean your shoulders over the bar.
  • Rotate your wrists quickly.
  • Press into the dip.
  • Lock out your elbows.

Congratulations.

You’ve achieved your first Muscle-Up.

Workout

Muscle-Up Attempts

  • 8–10 attempts

Chest-to-Bar Pull-Ups

  • 3 sets × 5 reps

Dips

  • 3 sets × 10 reps

Transition Drills

  • 3 sets × 5 reps

Train three times weekly.


Post-Workout Stretch Routine

Repeat after every workout.


How Long Does It Take to Get Your First Muscle-Up?

Progress depends on:

  • Pulling strength
  • Explosiveness
  • Technique
  • Bodyweight
  • Consistency

Estimated Timelines

Starting LevelTime Estimate
Complete Beginner6–18 Months
Can Do 10 Pull-Ups2–6 Months
Experienced Athlete1–3 Months

Patience and quality practice are the keys to success.


Common Muscle-Up Mistakes

Pulling Too Late

Explode from the very start.

Looking Down

Keep your eyes forward.

Ignoring Transition Practice

Most failed Muscle-Ups happen during the transition.

Skipping Explosive Training

Strength alone isn’t enough.

Weak Dips

Finish every Muscle-Up with a powerful lockout.


Nutrition Tips for Faster Progress

Explosive strength requires proper recovery.

Prioritize:

  • Lean protein
  • Complex carbohydrates
  • Healthy fats
  • Plenty of water
  • 7–9 hours of quality sleep

Train hard.

Recover harder.


Final Thoughts

Your first Muscle-Up isn’t just another repetition.

It’s proof that you’ve developed the strength, power, coordination, and determination to overcome one of calisthenics’ most rewarding milestones.

Every pull-up, every dip, every transition drill, and every explosive rep has prepared you for this moment.

  • Trust the roadmap.
  • Stay patient.
  • Keep practicing.

The bar that once stopped you will soon become the place where you rise above it.

How to Do Scapular Push-Ups Correctly: Step-by-Step Guide for Beginners

Scapular Push-Ups are a bodyweight exercise that focuses on moving your shoulder blades while keeping your arms straight. Unlike regular Push-Ups, which involve bending and extending your elbows, Scapular Push-Ups primarily involve the controlled movement of your shoulder blades around your rib cage.

This exercise is particularly useful for developing serratus anterior strength, shoulder blade control, and upper-body stability. It can also help you learn how to actively control your shoulders during Push-Ups, Planks, Handstands, and other calisthenics movements.

Although the movement is relatively small, proper technique is important. The goal is to move your shoulder blades through a comfortable range without bending your elbows, sagging your hips, or excessively arching your lower back.


What Are Scapular Push-Ups?

Scapular Push-Ups are a bodyweight exercise performed in a High Plank position by moving the shoulder blades through protraction and retraction while keeping the elbows extended.

You begin with your arms straight and hands underneath your shoulders. Without bending your elbows, allow your chest to move slightly toward the floor as your shoulder blades move toward each other.

You then push firmly through your hands, allowing your shoulder blades to spread apart as your upper back rises slightly.

The movement involves two main actions:

  • Scapular Retraction: Your shoulder blades move toward each other as your chest lowers slightly.
  • Scapular Protraction: Your shoulder blades move away from each other as you push the floor away.

Scapular Push-Ups are commonly used in:

  • Shoulder stability training
  • Calisthenics workouts
  • Push-Up preparation
  • Handstand training
  • Upper-body warm-ups
  • Serratus anterior strengthening
  • Bodyweight training
  • At-home workouts

They can also be performed from the knees or against an elevated surface to reduce difficulty.

Benefits of Scapular Push-Ups

Scapular Push-Ups develop the muscles responsible for controlling your shoulder blades during upper-body movements.

Benefits include:

  • Strengthens the serratus anterior
  • Improves active shoulder blade control
  • Develops scapular protraction strength
  • Trains controlled scapular retraction
  • Improves shoulder stability during weight-bearing exercises
  • Reinforces straight-arm support mechanics
  • Develops upper-body muscular endurance
  • Supports preparation for Push-Ups, Planks, and Handstands
  • Requires minimal equipment

Scapular Push-Ups can be a useful part of shoulder training, but they do not replace a complete strengthening program for the shoulders and upper back.

Muscles Worked in Scapular Push-Ups

Scapular Push-Ups primarily train the muscles responsible for moving and stabilizing your shoulder blades.

Unlike regular Push-Ups, the elbows remain extended, so the exercise places greater emphasis on scapular movement rather than repeated elbow flexion and extension.

Primary Muscles
  • Serratus Anterior
  • Trapezius
  • Rhomboid Major
  • Rhomboid Minor
Secondary Muscles
  • Pectoralis Minor
  • Pectoralis Major
  • Anterior Deltoids
  • Triceps Brachii
  • Rotator Cuff Muscles
  • Rectus Abdominis
  • Obliques
  • Gluteus Maximus

The serratus anterior is particularly important during the pushing phase because it helps move the shoulder blades forward and around the rib cage.

The trapezius and rhomboids contribute to controlling shoulder blade movement, while the chest, shoulders, triceps, and core help maintain your plank position.


How to Do Scapular Push-Ups (Step-by-Step)

Step 1: Start on Your Hands and Knees

Begin on all fours on the floor or an Exercise Mat.

Position your hands approximately shoulder-width apart with your fingers comfortably spread.

Keep your elbows extended and your shoulders positioned over your hands.

Step 2: Enter a High Plank

Step your feet backward until your legs are extended and your body forms a relatively straight line from your head to your heels.

Keep your:

  • Core braced
  • Glutes engaged
  • Legs controlled
  • Head relatively neutral
  • Hands firmly planted
  • Elbows extended

Avoid allowing your hips to sag toward the floor.

Step 3: Establish Your Starting Position

Begin with your arms straight and your shoulder blades in a comfortable, controlled position.

Keep your torso stable and avoid deliberately arching your lower back.

Your elbows should remain extended throughout the exercise.

Step 4: Retract Your Shoulder Blades

Slowly bring your shoulder blades toward each other.

As they retract, your chest will move slightly toward the floor.

Keep your:

  • Elbows straight
  • Core engaged
  • Hips stable
  • Head neutral
  • Shoulders controlled

Do not bend your elbows as you would during a regular Push-Up.

Step 5: Reach the Retraction Position

Continue until your shoulder blades have moved toward each other through a comfortable range.

Your chest should lower slightly between your shoulders without your hips dropping.

Avoid forcing your shoulder blades together or collapsing excessively through your upper back.

Step 6: Protract Your Shoulder Blades

Push firmly through your palms while keeping your elbows extended.

Allow your shoulder blades to move apart and wrap forward around your rib cage.

Your upper back will rise slightly as you push the floor away.

Step 7: Return to Full Protraction and Repeat

Continue pushing until you reach a strong, controlled protraction position.

Avoid excessively rounding your lower back or lifting your hips.

Slowly return to the retraction phase and repeat for your planned repetitions.

Warrior showcasing How to do Scapular Push-Ups with proper form.

Scapular Push-Ups Form Checklist

Use this checklist to maintain proper Scapular Push-Up technique.

  • Place your hands approximately shoulder-width apart
  • Keep your hands underneath or close to underneath your shoulders
  • Maintain straight elbows throughout the movement
  • Brace your core
  • Engage your glutes
  • Keep your head relatively neutral
  • Maintain a stable High Plank
  • Move primarily through your shoulder blades
  • Allow your chest to lower slightly during retraction
  • Avoid excessive shoulder blade squeezing
  • Push the floor away during protraction
  • Spread your shoulder blades apart under control
  • Avoid sagging or excessively raising your hips
  • Use a smooth and controlled tempo
  • Maintain a comfortable range of motion

The goal is to move your shoulder blades independently while keeping the rest of your body relatively stable.


Common Scapular Push-Ups Mistakes

Bending the Elbows

Problem: Bending your elbows turns the exercise into a partial regular Push-Up and reduces the emphasis on controlled scapular movement.

Fix: Keep your elbows extended throughout the repetition and focus on moving your shoulder blades rather than lowering your body by bending your arms.

Letting the Hips Sag

Problem: Allowing your hips to drop can cause excessive movement through your lower back and disrupt your plank position.

Fix: Brace your core and engage your glutes to maintain a relatively straight body line.

Raising the Hips Too High

Problem: Pushing your hips upward changes your body angle and reduces the intended straight-body support challenge.

Fix: Keep your hips aligned with your torso and legs throughout the exercise.

Moving the Entire Torso Instead of the Shoulder Blades

Problem: Excessively arching and rounding your spine can create the appearance of scapular movement without properly controlling your shoulder blades.

Fix: Keep your core engaged and focus on allowing your shoulder blades to move around your rib cage while minimizing unnecessary spinal movement.

Forcing Excessive Retraction

Problem: Trying to squeeze your shoulder blades together as tightly as possible can create an uncomfortable position and cause you to lose control.

Fix: Allow your shoulder blades to retract naturally through a comfortable range without forcing the movement.

Performing the Repetitions Too Quickly

Problem: Rushing through the movement makes it difficult to control the relatively small range of scapular motion.

Fix: Use slow, deliberate repetitions and briefly control both the retracted and protracted positions.

Shrugging the Shoulders Excessively

Problem: Unnecessarily lifting your shoulders toward your ears can create additional neck tension and make scapular control more difficult.

Fix: Maintain a comfortable neck position and focus on smooth shoulder blade movement without deliberately shrugging.


Scapular Push-Up Progressions and Variations

Scapular Push-Ups can be modified according to your current shoulder strength, bodyweight control, and training experience.

Wall Scapular Push-Up

This beginner-friendly variation reduces the amount of bodyweight supported by your arms.

How to Do Wall Scapular Push-Ups

  • Stand facing a sturdy wall.
  • Place your palms against the wall at approximately shoulder height.
  • Step your feet backward into a comfortable lean.
  • Keep your elbows extended.
  • Allow your shoulder blades to move toward each other.
  • Push through your palms to spread your shoulder blades apart.
  • Repeat while maintaining a controlled body position.

Knee Scapular Push-Up

Keeping your knees on the floor reduces the difficulty while allowing you to practice scapular movement.

How to Do Knee Scapular Push-Ups

  • Begin on your hands and knees.
  • Position your hands approximately underneath your shoulders.
  • Move your knees backward slightly if needed for a comfortable support position.
  • Keep your elbows extended and brace your core.
  • Allow your shoulder blades to retract as your chest lowers slightly.
  • Push the floor away to protract your shoulder blades.
  • Repeat without excessive movement through your hips or lower back.

Incline Scapular Push-Up

Placing your hands on an elevated surface reduces the amount of bodyweight supported by your upper body.

How to Do Incline Scapular Push-Ups

  • Choose a sturdy elevated surface.
  • Place your hands approximately shoulder-width apart.
  • Walk your feet backward into an inclined plank.
  • Keep your elbows extended and core engaged.
  • Allow your shoulder blades to retract under control.
  • Push firmly through your hands to protract your shoulder blades.
  • Repeat while maintaining a straight body line.

Slow-Tempo Scapular Push-Up

Slowing the movement increases the amount of time your shoulder stabilizers must work.

How to Do Slow-Tempo Scapular Push-Ups

  • Begin in a stable High Plank.
  • Keep your elbows extended.
  • Slowly retract your shoulder blades over several seconds.
  • Pause briefly in the retracted position.
  • Gradually push the floor away to protract your shoulder blades.
  • Pause briefly in full controlled protraction.
  • Repeat without rushing or losing your plank position.

Scapular Push-Up With Protraction Hold

This variation emphasizes the serratus anterior by increasing the time spent maintaining a strong protracted position.

How to Do Scapular Push-Ups With a Protraction Hold

  • Begin in a High Plank with your elbows extended.
  • Brace your core and glutes.
  • Allow your shoulder blades to retract under control.
  • Push firmly through your palms to spread your shoulder blades apart.
  • Hold the fully protracted position for several seconds.
  • Slowly return to the retracted position.
  • Repeat while maintaining stable hips and straight elbows.

Final Thoughts

Scapular Push-Ups are a simple but effective bodyweight exercise for developing shoulder blade control and strengthening the muscles responsible for stabilizing your shoulders.

They develop:

  • Serratus anterior strength
  • Scapular protraction control
  • Scapular retraction control
  • Shoulder stability
  • Straight-arm support strength
  • Core stability
  • Upper-body muscular endurance
  • Body awareness

Unlike regular Push-Ups, Scapular Push-Ups do not require you to bend your elbows. Instead, focus on allowing your shoulder blades to move toward each other as your chest lowers slightly, then spreading them apart as you push the floor away.

Start with Wall, Knee, or Incline Scapular Push-Ups if the standard version is too challenging. As your control improves, progress to full High Plank Scapular Push-Ups, slower repetitions, and longer protraction holds. Learn more about Push Workouts here.

Essential Gear for Scapular Push-Ups

Scapular Push-Ups require no mandatory equipment, but a few items can improve comfort or provide additional progression options.

  • Exercise Mat: Provides a comfortable, non-slip surface for your hands, knees, and feet during floor-based Scapular Push-Ups.
  • Workout Bench: A sturdy bench can be used for Incline Scapular Push-Ups, reducing the amount of bodyweight supported by your arms.
  • Push-Up Handles: Provide an alternative wrist position when placed securely on a stable surface.
  • Resistance Band: Can provide additional resistance around the upper back during advanced Scapular Push-Up variations when positioned securely.
  • Wrist Wraps: Provide additional wrist support and stability if you experience discomfort during higher-volume pushing exercises.

Scapular Push-Up FAQ

Q1: What is the difference between Scapular Push-Ups and regular Push-Ups?
Regular Push-Ups involve bending and extending the elbows to lower and raise your body. Scapular Push-Ups keep the elbows extended and focus on moving the shoulder blades through retraction and protraction.

Q2: Should my elbows bend during Scapular Push-Ups?
No. Your elbows should remain extended throughout the movement. The goal is to control your shoulder blades without turning the exercise into a regular Push-Up.

Q3: How many Scapular Push-Ups should beginners do?
A practical starting point is around 8–15 controlled repetitions for 2–3 sets. Adjust the variation and number of repetitions according to your strength, comfort, and ability to maintain proper technique.

Q4: Can Scapular Push-Ups help with Handstands and regular Push-Ups?
Yes. Scapular Push-Ups can help develop serratus anterior strength and shoulder blade control, which are useful during Push-Ups, Planks, and Handstands. However, these skills also require additional strength, technique, and progressive practice.

Q5: How can I make Scapular Push-Ups harder?
You can slow each repetition, pause longer in the protracted position, increase your controlled repetitions, or add appropriate resistance. Progress only while maintaining straight elbows, stable hips, and controlled shoulder blade movement.