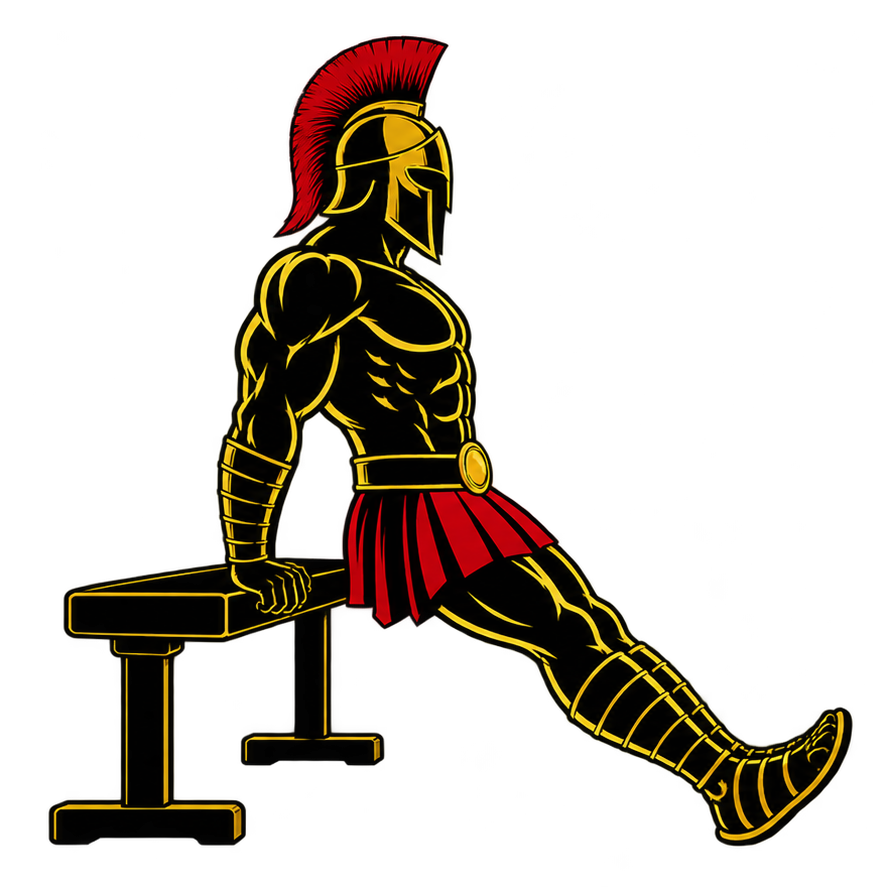
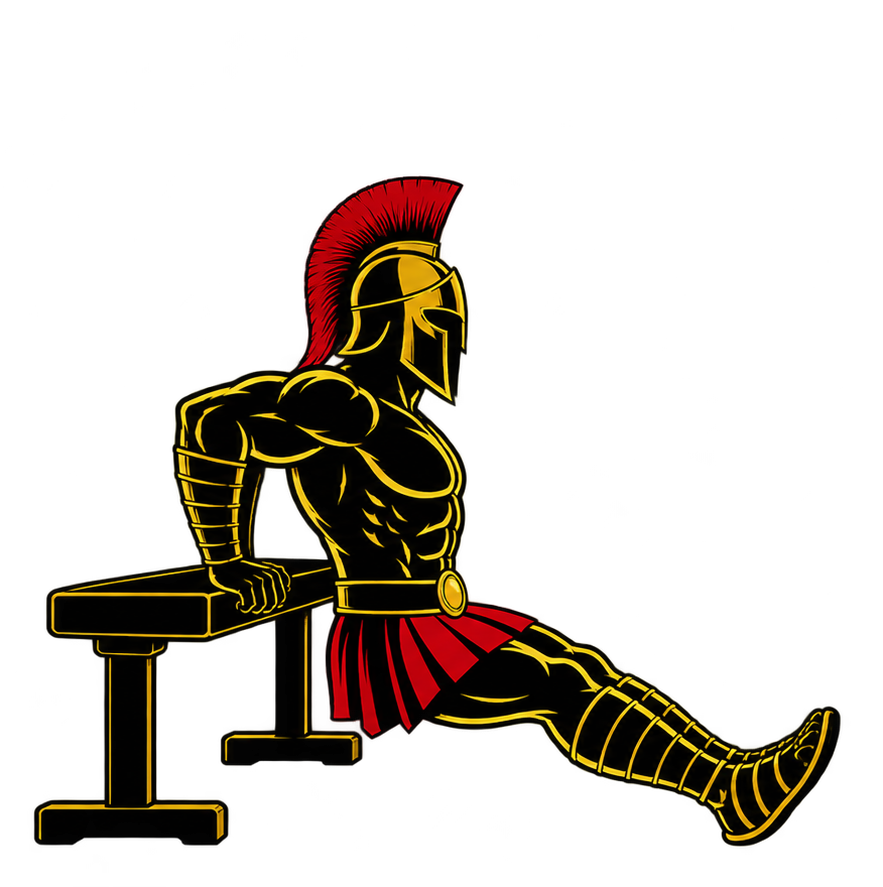
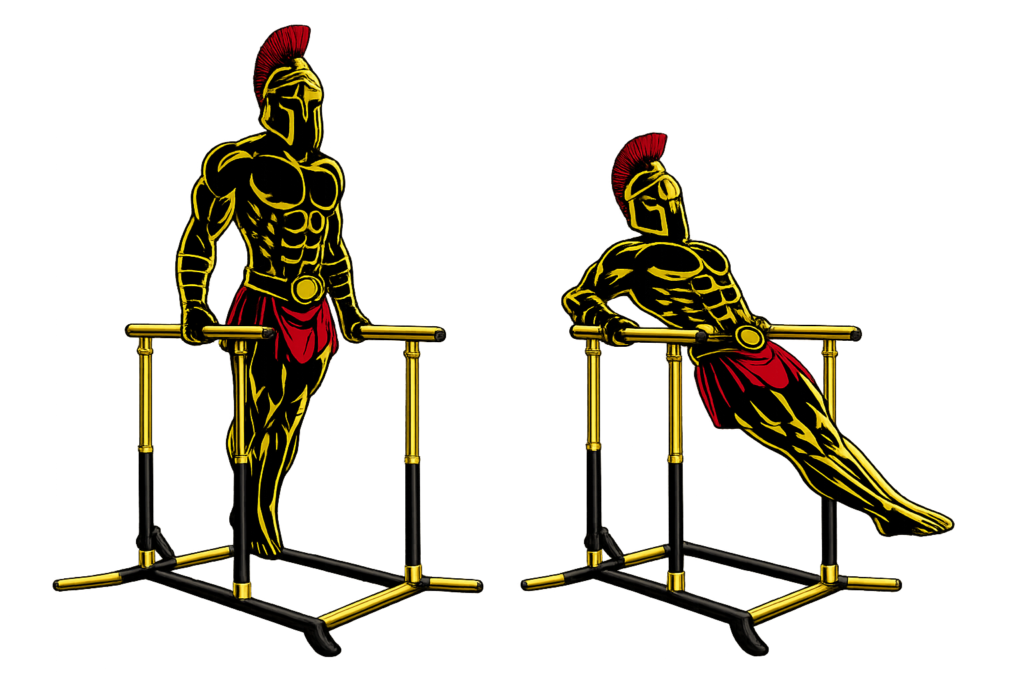
How to Do Sissy Squats Correctly: Step-by-Step Guide for Beginners

Learn how to do Sissy Squats with proper form, avoid common mistakes, and discover the best Sissy Squat variations to build stronger quadriceps, improve lower-body control, and develop impressive leg strength.

The Sissy Squat is an advanced bodyweight leg exercise that places significant emphasis on the quadriceps while challenging your balance, ankle mobility, and core stability. Unlike a traditional squat, the Sissy Squat involves leaning the body backward while allowing the knees to travel forward as you lower toward the floor.

Whether you’re training for calisthenics, bodybuilding, athletic performance, or simply want stronger legs without heavy equipment, learning the Sissy Squat can add a unique challenge to your lower-body training.


What Is a Sissy Squat?

A Sissy Squat is a bodyweight squat variation performed by rising onto the balls of your feet, bending your knees forward, and leaning your torso backward while keeping your body aligned. You then lower your body under control before driving through your feet to return to the starting position.

The movement places a strong emphasis on the quadriceps and requires considerable ankle mobility, balance, and body control.

Sissy Squats are commonly used in:

  • Calisthenics training
  • Bodyweight leg workouts
  • Bodybuilding routines
  • Quadriceps-focused training
  • Advanced lower-body conditioning

Because the exercise can place substantial stress on the knees when performed incorrectly, beginners should start with an assisted variation and gradually progress.

Benefits of Sissy Squats

Sissy Squats offer several lower-body strength and control benefits.

Benefits include:

  • Builds strong quadriceps
  • Improves lower-body control
  • Strengthens the hip flexors
  • Challenges balance and coordination
  • Improves ankle mobility
  • Develops muscular endurance
  • Requires minimal equipment

Few bodyweight exercises isolate the quadriceps as strongly as a properly performed Sissy Squat.

Muscles Worked in Sissy Squats

Sissy Squats primarily target the muscles responsible for extending the knee.

Primary Muscles
  • Quadriceps
  • Rectus Femoris
  • Vastus Lateralis
  • Vastus Medialis
Secondary Muscles
  • Gluteus Maximus
  • Hip Flexors
  • Calves
  • Core Muscles

The core and lower-leg muscles work continuously to stabilize your body while you lean backward and control the movement.


How to Do Sissy Squats (Step-by-Step)

Step 1: Stand Upright

Stand with your feet approximately hip-width apart.

Maintain:

  • Chest upright
  • Core engaged
  • Feet firmly planted
  • Eyes looking forward

Tip: Stand next to a sturdy support when learning the movement.

Step 2: Rise Onto the Balls of Your Feet

Slowly raise your heels from the floor so that you are standing on the balls of your feet.

Keep your body controlled and your feet stable.

Step 3: Lean Your Body Back

Begin bending your knees while slowly leaning your torso backward.

Focus on:

  • Keeping your hips extended
  • Maintaining a straight line from your knees through your shoulders
  • Keeping your heels elevated
  • Moving slowly

Your knees will travel forward as your torso moves backward.

Step 4: Lower Into the Squat

Continue lowering your body toward the floor under control.

Descend only as far as you can while maintaining:

  • Stable feet
  • Controlled knee movement
  • A strong core
  • Proper body alignment

You do not need to reach maximum depth to perform an effective Sissy Squat.

Step 5: Push Back Up

Drive through the balls of your feet and straighten your knees.

Use your quadriceps to raise your body back to the starting position.

Keep the movement smooth and controlled.
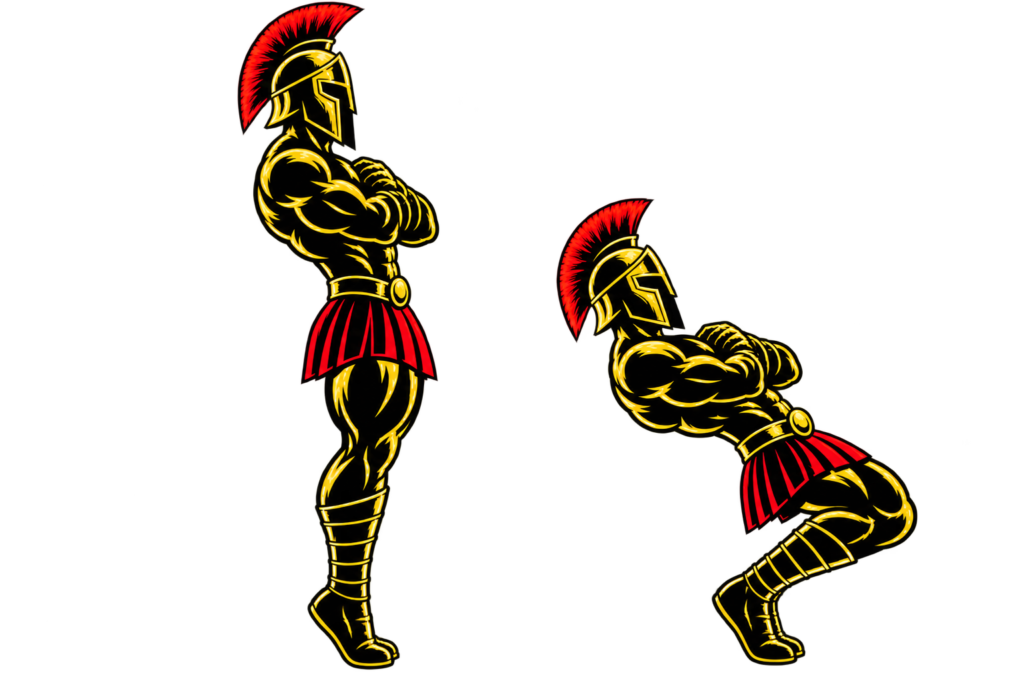

Warrior showcasing How to do Sissy Squats with proper form.

Sissy Squats Form Checklist

Use this quick checklist to ensure proper Sissy Squat form.

  • Keep your core engaged
  • Maintain an upright and controlled body line
  • Keep your heels elevated
  • Move slowly through the entire range
  • Avoid forcing maximum depth
  • Keep your knees tracking consistently

Good technique is especially important because the Sissy Squat places substantial demand on the knees and quadriceps.


Common Sissy Squats Mistakes

Dropping Too Quickly

Problem: A fast descent reduces muscular control and can place unnecessary stress on the knees.

Fix: Lower your body slowly and deliberately.

Going Too Deep Too Soon

Problem: Insufficient strength or mobility can make excessive depth difficult to control.

Fix: Start with a partial range of motion and gradually increase your depth.

Losing Body Alignment

Problem: Excessive bending at the hips changes the movement and reduces quadriceps involvement.

Fix: Keep your hips extended and maintain a controlled backward lean.

Allowing the Knees to Collapse

Problem: Poor knee tracking can reduce stability and increase unnecessary joint stress.

Fix: Keep your knees aligned with your feet throughout the movement.

Attempting the Exercise Without Enough Strength

Problem: The Sissy Squat is significantly more demanding than a standard squat.

Fix: Begin with an assisted variation and build your strength before performing unsupported repetitions.

Never sacrifice control simply to perform a deeper repetition.


Sissy Squat Variations

Once you master the basic movement, these variations can help you progress safely.

Assisted Sissy Squats

The ideal beginner progression.

How to Do Assisted Sissy Squats

  • Hold a sturdy support with one or both hands.
  • Rise onto the balls of your feet.
  • Bend your knees and lean backward while using the support for balance.
  • Return to the starting position under control.

Use as little assistance as necessary.

Partial Sissy Squats

Builds strength through a manageable range of motion.

How to Do Partial Sissy Squats

  • Begin in the standard starting position.
  • Lower only partway toward the floor.
  • Maintain control throughout the movement.
  • Gradually increase your depth as your strength improves.

Full Sissy Squats

The standard advanced variation.

How to Do Full Sissy Squats

  • Rise onto the balls of your feet.
  • Lean backward while bending your knees.
  • Lower your body toward the floor.
  • Return to standing using your quadriceps.

Only perform the full range if you can maintain excellent control.

Weighted Sissy Squats

The advanced strength progression.

How to Do Weighted Sissy Squats

  • Hold a light dumbbell or weight plate against your chest.
  • Perform a controlled Sissy Squat.
  • Maintain proper alignment throughout the movement.
  • Increase the resistance gradually.

Weighted Sissy Squats should only be attempted after mastering the bodyweight version.


Final Thoughts

The Sissy Squat is one of the most challenging bodyweight exercises for developing powerful quadriceps and lower-body control.

It develops:

  • Quadriceps strength
  • Leg endurance
  • Ankle mobility
  • Balance
  • Body control

Because of the unique position of the knees and torso, the Sissy Squat requires more control than a conventional squat. Start with an assisted variation, master the technique, and gradually increase your range of motion. Learn more about Leg Workouts here.

Never force the exercise through pain or sacrifice proper form for greater depth.

Strong legs are built through disciplined progression, not reckless intensity.

Essential Gear for Sissy Squats

Sissy Squats can be performed without equipment, but a few pieces of gear can make training more comfortable and allow you to progress.

  • Exercise Mat: Provides cushioning and a non-slip surface during lower-body workouts.
  • Sturdy Support: A squat rack, pole, or other stable object can provide assistance while learning the movement.
  • Resistance Band: Can provide additional assistance during beginner progressions.
  • Dumbbell: Useful for adding resistance once you have mastered the bodyweight variation.

Sissy Squat FAQ

Q1: Are Sissy Squats good for building bigger quads?
Yes. Sissy Squats place a strong emphasis on the quadriceps and can be an effective addition to a leg-training program when performed with proper technique and appropriate progression.

Q2: Are Sissy Squats bad for your knees?
Sissy Squats are not inherently harmful, but they place significant demands on the knees. Start with an assisted variation, use controlled movement, and avoid forcing depth or training through pain.

Q3: Should beginners do Sissy Squats?
Beginners should start with assisted or partial Sissy Squats rather than immediately attempting the full movement. Building basic squat strength and gradually increasing the range of motion is a safer approach.

Q4: How many Sissy Squats should I do?
Beginners can start with 5-10 controlled repetitions for 2-3 sets using an assisted variation. More advanced athletes can gradually increase repetitions or add light resistance.

Q5: What muscles do Sissy Squats work?
Sissy Squats primarily target the quadriceps while also engaging the hip flexors, glutes, calves, and core for stabilization.
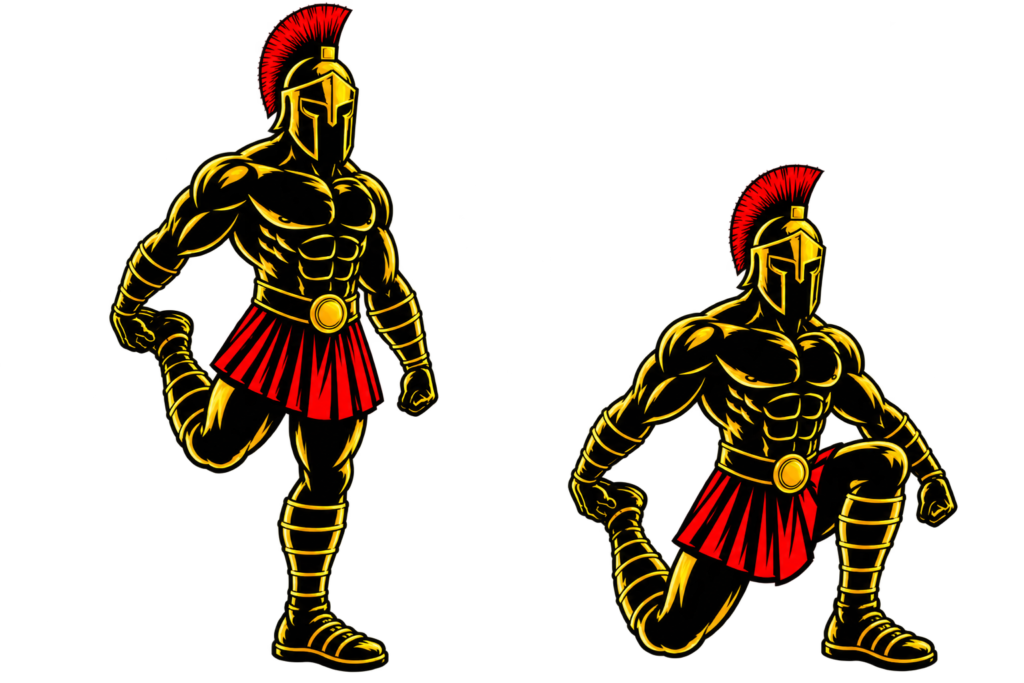
How to Do Shrimp Squats Correctly: Step-by-Step Guide for Beginners

Learn how to do Shrimp Squats with perfect form, avoid common mistakes, and discover the best Shrimp Squat variations to build single-leg strength, improve balance, and develop exceptional lower-body control.

The Shrimp Squat is an advanced unilateral bodyweight exercise that challenges your quadriceps, glutes, balance, mobility, and coordination. Unlike a traditional squat, the Shrimp Squat requires you to balance on one leg while the opposite leg is bent behind your body.

Whether you’re training for calisthenics, martial arts, athletic performance, or general strength, mastering the Shrimp Squat can help you develop powerful and well-balanced legs without requiring weights.


What Is a Shrimp Squat?

A Shrimp Squat is an advanced single-leg squat variation where you stand on one leg while bending the opposite leg behind you and bringing its knee toward the floor. The working leg performs the majority of the movement while your free leg remains folded behind your body.

The movement requires a combination of strength, balance, ankle mobility, hip mobility, and body control.

Shrimp Squats are commonly used in:

  • Calisthenics training
  • Functional strength workouts
  • Martial arts conditioning
  • Athletic training
  • Single-leg strength programs

Because the exercise places almost all of your bodyweight on one leg, it is considerably more demanding than a standard bodyweight squat.

Benefits of Shrimp Squats

Shrimp Squats offer several strength, mobility, and performance benefits.

Benefits include:

  • Builds powerful single-leg strength
  • Strengthens the quadriceps and glutes
  • Improves balance and coordination
  • Develops ankle and hip mobility
  • Corrects lower-body strength imbalances
  • Improves body control
  • Requires no equipment

Few bodyweight exercises challenge unilateral leg strength and balance as effectively as the Shrimp Squat.

Muscles Worked in Shrimp Squats

Shrimp Squats heavily recruit the muscles responsible for extending and stabilizing the lower body.

Primary Muscles
  • Quadriceps
  • Gluteus Maximus
  • Gluteus Medius
Secondary Muscles
  • Hamstrings
  • Calves
  • Hip Flexors
  • Adductors
  • Core Muscles

The supporting muscles of the ankle and foot also work continuously to maintain balance throughout each repetition.


How to Do Shrimp Squats (Step-by-Step)

Step 1: Stand on One Leg

Stand upright with your feet together.

Shift your weight onto your right leg and lift your left foot from the floor.

Maintain:

  • Chest upright
  • Core engaged
  • Standing foot firmly planted
  • Eyes looking forward

Tip: Practice near a sturdy support when learning the movement.

Step 2: Bend Your Free Leg Behind You

Bend your left knee and bring your left foot behind your body.

Reach backward with your left hand and hold the top of your left foot or ankle.

Keep your right leg straight and your torso upright.

Step 3: Begin the Descent

Slowly bend your right knee and lower your body toward the floor.

As you descend:

  • Keep your supporting heel planted
  • Keep your chest lifted
  • Keep your core tight
  • Maintain control of your free leg

Your rear knee should travel downward toward the floor behind your supporting foot.

Step 4: Reach the Bottom Position

Continue lowering until your rear knee approaches or lightly touches the floor.

At the bottom:

  • Keep your supporting foot stable
  • Maintain an upright torso
  • Keep your working knee controlled
  • Avoid collapsing inward

Only descend as deeply as you can while maintaining proper form.

Step 5: Push Back Up

Drive through the heel and midfoot of your supporting leg.

Straighten your working knee and return to the starting position.

Release your rear foot once you are fully upright if necessary.

Complete your repetitions before switching legs.

Warrior showcasing How to do Shrimp Squats with proper form.

Shrimp Squats Form Checklist

Use this quick checklist to ensure proper Shrimp Squat form.

  • Keep your supporting heel planted
  • Keep your chest upright
  • Brace your core
  • Control the entire descent
  • Keep your supporting knee aligned with your toes
  • Avoid using momentum
  • Train both legs evenly

Good technique is more important than achieving maximum depth.


Common Shrimp Squats Mistakes

Losing Balance

Problem: Poor balance can cause you to fall forward or sideways during the movement.

Fix: Practice assisted Shrimp Squats while holding a sturdy support until your balance improves.

Letting the Supporting Knee Collapse Inward

Problem: Reduces stability and can place unnecessary stress on the knee.

Fix: Keep your knee tracking in the same direction as your toes.

Dropping Too Quickly

Problem: Makes the movement harder to control and reduces muscular tension.

Fix: Lower yourself slowly and deliberately.

Lifting the Supporting Heel

Problem: Reduces stability and makes it difficult to generate force.

Fix: Keep your heel firmly planted throughout the movement.

Forcing the Bottom Position

Problem: Limited mobility can cause you to lose balance or compensate with poor technique.

Fix: Use an easier variation and gradually increase your range of motion.

Master the movement before chasing depth.


Shrimp Squat Variations

Once you develop the necessary strength and balance, these variations can help you progress.

Assisted Shrimp Squats

The ideal beginner progression.

How to Do Assisted Shrimp Squats

  • Stand near a sturdy support.
  • Hold the support with one hand.
  • Perform the Shrimp Squat while using the support for balance.
  • Gradually reduce your assistance as you become stronger.

Partial Shrimp Squats

Builds strength through a limited range of motion.

How to Do Partial Shrimp Squats

  • Perform the Shrimp Squat without descending all the way to the floor.
  • Control the movement throughout the available range.
  • Gradually increase your depth as your strength and mobility improve.

Full Shrimp Squats

The standard advanced variation.

How to Do Full Shrimp Squats

  • Hold your rear foot with your hand.
  • Lower your rear knee toward the floor.
  • Keep your supporting foot planted.
  • Push through your working leg to return to standing.

Weighted Shrimp Squats

The advanced strength progression.

How to Do Weighted Shrimp Squats

  • Hold a dumbbell or kettlebell close to your chest.
  • Perform a controlled Shrimp Squat.
  • Keep your balance and maintain proper alignment.
  • Increase resistance gradually.

Only add weight once you can perform strict bodyweight Shrimp Squats with excellent technique.


Final Thoughts

The Shrimp Squat is one of the best advanced bodyweight exercises for developing single-leg strength and lower-body control.

It develops:

  • Quadriceps strength
  • Glute strength
  • Balance
  • Mobility
  • Coordination
  • Unilateral leg control

Although the movement can be difficult to master, consistent practice with easier progressions will gradually build the strength and mobility required for a full Shrimp Squat. Learn more about Leg Workouts here.

Focus on control, stability, and proper alignment rather than rushing toward the hardest variation.

A warrior builds strength one leg at a time.

Essential Gear for Shrimp Squat

Shrimp Squats require no equipment, but a few pieces of gear can make training more comfortable and allow you to progress.

  • Exercise Mat: Provides cushioning for the rear knee when practicing Shrimp Squats.
  • Resistance Band: Can provide assistance while learning the movement.
  • Dumbbell: Useful for adding resistance once you master the bodyweight version.
  • Kettlebell: Provides another effective option for weighted Shrimp Squats.

Shrimp Squats FAQ

Q1: Are Shrimp Squats harder than regular squats?
Yes. Shrimp Squats are considerably more difficult because one leg must support nearly your entire bodyweight while you also maintain balance and control.

Q2: Should beginners do Shrimp Squats?
Beginners should start with assisted or partial Shrimp Squats. Build sufficient single-leg strength and balance before attempting the full movement.

Q3: How many Shrimp Squats should I do?
Beginners can start with 3-6 repetitions per leg for 2-3 sets using an assisted variation. As your strength improves, gradually work toward 6-10 strict repetitions per leg.

.

How to Do Cossack Squats Correctly: Step-by-Step Guide for Beginners

Learn how to do Cossack Squats with perfect form, avoid common mistakes, and discover the best Cossack Squat variations to build lower-body strength, improve hip mobility, and develop greater balance and flexibility.

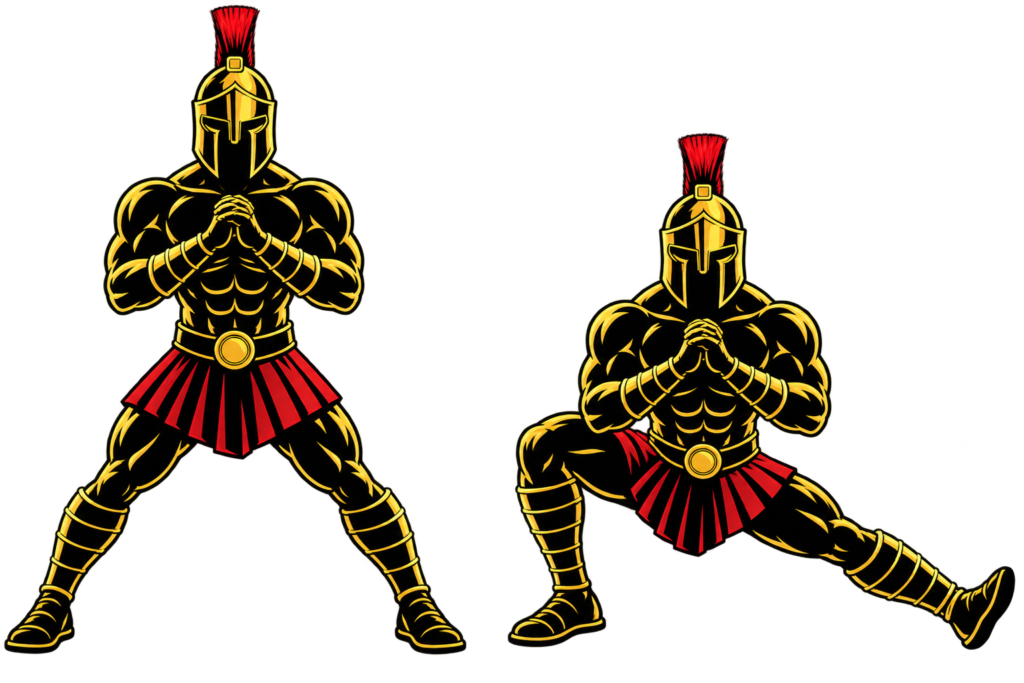
The Cossack Squat is a powerful bodyweight exercise that combines strength, mobility, balance, and coordination. Unlike a traditional squat, the Cossack Squat trains one leg while the opposite leg remains extended, creating a deep lateral movement that challenges your hips, adductors, hamstrings, and ankles.

Whether you’re training for calisthenics, martial arts, athletic performance, or general fitness, mastering the Cossack Squat can improve both your lower-body strength and movement quality.


What Is a Cossack Squat?

A Cossack Squat is a unilateral squat variation performed by shifting your body weight onto one bent leg while extending the opposite leg out to the side. The working leg bends deeply while the extended leg remains relatively straight, with the foot either planted or turned upward depending on your mobility and technique.

Unlike forward or backward lunges, the Cossack Squat moves laterally and places a greater emphasis on hip mobility and the inner thighs.

Cossack Squats are commonly used in:

  • Calisthenics training
  • Mobility routines
  • Martial arts conditioning
  • Athletic strength programs
  • Warm-up and movement preparation
  • Functional lower-body workouts

The exercise is especially valuable for athletes who need strength and mobility in multiple planes of movement.

Benefits of Cossack Squats

Cossack Squats offer several strength, mobility, and athletic benefits.

Benefits include:

  • Builds single-leg strength
  • Improves hip mobility
  • Stretches the inner thighs
  • Improves ankle mobility
  • Strengthens the quadriceps and glutes
  • Develops balance and coordination
  • Improves lateral movement ability
  • Requires no equipment

Few bodyweight exercises combine lower-body strength and lateral mobility as effectively as the Cossack Squat.

Muscles Worked in Cossack Squats

Cossack Squats engage several major muscles throughout the lower body.

Primary Muscles
  • Quadriceps
  • Gluteus Maximus
  • Adductors
  • Hamstrings
Secondary Muscles
  • Gluteus Medius
  • Calves
  • Hip Flexors
  • Tibialis Anterior
  • Core Muscles

The extended leg also receives a significant stretch, making the Cossack Squat both a strengthening exercise and a mobility movement.


How to Do Cossack Squats (Step-by-Step)

Step 1: Stand With a Wide Stance

Stand upright with your feet considerably wider than shoulder-width apart.

Maintain:

  • Chest lifted
  • Core engaged
  • Toes pointing mostly forward or slightly outward
  • Weight distributed evenly between both feet

Tip: Use a stance wide enough to allow you to descend comfortably without forcing your hips.

Step 2: Shift Your Weight to One Side

Slowly transfer your body weight onto your right leg.

Keep your left leg extended to the side.

As you shift:

  • Keep your right foot flat
  • Keep your left leg straight
  • Maintain an upright torso
  • Keep your core engaged

Step 3: Lower Into the Cossack Squat

Bend your right knee and lower your hips toward the floor.

Focus on:

  • Keeping your working heel planted
  • Driving your knee in the same direction as your toes
  • Keeping your extended leg straight
  • Maintaining control throughout the descent

Descend only as deeply as your mobility allows.

Step 4: Reach the Bottom Position

At the bottom:

  • Keep your working foot firmly planted
  • Keep your extended leg straight
  • Keep your chest lifted
  • Maintain a neutral spine

Your extended leg may remain flat on the floor or have the heel lifted, depending on your mobility and the variation being performed.

Pause briefly if you can maintain good form.

Step 5: Push Back to the Starting Position

Drive through the heel and midfoot of your working leg.

Straighten your working knee and shift your body back to the center.

Return to the starting position before repeating on the opposite side.

Perform equal repetitions on both sides.

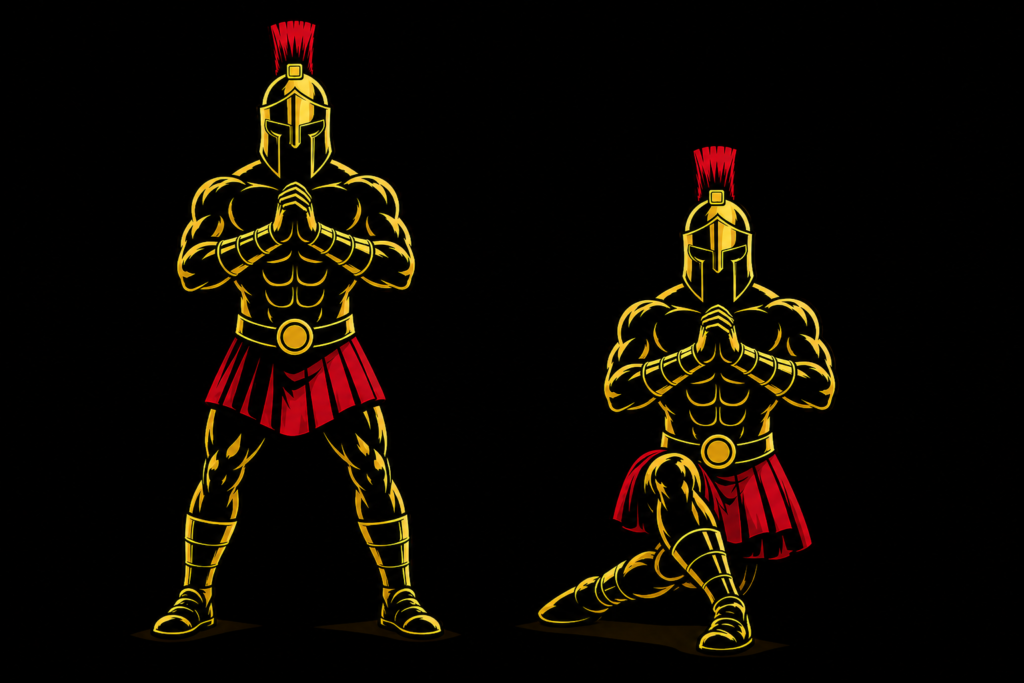
Warrior showcasing How to do Cossack Squats with proper form.

Cossack Squats Form Checklist

Use this quick checklist to ensure proper Cossack Squat form.

  • Start with a wide stance
  • Keep your working heel planted
  • Keep your extended leg straight
  • Keep your chest lifted
  • Keep your knee aligned with your toes
  • Control the descent and ascent
  • Never force your range of motion

Good technique allows you to develop strength while gradually improving mobility.


Common Cossack Squats Mistakes

Using a Stance That Is Too Narrow

Problem: Limits your range of motion and makes it difficult to reach a deep position.

Fix: Widen your stance until you can comfortably shift your hips toward one side.

Letting the Working Heel Lift

Problem: Reduces stability and can make the movement less controlled.

Fix: Work on ankle mobility and keep the working heel firmly connected to the floor.

Collapsing the Working Knee Inward

Problem: Reduces stability and places unnecessary stress on the knee.

Fix: Keep your knee tracking in the same direction as your toes.

Rounding the Back Excessively

Problem: Reduces control and can make the bottom position uncomfortable.

Fix: Keep your chest lifted and maintain a controlled, neutral spinal position.

Forcing the Depth

Problem: Insufficient hip or ankle mobility can make a deep Cossack Squat uncomfortable.

Fix: Only descend as far as you can while maintaining proper technique. Gradually increase your range of motion as your mobility improves.

Controlled movement is more important than achieving maximum depth.


Cossack Squat Variations

Once you master the basic Cossack Squat, these variations can help you progress.

Assisted Cossack Squats

The ideal beginner progression.

How to Do Assisted Cossack Squats

  • Hold onto a sturdy object for balance.
  • Perform the Cossack Squat while using your arms for minimal assistance.
  • Gradually reduce the amount of support as your mobility and strength improve.

Bodyweight Cossack Squats

The standard variation.

How to Do Bodyweight Cossack Squats

  • Start with a wide stance.
  • Shift your weight onto one leg.
  • Lower into the squat while extending the opposite leg.
  • Push back to the center and switch sides.

Goblet Cossack Squats

Adds resistance to the movement.

How to Do Goblet Cossack Squats

  • Hold a kettlebell or dumbbell close to your chest.
  • Perform a controlled Cossack Squat.
  • Keep your chest upright throughout the movement.

The added resistance increases the strength demands on the working leg.

Weighted Cossack Squats

The advanced progression.

How to Do Weighted Cossack Squats

  • Hold a dumbbell, kettlebell, or other suitable weight.
  • Perform a full Cossack Squat through your comfortable range of motion.
  • Maintain control throughout every repetition.

Increase the resistance gradually while preserving proper form.


Final Thoughts

The Cossack Squat is one of the best bodyweight exercises for developing lower-body strength and lateral mobility.

It improves:

  • Single-leg strength
  • Hip mobility
  • Ankle mobility
  • Balance
  • Lateral movement
  • Lower-body flexibility

Unlike traditional squats, the Cossack Squat challenges your body in the frontal plane while simultaneously strengthening one leg and stretching the other. Learn more about Leg Workouts here.

Start with a comfortable range of motion and gradually work toward greater depth. Never sacrifice control simply to reach the floor.

Strong legs are important, but a warrior who can move freely is even harder to stop.

Essential Gear for Cossack Squats

Cossack Squats require no equipment, but a few pieces of gear can make your training more comfortable and allow you to progress.

  • Exercise Mat: Provides cushioning and grip during mobility-focused Cossack Squat sessions.
  • Kettlebell: Excellent for adding resistance with Goblet Cossack Squats.
  • Dumbbell: Provides another simple option for progressively loading the movement.
  • Resistance Band: Can be used for assisted Cossack Squats or added resistance during advanced variations.

Cossack Squat FAQ

Q1: Are Cossack Squats good for beginners?
Yes. Beginners can perform assisted Cossack Squats while holding a sturdy support. Start with a comfortable range of motion and gradually build strength and mobility.

Q2: Why can’t I get very low in a Cossack Squat?
Limited hip, ankle, or inner-thigh mobility can restrict your depth. Use an assisted variation and gradually increase your range of motion instead of forcing yourself into a deeper position.

Q3: Should my extended foot stay flat on the floor?
It depends on your mobility and the variation. Keeping the extended leg straight is more important than forcing the entire foot to remain flat. Allow your foot to adjust naturally if necessary.

How to Do Chin-Ups Correctly: Step-by-Step Guide for Beginners

Chin-Ups are a compound bodyweight exercise that strengthens your back, biceps, forearms, and other upper-body pulling muscles. They are performed by hanging from a bar with an underhand grip and pulling your body upward until your chin reaches or passes the bar.

The underhand grip distinguishes Chin-Ups from standard Pull-Ups and places the arms in a position that allows substantial involvement from the biceps and other elbow flexors. Many beginners find this grip easier for developing their first bodyweight vertical pulling repetitions, although individual differences matter.

Chin-Ups require only a secure Pull-Up Bar and can be progressed from assisted repetitions to weighted and advanced variations as your strength improves.


What Are Chin-Ups?

Chin-Ups are a vertical pulling exercise in which you hang from an overhead bar with a supinated, or underhand, grip. Your palms face toward you as you pull your body upward by bending your elbows and using your back and arm muscles.

A standard repetition begins with your arms extended. You then pull upward until your chin reaches or clears the bar before lowering yourself under control.

The primary difference between Chin-Ups and Pull-Ups is the grip. Chin-Ups use an underhand grip, whereas standard Pull-Ups generally use an overhand grip with the palms facing away.

Chin-Ups are commonly used in:

  • Calisthenics training
  • Back workouts
  • Biceps training
  • Pull-day workouts
  • Upper-body strength programs
  • Bodyweight workouts
  • Military-style fitness training
  • Pull-Up progression programs

Both Chin-Ups and Pull-Ups train the back and arms, but the change in grip alters the mechanics and relative muscular contribution.

Benefits of Chin-Ups

Chin-Ups provide an efficient way to train several upper-body muscle groups using your bodyweight.

Benefits include:

  • Strengthens the latissimus dorsi
  • Builds the biceps and other elbow flexors
  • Develops upper-back strength
  • Improves vertical pulling strength
  • Develops grip strength and endurance
  • Strengthens the forearms
  • Builds bodyweight control
  • Requires minimal equipment
  • Provides a foundation for harder pulling exercises

Chin-Ups can also be progressively overloaded by increasing repetitions, improving range and control, or eventually adding external resistance.

Muscles Worked in Chin-Ups

Chin-Ups are a compound exercise involving muscles throughout your back, arms, shoulders, and trunk.

Primary Muscles
  • Latissimus Dorsi
  • Biceps Brachii
  • Brachialis
  • Teres Major
Secondary Muscles
  • Brachioradialis
  • Trapezius
  • Rhomboids
  • Posterior Deltoids
  • Forearms
  • Rotator Cuff Muscles
  • Core Muscles

The underhand grip places the biceps in a mechanically favorable position to contribute strongly to elbow flexion, but Chin-Ups remain a compound back-and-arm exercise rather than simply a biceps exercise.


How to Do Chin-Ups (Step-by-Step)

Step 1: Grip the Bar

Stand underneath a secure Pull-Up Bar.

Grip the bar with your palms facing toward you.

Use approximately a shoulder-width grip or slightly narrower, according to what feels comfortable for your wrists, elbows, and shoulders.

Wrap your fingers and thumbs securely around the bar.

Step 2: Establish the Starting Position

Hang underneath the bar with your arms extended.

Keep your:

  • Grip secure
  • Head relatively neutral
  • Core braced
  • Legs controlled
  • Body underneath the bar

Avoid beginning with unnecessary swinging.

If the bar is difficult to reach, use a stable step or platform instead of repeatedly jumping onto it.

Step 3: Establish Shoulder Control

Before beginning the main pull, establish control around your shoulders and shoulder blades.

Avoid suddenly yanking yourself upward from an uncontrolled hanging position.

Keep your torso stable and prepare to pull smoothly.

Step 4: Pull Your Body Upward

Begin bending your elbows while driving them down toward your sides.

Pull your body upward using your back and arms.

As you rise:

  • Keep your grip secure
  • Brace your core
  • Keep your legs controlled
  • Avoid excessive swinging
  • Keep your shoulders controlled

Do not kick your legs to generate momentum during a strict Chin-Up.

Step 5: Reach the Top Position

Continue pulling until your chin reaches or passes the height of the bar.

Keep your head relatively neutral rather than aggressively extending your neck to reach over the bar.

At the top, your elbows should be strongly flexed, and your body should remain controlled.

Step 6: Lower Yourself Slowly

Reverse the movement by gradually extending your elbows.

Control your descent rather than simply dropping from the top position.

Continue lowering until your arms return to extension.

Step 7: Reset and Repeat

Stabilize your body at the bottom.

Minimize any swinging generated during the previous repetition before pulling again.

Continue for your desired number of repetitions while maintaining consistent technique.

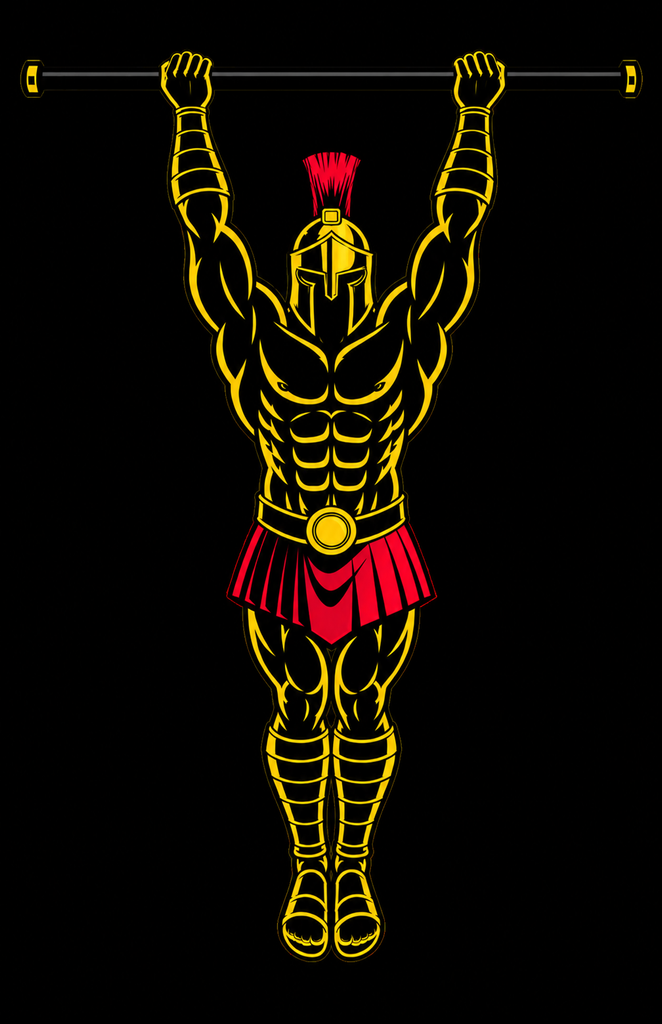
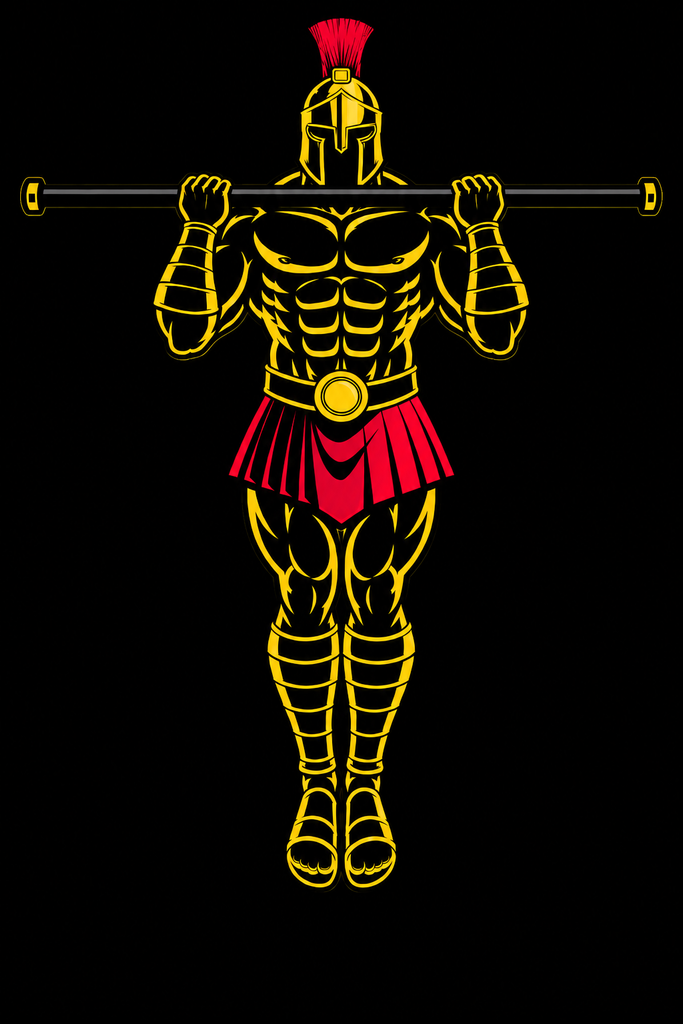
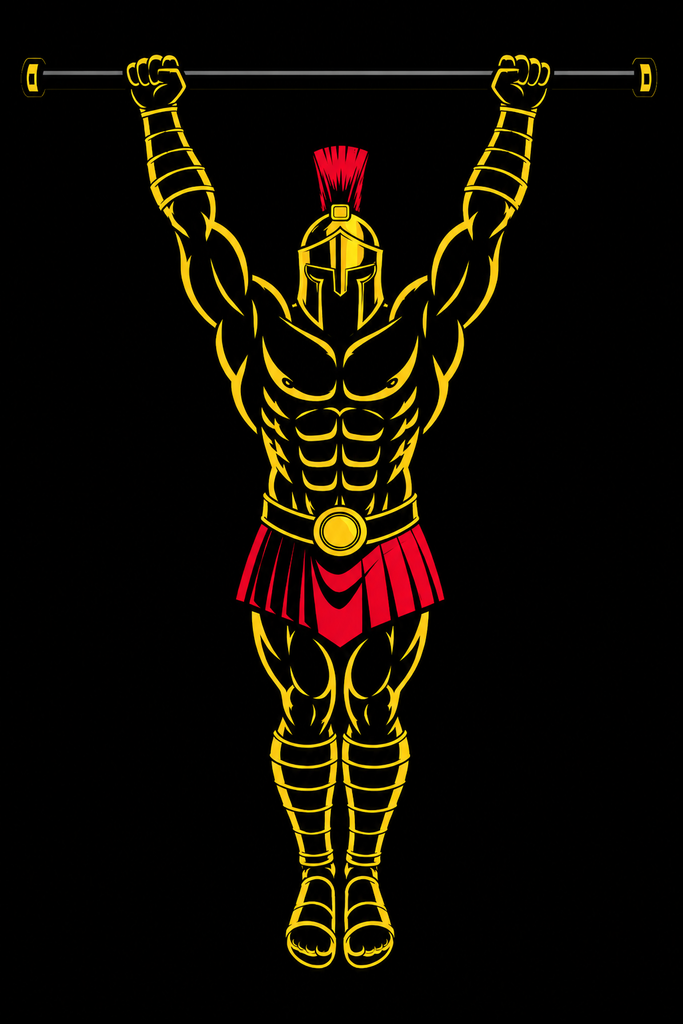
Warrior showcasing How to do Chin-ups with proper form.

Chin-Ups Form Checklist

Use this checklist to maintain proper Chin-Up technique.

  • Use a secure Pull-Up Bar
  • Grip the bar with your palms facing you
  • Keep your hands around shoulder-width apart
  • Wrap your thumbs securely around the bar
  • Begin with your arms extended
  • Establish shoulder control before pulling
  • Brace your core
  • Drive your elbows downward
  • Pull smoothly toward the bar
  • Keep your head relatively neutral
  • Minimize swinging and leg kicking
  • Bring your chin to or above bar height
  • Lower yourself under control
  • Return to a controlled hanging position

Prioritize complete, controlled repetitions instead of using momentum to increase your repetition count.


Common Chin-Ups Mistakes

Using Excessive Momentum

Problem: Swinging your torso or kicking your legs can help propel you upward without requiring the same amount of strict pulling strength.

Fix: Brace your core, control your legs, and begin each repetition from a stable position.

Using an Uncomfortable Grip Width

Problem: An excessively wide or narrow underhand grip can make the movement uncomfortable for some people’s wrists, elbows, or shoulders.

Fix: Start around shoulder-width and adjust slightly until you find a comfortable position that allows a strong range of motion.

Performing Partial Repetitions

Problem: Consistently avoiding the bottom or top of the movement limits the range through which you train.

Fix: Use the largest controlled range you can perform comfortably. If full repetitions are too difficult, use an assisted variation.

Craning the Neck Over the Bar

Problem: Throwing your head backward can make your chin appear to clear the bar even though your torso has not reached the same height.

Fix: Keep your head relatively neutral and reach the top by pulling your body higher.

Shrugging Without Control

Problem: Beginning each repetition without controlling your shoulders can make the movement less stable.

Fix: Establish shoulder control before initiating your main pull and maintain it throughout the repetition.

Dropping From the Top

Problem: Rapidly falling into the bottom position removes control from the eccentric portion of the exercise.

Fix: Lower yourself deliberately until your elbows return to extension.

Continuing After Technique Breaks Down

Problem: As fatigue increases, strict Chin-Ups can become progressively shorter and more dependent on swinging or kicking.

Fix: End your set when you can no longer maintain your intended technique, or switch to an easier assisted variation.


Chin-Ups Progressions and Variations

Chin-Ups can be modified for beginners or progressed for stronger trainees.

Band-Assisted Chin-Ups

A Resistance Band reduces the effective load and helps you practice the full Chin-Up movement.

How to Do Band-Assisted Chin-Ups

  • Secure a suitable Resistance Band around the Pull-Up Bar.
  • Carefully place your foot or knee into the band.
  • Grip the bar with your palms facing you.
  • Begin from a controlled hanging position.
  • Pull until your chin reaches or passes the bar.
  • Lower yourself under control.
  • Repeat without bouncing against the band.

Always inspect your Resistance Band and make sure it is securely attached before use.

Negative Chin-Ups

Negative Chin-Ups emphasize the lowering phase and are useful when you cannot yet perform a complete repetition.

How to Do Negative Chin-Ups

  • Use a stable platform to reach the top position.
  • Grip the bar with your palms facing you.
  • Begin with your chin above the bar.
  • Stabilize your shoulders and torso.
  • Slowly lower your body.
  • Continue until your arms reach extension.
  • Step back onto the platform and reset.

Close-Grip Chin-Ups

A somewhat narrower grip changes the arm position while maintaining the underhand Chin-Up mechanics.

How to Do Close-Grip Chin-Ups

  • Grip the bar with your palms facing you.
  • Position your hands somewhat closer than shoulder-width.
  • Begin from a controlled hang.
  • Brace your core and drive your elbows downward.
  • Pull until your chin reaches or passes the bar.
  • Pause briefly under control.
  • Lower yourself slowly.

Use a grip width that remains comfortable for your wrists and elbows.

Tempo Chin-Ups

Tempo Chin-Ups deliberately slow portions of the repetition to increase time under tension and movement control.

How to Do Tempo Chin-Ups

  • Begin from a controlled underhand hang.
  • Establish shoulder control.
  • Pull yourself upward smoothly.
  • Reach the top without using momentum.
  • Pause briefly if prescribed.
  • Lower yourself slowly for several seconds.
  • Reset before beginning the next repetition.

Weighted Chin-Ups

Weighted Chin-Ups increase the resistance after bodyweight Chin-Ups become sufficiently manageable.

How to Do Weighted Chin-Ups

  • Secure a modest additional load using appropriate equipment.
  • Grip the bar with an underhand grip.
  • Begin from a controlled hang.
  • Brace your core and pull upward.
  • Bring your chin to or above the bar.
  • Keep the added weight controlled.
  • Lower yourself slowly.

Add resistance gradually and maintain the same controlled technique you use for bodyweight Chin-Ups.


Final Thoughts

Chin-Ups are a foundational bodyweight pulling exercise for developing your back, biceps, forearms, and grip.

They develop:

  • Lat strength
  • Biceps strength
  • Upper-back strength
  • Forearm strength
  • Grip strength
  • Vertical pulling ability
  • Bodyweight control
  • Calisthenics pulling strength

The key is to perform each repetition through a controlled range rather than relying on swinging or leg momentum. Use a comfortable underhand grip, drive your elbows downward, bring your chin to or above the bar, and control your descent.

If you cannot perform a full Chin-Up yet, assisted repetitions, Australian Rows, Dead Hangs, Scapular Pull-Ups, and controlled negatives can help build the strength needed for your first repetition. Learn more about Pull Workouts here.

Essential Gear for Chin-Ups

Chin-Ups require minimal equipment, but a few items can make progression and training more practical.

  • Pull-Up Bar: The essential equipment for Chin-Ups. Use a sturdy, securely installed bar with sufficient space for your full range of motion.
  • Resistance Bands: Useful for assisted Chin-Ups when you cannot yet lift your entire bodyweight.
  • Gym Chalk: Can improve friction between your hands and the bar when grip becomes limiting.
  • Wrist Wraps: Protects the Wrists during high repetitions or explosive sets, while allowing grip strength to be improved.
  • Stable Step or Platform: Useful for safely reaching a high bar and setting up Negative Chin-Ups.
  • Dip Belt or Weighted Vest: Useful for advanced trainees who want to progressively add resistance after mastering bodyweight Chin-Ups.

Chin-Ups FAQ

Q1: What is the difference between Chin-Ups and Pull-Ups?
Chin-Ups use an underhand grip with your palms facing you, while standard Pull-Ups use an overhand grip with your palms facing away. Both train the back and arms, but their grip positions alter the mechanics and relative muscular contribution.

Q2: Are Chin-Ups easier than Pull-Ups?
Many people can perform more Chin-Ups than overhand Pull-Ups because the underhand grip allows strong contribution from the elbow flexors, including the biceps. However, which exercise feels easier can vary between individuals.

Q3: How many Chin-Ups should beginners do?
If you can perform full Chin-Ups, start with a manageable number of clean repetitions and stop before your technique breaks down. If you cannot perform one yet, use assisted or negative repetitions rather than forcing incomplete reps.

Q4: Should my chin go above the bar during Chin-Ups?
For a conventional full Chin-Up, bringing your chin to or above bar height is a useful standard. Reach this position by pulling your body upward rather than aggressively extending your neck.

Q5: How can I improve my Chin-Ups?
Practice Chin-Ups consistently, strengthen your back and elbow flexors, develop your grip, and use appropriate progressions such as Band-Assisted and Negative Chin-Ups. As you become stronger, gradually increase high-quality repetitions or add external resistance.


How to Do a Dragon Squat Correctly: Step-by-Step Guide for Beginners

Learn how to do a Dragon Squat with perfect form, avoid common mistakes, and discover the best Dragon Squat variations to build single-leg strength, improve hip mobility, and develop exceptional balance and coordination.

The Dragon Squat is one of the most advanced lower-body exercises in calisthenics. Combining strength, flexibility, balance, and coordination, this movement challenges your entire body while building powerful legs and outstanding body control. Whether you’re training for calisthenics, martial arts, military fitness, or athletic performance, mastering the Dragon Squat is an impressive milestone.


What Is a Dragon Squat?

A Dragon Squat is an advanced single-leg squat variation where one leg supports your entire body while the opposite leg crosses behind the standing leg as you descend into a deep squat. Throughout the movement, your torso remains upright while your hips, knees, and ankles work together to maintain balance.

Unlike a Pistol Squat, the Dragon Squat places greater emphasis on rotational control, hip mobility, and balance rather than pure leg strength.

Dragon Squats are commonly used in:

  • Advanced calisthenics training
  • Martial arts conditioning
  • Functional strength workouts
  • Athletic performance programs
  • Mobility and balance training

Because of its complexity, the Dragon Squat should only be attempted after mastering basic single-leg exercises.

Benefits of Dragon Squats

Dragon Squats provide numerous athletic benefits beyond simply strengthening the legs.

Benefits include:

  • Builds exceptional single-leg strength
  • Improves balance and coordination
  • Increases hip mobility
  • Develops ankle stability
  • Strengthens the glutes and quadriceps
  • Improves lower-body control
  • Requires no equipment

Few bodyweight exercises develop lower-body strength and balance as effectively as the Dragon Squat.

Muscles Worked in Dragon Squats

Dragon Squats activate nearly every major muscle in the lower body.

Primary Muscles
  • Quadriceps
  • Gluteus Maximus
  • Gluteus Medius
Secondary Muscles
  • Hamstrings
  • Adductors
  • Calves
  • Hip Flexors
  • Core Muscles
  • Tibialis Anterior

Because of this muscle activation, Dragon Squats are one of the best exercises for developing functional lower-body strength.


How to Do a Dragon Squat (Step-by-Step)

Step 1: Stand on One Leg

Stand upright on one foot.

Maintain:

  • Chest lifted
  • Core engaged
  • Standing knee slightly unlocked
  • Eyes looking forward

Lift your non-working foot slightly off the floor.

Tip: Perform the exercise barefoot or with flat shoes for better balance.

Step 2: Cross the Free Leg Behind You

Slowly move your free leg behind your supporting leg.

Keep:

  • Your hips square
  • Torso upright
  • Your movements slow and controlled

Allow the free leg to wrap naturally behind the standing leg.

Step 3: Lower Into the Squat

Bend your supporting knee while lowering your body.

Focus on:

  • Keeping your heel firmly on the floor
  • Maintaining an upright chest
  • Controlling the descent
  • Keeping your core tight

Lower until your free knee lightly touches or comes close to the floor behind your supporting foot.

Step 4: Pause Briefly

At the bottom position:

  • Maintain your balance
  • Keep your supporting knee aligned with your toes
  • Avoid collapsing inward

Pause briefly while staying under control.

Step 5: Return to the Starting Position

Drive through your supporting heel to stand back up.

Maintain:

  • Full-body tension
  • A controlled ascent
  • Stable hips
  • Smooth movement

Complete all repetitions before switching to the opposite leg.

Warrior showcasing How to do Dragon Squats with proper form

Dragon Squat Form Checklist

Use this quick checklist to ensure perfect Dragon Squat form.

  • Keep your chest upright
  • Brace your core throughout
  • Keep your supporting heel on the floor
  • Control both the descent and ascent
  • Perform equal repetitions on both legs

Perfect form builds strength, mobility, and long-term joint health.


Common Dragon Squat Mistakes

Losing Balance

Problem: Rushing the movement causes instability.

Fix: Slow down every repetition and focus on maintaining control.

Letting the Supporting Knee Collapse Inward

Problem: Places unnecessary stress on the knee joint.

Fix: Keep your knee tracking in line with your toes throughout the movement.

Leaning Too Far Forward

Problem: Reduces balance and shifts tension away from the legs.

Fix: Keep your chest lifted and your spine neutral.

Lifting the Heel

Problem: Reduces stability and limits force production.

Fix: Keep your supporting heel planted firmly on the floor.

Attempting the Exercise Too Soon

Problem: Insufficient mobility and strength increase the risk of losing balance.

Fix: Master split squats, Bulgarian split squats, and pistol squats before progressing to Dragon Squats.

Quality repetitions always outperform rushed repetitions.


Dragon Squat Variations

Once you develop the necessary strength and mobility, these variations can help you progress safely.

Assisted Dragon Squats

The ideal beginner progression.

How to Do Assisted Dragon Squats

  • Hold onto a sturdy pole, suspension trainer, or door frame.
  • Perform the Dragon Squat while using minimal assistance for balance.
  • Gradually reduce the amount of support over time.

Partial Range Dragon Squats

Builds confidence and control.

How to Do Partial Range Dragon Squats

  • Perform the movement through a comfortable range of motion.
  • Descend only as far as your mobility allows.
  • Increase your depth gradually over time.

Deficit Dragon Squats

Increases mobility demands.

How to Do Deficit Dragon Squats

  • Stand on a low platform or sturdy step.
  • Perform a full Dragon Squat while maintaining control.
  • Return to the starting position under control.

This variation increases the available range of motion.

Weighted Dragon Squats

The most advanced progression.

How to Do Weighted Dragon Squats

  • Hold a kettlebell or dumbbell close to your chest.
  • Perform strict Dragon Squats with perfect form.
  • Maintain balance throughout every repetition.

This variation develops exceptional lower-body strength and stability.


Final Thoughts

The Dragon Squat is one of the most advanced bodyweight leg exercises you can master.

It develops:

  • Single-leg strength
  • Balance
  • Hip mobility
  • Ankle stability
  • Athletic coordination

Although the Dragon Squat requires patience to learn, the rewards are well worth the effort. Focus on mastering the movement with complete control before adding more repetitions or external resistance. Learn more about Leg Workouts here.

Perfect technique is always more important than depth or speed.

A warrior’s balance is just as powerful as his strength.

Essential Gear for Dragon Squats

Using the right equipment can make Dragon Squat training safer, more effective, and easier to progress as your strength, balance, and mobility improve.

  • Athletic Training Shoes: Provide the grip and stability needed to maintain balance while performing controlled single-leg movements. Flat, stable shoes are ideal for this exercise.
  • Resistance Bands: Perfect for warming up the hips and glutes before training, helping improve stability and movement quality throughout the exercise.
  • Parallettes or Suspension Trainer: Excellent for assisted Dragon Squats, allowing you to reduce the amount of support as your balance and strength improve.
  • Exercise Step or Plyometric Box: Ideal for performing deficit Dragon Squat variations, increasing the range of motion while maintaining proper control.
  • Kettlebell or Dumbbell: Perfect for advanced athletes looking to add resistance and continue building lower-body strength once bodyweight Dragon Squats become easier.
  • Exercise Mat: Provides a comfortable surface for warm-ups, mobility drills, and assisted Dragon Squat progressions, making practice more comfortable on hard floors.

Dragon Squat FAQ

Q1: Is the Dragon Squat harder than the Pistol Squat?
Yes. While both are advanced exercises, the Dragon Squat generally requires greater balance, hip mobility, coordination, and rotational control than the Pistol Squat.

Q2: What exercises should I master before attempting Dragon Squats?
You should first become proficient with bodyweight squats, Bulgarian split squats, lunges, step-ups, and pistol squats before attempting Dragon Squats.

Q3: Are Dragon Squats good for athletes?
Yes. Dragon Squats improve single-leg strength, balance, joint stability, mobility, and coordination, making them highly beneficial for martial artists, runners, calisthenics athletes, military personnel, and field sport athletes.

How to Do a One-Arm Plank Correctly: Step-by-Step Guide for Beginners

Learn how to do a one-arm plank with perfect form, avoid common mistakes, and discover the best one-arm plank variations to build core strength, improve shoulder stability, and develop total-body balance.

The one-arm plank is an advanced core exercise that challenges your stability by reducing your base of support. Unlike a standard plank, lifting one arm forces your core to resist rotation while your supporting arm and shoulder stabilize your entire body weight. Whether you’re training for calisthenics, military fitness, combat sports, or general athletic performance, mastering the one-arm plank will improve your balance, coordination, and core strength.


What Is a One-Arm Plank?

A one-arm plank is an advanced variation of the traditional plank performed by supporting your body with one hand while the opposite arm is extended forward or placed alongside your body.

Because only one arm supports the upper body, the exercise significantly increases the demand on your core, shoulders, and stabilizing muscles.

One-arm planks are commonly used in:

  • Calisthenics training
  • Military fitness programs
  • Functional strength workouts
  • Athletic conditioning
  • Core stability training

The one-arm plank is an excellent progression once you have mastered the standard plank.

Benefits of One-Arm Planks

One-arm planks provide numerous strength and stability benefits.

Benefits include:

  • Builds exceptional core strength
  • Improves anti-rotation stability
  • Strengthens the shoulders
  • Develops balance and coordination
  • Increases body awareness
  • Improves overall athletic performance
  • Requires no equipment

Few bodyweight exercises challenge your core and shoulder stability as effectively as the one-arm plank.

Muscles Worked in One-Arm Planks

One-arm planks engage nearly every major stabilizing muscle throughout the body.

Primary Muscles
  • Rectus Abdominis
  • Transverse Abdominis
  • Internal and External Obliques
  • Anterior Deltoids
Secondary Muscles
  • Serratus Anterior
  • Pectoralis Major
  • Triceps Brachii
  • Gluteus Maximus
  • Quadriceps
  • Lower Back Muscles

Because of this muscle activation, one-arm planks are one of the best exercises for developing full-body stability.


How to Do a One-Arm Plank (Step-by-Step)

Step 1: Begin in a High Plank

Start in a standard high plank position.

Place:

  • One hand directly beneath your shoulder
  • Feet wider than shoulder-width apart
  • Body in a straight line from head to heels

Tip: A wider foot position provides greater stability while learning the exercise.

Step 2: Brace Your Core

Before lifting your arm:

  • Tighten your abdominal muscles
  • Squeeze your glutes
  • Keep your legs straight
  • Maintain a neutral neck

Your body should remain rigid throughout the exercise.

Step 3: Lift One Arm

Slowly lift one hand off the floor.

Either:

  • Extend the arm straight in front of you
  • Keep it resting alongside your body

Avoid shifting your hips or rotating your torso.

Step 4: Hold the Position

Maintain the plank while focusing on:

  • Keeping your hips level
  • Breathing steadily
  • Maintaining shoulder stability
  • Keeping your core fully engaged

Hold for the desired amount of time.

Step 5: Return and Switch Sides

Slowly place your hand back on the floor.

Reset your position before repeating the hold on the opposite arm.

Alternate sides evenly.

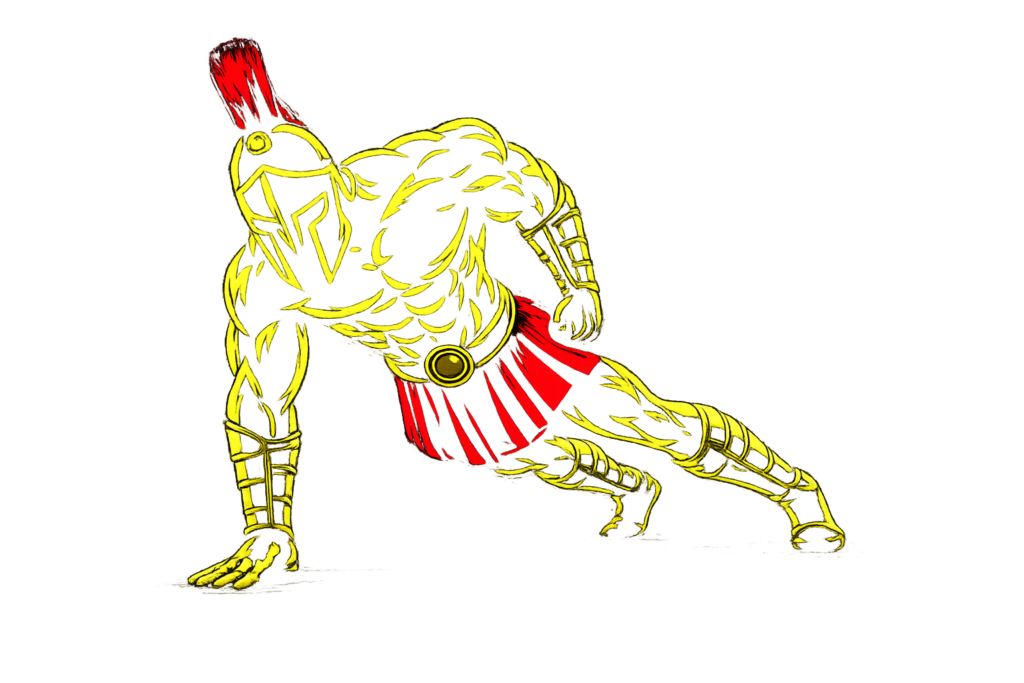
Warrior showcasing How to do a One-Arm Plank with proper form

One-Arm Plank Form Checklist

Use this quick checklist to ensure perfect one-arm plank form.

  • Keep your body straight
  • Brace your core throughout
  • Keep your hips level
  • Support yourself directly under your shoulder
  • Breathe normally during the hold

Perfect form develops greater stability while reducing unnecessary strain.


Common One-Arm Plank Mistakes

Rotating the Hips

Problem: Reduces core activation and makes the exercise less effective.

Fix: Keep your hips square to the floor throughout the hold.

Raising the Hips Too High

Problem: Reduces tension on the core.

Fix: Maintain a straight line from your head to your heels.

Letting the Hips Sag

Problem: Places unnecessary stress on the lower back.

Fix: Brace your core and squeeze your glutes throughout the exercise.

Holding Your Breath

Problem: Creates unnecessary tension and reduces endurance.

Fix: Take slow, controlled breaths throughout the hold.

Looking Forward

Problem: Places unnecessary strain on the neck.

Fix: Keep your head neutral and look at the floor a short distance in front of your supporting hand.

Controlled holds build more stability than longer holds with poor form.


One-Arm Plank Variations

Once you master the standard one-arm plank, these variations can further improve your stability and core strength.

Knee One-Arm Plank

The easiest progression.

How to Do Knee One-Arm Planks

  • Begin on your knees instead of your toes
  • Lift one hand while maintaining a straight line from your head to your knees
  • Hold under control

This variation reduces the amount of bodyweight you must stabilize.

One-Arm Plank with Shoulder Tap

Builds dynamic stability.

How to Do One-Arm Plank with Shoulder Taps

  • Begin in a high plank
  • Lift one hand and tap the opposite shoulder
  • Return to the floor and alternate sides

This variation improves coordination and anti-rotation strength.

One-Arm Side Plank

Increases oblique activation.

How to Do One-Arm Side Planks

  • Rotate into a side plank
  • Support yourself on one hand
  • Extend your free arm toward the ceiling
  • Hold under control

This variation emphasizes lateral core stability.

One-Arm Plank with Leg Lift

The most advanced progression.

How to Do One-Arm Plank with Leg Lift

  • Perform a one-arm plank
  • Lift the opposite leg slightly off the floor
  • Maintain a stable body position throughout the hold

This variation significantly increases the balance and core demands.


Final Thoughts

The one-arm plank is one of the best bodyweight exercises for building total-body stability and core strength.

It develops:

  • Core strength
  • Shoulder stability
  • Balance
  • Anti-rotation control
  • Athletic performance

Although it is an advanced exercise, mastering the one-arm plank will improve your performance in countless sports and bodyweight movements. Focus on maintaining perfect alignment rather than holding the position for excessive time. Learn more about Core Workouts here.

Quality always beats duration.

A warrior’s strength is measured by the control he maintains under pressure.

Essential Gear for One-Arm Planks

While one-arm planks require no equipment, a few training tools can make your workouts more comfortable, improve stability, and help you progress toward more advanced variations.

  • Exercise Mat: Cushions your hands, wrists, and elbows while providing a stable, non-slip surface for planks and other floor exercises.
  • Resistance Bands: Great for improving shoulder stability, strengthening the core, and assisting with progression exercises that build toward one-arm planks.
  • Medicine Ball: Adds an extra stability challenge during advanced plank variations and core training.
  • Push-Up Handles or Pallettes: Help keep your wrists in a more neutral position during high plank variations while increasing comfort during longer training sessions.

Explore more equipment recommendations in our Equipment Guides to support your core strength and bodyweight training journey.


One-Arm Plank FAQ

Q1: Is a one-arm plank harder than a regular plank?
Yes. A one-arm plank is significantly more challenging because supporting your body with one arm greatly increases the demand on your core, shoulders, and stabilizing muscles.

Q2: How long should beginners hold a one-arm plank?
Most beginners should aim to hold the position for 10-20 seconds per side for 2-4 sets while maintaining perfect form.

Q3: Do one-arm planks help improve sports performance?
Yes. One-arm planks improve balance, anti-rotation strength, shoulder stability, and core control, making them beneficial for calisthenics, martial arts, running, climbing, military fitness, and many other athletic activities.

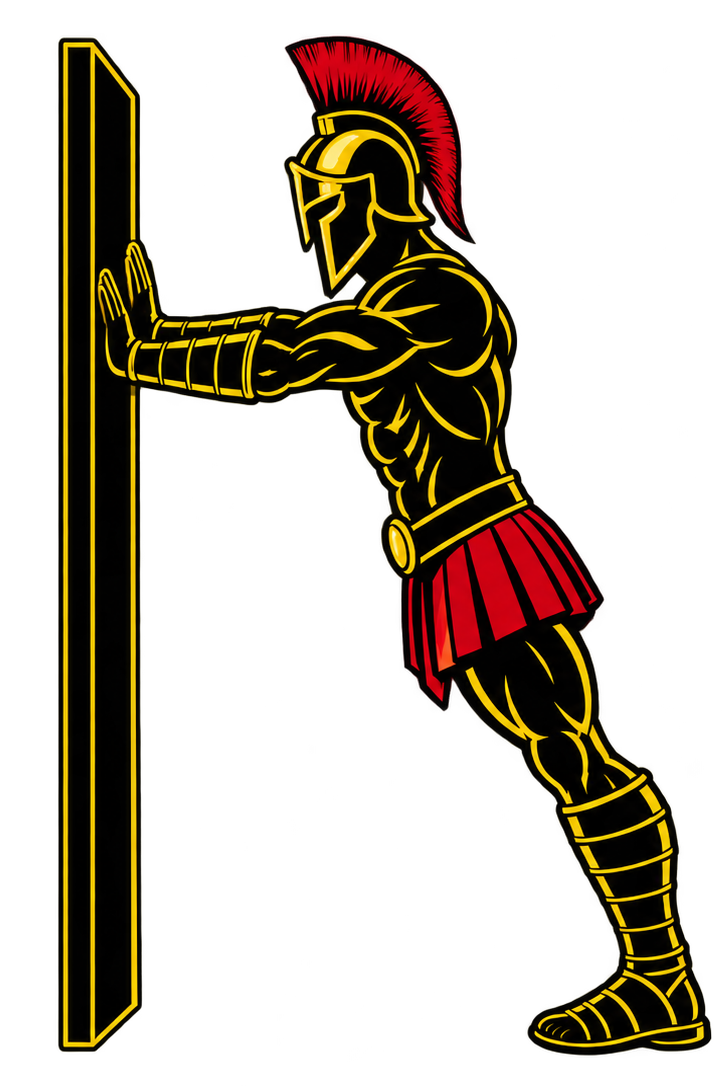
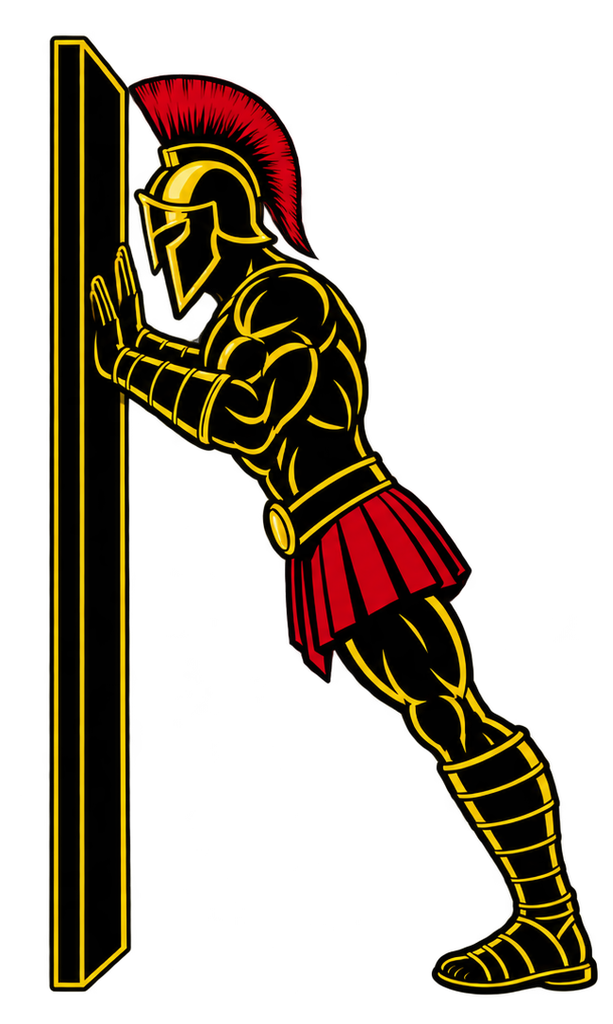
How to Do Wall Push-Ups Correctly: Step-by-Step Guide for Beginners

Wall Push-Ups are a beginner-friendly Push-Up variation performed while standing and pressing against a wall. Because your body remains much more upright than during a standard floor Push-Up, your arms support a smaller portion of your bodyweight.

This makes Wall Push-Ups an excellent starting point for people who are not yet ready for Incline, Knee, or standard Push-Ups. They train the chest, shoulders, triceps, and supporting muscles while allowing you to learn the basic Push-Up movement with manageable resistance.

As your strength improves, you can make Wall Push-Ups more challenging by moving your feet farther from the wall before progressing to lower elevated surfaces.


What Are Wall Push-Ups?

Wall Push-Ups are a bodyweight pressing exercise performed with your hands against a sturdy wall rather than on the floor.

You begin standing in front of the wall with your arms extended and hands approximately shoulder-width apart. Keeping your body controlled, you bend your elbows and bring your chest toward the wall before pressing yourself back to the starting position.

The upright body angle reduces the amount of bodyweight your upper body must move compared with lower-angle Push-Up variations.

Wall Push-Ups are commonly used in:

  • Beginner strength training
  • At-home workouts
  • Push-Up progression programs
  • Chest workouts
  • Upper-body workouts
  • Warm-up routines
  • Bodyweight training
  • Calisthenics preparation

They can also help beginners practice body alignment, elbow control, and pressing mechanics before progressing toward harder Push-Up variations.

Benefits of Wall Push-Ups

Wall Push-Ups provide an accessible introduction to bodyweight pressing while still training several major upper-body muscles.

Benefits include:

  • Strengthens the chest
  • Develops the triceps
  • Strengthens the front of the shoulders
  • Introduces the Push-Up movement pattern
  • Allows beginners to build pressing strength progressively
  • Develops basic core and body-position control
  • Places less bodyweight through the arms than floor Push-Ups
  • Requires little to no equipment
  • Provides an easy-to-adjust Push-Up progression

The exercise can be made easier by standing closer to the wall or harder by moving your feet farther away while maintaining proper form and secure footing.

Muscles Worked in Wall Push-Ups

Wall Push-Ups train the same general pushing muscles used during other Push-Up variations, although the upright position substantially reduces the resistance.

Primary Muscles
  • Pectoralis Major
  • Triceps Brachii
  • Anterior Deltoids
Secondary Muscles
  • Serratus Anterior
  • Rotator Cuff Muscles
  • Rectus Abdominis
  • Obliques
  • Forearms
  • Other Core Stabilizers

Your core helps maintain a controlled body position while your shoulder stabilizers support the pressing movement.


How to Do Wall Push-Ups (Step-by-Step)

Step 1: Choose a Stable Wall

Use a solid wall with enough clear space for both hands.

Avoid:

  • Unstable surfaces
  • Slippery surfaces
  • Doors that could unexpectedly open
  • Fragile panels
  • Areas containing objects that interfere with your movement

Make sure your shoes or feet also have secure contact with the floor.

Step 2: Position Your Hands

Face the wall and place your palms against it at approximately chest to shoulder height.

Position your hands approximately shoulder-width apart or slightly wider.

Keep your fingers comfortably spread and your hands firmly against the wall.

Step 3: Step Your Feet Back

Walk your feet backward until your body leans toward the wall with your arms extended.

The farther your feet move away from the wall, the more demanding the exercise generally becomes.

Begin with a distance that allows you to maintain complete control.

Step 4: Establish Your Starting Position

Create a relatively straight line through your head, torso, hips, and legs.

Keep your:

  • Core lightly braced
  • Glutes controlled
  • Head relatively neutral
  • Shoulders away from your ears
  • Hands firmly against the wall
  • Feet planted securely

Avoid bending excessively at the hips.

Step 5: Lower Toward the Wall

Bend your elbows and allow your body to move toward the wall as one controlled unit.

Let your elbows travel backward and outward at a comfortable angle rather than flaring directly sideways.

Bring your chest toward the wall while maintaining your body position.

Step 6: Reach Your Controlled Bottom Position

Lower until your chest approaches the wall or until you reach your comfortable range of motion.

Keep your:

  • Core engaged
  • Hips controlled
  • Heels and feet stable
  • Wrists comfortable
  • Head neutral

Do not reach your head forward just to touch the wall.

Step 7: Press Back to the Starting Position

Push firmly through your palms and extend your elbows.

Move your entire body away from the wall rather than pushing your shoulders back while leaving your hips behind.

Return to the starting position under control and repeat.

Warrior showcasing How to do Wall Push-Ups with proper form.

Wall Push-Up Form Checklist

Use this checklist to maintain proper Wall Push-Up technique.

  • Use a solid and stable wall
  • Keep your feet securely planted
  • Position your hands around chest to shoulder height
  • Keep your hands approximately shoulder-width or slightly wider
  • Maintain a controlled body line
  • Brace your core
  • Keep your head relatively neutral
  • Bend your elbows smoothly
  • Avoid excessive elbow flare
  • Lower your chest toward the wall
  • Keep your hips from sagging toward the wall
  • Avoid pushing your hips backward
  • Press evenly through both hands
  • Extend your arms under control
  • Use a controlled tempo throughout each repetition

Once you can perform Wall Push-Ups easily with consistent technique, consider progressing the exercise rather than simply performing increasingly large numbers of repetitions.


Common Wall Push-Up Mistakes

Standing Too Close to the Wall

Problem: Standing very close to the wall can make the exercise so easy that there is little challenge for your pushing muscles.

Fix: Gradually move your feet farther from the wall while maintaining secure footing and proper body alignment.

Flaring the Elbows Directly Sideways

Problem: Allowing your elbows to flare excessively can create an awkward pressing position.

Fix: Allow your elbows to travel backward and outward at a comfortable angle instead of forcing them directly sideways.

Bending at the Hips

Problem: Sending your hips backward while your upper body approaches the wall reduces the amount of bodyweight your arms must control.

Fix: Keep your torso, hips, and legs moving together as one controlled unit.

Leading With the Head

Problem: Pushing your head forward can make it appear that you have reached the wall without completing the intended range of motion.

Fix: Keep your head relatively neutral and bring your chest toward the wall.

Performing Partial Repetitions

Problem: Only bending your elbows slightly limits the range through which your pushing muscles work.

Fix: Use the deepest comfortable range you can control while maintaining proper alignment.

Rushing the Repetitions

Problem: Dropping quickly toward the wall and bouncing back reduces muscular control.

Fix: Lower yourself deliberately, briefly control the bottom position, and press back smoothly.

Using an Unstable Surface

Problem: Performing Wall Push-Ups against a door or unstable object can cause the surface to move unexpectedly.

Fix: Use a solid, stationary wall that can safely support the force you apply to it.


Wall Push-Up Progressions and Variations

Wall Push-Ups can be adjusted according to your current strength and used as the beginning of a complete Push-Up progression.

Close-Grip Wall Push-Up

Bringing your hands closer together changes the pressing position and can increase the demand on the triceps.

How to Do Close-Grip Wall Push-Ups

  • Stand facing a sturdy wall.
  • Place your hands closer than shoulder-width apart.
  • Step your feet backward into a comfortable lean.
  • Brace your core and maintain a controlled body line.
  • Bend your elbows and lower toward the wall.
  • Press through your palms to extend your arms.
  • Repeat while keeping your elbows controlled.

Wide-Grip Wall Push-Up

This variation uses a moderately wider hand position.

How to Do Wide-Grip Wall Push-Ups

  • Face the wall and establish secure footing.
  • Place your hands moderately wider than shoulder-width.
  • Step backward until your body leans toward the wall.
  • Brace your core and maintain body alignment.
  • Lower your chest toward the wall.
  • Avoid excessively flaring your elbows.
  • Press back to the starting position under control.

Do not place your hands as wide as possible. Use a comfortable width that allows smooth shoulder movement.

Slow-Tempo Wall Push-Up

Slowing each repetition increases time under tension and helps reinforce technique.

How to Do Slow-Tempo Wall Push-Ups

  • Set up in your normal Wall Push-Up position.
  • Brace your core and maintain a straight body line.
  • Lower yourself slowly for several seconds.
  • Reach your controlled bottom position.
  • Pause briefly near the wall.
  • Press yourself away smoothly.
  • Repeat without rushing between repetitions.

Single-Arm Assisted Wall Push-Up

This progression shifts more work toward one arm while the opposite hand continues providing assistance.

How to Do Single-Arm Assisted Wall Push-Ups

  • Place both hands against the wall.
  • Position one hand normally and the assisting hand farther outward or in a less advantageous position.
  • Keep your feet stable and brace your core.
  • Shift more of the pressing demand toward the working arm.
  • Lower your body toward the wall under control.
  • Press yourself back to the starting position.
  • Train both sides evenly.

Avoid excessive torso rotation while using this progression.

Incline Push-Up

Incline Push-Ups are a natural next progression after Wall Push-Ups because lowering the hand position increases the amount of bodyweight supported by the upper body.

How to Do Incline Push-Ups

  • Choose a sturdy elevated surface.
  • Place your hands approximately shoulder-width apart.
  • Walk your feet backward until your body forms a straight line.
  • Brace your core and glutes.
  • Lower your chest toward the elevated surface.
  • Press through your hands until your arms extend.
  • Gradually use lower surfaces as your strength improves.

Final Thoughts

Wall Push-Ups are a simple and effective starting point for learning the Push-Up movement pattern and developing basic upper-body pressing strength.

They develop:

  • Chest strength
  • Triceps strength
  • Shoulder strength
  • Basic core stability
  • Body-position control
  • Pressing technique
  • Push-Up confidence
  • Foundational bodyweight strength

Start at a distance from the wall that allows controlled repetitions. As the exercise becomes easier, move your feet farther away or progress to an Incline Push-Up on a sturdy elevated surface.

The long-term goal should be progressive resistance rather than simply accumulating hundreds of easy repetitions. Gradually moving from Wall Push-Ups to lower Incline Push-Ups, Knee Push-Ups when appropriate, and eventually standard Push-Ups can provide a clear progression path. Learn more about Push Workouts here.

Essential Gear for Wall Push-Ups

Wall Push-Ups require almost no equipment, making them particularly convenient for home workouts.

  • Stable Wall: A solid, stationary wall with enough clear space for your hands is the primary requirement.
  • Training Shoes: Shoes with reliable traction can help prevent your feet from slipping as you increase your distance from the wall.
  • Exercise Mat: An optional mat can provide a defined training area and may improve comfort depending on the floor surface.
  • Push-Up Handles: Help keep your wrists in a more neutral position, reducing strain and making the transition to incline and standard push-ups more comfortable.
  • Wrist Wraps: Provide additional wrist support and stability during higher-volume push-up training or for individuals who experience mild wrist discomfort while performing pressing exercises.

Wall Push-Up FAQ

Q1: How many Wall Push-Ups should a beginner do?
A practical starting point is around 8–15 controlled repetitions for 2–3 sets. Adjust the number of repetitions and your distance from the wall according to your current strength and technique.

Q2: How far should I stand from the wall?
There is no single correct distance because body proportions and strength differ. Start close enough to perform controlled repetitions, then gradually move your feet farther away as the exercise becomes easier.

Q3: When should I progress from Wall Push-Ups?
When you can perform your Wall Push-Ups comfortably with consistent technique and the exercise no longer provides much challenge, progress by increasing your lean or moving to Incline Push-Ups on a stable elevated surface.

Q4: Are Wall Push-Ups easier than Knee Push-Ups?
Wall Push-Ups are generally easier because your body remains much more upright and your upper body supports a smaller proportion of your weight. The exact difficulty depends on your setup and body position.

Q5: Can Wall Push-Ups help me perform regular Push-Ups?
Yes. They can teach basic pressing mechanics and build initial chest, shoulder, and triceps strength. Progressively moving from the wall to lower elevated surfaces and eventually floor-based Push-Up variations can help you work toward standard Push-Ups.


How to Do Archer Pull-Ups Correctly: Step-by-Step Guide for Beginners

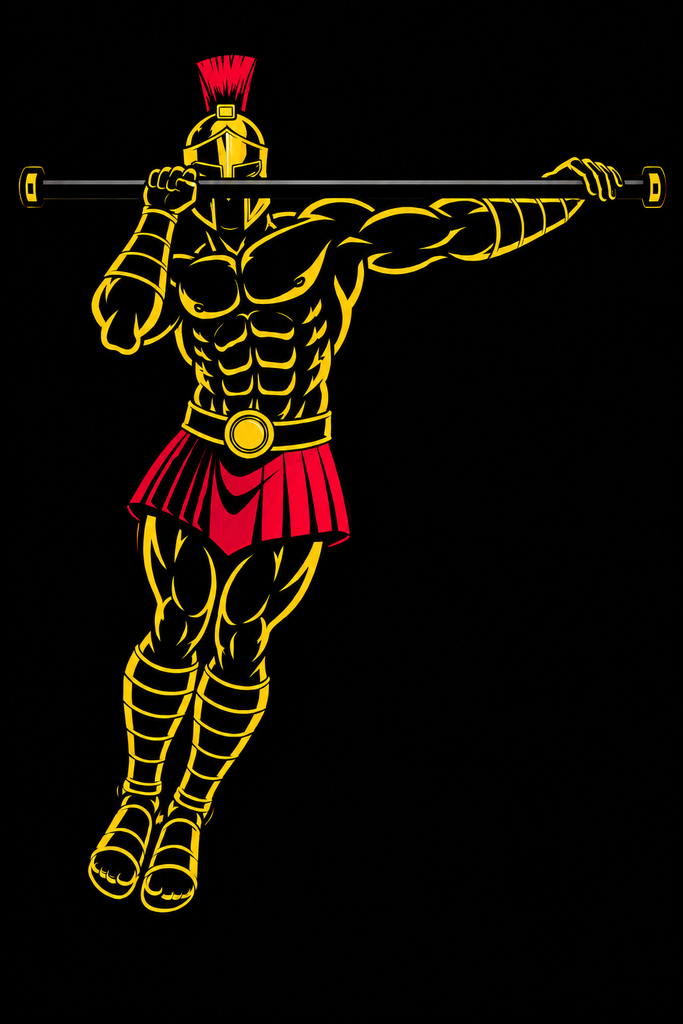
Archer Pull-Ups are an advanced Pull-Up variation that shifts most of your bodyweight toward one arm while the opposite arm extends outward along the bar. At the top, the position resembles an archer drawing a bow, which gives the exercise its name.

Unlike a standard Pull-Up, where both arms contribute relatively evenly, Archer Pull-Ups deliberately create an uneven load. The working arm performs most of the pulling while the straighter assisting arm provides support.

This makes Archer Pull-Ups useful for developing unilateral pulling strength and bridging the gap between standard Pull-Ups and advanced skills such as Assisted One-Arm and One-Arm Pull-Ups.


What Are Archer Pull-Ups?

Archer Pull-Ups are an advanced bodyweight pulling exercise performed with a wide overhand grip.

You begin hanging from a Pull-Up Bar with both arms extended. As you pull upward, you shift your torso toward one hand while bending that arm strongly. At the same time, the opposite arm gradually straightens along the bar.

At the top, your head and upper torso are positioned closer to the working hand rather than centered between both hands. The assisting arm should be relatively straight, although exactly how straight it becomes depends on your strength, mobility, proportions, and experience.

Archer Pull-Ups are commonly used in:

  • Advanced calisthenics
  • Unilateral pulling training
  • Pull-Up workouts
  • Back workouts
  • Pull-day workouts
  • Bodyweight strength programs
  • One-Arm Pull-Up progressions
  • Advanced upper-body training

Archer Pull-Ups require considerably more strength than standard Pull-Ups, so a solid foundation of controlled Pull-Ups should be developed first.

Benefits of Archer Pull-Ups

Archer Pull-Ups provide a challenging way to progress beyond bilateral Pull-Ups without immediately attempting a full One-Arm Pull-Up.

Benefits include:

  • Develops unilateral pulling strength
  • Strengthens the lats and upper back
  • Builds the biceps and other elbow flexors
  • Increases the load placed on each working arm
  • Develops grip and forearm strength
  • Challenges core and torso control
  • Helps identify and train side-to-side strength differences
  • Provides progression beyond standard Pull-Ups
  • Can help prepare for One-Arm Pull-Up progressions

Because each repetition emphasizes one side, Archer Pull-Ups allow you to gradually expose each arm to a greater share of your bodyweight.

Muscles Worked in Archer Pull-Ups

Archer Pull-Ups train many of the same muscles as regular Pull-Ups, but the working side experiences substantially greater demand.

Primary Muscles
  • Latissimus Dorsi
  • Biceps Brachii
  • Brachialis
  • Teres Major
Secondary Muscles
  • Trapezius
  • Rhomboids
  • Posterior Deltoids
  • Brachioradialis
  • Forearms
  • Rotator Cuff Muscles
  • Core Muscles

The assisting arm also remains active. It helps support and control your body even though it is straighter than the primary pulling arm.


How to Do Archer Pull-Ups (Step-by-Step)

Step 1: Take a Wide Overhand Grip

Grip a secure Pull-Up Bar with your palms facing away from you.

Position your hands wider than you would for standard Pull-Ups.

The grip should be wide enough to allow one arm to extend as you move toward the opposite side, but not so wide that you cannot comfortably control the movement.

Step 2: Establish a Controlled Hang

Hang underneath the bar with both arms extended.

Keep your:

  • Grip secure
  • Head relatively neutral
  • Core braced
  • Legs controlled
  • Shoulders stable

Avoid beginning with excessive swinging.

Step 3: Choose the Working Side

Decide which arm will perform the majority of the pull.

For example, when pulling toward your right hand, your right arm becomes the primary working arm while your left arm gradually extends outward.

Maintain tension through both hands.

Step 4: Pull Toward the Working Hand

Begin pulling your body upward and sideways toward the working arm.

Bend the working elbow strongly while driving it downward.

At the same time, allow the opposite arm to become progressively straighter.

Your torso should travel diagonally toward the working hand rather than remaining perfectly centered beneath the bar.

Step 5: Extend the Assisting Arm

As you rise, continue straightening the assisting arm along the bar.

Do not suddenly lock it out or completely relax it.

The assisting hand should remain securely on the bar while the working arm takes a greater proportion of the load.

Step 6: Reach the Top Position

Continue pulling until your chin reaches or passes bar height near the working hand.

At the top:

  • Keep the working elbow strongly bent
  • Keep the assisting arm relatively straight
  • Maintain a secure grip with both hands
  • Keep your torso controlled
  • Avoid excessive twisting
  • Keep unnecessary swinging to a minimum

Your body should resemble the shape of an archer drawing a bow.

Step 7: Lower and Train the Opposite Side

Slowly reverse the movement and return toward the center as you descend.

Extend the working elbow gradually until you reach a controlled hanging position.

You can perform your planned repetitions on one side before switching or alternate sides between repetitions.

Train both sides consistently.

Warrior showcasing How to do Archer Pull-Ups with proper form.

Archer Pull-Ups Form Checklist

Use this checklist to maintain proper Archer Pull-Up technique.

  • Use a sturdy and secure Pull-Up Bar
  • Use a wide but manageable overhand grip
  • Begin from a controlled hang
  • Keep both hands securely on the bar
  • Brace your core
  • Pull your torso toward the working hand
  • Bend the working arm strongly
  • Gradually straighten the assisting arm
  • Keep tension through the assisting side
  • Bring your chin toward bar height near the working hand
  • Minimize excessive torso rotation
  • Avoid swinging or kicking for momentum
  • Lower yourself under control
  • Train both sides evenly
  • Stop when you can no longer maintain the Archer position

The goal is not simply to perform a wide-grip Pull-Up. Your torso should clearly shift toward one side while the opposite arm becomes relatively straight.


Common Archer Pull-Ups Mistakes

Staying in the Center

Problem: Pulling straight upward between your hands keeps the exercise similar to a Wide-Grip Pull-Up instead of shifting enough load toward one arm.

Fix: Actively pull your torso toward the working hand while allowing the opposite arm to extend.

Bending the Assisting Arm Too Much

Problem: Keeping both elbows strongly bent allows the assisting arm to contribute too much and reduces the unilateral nature of the exercise.

Fix: Gradually straighten the assisting arm as you rise while maintaining a secure grip and controlled tension.

Forcing the Assisting Arm Completely Straight

Problem: Trying to aggressively lock the assisting elbow before you have sufficient strength can disrupt your technique.

Fix: Allow the assisting arm to become progressively straighter as your strength improves. A slightly bent assisting arm is an appropriate progression.

Using Excessive Momentum

Problem: Swinging or kicking can propel your body toward the working hand without requiring the same amount of unilateral pulling strength.

Fix: Brace your torso, control your legs, and perform each repetition with minimal unnecessary momentum.

Using an Excessively Wide Grip

Problem: Placing your hands extremely far apart can make the exercise awkward and unnecessarily restrict your movement.

Fix: Use a wide grip that allows the assisting arm to extend while still giving you strong, comfortable control.

Twisting the Torso Excessively

Problem: Rotating aggressively can change the movement and allow you to compensate for insufficient pulling strength.

Fix: Some natural torso movement can occur, but keep your chest relatively controlled and focus on moving sideways toward the working hand.

Training Only the Stronger Side

Problem: Consistently favoring one arm can reinforce differences between your sides.

Fix: Train both directions and use comparable technique and training volume for each side.


Archer Pull-Ups Progressions and Variations

Archer Pull-Ups can be modified to match your current unilateral pulling strength or progress toward harder exercises.

Band-Assisted Archer Pull-Ups

A Resistance Band reduces the effective load while allowing you to practice the Archer Pull-Up movement.

How to Do Band-Assisted Archer Pull-Ups

  • Secure a suitable Resistance Band to the Pull-Up Bar.
  • Carefully place your foot or knee into the band.
  • Take a wide overhand grip.
  • Pull your torso toward one hand.
  • Straighten the opposite arm as much as you can control.
  • Reach your highest controlled position.
  • Lower slowly and train the opposite side.

Assisted Archer Pull-Ups

This easier progression keeps more bend in the assisting arm.

How to Do Assisted Archer Pull-Ups

  • Take a moderately wide overhand grip.
  • Begin from a controlled hang.
  • Choose your working side.
  • Pull toward the working hand.
  • Keep some bend in the assisting elbow.
  • Reach the top under control.
  • Lower slowly and repeat on the other side.

As you become stronger, gradually reduce how much the assisting arm contributes.

Alternating Archer Pull-Ups

This variation alternates the working side from repetition to repetition.

How to Do Alternating Archer Pull-Ups

  • Begin from a wide overhand hang.
  • Pull upward toward your right hand.
  • Extend your left arm as you rise.
  • Lower yourself under control.
  • Pull upward toward your left hand.
  • Extend your right arm as you rise.
  • Continue alternating sides.

Archer Chin-Ups

This variation uses an underhand or modified underhand grip where the setup allows it, changing the arm mechanics and increasing elbow-flexor involvement.

How to Do Archer Chin-Ups

  • Take a suitably wide underhand grip.
  • Begin from a controlled hang.
  • Choose one working side.
  • Pull your torso toward that hand.
  • Allow the opposite arm to straighten.
  • Reach your highest controlled position.
  • Lower slowly and switch sides.

Only use this variation if the grip feels comfortable for your wrists and elbows.

Typewriter Pull-Ups

Typewriter Pull-Ups connect the left and right Archer positions while you remain near the top of the movement.

How to Do Typewriter Pull-Ups

  • Take a wide overhand grip.
  • Pull yourself toward one hand.
  • Reach a controlled Archer position.
  • Stay near bar height while moving across toward the opposite hand.
  • Gradually bend the new working arm as the other arm straightens.
  • Reach the Archer position on the opposite side.
  • Lower yourself under control.

Typewriter Pull-Ups require considerable strength because you remain near the top while transferring your weight between sides.


Final Thoughts

Archer Pull-Ups are an advanced bodyweight pulling exercise that bridges the gap between regular two-arm Pull-Ups and more demanding unilateral pulling skills.

They develop:

  • Unilateral pulling strength
  • Lat strength
  • Upper-back strength
  • Biceps strength
  • Grip and forearm strength
  • Core control
  • Side-to-side body control
  • Advanced calisthenics pulling ability

The key is to clearly shift your body toward the working arm while progressively straightening the opposite arm. If both arms remain equally bent and your torso stays centered, you are performing something closer to a Wide-Grip Pull-Up.

Master strong standard Pull-Ups first. Then gradually reduce the contribution of the assisting arm as you work toward increasingly demanding unilateral Pull-Up progressions. Learn more about Pull Workouts here.

Essential Gear for Archer Pull-Ups

Using the right equipment can make archer pull-up training safer, improve your unilateral pulling strength, and help you progress toward the one-arm pull-up.

  • Pull-Up Bar: The most essential piece of equipment for performing archer pull-ups. Choose a sturdy doorway, wall-mounted, or freestanding pull-up bar with enough width to accommodate a wide grip.
  • Resistance Bands: Perfect for assisted archer pull-ups, allowing you to build unilateral strength and master the movement before performing full bodyweight repetitions.
  • Gymnastics Rings: Allow your hands to rotate naturally during the movement, reducing wrist strain while improving shoulder stability and control.
  • Stable Step or Platform: Useful for safely reaching a high bar and entering or exiting assisted setups.
  • Gym Chalk or Liquid Chalk: Improves grip by reducing moisture on your hands, helping you maintain a secure hold during demanding unilateral pulling exercises.
  • Weighted Vest or Dip Belt: Ideal for advanced athletes who have mastered bodyweight archer pull-ups and want to continue increasing their pulling strength and prepare for one-arm pull-ups.

Archer Pull-Ups FAQ

Q1: Should the assisting arm be completely straight during Archer Pull-Ups?
A strong Archer Pull-Up generally uses a relatively straight assisting arm, but it does not need to be forcibly locked. Beginners to the movement can keep some elbow bend and progressively straighten the assisting arm as their strength improves.

Q2: How wide should my grip be for Archer Pull-Ups?
Use a grip wider than your standard Pull-Up grip so the assisting arm has room to extend. The exact width depends on your arm length and comfort, so avoid forcing an extremely wide position.

Q3: Do Archer Pull-Ups help with One-Arm Pull-Ups?
Yes. Archer Pull-Ups are commonly used as a progression because they increase the proportion of bodyweight handled by one arm while the other arm continues to provide assistance. More specific assisted One-Arm Pull-Up training may still be needed before achieving a full One-Arm Pull-Up.

Q4: Should I alternate sides during Archer Pull-Ups?
You can alternate sides every repetition or complete repetitions on one side before switching. Either approach can work as long as both sides receive balanced training and your technique remains consistent.

Q5: How can I make Archer Pull-Ups harder?
Gradually straighten the assisting arm more, reduce how much it contributes, improve your range of motion, use slower, controlled repetitions, progress to Typewriter Pull-Ups, or eventually move toward Assisted One-Arm Pull-Ups.


How to Do Bench Dips Correctly: Step-by-Step Guide for Beginners

Bench Dips are a bodyweight exercise that primarily targets the triceps while also involving the chest and shoulders. You perform them with your hands supported on a sturdy bench or elevated surface behind you while your feet stay on the floor.

Unlike Parallel Bar Dips, Bench Dips allow you to adjust the difficulty by changing your knee position and the amount of bodyweight supported by your legs. This makes them an accessible triceps exercise for people who can perform the movement comfortably.

However, Bench Dips place the shoulders in an extended position behind the torso, which can be uncomfortable for some individuals. Proper technique, controlled depth, and a stable support surface are important for performing the exercise safely.


What Are Bench Dips?

Bench Dips are a bodyweight pressing exercise performed with your hands resting on the edge of a sturdy bench behind your hips.

You begin with your arms extended, hips positioned just in front of the bench, and feet planted on the floor. From this position, bend your elbows to lower your body before pressing through your hands to return to the starting position.

The exercise primarily involves elbow extension, making the triceps the main working muscle group.

Bench Dips are commonly used in:

  • Triceps workouts
  • Upper-body workouts
  • At-home workouts
  • Bodyweight training
  • Calisthenics programs
  • Push-day routines
  • Muscular endurance workouts
  • Minimal-equipment strength training

Although Bench Dips can develop pressing strength, they are not a necessary prerequisite for Parallel Bar Dips. The two exercises involve different body positions and shoulder demands.

Benefits of Bench Dips

Bench Dips provide a convenient way to train the triceps using bodyweight resistance and minimal equipment.

Benefits include:

  • Strengthens the triceps
  • Develops elbow-extension strength
  • Trains the chest and front of the shoulders
  • Improves upper-body muscular endurance
  • Provides an adjustable bodyweight pressing exercise
  • Requires minimal equipment
  • Can be performed at home or in the gym
  • Offers a variation for triceps-focused workouts
  • Allows progressive difficulty through changes in leg position

Bench Dips can support triceps strength and muscle development when performed with appropriate difficulty and controlled technique.

However, individuals who experience shoulder discomfort during Bench Dips may find Close-Grip Push-Ups, Triceps Pushdowns, or other triceps exercises more comfortable.

Muscles Worked in Bench Dips

Bench Dips primarily train the muscles responsible for extending the elbows while involving the chest and shoulders to assist and stabilize the movement.

Primary Muscles

– Triceps Brachii

Secondary Muscles
  • Pectoralis Major
  • Anterior Deltoids
  • Serratus Anterior
  • Rotator Cuff Muscles
  • Forearm Muscles
  • Trapezius
  • Other Shoulder Stabilizers

The triceps perform most of the pressing work as you extend your elbows.

The chest and anterior deltoids assist with shoulder control, while the forearms and other stabilizing muscles help maintain your position.


How to Do Bench Dips (Step-by-Step)

Step 1: Choose a Stable Bench

Select a sturdy workout bench or another secure elevated surface that will not move when you support your bodyweight.

Avoid:

  • Lightweight chairs
  • Unstable furniture
  • Slippery surfaces
  • Wheeled benches
  • Surfaces that may tip backward

Make sure the floor provides secure footing.

Step 2: Position Your Hands

Sit near the front edge of the bench.

Place your palms on the bench beside your hips, with your fingers directed toward the front edge or positioned in another comfortable orientation permitted by the surface.

Keep your hands approximately shoulder-width apart.

Maintain firm contact with the bench.

Step 3: Move Your Hips Forward

Press through your hands and move your hips just beyond the front edge of the bench.

Keep your torso relatively upright and your hips close to the bench.

Avoid moving your body excessively far forward.

Step 4: Position Your Legs

Bend your knees and place your feet flat on the floor.

This position allows your legs to support part of your bodyweight, making the exercise easier to control.

Keep your feet approximately hip-width apart and securely planted.

Step 5: Lower Your Body

Slowly bend your elbows and lower your hips toward the floor.

Allow your elbows to travel backward rather than flaring excessively outward.

Keep your hips close to the bench and your shoulders controlled.

Step 6: Reach a Comfortable Bottom Position

Lower only as far as your shoulders can comfortably tolerate.

A modest elbow bend is sufficient, especially when learning the exercise.

Keep your:

  • Feet firmly planted
  • Elbows controlled
  • Hips close to the bench
  • Torso relatively upright
  • Shoulders comfortable

Avoid forcing your upper arms below parallel to the floor or pushing into a deep shoulder stretch.

Step 7: Press Back to the Starting Position

Push firmly through your palms and extend your elbows.

Raise your body until your arms return to a comfortable extended position.

Avoid using excessive leg momentum to bounce upward.

Reset your position and repeat for your planned repetitions.

Warrior showcasing How to do Bench Dips with proper form.

Bench Dips Form Checklist

Use this checklist to maintain proper Bench Dip technique.

  • Use a sturdy and stable bench
  • Keep your hands approximately shoulder-width apart
  • Maintain firm contact with the bench
  • Keep your hips close to the bench
  • Position your feet securely on the floor
  • Begin with bent knees if necessary
  • Keep your torso relatively upright
  • Lower your body under control
  • Keep your elbows from flaring excessively
  • Avoid forcing excessive shoulder extension
  • Use a comfortable range of motion
  • Avoid bouncing at the bottom
  • Press evenly through both hands
  • Extend your elbows smoothly
  • Stop if you experience shoulder pain

The goal is to train your triceps through a controlled range of motion without forcing your shoulders into uncomfortable positions.


Common Bench Dips Mistakes

Lowering Too Deeply

Problem: Lowering excessively can place the shoulders into a large amount of extension behind the torso, which may cause discomfort or excessive stress for some individuals.

Fix: Use a controlled, comfortable range of motion. Stop lowering before your shoulders become uncomfortable rather than trying to reach a specific depth.

Moving the Hips Too Far From the Bench

Problem: Allowing your hips to drift far away from the bench changes your body position and can make the movement harder to control.

Fix: Keep your hips relatively close to the front edge of the bench throughout the exercise.

Flaring the Elbows Excessively

Problem: Allowing your elbows to move excessively outward can create an awkward pressing position.

Fix: Keep your elbows generally directed backward while allowing a natural, comfortable movement path.

Using an Unstable Bench

Problem: A bench or chair that slides, tips, or moves unexpectedly can cause you to lose support during the exercise.

Fix: Use a solid, stationary bench that can safely support the forces produced during the movement.

Bouncing at the Bottom

Problem: Dropping quickly into the bottom position and bouncing upward reduces muscular control and may create unnecessary stress around the shoulders.

Fix: Lower yourself slowly, control the bottom position, and press upward without bouncing.

Straightening the Legs Too Early

Problem: Extending your legs increases the amount of bodyweight your arms must support and may make the exercise too difficult for your current strength.

Fix: Begin with your knees bent and feet closer to your body. Progress only when you can maintain proper technique.

Continuing Through Shoulder Pain

Problem: Bench Dips require substantial shoulder extension, and forcing repetitions through pain may aggravate an existing problem.

Fix: Stop the exercise if you experience sharp, worsening, or unusual shoulder pain. Reduce the range if appropriate, or choose a more comfortable triceps exercise such as Close-Grip Push-Ups or Triceps Pushdowns.


Bench Dip Progressions and Variations

Bench Dips can be adjusted by changing your leg position, tempo, and the amount of bodyweight supported by your feet.

Bent-Knee Bench Dip

This is the most accessible standard variation because your bent legs help support your bodyweight.

How to Do Bent-Knee Bench Dips

  • Sit near the edge of a sturdy bench.
  • Place your hands beside your hips.
  • Move your hips just beyond the front edge.
  • Bend your knees and plant your feet firmly.
  • Lower your body by bending your elbows.
  • Stop at a comfortable depth.
  • Press through your palms to return to the starting position.

Straight-Leg Bench Dip

Extending your legs increases the amount of bodyweight supported by your upper body compared with a bent-knee position.

How to Do Straight-Leg Bench Dips

  • Position your hands securely on a sturdy bench.
  • Move your hips just beyond the front edge.
  • Extend your legs forward with your heels on the floor.
  • Keep your hips close to the bench.
  • Slowly bend your elbows to lower your body.
  • Stop before reaching an uncomfortable shoulder position.
  • Press through your palms until your arms extend.

Partial-Range Bench Dip

This variation limits the lowering depth and can help you practice the movement through a comfortable range.

How to Do Partial-Range Bench Dips

  • Sit near the front edge of a stable bench.
  • Place your hands beside your hips.
  • Move your hips slightly forward.
  • Keep your knees bent and feet firmly planted.
  • Lower your body through a small, controlled range.
  • Press yourself back to the starting position.
  • Gradually increase the range only if comfortable.

Slow-Tempo Bench Dip

Slowing the repetitions increases time under tension without requiring additional equipment.

How to Do Slow-Tempo Bench Dips

  • Establish a stable Bench Dip position.
  • Keep your hips close to the bench.
  • Slowly bend your elbows over several seconds.
  • Lower to a comfortable bottom position.
  • Pause briefly without bouncing.
  • Press yourself upward smoothly.
  • Repeat while maintaining the same controlled tempo.

Feet-Elevated Bench Dip

This advanced variation places your feet on another stable elevated surface and can increase the challenge.

It also requires greater attention to shoulder comfort and support stability.

How to Do Feet-Elevated Bench Dips

  • Position two sturdy, stationary benches at a suitable distance.
  • Place your hands securely on the bench behind you.
  • Rest your heels on the opposite bench.
  • Keep your hips close to the rear bench.
  • Slowly bend your elbows and lower through a comfortable range.
  • Avoid forcing deep shoulder extension.
  • Press through your palms to return to the starting position.

This variation is optional. Increasing Bench Dip difficulty is not necessary if the movement causes shoulder discomfort.


Final Thoughts

Bench Dips are a convenient bodyweight exercise for training the triceps with minimal equipment.

They develop:

  • Triceps strength
  • Elbow-extension strength
  • Upper-body muscular endurance
  • Pressing control
  • Shoulder stabilization
  • Bodyweight coordination
  • Foundational upper-body strength

The most important part of performing Bench Dips correctly is maintaining a controlled movement while respecting your shoulder’s comfortable range of motion.

Keep your hips close to the bench, lower yourself gradually, and avoid forcing excessive depth.

Begin with Bent-Knee Bench Dips if you are comfortable performing the exercise. As your strength improves, you can progress to Straight-Leg or Slow-Tempo Bench Dips.

However, Bench Dips are not essential for building strong triceps. If the exercise consistently causes shoulder discomfort, Close-Grip Push-Ups, Cable Triceps Pushdowns, or other comfortable triceps exercises can provide effective alternatives. Learn more about Push Workouts here.

Essential Gear for Bench Dips

The right equipment can make bench dips safer, more comfortable, and easier to progress as your upper-body strength improves. Here are the essentials every warrior should consider.

  • Workout Bench: Provides a stable elevated surface for performing standard Bench Dips.
  • Dip Bars: A great progression from bench dips, allowing a deeper range of motion, a more natural shoulder position, and greater upper-body strength development.
  • Exercise Mat: Provides cushioning beneath your hands and feet while preventing slipping on smooth surfaces during home workouts.
  • Resistance Bands: Perfect for warming up the shoulders, improving triceps activation, and assisting with dip progressions as you work toward parallel bar dips.
  • Wrist Wraps: Help support your wrists during higher-volume training or if you experience wrist discomfort while performing bench dips.
  • Weighted Vest: An excellent progression tool for increasing resistance once bodyweight bench dips become easy, helping you continue building triceps strength and muscular endurance.

Bench Dips FAQ

Q1: How low should I go during Bench Dips?
Lower only as far as you can comfortably control without shoulder pain. You do not need to lower until your upper arms are below parallel to the floor. A smaller range of motion is acceptable when learning the exercise.

Q2: Are Bench Dips easier than Parallel Bar Dips?
Bench Dips are generally easier because your feet support part of your bodyweight. However, they place the shoulders in a different position, so easier does not necessarily mean more comfortable or suitable for everyone.

Q3: How many Bench Dips should beginners do?
If you can perform Bench Dips comfortably, a practical starting point is around 6–12 controlled repetitions for 2–3 sets. Adjust the repetitions and leg position according to your strength and shoulder comfort.

Q4: Can Bench Dips build bigger triceps?
Yes. Bench Dips can contribute to triceps muscle growth when performed with sufficient resistance, appropriate training volume, and progressive overload. However, they are not necessary for triceps development, and other exercises can provide similar training benefits.

Q5: Why do my shoulders hurt during Bench Dips?
Bench Dips place your shoulders into extension behind your torso, particularly at the bottom of the movement. This position can be uncomfortable for some individuals. Reduce the depth or stop the exercise if pain occurs. Persistent or worsening shoulder pain should be assessed by an appropriate healthcare professional.


How to Do Impossible Dips Correctly: Step-by-Step Guide for Beginners

Learn how to do impossible dips with perfect form, avoid common mistakes, and discover the best impossible dip variations to build elite pushing strength, shoulder stability, and full-body control.

Impossible dips are one of the most advanced bodyweight pushing exercises in calisthenics. Unlike traditional dips, this variation requires you to keep your body almost completely straight while leaning backward underneath the bars. The movement combines dip strength, straight-arm stability, and intense core tension, making it a true test of upper-body control.

Whether you’re training for advanced calisthenics, gymnastics, or elite bodyweight strength, mastering the impossible dip is an impressive achievement.


What Is an Impossible Dip?

An impossible dip is an advanced parallel-bar exercise performed with a rigid, straight body while leaning backward underneath the bars. Instead of keeping your torso upright like a standard dip, your body remains almost horizontal throughout the movement as you lower and press yourself back up.

Because your body acts as a long lever, the exercise places enormous demands on the shoulders, chest, triceps, and core.

Impossible dips are commonly used in:

  • Advanced calisthenics training
  • Gymnastics strength development
  • Bodyweight skill training
  • Elite pushing strength programs

Unlike standard dips, impossible dips emphasize full-body tension just as much as upper-body pressing strength.

Benefits of Impossible Dips

Impossible dips are one of the most challenging pushing exercises in calisthenics.

Benefits include:

  • Builds exceptional chest strength
  • Develops powerful triceps
  • Improves anterior shoulder strength
  • Strengthens the core through anti-extension
  • Enhances straight-body control
  • Develops elite body awareness and stability

Very few bodyweight exercises challenge pushing strength and body tension as effectively as impossible dips.

Muscles Worked in Impossible Dips

Impossible dips activate numerous muscles simultaneously.

Primary Muscles
  • Pectoralis Major
  • Triceps Brachii
  • Anterior Deltoids
Secondary Muscles
  • Serratus Anterior
  • Rectus Abdominis
  • Transverse Abdominis
  • Hip Flexors
  • Forearms
  • Rotator Cuff Muscles
  • Latissimus Dorsi

Because of this muscle activation, impossible dips are one of the best exercises for developing elite pushing strength and total-body rigidity.


How to Do Impossible Dips (Step-by-Step)

Step 1: Grip the Parallel Bars

Grip the bars firmly with:

  • Hands shoulder-width apart
  • Arms fully extended
  • Wrists neutral
  • Shoulders depressed

Tip: Before attempting impossible dips, you should already be comfortable performing strict dips, straight-bar support holds, and advanced core exercises such as hollow holds.

Step 2: Lean Back Into Position

Slowly shift your body backward underneath the bars.

Maintain:

  • A straight body from shoulders to feet
  • Legs together
  • Toes pointed
  • Core fully braced

Your body should resemble a straight plank rather than a traditional dip position.

Step 3: Lower Yourself Under Control

Begin bending your elbows while maintaining your straight-body position.

Focus on:

  • Keeping your hips from sagging
  • Maintaining full-body tension
  • Keeping your shoulders stable
  • Lowering slowly

Avoid allowing your knees or hips to bend.

Step 4: Reach the Bottom Position

At the lowest point:

  • Your elbows are deeply bent
  • Your body remains straight
  • Shoulders stay stable
  • Your heels remain together

Pause briefly while maintaining complete control.

Step 5: Press Back to the Starting Position

Drive through your palms while extending your elbows.

Maintain:

  • A rigid body
  • Tight core
  • Straight legs
  • Controlled movement

Finish with your elbows fully extended before beginning the next repetition.

Warrior showcasing How to do Impossible Dips with proper form

Impossible Dip Form Checklist

Use this quick checklist to ensure perfect impossible dip form.

  • Keep your body completely straight
  • Brace your core throughout
  • Keep your legs together
  • Lower under complete control
  • Press back without losing body tension

Perfect form develops greater strength and protects the shoulders.


Common Impossible Dip Mistakes

Bending at the Hips

Problem: Reduces leverage demands and makes the exercise easier.

Fix: Squeeze your glutes and brace your core to maintain a straight body throughout every repetition.

Losing Shoulder Stability

Problem: Places unnecessary stress on the shoulder joint.

Fix: Keep your shoulders depressed and actively engaged throughout the movement.

Using Momentum

Problem: Reduces muscle activation and body control.

Fix: Perform slow, deliberate repetitions without swinging.

Letting the Legs Separate

Problem: Reduces total-body tension.

Fix: Keep your legs together with your toes pointed throughout the exercise.

Attempting the Exercise Too Soon

Problem: Increases injury risk and limits progress.

Fix: Build strength with foundational pushing exercises before progressing to impossible dips.

Quality repetitions always outperform sloppy repetitions.


Impossible Dip Variations

Once you master foundational pushing exercises, these progressions will help you build toward the impossible dip.

Bench Dips

A beginner-friendly progression.

How to Do Bench Dips

  • Place your hands on a bench behind you
  • Lower under control
  • Press back to full extension

This variation develops basic triceps strength.

Parallel Bar Dips

The foundational progression.

How to Do Parallel Bar Dips

  • Lower until your upper arms are approximately parallel to the floor
  • Press back to full lockout
  • Maintain strict technique

This variation builds the pressing strength required for advanced dip skills.

Straight-Body Support Holds

Develops body tension.

How to Do Straight-Body Support Holds

  • Support yourself on parallel bars
  • Lock your elbows
  • Keep your body straight
  • Hold the position for time

This variation strengthens shoulder stability and body control.

Assisted Impossible Dips

The closest progression.

How to Do Assisted Impossible Dips

  • Use a resistance band attached beneath the bars or have a spotter assist your hips
  • Perform the complete movement while maintaining a rigid body
  • Gradually reduce assistance as your strength improves

This variation allows you to learn the movement safely while developing the required strength.


Final Thoughts

The impossible dip is one of the most advanced pushing skills in calisthenics.

It builds:

  • Elite chest strength
  • Powerful triceps
  • Shoulder stability
  • Core rigidity
  • Full-body control

Progress may take months or even years because this exercise demands exceptional pressing strength, straight-body tension, and shoulder stability. Master the foundational progressions before attempting full impossible dips. Learn more about Push Workouts here.

Never sacrifice body alignment for extra repetitions.

Focus on maintaining a rigid body, moving under complete control, and developing strength gradually.

A warrior doesn’t make the movement easier—he becomes stronger until the impossible becomes possible.

Essential Gear for Impossible Dips

The right equipment can improve your pushing performance, enhance shoulder stability, and help you safely progress toward mastering impossible dips. Here are the essentials every warrior should consider.

  • Push-Up Handles: Provide a stable, elevated grip for straight-arm support work, deficit push-up progressions, and building the pressing strength needed before advancing to impossible dips.
  • Resistance Bands: Excellent for assisted impossible dip progressions, allowing you to reduce the load while learning proper body positioning and developing the required strength.
  • Wrist Wraps: Provide additional wrist support and stability during demanding straight-arm holds and high-intensity dip training, helping reduce discomfort and improve confidence.
  • Gym Chalk: Improves grip by reducing sweat on your hands, helping you maintain secure contact with the bars during long support holds and impossible dip attempts.
  • Weighted Vest: An excellent way to increase resistance once you can perform strict parallel bar dips with perfect form, helping build the elite pushing strength and shoulder stability required for impossible dips.

This equipment can make your impossible dip training safer, more comfortable, and more effective while helping you develop the elite strength, stability, and body control needed to conquer one of calisthenics’ most demanding pushing skills.


Impossible Dip FAQ

Q1: Are impossible dips harder than regular dips?
Yes. Impossible dips are significantly harder because your body acts as a long lever throughout the movement, dramatically increasing the load on your chest, shoulders, triceps, and core.

Q2: What exercises should I master before attempting impossible dips?
You should first master strict parallel bar dips, straight-body support holds, hollow holds, weighted dips, and assisted impossible dips before attempting the full movement.

Q3: How long does it take to learn impossible dips?
The timeline varies depending on your strength and experience. Most athletes need several months of focused training after mastering strict dips before performing their first clean impossible dip with proper form.