How to Do a Front Lever Correctly: Step-by-Step Guide for Beginners

Learn how to do a Front Lever with proper form, avoid common mistakes, and follow the right progressions to develop the back, core, shoulder, and straight-arm strength required for this advanced calisthenics skill.

The Front Lever is one of the most impressive static holds in calisthenics. You hang from a bar with straight arms while holding your entire body horizontally and facing upward, creating a straight line roughly parallel to the ground.

It requires exceptional pulling strength, core tension, scapular control, and full-body coordination. The full Front Lever is an advanced skill, so beginners should build it progressively rather than attempting to force the final position immediately.


What Is a Front Lever?

The Front Lever is an advanced static calisthenics exercise performed while hanging from a Pull-Up bar or gymnastics rings.

Instead of hanging vertically beneath the bar, you raise your body until your torso and legs are approximately horizontal while keeping your arms straight.

A strong Front Lever position generally involves:

  • Straight arms
  • Depressed and controlled shoulder blades
  • Tight core
  • Engaged glutes
  • Straight legs
  • Pointed toes
  • Body approximately parallel to the floor

Front Levers are commonly used in:

  • Calisthenics
  • Street workout
  • Gymnastics
  • Bodyweight strength training
  • Static skill training
  • Advanced core training

The exercise requires considerably more than abdominal strength. Your lats, shoulders, upper back, arms, and core must work together to maintain the position.

Benefits of the Front Lever

Front Lever training provides several advanced strength and body-control benefits.

Benefits include:

  • Builds powerful back strength
  • Develops exceptional core strength
  • Builds straight-arm pulling strength
  • Strengthens the shoulders
  • Improves scapular control
  • Develops full-body tension
  • Improves body awareness
  • Strengthens the grip
  • Builds advanced calisthenics control

Front Lever progressions also allow you to progressively develop these qualities long before you can perform the full skill.

Muscles Worked in the Front Lever

The Front Lever is a full-body isometric exercise, but the back and core perform much of the work required to maintain the horizontal position.

Primary Muscles
  • Latissimus Dorsi
  • Rectus Abdominis
  • Trapezius
  • Teres Major
Secondary Muscles
  • Rhomboids
  • Rear Deltoids
  • Triceps
  • Forearms
  • Obliques
  • Glutes
  • Quadriceps

Your lats and shoulder girdle help resist your body falling downward, while your core, glutes, and legs maintain a rigid body line.


How to Do a Front Lever (Step-by-Step)

Step 1: Grip the Bar

Grip a secure Pull-Up bar slightly wider than shoulder-width apart with your palms facing away from you.

Start from a controlled Dead Hang.

Keep your:

  • Arms straight
  • Grip firm
  • Legs together
  • Core engaged

Make sure you have sufficient space around and underneath the bar before attempting the movement.

Step 2: Engage Your Shoulders

Move from a passive hang into an active shoulder position.

Without bending your elbows, pull your shoulders down and create tension through your lats and upper back.

Avoid simply hanging loosely from your shoulder joints.

Step 3: Brace Your Entire Body

Tighten your core and squeeze your glutes.

Keep your:

  • Knees straight
  • Legs together
  • Toes pointed
  • Ribs controlled
  • Pelvis stable

Think about turning your entire body into one rigid unit.

Step 4: Raise Your Body

Using your lats, shoulders, and core, begin raising your body in front of you.

Keep your arms straight throughout the movement.

As you rise:

  • Maintain shoulder tension
  • Keep your core braced
  • Avoid bending your knees
  • Keep your hips controlled
  • Maintain straight elbows

Beginners should practice an appropriate Front Lever progression rather than trying to force the full position.

Step 5: Reach the Horizontal Position

Continue until your body is approximately parallel to the ground.

In a full Front Lever:

  • Your shoulders remain controlled
  • Your arms stay straight
  • Your hips remain level with your torso
  • Your knees remain extended
  • Your legs stay together
  • Your body forms a straight line

Avoid allowing your hips to sag below the rest of your body.

Step 6: Hold the Position

Maintain maximum full-body tension.

Continue actively pulling through your shoulders and lats while keeping your elbows straight.

Breathe under control rather than holding your breath.

Start with short, high-quality holds and gradually increase the duration as your strength improves.

Step 7: Lower Yourself Under Control

When you can no longer maintain proper form, slowly lower your body toward the hanging position.

Keep your shoulders and core engaged throughout the descent.

Avoid suddenly dropping out of the Front Lever.

Rest before attempting another hold.
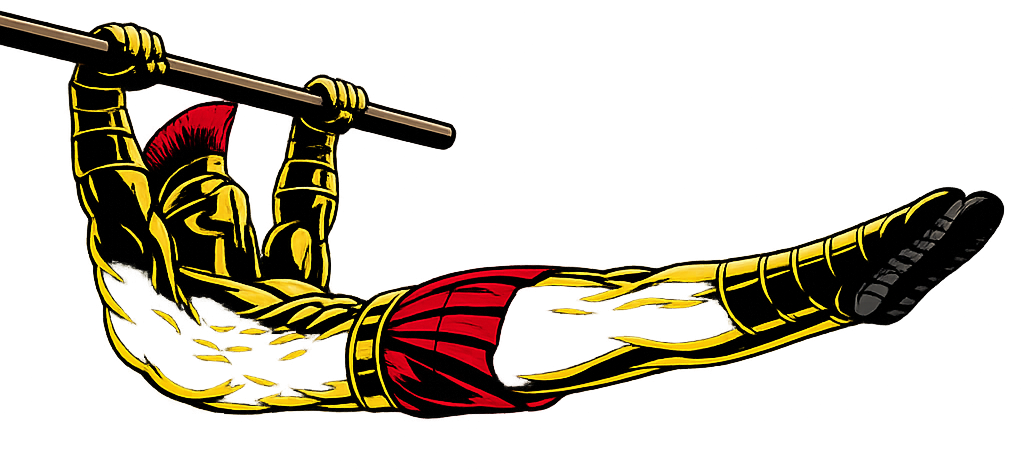
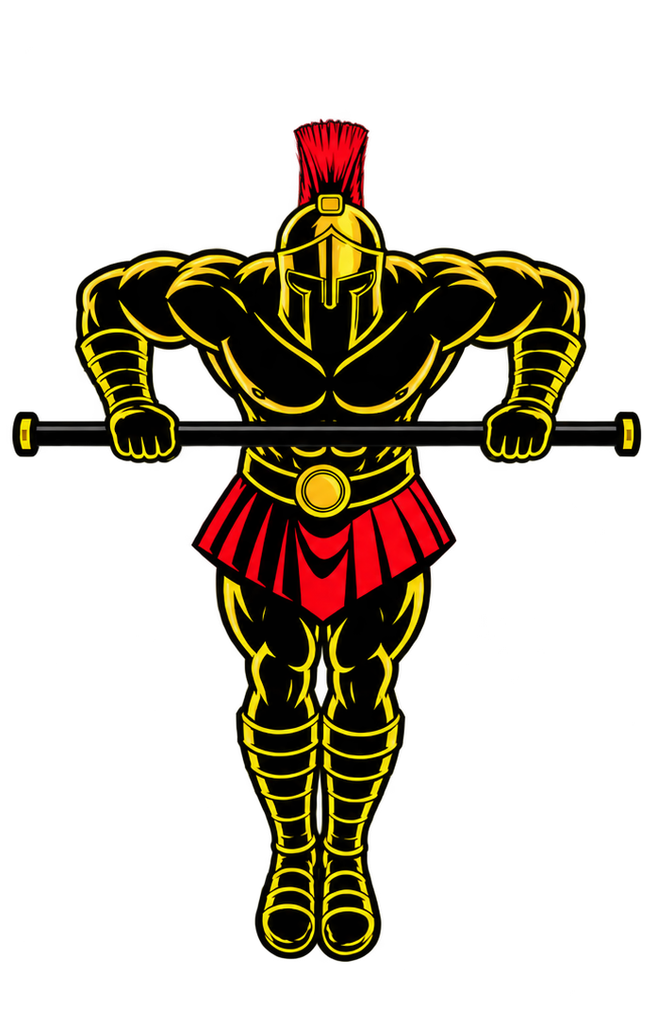
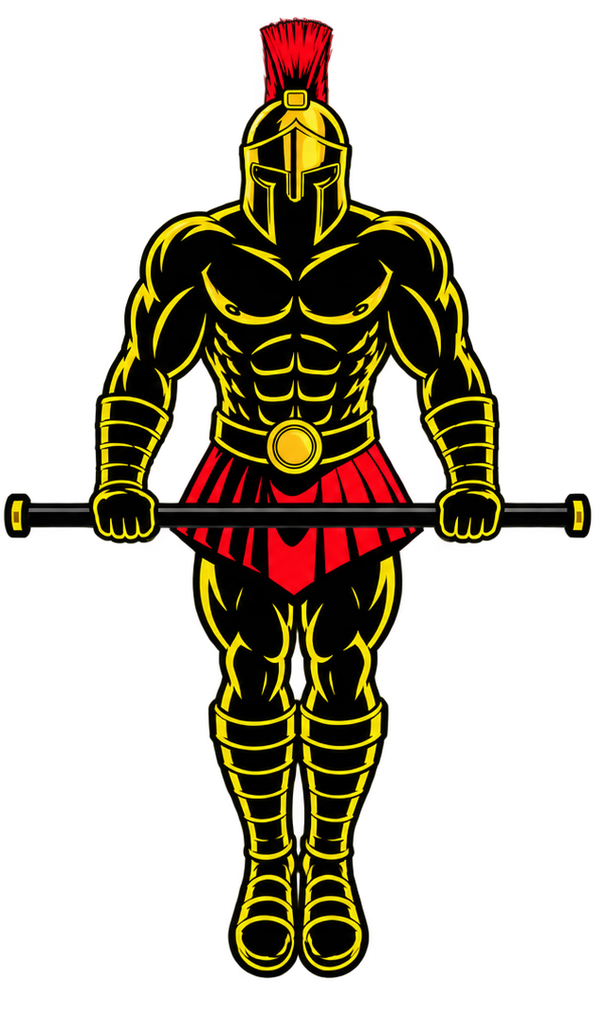
Warrior showcasing How to do Front Lever with proper form

Front Lever Form Checklist

Use this quick checklist to ensure proper Front Lever form.

  • Grip the bar firmly
  • Keep your arms straight
  • Maintain active shoulders
  • Engage your lats
  • Brace your core
  • Squeeze your glutes
  • Keep your legs together
  • Straighten your knees
  • Keep your hips from sagging
  • Maintain full-body tension
  • Hold your body approximately parallel to the floor
  • Lower yourself under control

A shorter hold with clean technique is better than a longer hold with bent arms, sagging hips, or poor body alignment.


Common Front Lever Mistakes

Bending the Arms

Problem: Bending your elbows changes the strength demands of the skill and reduces the straight-arm component of the Front Lever.

Fix: Keep your elbows fully extended throughout your Front Lever holds and use an easier progression if necessary.

Letting the Hips Sag

Problem: Dropping your hips creates a curved body position instead of a clean horizontal line.

Fix: Brace your abs, squeeze your glutes, and use a progression that allows you to keep your hips aligned with your shoulders and legs.

Losing Shoulder Engagement

Problem: Hanging passively reduces stability and makes it difficult to control the Front Lever.

Fix: Maintain active shoulders and create continuous tension through your lats and upper back.

Arching the Lower Back

Problem: Excessive lower-back extension breaks your body line and usually indicates insufficient full-body tension.

Fix: Keep your ribs controlled, brace your abs, and squeeze your glutes throughout the hold.

Progressing Too Quickly

Problem: Attempting a Full Front Lever before developing enough strength often results in bent arms, sagging hips, and extremely short holds.

Fix: Master each progression with consistent clean holds before moving to a harder variation.

Holding Your Breath

Problem: Holding your breath unnecessarily can make longer holds more difficult.

Fix: Maintain full-body tension while taking short, controlled breaths.

Training Only the Final Position

Problem: Repeatedly attempting a Full Front Lever without sufficient foundational strength may produce little progress.

Fix: Combine Front Lever holds with appropriate pulling, scapular, and core-strength exercises while progressively advancing through easier Lever variations.


Front Lever Progressions and Variations

The Front Lever should be developed gradually. Progress to the next variation only when you can maintain your current progression with clean technique.

Tuck Front Lever

The primary beginner Front Lever progression.

How to Do a Tuck Front Lever

  • Hang from the bar with straight arms.
  • Engage your shoulders and lats.
  • Bring both knees toward your chest.
  • Raise your hips until your torso approaches horizontal.
  • Keep your arms straight.
  • Hold the position under control.

Keeping your knees tucked shortens the lever and significantly reduces the difficulty.

Advanced Tuck Front Lever

A harder progression that increases the distance between your knees and torso.

How to Do an Advanced Tuck Front Lever

  • Start from a Tuck Front Lever.
  • Move your knees farther away from your chest.
  • Keep your hips approximately level with your shoulders.
  • Maintain straight arms.
  • Hold the position without allowing your hips to sag.

One-Leg Front Lever

Extending one leg increases the leverage while keeping the other leg tucked.

How to Do a One-Leg Front Lever

  • Begin from an Advanced Tuck position.
  • Extend one leg straight.
  • Keep the opposite leg tucked.
  • Maintain level hips.
  • Hold the position with straight arms.
  • Train both sides evenly.

Straddle Front Lever

Spreading your legs reduces the effective leverage compared with keeping both legs together.

How to Do a Straddle Front Lever

  • Establish a strong Front Lever position.
  • Extend both legs outward into a wide straddle.
  • Keep your knees straight.
  • Brace your core and squeeze your glutes.
  • Maintain a horizontal body position.
  • Gradually narrow your straddle as you become stronger.

Full Front Lever

The complete version of the skill.

How to Do a Full Front Lever

  • Hang from the bar with straight arms.
  • Engage your shoulders and lats.
  • Raise your body toward horizontal.
  • Extend both legs completely.
  • Keep your legs together and toes pointed.
  • Maintain a straight line through your torso and legs.
  • Hold the position with maximum full-body tension.

Final Thoughts

The Front Lever is one of the ultimate tests of straight-arm pulling strength, core stability, and body control in calisthenics.

It develops:

  • Back strength
  • Core strength
  • Straight-arm strength
  • Scapular control
  • Grip strength
  • Full-body tension
  • Advanced body control

Don’t rush from basic hangs directly into Full Front Lever attempts. Build your foundation, master the Tuck Front Lever, and gradually progress through increasingly difficult positions.

Front Lever progress is often slow because small changes in body position can dramatically increase the difficulty. Consistent, high-quality practice matters far more than forcing a progression you cannot yet control.

Master each stage, keep your form strict, and earn the Full Front Lever one progression at a time. Learn more about Calisthencis Skills here.

Essential Gear for Front Lever

Front Lever training requires relatively little equipment, but the right setup provides several ways to practice and progress the skill.

  • Pull-Up Bar: The standard piece of equipment for practicing Front Lever holds, progressions, and related pulling exercises.
  • Gymnastics Rings: Provide an alternative platform for Front Lever training while requiring additional stabilization and control.
  • Gymnastics Grips: Help improve grip security and protect your hands from blisters and calluses during long lever practice sessions, allowing you to train more comfortably.
  • Resistance Bands: Can provide assistance during harder Front Lever progressions and allow you to practice positions you cannot yet hold unassisted.
  • Wrist Wraps: Provide additional wrist support during advanced lever progressions, especially when training on rings or performing long static holds that place significant stress on the wrists.
  • Gym Chalk: Can improve grip when your hands become sweaty during demanding Front Lever sessions.

Front Lever FAQ

Q1: How long does it take to learn a Front Lever?
There is no universal timeline. Depending on your existing pulling strength, body composition, training experience, technique, and consistency, developing a Full Front Lever may take months or considerably longer.

Q2: How long should I hold a Front Lever progression?
Beginners can aim for several high-quality holds of roughly 5-10 seconds in a progression they can control. Prioritize correct body position rather than extending a hold after your form breaks down.

Q3: What is the best Front Lever progression order?
A common progression is Tuck Front Lever, Advanced Tuck Front Lever, One-Leg or Straddle Front Lever, and finally Full Front Lever. The exact progression can vary between athletes, so advance based on your ability to maintain clean form rather than following a fixed timeline.
How to Do Muscle-Ups Correctly: Step-by-Step Guide for Beginners

Muscle-Ups are an advanced calisthenics exercise that combines a powerful pull, a transition over the bar, and a straight-bar dip into one continuous movement. You begin hanging below a Pull-Up Bar and finish supported above it with your arms extended.

Unlike a standard Pull-Up, simply getting your chin above the bar is not enough. You must generate sufficient pulling height to bring your torso above the bar, transition your shoulders and chest forward, and then press yourself into the top support position.

The Muscle-Up requires pulling strength, explosiveness, coordination, grip strength, and pressing ability. Developing strong Pull-Ups, High Pull-Ups, Straight-Bar Dips, and transition drills before attempting full repetitions can make learning the skill more manageable.


What Are Muscle-Ups?

Muscle-Ups are an advanced compound bodyweight exercise that moves your body from below a bar to a supported position above it.

A bar Muscle-Up can be divided into three main phases:

  • Powerful pulling phase
  • Transition over the bar
  • Straight-bar dip and press-out

You begin hanging below the bar and pull yourself upward much higher than during an ordinary Pull-Up. As your torso reaches sufficient height, you bring your chest over the bar, transition your elbows from below to above it, and press until your arms are extended.

Muscle-Ups are commonly used in:

  • Advanced calisthenics
  • Street workout training
  • Gymnastics-inspired training
  • Upper-body strength programs
  • Explosive pulling workouts
  • Bodyweight skill training
  • Pull-and-push workouts
  • Athletic conditioning

Strict and kipping Muscle-Ups are different techniques. This guide focuses primarily on developing a controlled bar Muscle-Up with minimal unnecessary momentum.

Benefits of Muscle-Ups

Muscle-Ups combine several upper-body movement patterns into a single advanced exercise.

Benefits include:

  • Develops explosive upper-body pulling strength
  • Strengthens the lats and upper back
  • Develops the chest, shoulders, and triceps
  • Builds high-range pulling ability
  • Challenges grip and forearm strength
  • Develops transition strength and coordination
  • Improves upper-body bodyweight control
  • Combines pulling and pressing in one movement
  • Provides progression beyond basic Pull-Ups and Dips

Because Muscle-Ups require multiple strength qualities at once, progress often depends on improving the weakest phase of the movement rather than simply performing more attempts.

Muscles Worked in Muscle-Ups

Muscle-Ups train a large portion of the upper body, with different muscles becoming more important during the pull, transition, and press.

Primary Muscles
  • Latissimus Dorsi
  • Biceps Brachii
  • Triceps Brachii
  • Pectoralis Major
  • Anterior Deltoids
  • Teres Major
Secondary Muscles
  • Brachialis
  • Brachioradialis
  • Trapezius
  • Rhomboids
  • Posterior Deltoids
  • Serratus Anterior
  • Forearms
  • Rotator Cuff Muscles
  • Core Muscles

The lats and elbow flexors contribute strongly during the pull, while the chest, shoulders, and triceps become increasingly important through the transition and pressing phase.


How to Do Muscle-Ups (Step-by-Step)

Step 1: Grip the Pull-Up Bar

Grip a sturdy Pull-Up Bar with your palms facing away from you.

Use approximately a shoulder-width or slightly wider grip.

Wrap your hands securely around the bar and make sure you have sufficient clearance above it.

For a bar Muscle-Up, letting your hands sit slightly higher on the bar can make the transition into the support position easier than hanging entirely from your fingers.

Step 2: Establish the Starting Position

Begin hanging underneath the bar with your arms extended.

Keep your:

  • Grip secure
  • Core braced
  • Legs controlled
  • Shoulders controlled
  • Head relatively neutral

For a strict Muscle-Up, minimize unnecessary swinging. If learning a dynamic version, any controlled body movement should be deliberate rather than an uncontrolled kip.

Step 3: Generate a Powerful High Pull

Pull upward explosively.

Do not aim merely to bring your chin above the bar. Drive your elbows down and back while trying to bring your torso significantly higher.

Think about pulling the bar toward your lower chest or upper abdomen as your strength improves.

The higher you can pull, the easier the transition generally becomes.

Step 4: Bring Your Torso Toward the Bar

As you continue rising, allow your torso to approach the bar.

Maintain tension through your core and keep the bar relatively close.

Your pulling path will differ from a normal strict Pull-Up because you need enough height and positioning to move from underneath the bar to above it.

Step 5: Transition Over the Bar

Once you have generated sufficient height, bring your shoulders and chest forward over the bar.

Your elbows must move from a pulling position below the bar into a position above and behind it that allows you to press.

Try to transition both arms smoothly rather than placing one elbow over the bar significantly before the other.

Step 6: Press Into the Support Position

Once your chest is above the bar, begin the Straight-Bar Dip portion.

Press downward into the bar and extend your elbows.

Continue until you reach a stable support position above the bar with your arms extended.

Step 7: Return Under Control

Reverse the movement carefully.

Bend your elbows, lower your chest toward the bar, and transition back underneath it.

Control your descent until your arms return to extension.

Reset your body before attempting another repetition.

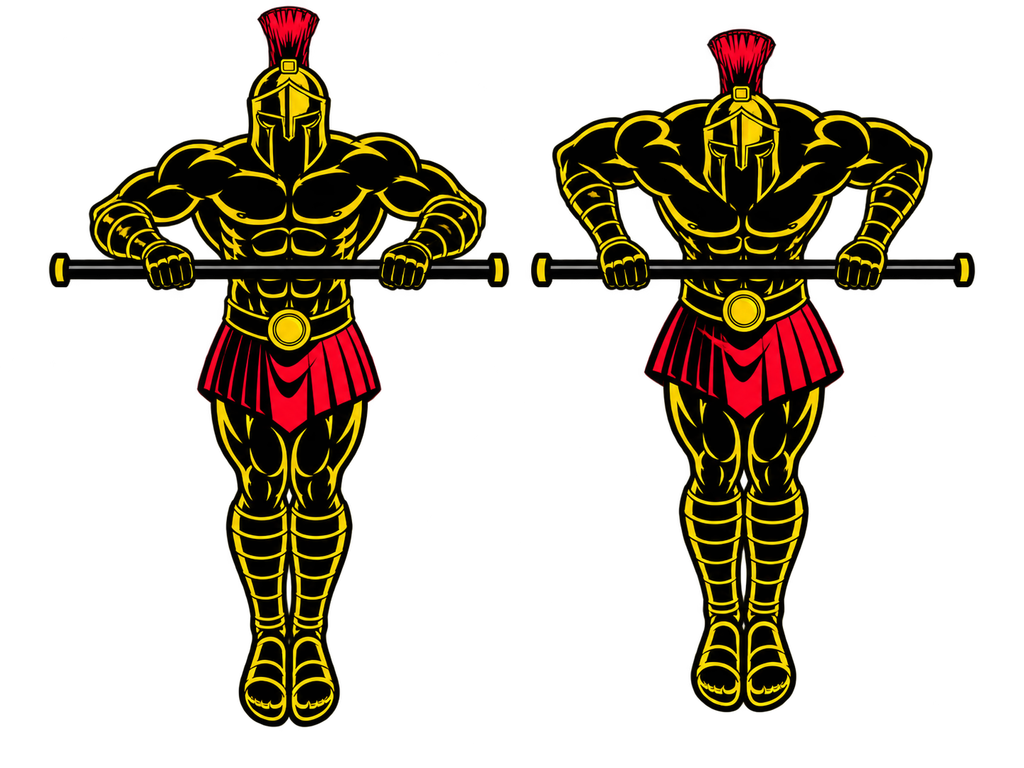
Warrior showcasing How to do Muscle-Ups with proper form.

Muscle-Ups Form Checklist

Use this checklist to maintain proper Muscle-Up technique.

  • Use a sturdy and secure Pull-Up Bar
  • Grip approximately shoulder-width or slightly wider
  • Keep your grip secure throughout the movement
  • Begin from a controlled hanging position
  • Brace your core
  • Generate a powerful high pull
  • Pull substantially higher than a normal Pull-Up
  • Keep the bar relatively close to your body
  • Bring your chest and shoulders over the bar
  • Transition both elbows as smoothly as possible
  • Avoid relying on a large uncontrolled kip
  • Press strongly through the Straight-Bar Dip
  • Finish in a stable support position
  • Control your descent
  • Stop practicing when fatigue significantly reduces technique

A successful Muscle-Up depends heavily on pulling high enough before attempting to transition over the bar.


Common Muscle-Ups Mistakes

Pulling Only to Chin Height

Problem: A standard chin-over-bar Pull-Up usually does not provide enough height for an efficient bar Muscle-Up transition.

Fix: Develop explosive High Pull-Ups and progressively work toward pulling the bar to your chest, lower chest, or upper abdomen.

Trying to Transition Too Early

Problem: Attempting to throw your chest over the bar before generating sufficient height can cause you to become stuck underneath it.

Fix: Prioritize the powerful pulling phase. Begin transitioning once your torso has risen high enough to move over the bar efficiently.

Chicken-Winging Over the Bar

Problem: Placing one elbow over the bar well before the other creates an uneven transition often called a chicken wing.

Fix: Use appropriate assistance and transition drills until you can bring both sides over the bar more smoothly. Avoid repeatedly forcing highly uneven repetitions.

Using Excessive Kipping

Problem: A large uncontrolled swing can turn the movement into a momentum-dominant repetition and make your technique inconsistent.

Fix: Develop sufficient pulling strength and use only the amount of deliberate body movement appropriate for the Muscle-Up style you are training.

Moving Too Far Away From the Bar

Problem: Pulling your body excessively backward can leave your torso too far from the bar to transition efficiently.

Fix: Generate height while maintaining an appropriate path that allows your torso to return toward and above the bar.

Having Insufficient Straight-Bar Dip Strength

Problem: You may successfully transition above the bar but fail to press into the final support position.

Fix: Train Straight-Bar Dips separately until you can press strongly and confidently from the bottom position.

Repeatedly Attempting Muscle-Ups While Fatigued

Problem: Muscle-Ups require power and coordination. As fatigue increases, pulling height can decrease, and transitions can become increasingly uneven.

Fix: Practice high-quality repetitions and skill work while relatively fresh. End the set when your pulling height or transition quality noticeably deteriorates.


Muscle-Ups Progressions and Variations

Muscle-Ups can be broken into easier progressions or advanced into more demanding variations.

Band-Assisted Muscle-Ups

A Resistance Band reduces the effective load and allows you to practice the complete movement.

How to Do Band-Assisted Muscle-Ups

  • Secure an appropriate Resistance Band to the bar.
  • Carefully place your foot or knee into the band.
  • Begin from a controlled hanging position.
  • Pull upward explosively toward the bar.
  • Bring your chest and shoulders over the bar.
  • Transition both elbows above it.
  • Press into the top support position.

Control the band throughout the exercise and inspect it for damage before use.

Jumping Muscle-Ups

A low bar or stable platform allows your legs to provide assistance while you practice the transition.

How to Do Jumping Muscle-Ups

  • Use a secure bar at an appropriate height.
  • Stand on a stable platform underneath it.
  • Grip the bar firmly.
  • Use a controlled jump to assist your upward movement.
  • Guide your chest over the bar.
  • Transition your elbows into the pressing position.
  • Press yourself into full support.

Gradually reduce the assistance from your legs as your technique improves.

Negative Muscle-Ups

Negative Muscle-Ups reverse the exercise and allow you to practice the transition under control.

How to Do Negative Muscle-Ups

  • Begin in a stable support position above the bar.
  • Bend your elbows and lower into the Straight-Bar Dip.
  • Bring your chest toward the bar.
  • Slowly transition your shoulders backward.
  • Allow your elbows to move below the bar.
  • Continue lowering through the high-pull position.
  • Finish in a controlled hang.

Strict Muscle-Ups

The Strict Muscle-Up minimizes momentum and places greater emphasis on pulling strength and transition control.

How to Do Strict Muscle-Ups

  • Begin from a controlled dead hang.
  • Brace your core and minimize swinging.
  • Pull upward as powerfully as possible.
  • Bring your lower chest or upper abdomen toward the bar.
  • Transition your torso over the bar.
  • Move both elbows into the pressing position.
  • Press to full support.

Weighted Muscle-Ups

Weighted Muscle-Ups are an advanced progression for athletes who have already developed consistent bodyweight repetitions.

How to Do Weighted Muscle-Ups

  • Secure a modest additional load appropriately.
  • Begin from a controlled hanging position.
  • Generate a powerful high pull.
  • Keep the added weight stable.
  • Transition your torso over the bar.
  • Press strongly through the dip.
  • Finish under control before descending.

Weighted Muscle-Ups should only be introduced after strong, consistent bodyweight technique has been established.


Final Thoughts

Muscle-Ups are an advanced calisthenics exercise that combines explosive pulling, a technically demanding transition, and powerful pressing into one continuous movement.

They develop:

  • Explosive pulling strength
  • Lat and upper-back strength
  • Biceps strength
  • Chest and shoulder strength
  • Triceps strength
  • Grip strength
  • Transition coordination
  • Advanced bodyweight control

Do not rush directly from basic Pull-Ups into repeated Muscle-Up attempts. Build strong Pull-Ups, High Pull-Ups, Straight-Bar Dips, and controlled transition drills first.

The higher and more efficiently you can pull, the less difficult the transition becomes. Develop each phase individually, then gradually combine them into a smooth movement from below the bar to full support above it. Learn more about Calisthenics Skills here.

Essential Gear for Muscle-Ups

Muscle-Ups require relatively little equipment, but the equipment must safely accommodate powerful movement both below and above the bar.

  • Pull-Up Bar: A sturdy bar with sufficient overhead and surrounding clearance is essential for bar Muscle-Ups.
  • Resistance Bands: Useful for reducing the effective load while practicing the high pull and transition.
  • Liquid Chalk or Gym Chalk: Can improve grip when sweaty hands limit powerful pulling or transition control.
  • Stable Step or Platform: Useful for safely reaching the bar and practicing Jumping or Negative Muscle-Ups.
  • Weighted Vest: An advanced option for adding resistance after consistent bodyweight Muscle-Ups have been mastered.

Muscle-Ups FAQ

Q1: How many Pull-Ups should I be able to do before learning Muscle-Ups?
There is no universal repetition requirement because pulling height and power matter in addition to repetition count. A foundation of strong, controlled Pull-Ups is important, but developing High Pull-Ups and the ability to pull your torso well above normal Pull-Up height is particularly useful.

Q2: Why can I do Pull-Ups but not Muscle-Ups?
Regular Pull-Ups alone do not train every requirement of the Muscle-Up. You may need greater explosive pulling height, better transition technique, stronger Straight-Bar Dips, or improved coordination between the three phases.

Q3: How high should I pull for a Muscle-Up?
You generally need to pull substantially higher than chin-over-bar height. Developing the ability to bring the bar toward your lower chest or upper abdomen can make the transition considerably easier.

Q4: Should beginners use Resistance Bands for Muscle-Ups?
Resistance Bands can be useful for practicing the complete movement when combined with separate strength work. Use an appropriate band, inspect it before training, secure it correctly, and avoid becoming dependent on excessive assistance.

Q5: How can I improve my Muscle-Ups?
Develop strong Pull-Ups, practice explosive High Pull-Ups, strengthen your Straight-Bar Dips, train assisted and negative transitions, and practice full Muscle-Ups while relatively fresh. Focus on increasing pulling height and creating a smooth transition rather than repeatedly forcing unsuccessful attempts.


How to Do an L-Sit Correctly: Step-by-Step Guide for Beginners

Learn how to do an L-sit with perfect form, avoid common mistakes, and discover the best progressions to build elite core strength and body control.

The L-sit is one of the most effective calisthenics exercises for developing core stability, hip flexor strength, and total-body control. Whether you are training for calisthenics, gymnastics, or athletic performance, mastering the L-sit is essential.


What Is an L-Sit?

An L-sit is a bodyweight static hold where you support yourself on your hands while keeping your legs extended straight in front of you, forming an “L” shape.

This exercise requires strength, balance, flexibility, and full-body tension.

The L-sit is commonly used in:

  • Calisthenics training
  • Gymnastics conditioning
  • Core strengthening workouts
  • Bodyweight skill development

Unlike traditional ab exercises, the L-sit develops functional core strength and advanced body control.

Benefits of L-Sits

L-sits are one of the best exercises for building core stability and total-body tension.

Benefits include:

  • Builds powerful core strength
  • Improves hip flexor endurance
  • Enhances shoulder stability
  • Develops body control and balance
  • Strengthens arms and wrists
  • Improves calisthenics performance

Few exercises challenge the core as effectively as the L-sit.

Muscles Worked in L-Sits

The L-sit activates multiple upper-body and core muscles simultaneously.

Primary Muscles
  • Core Muscles (Abdominals)
  • Hip Flexors
Secondary Muscles
  • Shoulders (Deltoids)
  • Triceps
  • Quadriceps
  • Forearms and Wrists
  • Chest (Pectorals)

This makes the L-sit one of the most effective full-body static holds.


How to Do an L-Sit (Step-by-Step)

Step 1: Sit on the Ground or Parallettes

Sit upright with your legs extended straight in front of you.

  • Hands beside your hips
  • Arms straight
  • Chest upright

Tip: Beginners may find parallettes easier than the floor.

Step 2: Engage Your Core

Tighten your abs and press your hands firmly into the ground or bars.

  • Shoulders active
  • Elbows locked
  • Core fully engaged

Step 3: Lift Your Body Off the Ground

Push through your hands and lift your hips upward.

  • Keep shoulders depressed
  • Maintain control

Step 4: Raise Your Legs

Lift both legs until they are parallel to the ground.

  • Keep legs straight
  • Point toes forward
  • Avoid bending knees
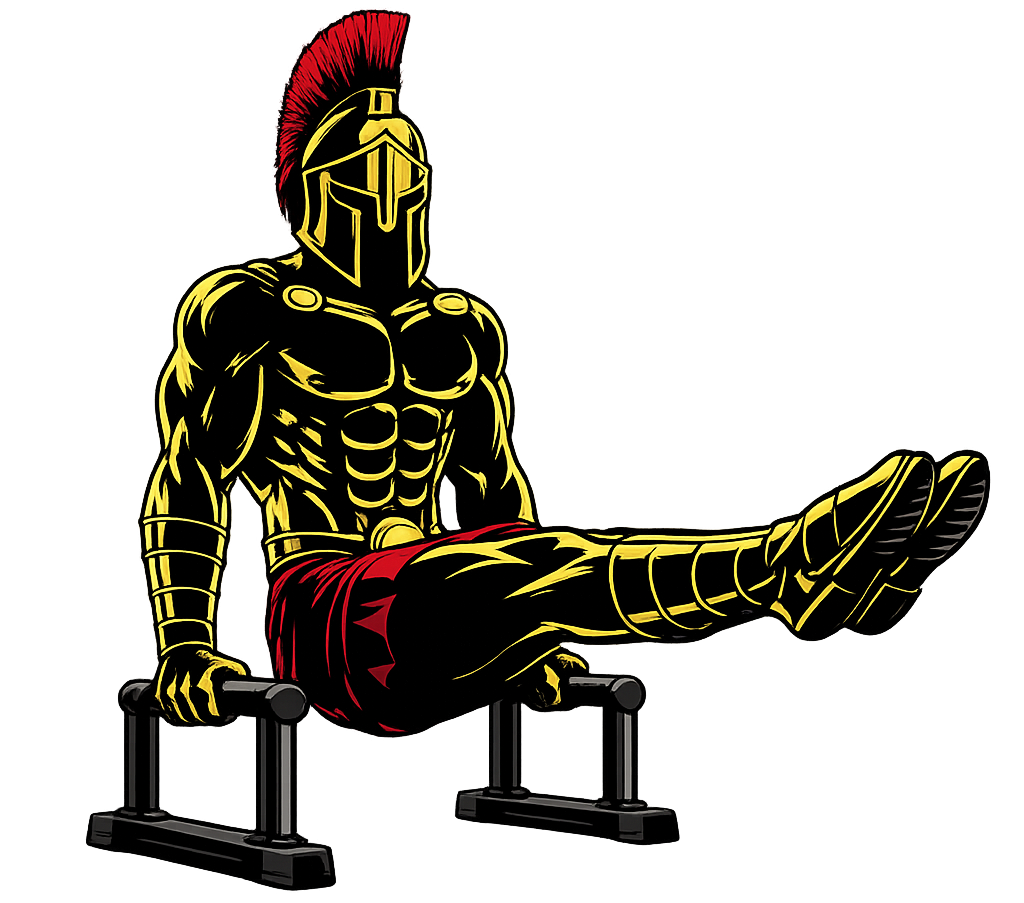
Warrior showcasing How to do an L-sit with proper form

Step 5: Hold the Position

Maintain the L-sit:

  • Core tight
  • Legs fully extended
  • Breathing controlled

Lower yourself slowly with control when finished.


L-Sit Form Checklist

Use this checklist to ensure proper form:

  • Keep arms straight
  • Maintain straight legs
  • Engage your core fully
  • Push your shoulders downward
  • Keep your chest upright

Perfect form builds strength efficiently and safely.


Common L-Sit Mistakes

Bent Knees

Problem: Reduces exercise difficulty and effectiveness.

Fix: Keep legs as straight as possible.

Rounded Shoulders

Problem: Causes instability.

Fix: Push shoulders down and maintain posture.

Weak Core Engagement

Problem: Makes holding the position difficult.

Fix: Tighten your abs throughout the hold.

Leaning Too Far Back

Problem: Breaks body alignment.

Fix: Keep your torso upright.

Holding Breath

Problem: Increases tension and fatigue.

Fix: Maintain steady breathing.


L-Sit Progressions and Variations

These progressions help beginners build strength safely.

Tucked L-Sit

The best beginner progression.

How to Do Tucked L-Sit

  • Bend your knees toward your chest
  • Lift hips off the ground
  • Hold the position with control

One-Leg L-Sit

Builds leg and core strength progressively.

How to Do One-Leg L-Sit

  • Extend one leg fully
  • Keep the other leg bent
  • Alternate sides

Paraclete L-Sit

Provides greater clearance and control.

How to Do Paraclete L-Sit

  • Use parallettes for support
  • Press downward strongly
  • Maintain full-body tension

V-Sit Progression

An advanced progression beyond the L-sit.

How to Do V-Sit Progression

  • Raise legs higher above parallel
  • Maintain straight arms and posture
  • Hold with control

Hanging L-Sit

Builds grip and pulling endurance.

How to Do Hanging L-Sit

  • Hang from a pull-up bar
  • Raise legs to parallel
  • Keep core engaged throughout

Final Thoughts

The L-sit is one of the most powerful calisthenics holds you can master.

It builds:

  • Core strength
  • Hip flexor endurance
  • Shoulder stability
  • Body control and balance
  • Mental discipline

Progress may feel difficult at first because the L-sit demands total-body tension and coordination. However, with consistent practice and proper progressions, your strength and control will improve rapidly. Learn more about Calisthenics Skills here.

Focus on quality holds and consistency.

A warrior controls his body through discipline — not momentum.

Essential Gear for L-Sits

While L-sits require nothing more than your body weight, the right equipment can make training more comfortable and help you progress faster.

  • Parallettes: Provide extra hand clearance, making L-sits easier to learn and hold.
  • Dip Bars: Offer a stable platform for practicing L-sits and other calisthenics skills.
  • Gymnastics Rings: Add an extra balance challenge while building shoulder stability and control.
  • Exercise Mat: Cushions your hands and provides a comfortable surface for floor practice.
  • Wrist Wraps: Provide extra wrist support during longer training sessions if needed.

Explore our equipment guides to find the best gear for building strength, stability, and mastering the L-sit.


L-Sit FAQ

Q1: How long should beginners hold an L-sit?
Beginners can start with 5–10-second holds and gradually increase the duration over time.

Q2: Are L-sits good for abs?
Yes, L-sits are among the best bodyweight exercises for developing strong, functional core muscles.

Q3: How often should I train L-sits?
You can train L-sits 3–5 times per week, depending on recovery and wrist health.

How to Do a Handstand Correctly: Step-by-Step Guide for Beginners

Learn how to do a Handstand with proper form, avoid common mistakes, and discover the best Handstand progressions to build balance, shoulder strength, core stability, and advanced bodyweight control.

The Handstand is one of the most recognizable skills in calisthenics and gymnastics. It requires you to support your body upside down using your hands while maintaining balance through precise control of your fingers, wrists, shoulders, hips, and core.

Whether you’re training for calisthenics, gymnastics, martial arts, or want to master an impressive bodyweight skill, learning the Handstand provides an excellent foundation for more advanced movements such as Handstand Push-Ups.


What Is a Handstand?

A Handstand is an inverted bodyweight position in which you balance vertically on your hands with your arms extended and your feet above your head.

A technically strong Handstand generally involves:

  • Hands planted firmly on the floor
  • Straight arms
  • Active shoulders
  • Tight core
  • Engaged glutes
  • Legs together and controlled
  • Body stacked vertically

Handstands are commonly used in:

  • Calisthenics training
  • Gymnastics
  • Bodyweight skill training
  • Mobility and balance practice
  • Handstand Push-Up preparation
  • Advanced movement training

Although the position looks simple, maintaining balance requires continuous adjustments through the hands and fingers.

Benefits of Handstands

Handstands provide several benefits for strength, balance, and coordination.

Benefits include:

  • Improves balance
  • Strengthens the shoulders
  • Builds wrist and forearm strength
  • Develops core stability
  • Improves body awareness
  • Strengthens the upper body
  • Develops coordination
  • Builds a foundation for advanced calisthenics skills

Regular Handstand practice can also improve your ability to control your body in inverted positions.

Muscles Worked in Handstands

A Handstand is primarily an isometric exercise, meaning your muscles work continuously to hold your body in position rather than repeatedly moving through a range of motion.

Primary Muscles
  • Deltoids
  • Triceps
  • Forearms
  • Core Muscles
Secondary Muscles
  • Trapezius
  • Serratus Anterior
  • Glutes
  • Quadriceps
  • Calves

Your fingers, wrists, and forearms constantly make small adjustments to help keep your center of mass balanced over your hands.


How to Do a Handstand (Step-by-Step)

Step 1: Warm Up Your Wrists and Shoulders

Before attempting a Handstand, prepare the joints and muscles involved.

Perform movements such as:

  • Wrist circles
  • Wrist flexion and extension
  • Shoulder circles
  • Arm swings
  • Scapular movements

A proper warm-up can help you feel more comfortable when supporting your bodyweight through your hands.

Step 2: Set Your Hand Position

Place your hands on the floor approximately shoulder-width apart.

Spread your fingers wide and press your fingertips into the floor.

Your hands should be:

  • Flat
  • Stable
  • Shoulder-width apart
  • Fingers spread

Think of your hands as the foundation of the entire Handstand.

Step 3: Set Your Starting Position

Begin in a comfortable lunge or crouched position with one foot slightly forward.

Place your hands firmly on the floor.

Keep your arms straight and shoulders active.

Step 4: Kick Up Into the Handstand

Drive through your back leg while gently kicking your other leg upward.

Allow your second leg to follow until both legs reach above your head.

Start with controlled kicks rather than trying to launch yourself aggressively into the position.

Tip: Practice against a wall initially if you’re still learning how to control the kick-up.

Step 5: Stack Your Body

Once your legs are overhead, work toward a straight vertical line.

Aim to align your:

  • Hands
  • Shoulders
  • Hips
  • Knees
  • Ankles

Keep your legs together and point your toes.

Avoid excessive arching through your lower back.

Step 6: Engage Your Core and Glutes

Brace your abdominal muscles and squeeze your glutes.

Think about slightly tucking your pelvis rather than allowing your stomach and ribs to flare forward.

Your goal is to create a strong, controlled body line.

Step 7: Balance With Your Hands

Your fingers are extremely important for Handstand balance.

If you begin falling forward, press your fingertips harder into the floor.

If you begin falling backward, adjust the pressure through your hands and fingers while controlling your shoulders and body position.

Small corrections are better than large movements.

Step 8: Hold the Position

Once balanced, maintain the Handstand for as long as you can while keeping good form.

Focus on:

  • Straight arms
  • Active shoulders
  • Tight core
  • Engaged glutes
  • Controlled legs
  • Consistent breathing

Come down safely before losing control.

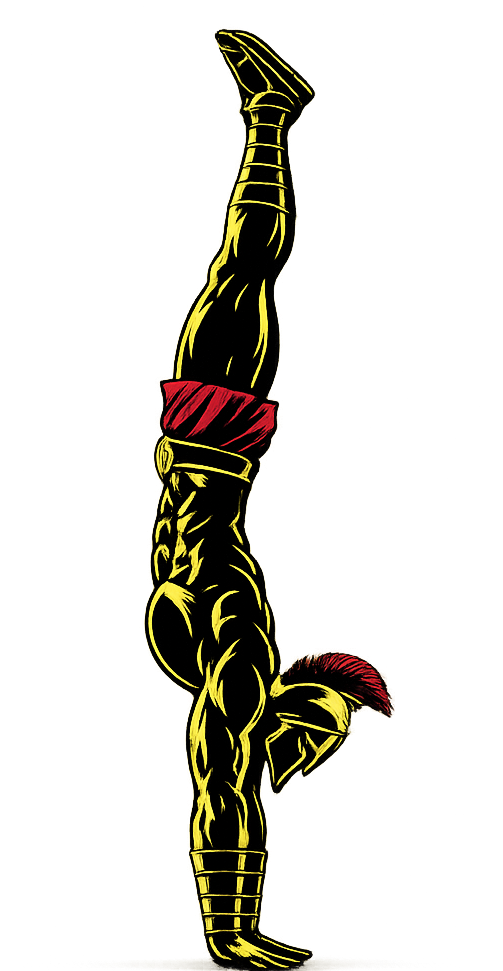
Warrior showcasing How to do a Handstand with proper form.

Handstand Form Checklist

Use this quick checklist to ensure proper Handstand form.

  • Keep your hands approximately shoulder-width apart
  • Spread your fingers
  • Keep your arms straight
  • Push actively through your shoulders
  • Keep your core tight
  • Squeeze your glutes
  • Keep your legs together
  • Point your toes
  • Maintain a controlled body line
  • Use your fingers to make small balance corrections

The goal is not simply to get upside down. The goal is to become comfortable controlling your body while inverted.


Common Handstand Mistakes

Excessive Lower-Back Arch

Problem: Allowing the ribs and stomach to flare forward creates a curved “banana” position.

Fix: Brace your core, squeeze your glutes, and work toward stacking your hips over your shoulders.

Bending the Elbows

Problem: Bent arms make the Handstand less stable and require more muscular effort.

Fix: Push actively through the floor and maintain straight elbows.

Looking Too Far Forward

Problem: Lifting your head excessively can disrupt your body alignment.

Fix: Keep your head in a neutral position and look toward the floor between your hands.

Kicking Too Hard

Problem: An aggressive kick can cause you to overshoot the balance point.

Fix: Use controlled kick-ups and gradually learn how much force you need.

Relaxing the Shoulders

Problem: Passive shoulders reduce stability and make it harder to maintain the inverted position.

Fix: Actively push the floor away and keep your shoulders elevated.

Separating the Legs

Problem: Uncontrolled legs make balancing more difficult.

Fix: Keep your legs together and squeeze your glutes once you reach the Handstand.

Holding Your Breath

Problem: Holding your breath creates unnecessary tension and makes longer holds more difficult.

Fix: Practice calm, controlled breathing while maintaining full-body tension.


Handstand Progressions and Variations

If you cannot yet hold a freestanding Handstand, these progressions can help you build the necessary strength and balance.

Wall Walks

A useful progression for developing shoulder strength and getting comfortable upside down.

How to Do Wall Walks

  • Start in a plank position with your feet against a wall.
  • Walk your hands toward the wall.
  • Walk your feet upward as your hands move closer.
  • Continue until your body reaches a controlled inverted position.
  • Walk your hands away from the wall to return.

Wall Handstand Holds

An excellent beginner progression.

How to Do Wall Handstand Holds

  • Place your hands on the floor near a wall.
  • Kick your feet up against the wall.
  • Straighten your arms.
  • Engage your core and glutes.
  • Hold the position while maintaining control.

Gradually move your feet away from the wall as your balance improves.

Chest-to-Wall Handstand

This variation encourages a straighter body line.

How to Do a Chest-to-Wall Handstand

  • Start facing away from the wall.
  • Place your hands on the floor.
  • Walk your feet up the wall.
  • Walk your hands toward the wall.
  • Bring your body into a vertical position.
  • Keep your chest facing the wall and maintain full-body tension.

Freestanding Handstand

The standard advanced version.

How to Do a Freestanding Handstand

  • Place your hands on the floor.
  • Perform a controlled kick-up.
  • Bring both legs together above your head.
  • Stack your hips over your shoulders and hands.
  • Use your fingers to make small balance corrections.
  • Maintain the position for as long as you can control it.

Handstand Shoulder Taps

An advanced variation that challenges balance and shoulder stability.

How to Do Handstand Shoulder Taps

  • Establish a stable Handstand against a wall or freestanding.
  • Shift your weight slightly onto one hand.
  • Briefly lift the opposite hand and touch your shoulder.
  • Return the hand to the floor.
  • Repeat on the opposite side.

Only attempt this variation after developing strong Handstand control.


Final Thoughts

The Handstand is one of the most valuable foundational skills in calisthenics because it develops balance, strength, coordination, and body awareness simultaneously.

It develops:

  • Shoulder strength
  • Wrist and forearm strength
  • Core stability
  • Balance
  • Coordination
  • Full-body control

Don’t expect to master the Handstand immediately. Spend time building wrist strength, shoulder stability, and wall-supported control before repeatedly attempting freestanding holds. Learn more about Calisthenics Skills here.

Practice consistently, make small adjustments, and focus on quality rather than simply chasing longer hold times.

Master the balance, and the upside-down world becomes your playground.

Essential Gear for Handstands

Handstands require very little equipment, but the right gear can make practice more comfortable and controlled.

  • Exercise Mat: Provides cushioning for your hands and body during practice.
  • Wall: Useful for learning kick-ups and building confidence with supported Handstands.
  • Parallettes: Provide an alternative hand position and can reduce wrist extension for some trainees.
  • Handstand Blocks: Help develop hand and wrist control while providing a stable gripping surface.
  • Resistance Bands: Can be used for assistance by tying them to a Pull-Up Bar/Sturdy Elevated Object to learn the movement’s progression.

Handstand FAQ

Q1: How long does it take to learn a Handstand?
The time varies from person to person. Beginners may need several weeks or months of consistent practice to develop a reliable Handstand, depending on their existing strength, mobility, balance, and coordination.

Q2: How long should I hold a Handstand?
Beginners can start with short holds of 5-15 seconds using a wall. Gradually increase the duration as your balance and technique improve rather than sacrificing form for a longer hold.

Q3: Should I practice Handstands every day?
Handstand practice can be performed frequently because it is primarily skill-based, but your wrists and shoulders still need adequate recovery. Short, high-quality sessions are generally more useful than repeatedly practicing when fatigued.

How to Do a Planche Correctly: Step-by-Step Guide for Beginners

Learn how to do a planche with perfect form, avoid common mistakes, and discover the best progressions to build elite upper-body strength and body control.

The planche is one of the most advanced calisthenics skills, requiring incredible shoulder strength, core stability, and balance. Whether you are training for calisthenics, gymnastics, or elite bodyweight mastery, learning the planche is a major achievement.


What Is a Planche?

A planche is an advanced bodyweight exercise where you hold your entire body parallel to the ground while supporting yourself only with your hands.

This movement demands full-body tension, balance, and immense pushing strength.

The planche is commonly used in:

  • Advanced calisthenics training
  • Gymnastics strength programs
  • Static hold skill training
  • Elite bodyweight conditioning

Unlike traditional strength exercises, the planche develops maximum relative strength and total-body control.

Benefits of Planche Training

Planche training is one of the most powerful methods for building advanced bodyweight strength.

Benefits include:

  • Builds elite shoulder and arm strength
  • Develops exceptional core stability
  • Improves balance and body control
  • Strengthens wrists and scapular muscles
  • Enhances straight-arm strength
  • Unlocks advanced calisthenics performance

Few exercises demonstrate upper-body mastery as effectively as the planche.

Muscles Worked in Planche

The planche activates nearly the entire body.

Primary Muscles
  • Shoulders (Anterior Deltoids)
  • Core Muscles
  • Chest (Pectorals)
Secondary Muscles
  • Triceps
  • Serratus Anterior
  • Forearms and Wrists
  • Upper Back Muscles
  • Hip Flexors and Glutes

This makes the planche one of the most demanding bodyweight exercises ever created.


How to Do a Planche (Step-by-Step)

Step 1: Start With a Planche Lean

Begin in a push-up position and lean your shoulders forward past your hands.

  • Arms straight
  • Hands shoulder-width apart
  • Fingers spread wide for balance

Tip: Keep your shoulders protracted (pushed forward).

Step 2: Engage Your Entire Body

Create full-body tension.

  • Tighten your core
  • Squeeze your glutes
  • Lock your elbows

Step 3: Shift Weight Forward

Lean farther forward while keeping control.

  • Shoulders move ahead of wrists
  • Maintain straight-arm support

Step 4: Lift Your Feet Off the Ground

Carefully raise your legs from the floor.

  • Keep your body as straight as possible
  • Avoid excessive swinging

Step 5: Hold the Position

Maintain the planche hold:

  • Keep core tight
  • Push strongly through the floor
  • Breathe steadily

Lower yourself with control when finished.

Warrior showcasing How to do a Planche with proper form

Planche Form Checklist

Use this checklist to ensure proper form:

  • Keep arms straight
  • Protract your shoulders
  • Engage your core and glutes
  • Lean forward gradually
  • Maintain full-body tension

Perfect form builds strength safely and efficiently.


Common Planche Mistakes

Bent Arms

Problem: Reduces straight-arm strength development.

Fix: Keep elbows locked throughout the movement.

Sagging Hips

Problem: Breaks body alignment.

Fix: Keep your core and glutes fully engaged.

Weak Shoulder Position

Problem: Causes instability.

Fix: Push shoulders forward and away from the ears.

Leaning Too Little

Problem: Prevents proper balance.

Fix: Gradually increase forward lean over time.

Ignoring Wrist Preparation

Problem: Increases injury risk.

Fix: Warm up wrists thoroughly before training.


Planche Progressions and Variations

The full planche is extremely advanced. These progressions help build strength gradually.

Frog Hold

The best beginner balance progression.

How to Do Frog Hold

  • Rest knees on upper arms
  • Lean forward slowly
  • Hold your balance

Tuck Planche

A beginner planche progression. Like Frog Hold, but the knees are inside the elbows.

How to Do Tuck Planche

  • Pull your knees toward your chest
  • Lift feet off the ground
  • Maintain straight arms

Advanced Tuck Planche

Increases leverage difficulty.

How to Do an Advanced Tuck Planche

  • Open your hips slightly
  • Move knees farther from the chest
  • Hold with control

Straddle Planche

A more advanced progression.

How to Do Straddle Planche

  • Spread legs apart
  • Maintain full-body tension
  • Keep body parallel to the floor

Full Planche

The ultimate progression.

How to Do a Full Planche

  • Keep legs fully straight together
  • Maintain a parallel body position
  • Hold with complete control

Final Thoughts

The planche is one of the most elite calisthenics skills you can master.

It builds:

  • Elite upper-body strength
  • Straight-arm stability
  • Core control
  • Balance and coordination
  • Mental discipline

Progress can take months or even years, depending on your strength level and consistency. However, every progression builds tremendous body control and athletic ability. Learn more about Calisthenics skills here.

Focus on patience, technique, and progression.

A warrior earns mastery through control — not shortcuts.

Essential Gear for Planche

While the planche can be trained using only your bodyweight, the right gear can improve wrist comfort, support progressions, and help you build the strength needed for this advanced skill.

  • Parallettes: Reduce wrist strain and provide a stable grip for planche progressions.
  • Wrist Wraps: Provide extra wrist support during planche training.
  • Resistance Bands: Assist with planche progressions while building strength and control.
  • Exercise Mat: Cushions your hands and provides a comfortable training surface.
  • Gym Chalk: Improves grip and helps prevent your hands from slipping during holds.

Planche FAQ

Q1: Is the planche difficult to learn?
Yes, the planche is one of the hardest calisthenics skills because it requires exceptional strength and balance.

Q2: Should beginners start with the full planche?
No, beginners should start with frog holds, planche leans, and tuck planche progressions.

Q3: How often should I train planche?
You can train planche progressions 2–5 times per week, depending on recovery and wrist health.

Calisthenics Skills: Benefits, Progressions & Best Skills

Calisthenics skills are the highest expression of bodyweight training. Rather than simply performing repetitions for strength or muscle growth, skill training teaches you to control your body through balance, coordination, mobility, and precision.

From mastering your first Frog Stand to achieving advanced movements like the Human Flag, Front Lever, or Planche, every calisthenics skill represents a combination of strength, technique, and consistency.

Whether your goal is to improve athletic performance, develop functional strength, or challenge yourself with advanced bodyweight movements, calisthenics skill training provides a rewarding path toward total-body mastery.


Why Calisthenics Skills Matter

Unlike traditional resistance training, calisthenics skills require multiple physical qualities to work together simultaneously.

Developing advanced bodyweight skills improves not only muscular strength but also balance, flexibility, coordination, body awareness, and mental focus.

Skill training benefits athletes involved in:

  • Calisthenics
  • Gymnastics
  • Rock climbing
  • Parkour
  • Martial arts
  • Cross-training
  • Obstacle course racing
  • Functional fitness

Learning progressively more difficult skills develops a level of body control that carries over into nearly every physical activity.

Benefits of Calisthenics Skills Training

Consistent skill practice offers numerous physical and performance benefits.

Build Functional Strength

Calisthenics skills strengthen multiple muscle groups simultaneously, improving real-world strength and movement efficiency.

Improve Body Control

Learning advanced positions develops coordination, balance, and proprioception, allowing greater control over your body.

Develop Core Stability

Nearly every calisthenics skill requires a strong, engaged core to stabilize the spine and maintain proper body alignment.

Increase Mobility and Flexibility

Many skills require excellent shoulder, wrist, hip, and spinal mobility, encouraging long-term flexibility and healthier joints.

Enhance Athletic Performance

Explosive transitions, isometric holds, and dynamic movements improve strength, power, agility, and coordination.

Build Mental Discipline

Mastering challenging skills demands patience, consistency, and resilience, strengthening both physical and mental performance.


Muscles Worked During Calisthenics Skills Training

Most calisthenics skills are full-body movements that recruit multiple muscle groups simultaneously.

Upper Body

  • Chest
  • Shoulders
  • Lats
  • Trapezius
  • Rhomboids
  • Biceps
  • Triceps
  • Forearms

Core

  • Rectus Abdominis
  • Obliques
  • Transverse Abdominis
  • Lower Back
  • Hip Flexors

Lower Body

  • Glutes
  • Quadriceps
  • Hamstrings
  • Calves

Together, these muscles work to create stability, body tension, and efficient movement throughout every skill progression.


Equipment Needed

One of the greatest advantages of calisthenics is that very little equipment is required.

Essential Equipment

Optional Equipment

  • Gymnastic Rings
  • Chalk
  • Wrist Wraps
  • Handstand Blocks
  • Weighted Vest
  • Weight Belt

Types of Calisthenics Skills

Calisthenics skills generally fall into four major categories.

Static Hold Skills

Static skills involve maintaining a fixed body position through isometric strength.

Examples

Benefits

  • Develops isometric strength
  • Builds tendon resilience
  • Improves total-body tension
  • Enhances stability

Dynamic Skills

Dynamic skills require explosive strength and smooth transitions between movements.

Examples

  • Muscle-Up
  • Bar Spin
  • Clap Pull-Up
  • 360 Pull-Up
  • Swing Transitions

Benefits

  • Builds explosive power
  • Improves coordination
  • Develops athletic movement

Balance Skills

Balance skills improve body awareness and stability while strengthening smaller stabilizing muscles.

Examples

  • Handstand
  • Headstand
  • Crow Pose
  • One-Arm Handstand

Benefits

  • Improves balance
  • Strengthens stabilizers
  • Enhances shoulder endurance

Mobility-Based Skills

Mobility skills combine flexibility with body control to improve movement quality.

Examples

  • Bridge
  • Pancake Stretch
  • Jefferson Curl
  • Deep Squat Hold

Benefits

  • Improves flexibility
  • Increases joint mobility
  • Reduces injury risk

Best Calisthenics Skills

Beginner Skills

Intermediate Skills

Advanced Skills


Calisthenics Skill Progressions

Beginner

Build a foundation of strength, stability, and body awareness.

Recommended skills:

Practice 2–4 sessions per week.

Intermediate

Develop greater balance, pulling strength, and pressing control.

Recommended skills:

Practice 3–5 sessions per week.

Advanced

Refine technique while building elite-level strength and control.

Recommended skills:

Practice according to your recovery and overall training volume.


Common Calisthenics Skill Training Mistakes

Rushing Progressions

Attempting advanced skills before mastering foundational movements often leads to poor technique and unnecessary setbacks.

Ignoring Mobility

Limited shoulder, wrist, and hip mobility restricts movement quality and slows progress.

Training Without Adequate Recovery

Skill training places significant stress on the muscles, tendons, and nervous system, making recovery essential.

Weak Core Engagement

Poor body tension reduces stability and makes advanced skills much more difficult to perform.

Skipping the Fundamentals

Strong basics create the foundation for every advanced calisthenics movement.


Pro Training Tips

  • Practice skills at the beginning of your workout while you’re fresh.
  • Master each progression before moving to the next level.
  • Train consistently with shorter, focused practice sessions.
  • Record your technique regularly to identify areas for improvement.
  • Prioritize mobility for the wrists, shoulders, hips, and thoracic spine.
  • Strengthen your grip to improve bar and ring performance.
  • Stay patient—advanced skills often require months or even years of dedicated practice.

Final Thoughts

Calisthenics skills represent more than impressive bodyweight movements—they are milestones that reflect strength, discipline, balance, mobility, and complete body control. Every progression, from your first dead hang to advanced skills like the Planche or Human Flag, builds the physical and mental qualities needed for long-term athletic development.

By practicing consistently, mastering the fundamentals, and progressing with patience, you can unlock increasingly challenging movements while developing exceptional functional strength and movement efficiency.

Master your body before you master advanced skills. Stay disciplined, trust the process, and forge the control, strength, and athleticism of a true warrior.


Frequently Asked Questions

How often should I practice calisthenics skills?

Most athletes benefit from practicing skills two to five times per week, depending on the movement’s difficulty and their recovery capacity.

Can beginners learn calisthenics skills?

Yes. Beginners should start with foundational skills such as dead hangs, frog stands, hollow body holds, wall handstands, and scapular pull-ups before progressing to more advanced movements.

Do calisthenics skills build muscle?

Yes. Skill training develops functional muscle, particularly in the shoulders, back, chest, arms, and core, although dedicated strength training can further maximize muscle growth.

How long does it take to learn advanced skills?

The time varies depending on the skill, your current strength, mobility, consistency, and training quality. Some skills may take several months, while others can require years of dedicated practice.

Should I practice skills before or after my workout?

Skill work is generally best performed at the beginning of your workout when your muscles and nervous system are fresh, allowing for better technique and control.

How to Do Frog Holds Correctly: Step-by-Step Guide for Beginners

Learn how to do frog holds with perfect form, avoid common mistakes, and discover the best variations to improve balance, arm strength, and body control.

Frog holds are one of the best beginner calisthenics exercises for developing balance, wrist strength, and upper-body stability. Whether you are training for calisthenics, gymnastics, or athletic performance, mastering frog holds is essential.


What Are Frog Holds?

A frog hold is a bodyweight balancing exercise where you support your body using your hands while resting your knees on your elbows or upper arms.

This movement teaches body control, balance, and coordination while strengthening the upper body and core.

Frog holds are commonly used in:

  • Calisthenics training
  • Gymnastics progressions
  • Balance and stability workouts
  • Wrist and arm strengthening routines

Unlike traditional strength exercises, frog holds develop static control and body awareness.

Benefits of Frog Holds

Frog holds are one of the best exercises for beginner balance training and upper-body control.

Benefits include:

  • Builds wrist and forearm strength
  • Improves balance and coordination
  • Enhances core stability
  • Develops shoulder and arm endurance
  • Teaches body control for advanced calisthenics skills
  • Improves confidence in balancing movements

Few exercises develop beginner calisthenics balance as effectively as frog holds.

Muscles Worked in Frog Holds

Frog holds activate multiple upper-body and core muscles.

Primary Muscles
  • Shoulders (Deltoids)
  • Core Muscles
  • Wrists and Forearms
Secondary Muscles
  • Triceps
  • Chest (Pectorals)
  • Upper Back Muscles
  • Hip Flexors

This makes frog holds an excellent exercise for total-body stability and control.


How to Do Frog Holds (Step-by-Step)

Step 1: Start in a Squat Position

Squat down with your feet slightly apart.

  • Hands placed shoulder-width apart on the ground
  • Fingers spread wide for stability

Tip: Use a soft surface or exercise mat for comfort.

Step 2: Place your knees on Your Arms

Rest your knees against your elbows or upper arms.

  • Keep elbows bent slightly
  • Maintain strong hand pressure on the ground

Step 3: Lean Forward Slowly

Shift your body weight forward gradually.

  • Keep your eyes focused slightly ahead
  • Engage your core for balance

Step 4: Lift Your Feet Off the Ground

Carefully raise both feet off the floor.

  • Keep movements controlled
  • Balance your body weight evenly

Step 5: Hold the Position

Maintain the frog hold:

  • Keep core tight
  • Breathe steadily
  • Stay balanced and controlled
Warrior showcasing How to do Frog Holds with proper form

Slowly lower your feet back down when finished.


Frog Hold Form Checklist

Use this checklist to ensure proper form:

  • Spread fingers for balance
  • Keep core engaged
  • Lean forward gradually
  • Maintain steady breathing
  • Balance body weight evenly

Perfect form improves stability and prevents injury.


Common Frog Hold Mistakes

Leaning Too Fast

Problem: Causes loss of balance.

Fix: Shift weight forward slowly and gradually.

Weak Hand Position

Problem: Reduces stability.

Fix: Spread fingers wide and press firmly into the floor.

Looking Straight Down

Problem: Affects balance.

Fix: Look slightly forward.

Holding Breath

Problem: Increases tension and instability.

Fix: Maintain slow and controlled breathing.

Elbows Collapsing

Problem: Reduces support and balance.

Fix: Keep arms stable and engaged.


Frog Hold Variations

Once you master basic frog holds, these variations can improve strength and balance further.

Tucked Frog Hold

A beginner-friendly variation.

How to Do Tucked Frog Hold

  • Keep your knees closer to your chest
  • Balance carefully
  • Focus on control

Straight-Arm Frog Hold

Increases arm and shoulder demand.

How to Do Straight-Arm Frog Hold

  • Keep arms straighter during the hold
  • Engage your shoulders strongly
  • Maintain balance carefully

One-Leg Frog Hold

Improves balance and control.

How to Do One-Leg Frog Hold

  • Extend one leg backward
  • Keep the other leg supported
  • Alternate sides

Frog Hold to Crow Pose

Progresses toward advanced balance skills.

How to Do Frog Hold to Crow Pose

  • Transition from frog hold
  • Bring knees closer toward triceps
  • Maintain a stable balance

Final Thoughts

Frog holds are one of the best beginner balance exercises you can master.

They build:

  • Wrist strength
  • Balance and coordination
  • Core stability
  • Upper-body endurance
  • Calisthenics body control

Progress may feel difficult at first because balancing exercises require patience and coordination. However, with consistent practice and proper form, your control and stability will improve rapidly. Learn more about Calisthenics Skills here.

Focus on patience and balance.

A warrior controls his body — not just his strength.

Essential Gear for Frog Holds

While frog holds require only your bodyweight, the right gear can improve comfort, support your wrists, and help you build better balance and control.

  • Exercise Mat: Cushions your hands and provides a comfortable surface for practice.
  • Wrist Wraps: Provide extra wrist support during balance training.
  • Parallettes: Reduce wrist strain and improve stability while practicing frog holds.
  • Chalk: Improves grip and helps prevent your hands from slipping.
  • Resistance Bands: Assist with beginner progressions and balance drills.

Frog Holds FAQ

Q1: How long should beginners hold a frog hold?
Beginners can start with 5–10-second holds and gradually increase the duration over time.

Q2: Are frog holds good for beginners in calisthenics?
Yes, frog holds are one of the best beginner exercises for developing balance and body control.

Q3: How often should I practice frog holds?
You can train frog holds 3–5 times per week, depending on wrist recovery and training intensity.

Calisthenics Mastery Program: The Ultimate At-Home Bodyweight Training Plan

The Calisthenics Mastery Program is a long-term bodyweight training system designed to develop strength, muscle, mobility, balance, coordination, explosive power, joint capacity, and advanced calisthenics skills.

One Long-Term System. From Fundamentals to Elite Bodyweight Skills.

This isn’t a program you complete in six weeks.

It is designed to grow with you for years.

A beginner may start with Push-Ups, Rows, Assisted Pull-Ups, basic support holds, and wall-supported Handstands. As strength and control develop, those movements progress toward Dips, Pull-Ups, L-Sits, Handstands, Muscle-Ups, Handstand Push-Ups, Levers, Planche, Human Flag, One-Arm Push-Ups, and eventually One-Arm Pull-Up progressions.

The program is built around one principle:

Master the prerequisite. Earn the progression. Then move forward.

Click on any exercise to learn how to do it.

What Can You Master With This Program?

The system provides progression pathways toward:

  • Handstand
  • Handstand Push-Up
  • Muscle-Up
  • L-Sit
  • V-Sit
  • Planche
  • Front Lever
  • Back Lever
  • Human Flag
  • Pistol Squat
  • Dragon Flag
  • One-Arm Push-Up
  • One-Arm Pull-Up
  • Explosive Pull-Ups
  • Weighted Pull-Ups and Dips

These skills shouldn’t all be treated as equal or trained at maximum intensity simultaneously.

Some require primarily strength. Others demand balance, mobility, straight-arm strength, tendon adaptation, explosive power, or highly specific technique.

The program develops those qualities systematically.

Benefits of the Calisthenics Mastery Program

  • Develops advanced relative strength
  • Builds muscle using bodyweight and external resistance
  • Develops exceptional body control
  • Builds pushing and pulling strength
  • Develops straight-arm strength
  • Improves balance and coordination
  • Builds core compression and anti-extension strength
  • Develops explosive upper-body power
  • Strengthens the legs through unilateral training
  • Improves wrist, shoulder, hip, and ankle mobility
  • Creates progression pathways toward elite calisthenics skills
  • Can be followed and progressed for years

The Calisthenics Mastery System

Instead of repeatedly replacing your workout program, the training structure remains relatively stable while the exercises evolve with your ability.

The system contains five major pillars.

1. Skill Training

Technical skills such as Handstands receive focused practice while you’re fresh.

2. Straight-Arm Strength

Planche, Front Lever, Back Lever, and Human Flag training require specific strength that ordinary Push-Ups and Pull-Ups don’t completely develop.

3. Bent-Arm Strength

Push-Ups, Dips, Pull-Ups, Rows, Handstand Push-Up progressions, and One-Arm Pull-Up progressions build foundational and advanced strength.

4. Lower-Body & Core Development

Pistol Squats, Split Squats, Nordic progressions, Dragon Flags, L-Sits, compression work, and other movements prevent the program from becoming upper-body-only.

5. Mobility & Joint Preparation

Wrists, elbows, shoulders, scapulae, hips, knees, and ankles need time to adapt to increasingly difficult movements.


Equipment Needed

The program can be performed at home or in a calisthenics park with relatively little equipment.

Recommended Equipment

Highly Useful for Advanced Training

  • Gymnastic Rings
  • Low Bar for Rows
  • Secure Vertical Pole or Stall Bars for Human Flag training
  • Additional Weight for Weighted Pull-Ups and Dips

A secure vertical structure is essential for Human Flag training. Don’t improvise this skill using furniture, unstable poles, or structures not designed to support your body weight.


Weekly Training Structure

For a genuine mastery program, I recommend a 6-day Skill + Strength split rather than traditional PPL.

DayPrimary FocusSecondary Focus
MondayHandstand + Vertical PushPush Strength
TuesdayMuscle-Up + Explosive PullPull Strength
WednesdayLegsL-Sit + Compression
ThursdayPlancheAdvanced Push Strength
FridayFront Lever + Back LeverPull Strength
SaturdayHuman Flag + CoreLegs + Athleticism
SundayComplete RestOptional Gentle Mobility

This distributes the major advanced skills instead of stacking several extremely demanding movements into one session.


The Primary-Skill Rule

This is one of the most important rules in the entire program.

Do not attempt to maximize every advanced skill simultaneously.

At any given time, choose approximately:

  • 1 Primary Push Skill
  • 1 Primary Pull Skill
  • 1 Balance/Secondary Skill

For example:

Primary Push: Planche
Primary Pull: Front Lever
Secondary: Handstand

You can maintain other skills at lower volume.

After a training block, your priorities can change:

Primary Push: Handstand Push-Up
Primary Pull: Muscle-Up
Secondary: Back Lever

This prevents the program from becoming ten separate specialist programs crammed into one week.


Skill Progression Levels

Every major skill has a progression ladder.

Use the variation appropriate for your current level rather than blindly performing the hardest exercise listed.

Handstand Progression

Level 1: Pike Hold
↓
Level 2: Wall Walk
↓
Level 3: Chest-to-Wall Handstand
↓
Level 4: Wall Handstand + Weight Shifts
↓
Level 5: Wall Handstand Shoulder Taps
↓
Level 6: Freestanding Handstand Attempts
↓
Level 7: Freestanding Handstand
↓
Level 8: Handstand Variations

Balance practice should generally stop before fatigue destroys technique.

Handstand Push-Up Progression

Pike Push-Up
↓
Feet-Elevated Pike Push-Up
↓
Wall Handstand Hold
↓
Partial-ROM Wall HSPU
↓
Wall Handstand Push-Up
↓
Deficit Wall HSPU
↓
Freestanding HSPU Progressions
↓
Freestanding Handstand Push-Up

Muscle-Up Progression

Pull-Up
↓
Chest-to-Bar Pull-Up
↓
Explosive High Pull-Up
↓
Straight-Bar Dip
↓
Band-Assisted Muscle-Up
↓
Jumping/Low-Bar Transition Drills
↓
Muscle-Up Negative
↓
Strict Muscle-Up
↓
Weighted / Advanced Muscle-Up

A Muscle-Up isn’t simply a Pull-Up followed by a Dip. Develop the high pull and transition specifically.

Planche Progression

Planche Lean
↓
Frog Stand / Crow
↓
Tuck Planche
↓
Advanced Tuck Planche
↓
Straddle Planche
↓
Full Planche

Later strength work can include:

  • Pseudo Planche Push-Ups
  • Planche Lean Push-Ups
  • Tuck Planche Push-Up Progressions
  • Band-Assisted Planche Work

Planche progression can take years, and that’s normal.

Front Lever Progression

Active Hang
↓
Scapular Pull-Ups
↓
Tuck Front Lever
↓
Advanced Tuck Front Lever
↓
One-Leg Front Lever
↓
Straddle Front Lever
↓
Full Front Lever

Supporting exercises include:

  • Front Lever Raises
  • Front Lever Rows
  • Straight-Arm Band Pulldowns
  • Weighted Pull-Ups

Back Lever Progression

Before serious Back Lever training, develop comfortable hanging and shoulder control.

Skin-the-Cat Preparation
↓
German Hang Preparation
↓
Tuck Back Lever
↓
Advanced Tuck Back Lever
↓
One-Leg Back Lever
↓
Straddle Back Lever
↓
Full Back Lever

Back Lever work places substantial demands on the shoulders and elbows. Progress conservatively and never force uncomfortable shoulder positions.

Human Flag Progression

Side Plank
↓
Vertical Pole Support / Flag Position Drills
↓
Vertical Flag Holds
↓
Tuck Human Flag
↓
Advanced Tuck Flag
↓
One-Leg Human Flag
↓
Straddle Human Flag
↓
Full Human Flag

Train both sides.

L-Sit to V-Sit Progression

Support Hold
↓
Seated Compression Lifts
↓
Tuck L-Sit
↓
One-Leg L-Sit
↓
L-Sit
↓
High L-Sit
↓
V-Sit Progressions

Hamstring mobility and compression strength become increasingly important as you progress.

One-Arm Push-Up Progression

Push-Up
↓
Diamond Push-Up
↓
Archer Push-Up
↓
Elevated One-Arm Push-Up
↓
Assisted One-Arm Push-Up
↓
One-Arm Push-Up

Train both arms rather than repeatedly practicing only your stronger side.

One-Arm Pull-Up Progression

This is an exceptionally demanding strength skill.

Pull-Up
↓
Weighted Pull-Up
↓
Archer Pull-Up
↓
Typewriter Pull-Up
↓
Uneven / Assisted One-Arm Pull-Up
↓
One-Arm Scapular Work
↓
Controlled One-Arm Eccentric
↓
Assisted Full-ROM One-Arm Pull-Up
↓
One-Arm Pull-Up

Don’t begin repeated One-Arm Pull-Up negatives simply because you can perform normal Pull-Ups. Build substantial bilateral and assisted unilateral pulling strength first.

Dragon Flag Progression

Reverse Crunch
↓
Lying Leg Raise
↓
Tuck Dragon Flag
↓
Dragon Flag Negative
↓
One-Leg Dragon Flag
↓
Full Dragon Flag

Keep your trunk rigid rather than folding excessively through the hips.

Pistol Squat Progression

Bodyweight Squat
↓
Split Squat
↓
Bulgarian Split Squat
↓
Box-Assisted Pistol Squat
↓
Counterbalanced Pistol Squat
↓
Pistol Squat
↓
Weighted Pistol Squat


Pre-Workout Joint Preparation & Warm-Up

Spend approximately 8–12 minutes warming up.

General Preparation

Calisthenics Activation

Before Planche or Handstand Training

Add:

  • Wrist Rocks – 10–15 reps
  • Palm Pulses – 10–15 reps
  • Easy Planche Leans – 2 short sets

Before Lever Training

Add:


Day 1 – Handstand + Vertical Push Strength

Skill Practice

Choose your current Handstand progression.

Perform:

Handstand Progression – 10–20 minutes

Use short, high-quality attempts rather than repeatedly training to exhaustion.

Then:

  • Handstand Weight Shifts or Shoulder Taps – 3 sets × 5–10 reps each side

Skip these if they exceed your current level.

Handstand Push-Up Progression

Choose one:

Perform 4 sets × 4–10 reps.

Strength Work

Core

  • L-Sit Progression – 4 sets × 10–30 seconds
  • Hollow Body Hold – 3 sets × 20–40 seconds

Day 2 – Muscle-Up + Explosive Pull

Muscle-Up Skill Work

Select the appropriate progression:

Perform 4–6 sets of 1–5 high-quality reps depending on the movement.

Stop when explosiveness or technique deteriorates.

Pull Strength

  • Pull-Ups or Weighted Pull-Ups – 4 sets × 5–10 reps
  • Chest-to-Bar Pull-Ups – 3 sets × 4–8 reps
  • Inverted Rows – 3 sets × 8–15 reps
  • Chin-Ups – 3 sets × 6–12 reps
  • Band Face Pulls – 3 sets × 12–20 reps

Grip

Core


Day 3 – Legs + L-Sit & Compression

Skill Work

  • L-Sit Progression – 4 sets × 10–30 seconds
  • Seated Compression Lifts – 3 sets × 8–15 reps
  • Pancake or Hamstring Mobility – 5–10 minutes

Strength

  • Pistol Squat Progression – 4 sets × 5–10 reps each leg
  • Bulgarian Split Squats – 3 sets × 8–15 reps each leg
  • Nordic Curl Progression – 3 sets × 4–8 reps
  • Single-Leg Romanian Deadlift – 3 sets × 8–12 reps each leg
  • Single-Leg Calf Raises – 4 sets × 12–20 reps

Only perform Nordic variations with a secure ankle setup. Use sliding leg curls or another hamstring exercise if a safe anchor isn’t available.

Core

  • Dragon Flag Progression – 3–4 sets × 3–8 reps
  • Side Plank – 3 sets × 30–60 seconds each side

Day 4 – Planche + Advanced Push Strength

Planche Skill Work

Choose your current progression:

  • Planche Lean
  • Tuck Planche
  • Advanced Tuck Planche
  • Straddle Planche
  • Full Planche

Perform approximately:

4–6 sets × 5–15 seconds

Quality matters more than accumulating ugly hold time.

Straight-Arm Strength

Advanced athletes already performing difficult Planche variations can reduce this accessory volume.

Push Strength

  • Weighted Dips – 4 sets × 5–8 reps
  • Archer Push-Ups – 3 sets × 5–10 reps each side
  • One-Arm Push-Up Progression – 3 sets × 3–8 reps each side
  • Resistance Band Tricep Extensions – 2 sets × 10–15 reps

Core

  • L-Sit Progression – 3 sets
  • Compression Holds – 3 sets × 15–30 seconds

Day 5 – Front Lever + Back Lever + Pull Strength

This is the primary straight-arm pulling day.

Front Lever Skill

Choose your progression and perform:

4–6 sets × 5–15 seconds

Then:

  • Front Lever Row Progression – 3 sets × 4–10 reps

Back Lever Skill

Choose your current Back Lever progression.

Perform:

3–4 sets × 5–15 seconds

Back Lever work should remain conservative, particularly while the shoulders and elbows are adapting.

Pull Strength

Advanced Option

If you’re ready for One-Arm Pull-Up training:

Replace Archer Pull-Ups with your current One-Arm Pull-Up progression for:

3–4 sets × 1–5 reps each arm

Don’t perform both at high volume.

Grip

Only use a secure towel and bar setup.


Day 6 – Human Flag + Athletic Legs & Core

Human Flag Skill Work

Using a secure vertical structure, choose your progression:

  • Vertical Flag Drill
  • Tuck Flag
  • Advanced Tuck
  • One-Leg Flag
  • Straddle Flag
  • Full Human Flag

Perform:

4–6 sets × 5–15 seconds each side

Lateral Core Strength

  • Side Plank Raises – 3 sets × 10–15 reps each side
  • Hanging Oblique Knee Raises – 3 sets × 8–15 reps each side

Athletic Lower Body

  • Jump Squats – 3 sets × 5–8 reps
  • Broad Jumps – 3 sets × 3–5 reps
  • Shrimp Squats – 3 sets × 6–10 reps each leg
  • Walking Lunges – 3 sets × 10–15 reps each leg
  • Single-Leg Glute Bridges – 3 sets × 12–15 reps each leg

Plyometric sets are for power, not exhaustion. Use full recovery and stop when jump quality declines.

Optional Conditioning

Complete 2–3 rounds:

This is optional.

If conditioning begins interfering with your skill or strength progression, remove it.


Post-Workout Stretch & Mobility Routine

Select stretches relevant to the day’s training.

Hold approximately 20–30 seconds.

Upper Body

Lower Body

Skill-Specific Mobility

Handstand and Planche athletes should give particular attention to:

  • Wrist mobility
  • Overhead shoulder mobility

L-Sit and V-Sit athletes should develop:

  • Hamstring flexibility
  • Hip compression

Bridge or advanced shoulder-extension work should be progressed gradually rather than forced.


The Mastery Level System

Instead of measuring this program in weeks, use levels.

Level 1 – Foundations

Build:

  • Push-Ups
  • Rows
  • Pull-Up Progressions
  • Dips
  • Squats
  • Hollow Body Strength
  • Active Hangs
  • Wrist and Shoulder Capacity

Spend as long here as necessary.

Level 2 – Basic Calisthenics Strength

Develop:

  • 15–25 Push-Ups
  • 5–10 Pull-Ups
  • 8–12 Dips
  • Pike Push-Ups
  • Bulgarian Split Squats
  • Hanging Knee/Leg Raises
  • Tuck L-Sit
  • Wall Handstand

Level 3 – Intermediate Skills

Begin serious work toward:

  • Freestanding Handstand
  • Muscle-Up
  • L-Sit
  • Pistol Squat
  • Tuck Front Lever
  • Tuck Back Lever
  • Tuck Planche
  • Human Flag Progressions
  • Archer Push-Ups
  • Archer Pull-Ups

Level 4 – Advanced Skills

Develop:

  • Consistent Muscle-Up
  • Handstand Push-Up
  • Advanced Tuck / Straddle Front Lever
  • Advanced Tuck / Straddle Planche
  • Back Lever
  • Human Flag
  • Dragon Flag
  • One-Arm Push-Up
  • Weighted Pull-Ups and Dips

Level 5 – Mastery

Long-term targets include:

  • Full Planche
  • Full Front Lever
  • Full Back Lever
  • Full Human Flag
  • Freestanding Handstand Push-Up
  • Strict Muscle-Up Variations
  • One-Arm Pull-Up
  • V-Sit
  • Advanced Handstand Variations
  • Advanced Planche and Lever combinations

There is no fixed deadline for reaching Level 5.

For many athletes, individual elite skills require years of specific training.


When Should You Advance a Skill Progression?

Don’t advance simply because you managed the next progression once.

Move forward when you can repeatedly demonstrate:

  • Correct body position
  • Controlled entry and exit
  • Consistent technique across sets
  • No significant pain
  • Adequate hold time or repetitions
  • Control rather than momentum

For static skills, a useful general rule is to build roughly 10–15 seconds of repeatable, clean holds across several sets before seriously emphasizing the next progression.

This isn’t universal. Some progressions are dramatically harder than others.

How to Progress Over Years

Progressive overload in calisthenics can come from:

  • More repetitions
  • Longer holds
  • Harder leverage
  • Reduced assistance
  • Added resistance
  • Greater range of motion
  • Better technique
  • Increased movement control

Eventually:

Push-Ups → Weighted Push-Ups → Archer Push-Ups → One-Arm Push-Ups

Pull-Ups → Weighted Pull-Ups → Archer Pull-Ups → Assisted One-Arm Pull-Ups → One-Arm Pull-Up

Tuck Lever → Advanced Tuck → One-Leg → Straddle → Full Lever

This is what allows the program to remain useful for years.


Training Blocks: The Key to Long-Term Mastery

Although the overall program can remain in place for years, your priorities should change.

Use approximately 6–12-week specialization blocks.

For example:

Block 1

Primary Skills:

  • Handstand
  • Muscle-Up

Secondary Skills:

  • L-Sit
  • Tuck Front Lever

Maintain:

  • Planche foundations
  • Back Lever preparation
  • Human Flag foundations

Block 2

Primary Skills:

  • Planche
  • Front Lever

Secondary:

  • Handstand

Maintain:

  • Muscle-Up
  • L-Sit
  • Human Flag

Block 3

Primary Skills:

  • Handstand Push-Up
  • Human Flag

Secondary:

  • One-Arm Pull-Up Preparation

Maintain:

  • Planche
  • Front Lever
  • Muscle-Up

This approach is much more sustainable than trying to progress every advanced skill at maximum speed simultaneously.


How Hard Should You Train?

Skill work and strength work require different approaches.

Balance & Technique Skills

For Handstands and technical Muscle-Up drills:

Stop before technique deteriorates.

Static Strength Skills

For Planche and Lever work:

Perform demanding but technically clean holds. Avoid turning every attempt into a maximum-duration grind.

Strength Exercises

Most working sets can finish with approximately 1–3 clean repetitions in reserve.

Explosive Training

Stop when speed or power noticeably decreases.

Quality is the priority.


Recovery and Joint Management

Advanced calisthenics can place considerable stress on connective tissues, especially the wrists, elbows, and shoulders.

Muscular strength can sometimes improve faster than connective tissues tolerate increasing skill difficulty.

Watch for Persistent:

  • Wrist pain
  • Medial or lateral elbow pain
  • Anterior shoulder pain
  • Declining pulling strength
  • Declining Planche or Lever performance
  • Unusual fatigue
  • Loss of motivation
  • Reduced quality across several sessions

Don’t try to solve every plateau by adding more training.

Sometimes the correct progression is more recovery.


Deloading

You don’t need to automatically deload every specific number of weeks.

Consider a lighter week when accumulated fatigue begins reducing training quality.

During a deload, you can:

  • Reduce total sets
  • Use easier progressions
  • Reduce weighted work
  • Avoid maximum holds
  • Continue light technical Handstand practice
  • Emphasize mobility and recovery

Then return gradually to normal training.


Nutrition for Calisthenics Mastery

Calisthenics performance depends heavily on relative strength—how strong you are relative to your body weight.

That doesn’t mean you should remain as light as possible.

You still need sufficient nutrition to build muscle, recover, and perform.

Protein

For many resistance-trained athletes, approximately 1.6–2.2 grams of protein per kilogram of body weight per day is a practical range.

Useful sources include:

  • Eggs
  • Chicken
  • Fish
  • Meat
  • Milk
  • Yogurt
  • Lentils
  • Beans

Carbohydrates

Carbohydrates can support demanding training.

Useful sources include:

  • Rice
  • Roti
  • Oats
  • Potatoes
  • Fruit
  • Whole grains

Dietary Fats

Include appropriate amounts of foods such as:

  • Nuts
  • Seeds
  • Eggs
  • Fish
  • Olive Oil

Hydration

Drink according to thirst, activity, climate, and sweat losses.


Tips for Mastering Calisthenics

  • Master fundamentals before chasing elite skills.
  • Train skills while fresh.
  • Choose a small number of primary skills at a time.
  • Keep secondary skills at maintenance volume.
  • Train both sides of unilateral movements.
  • Record difficult skill attempts to assess technique.
  • Track progression variations, holds, reps, and resistance.
  • Build weighted Pull-Up and Dip strength when appropriate.
  • Don’t rush straight-arm skills.
  • Give wrists and elbows time to adapt.
  • Use bands as progression tools rather than viewing assistance as failure.
  • Don’t turn power exercises into endurance work.
  • Maintain lower-body training.
  • Don’t sacrifice mobility for strength.
  • Don’t sacrifice strength for endless skill attempts.
  • Prioritize sleep and nutrition.
  • Treat pain differently from normal muscular fatigue.
  • Think in years, not weeks.

Final Thoughts

The Calisthenics Mastery Program isn’t designed around completing a fixed number of workouts and moving on.

It’s designed around progression.

At first, your challenge might be performing your first strict Pull-Up or holding yourself upside down against a wall.

Later, the challenge becomes a Muscle-Up.

Then a freestanding Handstand.

Then an L-Sit.

Then a Handstand Push-Up.

Then a Front Lever.

A Human Flag.

A Planche.

Perhaps eventually a One-Arm Pull-Up.

The exercises change. Your priorities change. Your leverage becomes harder. Your strength increases. Your control improves.

The system remains.

You don’t need to master everything at once, and you don’t need to race someone else’s timeline. Advanced calisthenics rewards athletes who build prerequisites, respect connective-tissue adaptation, and accumulate years of high-quality practice.

Master the fundamentals.

Earn each progression.

Keep developing strength.

Keep developing control.

Then take the skill that once looked impossible and make it your new foundation.


How to Do Bear Crawls Correctly: Step-by-Step Guide for Beginners

Learn how to do bear crawls with perfect form, avoid common mistakes, and discover the best variations to improve strength, coordination, and conditioning.

Bear crawls are one of the most effective full-body bodyweight exercises for developing functional strength, endurance, and athletic movement. Whether you are training for military fitness tests, sports performance, or general fitness, mastering bear crawls is essential.


What Are Bear Crawls?

Bear crawls are a crawling movement where you move on your hands and feet while keeping your knees elevated slightly above the ground.

This exercise challenges strength, coordination, stability, and cardiovascular endurance simultaneously.

Bear crawls are commonly used in:

  • Military fitness training
  • Athletic conditioning programs
  • Functional fitness workouts
  • Core and stability training

Unlike isolated exercises, bear crawls train the body to move as a connected unit.

Benefits of Bear Crawls

Bear crawls are one of the best exercises for developing athletic conditioning and total-body control.

Benefits include:

  • Builds full-body strength and endurance
  • Improves coordination and balance
  • Enhances core stability
  • Strengthens shoulders and grip
  • Develops functional movement ability
  • Essential for military and tactical fitness

Few exercises challenge the entire body as effectively as bear crawls.

Muscles Worked in Bear Crawls

Bear crawls activate multiple muscle groups throughout the body.

Primary Muscles
  • Shoulders (Deltoids)
  • Core Muscles
  • Quadriceps
Secondary Muscles
  • Chest (Pectorals)
  • Triceps
  • Glutes
  • Hamstrings
  • Calves

This makes bear crawls one of the best full-body conditioning exercises.


How to Do Bear Crawls (Step-by-Step)

Step 1: Start on All Fours

Get into a tabletop position on your hands and knees.

  • Hands under shoulders
  • Knees under hips
  • Spine neutral

Tip: Keep your movements controlled from the start.

Step 2: Lift Your Knees Slightly

Raise your knees a few inches off the ground.

  • Core engaged
  • Back flat
  • Neck neutral

Step 3: Move Opposite Hand and Foot

Move one hand and the opposite foot forward simultaneously.

  • Take small controlled steps
  • Maintain balance and posture
Warrior showcasing How to do Bear Crawls with proper form

Step 4: Continue Crawling Forward

Alternate sides while moving forward.

  • Keep hips stable
  • Avoid excessive body rotation

Step 5: Maintain Control

Keep your movements smooth and controlled throughout the crawl.

Avoid rushing or letting your knees touch the ground.


Bear Crawls Form Checklist

Use this checklist to ensure proper form:

  • Keep knees slightly elevated
  • Maintain a flat back
  • Move your opposite hand and foot together
  • Keep movements controlled
  • Engage your core throughout

Perfect form builds strength and prevents injury.


Common Bear Crawls Mistakes

Hips Too High

Problem: Reduces core activation.

Fix: Keep hips level and controlled.

Knees Touching the Ground

Problem: Reduces exercise difficulty and effectiveness.

Fix: Keep knees hovering slightly above the floor.

Moving Too Fast

Problem: Causes poor coordination.

Fix: Focus on slow, controlled movement first.

Excessive Body Rotation

Problem: Reduces stability.

Fix: Keep your torso stable and core engaged.

Looking Up Excessively

Problem: Creates neck strain.

Fix: Keep your neck neutral and eyes slightly forward.


Bear Crawls Variations

Once you master basic bear crawls, these variations can increase difficulty and effectiveness.

Backward Bear Crawls

Improves coordination and control.

How to Do Backward Bear Crawls

  • Crawl backward slowly
  • Maintain the same posture and control
  • Keep knees elevated

Lateral Bear Crawls

Builds side-to-side coordination.

How to Do Lateral Bear Crawls

  • Move sideways while maintaining crawl position
  • Keep hips stable
  • Move with control

Fast Bear Crawls

Increases conditioning demand.

How to Do Fast Bear Crawls

  • Maintain proper form
  • Increase crawling speed gradually
  • Stay controlled throughout

Weighted Bear Crawls

Adds resistance for advanced training.

How to Do Weighted Bear Crawls

  • Wear a weighted vest or backpack
  • Perform controlled crawls
  • Maintain proper posture

Final Thoughts

Bear crawls are one of the most effective full-body exercises you can master.

They build:

  • Functional strength
  • Core stability
  • Conditioning and endurance
  • Coordination and balance
  • Mental toughness

Progress may feel challenging at first because bear crawls demand total-body control. However, with consistent training and proper form, your strength and athleticism will improve rapidly. Learn more about Conditioning Exercises here.

Focus on smooth and controlled movement.

A warrior moves with strength — not chaos.

Essential Gear for Bear Crawls

While bear crawls require no equipment to perform, the right gear can make your workouts more comfortable, effective, and challenging as your fitness improves.

  • Exercise Mat: Cushions your hands and improves comfort on hard surfaces.
  • Wrist Wraps: Add wrist support during longer training sessions.
  • Resistance Bands: Increase resistance for advanced bear crawl variations.
  • Weighted Vest: Adds intensity to build strength and endurance.
  • Agility Cones: Help set up crawling drills and improve movement control.

Looking to upgrade your training setup? Explore our Equipment Guides to find the best gear for your workouts.


Bear Crawls FAQ

Q1: How far should beginners crawl?
Beginners can start with 10–20 meters or 20–30 seconds per set.

Q2: Are bear crawls good for core strength?
Yes, bear crawls heavily activate the core while also training the entire body.

Q3: How often should I do bear crawls?
You can train bear crawls 2–4 times per week, depending on workout intensity and recovery.

Conditioning Exercises: Benefits, Types & Best Exercises

Conditioning exercises are designed to improve endurance, work capacity, speed, power, and overall athletic performance. Unlike traditional strength training, conditioning focuses on how efficiently your heart, lungs, muscles, and nervous system work together under physical stress.

Whether you’re preparing for military fitness tests, improving your performance in combat sports, enhancing your endurance for athletics, or simply becoming harder to fatigue during everyday activities, conditioning training is an essential part of a complete fitness program.

From high-intensity interval training (HIIT) to sprinting, loaded carries, and bodyweight circuits, conditioning exercises develop the strength and stamina needed for real-world performance—not just aesthetics.


Why Conditioning Exercises Matter

Being strong is important, but strength alone isn’t enough if you tire quickly.

Conditioning training teaches your body to sustain effort, recover faster, and perform efficiently under fatigue. It improves cardiovascular fitness while developing muscular endurance, coordination, and mental resilience.

Conditioning exercises are widely used by:

  • Military personnel
  • Tactical athletes
  • Firefighters
  • Boxers
  • Mixed martial artists
  • Wrestlers
  • Team sport athletes
  • Endurance athletes

Regardless of your fitness level, improving your conditioning allows you to train harder, recover faster, and perform better.

Benefits of Conditioning Exercises

Consistent conditioning training provides numerous physical and performance benefits.

Improve Cardiovascular Endurance

Conditioning strengthens the heart and lungs, allowing you to perform physical activity for longer periods with less fatigue.

Increase Muscular Endurance

Repeated high-intensity movements improve the muscles’ ability to sustain work over time.

Burn Calories Efficiently

Conditioning workouts elevate heart rate and energy expenditure, making them effective for supporting fat loss goals.

Build Athleticism

Speed, agility, coordination, balance, and explosiveness all improve through well-designed conditioning programs.

Develop Mental Toughness

Working through fatigue builds discipline, resilience, and confidence that carry over into sports and everyday challenges.

Improve Recovery Capacity

Regular conditioning enables your body to recover more efficiently between exercises, sets, and training sessions.


Muscles Worked During Conditioning Exercises

Unlike isolation exercises, conditioning workouts train multiple muscle groups simultaneously.

Upper Body

  • Chest
  • Shoulders
  • Back
  • Biceps
  • Triceps
  • Forearms

Core

  • Rectus Abdominis
  • Obliques
  • Lower Back
  • Hip Stabilizers

Lower Body

  • Quadriceps
  • Hamstrings
  • Glutes
  • Calves
  • Hip Flexors

Cardiovascular System

  • Heart
  • Lungs
  • Circulatory System

Conditioning develops the body’s ability to produce force repeatedly while maintaining movement efficiency.


Equipment Needed

Many conditioning workouts require little or no equipment.

Essential Equipment

Optional Equipment

  • Jump Rope
  • Resistance Bands
  • Kettlebells
  • Dumbbells
  • Battle Ropes
  • Sandbag
  • Medicine Ball
  • Weighted Vest
  • Agility Cones
  • Sled

Types of Conditioning Exercises

Conditioning training can be divided into several categories depending on your goals.

Cardiovascular Conditioning

These exercises improve aerobic endurance and cardiovascular health.

Examples

  • Running
  • Jogging
  • Cycling
  • Rowing
  • Swimming
  • Jump Rope

Benefits

  • Improves endurance
  • Strengthens the heart
  • Enhances recovery

High-Intensity Interval Training (HIIT)

HIIT alternates short periods of maximum effort with brief recovery intervals.

Examples

Benefits

  • Burns calories efficiently
  • Improves anaerobic fitness
  • Saves training time

Combat and Tactical Conditioning

These workouts prepare the body for physically demanding situations requiring strength, endurance, and resilience.

Examples

  • Bear Crawls
  • Shuttle Runs
  • Heavy Bag Rounds
  • Sandbag Carries
  • Burpee Circuits
  • Loaded Carries

Benefits

  • Builds work capacity
  • Improves full-body endurance
  • Enhances functional performance

Strength Conditioning

These exercises combine resistance training with cardiovascular demands.

Examples

  • Kettlebell Swings
  • Farmer’s Carries
  • Thrusters
  • Sled Pushes
  • Dumbbell Complexes

Benefits

  • Builds muscular endurance
  • Improves functional strength
  • Increases total-body conditioning

Best Conditioning Exercises

Beginner Conditioning Exercises

Intermediate Conditioning Exercises

Advanced Conditioning Exercises

  • Hill Sprints
  • Weighted Vest Runs
  • Sandbag Carries
  • Sled Pushes
  • Heavy Bag Circuits
  • Tactical Obstacle Courses
  • Dumbbell or Kettlebell Complexes

Conditioning Workout Recommendations

Beginner

Focus on building endurance while learning proper movement mechanics.

Recommended exercises:

Train 2–3 times per week.

Intermediate

Increase intensity while improving cardiovascular fitness and muscular endurance.

Recommended exercises:

Train 3–4 times per week.

Advanced

Develop elite work capacity through high-intensity circuits and loaded conditioning.

Recommended exercises:

  • Hill Sprints
  • Weighted Vest Circuits
  • Sandbag Carries
  • Heavy Bag Conditioning
  • Sled Pushes
  • Tactical Circuits

Train according to your overall program and recovery.


Common Conditioning Workout Mistakes

Doing Too Much Too Soon

Beginning with excessive intensity often leads to burnout or injury. Build your conditioning gradually.

Ignoring Recovery

Conditioning places significant demands on the cardiovascular and muscular systems. Recovery is essential for continued progress.

Using Poor Technique

Moving quickly with improper form increases injury risk and reduces exercise effectiveness.

Skipping Warm-Ups

Prepare your muscles, joints, and cardiovascular system with a proper dynamic warm-up before every session.

Neglecting Progressive Overload

Conditioning improves through gradually increasing intensity, duration, or complexity over time.


Pro Training Tips

  • Prioritize quality movement before increasing intensity.
  • Combine aerobic and anaerobic conditioning for balanced fitness.
  • Include both steady-state cardio and interval training throughout the week.
  • Stay hydrated before, during, and after workouts.
  • Track your work-to-rest ratios to measure progress.
  • Schedule recovery days to avoid overtraining.
  • Challenge yourself gradually using progressive overload.

Final Thoughts

Conditioning exercises build the endurance, resilience, and work capacity needed to perform at your best in sport, military training, combat, and everyday life. They challenge your cardiovascular system, strengthen your muscles, sharpen your coordination, and develop the mental toughness required to keep going when fatigue sets in.

Whether you’re using bodyweight movements, sprint intervals, loaded carries, or high-intensity circuits, consistent conditioning training will help you move faster, recover quicker, and perform with greater confidence under pressure.

Endurance is earned through effort. Train with intensity, recover with purpose, and build the conditioning of a true warrior.


Frequently Asked Questions

How often should I perform conditioning exercises?

Most people benefit from two to four conditioning sessions per week, depending on their goals, training volume, and recovery.

Can beginners perform conditioning workouts?

Yes. Beginners should start with low-impact exercises such as brisk walking, light jogging, jump rope, and modified bodyweight movements before progressing to higher-intensity workouts.

Are conditioning exercises good for fat loss?

Yes. Conditioning workouts increase calorie expenditure and improve cardiovascular fitness, making them an effective part of a fat-loss program when combined with proper nutrition.

What’s the difference between conditioning and cardio?

Cardio primarily focuses on improving cardiovascular endurance, while conditioning combines cardiovascular fitness, muscular endurance, speed, power, agility, and work capacity into a more comprehensive training approach.

Do conditioning exercises build muscle?

Conditioning primarily develops endurance and athletic performance. Some exercises can contribute to muscle development, especially when resistance or explosive movements are included.