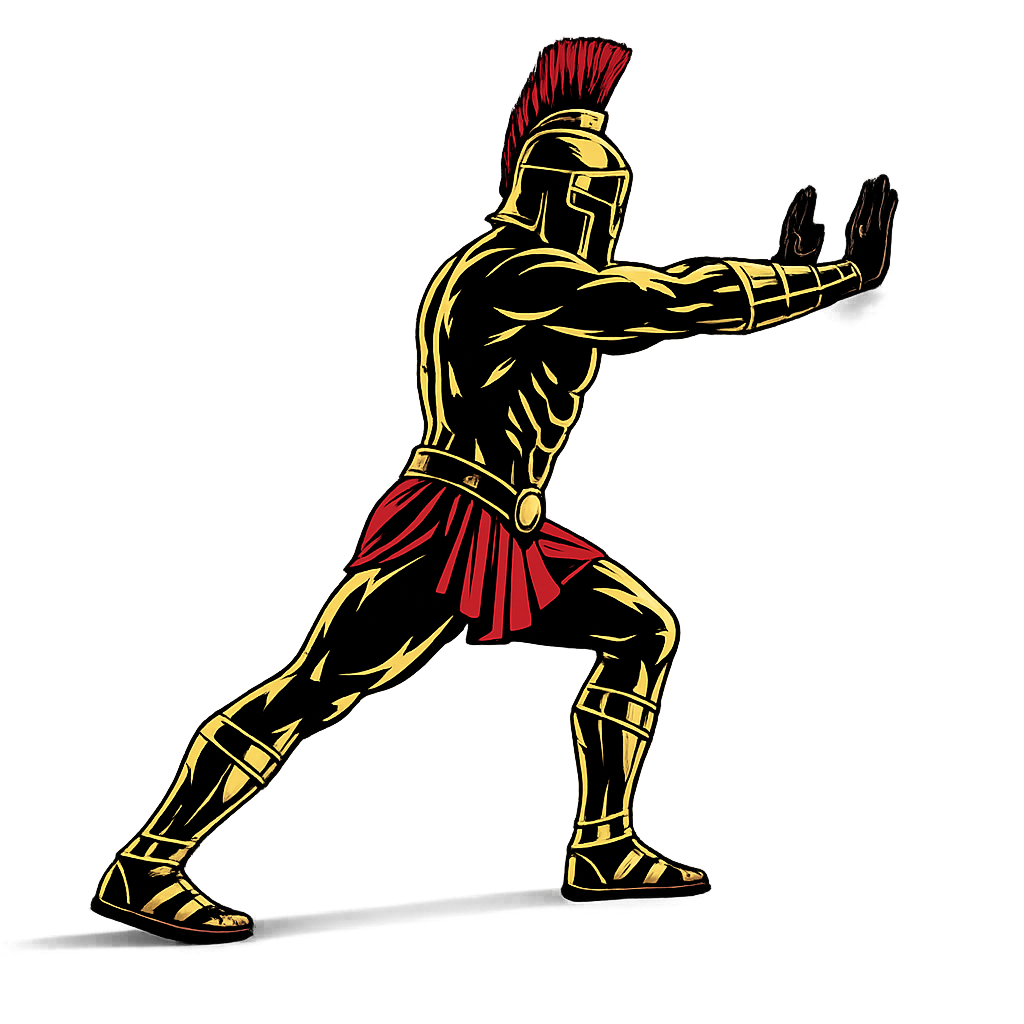
How to Do Burpees Correctly: Step-by-Step Guide for Beginners

Learn how to do burpees with perfect form, avoid common mistakes, and discover the best variations to improve conditioning and full-body athletic performance.

Burpees are one of the most effective bodyweight exercises for developing endurance, explosive power, and full-body conditioning. Whether you are training for military fitness tests, fat loss, or athletic performance, mastering burpees is essential.


What Are Burpees?

Burpees are a full-body bodyweight exercise that combines a squat, plank, and explosive jump into one continuous movement.

This exercise challenges strength, endurance, coordination, and cardiovascular fitness simultaneously.

Burpees are commonly used in:

  • Military fitness training
  • HIIT workouts
  • Athletic conditioning programs
  • Fat-loss training

Unlike isolated exercises, burpees train the entire body while improving conditioning.

Benefits of Burpees

Burpees are one of the most powerful conditioning exercises you can perform.

Benefits include:

  • Improves cardiovascular endurance
  • Burns calories effectively
  • Builds full-body strength and coordination
  • Enhances explosive power
  • Improves athletic conditioning
  • Essential for military and tactical fitness

Few exercises challenge both strength and endurance as effectively as burpees.

Muscles Worked in Burpees

Burpees activate multiple muscle groups throughout the body.

Primary Muscles
  • Quadriceps
  • Chest (Pectorals)
  • Core Muscles
Secondary Muscles
  • Glutes
  • Hamstrings
  • Shoulders (Deltoids)
  • Triceps
  • Calves

This makes burpees one of the best full-body exercises for athletic conditioning.


How to Do Burpees (Step-by-Step)

Step 1: Stand Tall

Stand upright with your feet shoulder-width apart.

  • Core engaged
  • Chest upright
  • Arms relaxed at your sides

Tip: Stay balanced and controlled before starting the movement.

Step 2: Lower Into a Squat

Bend your knees and hips to lower into a squat position.

  • Keep chest up
  • Place your hands on the ground in front of you
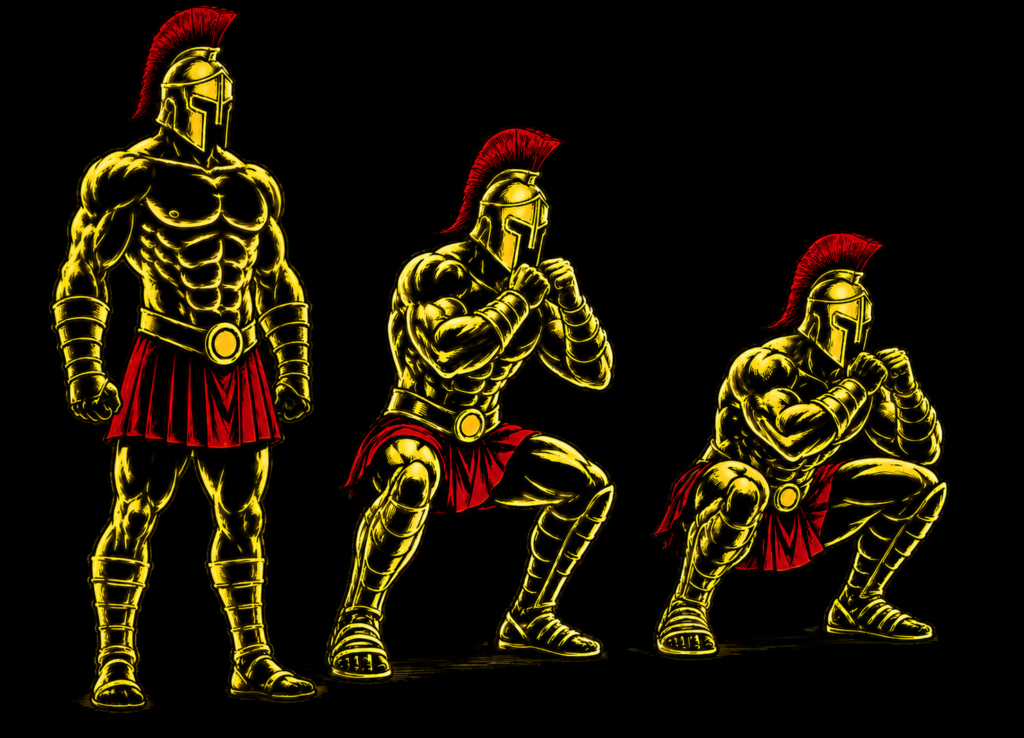
Step 3: Kick Your Feet Back

Jump or step your feet backward into a plank position.

  • Body in a straight line
  • Core tight
  • Hands under shoulders

Step 4: Return to the Squat Position

Jump or step your feet back toward your hands.

  • Maintain balance
  • Keep movement controlled
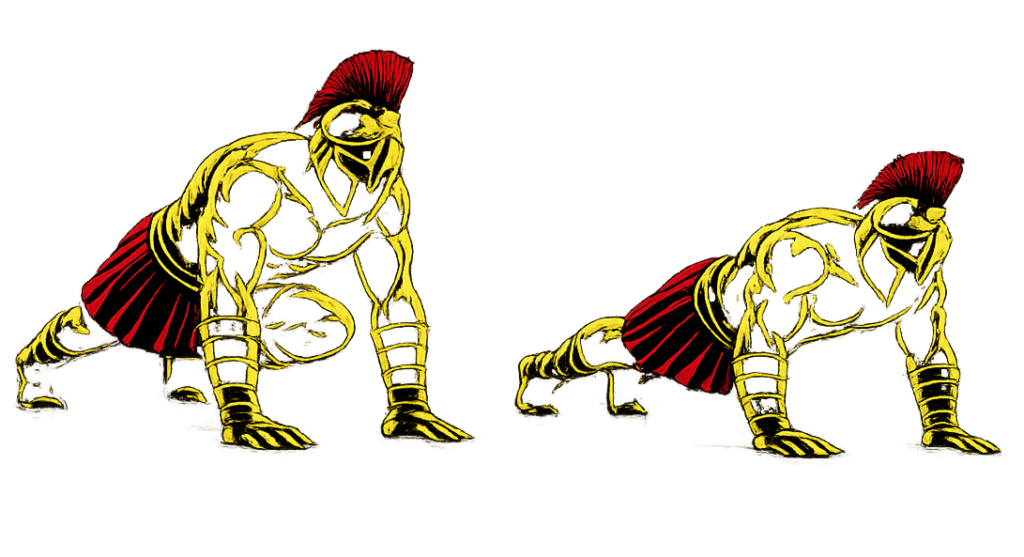
Warrior showcasing How to do Burpees with proper form

Step 5: Explode Upward

Jump upward explosively while reaching your arms overhead.

  • Land softly
  • Immediately prepare for the next rep

Burpees Form Checklist

Use this checklist to ensure proper form:

  • Keep your core engaged
  • Maintain a straight plank position
  • Land softly after each jump
  • Control each phase of the movement
  • Use full range of motion

Perfect form improves performance and reduces injury risk.


Common Burpees Mistakes

Poor Plank Position

Problem: Causes lower back strain.

Fix: Keep your body in a straight line during the plank phase.

Rushing the Movement

Problem: Reduces control and effectiveness.

Fix: Focus on proper form before increasing speed.

Hard Landings

Problem: Increases joint stress.

Fix: Land softly with bent knees.

Incomplete Range of Motion

Problem: Limits effectiveness.

Fix: Fully extend during the jump and maintain proper squat depth.

Letting Hips Sag

Problem: Reduces core stability.

Fix: Keep your abs tight throughout the movement.


Burpees Variations

Once you master basic burpees, these variations can increase intensity and effectiveness.

Half Burpees (Beginner Variation)

An easier version for beginners.

How to Do Half Burpees

  • Remove the jump at the top
  • Step feet back instead of jumping
  • Focus on movement control

Push-Up Burpees

Adds upper-body strength training.

How to Do Push-Up Burpees

  • Perform a push-up in the plank position
  • Return to standing and jump upward
  • Maintain proper form throughout

Explosive Burpees

Improves power and conditioning.

How to Do Explosive Burpees

  • Jump higher during the top phase
  • Move explosively while maintaining control
  • Land softly

Broad Jump Burpees

Builds athletic explosiveness.

How to Do Broad Jump Burpees

  • Perform a standard burpee
  • Instead of jumping vertically, jump forward
  • Reset and repeat

Final Thoughts

Burpees are one of the most effective full-body conditioning exercises you can master.

They build:

  • Cardiovascular endurance
  • Full-body strength
  • Explosive power
  • Coordination and agility
  • Mental toughness

Progress may feel difficult at first, especially during high-rep sets. However, with consistent training and proper form, your conditioning and endurance will improve rapidly. Learn more about Conditioning Exercises Here.

Focus on control before speed.

A warrior pushes through fatigue — without sacrificing form.

Essential Gear for Burpees

While burpees require no equipment, the right gear can improve comfort, protect your joints, and help you perform explosive repetitions more safely and effectively.

  • Exercise Mat: Cushions your hands during the plank phase and provides a more comfortable training surface.
  • Wrist Wraps: Provide extra wrist support during high-volume burpee workouts.
  • Resistance Bands: Great for adding resistance to explosive burpees or assisting beginners with movement progressions.
  • Plyometric Box: Perfect for progressing to box jump burpees, increasing explosive leg power, coordination, and cardiovascular conditioning while adding variety to your workouts.
  • Weighted Vest: Increases workout intensity while building greater strength and endurance.

Using the right equipment can make your workouts safer, more effective, and easier to progress over time. If you’re looking to take your conditioning to the next level, check out our recommended gear guides to find the best equipment for your fitness goals.


Burpees FAQ

Q1: How many burpees should beginners do?
Beginners can start with 5–10 reps per set and gradually increase volume as conditioning improves.

Q2: Are burpees good for fat loss?
Yes, burpees burn a high number of calories and are highly effective for improving conditioning and fat loss.

Q3: How often should I do burpees?
You can train burpees 2–5 times per week, depending on workout intensity and recovery.
How to Do Step-Ups Correctly: Step-by-Step Guide for Beginners

Learn how to do step-ups with perfect form, avoid common mistakes, and discover the best variations to build lower-body strength and athletic power.

Step-ups are one of the most effective lower-body exercises for developing leg strength, improving balance, and enhancing functional fitness. Whether you are training for military fitness tests, sports performance, or general fitness, mastering step-ups is essential.


What Are Step-Ups?

Step-ups are a lower-body exercise where you step onto an elevated surface using one leg, then drive your body upward before stepping back down under control.

This movement mimics real-world actions like climbing stairs, running uphill, and carrying loads.

Step-ups are commonly used in:

  • Military fitness training
  • Athletic conditioning programs
  • Lower-body strength workouts
  • Rehabilitation and mobility training

Unlike many machine exercises, step-ups develop real-world functional strength and balance.

Benefits of Step-Ups

Step-ups are one of the best exercises for lower-body strength and coordination.

Benefits include:

  • Builds strong legs and glutes
  • Improves balance and coordination
  • Enhances athletic performance
  • Strengthens knee stabilizers
  • Develops unilateral leg strength
  • Essential for military and tactical fitness

Few exercises improve lower-body functionality as effectively as step-ups.

Muscles Worked in Step-Ups

Step-ups activate multiple lower-body muscles.

Primary Muscles
  • Quadriceps
  • Glutes
Secondary Muscles
  • Hamstrings
  • Calves
  • Core Muscles
  • Hip Stabilizers

This makes step-ups an excellent compound movement for lower-body development.


How to Do Step-Ups (Step-by-Step)

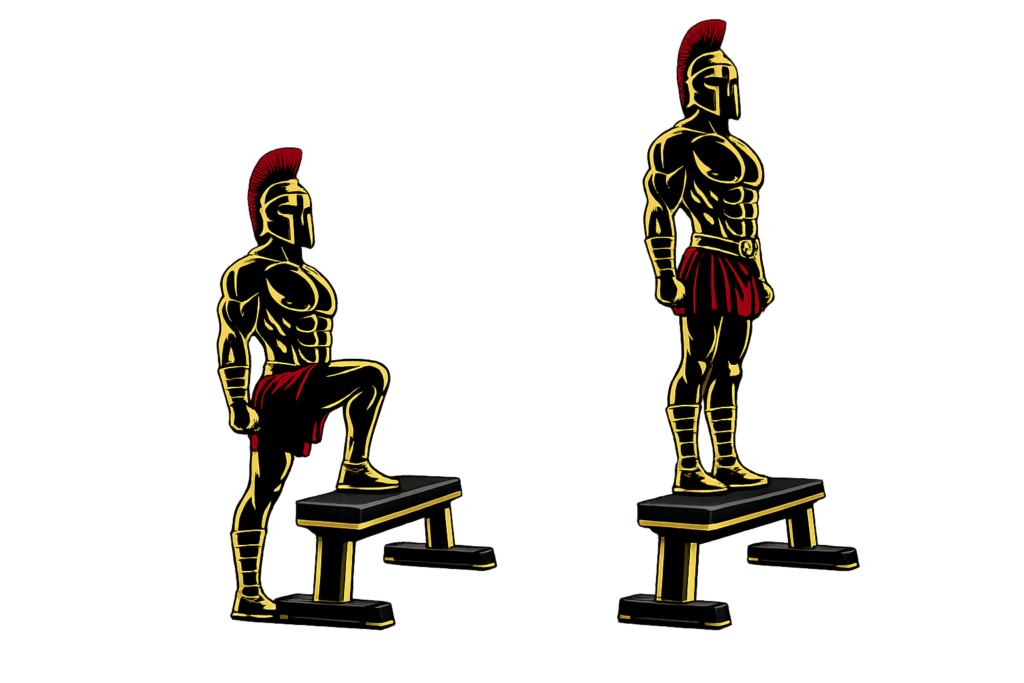
Step 1: Stand Facing an Elevated Surface

Stand upright in front of a sturdy bench, box, or platform.

  • Feet hip-width apart
  • Core engaged
  • Chest upright

Tip: Use a stable surface that allows safe movement.

Step 2: Place One Foot on the Platform

Step one foot firmly onto the elevated surface.

  • Entire foot planted
  • Knee aligned with toes

Step 3: Drive Through Your Front Foot

Push through the heel of your front foot and lift your body upward.

  • Keep torso upright
  • Avoid pushing excessively with the back leg

Step 4: Stand Tall at the Top

At the top position:

  • Hips fully extended
  • Body balanced
  • Core tight

Pause briefly for control.

Step 5: Lower Yourself Slowly

Step back down with control.

  • Maintain balance
  • Avoid dropping quickly

Repeat on the opposite leg or continue on one side.

Warrior showcasing How to do Step-Ups with proper form

Step-Ups Form Checklist

Use this checklist to ensure proper form:

  • Keep your chest upright
  • Drive through the front heel
  • Control the lowering phase
  • Keep knees aligned with toes
  • Maintain balance throughout

Perfect form builds strength and prevents injury.


Common Step-Ups Mistakes

Pushing Off the Back Leg

Problem: Reduces leg activation.

Fix: Drive primarily through the working leg.

Using an Unstable Surface

Problem: Increases injury risk.

Fix: Use a sturdy and secure platform.

Knee Collapsing Inward

Problem: Reduces stability and stresses the knee.

Fix: Keep your knee aligned with your toes.

Leaning Forward Excessively

Problem: Reduces balance and control.

Fix: Keep your torso upright.

Dropping Too Quickly

Problem: Reduces muscle control.

Fix: Lower yourself slowly and steadily.


Step-Ups Variations

Once you master basic step-ups, these variations can increase strength and difficulty.

Low Step-Ups (Beginner Variation)

An easier option for beginners.

How to Do Low Step-Ups

  • Use a lower platform
  • Focus on balance and control
  • Maintain proper posture

Weighted Step-Ups

Adds resistance for greater strength development.

How to Do Weighted Step-Ups

  • Hold dumbbells or wear a weighted vest
  • Perform controlled step-ups
  • Maintain balance throughout

Explosive Step-Ups

Improves power and athleticism.

How to Do Explosive Step-Ups

  • Drive upward explosively
  • Increase movement speed
  • Land softly and under control

Lateral Step-Ups

Targets additional stabilizing muscles.

How to Do Lateral Step-Ups

  • Stand sideways to the platform
  • Step up laterally
  • Lower yourself with control

Final Thoughts

Step-ups are one of the most effective lower-body exercises you can master.

They build:

  • Leg strength
  • Balance and coordination
  • Athletic power
  • Knee stability
  • Functional movement ability

Progress may feel challenging at first, especially when increasing height or resistance. However, with consistent training and proper form, your strength and stability will steadily improve. Learn more about Leg Workouts here.

Focus on control and balance.

A warrior climbs with strength — never with shortcuts.

Essential Gear for Step-Ups

The right equipment can improve your step-up performance, increase stability, and help you progress safely as your lower-body strength develops. Whether you’re mastering bodyweight step-ups or adding resistance for advanced variations, these essentials can support your training.

  • Exercise Bench or Plyometric Box: A sturdy, non-slip platform is the foundation of every step-up workout, providing a safe and stable surface for building leg strength, balance, and coordination.
  • Exercise Mat: Creates a stable, cushioned training area around your platform, improving grip and helping protect your joints during home workouts.
  • Resistance Bands: Excellent for lower-body activation, improving balance, and adding extra resistance to step-up variations without requiring heavy weights.
  • Weighted Vest: Increases resistance while keeping your hands free, making it an excellent choice for progressing bodyweight step-ups and improving functional lower-body strength.
  • Knee Sleeves: Provide compression and support during high-volume or weighted step-up sessions, helping improve comfort and confidence as training intensity increases.

Explore our equipment guides to find the best gear for your training and take your step-ups to the next level.


Step-Ups FAQ

Q1: How high should the platform be for beginners?
Beginners should start with a platform around knee height or lower to maintain proper form and control.

Q2: Are step-ups good for building legs?
Yes, step-ups are excellent for developing leg strength, balance, and athletic performance.

Q3: How often should I do step-ups?
You can train step-ups 2–4 times per week, depending on recovery and workout intensity.

How to Do High Knees Correctly: Step-by-Step Guide for Beginners

Learn how to do high knees with perfect form, avoid common mistakes, and discover the best variations to improve conditioning and athletic performance.

High knees are one of the most effective bodyweight cardio exercises for developing endurance, improving coordination, and building explosive lower-body power. Whether you are training for military fitness tests, sports performance, or fat loss, mastering high knees is essential.


What Are High Knees?

High knees are a dynamic cardio exercise where you run in place while driving your knees upward toward your chest as quickly as possible.

This movement combines speed, coordination, and cardiovascular endurance into one powerful exercise.

High knees are commonly used in:

  • Military fitness training
  • HIIT workouts
  • Athletic conditioning programs
  • Warm-up routines

Unlike traditional running, high knees place greater emphasis on explosive movement and core engagement.

Benefits of High Knees

High knees are one of the best exercises for conditioning and endurance.

Benefits include:

  • Improves cardiovascular endurance
  • Burns calories and supports fat loss
  • Enhances coordination and agility
  • Builds lower-body explosiveness
  • Strengthens core and hip flexors
  • Essential for military and tactical fitness

Few exercises improve conditioning as effectively as high knees.

Muscles Worked in High Knees

High knees activate multiple lower-body and core muscles.

Primary Muscles
  • Quadriceps
  • Hip Flexors
  • Calves
Secondary Muscles
  • Hamstrings
  • Glutes
  • Core Muscles
  • Shoulders

This makes high knees an excellent full-body conditioning exercise.


How to Do High Knees (Step-by-Step)

Step 1: Stand Tall

Stand upright with your feet hip-width apart.

  • Core engaged
  • Chest upright
  • Arms relaxed at your sides

Tip: Stay light on your feet throughout the movement.

Step 2: Begin Running in Place

Start jogging lightly in place.

  • Maintain balance
  • Keep movements controlled

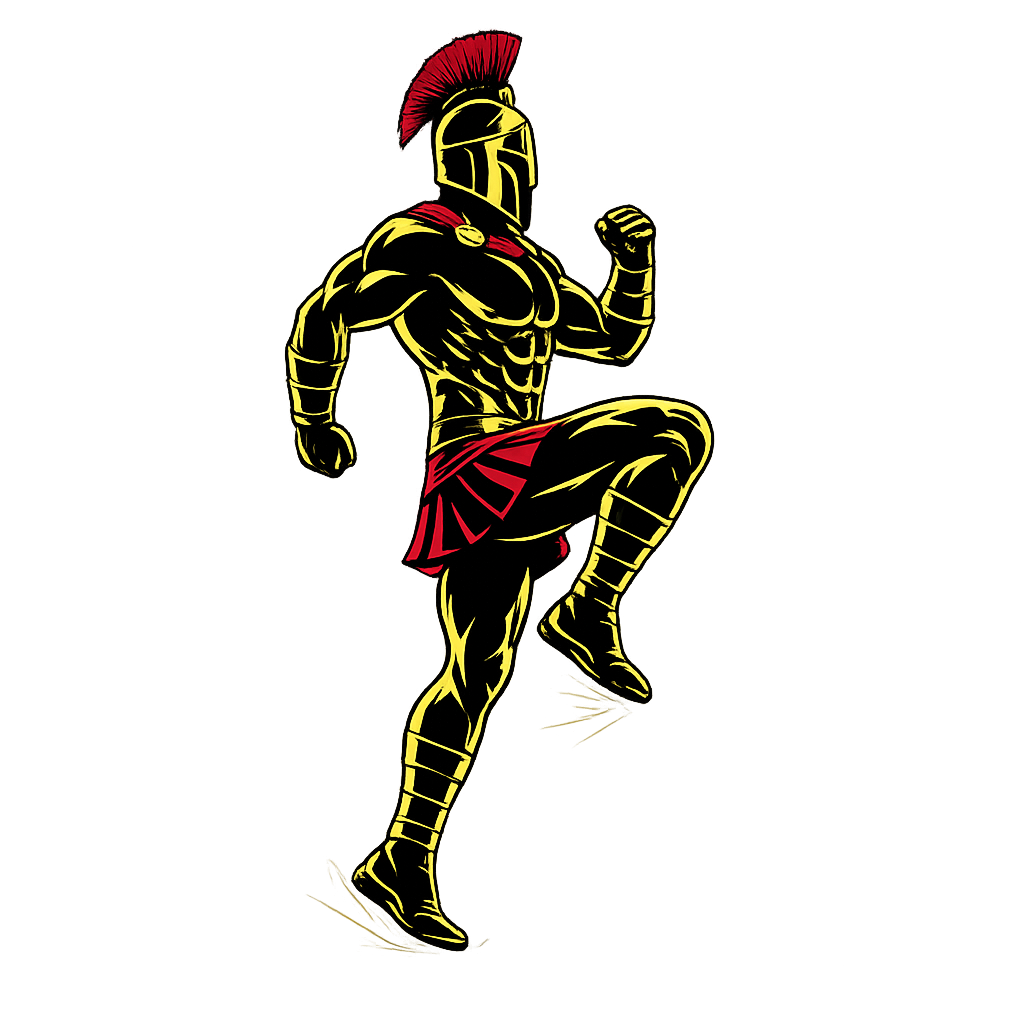
Step 3: Drive Your Knees Up

Lift one knee toward your chest while pumping the opposite arm.

  • Raise knees to waist height if possible
  • Land softly on the balls of your feet
Warrior showcasing How to do High Knees with proper form

Step 4: Alternate Legs Quickly

Continue switching legs rapidly in a running motion.

  • Keep your rhythm steady
  • Maintain posture and control

Step 5: Control Your Tempo

Perform the exercise at a manageable pace.

Avoid sacrificing form for speed.


High Knees Form Checklist

Use this checklist to ensure proper form:

  • Keep your chest upright
  • Drive knees upward with control
  • Pump your arms naturally
  • Stay on the balls of your feet
  • Maintain a steady rhythm

Perfect form improves performance and reduces injury risk.


Common High Knees Mistakes

Leaning Backward

Problem: Reduces efficiency and balance.

Fix: Keep your torso upright.

Low Knee Drive

Problem: Limits effectiveness.

Fix: Raise knees to at least waist level.

Heavy Foot Landing

Problem: Increases joint stress.

Fix: Land softly and stay light on your feet.

Moving Too Fast Too Soon

Problem: Causes poor form.

Fix: Master control before increasing speed.

Weak Arm Movement

Problem: Reduces coordination and power.

Fix: Pump your arms actively during movement.


High Knees Variations

Once you master basic high knees, these variations can increase intensity and effectiveness.

Slow High Knees

A beginner-friendly variation.

How to Do Slow High Knees

  • Perform the movement slowly
  • Focus on knee height and balance
  • Maintain control throughout

Sprint High Knees

Increases speed and conditioning demand.

How to Do Sprint High Knees

  • Perform high knees as fast as possible
  • Maintain quick foot contact
  • Keep posture upright

Resistance Band High Knees

Adds extra resistance for strength and endurance.

How to Do Resistance Band High Knees

  • Place a resistance band around your feet or waist
  • Perform controlled high knees
  • Maintain strong posture

High Knees With Pause

Improves balance and core control.

How to Do High Knees With Pause

  • Pause briefly at the top of each knee drive
  • Maintain balance
  • Alternate sides slowly

Final Thoughts

High knees are one of the most effective conditioning exercises you can master.

They build:

  • Cardiovascular endurance
  • Lower-body explosiveness
  • Coordination and agility
  • Core stability
  • Athletic performance

Progress may feel challenging at first, especially during longer sets. However, with consistent training and proper form, your endurance and conditioning will rapidly improve. Learn more about Conditioning Exercises here.

Focus on rhythm and control.

A warrior moves fast — but never loses form.

Essential Gear for High Knees

While high knees require no equipment to perform, the right gear can make your workouts more comfortable, effective, and challenging as your fitness improves.

  • Exercise Mat: Cushions your feet when training on hard surfaces and provides better traction.
  • Resistance Bands: Add resistance to increase lower-body strength and conditioning.
  • Weighted Vest: Increases intensity to build endurance and explosive power.
  • Jump Rope: Complements high knees by improving footwork, coordination, and cardio fitness.
  • Training Shoes: Provide grip, stability, and impact protection during fast-paced movements.

Looking to upgrade your training setup? Explore our Equipment Guides to find the best gear for your workouts.


High Knees FAQ

Q1: How long should beginners do high knees?
Beginners can start with 20–30 seconds per set and gradually increase duration over time.

Q2: Are high knees good for fat loss?
Yes, high knees burn calories effectively and are excellent for improving conditioning.

Q3: How often should I do high knees?
You can train high knees 3–5 times per week as part of your conditioning workouts.

Beginner Army Fitness Test Preparation Plan (At-Gym)

Starting your military fitness journey in the gym is one of the best ways to safely build strength, endurance, stamina, and athletic performance. This Beginner Army Fitness Test Preparation Plan is designed for beginners who want to prepare for military-style fitness tests while improving overall fitness and confidence.

This program combines strength training, cardio, muscular endurance, mobility work, and conditioning exercises to help build the foundation needed for army, police, tactical, or military entrance fitness standards around the world.

The workouts focus on gradual progression, proper form, injury prevention, and long-term consistency rather than extreme intensity.


What Is an Army Fitness Preparation Program?

An Army Fitness Preparation Program focuses on improving the physical qualities commonly tested in military fitness assessments, including:

  • Push-up performance
  • Running endurance
  • Core strength
  • Pulling strength
  • Lower-body endurance
  • Overall conditioning

This beginner-friendly gym plan helps trainees gradually develop these abilities through structured strength and cardio training.

Benefits of a Beginner Army Fitness Gym Plan

  • Builds full-body strength and muscular endurance
  • Improves cardiovascular fitness and stamina
  • Increases confidence in the gym environment
  • Helps beginners lose fat and build athleticism
  • Improves core strength and posture
  • Enhances recovery, flexibility, and mobility
  • Prepares the body for advanced military training

Equipment Needed

This gym-based program uses beginner-friendly equipment commonly available in most gyms.

  • Dumbbells
  • Barbells
  • Bench
  • Cable machines
  • Pull-up bar
  • Treadmill or running track
  • Exercise mat

Optional:

  • Resistance bands
  • Rowing machine
  • Stationary bike

Weekly Training Structure

Option 1 – 3 Day Beginner Split

  • Monday – Upper Body + Core
  • Wednesday – Lower Body + Cardio
  • Friday – Full Body Conditioning

Option 2 – 4 Day Beginner Split

  • Monday – Upper Body
  • Tuesday – Cardio & Mobility
  • Thursday – Lower Body + Core
  • Saturday – Full Body Conditioning

This structure provides enough recovery while steadily improving military-style fitness.


Pre-Workout Stretch & Warm-Up Routine

Perform this routine before every workout (5–10 minutes).

This warm-up increases blood flow, mobility, and injury prevention.


Monday – Upper Body + Core

Main Workout

  • Machine Chest Press – 3 sets × 10–12 reps
  • Lat Pulldown – 3 sets × 10–12 reps
  • Seated Dumbbell Shoulder Press – 3 sets × 10 reps
  • Cable Rows – 3 sets × 10–12 reps
  • Incline Push-Ups or Knee Push-Ups – 3 sets × 10 reps
  • Assisted Pull-Ups or Dead Hangs – 3 sets × max effort

Rest 60–90 seconds between sets.

Core Finisher


Wednesday – Lower Body + Cardio

Main Workout

  • Goblet Squats – 3 sets × 12 reps
  • Leg Press – 3 sets × 12 reps
  • Walking Lunges – 3 sets × 10 reps each leg
  • Romanian Deadlifts (Light) – 3 sets × 10 reps
  • Standing Calf Raises – 3 sets × 15–20 reps

Rest 60–90 seconds between sets.

Cardio Session

Choose ONE option:

Beginner Option

  • Treadmill Walk/Jog Intervals – 15–20 minutes

Example:

  • Walk 2 minutes
  • Jog 1 minute
  • Repeat

Improving Option

  • Continuous Jog – 10–15 minutes

The goal is to improve endurance gradually without excessive fatigue.


Friday – Full Body Conditioning

Conditioning Circuit

Complete 3 rounds:

  • Dumbbell Squats – 12 reps
  • Push-Ups – 10 reps
  • Cable Rows – 12 reps
  • Step-Ups – 10 reps each leg
  • Mountain Climbers – 20 seconds
  • Plank Hold – 20 seconds

Rest 1–2 minutes between rounds.

Optional Cardio Finisher

  • Rowing Machine – 5 minutes
    or
  • Incline Treadmill Walk – 10 minutes

This workout improves conditioning, stamina, and muscular endurance.


Optional Saturday – Endurance & Mobility Day

This session helps improve recovery and aerobic conditioning.

Endurance Work

Choose ONE:

  • 20–30 minute brisk treadmill walk
  • Easy jog
  • Cycling
  • Rowing machine

Mobility Routine

Keep the session light and recovery-focused.


Post-Workout Stretch Routine

Perform each stretch for 30 seconds after workouts.

Stretching improves flexibility, recovery, and mobility.


Beginner Army Fitness Training Tips

  • Focus on proper form over heavy weights
  • Increase weights gradually over time
  • Stay consistent with cardio training
  • Prioritize sleep, hydration, and nutrition
  • Avoid training to failure every workout
  • Build endurance patiently and progressively
  • Track your weekly improvements

Consistency beats intensity for beginners.

Beginner Fitness Goals

These are strong beginner goals after 8–12 weeks:

  • Push-Ups: 20–30 reps
  • Assisted Pull-Ups progressing toward full pull-ups
  • 1–2 mile continuous jog
  • Improved core endurance
  • Better overall stamina and recovery

Fitness standards vary worldwide, but building these fundamentals prepares beginners for military-style training.


Final Thoughts

This Beginner Army Fitness Test Preparation Plan (At-Gym) is designed to help beginners safely build the strength, endurance, stamina, and conditioning required for military fitness tests.

By combining gym-based strength training, cardio, conditioning circuits, and recovery work, this program creates a strong physical foundation for future tactical and military-style performance.

Stay disciplined, train consistently, and build yourself into a stronger warrior.

Beginner Army Fitness Test Preparation Plan (At-Home)

Starting your military fitness journey can feel overwhelming, especially if you are new to training or returning after a long break. This Beginner Army Fitness Test Preparation Plan is designed to help build the foundational strength, endurance, stamina, and discipline needed for military-style fitness tests worldwide.

This program focuses on gradual progression using bodyweight exercises, running improvement, core training, and mobility work to safely prepare beginners for the physical demands of Army fitness assessments.

Whether your goal is military preparation, police testing, tactical fitness, or simply building a stronger body and mindset, this plan provides a realistic starting point.

Click on any exercise to know How to do it.


What Is an Army Fitness Test Preparation Program?

An Army Fitness Preparation Program is designed to improve the physical abilities commonly tested in military fitness assessments worldwide, including:

  • Push-ups
  • Running endurance
  • Core strength
  • Pulling strength
  • Lower-body endurance
  • Stamina and conditioning

This beginner-friendly version focuses on safe progression and consistency instead of extreme intensity.

Benefits of a Beginner Army Fitness Preparation Plan

  • Builds foundational strength and endurance
  • Improves cardiovascular fitness
  • Increases push-up and core performance
  • Helps beginners lose fat and improve conditioning
  • Enhances mobility and flexibility
  • Develops discipline and consistency
  • Prepares the body for advanced military-style training

Equipment Needed

This is an at-home bodyweight-focused program requiring minimal equipment. (Click on the links to go to the recommended articles)

No gym membership is required.


Weekly Training Structure

Option 1 – 3 Day Beginner Split

  • Monday – Upper Body + Core
  • Wednesday – Lower Body + Running
  • Friday – Full Body Conditioning

Option 2 – 4 Day Beginner Split

  • Monday – Upper Body
  • Tuesday – Walking/Jogging
  • Thursday – Lower Body + Core
  • Saturday – Conditioning + Endurance

This structure allows proper recovery while gradually improving overall fitness.


Pre-Workout Stretch & Warm-Up Routine

Perform this warm-up before every workout (5–8 minutes).

This warm-up improves blood flow, mobility, and injury prevention.


Monday – Upper Body + Core

Main Workout

Rest 60–90 seconds between sets.

Core Finisher


Wednesday – Lower Body + Running

Main Workout

Rest 60–90 seconds between sets.

Running Session

Choose one option based on your fitness level.

Beginner Option

  • Walk 2 minutes
  • Jog 1 minute
  • Repeat for 15–20 minutes

Improving Option

  • Jog continuously for 10–15 minutes

The goal is to gradually improve endurance without overtraining.


Friday – Full Body Conditioning

Conditioning Circuit

Complete 3 rounds:

Rest 1–2 minutes between rounds.

Optional Finisher

  • Light Jog or Fast Walk – 10–15 minutes

This workout improves stamina, conditioning, and overall work capacity.


Optional Saturday – Endurance & Mobility Day

This optional session helps improve recovery and aerobic endurance.

Endurance Work

Choose ONE:

  • 20–30 minute brisk walk
  • Easy jog
  • Cycling
  • Hiking

Mobility Routine

Keep intensity light and recovery-focused.


Post-Workout Stretch Routine

Perform each stretch for 30 seconds after workouts.

Stretching improves flexibility, mobility, and recovery.


Beginner Army Fitness Training Tips

  • Focus on consistency before intensity
  • Prioritize proper exercise form
  • Gradually increase reps and running time
  • Stay hydrated throughout the day
  • Get quality sleep for recovery
  • Avoid comparing yourself to advanced athletes
  • Track your weekly improvements

Little progress every week leads to major results over time.


Beginner Fitness Goals

These are excellent beginner targets after 8–12 weeks of training:

  • Push-Ups: 20–30 reps
  • Pull-Ups: 3–5 reps
  • Plank Hold: 60+ seconds
  • Jogging: 1–2 miles continuously
  • Improved energy and stamina

Military standards vary globally, but building these fundamentals creates a strong tactical fitness base.


Final Thoughts

This Beginner Army Fitness Test Preparation Plan is designed to help new trainees safely build the strength, endurance, stamina, and confidence needed for military-style fitness tests.

By focusing on gradual progression, bodyweight strength, conditioning, mobility, and recovery, beginners can steadily transform their fitness while reducing injury risk.

Stay patient, stay disciplined, and keep training like a warrior.

How to Do a Lower Back Stretch Correctly: Step-by-Step Guide for Beginners

Learn how to do a lower back stretch with perfect form, avoid common mistakes, and discover the best variations to improve mobility and reduce tension.

The lower back stretch is one of the most effective exercises for relieving tightness, improving spinal mobility, and supporting healthy posture. Whether you are training for military fitness tests, calisthenics, or general fitness, mastering the lower back stretch is essential.


What Is a Lower Back Stretch?

A lower back stretch is a flexibility exercise designed to reduce tension and improve mobility in the muscles surrounding the lumbar spine.

Tight lower back muscles can limit movement, affect posture, and increase discomfort during daily activities or training.

Lower back stretches are commonly used in:

  • Warm-up routines
  • Cool-down sessions
  • Mobility and flexibility training
  • Recovery and rehabilitation programs

Unlike strength exercises, lower back stretches focus on flexibility, relaxation, and recovery.

Benefits of Lower Back Stretch

The lower back stretch is essential for maintaining spinal health and mobility.

Benefits include:

  • Reduces lower back tightness and stiffness
  • Improves spinal mobility and flexibility
  • Supports better posture
  • Relieves muscle tension
  • Enhances movement efficiency
  • Aids recovery after workouts

Few stretches are as important for spinal mobility as the lower back stretch.

Muscles Worked in Lower Back Stretch

Lower back stretches target several muscles around the spine and hips.

Primary Muscles
  • Erector Spinae
  • Quadratus Lumborum
Secondary Muscles
  • Glutes
  • Hamstrings
  • Core Muscles
  • Hip Flexors

This makes the lower back stretch highly effective for improving overall movement and comfort.


How to Do a Lower Back Stretch (Step-by-Step)

Step 1: Lie Flat on the Ground

Lie on your back with your legs extended and arms relaxed by your sides.

  • Spine neutral
  • Shoulders relaxed
  • Core lightly engaged

Tip: Use a comfortable surface or exercise mat.

Step 2: Bring Knees Toward Your Chest

Slowly pull both knees toward your chest.

  • Use your hands to hold your shins
  • Keep movement controlled

Step 3: Gently Pull Inward

Pull your knees slightly closer until you feel a stretch in your lower back.

  • Keep shoulders relaxed
  • Avoid excessive force

Step 4: Hold the Stretch

Maintain the position:

  • Hold for 15–30 seconds
  • Breathe steadily
  • Stay relaxed
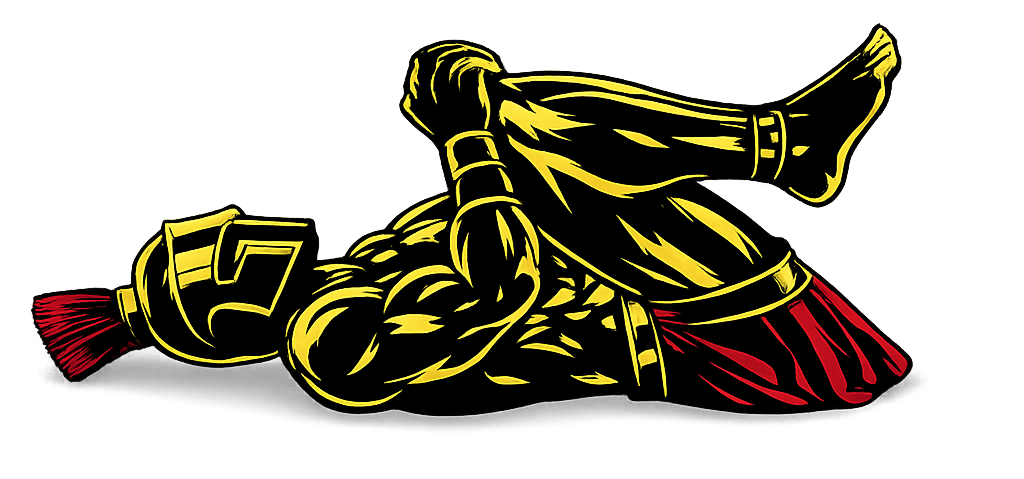
Warrior showcasing How to do a Lower Back Stretch with proper form

Step 5: Return Slowly

Slowly release your legs back to the starting position.

Avoid jerking or rushing the movement.


Lower Back Stretch Form Checklist

Use this checklist to ensure proper form:

  • Move slowly and with control
  • Keep shoulders relaxed
  • Avoid forcing the stretch
  • Maintain steady breathing
  • Use a comfortable range of motion

Proper form improves flexibility and prevents discomfort.


Common Lower Back Stretch Mistakes

Pulling Too Aggressively

Problem: Can strain the lower back.

Fix: Stretch gently and gradually.

Holding Breath

Problem: Increases muscle tension.

Fix: Breathe slowly and consistently.

Lifting the Head Excessively

Problem: Creates neck tension.

Fix: Keep your head relaxed on the ground.

Rushing the Movement

Problem: Reduces effectiveness.

Fix: Perform slow, controlled movements.

Stretching Through Pain

Problem: May worsen discomfort.

Fix: Stretch only within a comfortable range.


Lower Back Stretch Variations

Once you master the basic lower back stretch, these variations can improve mobility further.

Single Knee-to-Chest Stretch

Targets one side at a time.

How to Do a Single Knee-to-Chest Stretch

  • Keep one leg extended
  • Pull the opposite knee toward your chest
  • Hold and switch sides

Child’s Pose

A relaxing full-back stretch.

How to Do Child’s Pose

  • Sit back onto your heels
  • Extend your arms forward
  • Lower your chest toward the ground

Seated Lower Back Stretch

Improves spinal mobility.

How to Do a Seated Lower Back Stretch

  • Sit with legs extended
  • Reach forward slowly
  • Maintain a straight back

Cat-Cow Stretch

A dynamic mobility variation.

How to Do Cat-Cow Stretch

  • Alternate between arching and rounding your back
  • Move slowly with control
  • Coordinate breathing with movement

Final Thoughts

The lower back stretch is one of the most important mobility exercises you can master.

It improves:

  • Spinal mobility
  • Flexibility
  • Recovery
  • Posture
  • Overall movement quality

Progress may feel gradual if your lower back is tight. However, with consistent practice, your mobility and comfort will improve significantly. Learn more about Stretching Here.

Focus on control and consistency.

A warrior maintains mobility — not just strength.


Lower Back Stretch FAQ

Q1: How long should I hold a lower back stretch?
Hold each stretch for 15–30 seconds and repeat 2–3 times.

Q2: When should I do lower back stretches?
Perform static stretches after workouts or during recovery sessions. Gentle mobility work can also be done daily.

Q3: Can lower back stretches reduce stiffness?
Yes, regular stretching improves mobility and helps reduce lower back tension and stiffness.

How to Do a Quad Stretch Correctly: Step-by-Step Guide for Beginners

Learn how to do a quad stretch with perfect form, avoid common mistakes, and discover the best variations to improve lower-body mobility and flexibility.

The quad stretch is one of the most effective exercises for improving leg flexibility, reducing muscle tightness, and enhancing athletic performance. Whether you are training for military fitness tests, running, or general fitness, mastering the quad stretch is essential.


What Is a Quad Stretch?

A quad stretch is a flexibility exercise designed to lengthen the quadriceps muscles located at the front of your thighs.

Tight quadriceps can reduce mobility, affect posture, and increase the risk of lower-body injuries.

Quad stretches are commonly used in:

  • Warm-up routines
  • Cool-down sessions
  • Mobility and flexibility training
  • Injury prevention programs

Unlike strength exercises, quad stretches focus on mobility, recovery, and muscle relaxation.

Benefits of Quad Stretch

The quad stretch is essential for lower-body mobility and movement efficiency.

Benefits include:

  • Improves quadriceps flexibility
  • Reduces muscle tightness and stiffness
  • Enhances knee and hip mobility
  • Supports better posture and movement
  • Reduces risk of lower-body injuries
  • Aids recovery after leg workouts

Few stretches are as important for leg mobility as the quad stretch.

Muscles Worked in Quad Stretch

Quad stretches target several lower-body muscles.

Primary Muscles
  • Quadriceps (Rectus Femoris, Vastus Lateralis, Vastus Medialis, Vastus Intermedius)
Secondary Muscles
  • Hip Flexors
  • Glutes
  • Knee Stabilizers

This makes the quad stretch essential for maintaining balanced lower-body flexibility.


How to Do a Quad Stretch (Step-by-Step)

Step 1: Stand Tall

Stand upright with your feet shoulder-width apart.

  • Core engaged
  • Chest upright
  • Balance stable

Tip: Hold onto a wall or stable object if needed for balance.

Step 2: Bend One Knee

Lift one foot behind you by bending your knee.

  • Keep knees close together
  • Maintain upright posture

Step 3: Grab Your Ankle

Reach back and hold your ankle with the same-side hand.

  • Pull gently
  • Avoid forcing the movement

Step 4: Push Your Hips Forward

Slightly push your hips forward while pulling your foot toward your glutes.

  • Feel the stretch in the front of your thigh
  • Keep your chest upright
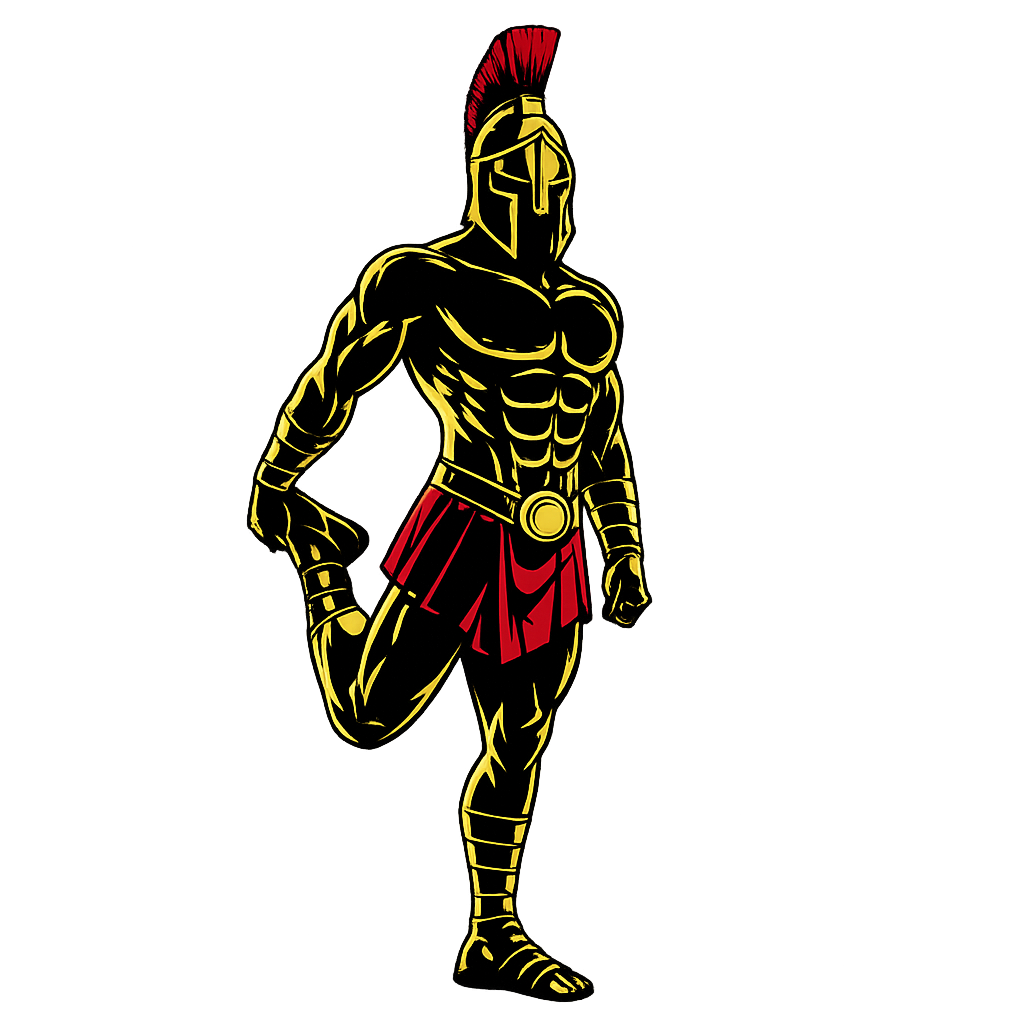
Warrior showcasing How to do a Quad Stretch

Step 5: Hold and Switch Sides

Maintain the stretch:

  • Hold for 15–30 seconds
  • Breathe steadily

Then repeat on the other leg.


Quad Stretch Form Checklist

Use this checklist to ensure proper form:

  • Keep your torso upright
  • Keep knees close together
  • Push hips forward gently
  • Avoid arching your lower back
  • Maintain steady breathing

Proper form improves flexibility and prevents injury.


Common Quad Stretch Mistakes

Pulling Too Hard

Problem: Can cause strain or discomfort.

Fix: Stretch gently and with control.

Arching the Lower Back

Problem: Reduces effectiveness.

Fix: Engage your core and keep your spine neutral.

Knees Flaring Out

Problem: Reduces quad activation.

Fix: Keep your knees close together.

Leaning Forward

Problem: Reduces stretch quality.

Fix: Keep your chest upright.

Holding Breath

Problem: Increases muscle tension.

Fix: Breathe slowly and consistently.


Quad Stretch Variations

Once you master the basic quad stretch, these variations can improve flexibility further.

Side-Lying Quad Stretch

A beginner-friendly and controlled variation.

How to Do Side-Lying Quad Stretch

  • Lie on your side
  • Grab your top ankle
  • Pull gently toward your glutes

Kneeling Quad Stretch

Provides a deeper stretch.

How to Do Kneeling Quad Stretch

  • Kneel on one knee
  • Grab the ankle of the back leg
  • Push hips forward slowly

Couch Stretch

An advanced and intense variation.

How to Do Couch Stretch

  • Place one foot against a wall or bench
  • Move into a lunge position
  • Keep torso upright and hips forward

Dynamic Quad Stretch

Ideal for warm-ups.

How to Do Dynamic Quad Stretch

  • Perform controlled walking quad stretches
  • Alternate legs
  • Maintain balance and posture

Final Thoughts

The quad stretch is one of the most important flexibility exercises you can master.

It improves:

  • Leg flexibility
  • Hip mobility
  • Recovery
  • Injury prevention
  • Athletic performance

Progress may feel gradual if your quadriceps are tight. However, with consistent practice, your mobility and movement quality will improve significantly. Learn more about Stretching Here.

Focus on control and consistency.

A warrior maintains mobility — not just strength.

Essential Gear for Quad Stretch

While the quad stretch requires no equipment, the right gear can improve comfort, support proper form, and help you increase lower-body mobility.

  • Exercise Mat: Cushions your knees during kneeling quad stretch variations.
  • Stretching Strap: Helps you reach your foot comfortably and maintain proper form.
  • Foam Roller: Loosens tight quadriceps before or after stretching.
  • Yoga Blocks: Provide extra support and improve balance during stretches.
  • Resistance Bands: Add light resistance for dynamic quad mobility drills.

Quad Stretch FAQ

Q1: How long should I hold a quad stretch?
Hold each stretch for 15–30 seconds and repeat 2–3 times per leg.

Q2: When should I do quad stretches?
Perform static stretches after workouts or during mobility sessions. Dynamic stretches are ideal before exercise.

Q3: Can quad stretches improve running performance?
Yes, flexible quadriceps improve movement efficiency and reduce injury risk during running and athletic activity.

How to Do a Lat Stretch Correctly: Step-by-Step Guide for Beginners

Learn how to do a lat stretch with perfect form, avoid common mistakes, and discover the best variations to improve upper-body mobility and flexibility.

The lat stretch is one of the most effective exercises for improving shoulder mobility, reducing upper-body tightness, and enhancing movement efficiency. Whether you are training for military fitness tests, calisthenics, or general fitness, mastering the lat stretch is essential.


What Is a Lat Stretch?

A lat stretch is a flexibility exercise designed to lengthen the latissimus dorsi muscles, commonly known as the lats, which are the large muscles along the sides of your back.

Tight lats can restrict shoulder movement, affect posture, and reduce athletic performance.

Lat stretches are commonly used in:

  • Warm-up routines
  • Cool-down sessions
  • Mobility and flexibility training
  • Recovery and injury prevention programs

Unlike strength exercises, lat stretches focus on mobility, flexibility, and muscle recovery.

Benefits of Lat Stretch

The lat stretch is essential for maintaining upper-body mobility and posture.

Benefits include:

  • Improves shoulder and upper-back mobility
  • Reduces muscle tightness and stiffness
  • Enhances overhead movement
  • Supports better posture
  • Helps relieve upper-body tension
  • Aids recovery after pull workouts

Few stretches are as effective for upper-back flexibility as the lat stretch.

Muscles Worked in Lat Stretch

Lat stretches target several upper-body muscles.

Primary Muscles
  • Latissimus Dorsi (Lats)
Secondary Muscles
  • Teres Major
  • Rear Deltoids
  • Triceps
  • Upper Back Muscles
  • Shoulder Stabilizers

This makes the lat stretch highly important for maintaining healthy shoulder function and mobility.


How to Do a Lat Stretch (Step-by-Step)

Step 1: Stand Near a Stable Surface

Stand facing a bench, wall, or sturdy object.

  • Feet shoulder-width apart
  • Core engaged
  • Spine neutral

Tip: Use a stable surface to maintain balance and control.

Step 2: Place Your Hands Forward

Extend your arms and place your hands on the surface.

  • Arms straight
  • Hands shoulder-width apart
  • Shoulders relaxed

Step 3: Push Your Hips Back

Slowly push your hips backward while lowering your chest.

  • Keep your back straight
  • Feel the stretch along your sides and upper back

Step 4: Hold the Stretch

Maintain the stretch position:

  • Hold for 15–30 seconds
  • Breathe steadily
  • Stay relaxed
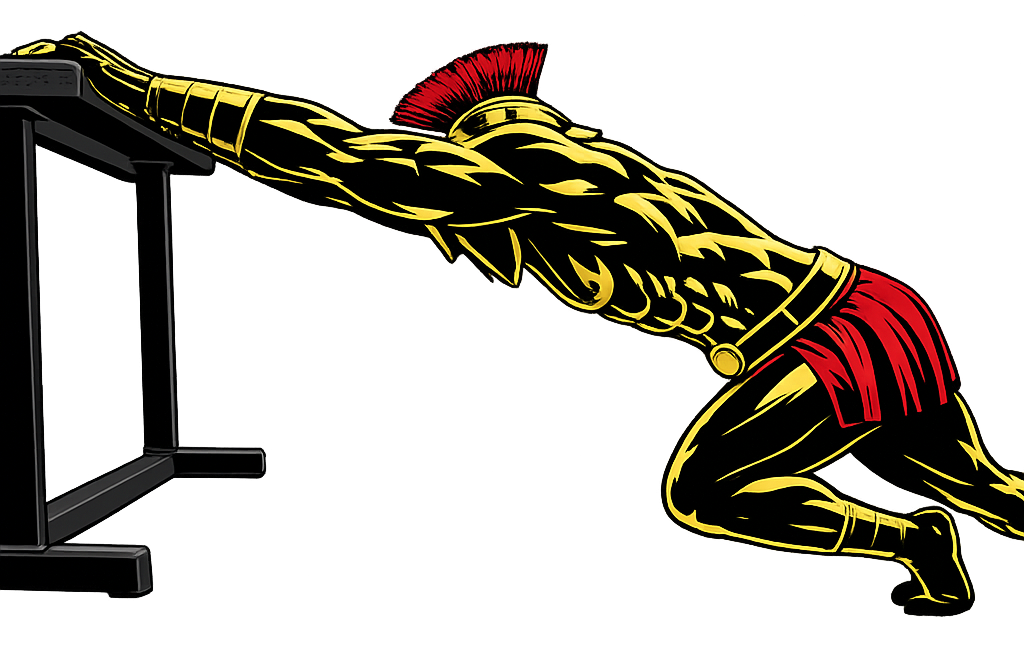
Warrior showcasing How to do a Lat Stretch with proper form

Step 5: Return Slowly

Slowly return to the starting position with control.

Avoid jerking or rushing the movement.


Lat Stretch Form Checklist

Use this checklist to ensure proper form:

  • Keep your arms straight
  • Push your hips backward slowly
  • Maintain a neutral spine
  • Avoid shrugging your shoulders
  • Breathe steadily throughout

Proper form improves flexibility and prevents injury.


Common Lat Stretch Mistakes

Rounding the Back

Problem: Reduces stretch effectiveness.

Fix: Keep your spine neutral throughout the movement.

Shrugging the Shoulders

Problem: Causes tension in the neck.

Fix: Keep shoulders relaxed and down.

Bending the Arms

Problem: Reduces lat engagement.

Fix: Keep your arms fully extended.

Overstretching

Problem: Can cause discomfort or strain.

Fix: Stretch only to a comfortable level.

Holding Breath

Problem: Increases muscle tension.

Fix: Maintain slow, controlled breathing.


Lat Stretch Variations

Once you master the basic lat stretch, these variations can improve mobility further.

Kneeling Lat Stretch

A deeper and more controlled variation.

How to Do Kneeling Lat Stretch

  • Kneel on the ground
  • Place your hands on a bench or chair
  • Push your hips backward slowly

Wall Lat Stretch

Great for beginners and mobility work.

How to Do Wall Lat Stretch

  • Place one hand on a wall
  • Lean your body away
  • Feel the stretch through the side of your back

Child’s Pose Lat Stretch

Targets both the lats and lower back.

How to Do Child’s Pose Lat Stretch

  • Sit back onto your heels
  • Extend your arms forward
  • Lower your chest toward the floor

Resistance Band Lat Stretch

Adds controlled tension for deeper stretching.

How to Do Resistance Band Lat Stretch

  • Hold a resistance band overhead
  • Lean slightly backward or sideways
  • Maintain tension throughout

Final Thoughts

The lat stretch is one of the most important mobility exercises you can master.

It improves:

  • Shoulder mobility
  • Upper-back flexibility
  • Posture
  • Recovery
  • Athletic performance

Progress may feel gradual if your lats are tight. However, with consistent practice, your mobility and movement quality will improve significantly. Learn more about Stretching Here.

Focus on control and consistency.

A warrior maintains mobility — not just strength.

Essential Gear for Lat Stretch

While the lat stretch requires little to no equipment, the right gear can help you improve flexibility, increase comfort, and enhance shoulder mobility.

  • Resistance Bands: Add gentle tension for deeper lat stretches and mobility work.
  • Exercise Mat: Provides a comfortable surface for kneeling and floor-based lat stretch variations.
  • Foam Roller: Helps loosen tight lats and upper-back muscles before or after stretching.
  • Yoga Blocks: Support proper positioning during kneeling and floor stretches.
  • Pull-Up Bar: Allows you to perform hanging lat stretches to improve shoulder and back mobility.

Lat Stretch FAQ

Q1: How long should I hold a lat stretch?
Hold each stretch for 15–30 seconds and repeat 2–3 times.

Q2: When should I do lat stretches?
Perform static stretches after workouts or during mobility sessions. Dynamic stretches are ideal before training.

Q3: Can lat stretches improve pull-up performance?
Yes, improving lat flexibility and shoulder mobility can enhance pulling mechanics and movement efficiency.

How to Do a Calf Stretch Correctly: Step-by-Step Guide for Beginners

Learn how to do a calf stretch with perfect form, avoid common mistakes, and discover the best variations to improve flexibility and lower-leg mobility.

The calf stretch is one of the most effective exercises for improving ankle mobility, reducing muscle tightness, and preventing lower-leg injuries. Whether you are training for military fitness tests, running, or general fitness, mastering the calf stretch is essential.


What Is a Calf Stretch?

A calf stretch is a flexibility exercise designed to lengthen the muscles at the back of your lower leg.

Tight calves can limit ankle mobility, affect performance, and increase the risk of injury.

Calf stretches are commonly used in:

  • Warm-up routines
  • Cool-down sessions
  • Mobility and flexibility training
  • Injury prevention programs

Unlike strength exercises, calf stretches improve movement efficiency and recovery.

Benefits of Calf Stretch

The calf stretch is essential for lower-leg flexibility and performance.

Benefits include:

  • Improves calf flexibility
  • Enhances ankle mobility
  • Reduces muscle tightness and stiffness
  • Supports better running and jumping performance
  • Reduces risk of injuries (e.g., strains, cramps)
  • Aids recovery after leg workouts

Few stretches are as important for lower-leg mobility as the calf stretch.

Muscles Worked in Calf Stretch

Calf stretches target key lower-leg muscles.

Primary Muscles
  • Gastrocnemius
  • Soleus
Secondary Muscles
  • Achilles Tendon
  • Hamstrings
  • Ankle Stabilizers

This makes the calf stretch crucial for maintaining lower-body balance and mobility.


How to Do a Calf Stretch (Step-by-Step)

Step 1: Stand Facing a Wall

Stand upright facing a wall with your hands placed against it.

Tip: Keep your posture straight and core engaged.

Step 2: Step One Foot Back

Move one foot backward while keeping the other foot forward.

  • Back leg straight
  • Front knee slightly bent
  • Both feet flat on the ground

Step 3: Push Into the Wall

Lean forward slightly and press your hands into the wall.

  • Feel the stretch in the back calf
  • Keep your heel on the ground

Step 4: Hold the Stretch

Maintain the position:

  • Hold for 15–30 seconds
  • Breathe steadily
  • Stay relaxed

Step 5: Switch Legs

Slowly return to the starting position and repeat on the other leg.

Warrior showcasing How to do a Calf Stretch

Calf Stretch Form Checklist

Use this checklist to ensure proper form:

  • Keep your back leg straight
  • Keep your heel on the ground
  • Lean forward gently
  • Maintain steady breathing
  • Avoid bouncing

Proper form improves flexibility and prevents injury.


Common Calf Stretch Mistakes

Lifting the Heel

Problem: Reduces stretch effectiveness.

Fix: Keep your heel firmly on the ground.

Bending the Back Knee

Problem: Shifts the stretch away from the calf.

Fix: Keep the back leg straight (for gastrocnemius stretch).

Overstretching

Problem: Can cause strain.

Fix: Stretch to a comfortable level.

Bouncing

Problem: Increases injury risk.

Fix: Hold the stretch steadily.

Poor Foot Position

Problem: Reduces effectiveness.

Fix: Keep feet pointing forward.


Calf Stretch Variations

Once you master the basic calf stretch, these variations can improve flexibility further.

Bent-Knee Calf Stretch

Targets the deeper soleus muscle.

How to Do Bent-Knee Calf Stretch

  • Slightly bend your back knee
  • Keep heel on the ground
  • Lean forward gently

Seated Calf Stretch

A controlled and beginner-friendly option.

How to Do Seated Calf Stretch

  • Sit with legs extended
  • Loop a towel or band around your foot
  • Pull gently toward you

Stair Calf Stretch

Increases range of motion.

How to Do Stair Calf Stretch

  • Stand on the edge of a step
  • Lower your heels downward
  • Hold the stretch

Dynamic Calf Stretch

Ideal for warm-ups.

How to Do Dynamic Calf Stretch

  • Perform controlled ankle movements
  • Rise onto toes and lower down
  • Move smoothly

Final Thoughts

The calf stretch is one of the most important flexibility exercises you can master.

It improves:

  • Lower-leg flexibility
  • Ankle mobility
  • Injury prevention
  • Recovery
  • Athletic performance

Progress may feel gradual if your calves are tight. However, with consistent practice, your mobility and performance will improve significantly. Learn more about Stretching Here.

Focus on control and consistency.

A warrior maintains mobility — not just strength.

Essential Gear for Calf Stretch

While the calf stretch requires no equipment, the right gear can make your stretching sessions more comfortable, improve flexibility, and support better lower-leg mobility.

  • Exercise Mat: Cushions your feet and provides a comfortable surface for floor stretches.
  • Stretching Strap: Helps deepen calf stretches while maintaining proper form.
  • Slant Board: Increases ankle range of motion for more effective calf stretching.
  • Foam Roller: Loosens tight calf muscles before or after stretching.
  • Resistance Bands: Add light resistance for calf mobility drills and ankle strengthening.

Calf Stretch FAQ

Q1: How long should I hold a calf stretch?
Hold each stretch for 15–30 seconds and repeat 2–3 times per leg.

Q2: When should I do calf stretches?
Perform static stretches after workouts or during mobility sessions. Use dynamic stretches before workouts.

Q3: Can calf stretches improve running performance?
Yes, flexible calves improve stride efficiency and reduce injury risk.

How to Do the Cat-Cow Stretch Correctly: Step-by-Step Guide for Beginners

Learn how to do the Cat-Cow stretch with perfect form, avoid common mistakes, and discover the best variations to improve spinal mobility and flexibility.

The Cat-Cow stretch is one of the most effective mobility exercises for improving spine flexibility, relieving tension, and enhancing movement control. Whether you are training for military fitness tests, calisthenics, or general fitness, mastering the Cat-Cow stretch is essential.


What Is the Cat-Cow Stretch?

The Cat-Cow stretch is a dynamic mobility exercise performed on all fours, where you alternate between arching and rounding your back.

This movement improves spinal flexibility while coordinating breathing with motion.

The Cat-Cow stretch is commonly used in:

  • Warm-up routines
  • Mobility and flexibility training
  • Yoga and recovery sessions
  • Injury prevention programs

Unlike static stretches, Cat-Cow is a dynamic movement that promotes fluid motion in the spine.

Benefits of Cat-Cow Stretch

The Cat-Cow stretch is essential for maintaining spinal health and flexibility.

Benefits include:

  • Improves spinal mobility and flexibility
  • Reduces stiffness in the back and neck
  • Enhances posture and alignment
  • Promotes better breathing coordination
  • Relieves tension in the spine
  • Aids recovery and relaxation

Few exercises are as effective for spinal mobility as the Cat-Cow stretch.

Muscles Worked in Cat-Cow Stretch

The Cat-Cow stretch activates multiple muscles along the spine and core.

Primary Muscles
  • Spinal Erectors
  • Abdominal Muscles
Secondary Muscles
  • Shoulders (Deltoids)
  • Neck Muscles
  • Hip Flexors
  • Glutes

This makes Cat-Cow an excellent movement for improving overall body coordination.


How to Do the Cat-Cow Stretch (Step-by-Step)

Step 1: Get Into All-Fours Position

Start on your hands and knees.

  • Hands under shoulders
  • Knees under hips
  • Spine neutral

Tip: Keep your head in line with your spine.

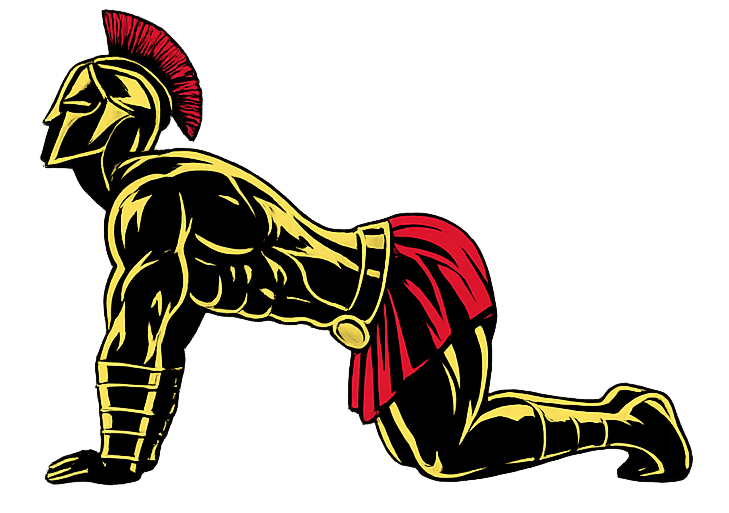
Step 2: Move Into Cow Position

Inhale and drop your belly toward the ground.

  • Lift your chest and tailbone upward
  • Keep shoulders relaxed
  • Gently look forward
Warrior showcasing How to do the Cat-Cow Stretch

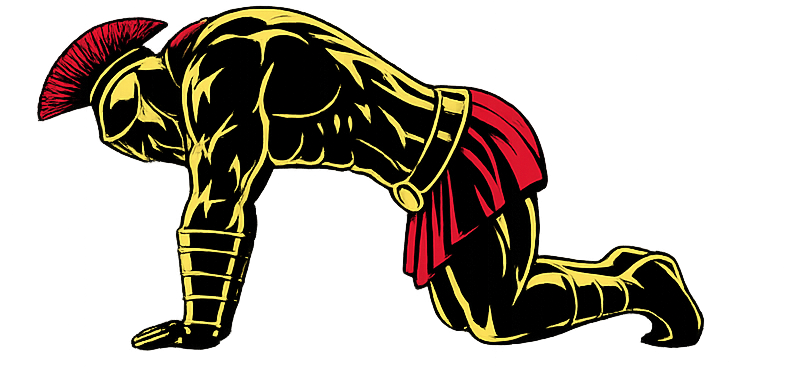
Step 3: Move Into Cat Position

Exhale and round your back upward.

  • Tuck your chin toward your chest
  • Pull your belly button inward
  • Spread your shoulder blades

Step 4: Flow Between Positions

Continue alternating between Cat and Cow positions.

  • Move slowly and smoothly
  • Sync your breathing with movement
Warrior showcasing How to do the Cat-Cow Stretch

Step 5: Maintain Control

Perform each repetition with control.

Avoid rushing — focus on quality movement.


Cat-Cow Stretch Form Checklist

Use this checklist to ensure proper form:

  • Keep movements slow and controlled
  • Coordinate breathing with movement
  • Maintain proper hand and knee placement
  • Avoid forcing the range of motion
  • Keep your core engaged

Proper form improves mobility and prevents strain.


Common Cat-Cow Stretch Mistakes

Moving Too Fast

Problem: Reduces effectiveness.

Fix: Perform slow, controlled movements.

Forcing the Range of Motion

Problem: Can cause discomfort.

Fix: Move within a comfortable range.

Poor Alignment

Problem: Reduces benefits.

Fix: Keep hands under shoulders and knees under hips.

Not Breathing Properly

Problem: Reduces coordination.

Fix: Inhale in Cow, exhale in Cat.

Collapsing Shoulders

Problem: Causes instability.

Fix: Keep shoulders active and stable.


Cat-Cow Stretch Variations

Once you master the basic Cat-Cow stretch, these variations can enhance mobility further.

Seated Cat-Cow Stretch

A beginner-friendly variation.

How to Do Seated Cat-Cow

  • Sit upright in a chair
  • Place hands on knees
  • Alternate arching and rounding your back

Standing Cat-Cow Stretch

Improves accessibility.

How to Do Standing Cat-Cow

  • Stand upright with hands on thighs
  • Alternate spinal flexion and extension
  • Move in a controlled manner

Extended Cat-Cow Stretch

Adds a greater range of motion.

How to Do Extended Cat-Cow

  • Reach one arm forward during the movement
  • Increase stretch intensity
  • Maintain balance

Slow Tempo Cat-Cow

Focuses on control and breathing.

How to Do Slow Tempo Cat-Cow

  • Hold each position for 2–3 seconds
  • Emphasize breathing
  • Move with precision

Final Thoughts

The Cat-Cow stretch is one of the most effective mobility exercises you can master.

It improves:

  • Spinal flexibility
  • Posture
  • Movement coordination
  • Recovery
  • Overall mobility

Progress may feel subtle at first, but consistent practice will greatly improve how your body moves and feels. Learn more about Stretching Here.

Focus on control and breathing.

A warrior moves with fluidity — not stiffness.

Essential Gear for the Cat-Cow Stretch

The right equipment can make the Cat-Cow stretch more comfortable, effective, and easier to perform. Here are the essentials every warrior should consider:

  • Exercise Mat: Cushions your hands and knees during the stretch.
  • Yoga Block: Provides support for modified variations.
  • Foam Roller: Helps loosen the back before mobility work.
  • Resistance Bands: Improve spinal and shoulder mobility in warm-ups.
  • Yoga Knee Pad: Adds extra comfort for kneeling positions.

Explore our equipment guides to find the best gear for your training and take your performance to the next level.


Cat-Cow Stretch FAQ

Q1: How many reps should I do for the Cat-Cow stretch?
Beginners can perform 8–12 slow repetitions per set.

Q2: When should I do the Cat-Cow stretch?
It is ideal for warm-ups, mobility sessions, or recovery routines.

Q3: Can Cat-Cow reduce back pain?
Yes, it can help relieve tension and improve spinal mobility, which may reduce discomfort.