Learn how to do a hip flexor stretch with perfect form, avoid common mistakes, and discover the best variations to improve mobility and reduce stiffness.
The hip flexor stretch is one of the most effective exercises for improving lower-body mobility, reducing tightness, and enhancing movement efficiency. Whether you are training for military fitness tests, running, or general fitness, mastering the hip flexor stretch is essential.
What Is a Hip Flexor Stretch?
A hip flexor stretch is a flexibility exercise designed to lengthen the muscles at the front of your hips, which are responsible for lifting your legs and stabilizing your pelvis.
Tight hip flexors are common due to prolonged sitting and intense training, and they can limit mobility and cause discomfort.
Hip flexor stretches are commonly used in:
Warm-up routines
Cool-down sessions
Mobility and flexibility training
Injury prevention programs
Unlike strength exercises, hip flexor stretches improve joint mobility and muscle recovery.
Benefits of Hip Flexor Stretch
The hip flexor stretch is essential for maintaining lower-body mobility and posture.
Benefits include:
Improves hip flexibility and mobility
Reduces muscle tightness and stiffness
Enhances stride and movement efficiency
Supports better posture and pelvic alignment
Reduces the risk of lower back pain
Aids recovery after leg workouts
Few stretches are as important for hip mobility as the hip flexor stretch.
Muscles Worked in Hip Flexor Stretch
Hip flexor stretches target several key lower-body muscles.
Primary Muscles
Hip Flexors (Iliopsoas, Rectus Femoris)
Secondary Muscles
Quadriceps
Glutes
Lower Back Muscles
This makes the hip flexor stretch crucial for maintaining balanced lower-body function.
How to Do a Hip Flexor Stretch (Step-by-Step)
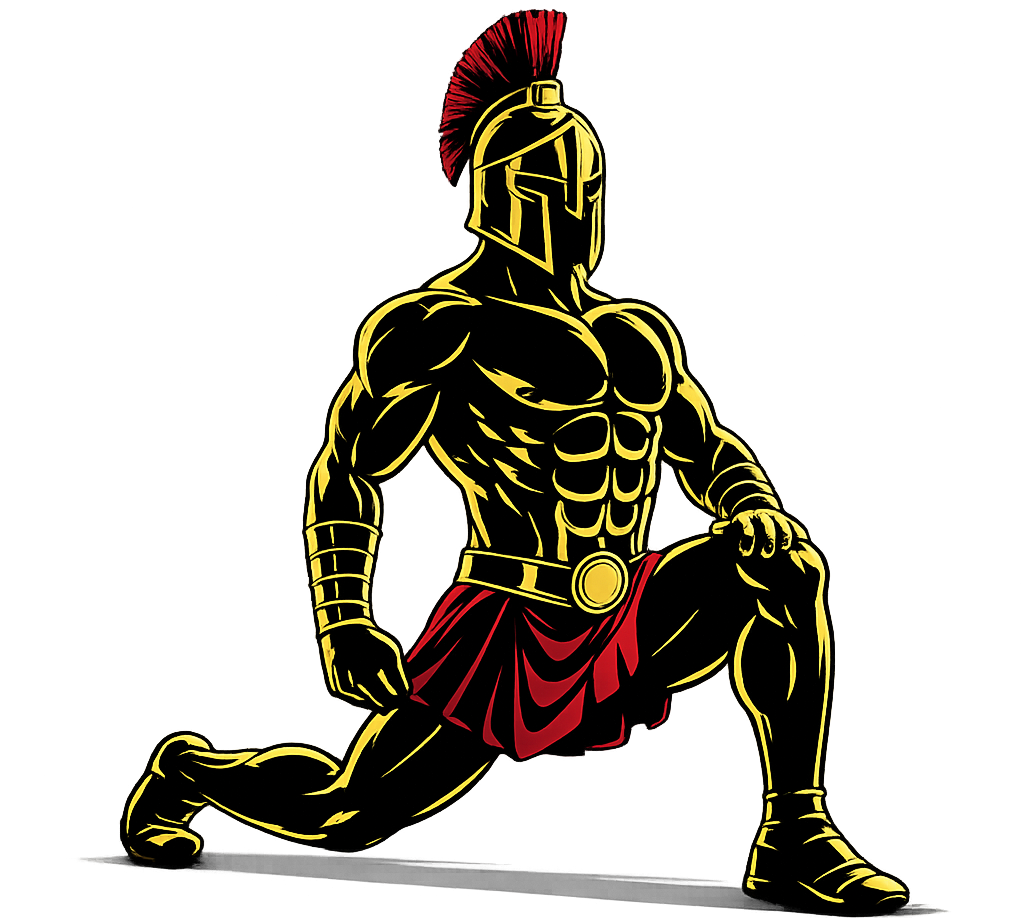
Step 1: Get Into a Lunge Position
Start in a kneeling lunge position with one knee on the ground and the other foot in front.
Front knee bent at 90 degrees
Back knee resting on the ground
Tip: Keep your torso upright.
Step 2: Engage Your Core
Tighten your core and keep your spine neutral.
Avoid arching your lower back
Maintain control
Step 3: Push Your Hips Forward
Gently push your hips forward.
Feel the stretch in the front of your hip
Keep movement controlled
Step 4: Hold the Stretch
Maintain the position:
Hold for 15–30 seconds
Breathe steadily
Stay relaxed
Step 5: Switch Sides
Slowly return to the starting position and repeat on the other side.
Hip Flexor Stretch Form Checklist
Use this checklist to ensure proper form:
Keep your torso upright
Engage your core
Push hips forward gently
Avoid arching your lower back
Maintain steady breathing
Proper form improves mobility and prevents injury.
Common Hip Flexor Stretch Mistakes
Arching the Lower Back
Problem: Reduces effectiveness and causes strain.
Fix: Keep your core engaged and spine neutral.
Leaning Forward
Problem: Shifts the stretch away from the hip flexors.
Fix: Keep your torso upright.
Overstretching
Problem: Can cause discomfort or injury.
Fix: Stretch to a comfortable level.
Poor Knee Position
Problem: Reduces stability.
Fix: Keep your front knee aligned over your ankle.
Holding Breath
Problem: Increases tension.
Fix: Breathe slowly and consistently.
Hip Flexor Stretch Variations
Once you master the basic hip flexor stretch, these variations can further improve flexibility.
Standing Hip Flexor Stretch
A simple and accessible variation.
How to Do Standing Hip Flexor Stretch
Stand upright
Step one leg backward
Push hips forward gently
Couch Stretch
A deeper and more intense stretch.
How to Do Couch Stretch
Place your back foot on a bench or wall
Move into a lunge position
Keep torso upright and push hips forward
Dynamic Hip Flexor Stretch
Ideal for warm-ups.
How to Do Dynamic Hip Flexor Stretch
Perform controlled lunges
Move in and out of the stretch
Maintain proper form
Elevated Hip Flexor Stretch
Increases range of motion.
How to Do Elevated Hip Flexor Stretch
Place your front foot on an elevated surface
Perform the stretch
Maintain control throughout
Final Thoughts
The hip flexor stretch is one of the most important mobility exercises you can master.
It improves:
Hip mobility
Posture
Movement efficiency
Injury prevention
Athletic performance
Progress may feel gradual if your hips are tight. However, with consistent practice, your mobility and comfort will significantly improve. Learn more about Stretching Here.
Focus on control and consistency.
A warrior maintains mobility — not just strength.
Essential Gear for Hip Flexor Stretch
While the hip flexor stretch requires no equipment, the right gear can make your stretching sessions more comfortable, improve stability, and help you progress safely.
Exercise Mat: Cushions your knees and provides a comfortable surface for kneeling stretches.
Resistance Bands: Add light resistance for advanced hip flexor stretch variations and mobility work.
Yoga Blocks: Help improve balance and support proper positioning during stretches.
Foam Roller: Loosens tight hip flexors and surrounding muscles before or after stretching.
Stretching Strap: Assists with flexibility exercises and helps improve lower-body mobility.
Hip Flexor Stretch FAQ
Q1: How long should I hold a hip flexor stretch? Hold each stretch for 15–30 seconds and repeat 2–3 times per side.
Q2: When should I do hip flexor stretches? Perform static stretches after workouts or during mobility sessions. Use dynamic versions before workouts.
Q3: Can hip flexor stretches reduce back pain? Yes, improving hip flexibility can reduce strain on the lower back and improve posture.
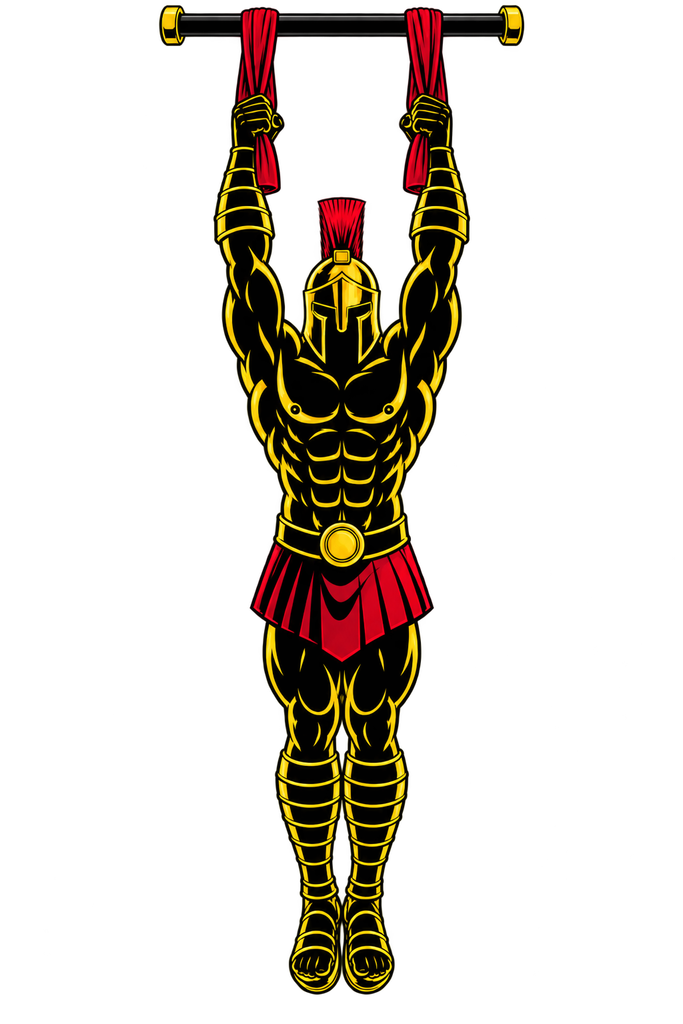
The Towel Hang is a challenging grip exercise where you hang one or more strong towels over a secure Pull-Up Bar and support your bodyweight by gripping the towel instead of the bar.
Compared with a standard Dead Hang, the towel creates a thicker, less rigid gripping surface. This puts greater demands on your fingers, hands, and forearms, making the exercise useful for developing grip strength and endurance.
Towel Hangs are especially useful for calisthenics athletes, climbers, grapplers, obstacle-course athletes, and anyone looking to make basic hanging exercises more grip-intensive.
What Is a Towel Hang?
A Towel Hang is a bodyweight hanging exercise in which a strong towel is securely draped over a Pull-Up Bar and used as the gripping surface.
Instead of wrapping your hands directly around the bar, you squeeze the hanging ends of the towel and suspend your body underneath it.
The towel’s thickness and flexible surface make maintaining your grip more difficult than during a standard Dead Hang. Your fingers must squeeze firmly to prevent the towel from slipping through your hands.
Towel Hangs are commonly used in:
Grip-strength training
Forearm training
Calisthenics workouts
Pull-Up training
Climbing-related training
Grappling and combat-sport conditioning
Obstacle-course preparation
Bodyweight workouts
Because your bodyweight depends on the towel and your grip, both the towel and Pull-Up Bar must be capable of safely supporting the exercise.
Benefits of Towel Hangs
Towel Hangs provide a simple way to make bodyweight hanging significantly more demanding on your grip.
Benefits include:
Builds grip strength
Develops grip endurance
Strengthens the fingers and hands
Challenges the forearm muscles
Develops support for towel-based pulling exercises
Provides a harder progression from standard Dead Hangs
Requires minimal equipment
Can improve hanging endurance
Provides grip-specific training for climbing and grappling activities
Towel Hangs can be highly demanding even when your standard Dead Hang is already strong, so begin with manageable hold times rather than immediately attempting maximum-duration sets.
Muscles Worked in Towel Hangs
Towel Hangs primarily challenge the muscles responsible for maintaining your grip, while several other upper-body muscles contribute to maintaining a controlled hanging position.
Primary Muscles
Finger Flexors
Forearm Flexors
Hand and Grip Muscles
Secondary Muscles
Brachioradialis
Biceps Brachii
Brachialis
Latissimus Dorsi
Trapezius
Rotator Cuff Muscles
Core Muscles
The towel’s thickness and tendency to move make your fingers and forearms work particularly hard to prevent your hands from sliding.
How to Do a Towel Hang (Step-by-Step)
Step 1: Choose a Strong Towel and Secure Pull-Up Bar
Use a sturdy towel that is large and strong enough for hanging exercises.
Inspect both your towel and Pull-Up Bar before every session.
Check for:
Tears
Fraying
Weak seams
Damaged fabric
Excessive wear
A loose Pull-Up Bar
Damage to the supporting structure
Do not use a towel simply because it feels thick. It must be structurally sound enough for the exercise.
Step 2: Position the Towel Over the Bar
Drape the middle of the towel over a secure Pull-Up Bar so that both ends hang downward.
Try to keep the two hanging sections reasonably even.
Make sure the towel sits securely over the bar and cannot easily slide off the side.
Step 3: Grip the Towel
Take one hanging end in each hand.
Wrap your fingers firmly around the fabric and squeeze tightly.
Keep your:
Hands secure
Wrists comfortable
Arms extended
Body close to underneath the towel
Your exact grip will depend on the thickness and shape of the towel, but you should be able to maintain firm contact without the fabric unexpectedly slipping through your fingers.
Step 4: Transfer Your Bodyweight Gradually
Use a stable step or platform if necessary.
Begin transferring your bodyweight into your hands gradually while keeping your feet supported.
This allows you to test:
Your grip
The towel
The Pull-Up Bar
The towel’s position on the bar
Do not immediately jump into a full bodyweight hang without first confirming that the setup is secure.
Step 5: Enter the Towel Hang
Once your setup feels secure, gradually lift your feet from the floor or platform.
Allow your body to hang beneath the towel with your arms extended.
Keep your:
Grip tight
Head neutral
Body controlled
Legs relatively still
Breathing natural
Your knees can remain slightly bent if necessary for floor clearance.
Step 6: Hold the Position
Maintain the Towel Hang for as long as you can safely control your grip and body position.
Beginners to towel-specific grip training can start with short holds of approximately 5-15 seconds.
During the hold:
Squeeze the towel firmly
Keep your arms extended
Minimize swinging
Breathe normally
Monitor your grip
Keep your body controlled
End the set before the towel begins uncontrollably slipping through your hands.
Step 7: Dismount Safely
Bring your feet back onto the floor or a stable platform.
Gradually transfer your bodyweight away from your hands before releasing the towel.
Do not intentionally hang until your grip suddenly fails.
Rest your hands and forearms before beginning another set.
Towel Hang Form Checklist
Use this checklist to maintain proper Towel Hang technique.
Use a strong and undamaged towel
Use a secure Pull-Up Bar
Inspect your setup before every session
Drape the towel securely over the bar
Grip one end in each hand
Squeeze the fabric firmly
Test the setup with partial bodyweight first
Transfer your bodyweight gradually
Keep your arms extended
Maintain a neutral head position
Keep your body controlled
Minimize swinging
Breathe normally
Monitor your grip throughout the hold
End the set before uncontrolled grip failure
Dismount onto a stable surface
Grip security should always take priority over achieving a longer hold.
Common Towel Hang Mistakes
Using a Weak or Damaged Towel
Problem: A towel with worn fabric, damaged seams, or tears may not be suitable for supporting bodyweight.
Fix: Inspect the entire towel before training and replace it if there is any doubt about its structural condition.
Hanging From an Unstable Bar
Problem: Even a strong towel cannot make an unsafe Pull-Up Bar suitable for hanging.
Fix: Use a properly installed Pull-Up Bar or another structure specifically capable of safely supporting your bodyweight and the forces created during hanging.
Jumping Straight Into the Hang
Problem: Jumping and suddenly loading the towel gives you little opportunity to identify a poor grip or unsafe setup before your full bodyweight is suspended.
Fix: Use a stable platform and gradually transfer weight into your hands before lifting your feet.
Hanging Until Your Grip Fails
Problem: Towel Hangs can cause rapid grip fatigue, and unexpectedly losing the towel can result in an uncontrolled fall.
Fix: End your set while you can still securely hold the towel and control your dismount.
Allowing the Towel to Slip Through the Hands
Problem: A gradually slipping grip can quickly become an uncontrolled grip failure.
Fix: Squeeze firmly and finish the set when you can no longer maintain a secure hand position.
Using Excessive Swinging
Problem: Swinging makes the exercise harder to control and places changing forces through your grip and hanging setup.
Fix: Enter the hang gradually and keep your torso and legs relatively still.
Progressing Too Quickly
Problem: Towel Hangs can be considerably harder on the grip than standard Dead Hangs.
Fix: Begin with short holds and gradually increase duration or difficulty as your hands and forearms adapt.
Towel Hang Variations
Towel Hangs can be modified to make the exercise easier or more difficult according to your grip strength.
Assisted Towel Hang
This variation allows your legs to support part of your bodyweight.
How to Do an Assisted Towel Hang
Drape a strong towel over a secure Pull-Up Bar.
Grip one end in each hand.
Keep your feet on the floor or a stable platform.
Gradually transfer some bodyweight into your hands.
Keep your arms extended.
Hold the towel firmly.
Use your legs to control the difficulty.
Standard Two-Hand Towel Hang
This is the standard full-bodyweight variation.
How to Do a Standard Two-Hand Towel Hang
Drape a strong towel over the bar.
Hold one end in each hand.
Test the setup with partial bodyweight.
Lift your feet from the floor.
Hang with your arms extended.
Keep your body controlled.
Hold while your grip remains secure.
Dismount before grip failure.
Two-Towel Hang
Using two separate towels provides an independent towel for each hand.
How to Do a Two-Towel Hang
Drape two strong towels securely over the bar.
Position them approximately shoulder-width apart.
Grip both ends of one towel with one hand and both ends of the other towel with the other hand, or use another secure configuration appropriate to the towels.
Test both towels before fully hanging.
Lift your feet gradually.
Maintain a controlled hang.
Dismount safely.
Make sure both towels are equally suitable for supporting the exercise.
Towel Hang With Active Shoulders
This variation combines the grip challenge of a Towel Hang with the shoulder engagement of an Active Hang.
How to Do a Towel Hang With Active Shoulders
Enter a standard Towel Hang.
Keep your elbows straight.
Draw your shoulder blades downward under control.
Allow your torso to rise slightly.
Maintain a strong towel grip.
Hold briefly.
Return gradually to the starting hang.
Single-Arm Assisted Towel Hang
This advanced variation increases the grip demand on one hand while the opposite arm provides assistance.
How to Do a Single-Arm Assisted Towel Hang
Secure a strong towel over the bar.
Grip the towel firmly with your working hand.
Use your opposite hand on the bar or another secure assistance point.
Gradually shift more bodyweight toward the towel hand.
Maintain control throughout the hold.
Keep the assistance necessary to prevent grip failure.
Dismount safely.
Repeat on the opposite side.
Do not rush toward unsupported one-arm Towel Hangs. They create substantially greater demands on the working hand, forearm, elbow, and shoulder.
Final Thoughts
The Towel Hang is a simple but demanding progression from the standard Dead Hang that places much greater emphasis on your grip.
It develops:
Grip strength
Grip endurance
Finger strength
Forearm strength and endurance
Hanging control
Towel-specific gripping ability
You do not need long holds to make Towel Hangs challenging. Begin with a strong towel, a secure Pull-Up Bar, short controlled holds, and enough grip strength remaining to dismount safely.
As your grip improves, gradually increase your hold duration or progress to more challenging variations rather than simply hanging until your hands fail. Learn more about Pull Workouts here.
Essential Gear for Towel Hangs
Towel Hangs require only basic equipment, but every part of the setup must be suitable for supporting your bodyweight.
Strong Towel: The primary gripping surface for the exercise. Use a sturdy, undamaged towel capable of safely tolerating the load rather than an old or weakened towel.
Pull-Up Bar: Provides the overhead support for the towel. The bar must be securely installed and capable of safely supporting your bodyweight.
Stable Step or Platform: Helps you reach the towel and gradually transfer your bodyweight into and out of the hang.
Gym Chalk: Can help improve grip when sweaty hands make the towel difficult to hold securely.
Weighted Vest or Dip Belt: Ideal for advanced athletes who want to increase resistance and further develop grip strength, scapular control, and upper-body stability.
Towel Hang FAQ
Q1: How long should beginners hold a Towel Hang? If you are new to towel-specific grip training, short holds of approximately 5-15 seconds can be a practical starting point. Adjust the duration to your current grip strength and end the set before your grip becomes unsafe.
Q2: What kind of towel should I use for Towel Hangs? Use a strong, durable, undamaged towel that can safely tolerate the exercise. Inspect it for tears, worn fabric, and damaged seams before every session. Do not assume that every household towel is suitable for supporting bodyweight.
Q3: How can I make Towel Hangs harder? You can gradually increase your hold duration, use two separate towels, incorporate controlled active-shoulder positions, use a weighted vest, or progress toward assisted single-arm variations. Increase difficulty gradually while keeping the towel, bar, and grip secure.
Learn how to do a hamstring stretch with perfect form, avoid common mistakes, and discover the best variations to improve flexibility and lower-body mobility.
The hamstring stretch is one of the most effective exercises for improving flexibility, reducing muscle tightness, and preventing injuries in the lower body. Whether you are training for military fitness tests, running, or general fitness, mastering the hamstring stretch is essential.
What Is a Hamstring Stretch?
A hamstring stretch is a flexibility exercise designed to lengthen the hamstring muscles located at the back of your thighs.
Tight hamstrings can limit mobility, reduce performance, and increase the risk of injury.
Hamstring stretches are commonly used in:
Warm-up routines
Cool-down sessions
Mobility and flexibility training
Injury prevention programs
Unlike strength exercises, hamstring stretches improve movement efficiency and recovery.
Benefits of Hamstring Stretch
The hamstring stretch is essential for lower-body flexibility and performance.
Benefits include:
Improves hamstring flexibility
Reduces muscle tightness and stiffness
Enhances range of motion
Supports better posture
Reduces risk of injuries (especially during running)
Aids recovery after leg workouts
Few stretches are as important for lower-body mobility as the hamstring stretch.
Muscles Worked in Hamstring Stretch
Hamstring stretches target several lower-body muscles.
This makes the hamstring stretch crucial for maintaining lower-body balance and mobility.
How to Do a Hamstring Stretch (Step-by-Step)
Step 1: Stand Tall
Stand upright with your feet hip-width apart.
Keep your posture straight and core engaged.
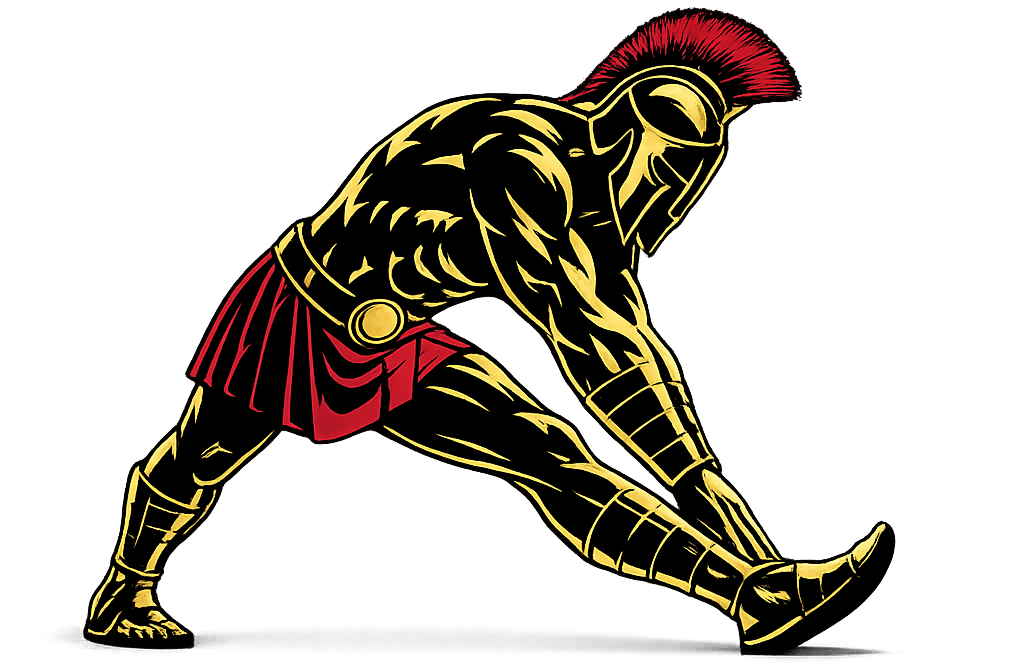
Step 2: Extend One Leg Forward
Place one leg slightly in front of you with your heel on the ground and toes pointing upward.
Keep the leg straight
Maintain balance
Step 3: Hinge at the Hips
Slowly bend forward from your hips toward your extended leg.
Keep your back straight
Avoid rounding your spine
Step 4: Feel the Stretch
Lower yourself until you feel a stretch in the back of your thigh.
Do not force the movement
Keep it controlled
Step 5: Hold and Switch
Hold the stretch:
15–30 seconds
Breathe steadily
Then switch to the other leg.
Hamstring Stretch Form Checklist
Use this checklist to ensure proper form:
Keep your back straight
Hinge from your hips, not your lower back
Keep your leg straight
Move slowly into the stretch
Avoid bouncing
Proper form improves flexibility and prevents injury.
Common Hamstring Stretch Mistakes
Rounding the Back
Problem: Reduces stretch effectiveness.
Fix: Keep your spine neutral and hinge at the hips.
Bouncing
Problem: Increases risk of injury.
Fix: Hold the stretch steadily.
Overstretching
Problem: Can cause muscle strain.
Fix: Stretch to a comfortable level.
Bending the Knee
Problem: Reduces hamstring activation.
Fix: Keep the leg straight.
Holding Breath
Problem: Increases tension.
Fix: Breathe slowly and consistently.
Hamstring Stretch Variations
Once you master the basic hamstring stretch, these variations can improve flexibility further.
Seated Hamstring Stretch
A simple and effective variation.
How to Do Seated Hamstring Stretch
Sit on the ground with legs extended
Reach toward your toes
Keep your back straight
Lying Hamstring Stretch
Great for controlled stretching.
How to Do Lying Hamstring Stretch
Lie on your back
Lift one leg upward
Hold behind your thigh or calf
Standing Toe Touch Stretch
A common flexibility exercise.
How to Do Standing Toe Touch
Stand upright
Bend forward and reach toward your toes
Keep legs straight
Dynamic Hamstring Stretch
Ideal for warm-ups.
How to Do Dynamic Hamstring Stretch
Perform controlled leg swings
Gradually increase the range of motion
Avoid excessive force
Final Thoughts
The hamstring stretch is one of the most important flexibility exercises you can master.
It improves:
Lower-body flexibility
Range of motion
Injury prevention
Recovery
Athletic performance
Progress may feel slow if your hamstrings are tight. However, with consistent practice, your flexibility and movement will significantly improve. Learn more about Stretching Here.
Focus on control and consistency.
A warrior maintains mobility — not just strength.
Essential Gear for the Hamstring Stretch
The right equipment can make hamstring stretches more effective, comfortable, and easier to perform. Here are the essentials every warrior should consider:
Yoga Strap: Helps achieve a deeper hamstring stretch.
Exercise Mat: Provides comfort for seated and lying variations.
Foam Roller: Loosens tight hamstrings before stretching.
Resistance Bands: Add gentle tension for dynamic hamstring stretches.
Stretching Strap: Assists with controlled flexibility training.
Explore our Equipment Guides to find the best gear for your training and take your performance to the next level.
Hamstring Stretch FAQ
Q1: How long should I hold a hamstring stretch? Hold each stretch for 15–30 seconds and repeat 2–3 times per leg.
Q2: When should I do hamstring stretches? Perform static stretches after workouts or during mobility sessions. Use dynamic stretches before workouts.
Q3: Can hamstring stretches improve running performance? Yes, flexible hamstrings improve stride efficiency and reduce injury risk.
Learn how to do a shoulder stretch with perfect form, avoid common mistakes, and discover the best variations to improve mobility and reduce stiffness.
The shoulder stretch is one of the most effective exercises for improving shoulder flexibility, reducing tension, and preventing injuries. Whether you are training for military fitness tests, calisthenics, or general fitness, mastering the shoulder stretch is essential.
What Is a Shoulder Stretch?
A shoulder stretch is a flexibility exercise designed to improve the range of motion in the shoulder joint while reducing muscle tightness.
It helps counteract stiffness caused by heavy training, poor posture, and prolonged sitting.
Shoulder stretches are commonly used in:
Warm-up routines
Cool-down sessions
Mobility and flexibility training
Injury prevention programs
Unlike strength exercises, shoulder stretches focus on mobility, recovery, and joint health.
Benefits of Shoulder Stretch
The shoulder stretch is essential for maintaining upper-body mobility and preventing injuries.
Benefits include:
Improves shoulder flexibility and mobility
Reduces muscle tightness and stiffness
Prevents shoulder injuries
Enhances range of motion
Supports better posture
Aids recovery after upper-body workouts
Few exercises are as effective for maintaining healthy shoulders as proper stretching.
This makes shoulder stretching crucial for overall shoulder health and function.
How to Do a Shoulder Stretch (Step-by-Step)
Step 1: Stand Tall
Stand upright with your feet shoulder-width apart.
Keep your posture straight and core engaged.
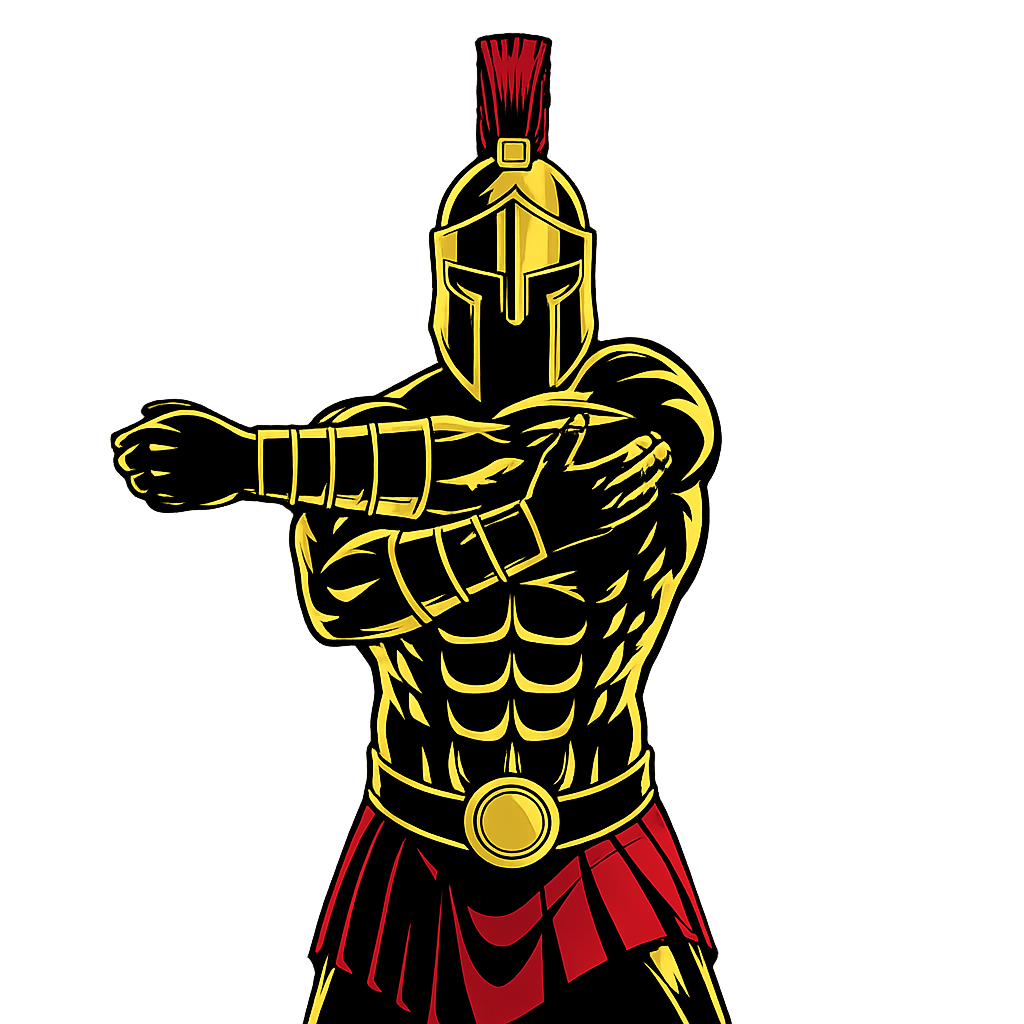
Step 2: Bring Your Arm Across Your Body
Lift one arm and bring it across your chest.
Keep the arm straight
Shoulder relaxed
Chest upright
Step 3: Support With Opposite Arm
Use your opposite hand to gently pull the arm closer to your chest.
Apply light pressure
Avoid jerking movements
Step 4: Hold the Stretch
Maintain the position:
Hold for 15–30 seconds
Breathe steadily
Stay relaxed
Step 5: Switch Sides
Slowly release and repeat on the other arm.
Shoulder Stretch Form Checklist
Use this checklist to ensure proper form:
Keep your posture upright
Pull your arm gently across your body
Avoid shrugging your shoulders
Maintain steady breathing
Do not force the stretch
Proper form improves mobility and prevents injury.
Common Shoulder Stretch Mistakes
Pulling Too Hard
Problem: Can cause strain or injury.
Fix: Use gentle, controlled pressure.
Shrugging the Shoulder
Problem: Reduces stretch effectiveness.
Fix: Keep your shoulders relaxed and down.
Bending the Arm
Problem: Limits muscle stretch.
Fix: Keep your arm straight.
Twisting the Body
Problem: Reduces shoulder isolation.
Fix: Keep your torso facing forward.
Holding Breath
Problem: Increases tension.
Fix: Breathe slowly and consistently.
Shoulder Stretch Variations
Once you master the basic shoulder stretch, these variations can improve mobility further.
Overhead Shoulder Stretch
Targets upper shoulders and triceps.
How to Do Overhead Shoulder Stretch
Raise one arm overhead
Bend the elbow behind your head
Use the opposite hand to gently press the elbow
Wall Shoulder Stretch
Improves shoulder and chest mobility.
How to Do Wall Shoulder Stretch
Place your hand on a wall
Rotate your body away
Feel the stretch across your shoulder
Dynamic Shoulder Stretch
Ideal for warm-ups.
How to Do a Dynamic Shoulder Stretch
Perform arm circles
Keep movements controlled
Gradually increase the range
Resistance Band Shoulder Stretch
Adds controlled tension.
How to Do Resistance Band Shoulder Stretch
Hold a resistance band with both hands
Raise arms overhead and backward
Maintain control throughout
Final Thoughts
The shoulder stretch is one of the most important exercises for maintaining shoulder health and mobility.
It improves:
Flexibility
Range of motion
Injury prevention
Recovery
Overall upper-body performance
Progress may feel gradual, especially if your shoulders are tight. However, with consistent stretching, your mobility and comfort will significantly improve. Learn more about Stretching Here.
Focus on control and consistency.
A warrior maintains mobility — not just strength.
Essential Gear for the Shoulder Stretch
The right equipment can make shoulder stretches more effective, comfortable, and easier to perform. Here are the essentials every warrior should consider:
Resistance Bands: Add gentle tension for shoulder mobility exercises.
Yoga Strap: Helps achieve a deeper shoulder stretch.
Foam Roller: Loosens tight shoulder and upper back muscles.
Exercise Mat: Provides comfort for floor-based shoulder stretch variations.
Massage Ball: Helps release tight shoulder muscles before stretching.
Explore our Equipment Guides to find the best gear for your training and take your performance to the next level.
Shoulder Stretch FAQ
Q1: How long should I hold a shoulder stretch? Hold each stretch for 15–30 seconds and repeat 2–3 times per side.
Q2: When should I do shoulder stretches? You can perform shoulder stretches after workouts or during mobility sessions. Dynamic stretches are ideal before workouts.
Q3: Can shoulder stretches prevent injuries? Yes, regular stretching improves mobility and reduces the risk of strains and injuries.
Learn how to do a chest stretch with perfect form, avoid common mistakes, and discover the best variations to improve flexibility and posture.
The chest stretch is one of the most effective exercises for opening up the chest, reducing muscle tightness, and improving posture. Whether you are training for military fitness tests, calisthenics, or general health, mastering the chest stretch is essential.
What Is a Chest Stretch?
A chest stretch is a flexibility exercise designed to lengthen the chest muscles (pectorals) and relieve tightness caused by poor posture or intense training.
This stretch helps counteract the effects of prolonged sitting, push workouts, and forward-rounded shoulders.
Chest stretches are commonly used in:
Warm-up routines
Cool-down sessions
Mobility and flexibility training
Rehabilitation and posture correction programs
Unlike strength exercises, chest stretches improve mobility and muscle recovery.
Benefits of Chest Stretch
The chest stretch is one of the most important movements for maintaining upper-body mobility and posture.
Benefits include:
Improves chest and shoulder flexibility
Corrects rounded shoulder posture
Reduces muscle tightness and stiffness
Enhances range of motion
Supports better breathing mechanics
Aids recovery after upper-body workouts
Few stretches are as effective for posture improvement as the chest stretch.
Muscles Worked in the Chest Stretch
The chest stretch targets and activates several upper-body muscles.
Primary Muscles
Pectoralis Major
Pectoralis Minor
Secondary Muscles
Anterior Deltoids
Biceps
Upper Chest Muscles
Shoulder Stabilizers
This makes the chest stretch essential for maintaining upper-body mobility and balance.
How to Do a Chest Stretch (Step-by-Step)
Step 1: Stand Tall Near a Wall or Doorway
Stand upright next to a wall or doorway.
Place one hand or forearm against the surface at shoulder height.
Tip: Keep your posture straight and core engaged.
Step 2: Position Your Arm
Extend your arm slightly behind your body with your palm against the wall.
Arm at shoulder height
Slight bend in the elbow
Chest open
Step 3: Rotate Your Body Away
Gently rotate your torso away from your arm.
Feel a stretch across your chest
Keep movement slow and controlled
Step 4: Hold the Stretch
Maintain the stretch position:
Hold for 15–30 seconds
Breathe steadily
Avoid bouncing
Step 5: Switch Sides
Slowly release and repeat on the opposite side.
Chest Stretch Form Checklist
Use this checklist to ensure proper form:
Keep your chest open and lifted
Avoid arching your lower back
Move slowly into the stretch
Maintain steady breathing
Do not force the stretch
Proper form improves flexibility and prevents injury.
Common Chest Stretch Mistakes
Overstretching
Problem: Can lead to muscle strain.
Fix: Stretch to a comfortable level, not pain.
Arching the Lower Back
Problem: Reduces effectiveness.
Fix: Keep your core engaged and spine neutral.
Bouncing During Stretch
Problem: Increases risk of injury.
Fix: Hold the stretch steadily.
Poor Arm Position
Problem: Limits stretch effectiveness.
Fix: Keep your arm aligned with your shoulder.
Holding Breath
Problem: Reduces relaxation.
Fix: Breathe slowly and deeply.
Chest Stretch Variations
Once you master the basic chest stretch, these variations can further improve your flexibility.
Doorway Chest Stretch
A highly effective and beginner-friendly variation.
How to Do Doorway Chest Stretch
Place both arms on a doorway
Step forward slowly
Stretch both sides of the chest simultaneously
Overhead Chest Stretch
Targets the upper chest and shoulders.
How to Do Overhead Chest Stretch
Raise your arms overhead
Clasp your hands behind your head or back
Gently pull elbows backward
Floor Chest Stretch
Improves deep chest mobility.
How to Do Floor Chest Stretch
Lie face down
Extend one arm outward
Rotate your body away from the arm
Dynamic Chest Stretch
Great for warm-ups.
How to Do Dynamic Chest Stretch
Swing your arms open and closed
Maintain controlled movement
Avoid excessive force
Final Thoughts
The chest stretch is one of the most important flexibility exercises you can master.
It improves:
Chest flexibility
Posture
Shoulder mobility
Recovery
Overall upper-body function
Progress may feel gradual, especially if your chest muscles are tight. However, with consistent practice, your flexibility and posture will significantly improve. Learn more about Stretching Here.
Focus on control and consistency.
A warrior maintains mobility — not just strength.
Essential Gear for the Chest Stretch
The right equipment can make chest stretches more effective, comfortable, and easier to perform. Here are the essentials every warrior should consider:
Resistance Bands: Add gentle resistance for dynamic chest stretches.
Foam Roller: Helps loosen the chest before stretching.
Yoga Strap: Assists with deeper, controlled stretches.
Exercise Mat: Provides comfort for floor-based chest stretch variations.
Massage Ball: Helps release tight chest muscles before mobility work.
Explore our Equipment Guides to find the best gear for your training and take your performance to the next level.
Chest Stretch FAQ
Q1: How long should I hold a chest stretch? Hold each stretch for 15–30 seconds and repeat 2–3 times per side.
Q2: When should I do chest stretches? You can perform chest stretches after workouts or during mobility sessions. Dynamic versions can be used in warm-ups.
Q3: Can chest stretches improve posture? Yes, chest stretches help open up tight chest muscles and correct rounded shoulders, improving posture over time.
Wrist pain during workouts can turn even simple exercises into a frustrating experience.
Whether you’re doing push-ups, pull-ups, dips, bench press, overhead press, or lifting weights, sore wrists can limit your performance and make you hesitant to train.
The good news?
Most workout-related wrist pain can be reduced with better preparation, proper technique, and the right support.
Why Your Wrists Hurt During Workouts
Your wrists absorb a lot of force during upper-body exercises.
Pain usually happens because of:
Weak wrist stability
Poor exercise technique
Tight forearm muscles
Limited wrist mobility
Sudden increases in training intensity
Lack of wrist support during heavy lifts
Ignoring these problems can lead to:
❌ Wrist pain
❌ Reduced lifting performance
❌ Less confidence during training
❌ Increased injury risk
Quick Fixes Before Buying Anything
Try these first.
Warm Up Your Wrists
Spend 3–5 minutes doing:
Wrist circles
Palm stretches
Finger extensions
Light wrist flexion and extension
A proper warm-up prepares your joints for heavier loads.
Improve Your Technique
Many people bend their wrists too far backward during exercises.
Keeping your wrists in a stronger, more neutral position often reduces unnecessary strain.
As the weight on the bar increases, your wrists need greater stability.
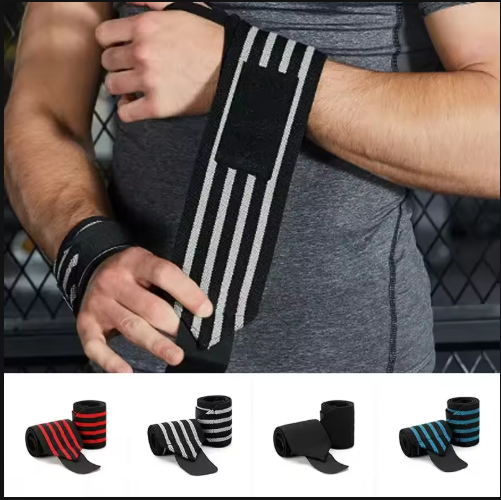
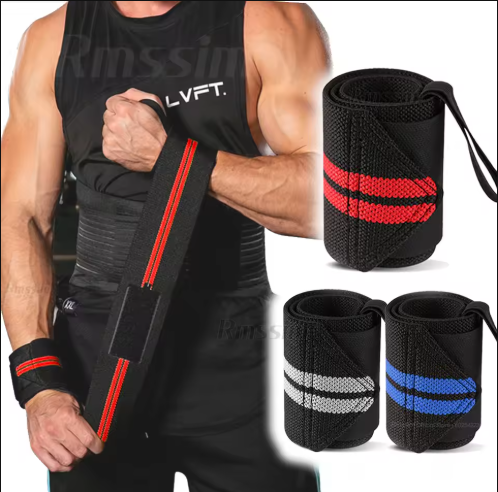
This heavy-duty wrap offers firmer compression and stronger support, making it better suited for demanding workouts.
Key Benefits
Superior wrist stabilization
Durable elastic construction
Better support for heavy lifts
Adjustable tightness
Best For:
Bench press
Overhead press
Heavy push workouts
Dips
Powerlifting
Advanced strength training
Reality:
If you regularly lift heavy or perform high-volume upper-body workouts, the extra support is worth it.
Which One Should You Choose?
New to strength training? → Choose the Elastic Wrist Support Strap.
It provides enough support for most people without restricting movement.
Training heavy every week? → Choose the Heavy-Duty Wrist Wrap.
The additional stability is better suited for heavier loads.
How to Prevent Wrist Pain During Workouts
Before Training
Warm up your wrists.
Stretch your forearms.
Start with lighter sets.
During Training
Keep your wrists in a neutral position.
Avoid increasing weight too quickly.
Wear wrist wraps during heavy sets if needed.
After Training
Stretch your forearms.
Allow sore wrists to recover.
Reduce training volume if pain persists.
Common Mistakes That Cause Wrist Pain
Avoid these common errors:
❌ Skipping your warm-up
❌ Poor lifting technique
❌ Increasing weight too quickly
❌ Training through sharp pain
❌ Ignoring recovery
Remember, wrist wraps support your wrists—they don’t replace good technique or proper recovery.
Final Verdict
If you’re experiencing wrist pain during workouts, don’t ignore it.
Start by improving your warm-up, mobility, and lifting technique.
If you still need extra support, a quality pair of wrist wraps can help reduce strain and make your workouts more comfortable.
For most beginners, the Elastic Wrist Support Strap is the best choice.
If you’re lifting heavier weights or training more intensely, the Heavy-Duty Wrist Wrap provides the extra stability you’ll appreciate.
Final Words
Don’t let wrist pain stop your progress.
Take care of your wrists, train with proper form, and use supportive equipment when needed.
A small change today can help you train stronger, longer, and with greater confidence tomorrow.
If your hands keep slipping during workouts, check out our guide on the best Gym Chalk for Better Grip.
Affiliate Disclosure: WarriorBodyAcademy may earn a commission when you purchase through affiliate links in this article, at no extra cost to you. We only recommend products that we believe are useful for our readers and training community.
Learn how to do mountain climbers with perfect form, avoid common mistakes, and discover the best variations to build a strong core and elite conditioning.
Mountain climbers are one of the most effective bodyweight exercises for developing core strength, improving cardiovascular endurance, and burning fat. Whether you are training for military fitness tests, calisthenics, or athletic performance, mastering mountain climbers is essential.
What Are Mountain Climbers?
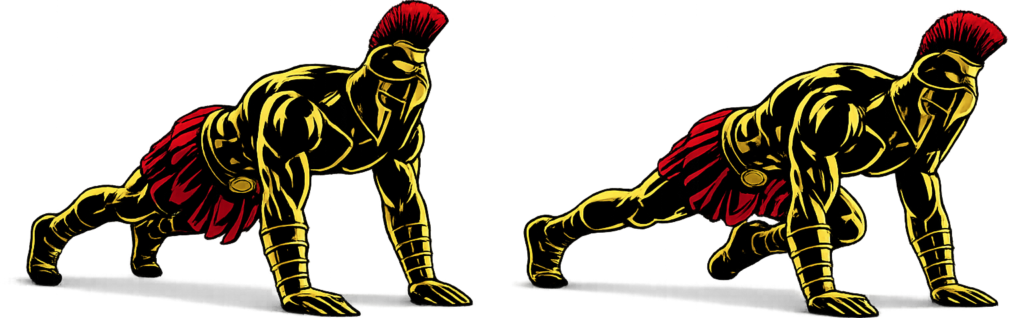
Mountain climbers are a dynamic bodyweight exercise performed in a high plank position where you rapidly drive your knees toward your chest in an alternating motion.
This exercise combines core training with cardio, making it highly effective for full-body conditioning.
Mountain climbers are commonly used in:
Military fitness training
HIIT (High-Intensity Interval Training) workouts
Fat-loss programs
Athletic conditioning
Unlike static exercises, mountain climbers train both strength and endurance simultaneously.
Benefits of Mountain Climbers
Mountain climbers are one of the most powerful exercises for building endurance and core strength.
Benefits include:
Strengthens the core and abs
Improves cardiovascular endurance
Burns calories and supports fat loss
Enhances coordination and agility
Builds full-body endurance
Essential for military and tactical fitness
Few exercises combine cardio and strength as effectively as mountain climbers.
Muscles Worked in Mountain Climbers
Mountain climbers activate multiple muscle groups across the body.
Primary Muscles
Rectus Abdominis
Lower Abdominals
Hip Flexors
Secondary Muscles
Shoulders (Deltoids)
Chest (Pectorals)
Quadriceps
Hamstrings
Glutes
This makes mountain climbers a highly effective full-body exercise.
How to Do Mountain Climbers (Step-by-Step)
Step 1: Get Into a High Plank Position
Start in a push-up position with:
Hands directly under shoulders
Arms fully extended
Body in a straight line
Tip: Engage your core to maintain stability.
Step 2: Drive One Knee Toward Your Chest
Bring one knee forward toward your chest.
Keep your core tight
Avoid lifting your hips too high
Step 3: Switch Legs Quickly
Return the leg to the starting position and immediately switch legs.
Alternate knees in a running motion
Keep movement controlled
Step 4: Maintain Proper Form
Throughout the movement:
Keep hips low
Maintain a straight body line
Engage your core continuously
Step 5: Control Your Speed
Perform the exercise at a steady pace.
Avoid going too fast — proper form is more important than speed.
Mountain Climbers Form Checklist
Use this checklist to ensure perfect form:
Keep your body in a straight line
Engage your core throughout
Keep hips low and stable
Drive your knees toward your chest
Control your movement
Perfect form maximizes results and prevents injury.
Common Mountain Climbers Mistakes
Hips Too High
Problem: Reduces core engagement.
Fix: Keep your body in a straight plank position.
Moving Too Fast
Problem: Leads to poor form and less effectiveness.
Fix: Focus on controlled movement before increasing speed.
Not Engaging the Core
Problem: Turns it into a leg exercise.
Fix: Keep your abs tight throughout.
Short Range of Motion
Problem: Limits effectiveness.
Fix: Bring knees fully toward your chest.
Bouncing or Sloppy Form
Problem: Reduces muscle activation.
Fix: Stay controlled and stable.
Mountain Climbers Variations
Once you master basic mountain climbers, these variations can increase intensity and effectiveness.
Slow Mountain Climbers
Focuses on control and core strength.
How to Do Slow Mountain Climbers
Perform the movement slowly
Hold each knee drive briefly
Maintain strict plank form
Cross-Body Mountain Climbers
Targets the obliques more effectively.
How to Do Cross-Body Mountain Climbers
Drive your knee toward the opposite elbow
Keep your core tight
Move in a controlled manner
Elevated Mountain Climbers
Increases upper-body involvement.
How to Do Elevated Mountain Climbers
Place hands on an elevated surface
Perform standard movement
Maintain stability
Sliding Mountain Climbers (Advanced)
Adds instability and difficulty.
How to Do Sliding Mountain Climbers
Place feet on sliders or a smooth surface
Slide knees toward your chest
Control the movement throughout
Final Thoughts
Mountain climbers are one of the most effective full-body exercises you can master.
They build:
Core strength
Cardiovascular endurance
Full-body coordination
Fat-burning capacity
Functional athletic performance
Progress may feel challenging at first, especially when maintaining form under fatigue. However, with consistent training and proper technique, your endurance and strength will rapidly improve. Learn more about Conditioning Exercises here.
Focus on control before speed.
A warrior moves with precision — even at high intensity.
Essential Gear for Mountain Climbers
While mountain climbers require no equipment to perform, the right gear can make your workouts more comfortable, effective, and challenging as your fitness improves.
Exercise Mat: Cushions your hands and provides better grip on hard surfaces.
Wrist Wraps: Add wrist support during high-repetition training.
Resistance Bands: Increase resistance for tougher mountain climber variations.
Sliding Discs: Perfect for performing sliding mountain climbers with smooth, controlled movement.
Weighted Vest: Increases intensity to build greater strength and conditioning.
Looking to upgrade your training setup? Explore our Equipment Guides to find the best gear for your workouts.
Mountain Climbers FAQ
Q1: How long should beginners do mountain climbers? Beginners can start with 20–30 seconds per set and gradually increase to 45–60 seconds.
Q2: Are mountain climbers good for fat loss? Yes, mountain climbers are excellent for burning calories and improving overall conditioning.
Q3: How often should I do mountain climbers? You can train mountain climbers 3–5 times per week as part of your workouts, depending on recovery.
Affiliate Disclosure: WarriorBodyAcademy may earn a commission when you purchase through affiliate links in this article, at no extra cost to you. We only recommend products that we believe are useful for our readers and training community.
Learn how to do reverse crunches with perfect form, avoid common mistakes, and discover the best variations to build strong, defined lower abs.
Reverse crunches are one of the most effective bodyweight exercises for targeting the lower abdominal muscles, improving core strength, and enhancing control. Whether you are training for military fitness tests, calisthenics, or athletic performance, mastering reverse crunches is essential.
What Are Reverse Crunches?
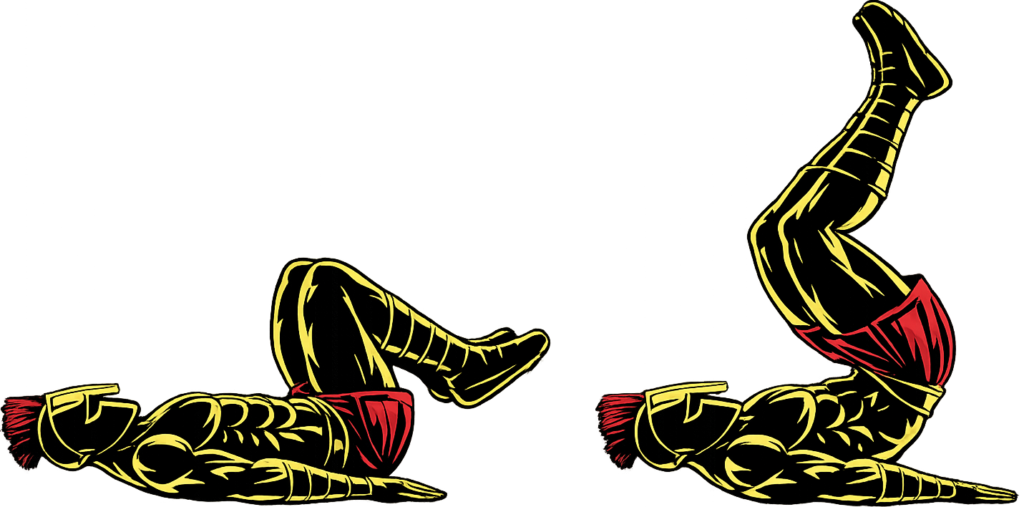
A reverse crunch is a bodyweight core exercise where you lift your hips off the ground by bringing your knees toward your chest.
Unlike traditional crunches, reverse crunches emphasize the lower abs rather than the upper abs.
Reverse crunches are commonly used in:
Core strengthening workouts
Fat-loss training programs
Athletic conditioning
Military fitness routines
This exercise builds real core strength that translates directly into better performance and control.
Benefits of Reverse Crunches
Reverse crunches are one of the best exercises for targeting the lower abs.
Benefits include:
Strengthens lower abdominal muscles
Improves core control and stability
Reduces strain on the neck and upper back
Enhances pelvic control
Supports better posture
Essential for military and tactical fitness
Few exercises isolate the lower abs as effectively as reverse crunches.
Muscles Worked in Reverse Crunches
Reverse crunches activate multiple core muscles.
Primary Muscles
Lower Abdominals
Rectus Abdominis
Secondary Muscles
Obliques
Hip Flexors
Lower Back Stabilizers
This makes reverse crunches highly effective for building a strong and controlled core.
How to Do Reverse Crunches (Step-by-Step)
Step 1: Lie Flat on the Ground
Lie on your back with your arms by your sides and knees bent at 90 degrees.
Tip: Keep your lower back pressed into the ground.
Step 2: Bring Knees Toward Chest
Lift your feet off the ground and bring your knees toward your chest.
Keep movement controlled
Core engaged
Legs relaxed
Step 3: Lift Your Hips
Using your core, lift your hips slightly off the ground.
Focus on curling your pelvis upward rather than swinging your legs.
Step 4: Pause at the Top
At the top of the movement:
Hips slightly elevated
Core fully engaged
Movement controlled
Pause briefly to maximize muscle activation
Step 5: Lower With Control
Slowly lower your hips back down to the starting position.
Avoid dropping your legs quickly — control is key.
Reverse Crunch Form Checklist
Use this checklist to ensure perfect form:
Keep your lower back pressed into the ground
Lift hips using your core, not momentum
Use slow and controlled reps
Avoid swinging your legs
Maintain constant tension on the abs
Perfect form builds stronger abs and prevents injury.
Common Reverse Crunch Mistakes
Using Momentum
Problem: Swinging the legs reduces core activation.
Fix: Focus on slow, controlled movement.
Not Lifting the Hips
Problem: Turns the exercise into a basic leg raise.
Fix: Actively curl your pelvis upward.
Arching the Lower Back
Problem: Reduces effectiveness and causes strain.
Fix: Keep your lower back pressed into the ground.
Fast Reps
Problem: Reduces muscle engagement.
Fix: Use a controlled tempo:
1–2 seconds up
2–3 seconds down
Pulling With Legs Instead of Core
Problem: Shifts focus away from abs.
Fix: Initiate movement from your core.
Reverse Crunch Variations
Once you master the basic reverse crunch, these variations can increase difficulty and effectiveness.
Assisted Reverse Crunch (Beginner Variation)
Easier version for beginners.
How to Do Assisted Reverse Crunch
Place hands under hips for support
Perform a smaller range of motion
Focus on control
Hanging Reverse Crunch
A more advanced version using a pull-up bar.
How to Do Hanging Reverse Crunch
Hang from a bar with legs extended
Bring your knees toward your chest
Lift hips slightly upward
Decline Reverse Crunch
Increases resistance and range of motion.
How to Do Decline Reverse Crunch
Lie on a decline bench
Perform reverse crunch with controlled movement
Focus on lifting hips
Straight-Leg Reverse Crunch
Adds intensity by keeping legs straight.
How to Do Straight-Leg Reverse Crunch
Keep legs extended
Lift hips using core strength
Lower slowly with control
Final Thoughts
Reverse crunches are one of the most effective lower ab exercises you can master.
They build:
Lower ab strength
Core stability
Pelvic control
Functional athletic strength
Improved body control
Progress may feel slow at first, especially when learning to control the movement. However, with consistent training and proper form, your core strength will steadily improve. Learn more about Core Workouts here.
Focus on control — not speed.
A warrior trains the core with precision — not momentum.
Essential Gear for Reverse Crunches
While reverse crunches require no equipment, a few training tools can improve comfort, support proper technique, and help you progress to more advanced core exercises.
Exercise Mat: Provides cushioning for your back and tailbone while creating a comfortable, non-slip surface for reverse crunches and other floor-based core exercises.
Resistance Bands: Great for improving core strength, hip mobility, and assisting with progression exercises that build toward more advanced abdominal movements.
Decline Bench: Increases the range of motion and difficulty for decline reverse crunches, helping build greater lower-ab strength and control.
Pull-Up Bar: The perfect progression tool for advancing from reverse crunches to hanging reverse crunches, hanging knee raises, and hanging leg raises.
Explore more equipment recommendations in our Equipment Guides to support your core strength and bodyweight training journey.
FAQ
Q1: Are reverse crunches better than regular crunches? Reverse crunches are better for targeting the lower abs, while regular crunches focus more on the upper abs. Both have their place in a complete core routine.
Q2: How many reverse crunches should beginners do? Beginners can start with 10–15 reps per set and gradually increase as strength improves.
Q3: How often should I do reverse crunches? You can train reverse crunches 3–5 times per week as part of your core routine, depending on recovery.
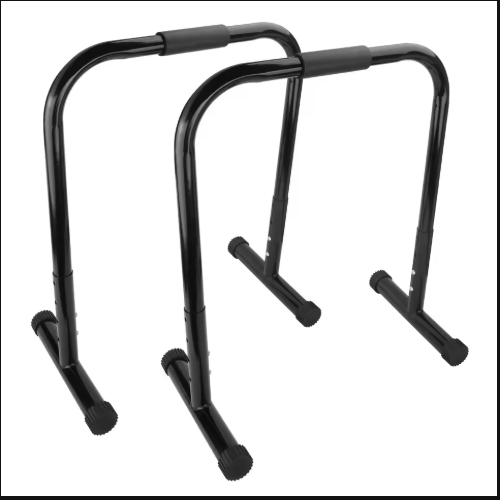
This is the option I’d choose for most home calisthenics athletes.
Why?
⇛ Height adjustability.
Different exercises and different athletes can benefit from different bar heights.
Instead of locking yourself into one setup, the adjustable version lets you change the height to better suit your training.
And because these are independent bars, you can position them according to the exercise you’re performing.
Use them for:
Dips
Assisted dips
Support holds
L-sits
Knee raises
Leg raises
Bodyweight rows
The seller also offers non-adjustable versions if you’d rather keep things simple.
Pros:
✓ Adjustable-height option ✓ Fixed-height alternatives available ✓ Suitable for multiple calisthenics exercises ✓ Independent bars allow flexible positioning ✓ Good option for home workouts ✓ Strong value compared with many larger dip stations
Cons:
❌ Takes considerably more floor space than parallettes ❌ Adjustable equipment should always be locked securely before training ❌ Shipping costs can heavily affect the final price
If you don’t need adjustable height and want a straightforward set of full-height dip bars, this is the alternative.
There are fewer decisions to make.
Set them up.
Position them correctly.
Start training.
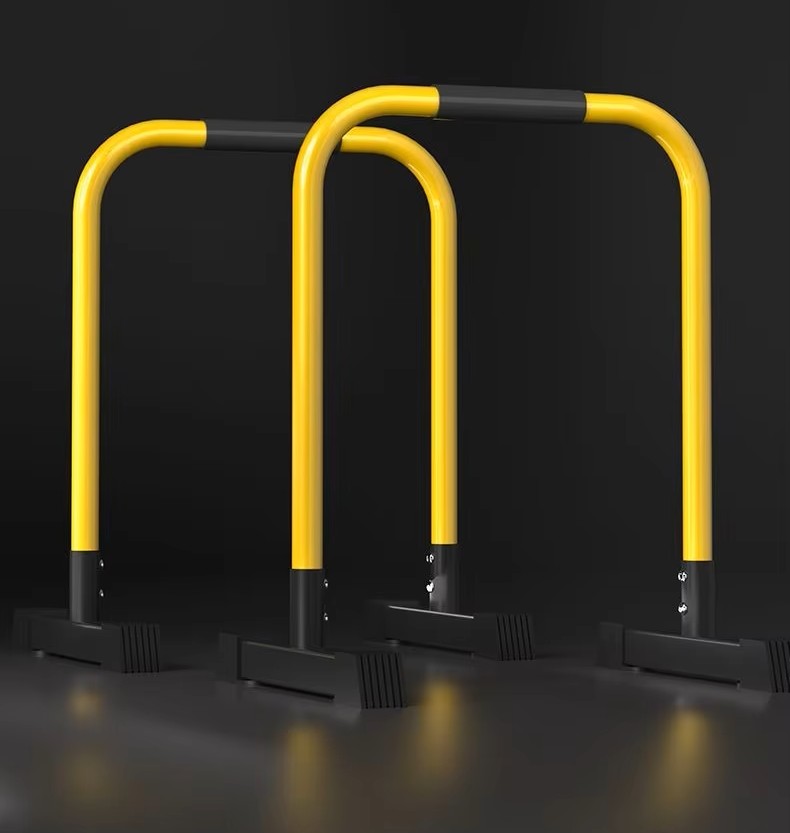
The approximately 78 cm height gives you the clearance needed for proper dip training while still keeping the equipment manageable for a home setup.
And because the two bars aren’t permanently connected, you can adjust their spacing to suit your body and the exercise.
Pros:
✓ Steel construction ✓ Full-height design ✓ Simple setup ✓ Independent bar positioning ✓ Suitable for dips and other calisthenics exercises ✓ Heavier construction than many basic options
Cons:
❌ More expensive ❌ Fixed height ❌ Less adaptable than Product 1 ❌ Takes up dedicated floor space
Comparison – Choose Your Arsenal
Feature
Adjustable Steel Dip Bars
Heavy-Duty Steel Dip Station
Height
Approx. 80–95 cm adjustable
Approx. 78 cm fixed
Adjustable Option
Yes
No
Construction
Steel
Steel
Independent Bars
Yes
Yes
Versatility
Excellent
Good
Best For
Most home athletes
Premium fixed setup
Our Pick
Best Overall
Premium Pick
Beginner Plan
Listen carefully—this is where most people fail.
Even with the BEST dip bars, you won’t build serious strength if you don’t train smart.
Then gradually progress toward full dips and harder calisthenics movements.
Important Buying Advice
Before you click:
Make sure you’re buying actual dip bars, not low parallettes or push-up handles.
For proper dips, you need enough height for your body to move freely between the bars.
Adjustable vs Fixed Height
If you’re unsure which height will suit you:
⇛ Choose the adjustable option.
Product 1’s adjustable version gives you approximately 80–95 cm of height, allowing you to experiment with your setup.
If you already know what you want and prefer simplicity:
⇛ A fixed-height pair can do the job perfectly well.
Also check:
Bar height
Base dimensions
Available floor space
Grip comfort
Bar spacing
Adjustment locks
Floor stability
Shipping cost
Your preferred configuration before ordering
Most importantly:
⇛ Never sacrifice stability for price.
Before every workout, place the bars on a flat surface and make sure they don’t wobble, slide, or shift.
Final Verdict
⇛ Want the best value and maximum versatility? Go for the Adjustable Steel Dip Bars.
The combination of adjustable height, multiple available configurations, independent positioning, and a relatively affordable product price makes Product 1 the better choice for most home calisthenics setups.
This would be my Best Overall pick.
⇛ Want a heavier, simple fixed-height setup? Go for the Heavy-Duty Steel Dip Station.
You lose the height adjustment, but you get a straightforward steel setup built specifically around dip and calisthenics training.
But between the two?
I’d take Product 1.
The adjustable version simply gives you more freedom for the money.
Final Words
You don’t need a commercial gym to build serious pushing strength.
You don’t need machines.
You need:
A stable pair of dip bars
Proper technique
Progressive training
Consistency
Discipline
Start with support holds.
Master your first clean dips.
Build your reps.
Then start chasing harder variations.
Your body is the weight.
The bars just give you somewhere to fight gravity.
Affiliate Disclosure: WarriorBodyAcademy may earn a commission when you purchase through affiliate links in this article, at no extra cost to you. We only recommend products that we believe are useful for our readers and training community.
Welcome to WarriorBodyAcademy
Every warrior begins somewhere.
Complete this quick assessment, and we’ll help you find the best place to start.